


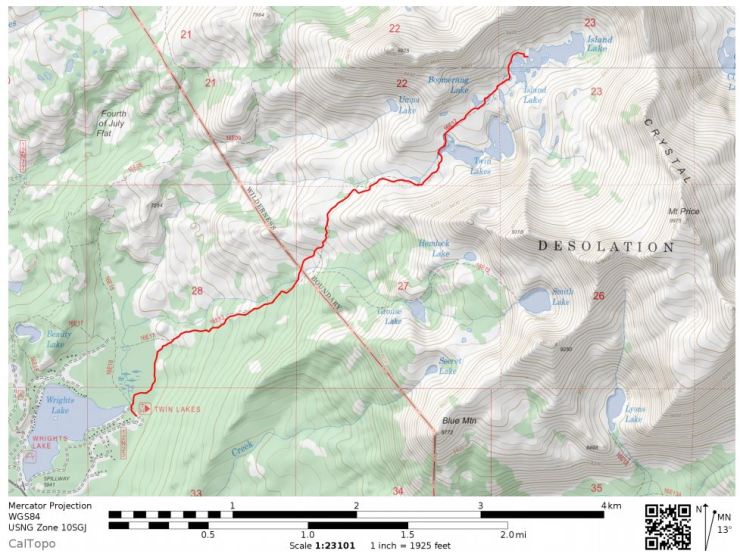
Trip Overview: ~12 mile relaxing backpacking trip in Desolation Wilderness. +/- 3,000 feet of elevation with a starting elevation of 6,970 feet and a peak elevation of 9,660 feet. Highlights include alpine lakes, granite peaks, and expansive views of Desolation Wilderness. We completed this short distance backpacking trip over 3 days in July of 2018.

- Link to download USGS topographic map of area (CA_Fallen Leaf Lake_geo)
- Link to purchase printed USGS topographic map of area (Amazon map)
Jump to Day 1: Twin Lakes trailhead to Island Lake
Jump to Day 2: Island Lake to Lake Aloha viewpoint (near Mount Price summit)
Jump to Day 3: Island Lake to Twin Lakes trailhead
Shop Deal of the Day at REI Outlet (up to 50% off)!
Preparations:
Click here to read more about Permits
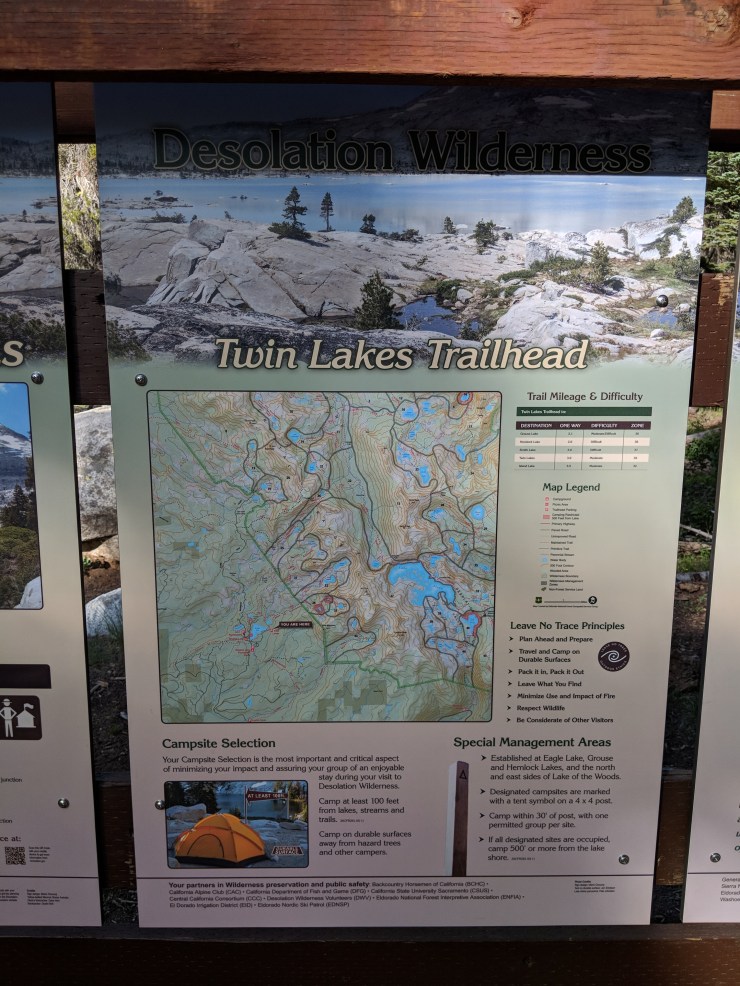
Permits: Permits are required year-round for overnight camping in Desolation Wilderness. During the summer (Friday before Memorial Day to Sept. 30), there is a permit quota for each different zone in the wilderness. Desolation Wilderness is split into 45 zones and the quota for each zone varies from 2 permits to 40 permits. More info about the permits and zones can be found on the Forest Service website. Your permit only specifies your night of entry into the wilderness and the zone you will camp in on the first night. After your first night, you are allowed to hike and camp anywhere within Desolation Wilderness.
70% of the permit quota for each zone is available for advanced reservation on recreation.gov for a $10 reservation fee. The remaining 30% of permits are available on a first-come, first-serve basis on the day of entry. The day of permits are claimed and picked up at one of the nearby ranger stations.
Click here to read more about Logistics
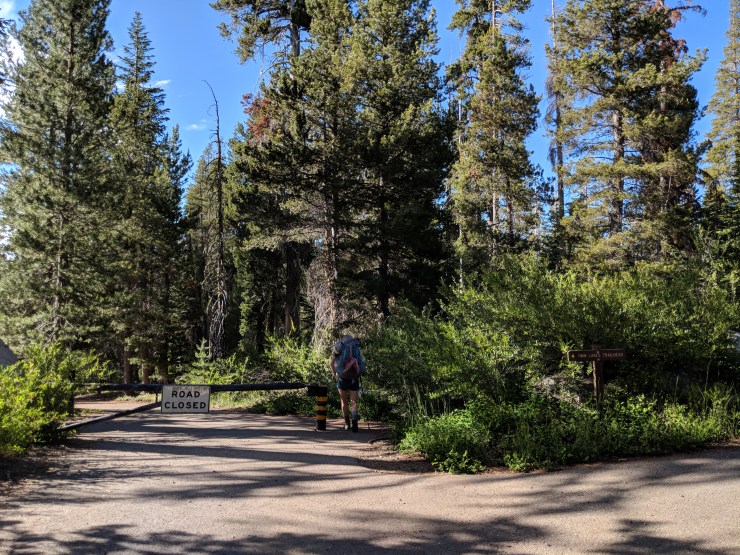
Logistics: We planned this trip at the last minute. I was able to book a permit on Thursday night and then we drove to the Twin Lakes trailhead Friday afternoon after work. Since the hike from Twin Lakes trailhead to Island Lake was only 4 miles, we decided to go ahead and hike in on Friday evening rather than camping at the trailhead.
If you need to camp at the trailhead, there is Wright’s Lake Campground very close. This campground requires reservations in the summer though and can fill up quickly. Other options include many of the first-come, first-serve forest service campsites in El Dorado National Forest.
There is a parking lot near the Twin Lakes trailhead, where can leave your car during your hike. There is no fee for parking so long as you have an overnight camping permit and there is a restroom near the parking lot. For water, we did not see a tap at the parking lot, but there is a potable water tap at the nearby Wright’s Lake Campground.
Click here to read more about Difficulty and Trail Conditions
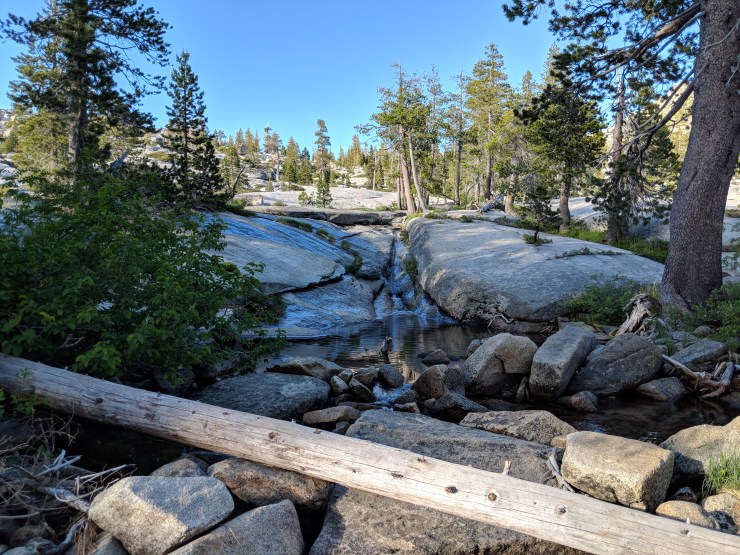
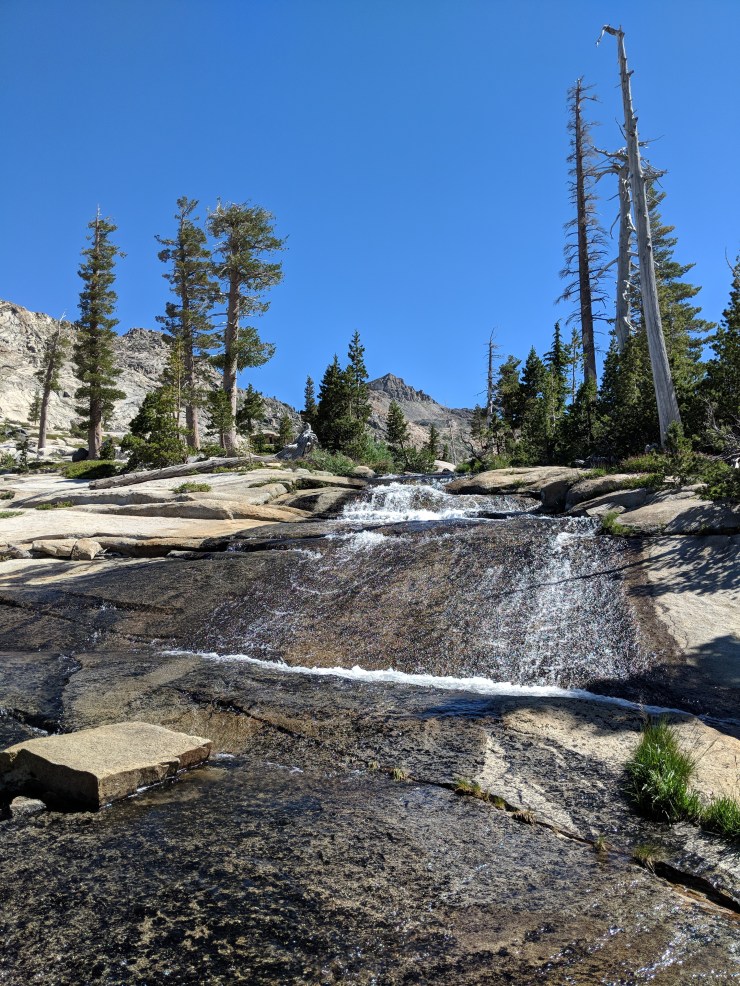
Trail Conditions and Difficulty: This trail has several small creek and river crossings but it is unlikely that the water level would be too high to cross. We never had to take our shoes off and were able to rock hop across all crossings.
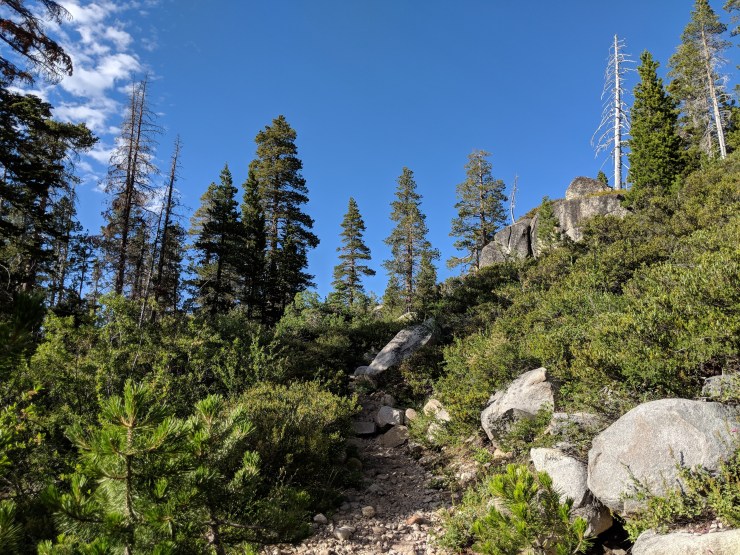
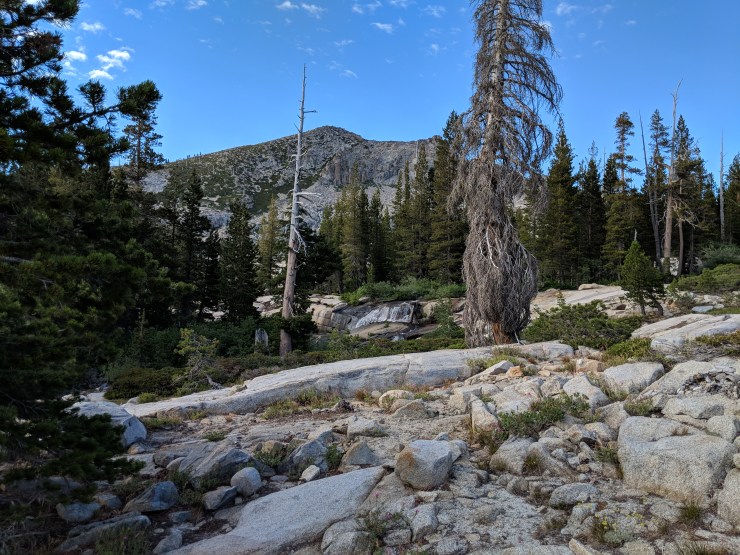
The biggest issue with this trail is that it is poorly marked in several areas. A mile or so into the trail, you are largely just walking on granite and there is no worn path to follow. There are strategically places rock cairns, which help with navigation, but it can be a bit tricky in places. Luckily the trail follows along creeks most of the time so you can be certain you are going the correct direction if you follow the creek. That said, you should have a map or have the route downloaded on your phone to help with navigation.
The trail is only ~3-4 miles long and thus is not very difficult. There is a bit of elevation gain, but overall this is a fairly easy trek. If you wish to hike up to the Crystal Range or Mount Price, you should be comfortable with scrambling and route finding. There is no maintained trail up the ridge and you must hike off-trail.
We wanted a relaxing and easy trip, so we completed our trek over 3 days. We camped at Island Lake two consecutive nights and just did a day hike on the 2nd day. The Twin Lakes area is a bit isolated by the Crystal Range Mountains, so there is not a super easy long loop from the Twin Lakes trailhead. We hiked to a small notch/pass just north of Mount Price. From this pass, it looked like it was possible to hike down to Lake Aloha (note that we did not actually hike down to Lake Aloha). If you are an experienced backpacker you could likely hike to Lake Aloha on day 2 and then head north and form a loop returning via the area by Rockbound Pass. Or, you could just do a short relaxing trip like that show below!
Supplies: There are black bears in the area, so you will want either a bear canister or a dry bag and rope for hanging your food. Doing so will also protect your food from the marmots and chipmunks that seem to search campsites for food.
You likely will want bug spray because the mosquitoes can be out in force in certain areas of the trek. I prefer a picaridin based spray because it does not damage plastics and synthetic fibers like high concentration DEET sprays do. I also like to pre-treat my clothes and tent with permethrin spray repellent
. The permethrin treatment stays on your clothes for up to 7 washes, so it helps reduce the amount of spray you need to put on your skin.
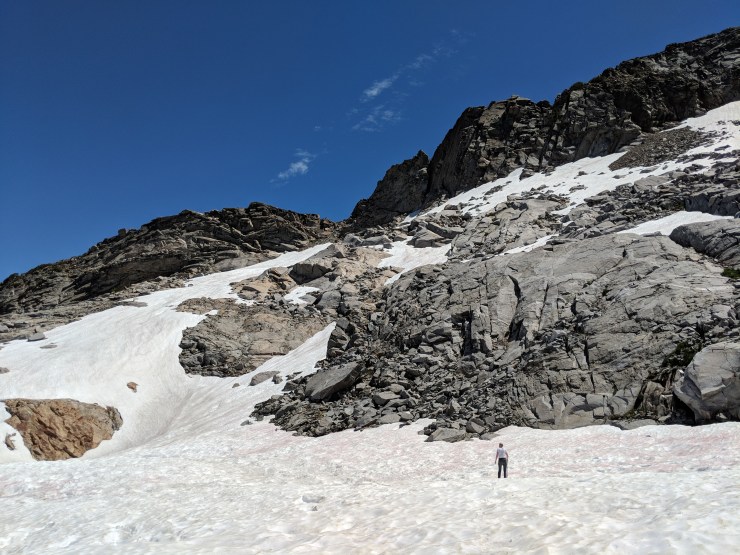
The other essential item for this trek is an inflatable sleeping pad. Most of the campsites are on pretty hard granite or gravel surfaces, so a good mat makes all the difference. If you plan to hike up to the top of the Crystal Ridge behind Island Lake to get a view of Lake Aloha, you will want trekking poles and possibly microspikes/crampons. There were several sections on this ridge where we hiked across snow and the extra traction from crampons would have been nice. The trekking poles are helpful because you can use them for stability in place of an ice ax (unnecessary for this hike unless you are hiking down the backside of the ridge all the way down to Lake Aloha).
Below is a list of the gear I brought on the hike to Island Lake in Desolation Wilderness:
Hiking clothes
- a lightweight hiking rain jacket (North Face Venture 2 Jacket)
- fast drying synthetic hiking pants (prAna Zion Pants)
- a quick drying long sleeve hiking shirt (Columbia Silver Ridge L/S Shirt)
- wool outer socks (People Socks Moreno 4-pack)
- thin blister preventing base socks (WrightSock double layer Coolmesh)
- quick drying synthetic boxer briefs (ExOfficio Give-N-Go)
- Gore-tex hiking shoes (adidas Outdoor Terrex Fast R Gore-Tex Shoe)
Clothes for camp
- wool leggings (Minus33 Merino Wool Kancamagus Midweight Bottom)
- wool base layer shirt (Minus33 Merino Wool Chocorua Midweight Crew)
- warm wool overshirt (Pendleton Long Sleeve Classic-Fit Board Shirt)
- lightweight down jacket (Patagonia 800-fill Down Jacket)
- lightweight camp shoes (Xero Z-Trail lightweight sandal)
Hiking gear
- topographic map (Tom Harrison Desolation Wilderness Map)
- trekking poles (Black Diamond Trail Ergo Cork Trekking Poles)
- 2 liter hydration bladder (Platypus Big Zip Water Reservoir)
- 65 liter backpack (Osprey Atmos 65 Liter pack)
- water filtration system (Platypus gravity filtration system)
Camp gear
- strong tent with rain-fly (Alps Mountaineering Chaos 2 Tent)
- inflatable sleeping pad (Therm-a-Rest Trail Pro Sleeping Pad)
- sleeping bag (REI Co-op Igneo 25 Sleeping Bag)
- inflatable camping pillow (Ultralight Inflating Pillow)
- lightweight backpacking chair (Helinox Chair Zero)
- lightweight lantern (MPOWERD Luci Outdoor 2.0)
- headlamp (Black Diamond Cosmo Headlamp)
- multi-tool with knife (Gerber MDime Mini Multi-Tool)
- Ursack (Ursack Major bear bag) or bear canister (BearVault BV500)
- lightweight stove (MSR PocketRocket 2)
- lighter (BIC plastic lighters)
- 2 liter pot (GSI Outdoors Halulite Boiler Pot)
- coffee cup (GSI Outdoors Glacier Stainless Cup)
- lightweight spork (Snow Peak Titanium Spork)
- small, quick drying towel (REI mutli towel mini)
Random
- wet wipes (Stall Mates individually wrapped wipes)
- mole skin for blisters (Blister medic kit)
- lightweight trowel (GSI Sanitation Trowel)
- small amount of duct tape for gear repairs
- chapstick and sun screen
Food and drink
- a variety of my favorite dehydrated meals
- electrolyte replacement (NUUN Hydration Tablets)
- quick snacks (Clif Shot Bloks and Clif energy bars)
- instant coffee (Starbucks VIA)
- small plastic water bottles filled with whisky 🙂
……
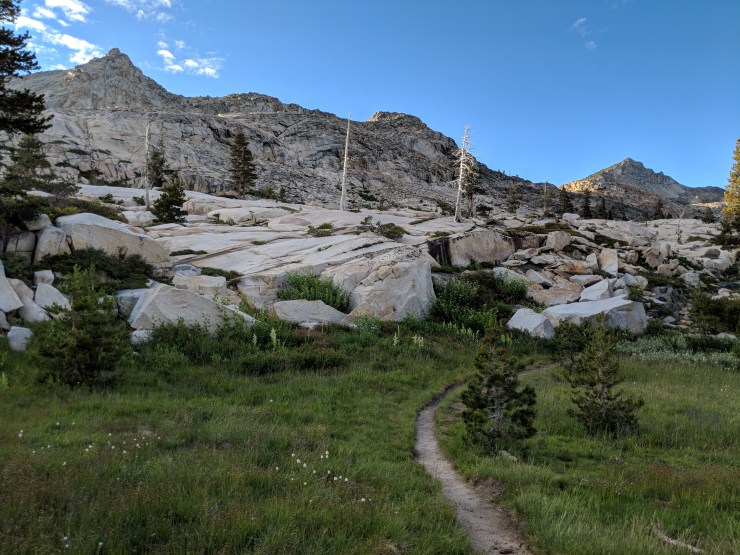
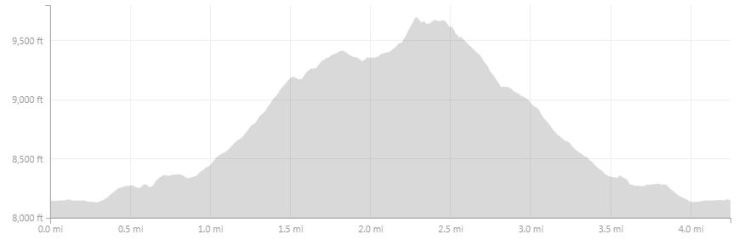
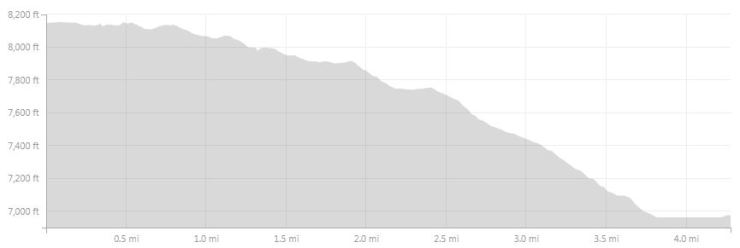
Day 1: 4 miles; +1,250 feet / -75 feet; Twin Lakes Trailhead to Island Lake
Desolation Wilderness hike hike from Twin Lakes Trailhead Day 1 Map (pdf)

Elevation profile of the day 1 hike Desolation Wilderness Twin Lakes Trailhead.
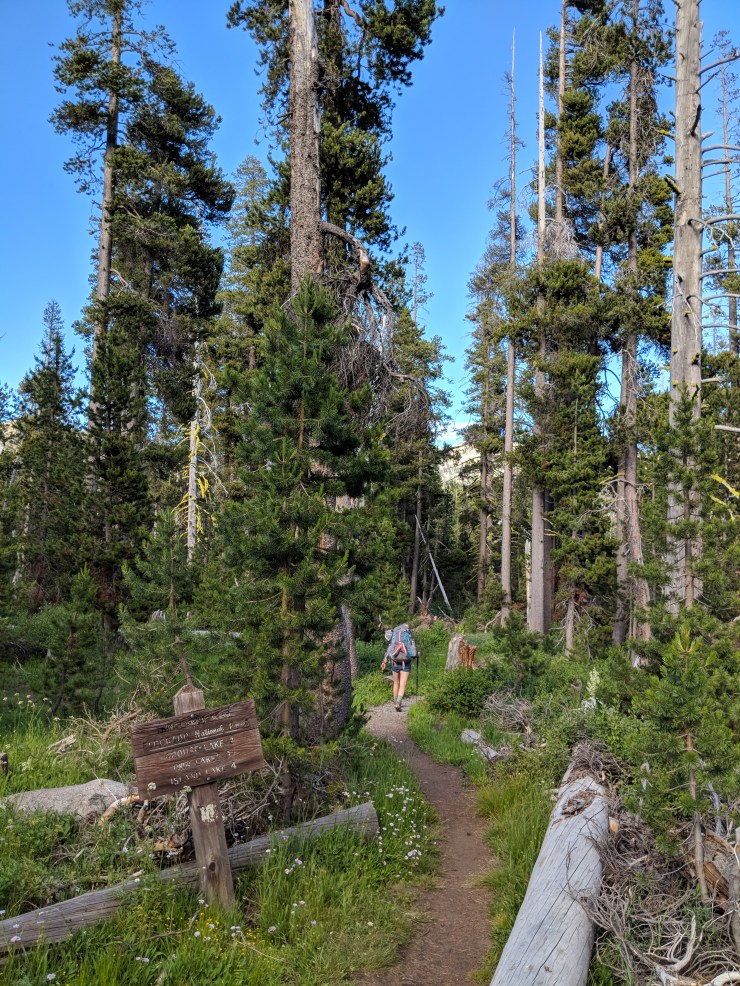
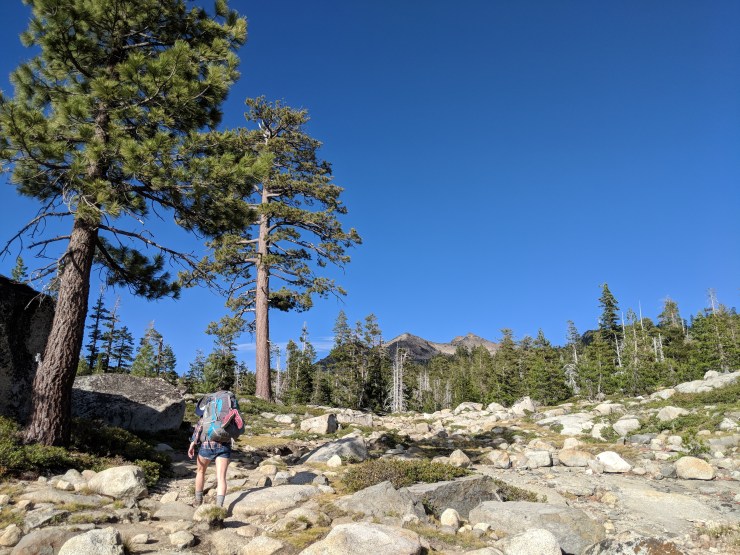
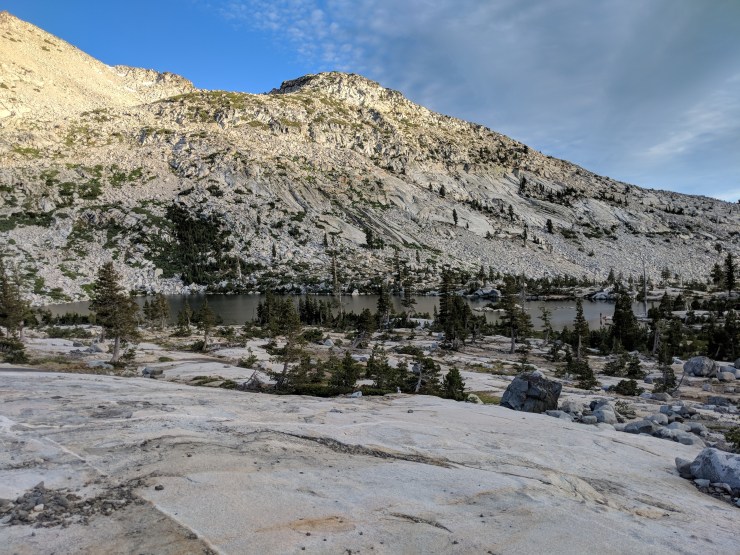
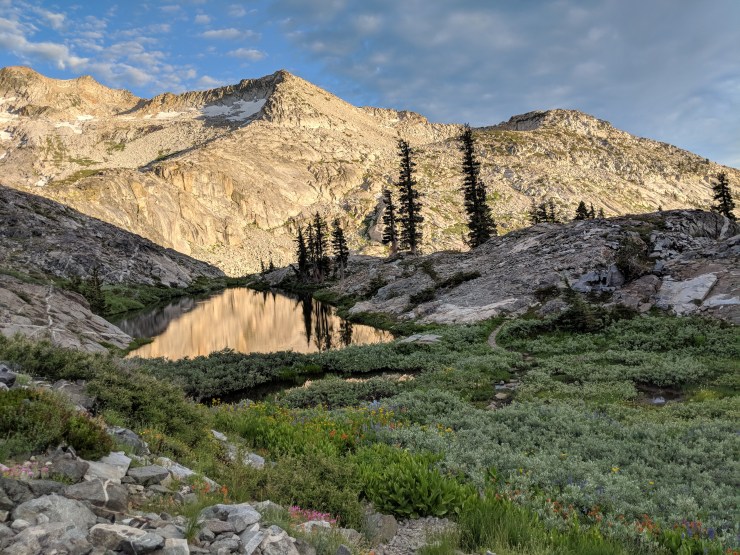
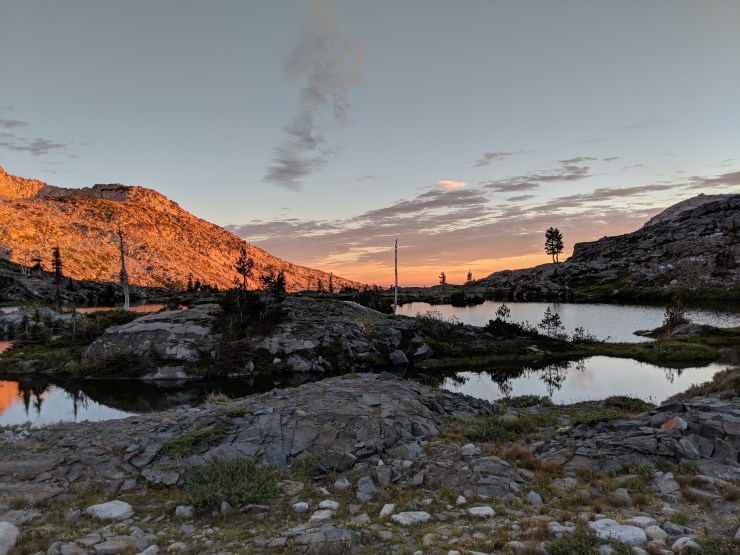
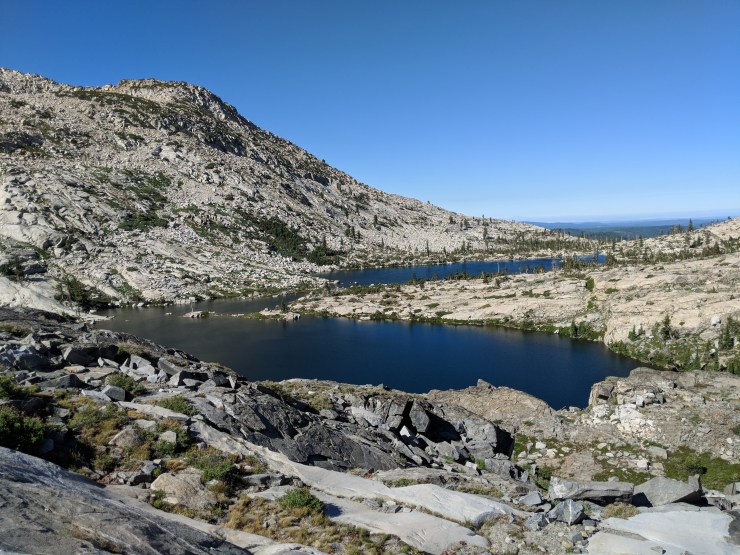
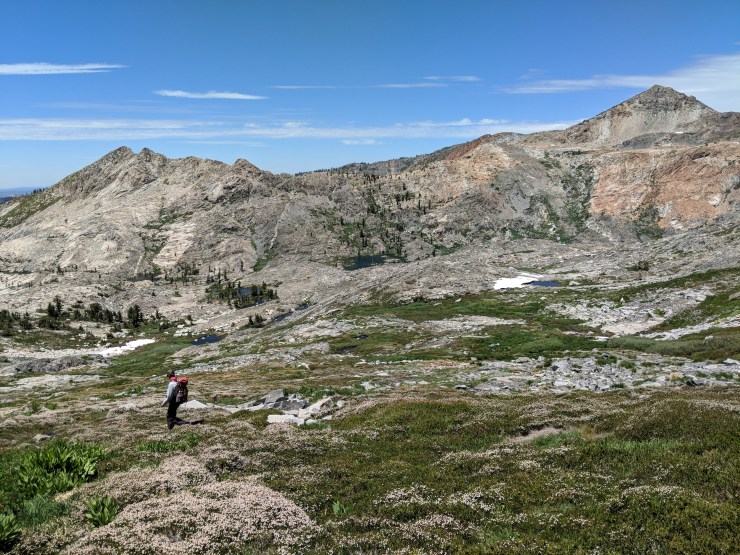
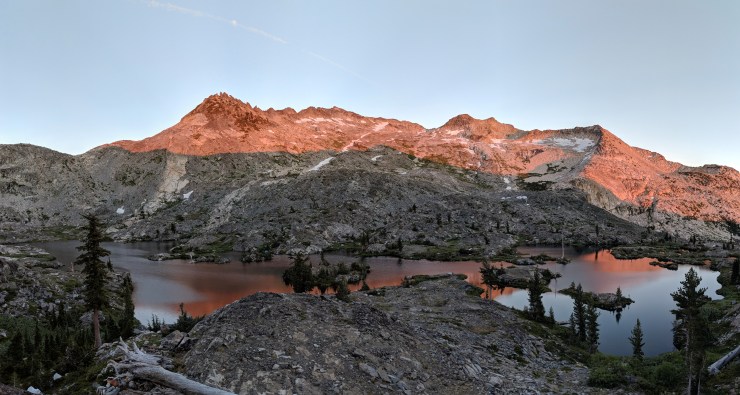
On the first day, we arrived at the Twin Lakes trailhead at 5:30pm. We began hiking at about 6:00pm and arrived at camp at ~7:45pm. We found a great secluded campsite (here), quickly set up camp, and then watched the sun set while cooking dinner. It can be a bit tricky to find campsites in the area. Most people seemed to look on the south side of the lake (opposite of where we went). It’s possible there were more sites on that side, but we really liked the site we found. Being on the north side of the lake lets you see the sunset over the lake and gives some fantastic views.


……
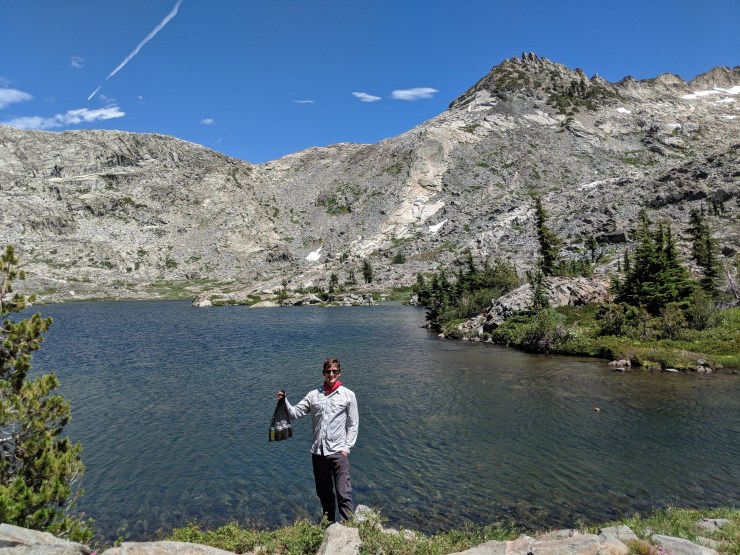
Day 2: 4.25 miles; +/- 1,700 feet; round trip Island Lake to Mount Price notch lookout

Desolation Wilderness Twin Lakes Day 2 Map (pdf)
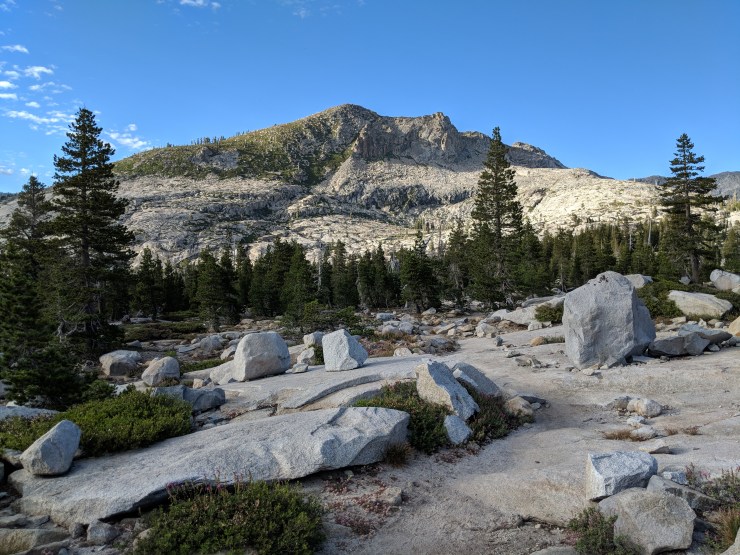
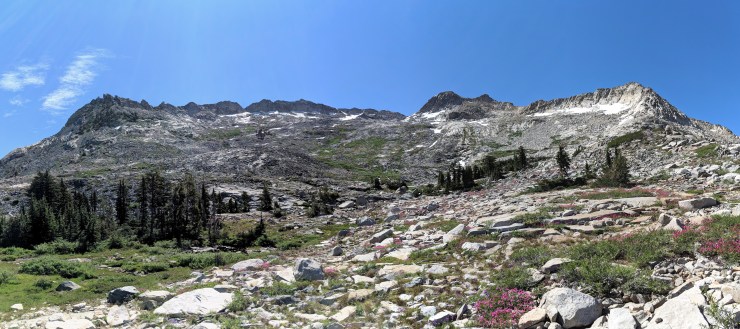
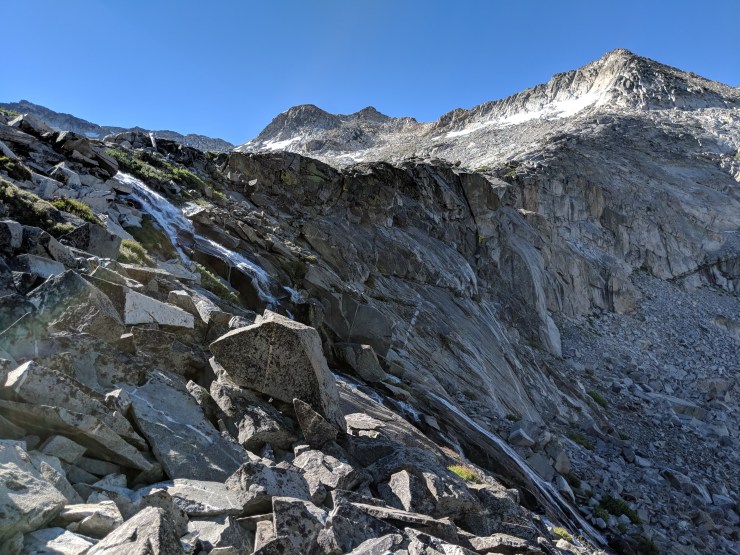
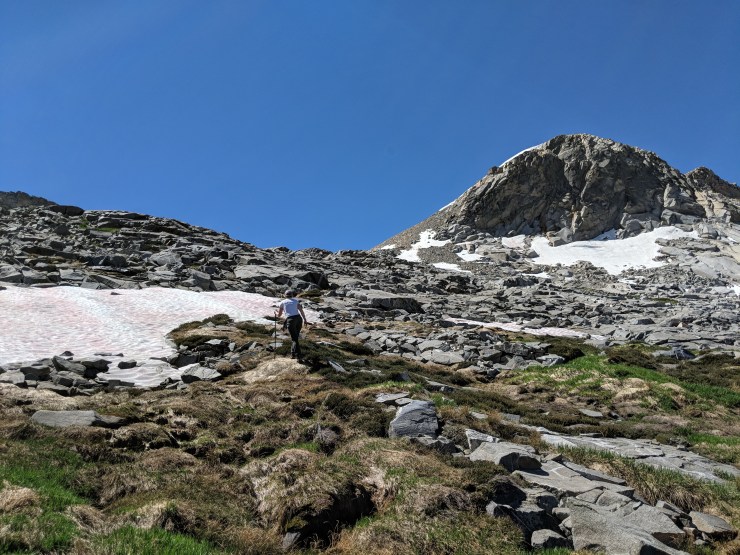
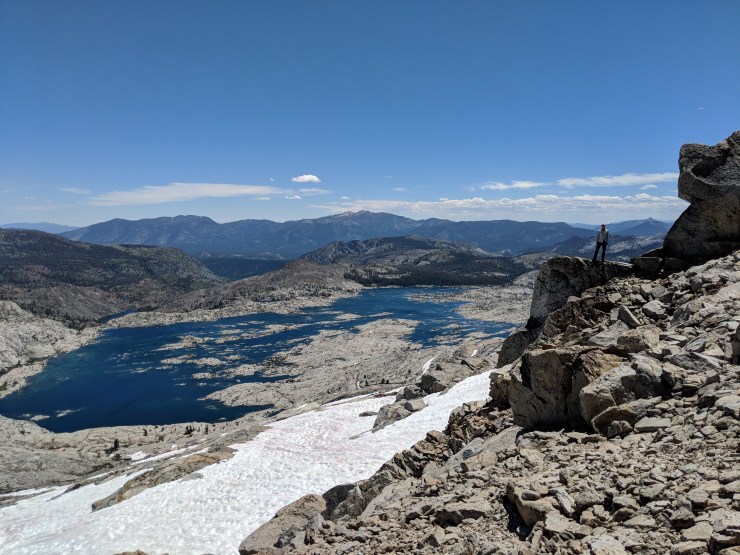
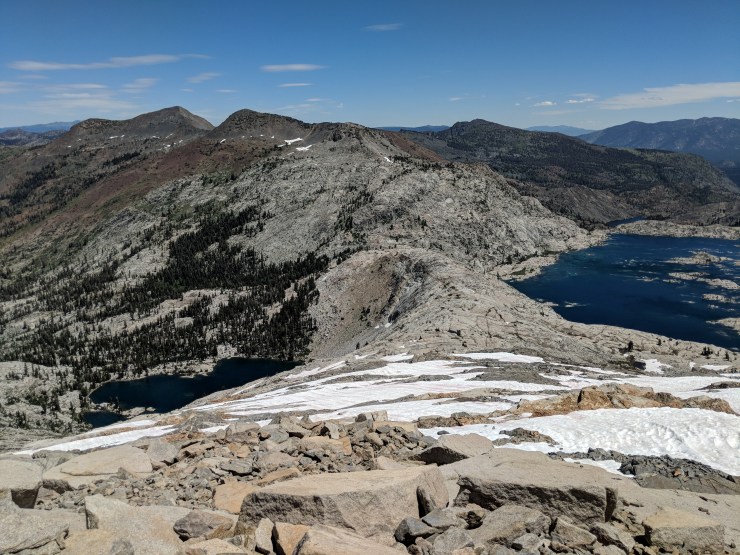
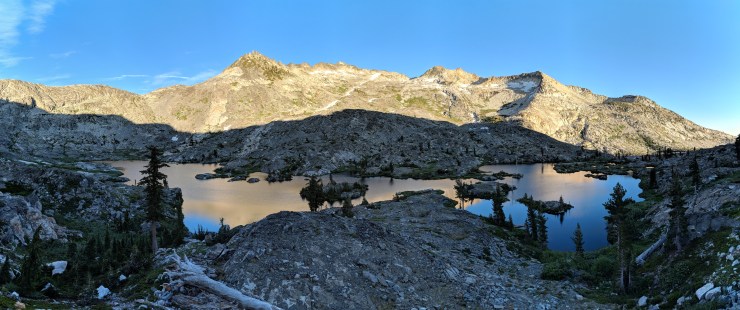
On our second day, we kept our camp at Island Lake and just set off on a day hike. The goal was to scramble up to the top of the Crystal Range mountain ridge near Mount Price. From the ridge we hoped to get a view of Lake Aloha. This part of the hike was all off-trail hiking, so I only recommend it if you are comfortable route finding and doing some basic scrambling.
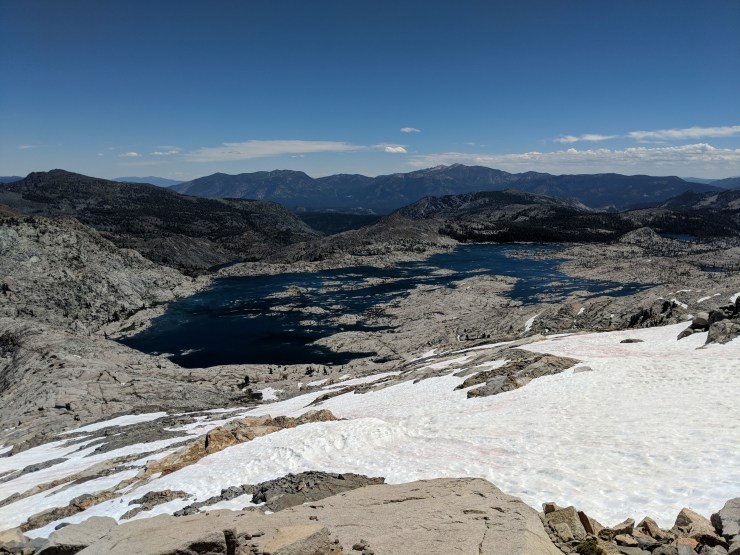
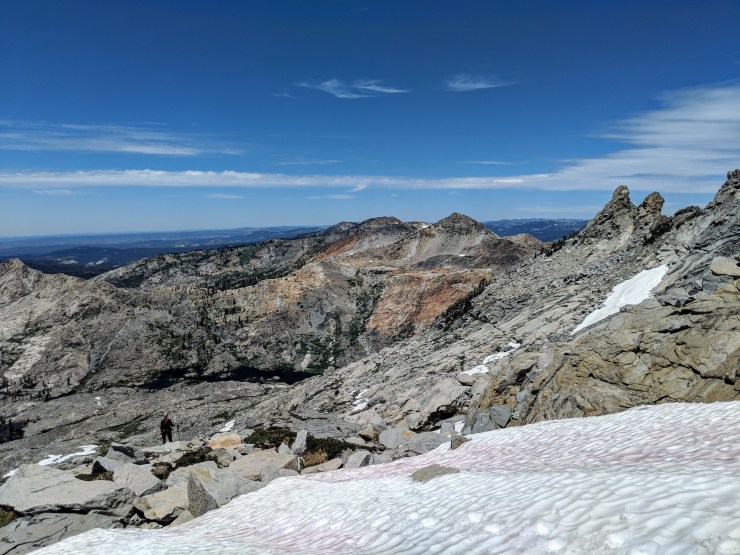
We did not summit Mount Price, but instead went to a small notch/pass just north of the summit. From this notch, we found a great view of the Lake Aloha area. I would highly recommend this day hike as the views are great. Lake Aloha is beautiful and the views of Island and Twin Lakes are great as well. If you wanted to do a longer day hike, it appeared possible to hike down all the way to Lake Aloha. Again, this would be off-trail hiking so stay within your skill level. There was fair amount of snow on the north side of the pass (the side going down to Lake Aloha), so crampons and an ice ax would not be the worst idea.


……
Day 3: 4.2 miles: +90 feet / -1275 feet; Island Lake to Twin Lakes Trailhead
On the last day of our trip, we followed the Twin Lakes trail back to the trailhead. When we reached the trailhead, we rinsed off at Wright’s Lake and relaxed for a bit. When we were ready, we then headed back to our car and went home.


Here are some related trip reports:
Trinity Alps Wilderness – Four Lakes Loop (20 mile trek)
Trinity Alps Wilderness – Emerald and Sapphire Lakes
The Enchantments – Alpine Lakes Wilderness (18 mile point-to-point)

Enjoyed this trip report. I am heading to Desolation on Monday 7/16/2018. Wondered how the mosquitoes were?
LikeLike
I can only speak about the situation in the Twin Lakes zone. There were definitely mosquitoes at the Twin Lakes Trailhead and during the first mile of the hike. They were not crazy bad, but they found you if you stopped hiking. Once we got out of the forest and onto the higher elevation areas, there was a breeze most of the time that kept the bugs away. At our camp on Island Lake, we didn’t even use repellent; the wind was enough to protect us. I’m not sure if it’s the same in other zones of the park though!
LikeLike
Nice report and photos. Thank you.
LikeLike
Such a nice write up! Thinking about heading up there in September. What did you use to plot your mileage graphs and maps?
LikeLike
All the maps are made at caltopo.com! The elevation data is from Strava data for those particular hikes. You can get elevation data from caltopo too though.
LikeLike
GREAT WRTIE UP. Thank you. Heading up there 9/7-9 thanks for the detailed log. Doesn’t seem like there is a lot of trees (thinking for hammocking).
LikeLike
Yes, there were not too many trees around the lakes. There were some trees near our campsite on Island Lake that seemed suitable for a hammock. Assuming you have a large group of people wanting to hang hammocks, you probably will need to look around for a while or decide to spread out a bit. There are not many areas with several large trees close together. You may be able to scope things out on Google Earth ahead of time and get an idea of what parts of the lake have the most trees though…
LikeLike
Also – Does Twin, Bommerang, or Island Lakes have ay fish?
LikeLike
We saw a lot of trout jumping at bugs in Twin Lakes as we hiked by. I do not recall seeing much fish action, if any, at Island Lake. I don’t remember much about Boomerang Lake either. If you plan to fish, I would target Twin Lakes first!
LikeLike
Enjoyed this account of your trip! Especially the great photos! fyi, Island Lake has been gill-netted to remove the fish, in the interest of the Sierra Nevada Yellow-Legged Frog….
LikeLike
Do you know of any longer loop hikes leaving from the Twin Lakes TH? I’d like to hit up Twin Lakes as part of a longer trek in desolation.
LikeLike
Hi Jim – there is not a great loop from this trail so you must do a little back tracking. One option would be to head out to Lake Schmidell using the trail that sits west of Rockbound Pass. Then you could return via the Rockbound Valley and Rockbound Pass.
Another option would be to hike out to Gertrude Lake. From there, you can hike off trail to Tyler Lake and then over the saddle near Little Pyramid Peak and down to Island Lake and Twin Lakes. From there, you can hike back to the trail head. I haven’t hiked this off trail section myself, but there are some reports online saying it is very doable.
It is also possible you could combine the two itineraries above to make a bigger loop: Trailhead -> Lake Scmhmidell -> Gertrude Lake -> Island Lake -> trailhead.
LikeLike
hey, how hard do you think it would be to hike from island lake over to lake aloha? thanks
LikeLike
Hi Brett – The hike over the Crystal Range between Island Lake and Lake Aloha would be a challenge for most backpackers. There is no trail and you would likely be on snow for a significant portion of the hike. We hiked from Island Lake up to a small pass or notch near the Mount Price Summit. From there, it seemed possible to navigate down to Lake Aloha, but we did not do so ourselves.
The best I can say is that the hike is likely possible, but you would want to bring crampons and an ice ax. You also likely want to have experience with off-trail hiking, especially on snow in steep sections.
If you are able to get from Island Lake to Lake Aloha, there is potential to make a fun loop that incorporates those lakes, Clyde Lake, Lake Doris, Rockbound Pass, and Maud Lake!
LikeLike
This trip looks amazing!
LikeLike
I am consider to go to the same area in early July. Would like to see wildflowers and avoid camping on snow(passing is fine), what time of the year did you go?
LikeLike
Hi, the photos in this report are from July 6-8 2018. Hope that helps!
LikeLike
That’s helped a lot! Thank you!
LikeLike
Hi there! I am planning an overnight to Island Lake and want to summit Mt. Price (or at least the overlook that you made it to).
Is there a way to send me the trail details or map of the path you made to the top?
LikeLike
There was no maintained trail leading up to Mt. Price and the lookout (at least that we could see) so we kind of just headed up the route of least resistance. The lookout was a notch in the Crystal Ridge located north of Mt. Price. I drew the super approximate route we took on the image below.
LikeLike
Just went for 3 days, 2 nights. Spent both nights at Islands Lake. Day 2 did a day hike to the saddle just west of Mt Price (looks down on Lyon’s Lake). On the return, took Loop Trail back and saw Enchanted Pools and Falls; it requires a little route finding. Beautiful time of year with some fall foliage. Excellent itenerary, couldn’t recommend it more! And friendly for beginner backpackers.
LikeLike