


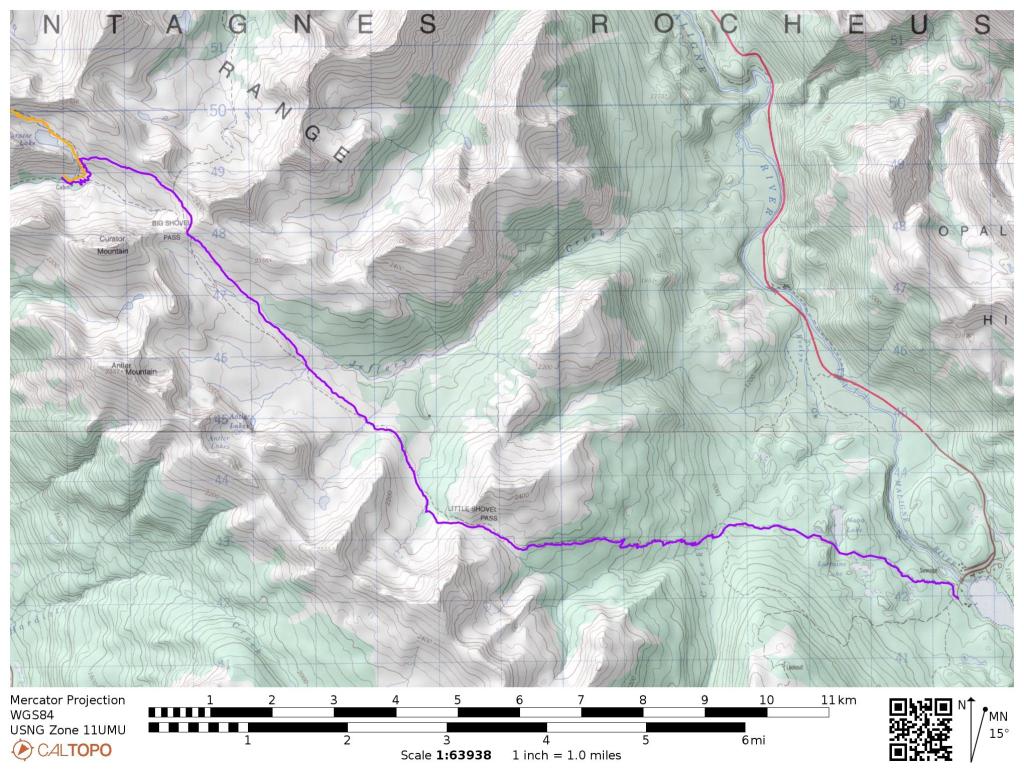
Trip Overview: This ~30 mile route offers unparalleled views of Jasper National Park as you traverse a high elevation ridge in the Maligne Range and cross over three mountain passes. The terrain is varied along the trail as you pass through forests, meadows, and long, windswept ridge. +/- 6,000 feet of elevation over the course of this trek with a peak elevation of 8,250 feet. Highlights include expansive views of the Canadian Rockies, alpine lakes, mountain streams and meadows, and a contiguous ~15 mile section of trail above the treeline. The majority of the images here are from a trip at the end of July. Unless otherwise noted all photos were taken by Brian Lang and are reused with permission.

- Map of the Skyline Trail from Parks Canada (JPEG)
- Topographic map of Jasper National Park for purchase (amazon link)
Jump to Day 1: Maligne Trailhead to Curator Camp
Jump to Day 2: Curator Camp to North Skyline/Signal Mountain Trailhead
Shop Deal of the Day at REI Outlet (up to 50% off)!
Preparations:
Click here to read more about Permits
Permits: Backcountry camping permits are required for all overnight stays along the Skyline Trail. Permits are limited based on a strict quota system, so you must plan far in advance of your trek if you plan to tackle the Skyline Trail in a multi-day trip. Permits can be reserved online (https://reservation.pc.gc.ca/). In the past, reservations have opened up between January and April, so it is best to check in early January to see when the expected reservation opening date is. Quotas are frequently filled within 24 hours of reservations opening so you need to be fast! When you are reserving your permit online, you are required to pick the specific campsites you will be staying at each night of your trek. Be sure to study the route beforehand so you know which campsites to target when reserving.
Click here to read more about Logistics
Logistics: Most backpackers hike the Skyline Trail as a one way trek over 2 or 3 days. In addition, it is generally recommended to hike the trail from south to north, starting at Maligne Lake. In order to get between the two trailheads before/after your trek, you can utilize a private shuttle service. Maligne Adventures operates a shuttle for hikers which costs CA$35 per person (https://maligneadventures.com/shuttle/). After you park your car at the North Skyline/Signal Mountain Trailhead the morning of your trek, the shuttle will pick you up and bring you to the Maligne Lake Trailhead. From there, you start your hike to the north and eventually end up back at your car.
Difficulty: The difficulty level of the Skyline Trail largely depends on your proposed itinerary. The itinerary described in this report completes the route in two days and thus is quite difficult (average of 15 miles a days). When hiked over the course of three days, the Skyline Trail is more moderate, yet still challenging. Your specific itinerary will likely depend on campsite availability. You can find more information of the location of the different campsites along the trail at the Parks Canada website. For the two day itinerary, it is most common to spend the night at the Curator Camp. For three day itineraries, most hikers choose to camp at Snowbowl Camp the first night and Tekarra Camp the second night.
Over the course of the trek, the Skyline Trail is well marked, so hikers usually have no issues with route finding. That said, the weather in the Canadian Rockies can be very unpredictable so backpackers should be prepared for all conditions. Snow can fall on the Skyline Trail at anytime of the year, so you should have a good map (and possibly a GPS device) and be comfortable with route finding.
Supplies: There are bears, both black and grizzly, in Jasper National Park, so you need to properly store you food and scented items. All designated campsites along the Skyline Trail have have food storage lockers, so you are not required to carry your hard-sided bear canister (though they are recommended). Campsites also have bear poles for hanging your scented items with an Ursack if you so choose. Given the presence of grizzly bears in the park, backpackers are also smart to carry bear spray along this route.
Below is a list of the gear I recommend for backpacking the Skyline Trail:
Hiking clothes
- a lightweight hiking rain jacket (North Face Venture 2 Jacket)
- fast drying synthetic hiking pants (prAna Zion Pants)
- a quick drying long sleeve hiking shirt (Columbia Silver Ridge L/S Shirt)
- wool outer socks (People Socks Moreno 4-pack)
- thin blister preventing base socks (WrightSock double layer Coolmesh)
- quick drying synthetic boxer briefs (ExOfficio Give-N-Go)
- Gore-tex hiking shoes (adidas Outdoor Terrex Fast R Gore-Tex Shoe)
Clothes for camp
- wool leggings (Minus33 Merino Wool Kancamagus Midweight Bottom)
- wool base layer shirt (Minus33 Merino Wool Chocorua Midweight Crew)
- lightweight down jacket (Patagonia 800-fill Down Jacket)
- lightweight camp shoes (Xero Z-Trail lightweight sandal)
Hiking gear
- topographic map (Gem Maps)
- trekking poles (Black Diamond Trail Ergo Cork Trekking Poles)
- 2 liter hydration bladder (Platypus Big Zip Water Reservoir)
- 65 liter backpack (Osprey Atmos 65 Liter pack)
- water filtration system (Platypus gravity filtration system)
Camp gear
- strong tent with rain-fly (Alps Mountaineering Chaos 2 Tent)
- inflatable sleeping pad (Therm-a-Rest Trail Pro Sleeping Pad)
- sleeping bag (REI Co-op Igneo 25 Sleeping Bag)
- lightweight backpacking chair (Helinox Chair Zero)
- headlamp (Black Diamond Cosmo Headlamp)
- multi-tool with knife (Gerber MDime Mini Multi-Tool)
- bear spray (Counter assault bear spray)
- lightweight stove (MSR PocketRocket 2)
- lighter (BIC plastic lighters)
- 2 liter pot (GSI Outdoors Halulite Boiler Pot)
- coffee cup (GSI Outdoors Glacier Stainless Cup)
- lightweight spork (Snow Peak Titanium Spork)
- small, quick drying towel (REI mutli towel mini)
Random
- wet wipes (Stall Mates individually wrapped wipes)
- mole skin for blisters (Blister medic kit)
- small amount of duct tape for gear repairs
- chapstick and sun screen
Food and drink
- a variety of my favorite dehydrated meals
- electrolyte replacement (NUUN Hydration Tablets)
- instant coffee (Starbucks VIA)
- quick snacks (Clif Shot Bloks and Clif energy bars)
- small plastic water bottles filled with whisky 🙂
……….
Day 1: 12.9 miles; +2,900 / -1,700 feet; Maligne Lake Trailhead to Curator Camp

On day 1 of this two day itinerary on the Skyline Trail, you hike from the Maligne Lake Trailhead to the Curator backcountry camp. The route starts with a slight climb through a forested area with a few lakes. At the 3 mile mark, you reach the Evelyn Creek Camp, the first of the backcountry camps along the trail. After this point, the trail climbs more steeply for the next 6 miles as the trees gradually begin to thin out. At the 6 mile mark, you pass through Little Shovel Pass and then descend down into the Snowbowl area. The popular Snowbowl Camp sits at the 7 mile mark. Here the trail passes through a beautiful meadow. Miles 7 through 11 take you across the meadow and up to Big Shovel Pass. The view gets more and more expansive as you climb up the large ridge. At the point the terrain is much different than the forests and meadow you just hiked through. After the pass it is just a downhill hike to the Curator backcountry Camp.

Small turquoise lake along the Skyline Trail in the vicinity of Lorraine Lake 
In the first couple miles of the Skyline Trail, you pass a few small lakes. 
At the 3 mile mark of the Skyline Trail you pass over Evelyn Creek (credit: Darren and Kristen) 
Through much of these first miles the Skyline Trail travels through the forest 
As you continue to gain elevation on the Skyline Trail, the views begin to open up and you get your first mountain views 
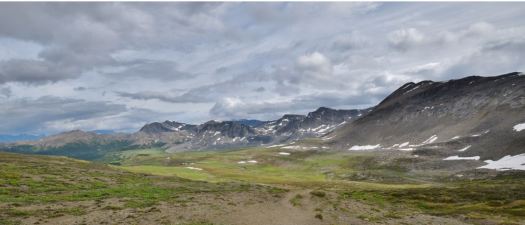
View from the Skyline Trail – eventually the trail leads above the treeline and hike along the mountain ridges 
View of the rugged peaks in Jasper National Park, seen from the Skyline Trail 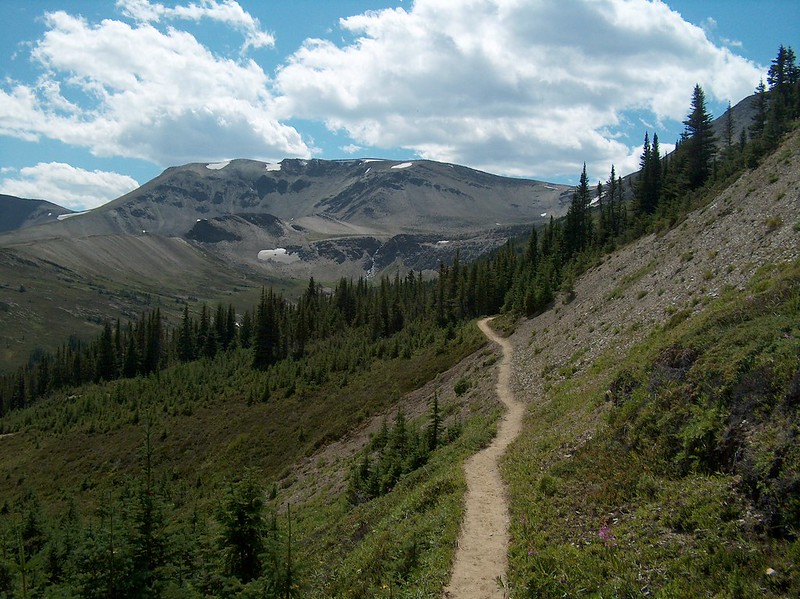
Skyline Trail in Jasper National Park as it heads towards Little Shovel Pass in the distance 
Mountain and waterfall view from the Skyline Trail in Jasper National Park 
As the Skyline Trail approaches Little Shovel Pass, you move above the treeline and the terrain changes significantly 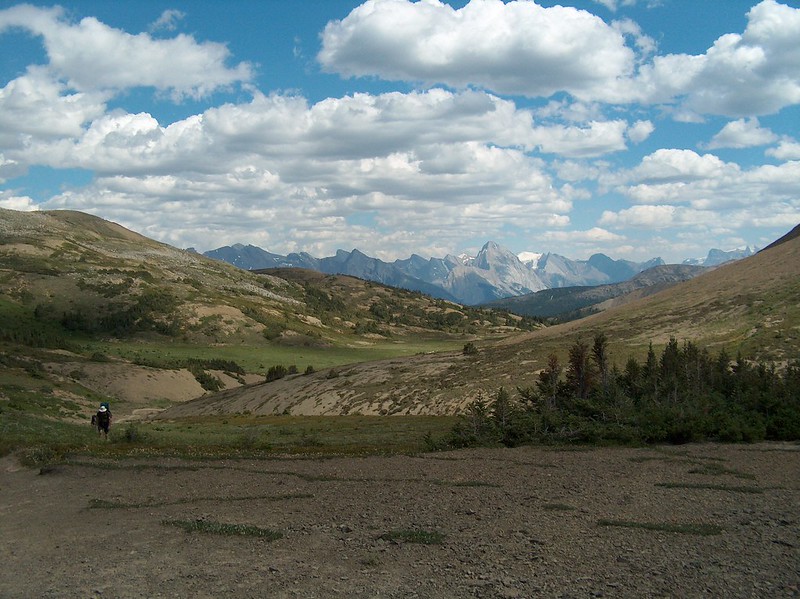
View looking southeast from the top of Little Shovel Pass in Jasper National Park 
Backpackers on the Skyline Trail, descending from Little Shovel Pass down into the Snowbowl area of Jasper National Park 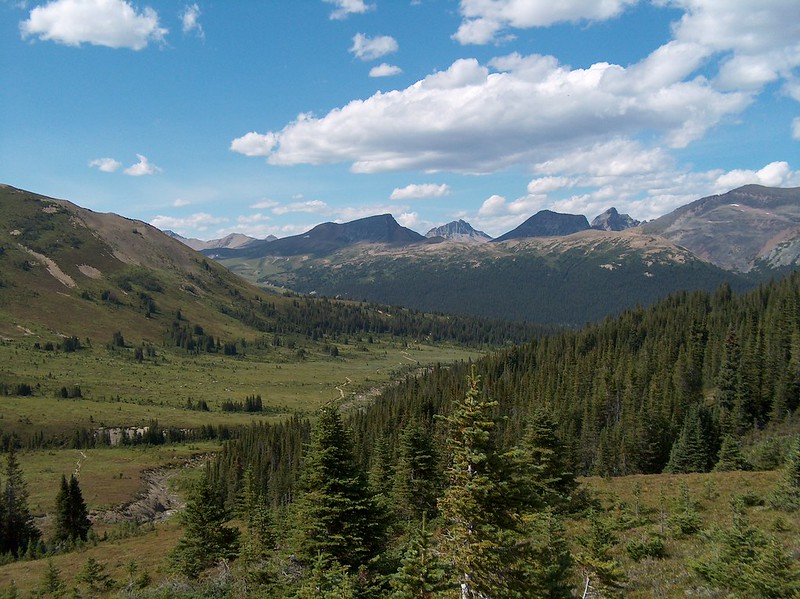
The Snowbowl area – a portion of the Skyline Trail with several streams and a large meadow. This is the site of the popular Snowbowl Backcountry Camp 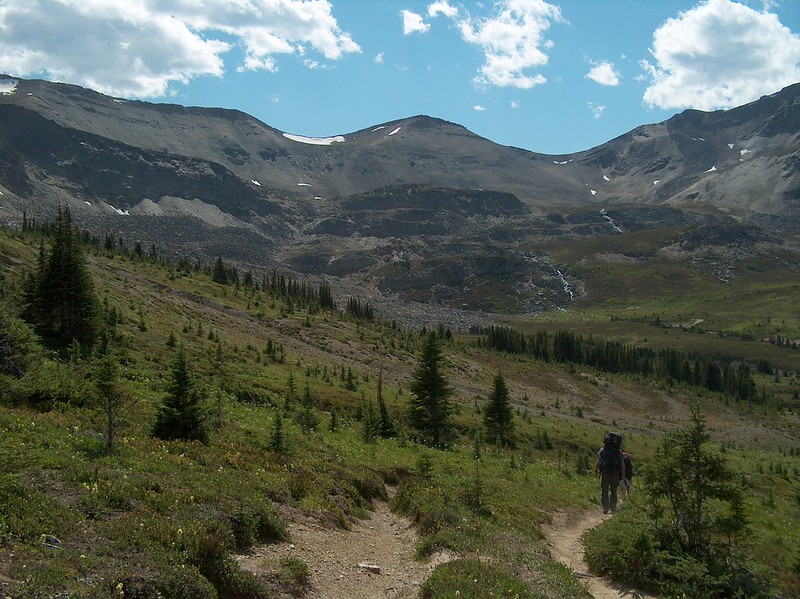
Hiking along the Skyline Trail, through the Snowbowl area 
Hiking along the Skyline Trail in Jasper National Park 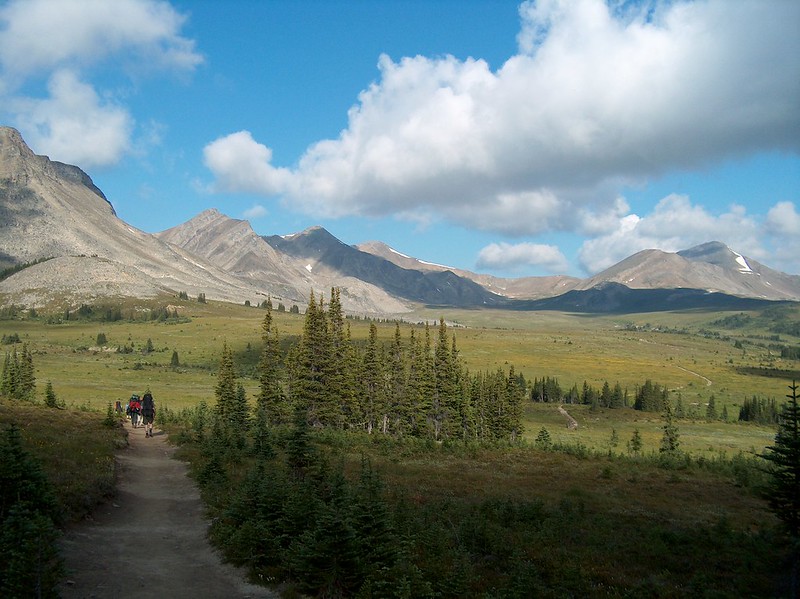
View of the large meadow in the Snowbowl area with a great mountain backdrop, along the Skyline Trail 
Skyline Trail – wildflower and mountain view 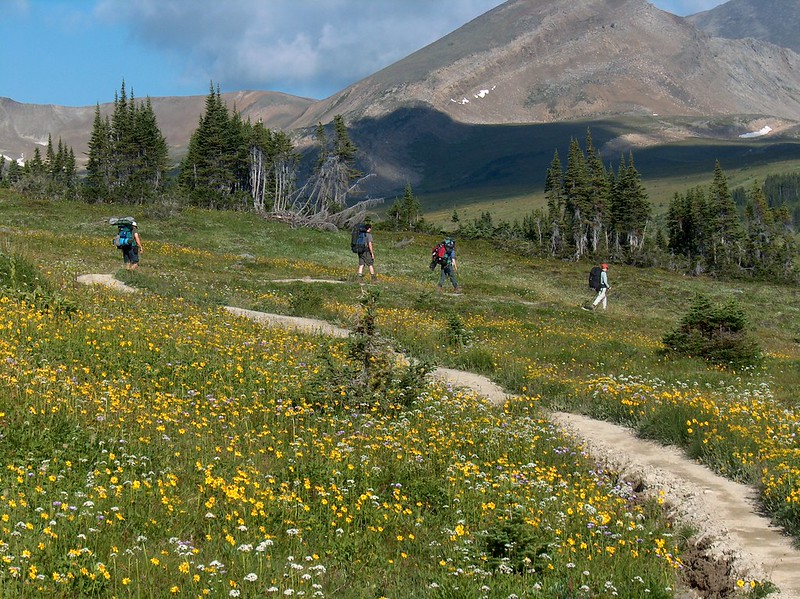
Hiking along the Skyline Trail – wildflowers in the Snowbowl area 
One of several of the small streams flowing in the Jefferson Creek area of the Snowbowl 
After passing through the Snowbowl, the Skyline Trail begins the steady climb up to Big Shovel Pass 
View of Curator Mountain, along the Skyline Trail before reaching Big Shovel Pass 
View of Jasper National Park from the top of Big Shovel Pass (credit: Darren and Kristen) 
View of The Notch in the distance as seen from near the top of Big Shovel Pass. From this point on the Skyline Trail traverses the mountain ridge and you are above the treeline for over 10 miles. 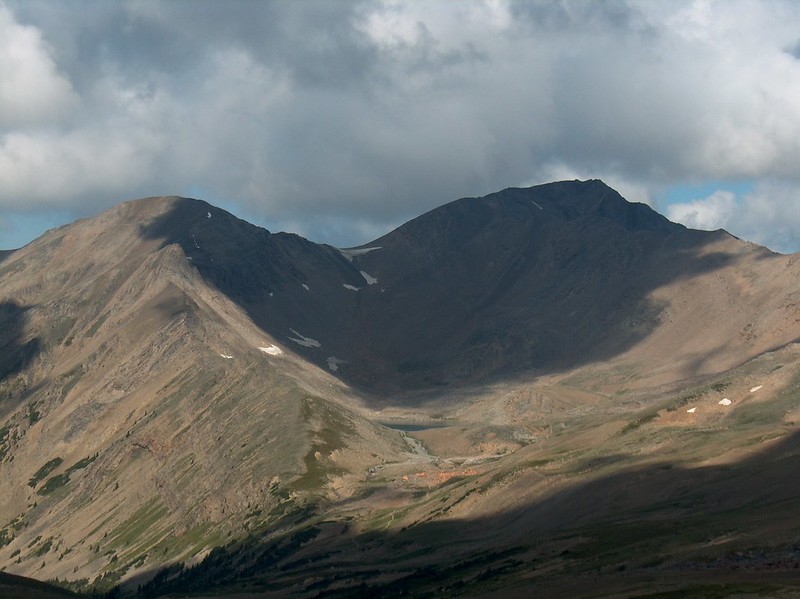
Zoomed in view of The Notch with Curator Lake below it. The Skyline Trail heads to the base of the lake and then passes through The Notch. 
Descending from Big Shovel Pass and hiking towards Curator Camp 
View looking down into the Wabasso Creek Valley, seen from the Skyline Trail 
View from the base of Curator Lake. You continue to descend from hear until you reach the Shovel Pass Lodge and Curator Backcountry Camp. 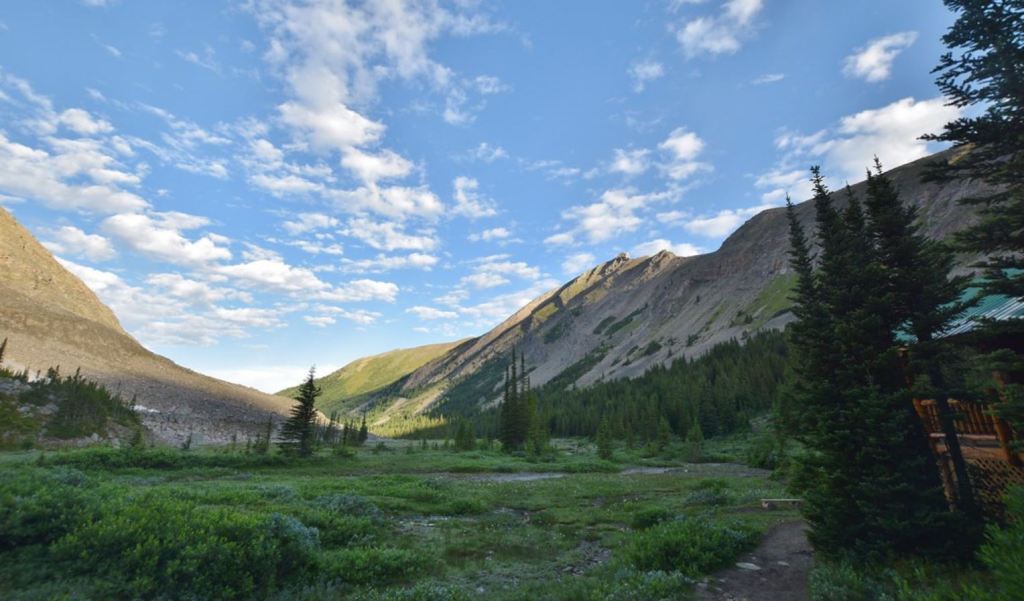
View from the Shovel Pass Lodge, which is near the Curator Backcountry Camp in Jasper National Park (credit: Darren and Kristen) 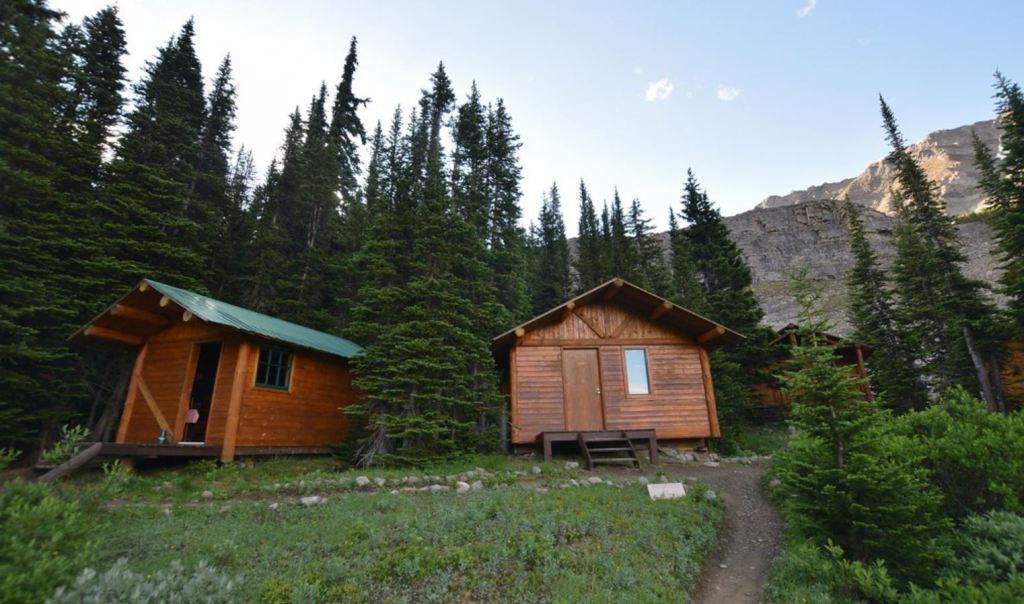
Cabins at the Shovel Pass Lodge in Jasper National Park (credit: Darren and Kristen) 
View from the Curator Backcountry Camp (credit: Parks Canada)
……….
Day 2: 16 miles; +2,200 / -5,200 feet; Curator Camp to North Skyline/Signal Mountain Trailhead


On Day 2, you hike mostly downhill but still need to cover 16 miles. The first 10 miles of the hike are above the treeline, providing great views in nearly every direction. That said, this section of the trail is also the most dangerous in terms of exposure to bad weather events. The hike starts with a 1,500 foot climb past Curator Lake and up to The Notch, a section of the Skyline trail that can be impassable early in the season. There are great views throughout this part of the hike, so it makes for a great start. After you pass through The Notch, you slowly descend across a ridge line passing Amber Mountain, Centre Mountain, and Mount Tekarra. The scenery in this whole section is great, though it can be cool and windy here. After the 7 mile mark, the trail flattens for a couple miles until you pass Signal Mountain at mile 10. From this point on, you descend quickly through the forest until you reach the ending trailhead. These last several miles can be a trudge, making it all the more rewarding when you finally reach your car.

Passing Curator Lake along the Skyline Trail and the trail climbs up to The Notch 
View looking back at Curator Lake 
Climbing up to The Notch, along the Skyline Trail in Jasper National Park 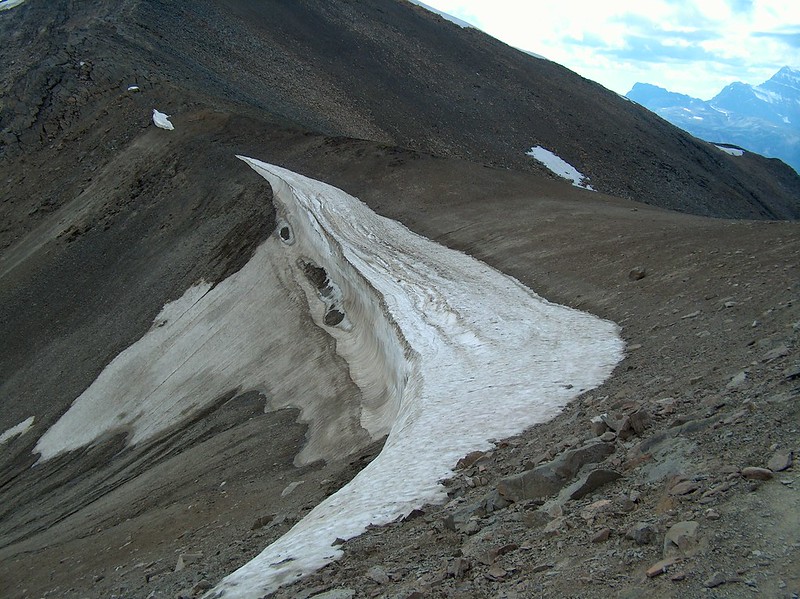
Snow cornice at the top of The Notch on the Skyline Trail. Early in the season this mountain pass can be unsafe to traverse. 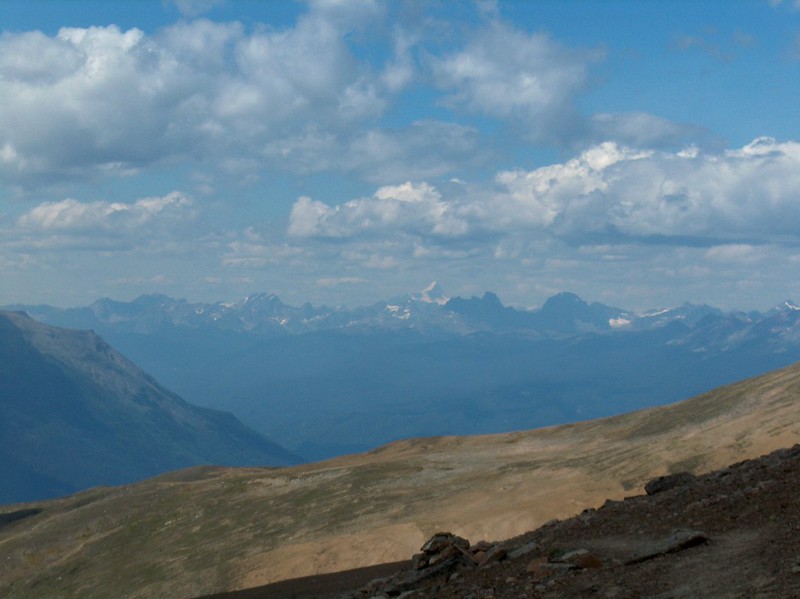
View of Mount Robson in the distance, seen from atop The Notch on the Skyline Trail 
View of Mount Edith Cavell, seen from atop The Notch 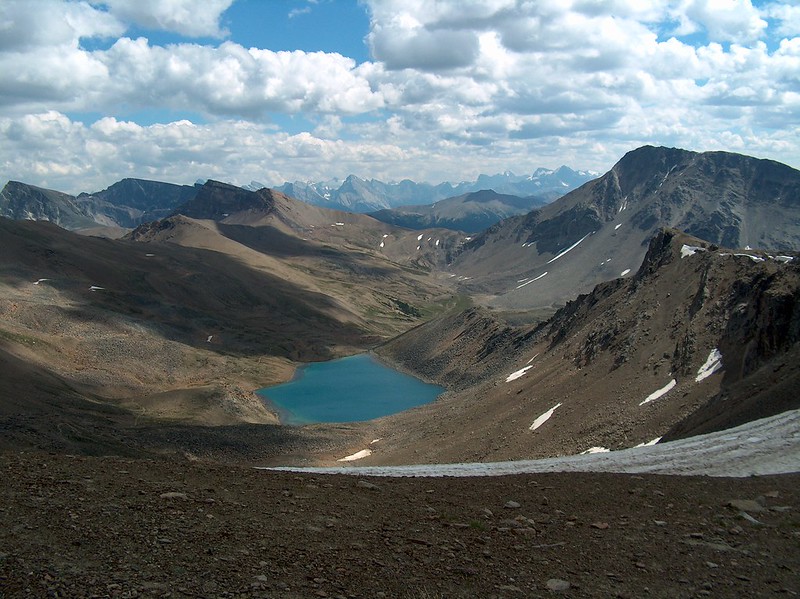
View looking down on Curator Lake from atop The Notch, along the Skyline Trail in Jasper National Park 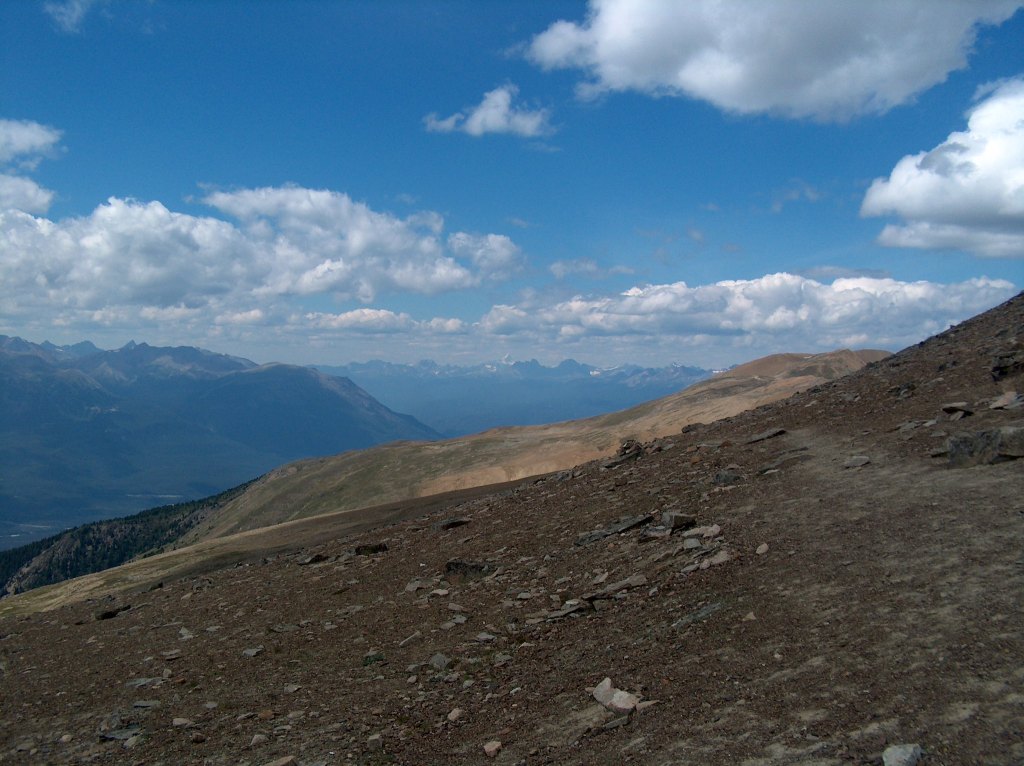
After passing through The Notch, the Skyline Trail traverse an expansive ridge and heads towards Amber Mountain 
Several turquoise tarns seen to the north of Amber Mountain, along the Skyline Trail 
Backpackers crossing the Amber Mountain section of the Skyline Trail in Jasper National Park 
Crossing over Amber Mountain along the Skyline Trail 
View of Mount Tekarra and the valley, which the Skyline Trail drops into 
Meandering Skyline Trail as it descends 
View of Centre Mountain and the oblong lake beneath it, seen from the Skyline Trail 
Skyline Trail and it heads towards to the east side of Mount Tekarra 
As the Skyline Trail continues to descend you begin to pass by trees again. You then pass by Signal Mountain, which is seen here. 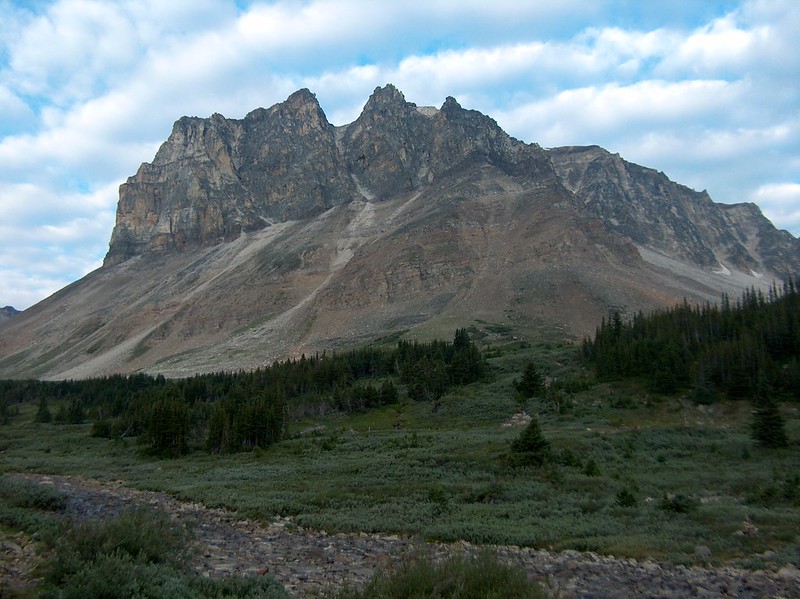
View looking back at Mount Tekarra, from the Skyline Trail near Signal Mountain 
View of Pyramid Mountain 
Final view of Mount Tekarra before the Skyline Trail descends through the forest for the last several miles.
……….
Here are some similar trip reports!
Loowit Trail – Mount St. Helens National Volcanic Monument (30 mile loop)
Four Lakes Loop – Trinity Alps Wilderness (20 mile trek)
Yosemite Highlights Loop – Yosemite National Park (40 mile loop)
Rae Lakes Loop – Kings Canyon National Park Backpacking (41 mile loop)
