Yosemite Highlights Loop – Yosemite National Park (40 mile loop)
View of Half Dome from the Snow Creek vista point
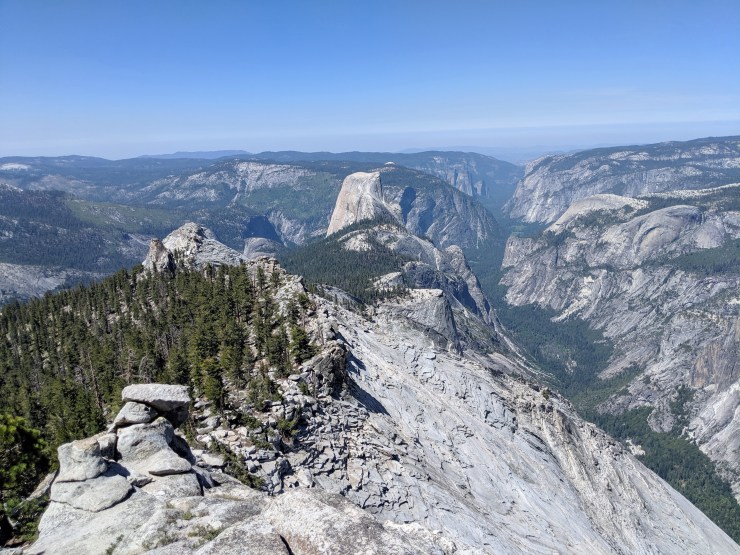
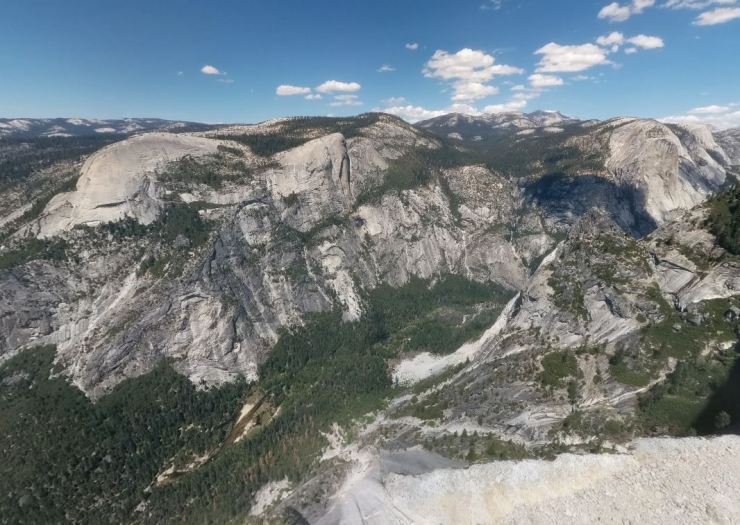
View from Clouds Rest looking into the Tenaya Canyon and Yosemite Valley and showing Half Dome and Mount Watkins
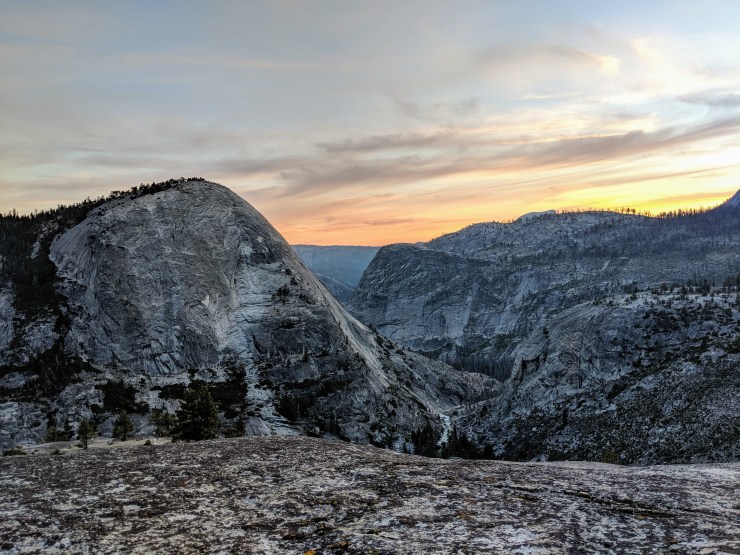
Sunset over Bunnell Point and the Lost Valley
Panoramic view showing the Merced River valley to the left and Bunnell Point and the Lost Valley to the right.
Along the way down the trail you get some awesome views of Nevada Falls, Liberty Cap, Mount Broderick, and Half Dome.
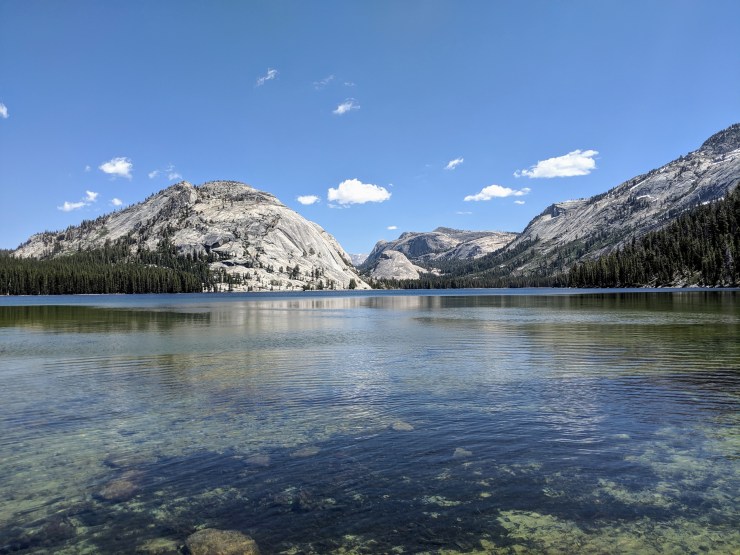
View from the south end of Tenaya Lake with the Polly Dome and Pywiack Dome in the background.
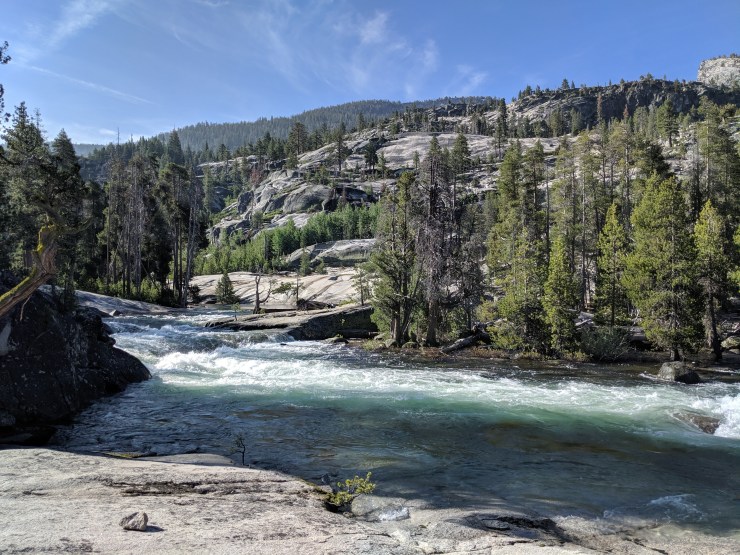
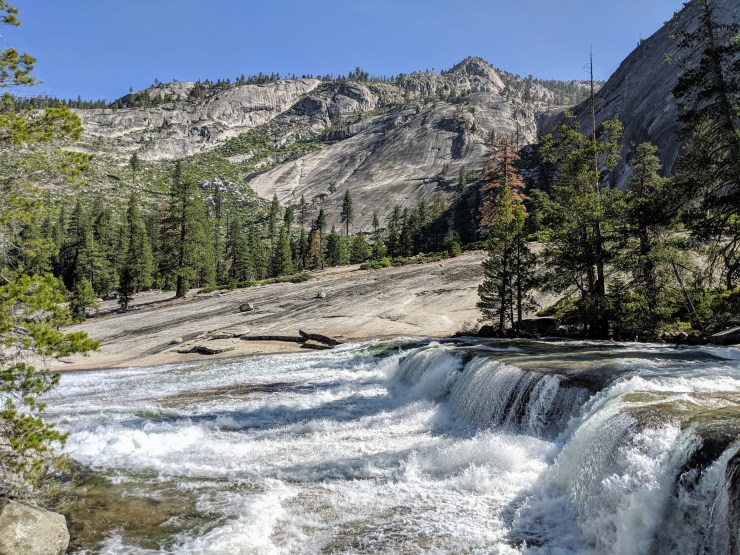
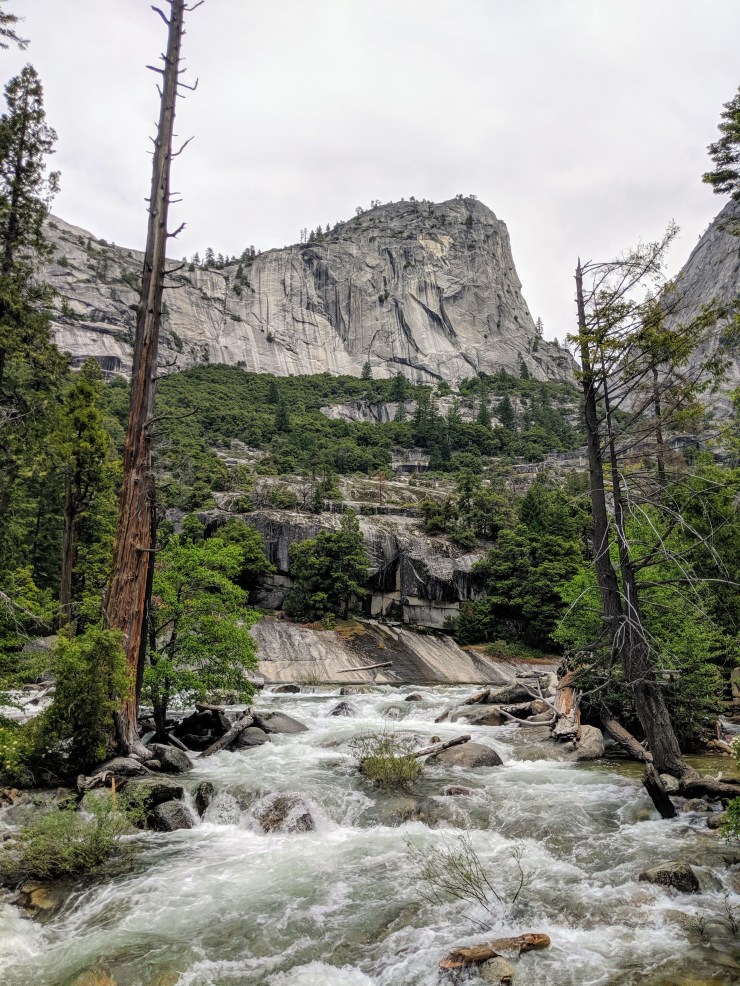
Looking back at Merced Falls
Trip Overview: This backpacking loop itinerary starts/ends within the famous Yosemite Valley in Yosemite National Park and traverses several of the highlights within the park. Along this loop you pass by the beautiful Tenaya Lake, hike over Clouds Rest, take in several great views of Half Dome, and hike through Little Yosemite Valley and the Lost Valley. The route has a peak elevation of 9,900 feet (atop Clouds Rest) and you climb roughly 9,000 vertical feet over the course of the ~40 mile trek. Highlights include epic waterfalls, expansive views of Yosemite Valley and the surrounding granite peaks and domes, alpine lakes, grassy meadows, and up close views of iconic Half Dome from all sides. We hiked this route on July 4th weekend in 2019.
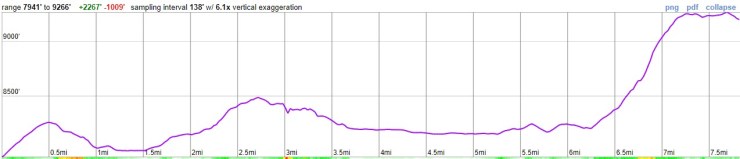
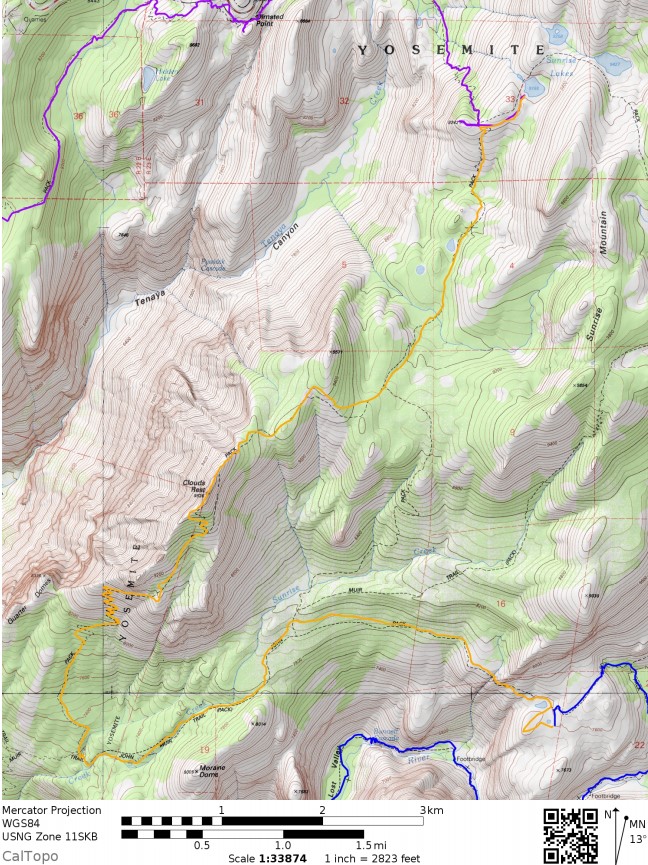
Overall map of the Yosemite Highlights Loop in Yosemite National Park, starting at the Mirror Lake Trailhead and ending at the Trailhead Parking Lot. Day 1 (red), Day 2 (purple), Day 3 (yellow), and Day 4 (blue).Overall elevation profile of the Yosemite Highlights Loop in Yosemite National Park.
Permits: Yosemite National Park is one of the most popular backpacking and hiking destinations in the United States, so permits are required year round for overnight camping and the number of permits is limited. You will want to secure a permit as early as possible to do this hike in either late June, July, August, or September. The peak hiking season is generally mid July through early September and many trailhead quotas fill up very early for these dates. In May or early June, trails may still be covered in snow in many parts of the park depending on how much snow fell in the winter that year.
60% of wilderness permits are available for advanced reservation and the remaining 40% are saved for first-come, first-serve walk ups (starting 11am the day before you start the hike). Wilderness permit applications for any given trek start day are processed (via random lottery) starting 24 weeks before the hike start date, so you want to submit an application at least 24 weeks in advance of your hike. Permit applications can be easily submitted online (info here) and the cost is $5 per confirmed reservation plus $5 per person on the permit. You only pay the fee if you permit application is accepted and confirmed.
Prior to submitting an application for a permit, check the Yosemite National Park trailhead map and trailhead permit availability report (if applying fewer than 24 weeks before your start date). Note that each trailhead has a designated direction you must hike. For the specific Yosemite Highlights Loop described in this report, you want to start at the Mirror Lake Trailhead and must hike towards Snow Creek. You exit the wilderness via the Happy Isles Trailhead, which is very close to the Trailhead Parking Lot where you can leave your car during the trek. This allows you to avoid having to take a shuttle at the end of your hike. A similar itinerary (slightly longer) could also be put together by exiting Yosemite Valley via the Yosemite Falls Trail rather than the Snow Creek Trail.
If you are able to reserve a permit and pay your fee, the next step is to pick up the permit from the wilderness permit station the day before or up to 10am on the day of your hike. If you will be arriving at the wilderness permit station later than 10am on the day of your hike, you must arrange for a late pickup or your permit will be given away. There are wilderness permit stations at the Yosemite Valley Wilderness Center and at the Big Oak Flat Road Information Station. For information on the other permit stations check online (here).
Along this itinerary, you pass near Half Dome and have an opportunity to take the ~5 mile round trip detour up the Half Dome cables. A special permit is required for backpackers to ascend the cables. 75 permits are issued to backpackers each day (50 reserved ahead of time / 25 first-come, first-serve) and they cost $10 each. You can specify whether you want to apply for a Half Dome permit when you submit your wilderness permit application. Note that the Half Dome ascent is not for the faint of heart and is very steep.
Click here to read more about Logistics
Logistics: If you have a wilderness permit, you may camp at one of the Yosemite backpackers’ campgrounds the night before and night after your wilderness trek. This means you do not need to acquire a separate camping permit if you want to stay the night near the trailhead. For this specific itinerary, it is easiest to stay at the Yosemite Valley backpackers’ campground, which is just north of the North Pines Campground in Yosemite Valley. This campground is very close to the Mirror Lake Trailhead, so it is convenient for this backpacking loop. Backpackers must pay $6 per person to camp and you pay with exact cash at the campground.
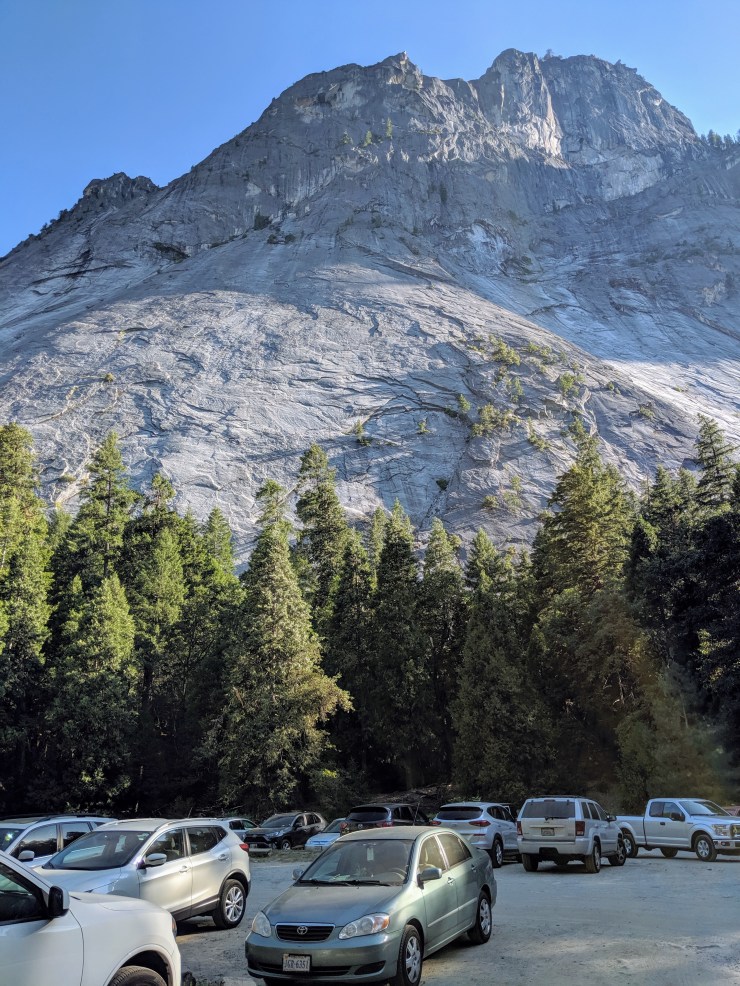
For overnight parking during your trek, you will want to insure that you are parked in a legal overnight area. Two areas where you can legally park overnight are at Half Dome Village (aka Curry Village) and at the trailhead parking lot southeast of Half Dome Village. There are food lockers at both parking locations, so leave any extra food or scented items in the lockers to avoid bear issues while you are away.
Map of the east end of Yosemite Valley showing the two overnight parking options: Half Dome Village (aka Curry Village) and Trailhead Parking.Click here to read more about Weather and Trail Conditions
Weather and Trail Conditions: It is important to check the trail conditions before taking off on this trek. You can find some reports on wilderness conditions here. The main concerns for this itinerary are typically the snow level once you hike out of the valley and the creek crossing at Tenaya Lake. The Tenaya Creek crossing can be waist high early in the season and can be swift in snowy years. Additionally, snow can linger on sections of the trails near or above 9,000 feet late into the season. Check with the rangers before heading out on the hike to make sure you know what conditions to expect.
Weather is Yosemite National Park is similar to the rest of the Sierra. In the mountains you can have afternoon thunderstorms, but the weather is typically good in the summer. Temperatures can be hot in Yosemite Valley but decrease as you go higher in elevation. This Yosemite Highlights Loop itinerary does not spend too much time at high elevation (>9,000 feet), except when you hike over Clouds Rest.
Click here to read more about Difficulty
Difficulty: If you are doing this loop in 4 days, expect a tough hike. Each day will be close to 10 miles and 2 of the days will have serious climbs. If you want to include the hike up Half Dome (permit required), it would be wise to build in an extra day to the itinerary unless you are a very fit hiker.
Supplies: There are active black bears in the Yosemite National Park, so you need to bring a bear canister to store food and scented items. Bear spray is not allowed and hanging food is illegal throughout Yosemite. If you do not own a bear canister, you can rent them from the various Wilderness Centers in the park for $5 per week.
You likely will want bug spray because the mosquitoes can be out in force in certain areas of the trek. I prefer a picaridin based spray because it does not damage plastics and synthetic fibers like high concentration DEET sprays can. I also like to pre-treat my clothes and tent with permethrin spray repellent. The permethrin treatment stays on your clothes for up to 7 washes, so it helps reduce the amount of spray you need to put on your skin.
Below is a list of the gear I brought on this backpacking loop in Yosemite National Park:
Day 0: Arrival at Yosemite Valley Backpackers’ Campground
Map showing the location of the Yosemite Valley Backpackers’ Campground north of the North Pines Campground
We arrived in Yosemite National Park the day before starting our backpacking trek on the Yosemite Highlights Loop. On the way into the park we paid the $35 entrance fee and picked up our wilderness permit at the Big Oak Flat Information Station. The permit station here is open until 5pm and you can ask the rangers questions about trail conditions and regulations. You then drive into the park and get your first glimpse of some of the beautiful sights within Yosemite National Park.
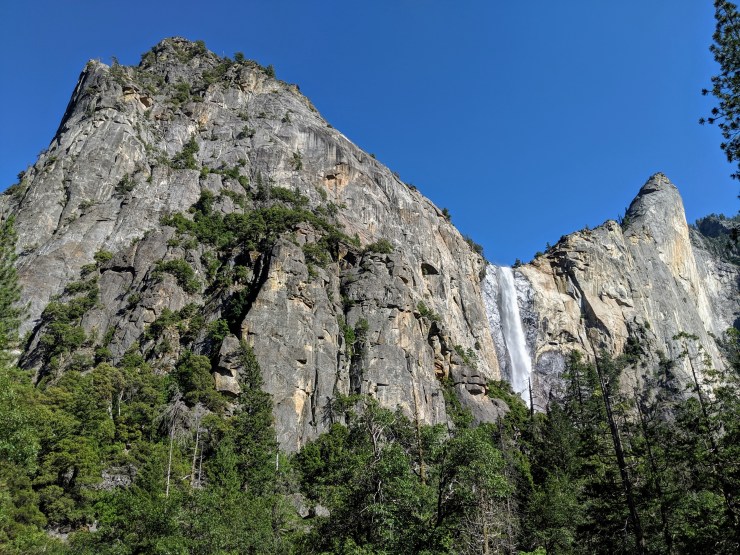
View of El Capitan from the road that leads into Yosemite ValleyView of Bridalveil Falls from the road leading into Yosemite Valley
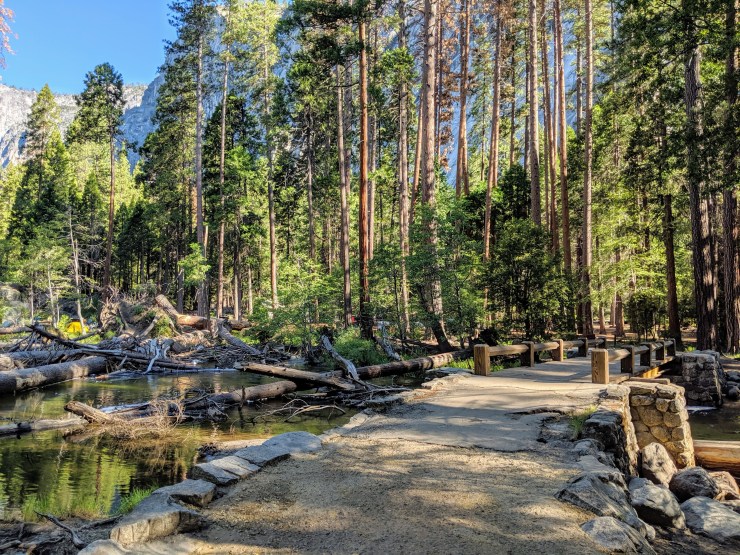
The Yosemite Valley Backpackers’ Campground is conveniently located close to the Mirror Lake Trailhead and to two overnight parking lots. To get to the camp, either drive or take the shuttle to North Pines campground. The route to the Backpackers’ Campground is located across the bridge in the back of the camp.
If driving, you can drive into the North Pines Campground and briefly park in the temporary loading zone to unpack your gear. You then must move your car to one of the nearby overnight parking lots.You then carry your gear across the bridge over Tenaya Creek and will come across the Backpackers’ campground, about 5 minutes walk from the loading zone.There are no designated tent sites at the Backpackers’ Campground, you just pick a spot you like and set up camp. This is our camp for the first night (pictured: Alps Mountaineering Chaos 2 tent)
After setting up camp, go to the information board, register your party, and pay the $6 per person fee. There are vault toilets and bear vaults for food storage at the backpackers’ campground, but there is no potable water (you get water from the nearby North Pines campsite). The camp is also located within walking distance of Half Dome Village if you want to buy dinner instead of cooking at camp on the night before the trek.
View of Yosemite Falls in the distance from near the Backpackers’ CampgroundView of Glacier Point, which rises up behind the Happy Isles Trailhead Parking Lot
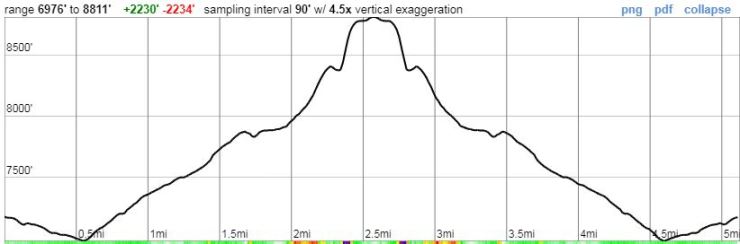
Approximate elevation profile of the Day 1 hike on the Yosemite Highlights Loop from the Mirror Lake Trailhead to the campsite north of Mount Watkins.
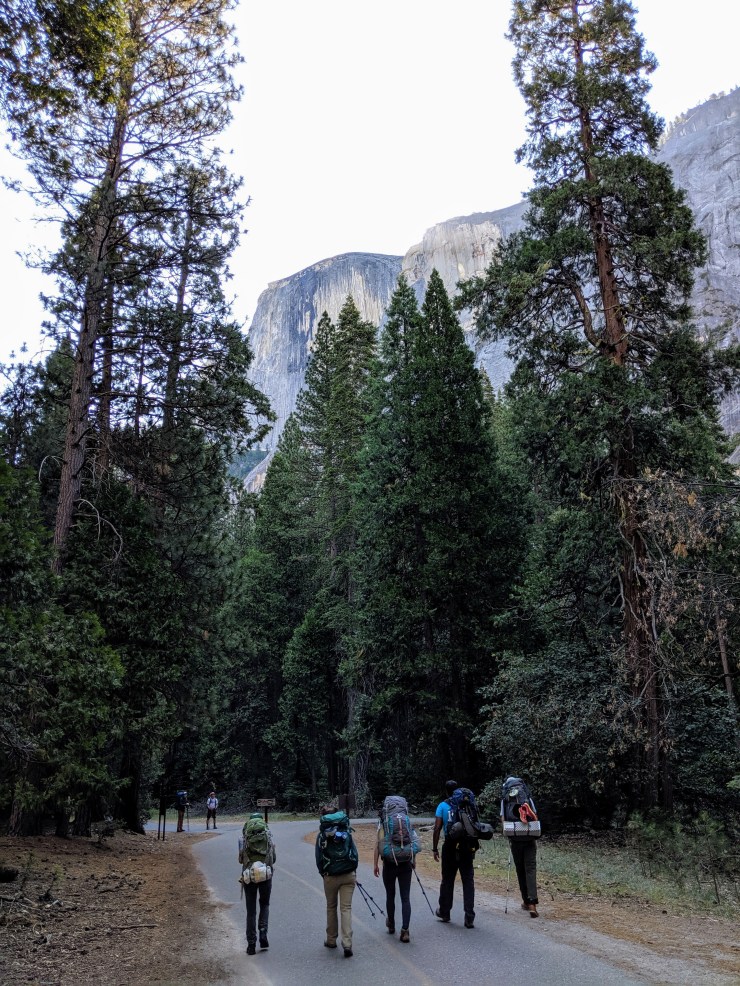
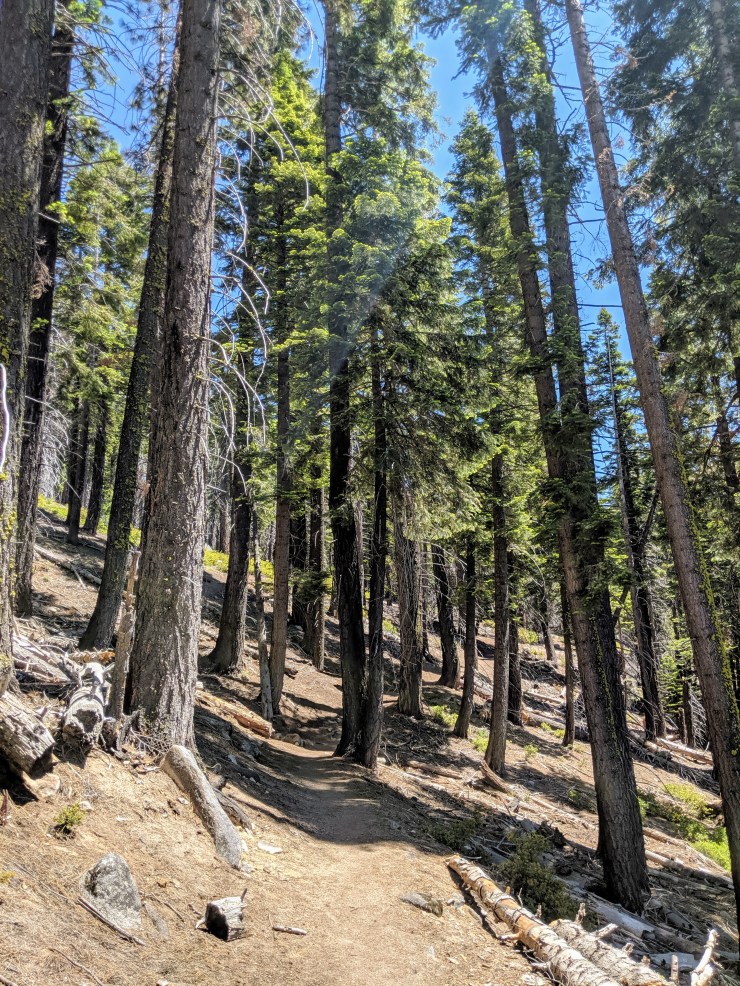
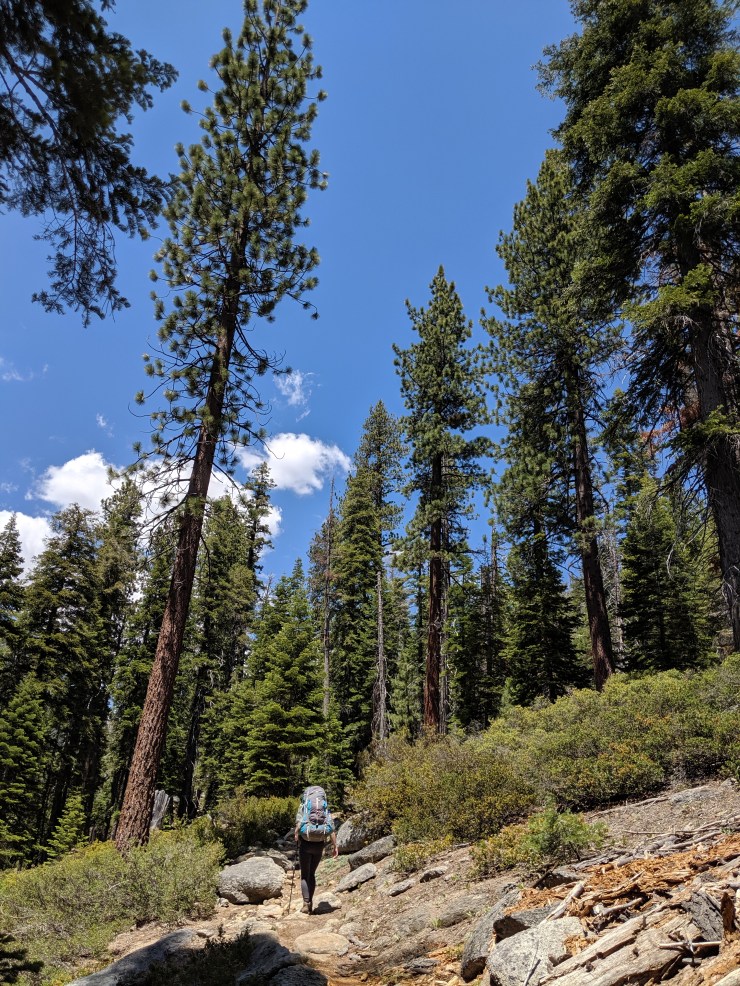
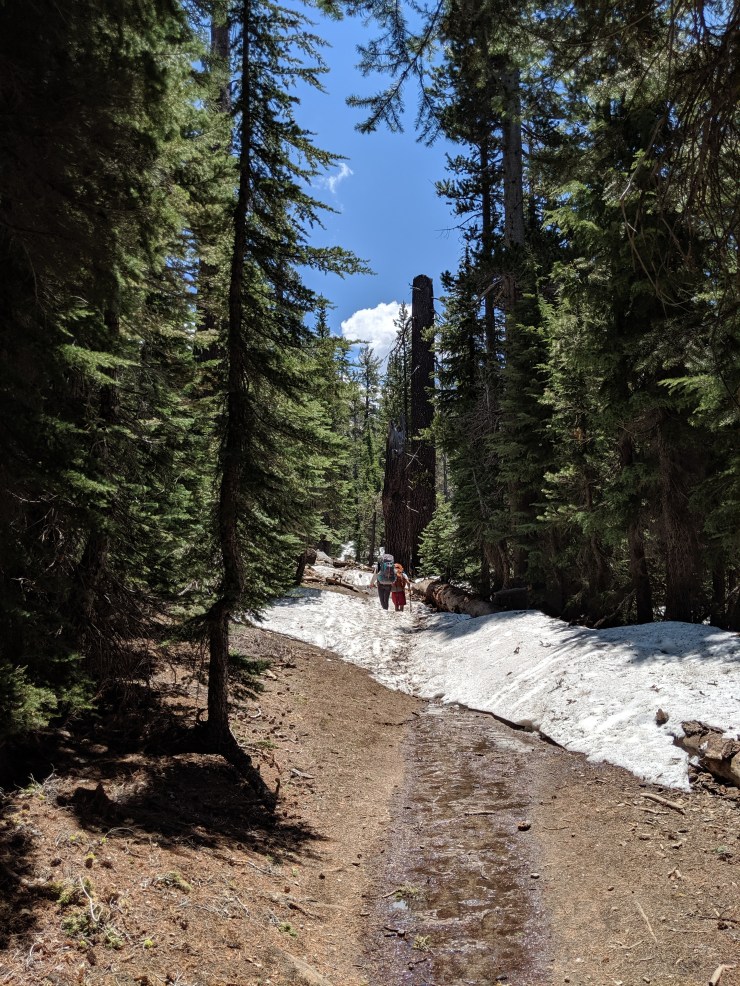
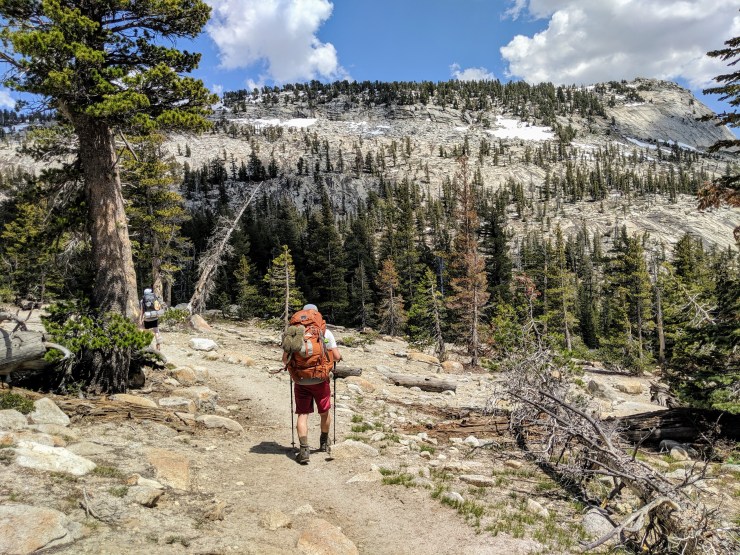
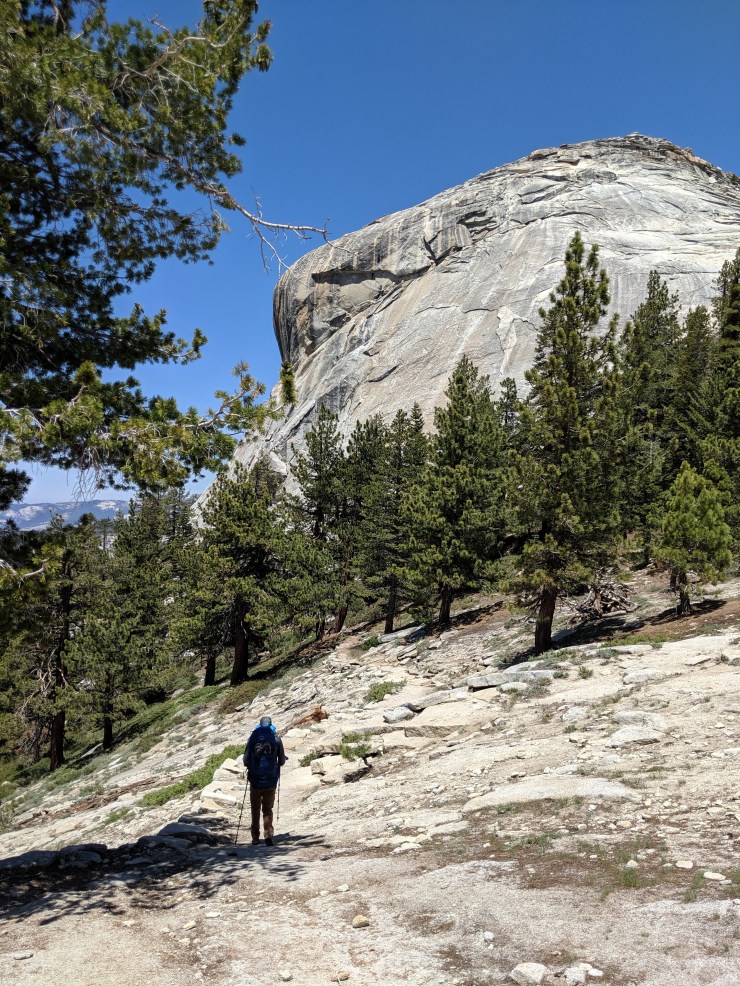
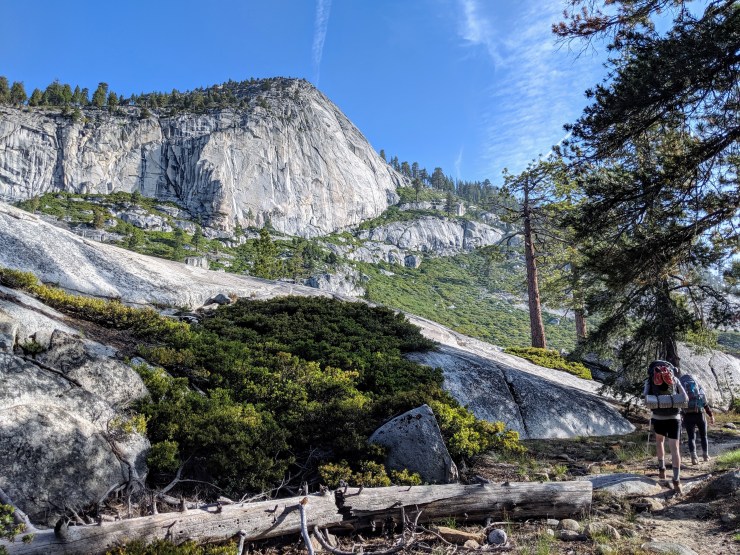
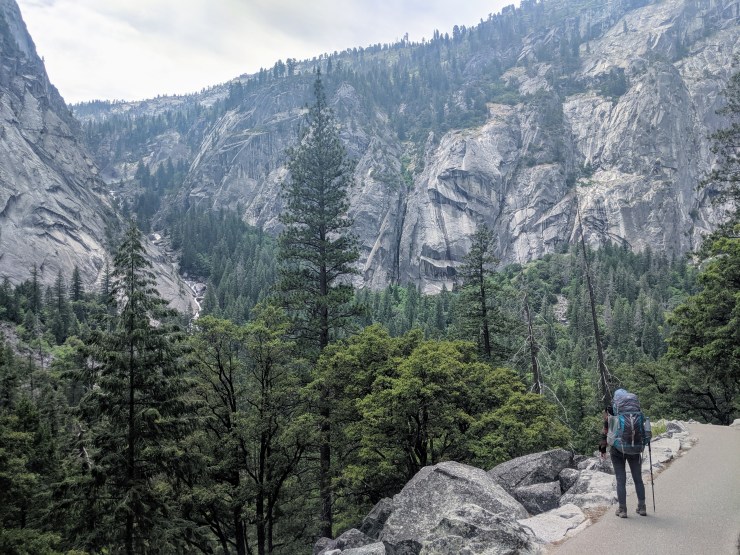
The morning of our trek, we made breakfast at the Backpackers’ Campground and filled up our camelbaks at the nearby North Pines Campground. We then packed up all our gear and set out on the Mirror Lake Trail, which leaves right from behind the Backpackers’ Campground. The hike on Day 1 is relatively short (7 miles) but is quite tough. There is a lot of climbing and the trail is exposed to the sun, so you want to get off to an early start. Since you only need to cover 7 miles, there is plenty of time to take breaks and enjoy the views of Yosemite Valley and Tenaya Canyon along the way. The views get better and better as you climb up the Snow Creek Trail.
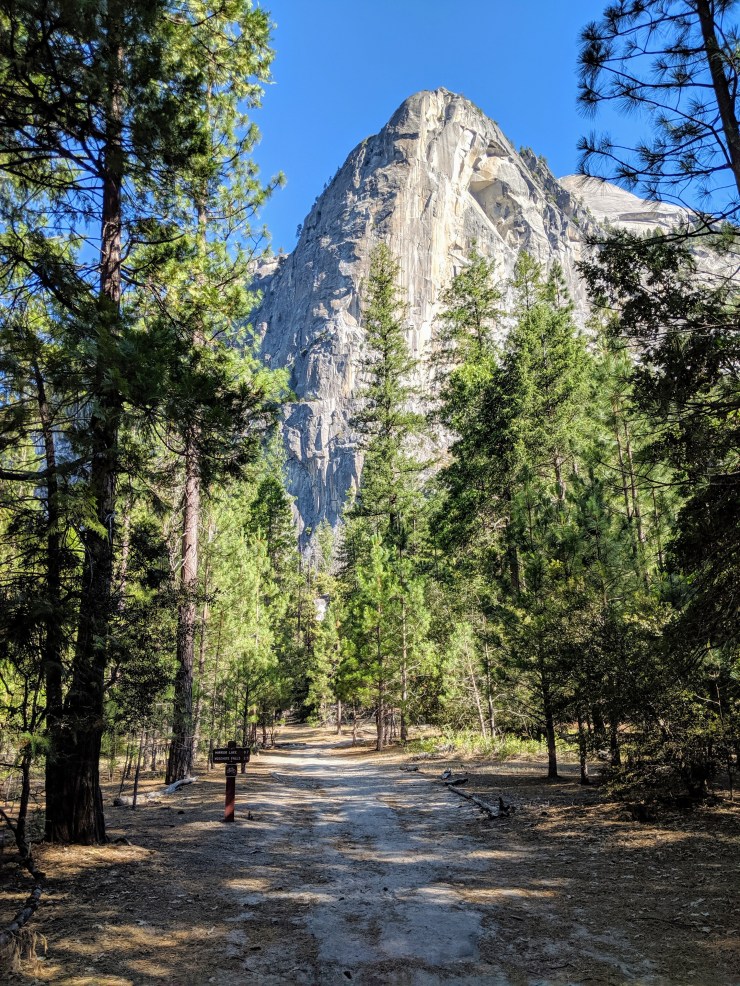
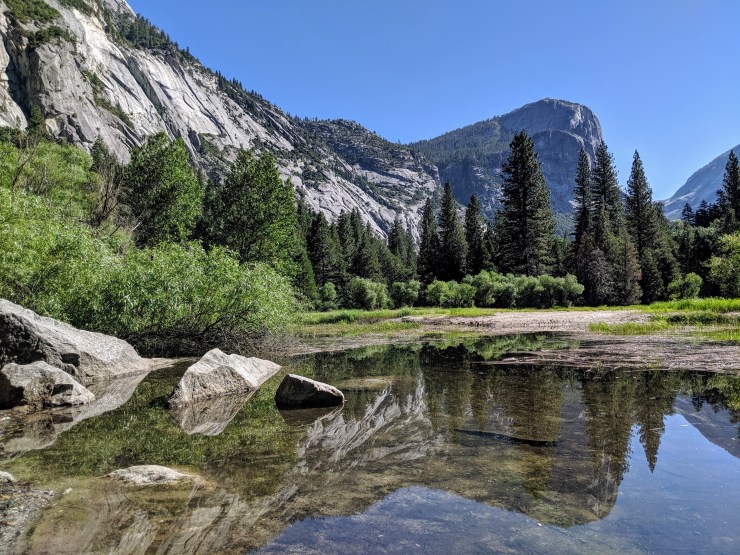
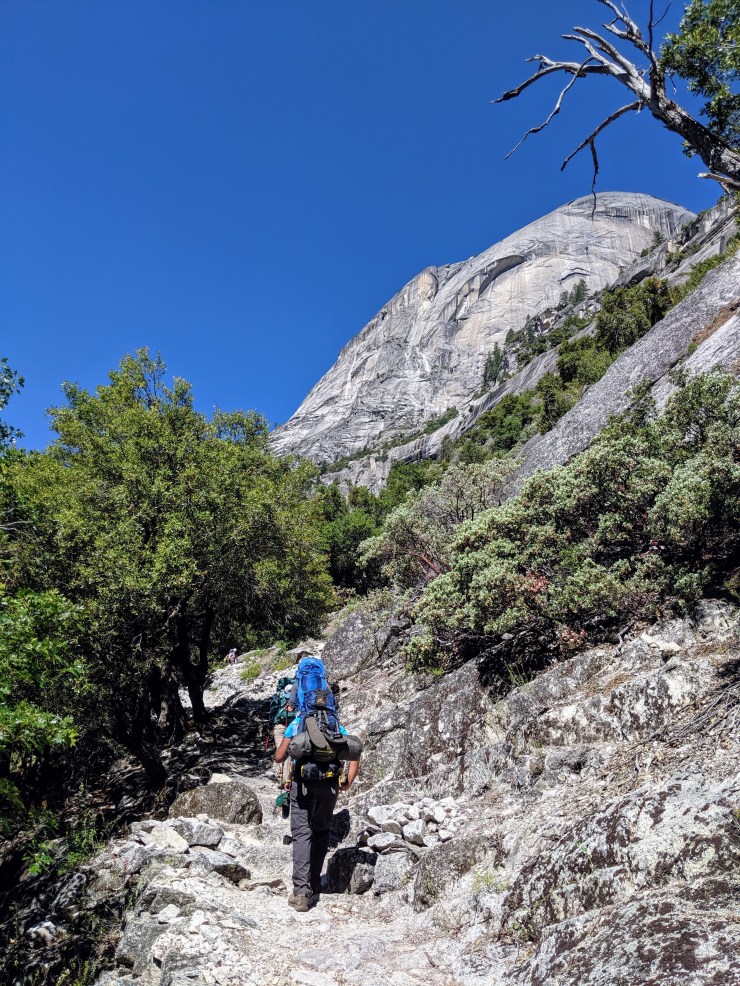
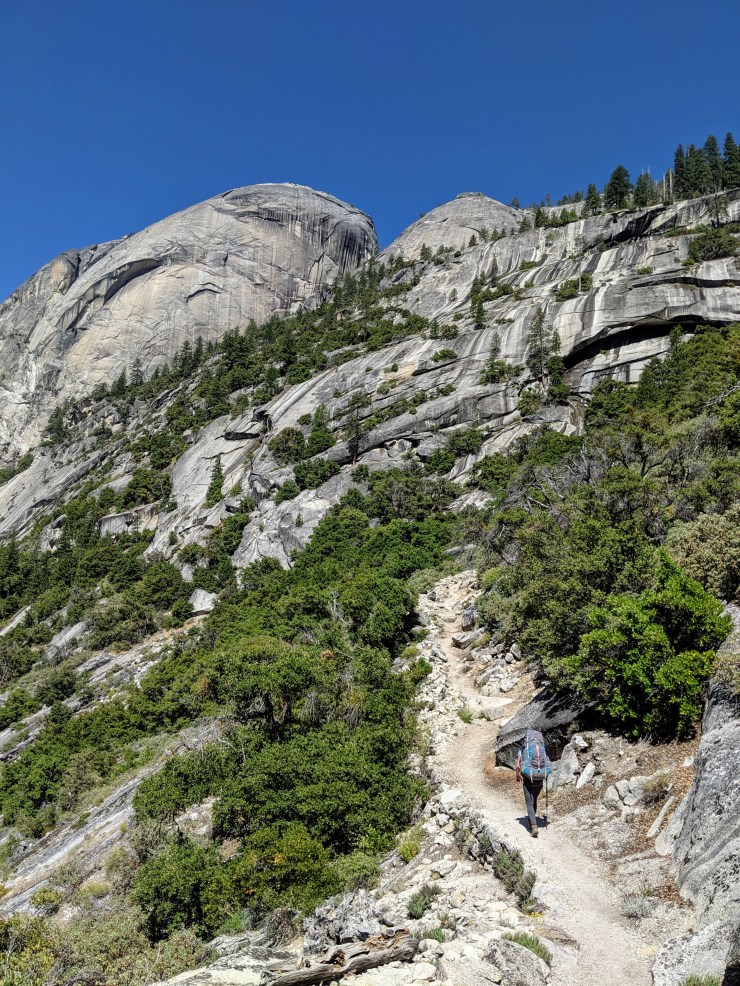
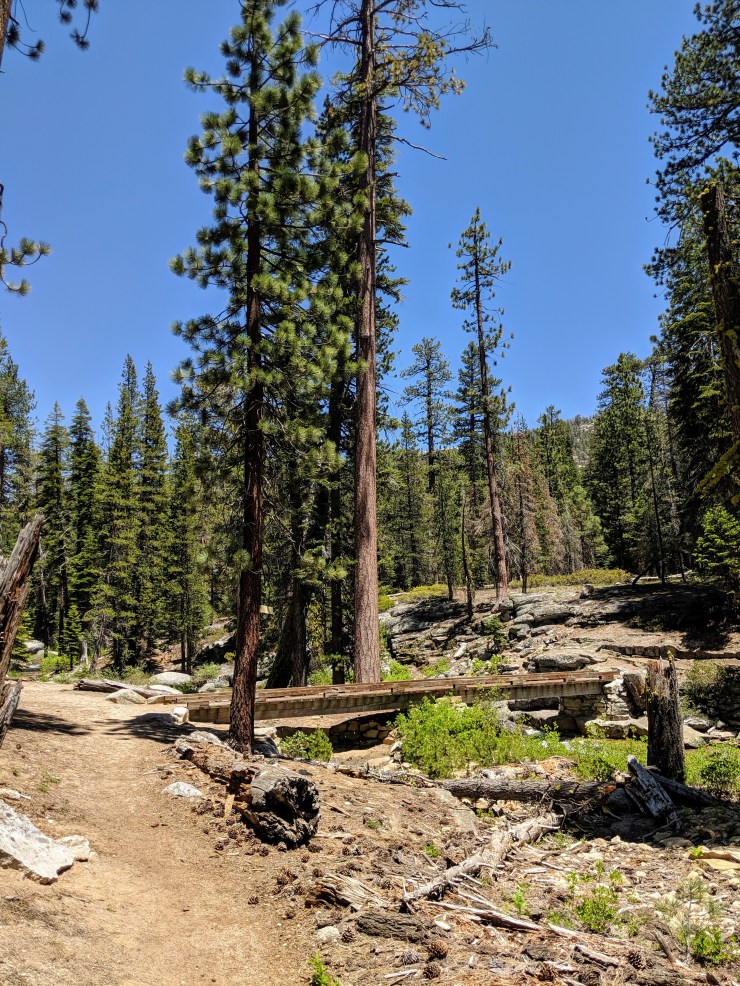
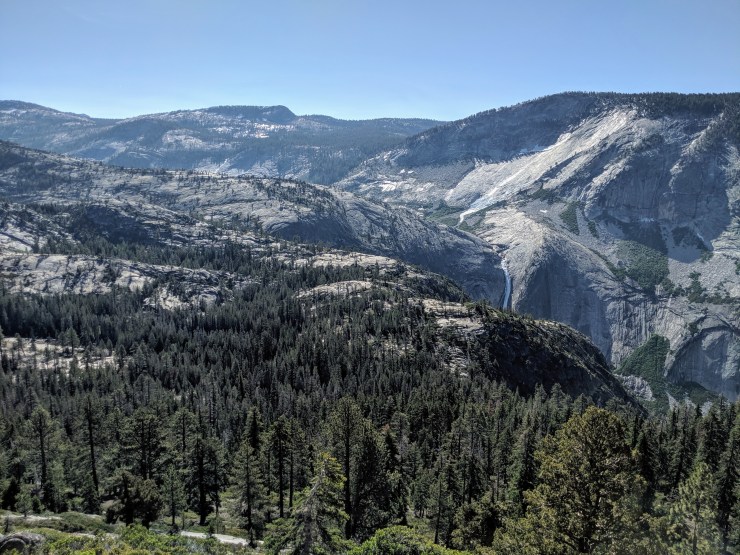
Starting off our trek on the Yosemite Highlights Loop trek. We started on the Valley Loop Bike Path, which leads right behind the Backpackers’ Campground. Along the way you get your first glimpse of the vertical face of Half Dome.Around the 0.5 mile mark, you reach a junction and head to the left onto the trail. The Valley Loop trail then heads towards Mirror Lake. Here the Washington Column is in the background.You are then hiking on the Valley Loop Trail towards Mirror Lake. The trail meanders between boulders in the forest (pictured: prAna Briann women’s pants)You come across Mirror Lake at around the 1 mile mark and are treated to some nice views of the water and the surrounding granite walls that tower above Yosemite Valley. Note that Mirror Lake may be dry if you hike late in the summer. This is the view looking northeast towards Mount Watkins.View of the vertical north face of Half Dome from across Mirror LakeThe Valley Loop Trail then heads away from Mirror Lake and heads into the forest as you hike towards the Snow Creek Trail. For the next mile or so the trail follows along near Tenaya Creek.After the 2 mile mark, you begin the ~2.2 mile ascent from the valley floor up the north wall of the valley and to the Snow Creek footbridge. This section is a steep ~2,500 foot climb (pictured: Osprey Aether AG 70l Pack )About a quarter mile into the climb, the Snow Creek Trail emerges from the forest and views start to get better while the climb gets steeperAs you climb higher, the views get better and better. This is the view of Yosemite Valley from the Snow Creek Trail looking southwest towards Glacier Point.View along the Snow Creek Trail looking east into the Tenaya Canyon where you can see Mount Watkins, Clouds Rest, and the Quarter Domes.View along the Snow Creek Trail looking west towards the Basket Dome and North DomeA large granite overhang along the trail that forms a partial archHalf Dome and Yosemite Valley as seen from midway up the Snow Creek TrailView of Mount Watkins, Clouds Rest, and the Quarter Domes from the Snow Creek TrailPanoramic view of Half Dome and Yosemite Valley and seen from the Snow Creek TrailAfter the main switchbacks (~3.5 mile mark), the Snow Creek Trail begins to climb through a forest and the views are less dramaticAt the 4 mile mark, the trail flattens out as you hike towards Snow Creek (pictured: Black Diamond Trekking Poles)After the 4 mile mark, you have the option to take a right and head southeast towards a vista point. The vista is only ~0.2 miles from the trail and has some great views of Yosemite Valley.View of Half Dome from the Snow Creek vista pointView of Clouds Rest and the Quarter Domes from the Snow Creek vista pointView of Basket Dome and Glacier Point from the Snow Creek vista pointAfter visiting the vista, head back to the main trail and continue hiking until you reach Snow Creek. This makes for a good place to take a break and filter some water (credit: Ben Chen)Note that the section of the trail before the footbridge is off limits to camping due to bear activity. Here is a map showing the Snow Creek Trail and the restricted camping area (shaded in red). Backpackers may not camp in the restricted area because of increased bear activity. Up to date info can be found here: https://www.nps.gov/yose/learn/management/closures.htmYou then reach a Y-junction and turn right before passing over the Snow Creek footbridge. After crossing the bridge continue on the trail towards Tenaya Lake.After the footbridge, the trail goes east through the forest towards Tenaya Lake. The trails continues to climb here (another ~1,200 feet), though more gradually compared to before.Starting about a mile from the footbridge, the trail climbs steeply via some switch backsNear the 6 mile mark there is a second junction. One trail heads to Highway 120 and the other trail continues east towards Tenaya Lake. Continue on the trail that heads to Tenaya Lake.Granite dome to the north of the trailPurple wildflowers growing over the granite near a small creek crossing
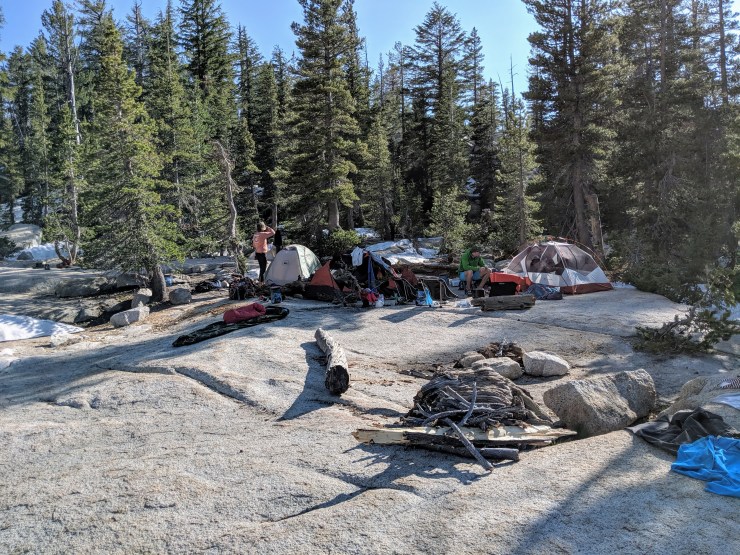
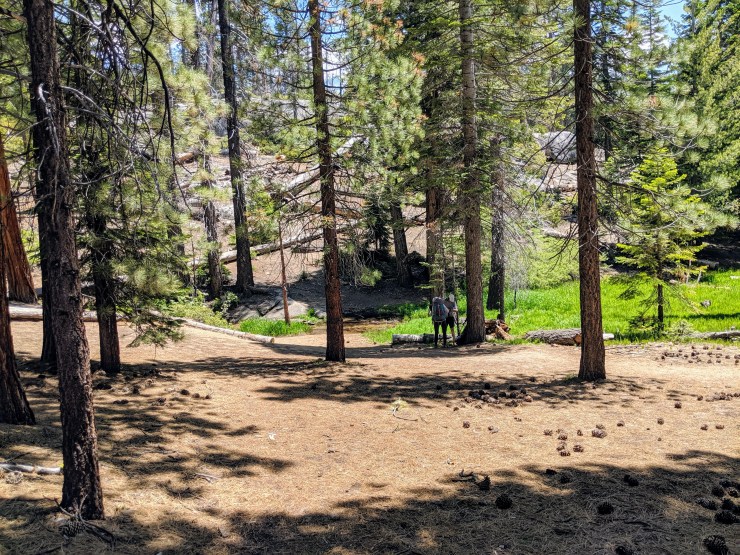
We chose to continue hiking roughly 2.5 miles past the Snow Creek footbridge before making camp. We camped near a stream crossing north of Mount Watkins and before another set of switchbacks. There was water access from two nearby streams, but check with the rangers beforehand to insure the streams are still flowing if you do this trek later in the summer or in a drought year. We found an area that was suitable for making camp, but note that it was not exactly easy to find sites. There are no markings indicating campsites and you need to go off trail and search around.
Setting up camp near two creeks north of Mount Watkins (Credit: Brennan Polley)Relaxing and cooking dinner after the big +4,000 foot climb on Day 1 (pictured: Alite Mayfly packable chairs)
If you have extra energy after completing the hike on Day 1, you can leave your pack at camp and do the ~2 mile hike up to the summit of Mount Watkins. From the summit you get great views of Half Dome, Clouds Rest, and Pywlack Cascade. Just be sure to properly store any food you leave at camp in bear canisters so that you do not risk having your backpack carried away by a bear!
Approximate elevation profile of the Day 2 hike on the Yosemite Highlights Loop from the Mount Watkins camp to Sunrise Lakes
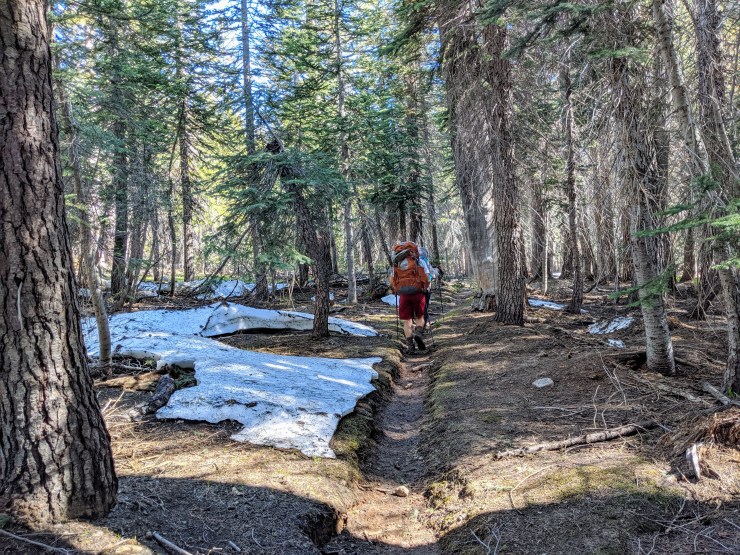
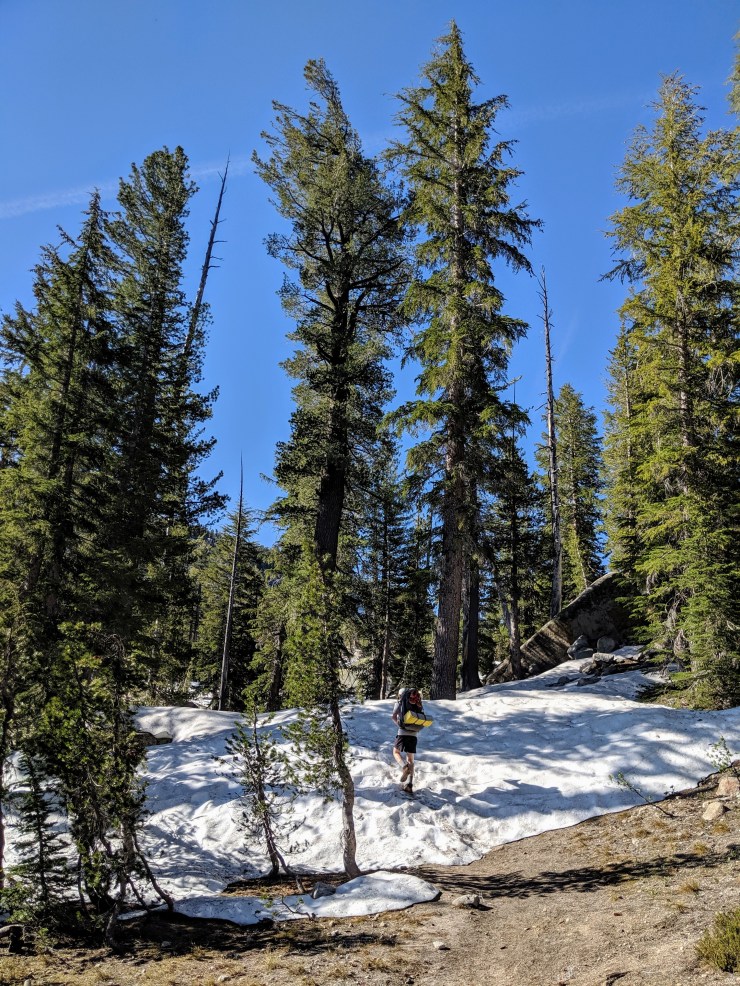
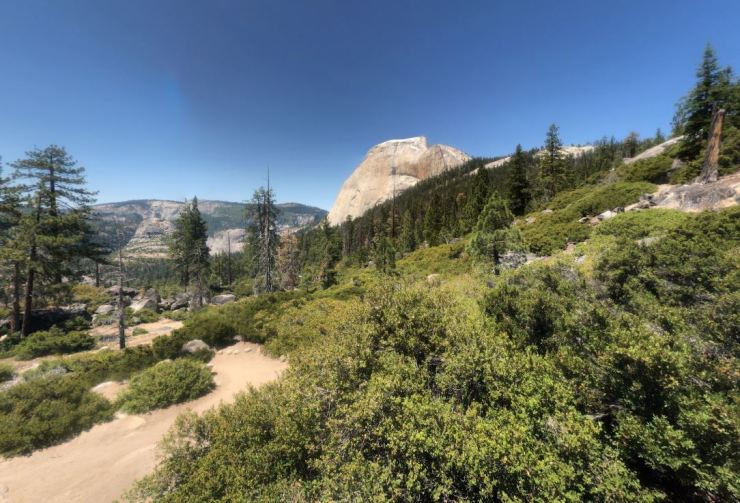
The hike on the second day of the Yosemite Highlights Loop heads from camp on the Snow Creek Trail past Olmsted Point and Tenaya Lake and up to Sunrise Lakes. This hike is less tough than Day 1, but still involves a steep climb near the end of the hike. That said, this is probably the easiest day out of the four described in this itinerary. The views are great along this route and you get some very expansive views of Tenaya Canyon, Half Dome, and Clouds Rest. Note that this section of the hike is the most likely to cause issues early in the hiking season. Snow frequently lingers on the trail before Olmsted Point and after Tenaya Lake. Also, the Tenaya Creek crossing can be waist high and very cold early in the season. You will want to check with the rangers and make sure you understand the current conditions before starting your trip. If snow persists on the trail, you may need a GPS, compass, and map to follow the trail.
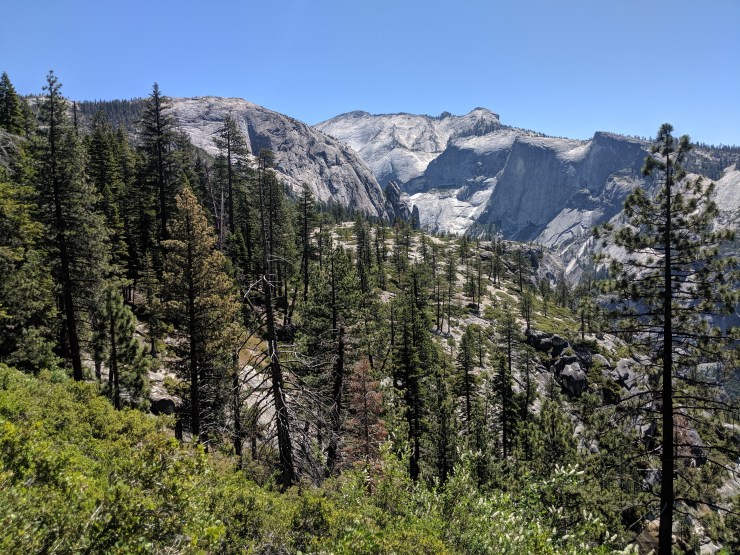
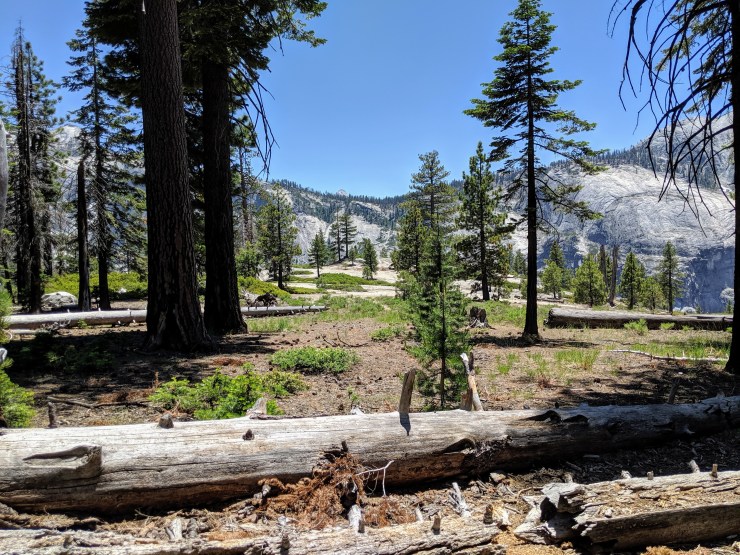
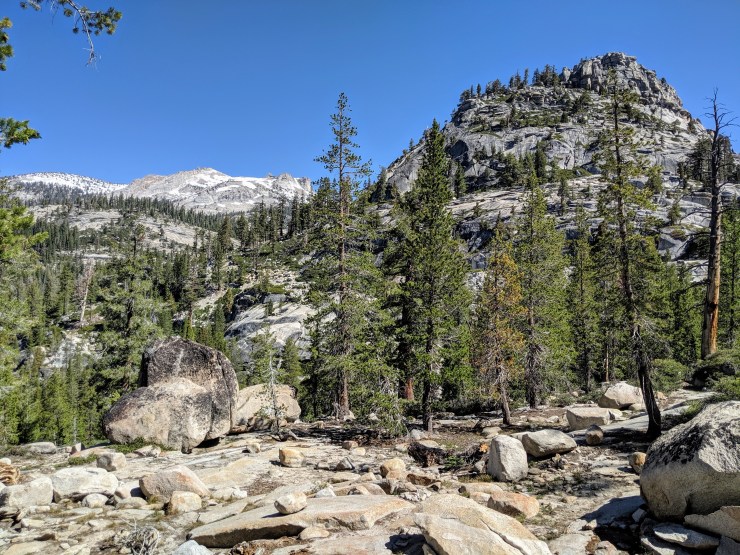
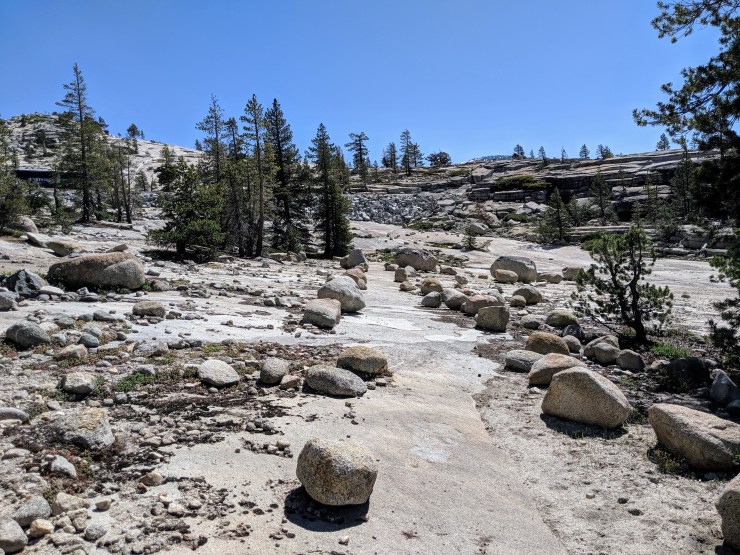
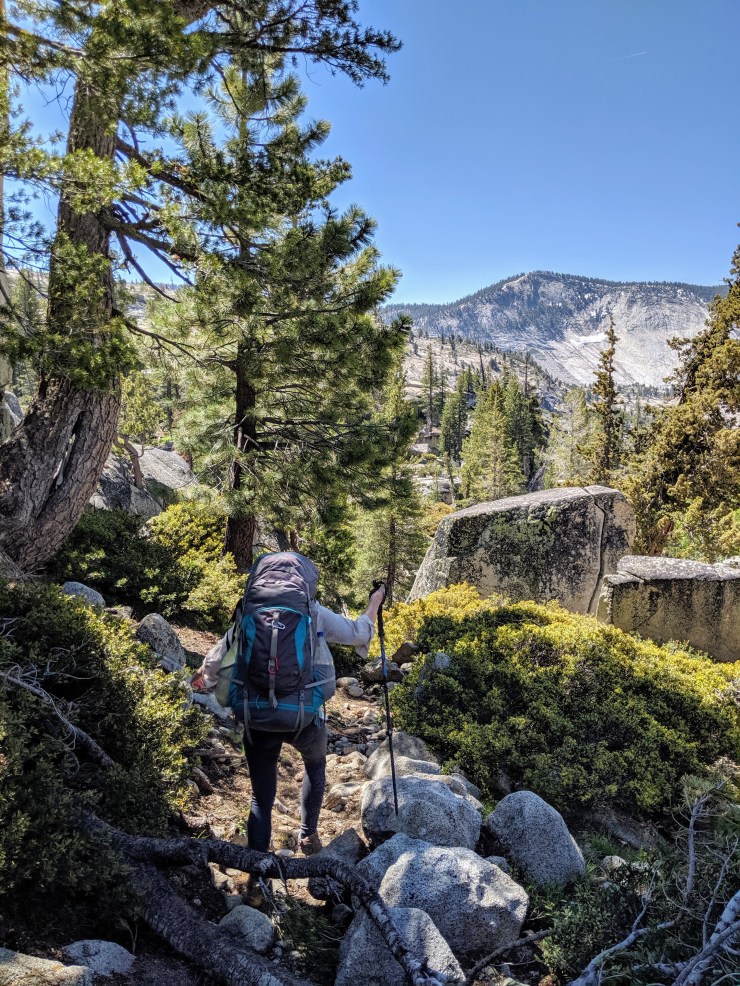
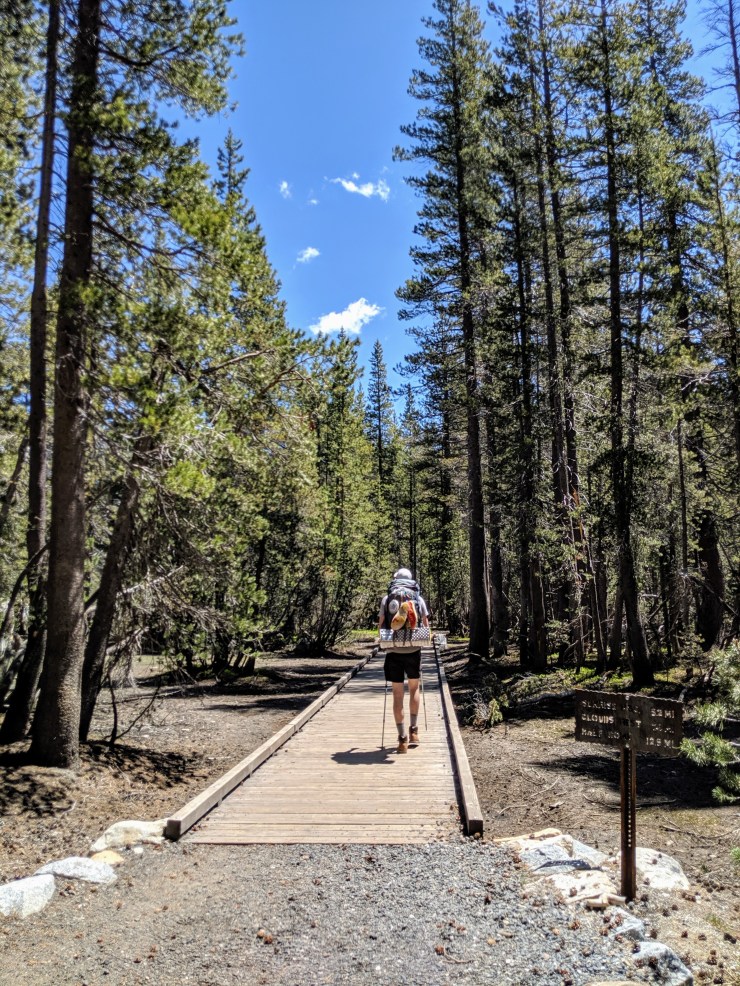
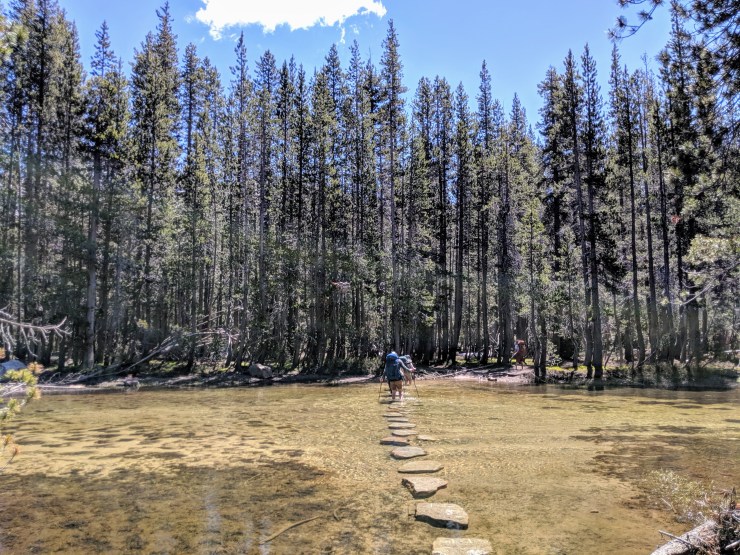
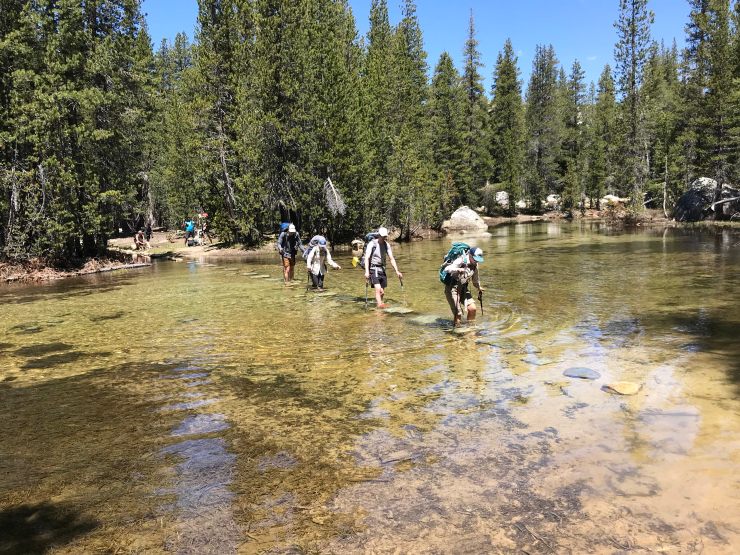
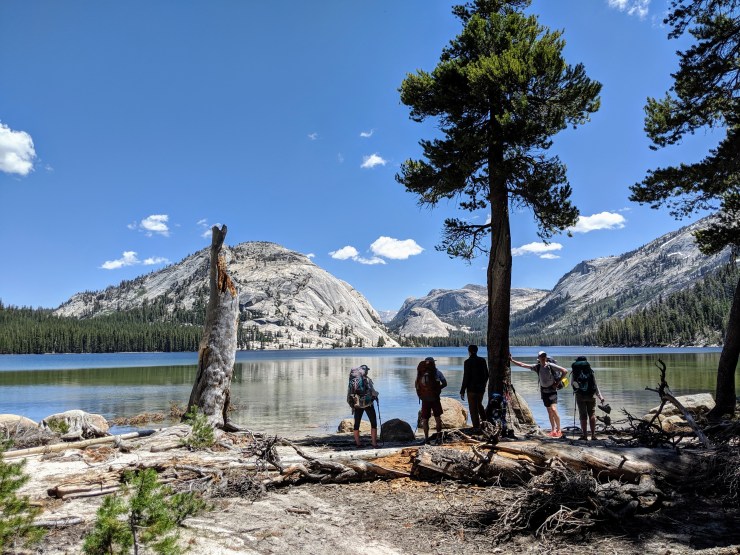
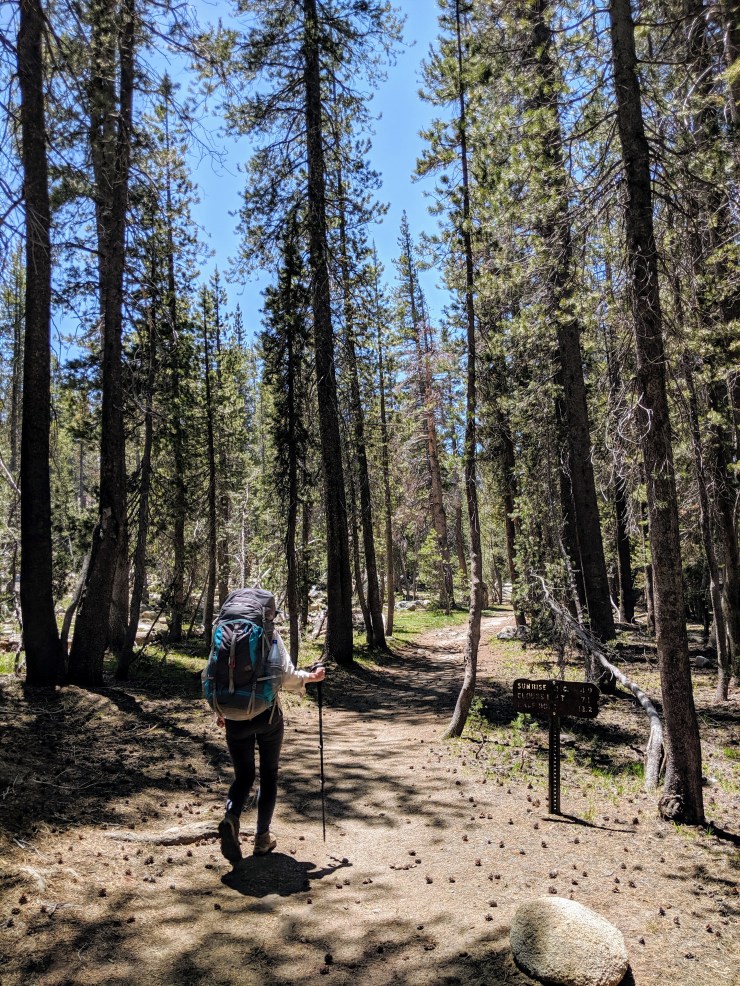
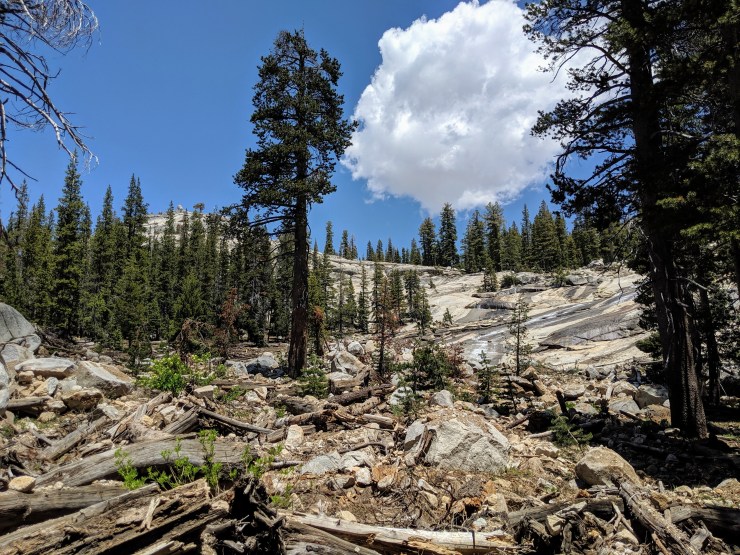
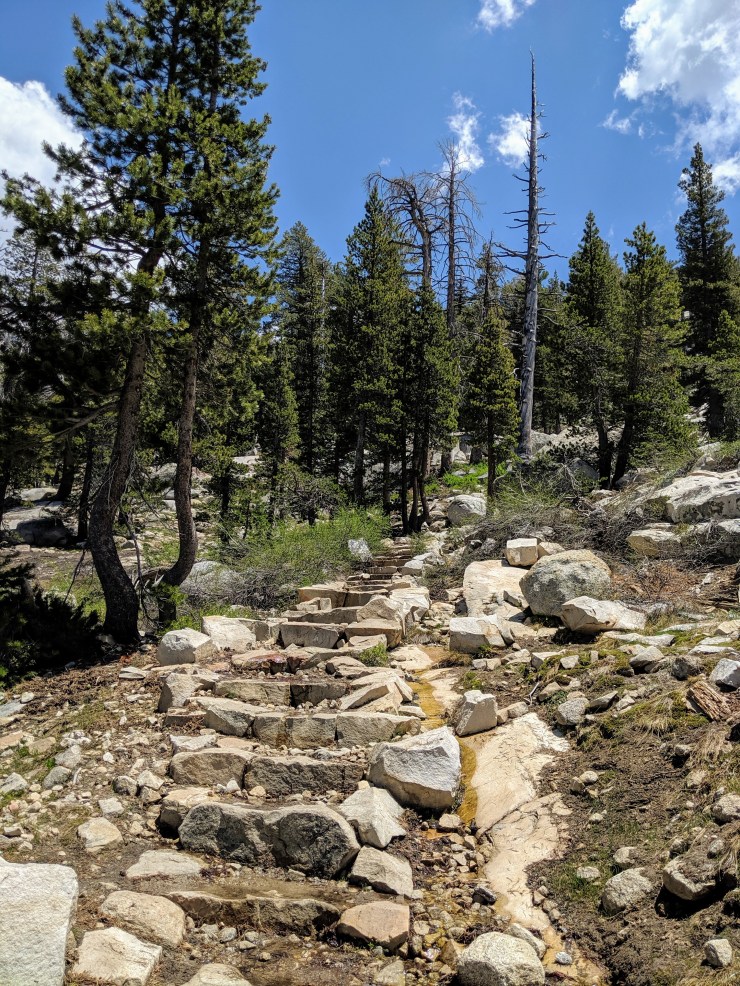
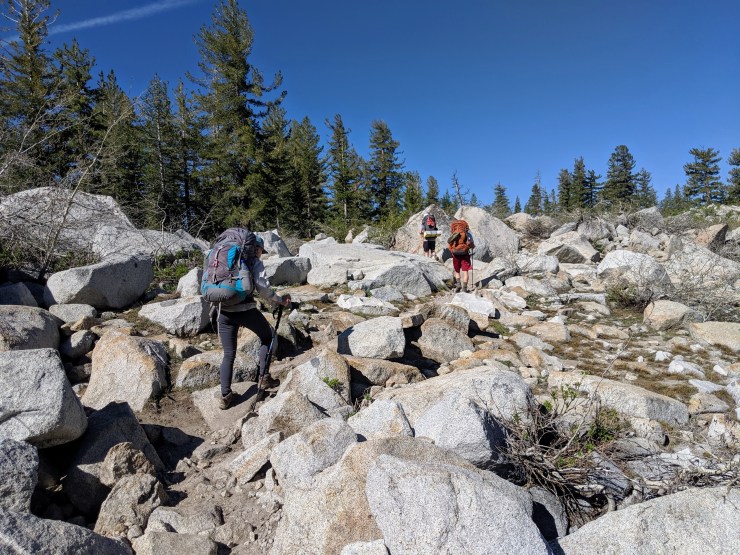
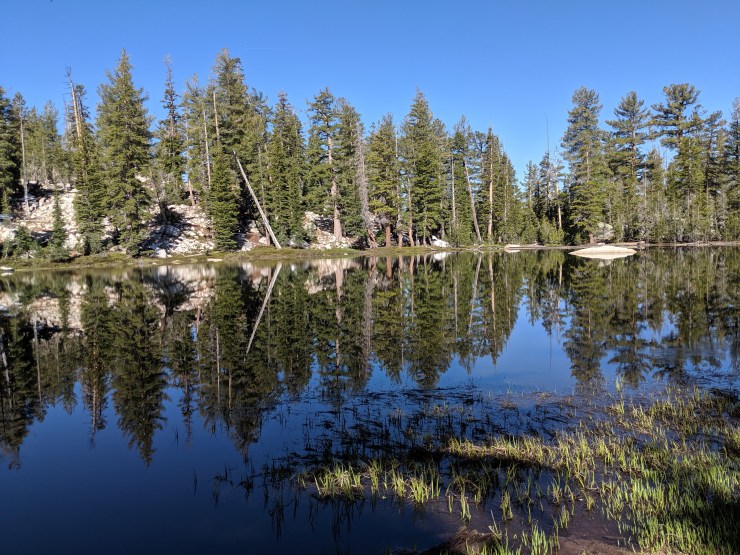
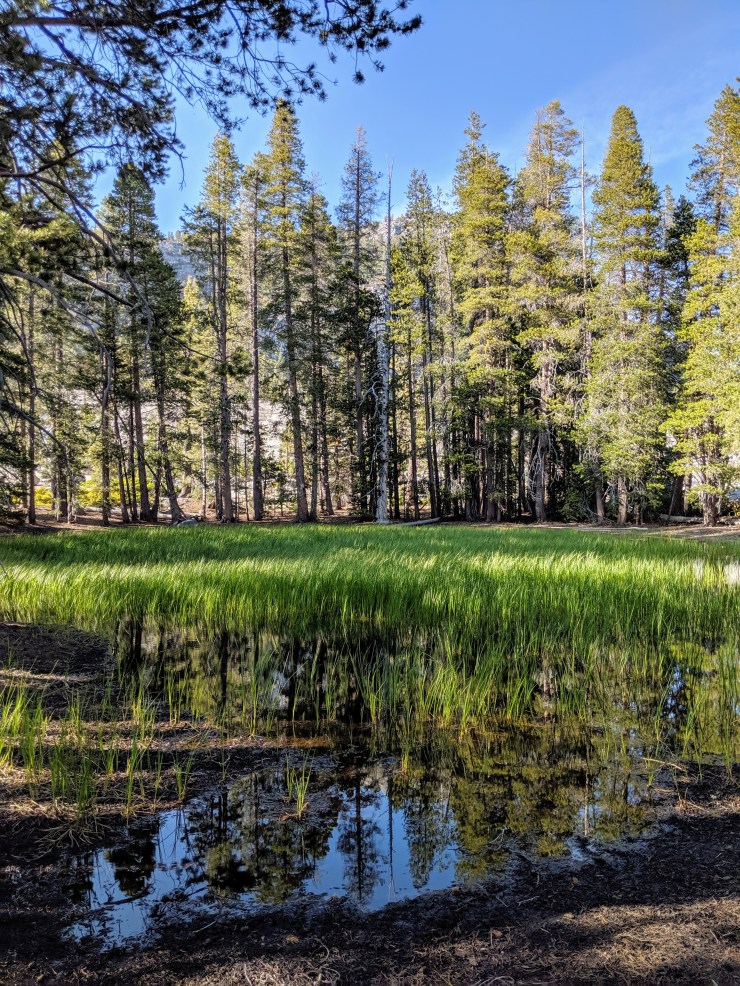
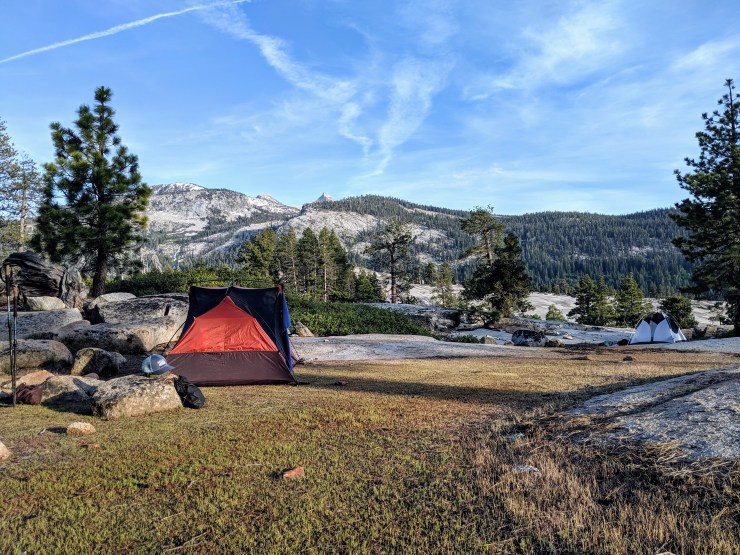
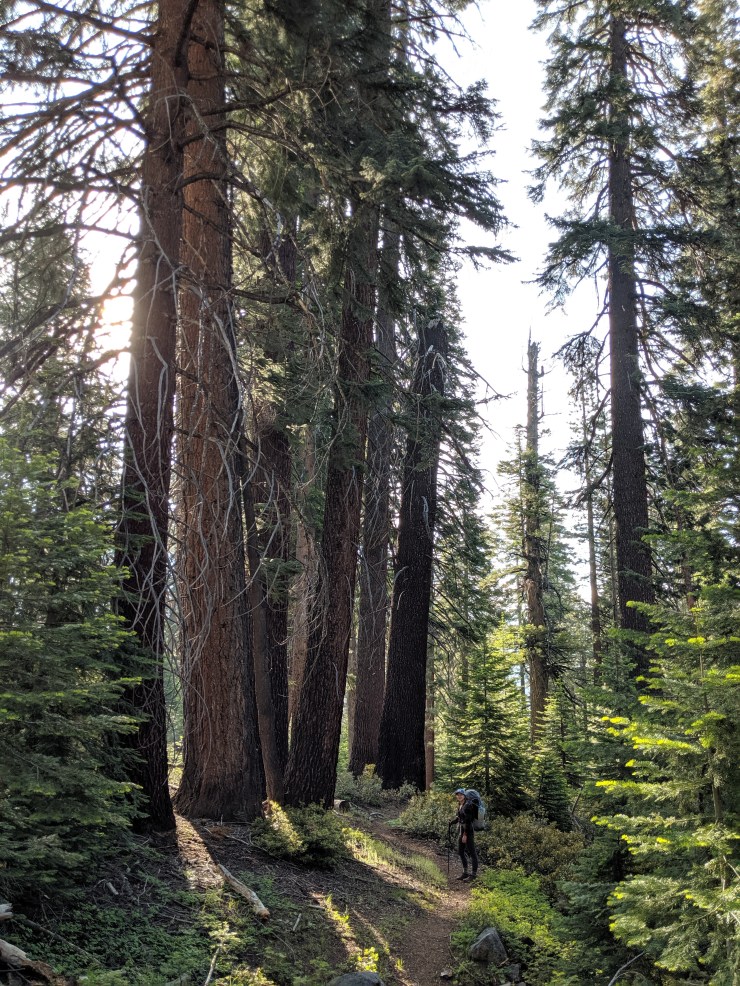
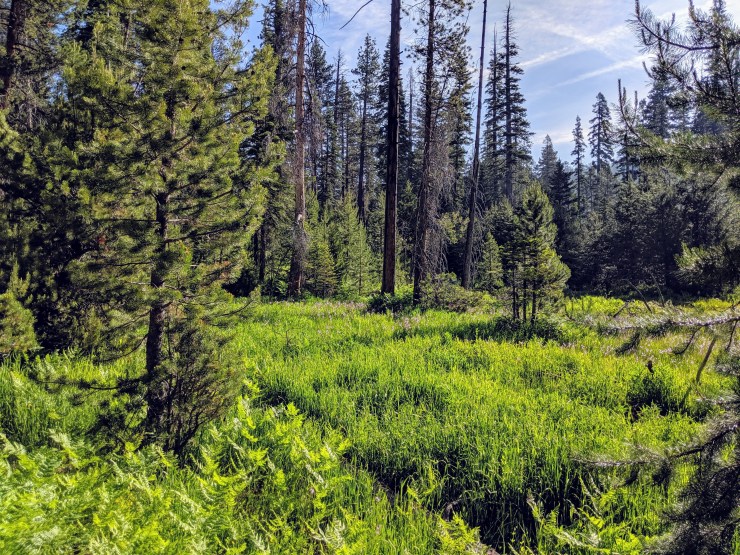
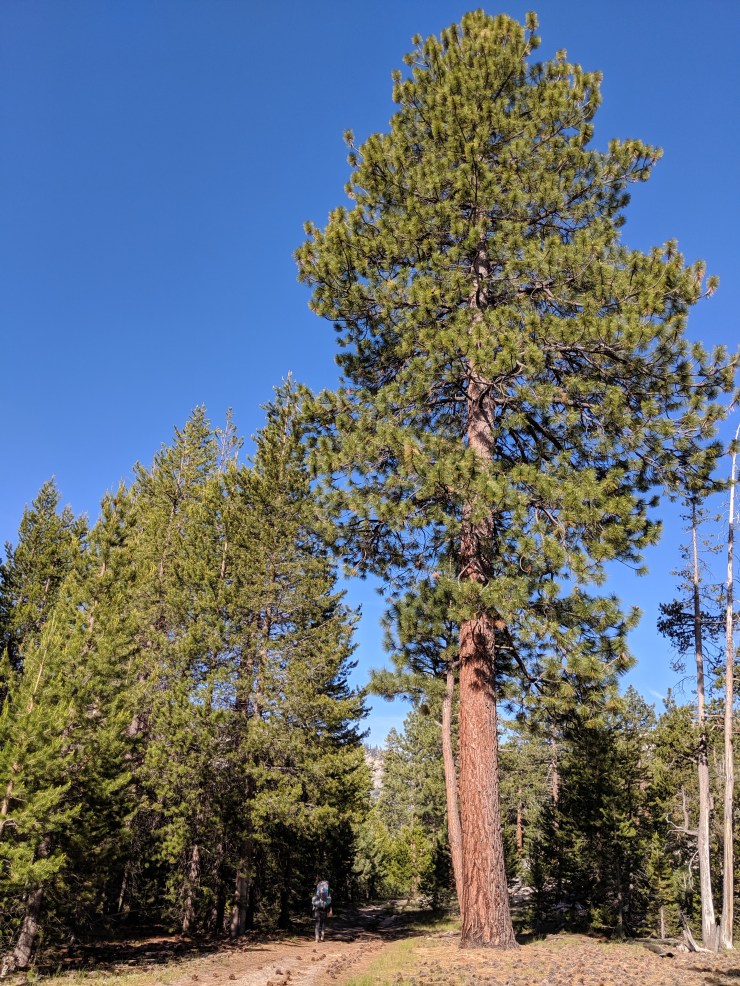
The second day’s hike starts with a ~0.5 mile gradual climb through the forest (pictured: Therm-a-Rest Z Lite Sol Sleeping Pad)The trail then reaches a bluff with great views of Yosemite Valley. Take in the views and catch your breathe after the climb. This is the view looking east towards Pywiack Cascade.This is the view looking south from the vista towards Clouds Rest and the Quarter DomesThe trail then descends along the bluff for another 0.5 miles providing great views along the way.View of Mount Hoffman in the distanceAt the ~1 mile mark, the trail enters the forest and continues through the forest for another mile or so. There was snow that obscured the trail in sections here, but it was still relatively easy to follow the trail (pictured: Osprey Aether AG 70l Pack )From the 2 mile mark to Olmsted Point at the ~3 mile mark, the trail slowly climbs up towards Highway 120.There was a small pond with a nice reflection around the 2.5 mile mark.The views along the trail start to open open up after the 2.5 mile mark. At this point you are approaching Olmsted Point.At the ~3 mile mark, there is a nice view of Clouds Rest in the distance.The trail then meanders down a steep section before you reach Olmsted Point. There are likely to be day hikers in this area because cars frequently stop at Olmsted Point (pictured: Platypus Hoser Reservoir – 2 Liters)You reach Olmsted Point at the ~3.3 mile mark and can take a short walk to the Half Dome vista point. This makes for a nice lunch spot.After Olmsted Point, the trail follows along Highway 120 east towards Tenaya Lake. Being close to the highway was not an issue. The views were still great and the car noises were minimal.The trail here is relatively flat (slightly downhill) and you get some nice views of the peaks in the distance.Around the 3.5 mile mark, the trail enters the forest. There were patches of snow here, but it was still easy to follow the trail.After the 4 mile mark, the trail emerges from the forest and you reach a nice meadow with tributaries from Tenaya Creek flowing through it. The mosquitoes in this area were quite fierce so we hiked quickly.There is a junction in the meadow at the ~4.3 mile mark. Stay right and head towards Tenaya Lake (pictured: prAna Zion Straight pants)View of the meadow as you hike towards Tenaya LakeNear the 5 mile mark, you reach the Sunrise Lakes Trailhead. Follow the trail towards Sunrise and Clouds Rest. You cross a bridge, which leads to Tenaya Creek. You likely will see several day hikers here as this is a popular trailhead for several hikes.You most likely will need to take your shoes off and get wet crossing Tenaya Creek. The creek can be waist high and cold in June and typically begins to recede later into the summer. The creek was knee high in the deepest spot when we crossed. If the creek is too high and cold to cross, you must hike around Tenaya Lake, which adds roughly 3 miles to the hike.Crossing Tenaya Creek on July 5, 2019 (credit: Ben Chen)After crossing the creek, the beach at the south end of Tenaya Lake makes for a great lunch spot where you can take a break, enjoy the view, and dry off. The beach is just a short walk north from the trail after the creek crossing.View from the south end of Tenaya Lake with the Polly Dome and Pywiack Dome in the background.After Tenaya Creek, the trail to Clouds Rest and Sunrise Lakes starts with a ~1 mile flat hike through a forest (pictured: prAna Briann women’s pants)The trail then emerges from the forest and starts meandering between large boulders. You also must cross several small streams in this section. Because the snow had recently melted in this area, there was a lot of water and mud to negotiate along the trail.A cascade can be seen behind this large debris fieldThere were fairly large snow banks in some sections of the trail here.At the ~6 mile mark, the Sunrise Lakes / Clouds Rest Trail begins a steep ascent up a series of switchbacks. The trail climbs ~1,100 feet over the next mile.When you need a break, you can turn around and enjoy the nice view of Mount Hoffman to the north.As we climbed further and further up, the trail was soon covered in large snow drifts. You had to be careful about which route to take. A GPS and map is useful if hiking this trail early in the season. Many day hikers were unprepared for the snow and had to turn around before reaching Sunrise Lakes or Clouds Rest (pictured: prAna Zion Straight pants)At the ~7 mile mark, the trail flattens out and the snow was thinned. Here you reach a 4-way junction. The Clouds Rest trail continues to the south, the trail to Sunrise Lakes goes to the east, and there is an unmarked trail leading to a vista point to the west.The vista is only a few minute hike from the junction and is well worth the effort. This is the view looking northwest at Tenaya Creek cascading through the canyon with snow peaks in the background.View of Clouds Rest, Half Dome, and Mount Watkins from the vista point near Sunrise Lakes.After visiting the vista point, we headed back along the trail east to Sunrise Lakes. Sunrise Lakes is roughly 0.5 miles from the junction.We found snow free campsites on the southwest shore of the first Sunrise Lake. There are three lakes in this area, but we only explored the first one.Our campsite at Sunrise Lakes with a fire pit and nice area for hanging out. The campsite was really nice, but the mosquitoes were thick. We have to apply lots of DEET and several of us used bug nets (pictured: MSR Hubba Hubba NX 2 Tent)Relaxing at the Sunrise Lake campsite in the evening (credit: Brennan Polley) (pictured: BearVault BV500 Food Container)
Approximate elevation profile of the Day 3 hike on the Yosemite Highlights Loop from the Sunrise Lakes to camp west of Echo Valley.
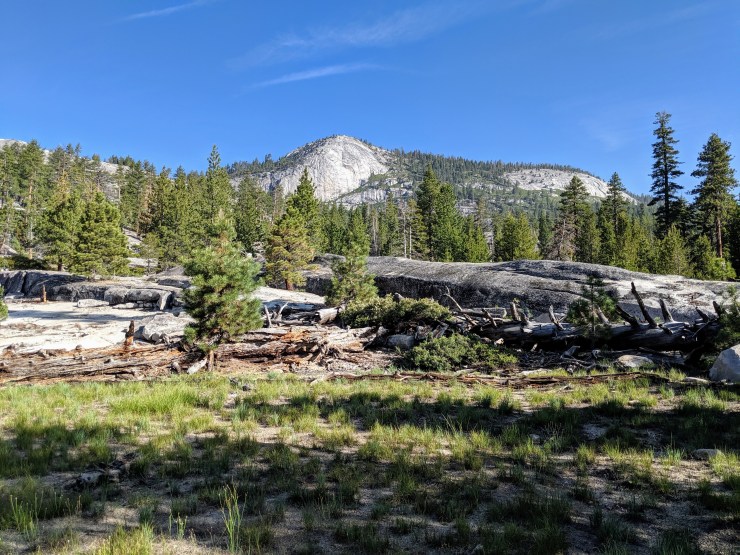
On the third day of the Yosemite Highlights Loop, you have the choice of hiking a couple different routes. The goal is to reach the third night campsite near Echo Valley. To get there you can either hike up and over Clouds Rest and meet up with the John Muir Trail or hike towards Clouds Rest and then take the Forsyth trail that shortcuts around Clouds Rest and meets up directly with the John Muir Trail. If you have the energy and stamina, the hike up and over Clouds Rest is well worth the effort. The views from atop Clouds Rest are amazing. That said, it adds roughly 4 miles and 1,600 feet of elevation gain compared to the Forsyth route. We decided to do the hike up and over Clouds Rest so I will describe that route. Overall, the hike on this day was quite tough. The climb over Clouds Rest is not too bad, but the descent from Clouds Rest to Sunrise Creek is steep and really pounds at your knees. The great views on Clouds Rest and at the beginning of the descent make it all worth it though. As you approach the campsite, there are also great views! Just be aware that this is a long day of hiking.
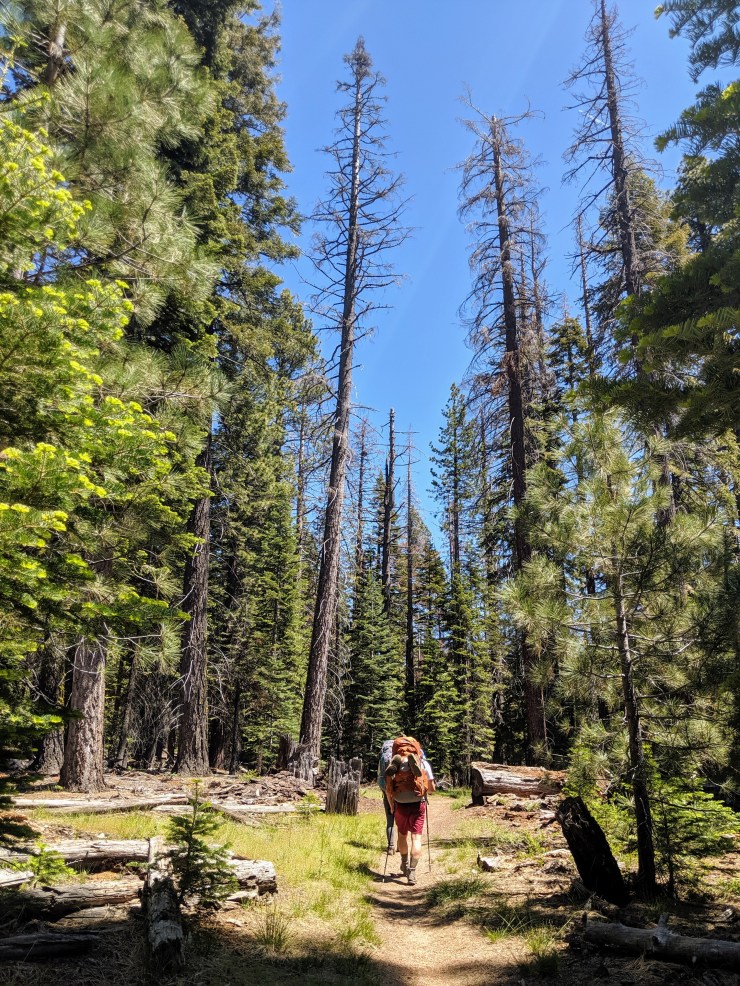
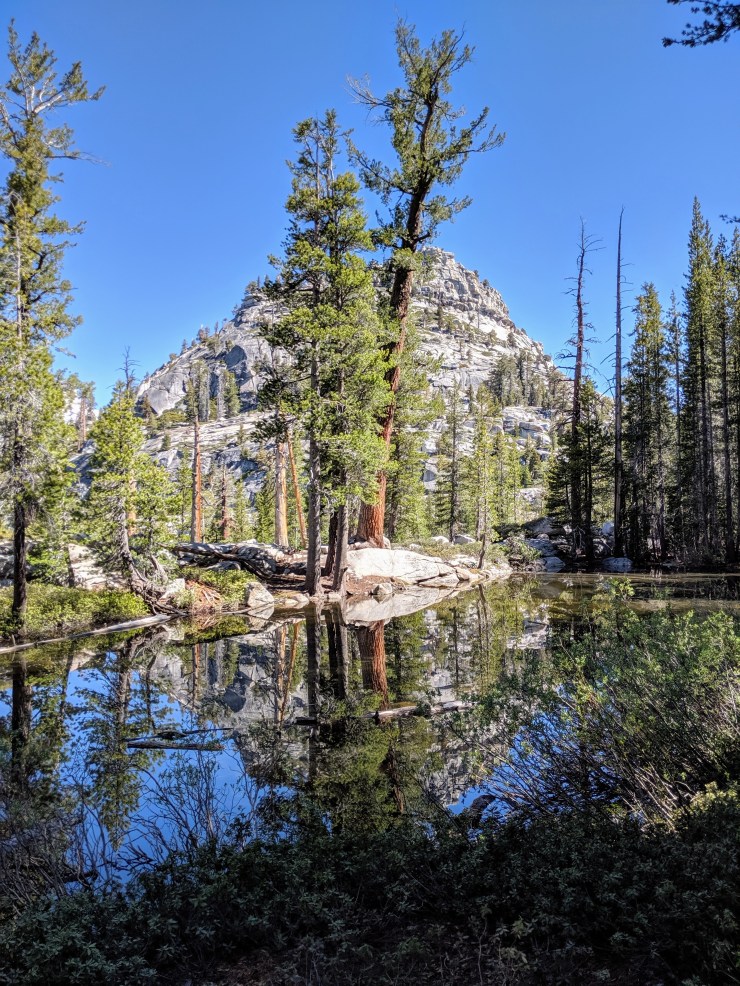
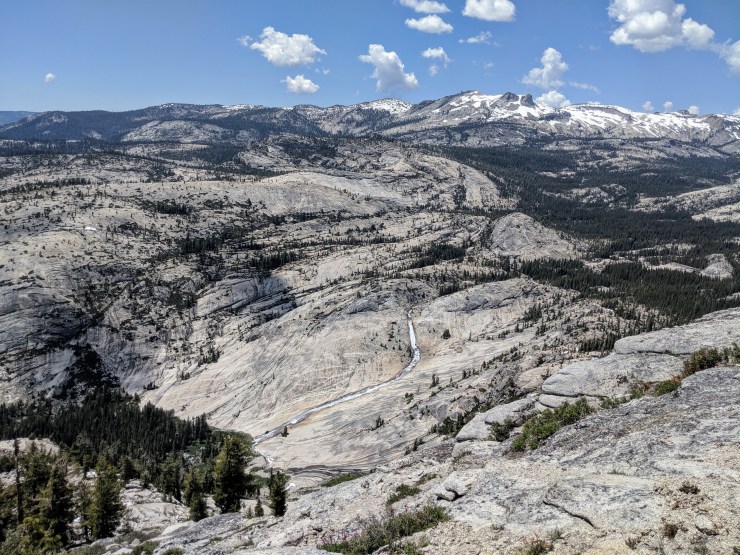
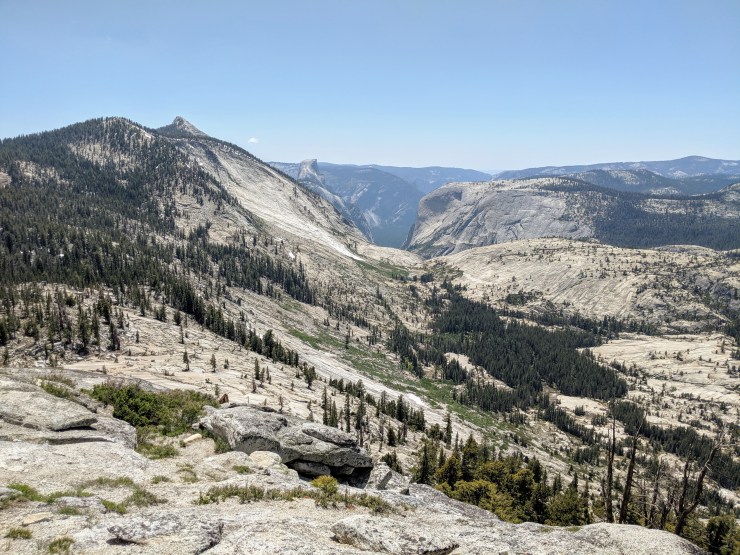
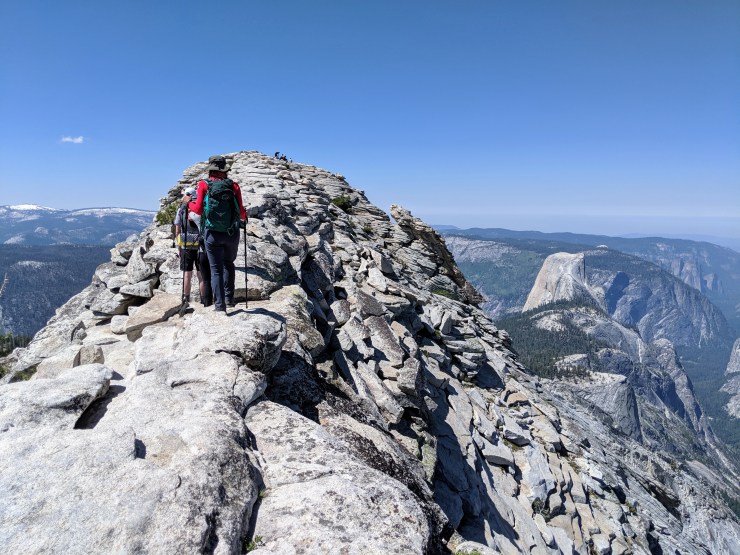
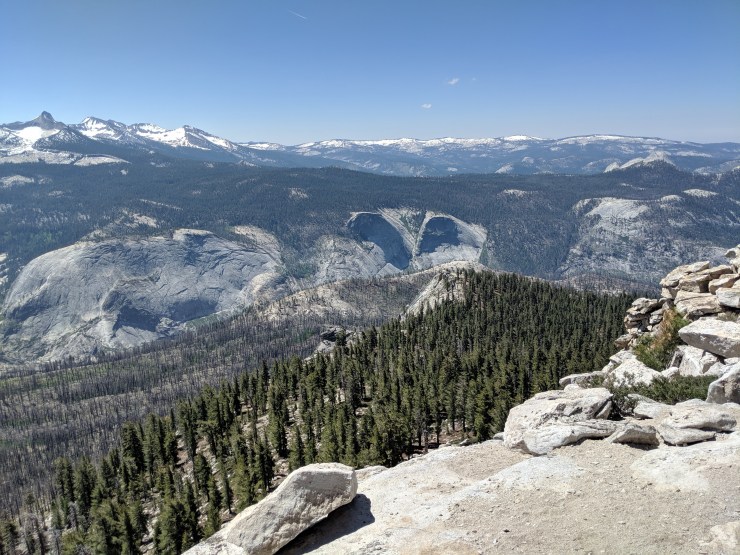
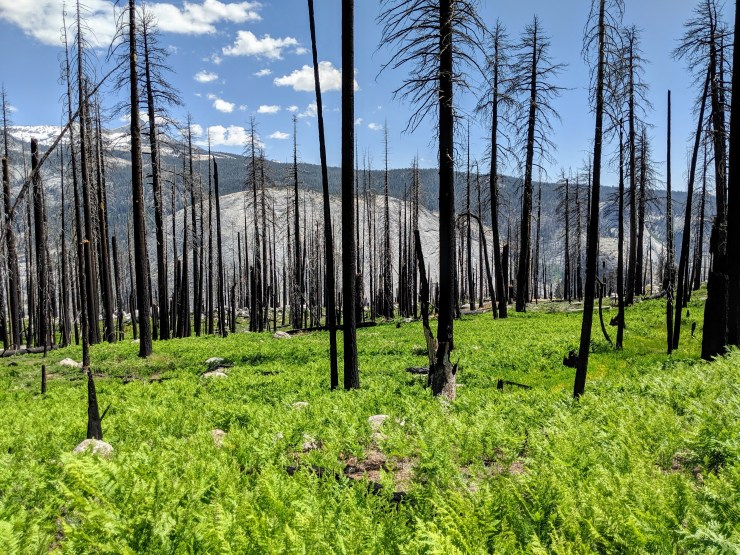
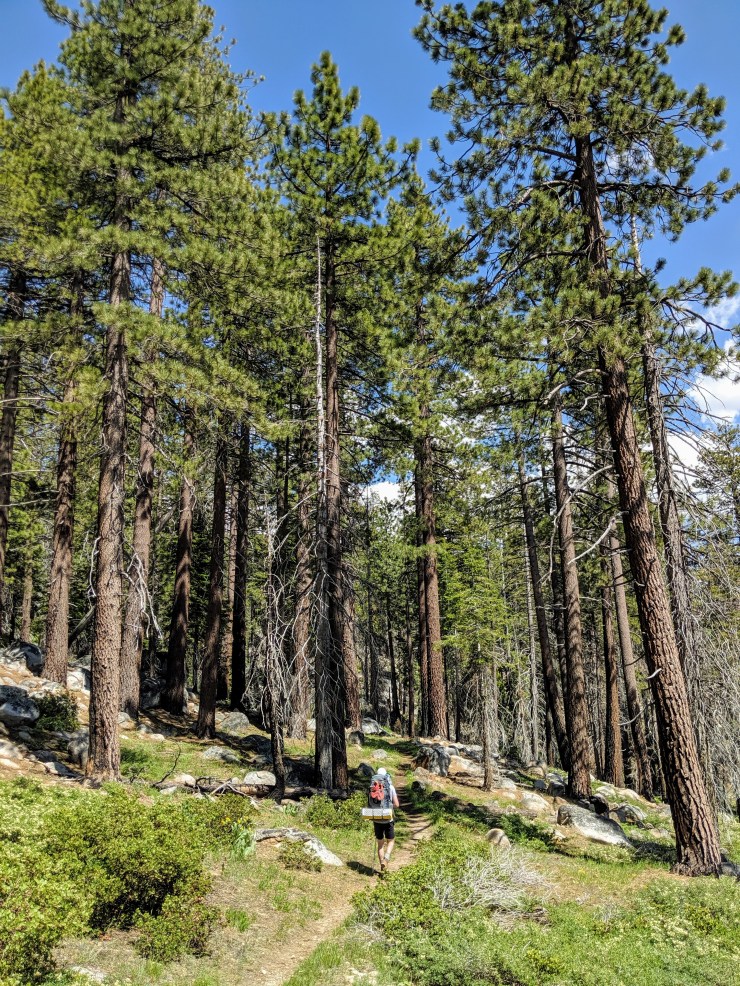
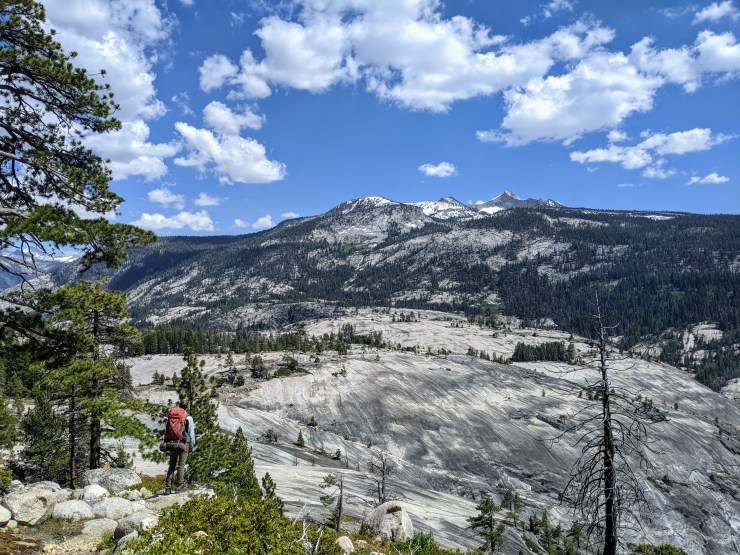
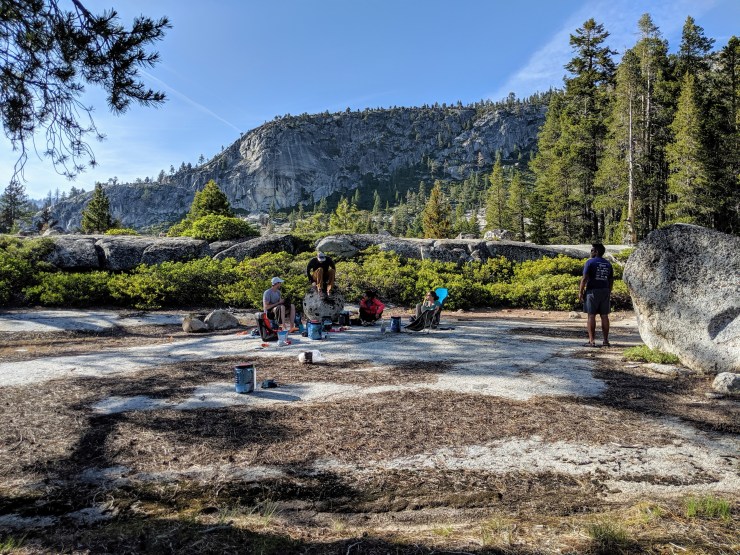
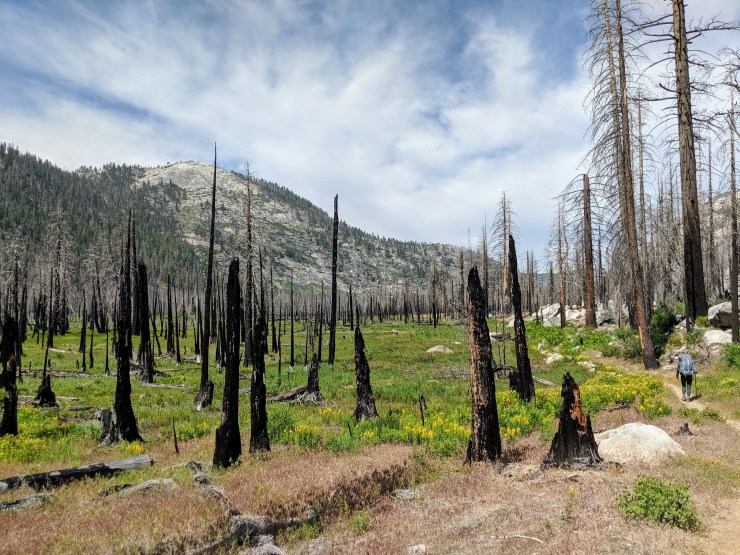
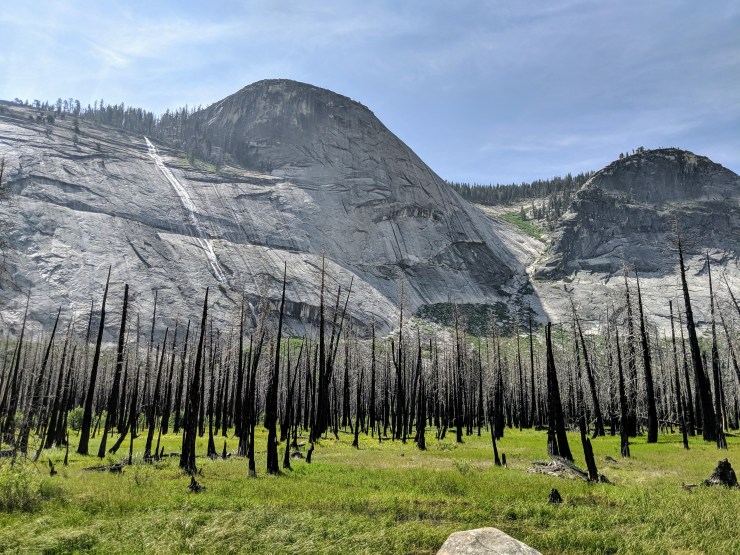
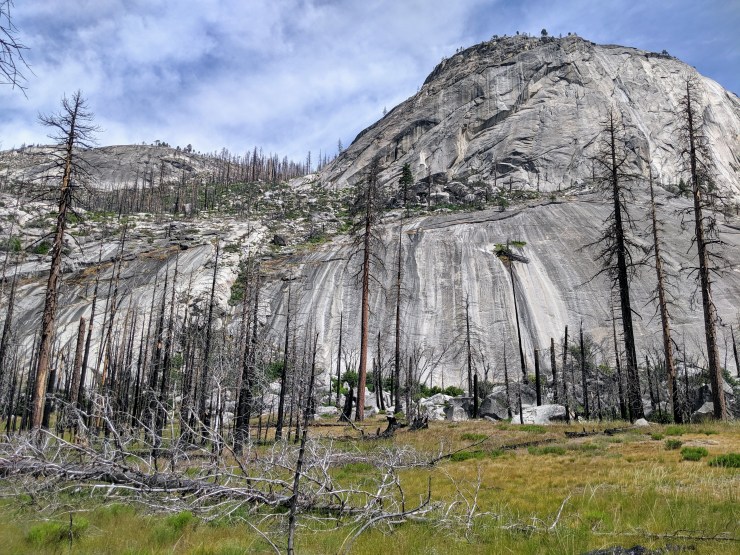
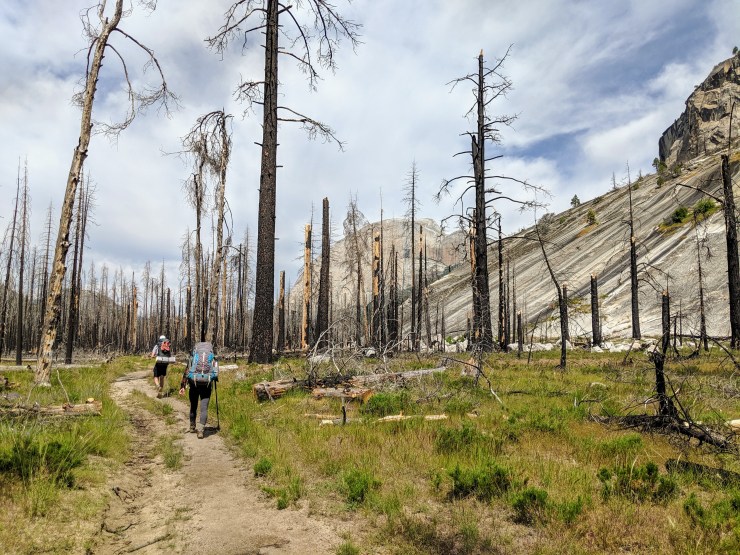
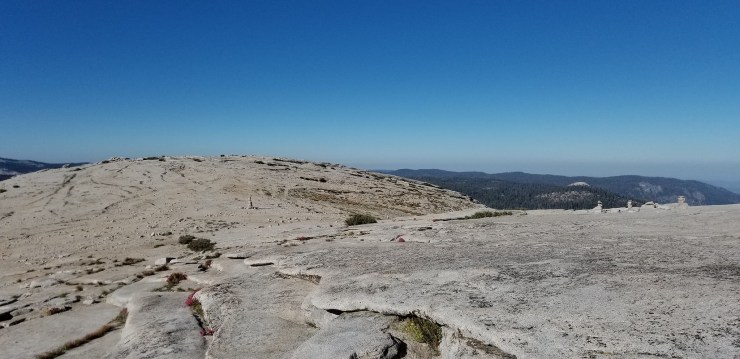
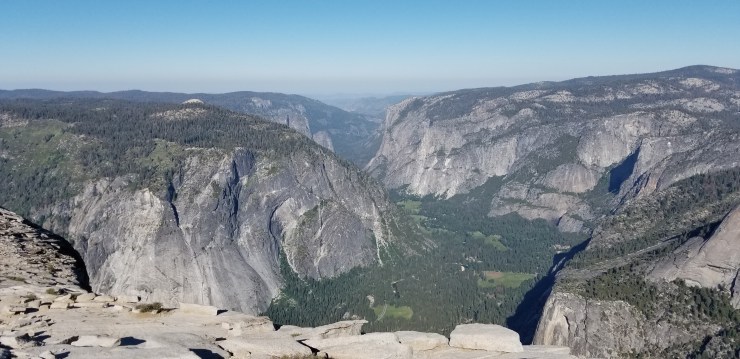
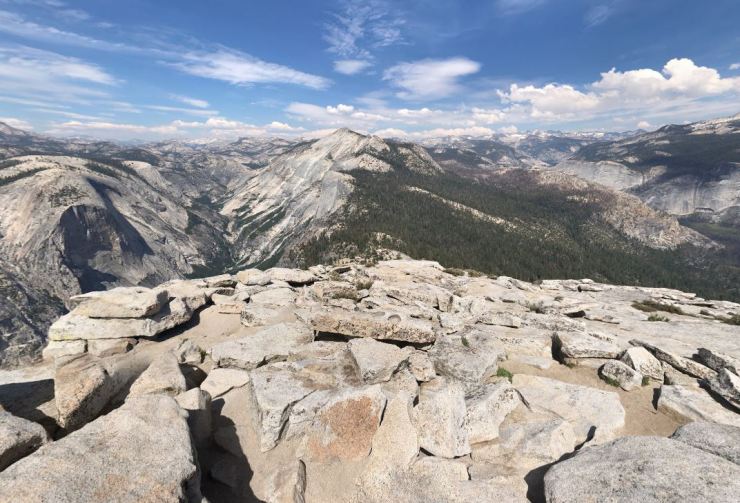
The trail near Sunrise Lakes was covered in some large snow drifts near the lake. The exact trail was difficult to find, but it was easy enough to work our way back to the Clouds Rest trail.Hiking back to the Clouds Rest Trail from Sunrise Lakes In sections of the trail exposed to the sun, no snow remained on the ground.The Clouds Rest Trail then meanders up and down through boulders and a forest for the next ~1 mile (pictured: Kelty 60l women’s pack)Near the 1.5 mile mark, you come across a small lake with beautiful reflections.Shortly after the 2 mile mark, you reach the junction with the Forsyth trail. Head straight up the climb if you wish to summit Clouds Rest. To skip Clouds Rest, take a left and descend down the Forsyth Trail.From this point, it is a steady climb through the forest until you reach the rocky top of Clouds Rest (pictured: Osprey Aether AG 70l Pack )At the ~3.5 mile mark, you emerge from the forest and see the large rocky top of Clouds Rest. The trail travels up the rocky spine and there are steep cliffs on either side of the trailHiking up the rocky spine towards the summit of Clouds RestThe trail is only a few feet wide in spots, but it opens up at the summit and there is a large flat area where you can have lunch and enjoy the views. The Clouds Rest summit sits at 9,930 feet.View looking back towards Tenaya Lake from the summit of Clouds RestView looking east from Clouds Rest towards the Forsyth Trail.View from Clouds Rest looking into the Tenaya Canyon and Yosemite Valley and showing Half Dome and Mount WatkinsView from Clouds Rest looking towards the Lost Valley, Echo Valley, and the Merced River Valley.View from Clouds Rest looking towards the Cascade Cliffs in Little Yosemite Valley. Bunnell Point is also visible on the left.The trail then continues southwest over the summit of Clouds Rest and down towards Half Dome and the Quarter DomesLooking back up as hikers descend from the summit of Clouds Rest. This section is a steep descent and the steps are narrow (credit: Brennan Polley)The descent drops 2,700 feet over the next 3 miles. There are some nice views in the first half of descent.View of Half Dome, the Liberty Cap, and Mount Broderick from the Clouds Rest trail descent towards Sunrise Creek.The switchbacks provide some great views of Half Dome and you can more clearly see the cables on the dome the further you descend (pictured: Kelty 65l pack)At roughly the 6 mile mark, the trail enters a forest and the views become obscured. This section of the trail was hot and dusty. We quickly rushed to finish this portion of the trek.At the 7 mile mark, the trail meets up with the John Muir Trail at Sunrise Creek. You will want to fill up your water at the creek and probably want to rest your knees for a bit after the descent.After a short break, begin hiking east on the John Muir Trail. The trail follows Sunrise Creek and climbs steadily for the next 2 miles. The climb goes up ~800 feet before reaching the next trail junction.Hiking along the John Muir Trail towards the junction with the Merced River High Trail.Eventually the John Muir Trail enters a burned forest region (burned in the 2014 Meadow Fire). The forest was slowly coming back to life with many ground plants, birds, and insects present.Hiking through the burned forest on the John Muir TrailMore burned trees and some rock structures along the trailNear the 9 mile mark, the trail begins to flatten out as you approach the junction with the High Trail that leads to Merced Lake. When you reach the junction, take a right and head towards Merced Lake (pictured: Cascade Mountain carbon fiber trekking pole)The High Trail to Merced Lake also traverses a burned forest. Here you see Bunnell Point in the background.The views along the High Trail were really awesome. You get to look forward towards Echo Valley and Merced Lake, have views of the Lost Valley to your right, and have views of Clouds Rest behind you.View of the ridge to the north of the trailView of Bunnell Point and the Lost Valley to the south of the High Trail to Merced Lake.In a couple of sections near waterfalls, streams, or lakes, the trail ducks into small forested sections. Any of these areas would make for a nice campsite.Near the 10 mile mark, the trail really opens up and provides some great views.Panoramic view showing the Merced River valley to the left and Bunnell Point and the Lost Valley to the right.View looking northeast towards Vogelsang Peak. The small bunch of trees on the granite bluff (right side of image) is where we camped this night (pictured: prAna Zion Straight pants)At the 11 mile mark we came across the first of two lakes on a granite bluff across from Bunnell Point. This first lake did not seem to have great camping options, so we decided to continue forwardThe trail enters a small forest between the two lakesTraversing southeast towards the small second lake on the bluffThe water quality at the second lake was not the best, but it tasted fine after filtering. This area also had a really nice place to set up several tents and make camp. Unfortunately, there were no running streams nearby so we made due with the pond water.Our campsite for night 3. It was located just southeast of the small lake on the bluff northeast of Bunnell Point (pictured: Alps Mountaineering Chaos 2 Tent)After setting up our tents, we relaxed in an area with a great view. We had the whole granite bluff to ourselves and did not see any other hikers in this area (pictured: BearVault BV500 Food Container)Just a short walk away from our camp, there was a nice viewpoint that overlooked the Lost Valley and the Merced River. This was a great place to watch the sun set (pictured: Therm-a-Rest trekker chair)Sunset over Bunnell Point and the Lost ValleySunset over Clouds Rest and the Quarter Domes
Day 4: 13 miles; +1,100 feet / -4,700 feet; Echo Valley camp through Little Yosemite Valley to Happy Isles Trailhead Parking Lot
Map of the Day 4 hike on the Yosemite Highlights Loop from Echo Valley through Little Yosemite Valley to the Happy Isles Trailhead Parking Lot (blue line).
Approximate elevation profile of the Day 4 hike on the Yosemite Highlights Loop from Echo Valley through Little Yosemite Valley to the Happy Isles Trailhead Parking Lot
On the last day of our trek we hiked out of wilderness from Echo Valley to the Happy Isles Trailhead in Yosemite Valley. Although the hike is mostly downhill, the 13 mile length makes this hike reasonably tough. The views throughout the Merced River Valley are phenomenal and the Lost Valley and Little Yosemite Valley are also quite interesting. The hike ends with great views of Nevada and Vernal Falls from the John Muir Trail and Mist Trail. Overall, this was one of the more beautiful hikes I have been on. Afterwards, you can make a quick stop at Half Dome Village for pizza and beer!
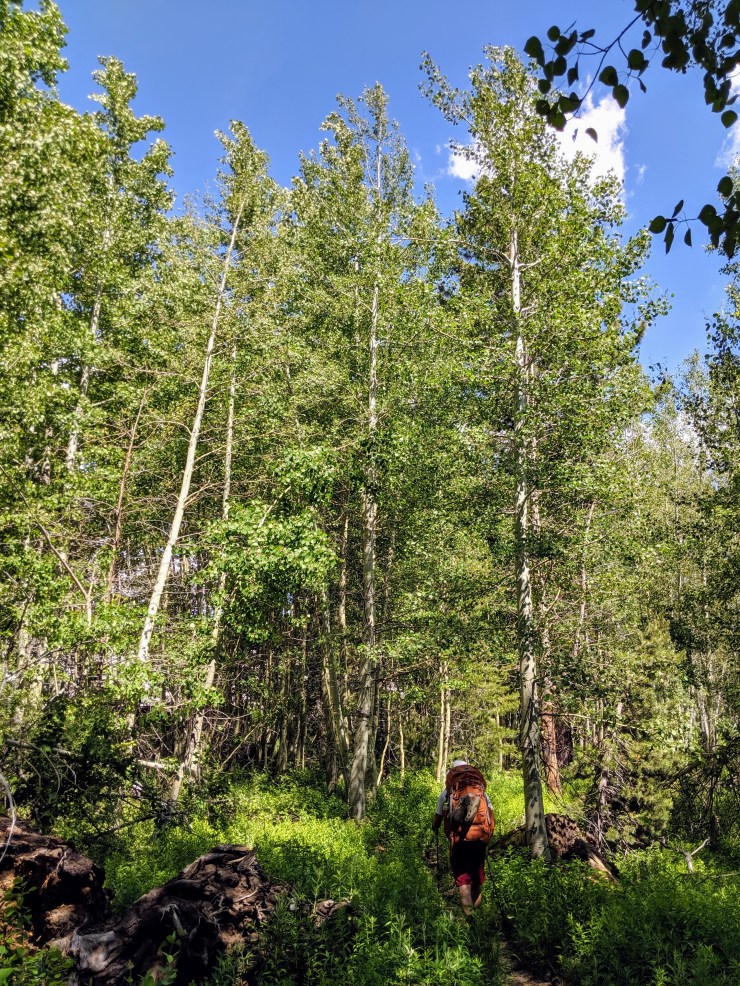
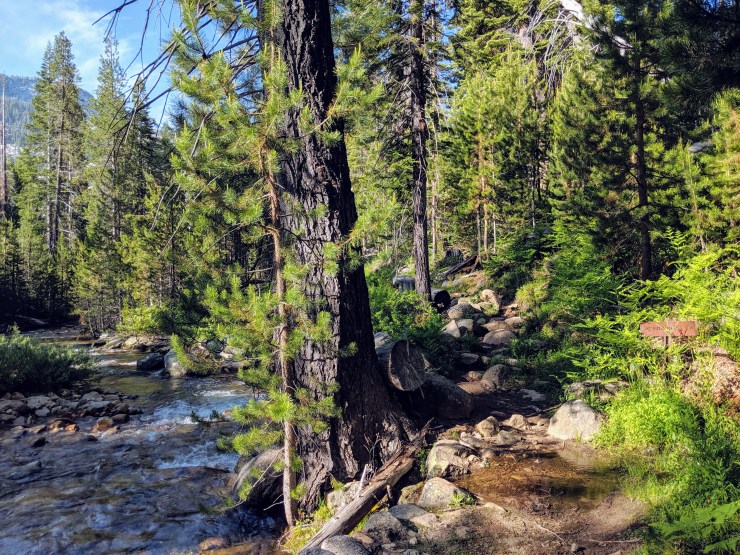
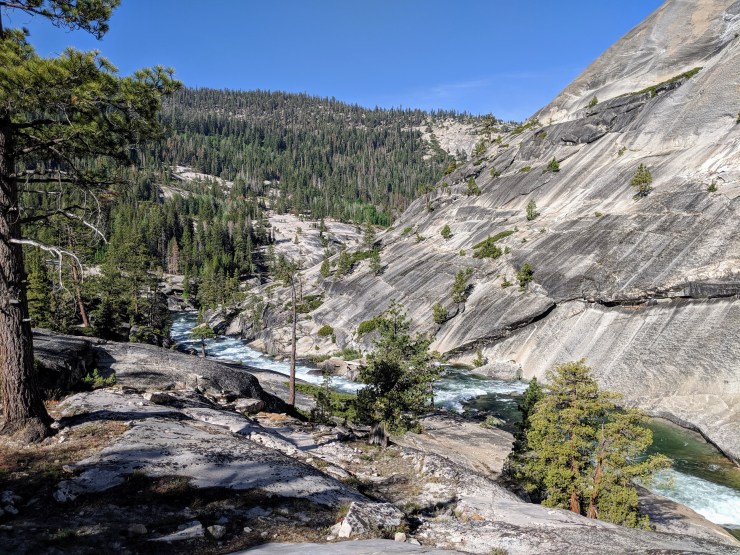
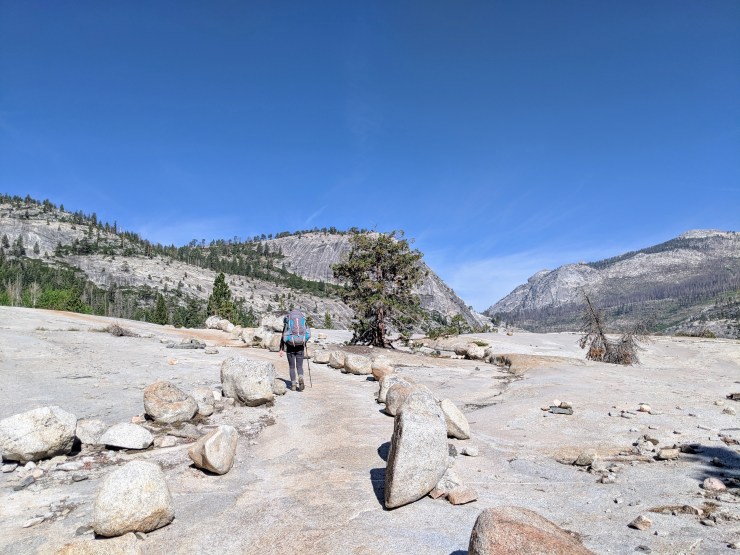
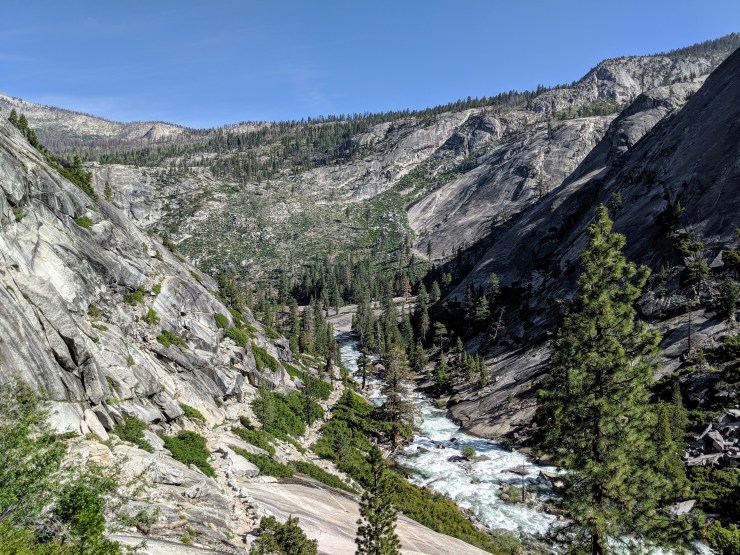
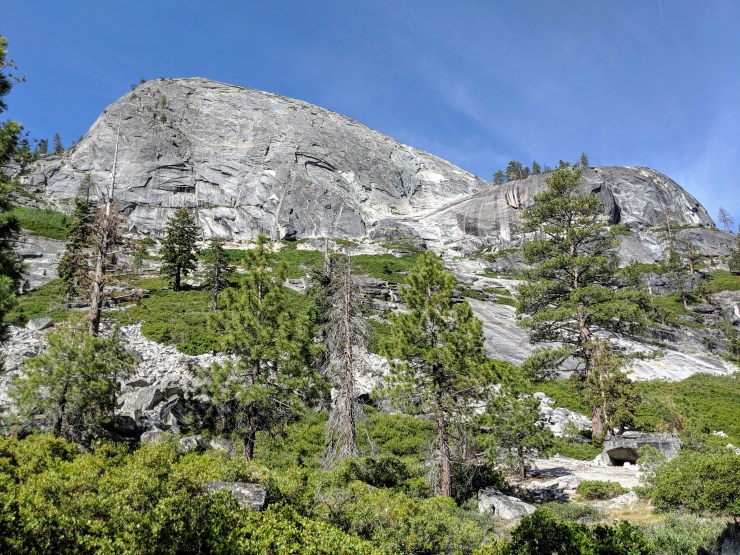
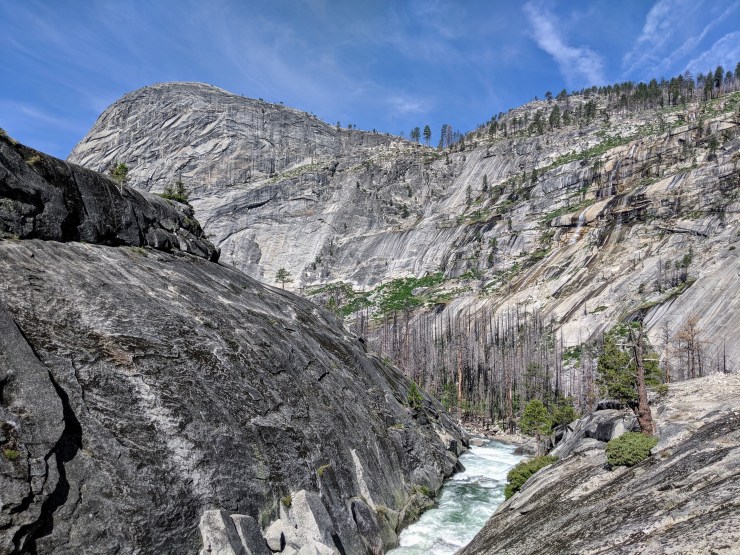
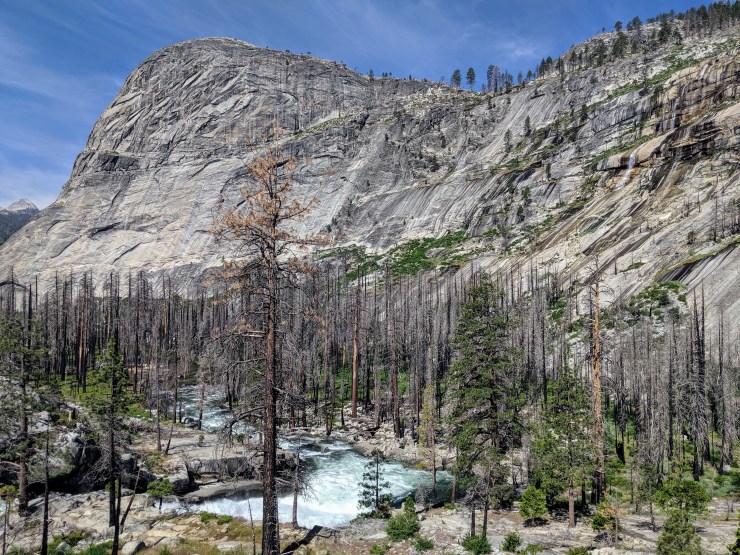
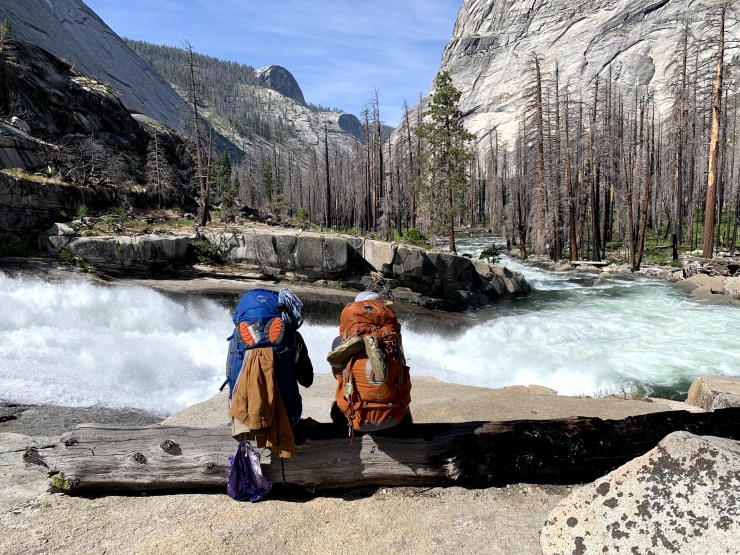
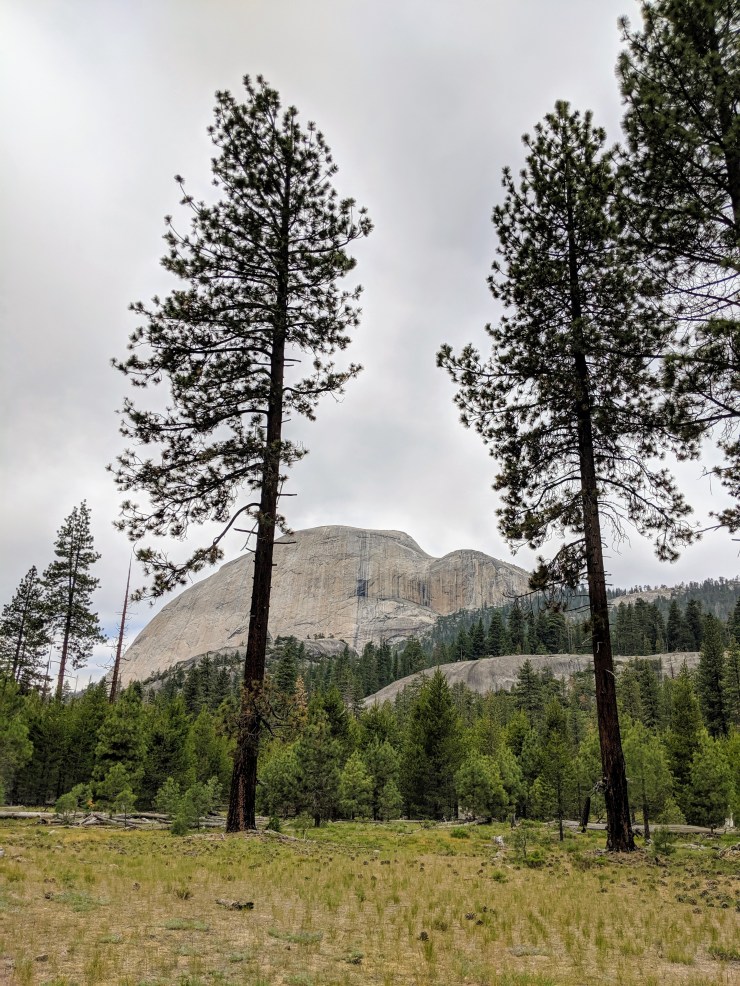
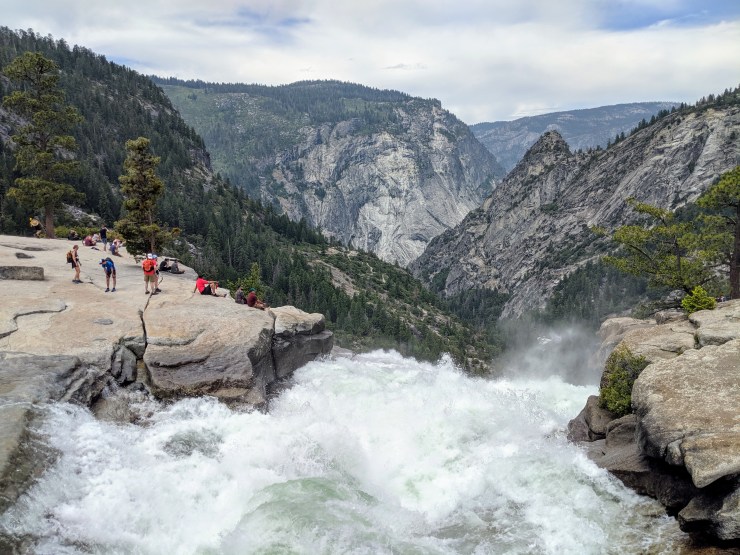
A beautiful view from our campsite in the morningWe started the hike by heading north to get back onto the High Trail leading to Merced Lake. Much of the area was super smooth granite and the views were impressive.We then caught the trail and headed towards Echo ValleyAfter the half mile mark, the trail descends into a pretty forest with large trees.The trail also passes by a couple meadows with some beautiful wildflowers. In this section of the trail, the air was crisp and cool, which felt great while hiking.Around the 1.2 mile mark, the trail emerges from the forest and you get a nice view of Echo Valley as you descend down some switchbacks.At the 1.25 mile mark, the trail reaches Echo Creek and flattens out as you hike through Echo Valley. There is a bridge across Echo Creek here that leads to Merced Lake. Do not cross the bridge and instead head towards Yosemite Valley.A nice view while hiking through Echo ValleyHiking along the trail through Echo Valley. The forest was young on the left side of the trail, while there were large trees on the right side.At the 2 mile mark, the trail met up with the Merced River. From this point on, the views got better and better. The Merced River is extremely powerful and is awesome to hike next to.You cross a footbridge near the 2.5 mile mark and then get a nice view of a cascade.The trail then briefly climbs up away from the Merced River (pictured: Kelty 60l women’s pack)View looking towards the Lost Valley and Bunnell PointAfter the climb and a small stretch through a forest, the trail opens up and you begin to descend a series of switchbacks leading down to the Merced River.View looking back east along the riverThe Merced River flowing quickly towards the Lost ValleyA waterfall along the Merced River. Note that the granite bluff in the background is the area where we camped the previous night.View looking south up at Bunnell Point. There are large granite walls on both sides of the trail in this section.At the 4 mile mark you cross another footbridge and then the trail meanders through a large boulder field.After emerging from the boulders, you descend down into the Lost Valley.This section of the trail was very beautiful with a narrow canyon and a large waterfall in the background. The Lost Valley was also burned in the 2014 Meadow Fire, so the trees in the valley are charred.Closer view of the Merced River and the Lost ValleyThe trail goes alongside the Bunnell Cascade in this section. When the flow of water is lower, people sometimes use this cascade as a waterslide.Enjoying the view as the water quickly churns down the Bunnell Cascade and flows into the Lost Valley (credit: Amy Walecka)The trail then enters the Lost Valley, which is slowly recovering from the 2014 Meadow fire.Closer view of the colorful waterfall flowing into the valleyThere is a large dome with an arch that sits at the south end of the Lost ValleyThe trail then continues past the Lost Valley and passes Merced Falls. This falls has a water wheel feature that kicks water vertically into the air.Looking back at Merced FallsLooking back at the Moraine Dome as the trail begins to enter Little Yosemite Valley.The trail enters Little Yosemite Valley next. This valley was also burned in 2014. The trail here is sandy can be pretty annoying on your footing. The scenery is very nice though.View of the Cascade Cliffs in Little Yosemite ValleyA dome and granite bluff on the north side of Little Yosemite ValleyThe trail through the burned section of Little Yosemite Valley is about 2 miles longNear the 7.5 mile mark, the trail meets up with the Merced River again. This area of Little Yosemite Valley was not burned. This makes for a nice spot to refill your water and have a snack.As you head further into Little Yosemite Valley, you eventually get a nice view of Half Dome and sub dome.At the 8 mile mark, you pass the Little Yosemite Campground. After this point, the trail continues through the forest for another mile or so.At roughly mile 9, you reach the top of Nevada Fall. Here you can either take the Mist Trail down to Happy Isles or can start on the John Muir Trail. We took the John Muir Trail and really enjoyed the views.
View of Nevada Falls from the footbridge over the Merced River. You can see Grizzly Peak and and Glacier Point in the background. You cross the bridge over the falls to access the John Muir Trail.
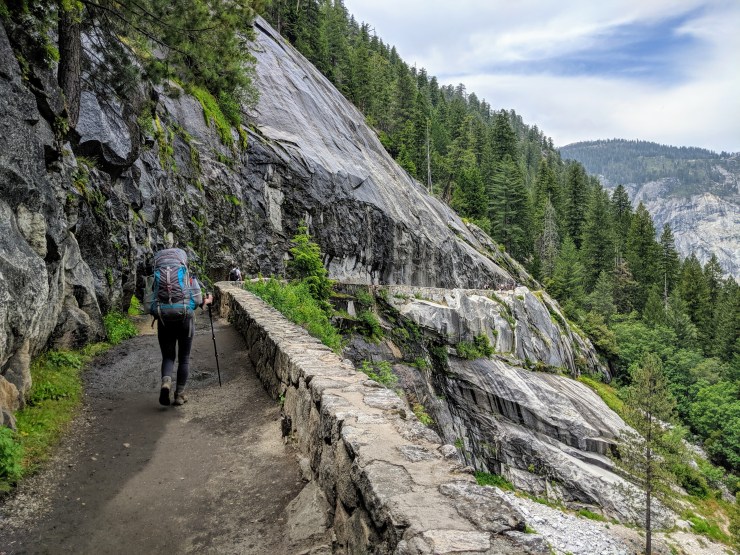
The John Muir Trail hugs the cliffside in sections
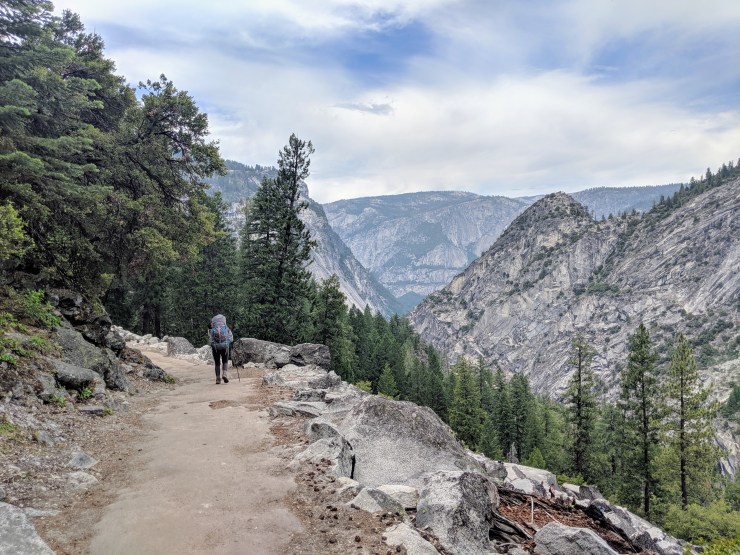
Along the way down the trail you get some awesome views of Nevada Falls, Liberty Cap, Mount Broderick, and Half Dome.
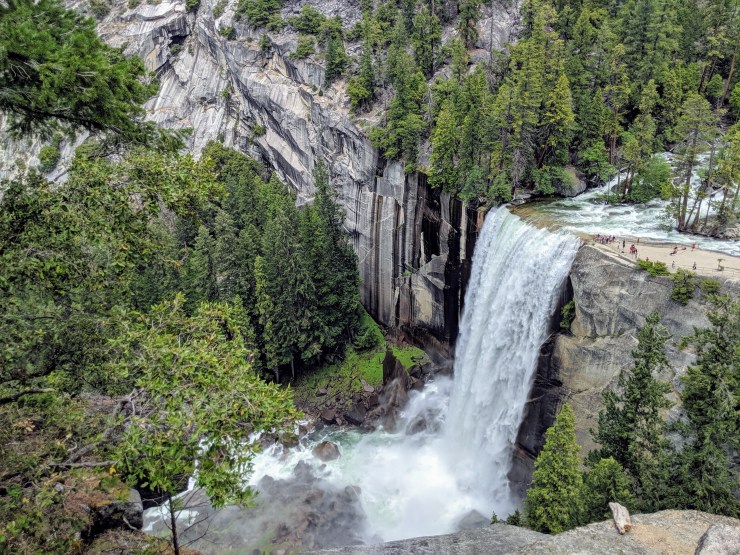
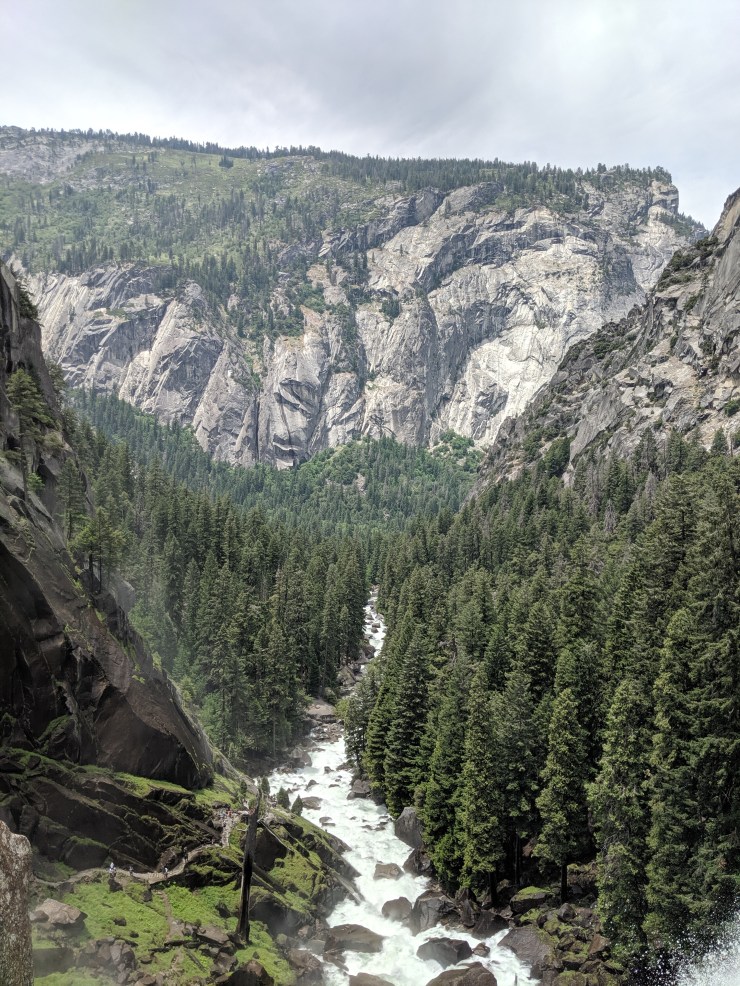
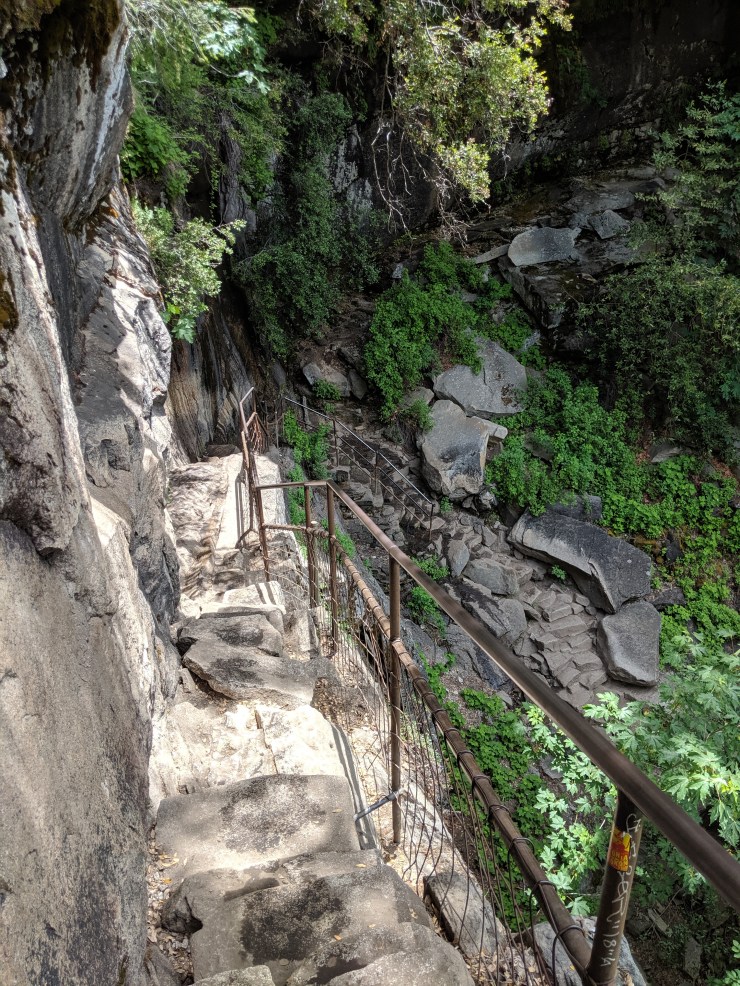
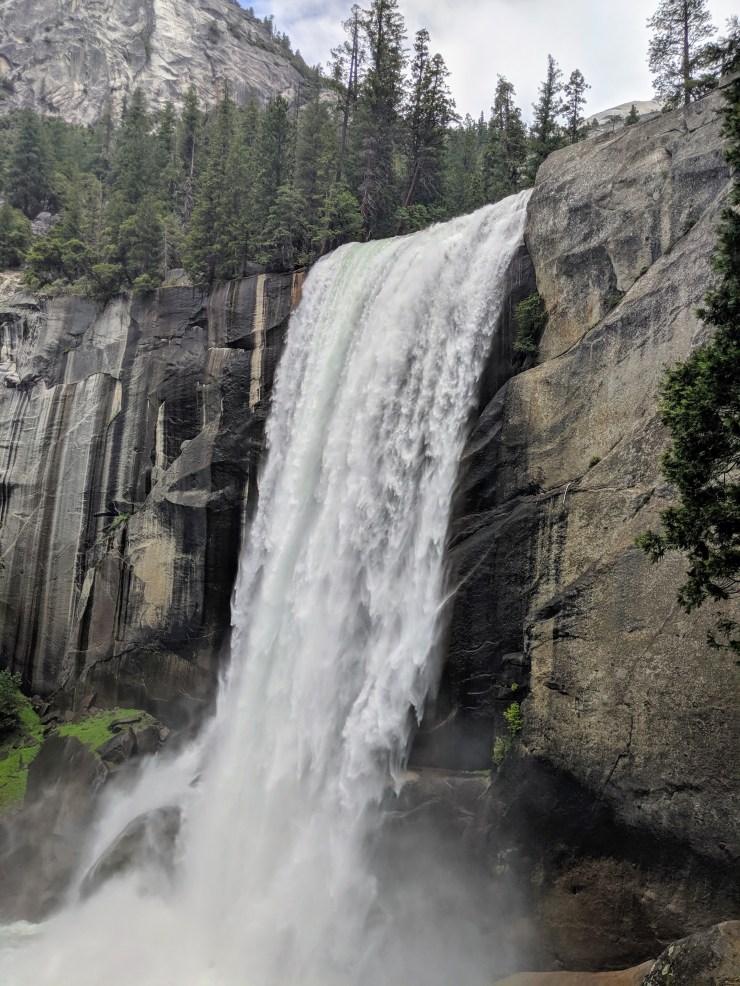
Continuing along the descent down the John Muir Trail with Grizzly Peak in the backgroundThe trail switches back and forth so the view alternates between Half Dome and Grizzly Peak.Around the 10.5 mile mark, you approach the Clark Point Lookout.This is the view from the famous Clark Point lookout. There is a junction here. You can either continue down on the John Muir Trail or can take a connector trail that leads to Vernal Falls and the Mist Trail. We chose to head to the Mist Trail.There is a great vista point along the connector trail that allows you to see Vernal Falls from above.View of Mount Broderick and the Merced River above Vernal Falls.View looking down from the top of Vernal FallsFrom this point, we took the Mist Trail down to the Happy Isles Trailhead. The Mist Trail consists from steep granite steps and provides awesome views of Vernal Falls.View of Vernal Falls from the Mist Trail.The Mist Trail passes so close to Vernal Falls that you get wet from the water that sprays off the rocks at the bottom of the fallsAfter you pass Vernal Falls, the Mist Trail becomes paved and continues to follow the Merced River into Yosemite Valley.The trail eventually reaches a bridge, which you cross to get over to the Happy Isles Trailhead. It is then a ~0.5 mile walk to the trailhead parking lot.After getting our car at the trailhead parking lot, we drove over to Half Dome Village to wash up and get some food. There is a nice view of Half Dome from the parking lot!The pizza at Half Dome Village really hit the spot after a long hike and everyone enjoyed a beer or two to celebrate finishing!
Approximate elevation profile of side trip route to the summit of Half Dome leaving from the junction between the Clouds Rest Trail and John Muir Trail.
This Yosemite Highlights Loop itinerary passes nearby Half Dome, so backpackers have the opportunity to summit Half Dome on Day 3. To do so, you need to have a Half Dome permit. It is a roughly a 5 mile round trip hike from the junction where the Clouds Rest Trail meets the John Muir Trail by Sunrise Creek.
If you decide to summit Half Dome, you may want to add an additional day to this itinerary, otherwise the hike on Day 3 will be very long at over 16 miles with >4,000 feet of elevation gain. One potential option is to add one day to the itinerary and set up camp on night 3 near the junction where the Clouds Rest Trail meets the John Muir Trail. This will allow you to summit Half Dome on the morning of Day 4 and then move camp to the suggest campsite near Echo Valley for the 4th night. On day 5 you would hike out via the Lost Valley and Little Yosemite Valley. This option also gives you the possibility to hike Half Dome on either the end of Day 3 after you set up camp or the morning of Day 4 before leaving camp. Thus, you have two chances to secure a permit.
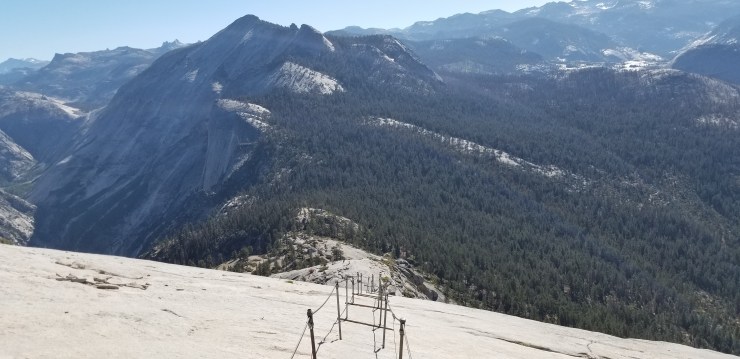
To get to Half Dome, you take the take south from Clouds Rest until you reach the junction with the John Muir Trail. Then, take the John Muir Trail west for roughly 0.5 miles until you reach the junction with the Half Dome Trail. Continue up the trail along a moderately steep incline for 1.5 miles (up ~1,000 feet). At the 2 mile mark, you start the steeper ascent up to the top of the sub dome (about 0.3 miles). Then, at the ~2.3 mile mark, you reach the famous Half Dome cables that lead up the final extremely steep ~500 foot climb to the top of Half Dome. The cables are there to help stabilize hikes during the ascent. At the summit, you get great views of Yosemite Valley. On the descent, you follow the same set of cables.
View of Half Dome in the distance as you hike from the John Muir Trail over to the Half Dome Trail (credit: Daniel Betcher)View of Half Dome and the cables from the top of the subdome (credit: Spencer Graves)Hikers climbing up the cables to the summit of Half Dome (credit: Darold Massaro)View of the large flat area atop Half Dome. There is plenty of space to walk around and explore the views in all directions (credit: Darold Massaro)View looking to the west from the Half Dome summit. El Capitan can be seen in the distance (credit: Darold Massaro)View looking south from the Half Dome summit. Looking towards Little Yosemite Valley (credit: Darold Massaro)View looking northeast from the Half Dome summit. You can see Clouds Rest in the center of the photo and Mount Watkins on the left (credit: Eric Pheterson)View looking northwest from the Half Dome summit. You can see North Dome, Basket Dome and Mount Watkins (credit: Louis Huemiller)Then, you must head down the set of cables to get off of the Half Dome summit (credit: Darold Massaro)
23 Replies to “Yosemite Highlights Loop – Yosemite National Park (40 mile loop)”
Awesome pictures! Not sure I have ever seen such a complete trail description. I am hoping to get out to Yosemite in August and will try to check out the trail section near Lost Valley.
Hi Robin – that was a great campsite! It sits right above the Merced River valley with a great view of Bunnell Point. The coordinates are: 37.7469, -119.4510
Thank you SO much for the info about clouds rest!! My husband and I hiked from sunrise this week and were totally prepared. We made it all the way to clouds rest and did not get lost. The views from the top are AMAZING. Pics do not do it justice!!
Really nice report. Interesting to note that the first 10 miles or so is on the original and official John Muir Trail, as described in 1915 and mapped in 1916. It migrated by popular use over the years to Happy Isles and Sunrise Trail, so this route covers the original and modern trailheads
Good to know! I really enjoyed the first 10 miles despite there being the serious Snow Creek climb and then a little bit of road noise before Tenaya Lake. The views of Half Dome and Clouds Rest in this section were very nice.
That road noise is exactly why the Trail migrated over to Happy Isles and the Nevada Fall/Cathedral Pass route. By 1934, when Starr’s Guide was published, it was already suggested that the developement of Tioga road made it inapproporiate for the JMT. The original route went all the way to Tuolumne from Tenaya on the road.
Hi!
I love your website! I’ve used it this year to plan some backpacking trips but unfortunately, coronavirus has canceled them. This includes my Yosemite trip 😦 I was wondering if you think it is a good idea to do your Yosemite loop backward, as there might be more permit space starting at Happy Isles Trailhead Parking Lot to Little Yosemite. I’m not sure how their permit system works but this seems like a possible solution if I want to backpack Yosemite in August.
You can certainly do the loop backwards. A few comments though:
1) I believe permits for Happy Isles TH heading to Little Yosemite are super popular, so these are probably hard to get. Give it a shot, but I think it fills up fast with people looking to do Half Dome.
2) You’ll want to think about where to camp the first night. It would be a rough day to hike all the way to where we camped above the Merced River.
3) The hike up to Clouds Rest will be long and hot if you are going up the backside. Be prepared to carry a good amount of water.
We are doing a very similar route this summer to your Yosemite highlights loop , provided the park opens…Can you provide the GPS coordinates for your campsite near Mt. Watkins? Thanks!
I don’t have the exact coordinates, but it should be around 37.7905, -119.5157. We basically hiked along the Snow Creek Trail until it flattened out for a bit (right before heading uphill again). We had to meander around a bit to find the site, but it ended up being a nice big one. It was on the south side of the trail and there was a running creek nearby. Hopefully you are able to go on the trip!
Did this entire trail from June 12th to June 17th. Absolutely legendary! Thanks for the detailed description and layout! We had an awesome time. Only thing we did differently was take the John Muir Trial to Yosemite Valley instead of the mist trail. This adds about .4 miles and eliminates going down very wet rocks.
Thank you sooo much for thoroughly documenting your adventure:) I am planning to visit Yosemite and will now extend my trip to include this incredible trail loop. Appreciate you and your team!
Hi Gene – hope you have a great trip! I would just note that if you are going in 2021, it has been a very dry year in California. I would be sure to check with the park rangers and ask about water availability along the route before you set off!
Hi. this is an awesome trail and trip description. My husband and I are planning on doing an almost identical trip on August 1st. We are so excited!!!! We plan to stop night 3 near the junction of the Clouds Rest trail and the JMT and summiting Half Dome on the morning of day 4. Are there plenty of campsites near that junction? We want to be as close to the start of the Half Dome trail as possible so that we can get an early start before all the day hikers arrive and the cables get jammed up. Also are we allowed or is it safe to leave our tent up at our campsite that morning and leave our packs and bear vault (a safe distance away of course) there while we summit?? I was planning on taking a small packable daypack to use for just the essentials and using it for the climb. Any tips are appreciated and thank you so much for this amazing description!!! It has been SO HELPFUL in my planning!!!!
Hi Trista – There is a popular camping area near the Clouds Rest Trail and JMT junction, right by Sunrise Creek. It tends to get used a lot because it is near the creek and makes for a good basecamp for Half Dome hikers. If you camp there, just be prepared to have some neighbors. I don’t recall there being a ton of campsites here, but I think it was a large enough area that you can rely on camping there.
I believe it is fine to leave your tent up there while you summit Half Dome. My gut says it should be fine, but I honestly don’t remember. The whole Sunrise and Little Yosemite Valley area is popular with black bears, so make sure you take all scented items on your person or leave them in a properly stored bear vault (outside, away from your tent). Hope you have a great trip!
Amazing write up. I created an all trails map in case it can help save the next person some time. I am going to break the trip into a 5 day trip, with the camp on Day 3 the earlier campsites mentioned in the writeup. I also added in the campsite in the Echo valley in case you’re feeling frisky. I then added in camping at the little yosemite valley to break it into 5 days. I’m heading out tomorrow morning! Best of luck y’all.
Thank you so much for this writing this detailed trip!! For someone new to Yosemite it can be bewildering to know what to pick, and this was just the perfect trip. We did it in the order described, which I can only recommend, as you have Little Yosemite to look forward too!
Some notes. We did this in the first week of October. Parts of California, including Yosemite were experiencing a heat wave at that time: the 1,000 metres up on the first day were the hardest I’ve ever done on my life. The temperature was like 35°C, and the elevation gain meant quite a reduction in oxygen. We even had a headache at night, which went away late in the night, and we spoke to others we had experienced this too. The elevation should really be factored in as slowing you significantly, as also the next few days ups were harder to do than we had experienced with.
Given it was October, the pool on day 3 was empty, the other pool was surrounded by deadly mud, and indeed give that a pass at all times of the year. We went on a bit further and a bit down (about 1.5km?), and still found some stream which was filterable (having done the AZ we have significantly lowered thresholds for what counts as drinkable water 🙂 ).
Cons: plane traffic is insane. Take earplugs, as you are not getting a wilderness experience. At least 2 planes per minute flow over, day and night. Never experienced anything like this. You get less plane noise near an airport.


Awesome pictures! Not sure I have ever seen such a complete trail description. I am hoping to get out to Yosemite in August and will try to check out the trail section near Lost Valley.
LikeLike
Hi! Do have the GPS coordinates for the campsite you stayed at near echo valley? Looks like an awesome site and I want to check it out sometime. thnx
LikeLike
Hi Robin – that was a great campsite! It sits right above the Merced River valley with a great view of Bunnell Point. The coordinates are: 37.7469, -119.4510
LikeLike
Thank you SO much for the info about clouds rest!! My husband and I hiked from sunrise this week and were totally prepared. We made it all the way to clouds rest and did not get lost. The views from the top are AMAZING. Pics do not do it justice!!
LikeLike
I backpacked a similar loop this past weekend. Very beautiful! Just want to say that the snow is melting very fast and is not an issue any more…
LikeLike
Really nice report. Interesting to note that the first 10 miles or so is on the original and official John Muir Trail, as described in 1915 and mapped in 1916. It migrated by popular use over the years to Happy Isles and Sunrise Trail, so this route covers the original and modern trailheads
LikeLike
Good to know! I really enjoyed the first 10 miles despite there being the serious Snow Creek climb and then a little bit of road noise before Tenaya Lake. The views of Half Dome and Clouds Rest in this section were very nice.
LikeLike
That road noise is exactly why the Trail migrated over to Happy Isles and the Nevada Fall/Cathedral Pass route. By 1934, when Starr’s Guide was published, it was already suggested that the developement of Tioga road made it inapproporiate for the JMT. The original route went all the way to Tuolumne from Tenaya on the road.
LikeLike
Hi!
I love your website! I’ve used it this year to plan some backpacking trips but unfortunately, coronavirus has canceled them. This includes my Yosemite trip 😦 I was wondering if you think it is a good idea to do your Yosemite loop backward, as there might be more permit space starting at Happy Isles Trailhead Parking Lot to Little Yosemite. I’m not sure how their permit system works but this seems like a possible solution if I want to backpack Yosemite in August.
Thanks!
LikeLike
Hi Nick,
You can certainly do the loop backwards. A few comments though:
1) I believe permits for Happy Isles TH heading to Little Yosemite are super popular, so these are probably hard to get. Give it a shot, but I think it fills up fast with people looking to do Half Dome.
2) You’ll want to think about where to camp the first night. It would be a rough day to hike all the way to where we camped above the Merced River.
3) The hike up to Clouds Rest will be long and hot if you are going up the backside. Be prepared to carry a good amount of water.
Good luck!
LikeLike
We are doing a very similar route this summer to your Yosemite highlights loop , provided the park opens…Can you provide the GPS coordinates for your campsite near Mt. Watkins? Thanks!
LikeLike
I don’t have the exact coordinates, but it should be around 37.7905, -119.5157. We basically hiked along the Snow Creek Trail until it flattened out for a bit (right before heading uphill again). We had to meander around a bit to find the site, but it ended up being a nice big one. It was on the south side of the trail and there was a running creek nearby. Hopefully you are able to go on the trip!
LikeLike
Wow, what a trip! I wouldn’t make it a day!
LikeLike
Did this entire trail from June 12th to June 17th. Absolutely legendary! Thanks for the detailed description and layout! We had an awesome time. Only thing we did differently was take the John Muir Trial to Yosemite Valley instead of the mist trail. This adds about .4 miles and eliminates going down very wet rocks.
LikeLike
Thank you sooo much for thoroughly documenting your adventure:) I am planning to visit Yosemite and will now extend my trip to include this incredible trail loop. Appreciate you and your team!
LikeLike
Hi Gene – hope you have a great trip! I would just note that if you are going in 2021, it has been a very dry year in California. I would be sure to check with the park rangers and ask about water availability along the route before you set off!
LikeLike
Will do! Happy trails ^^
LikeLike
Hi. this is an awesome trail and trip description. My husband and I are planning on doing an almost identical trip on August 1st. We are so excited!!!! We plan to stop night 3 near the junction of the Clouds Rest trail and the JMT and summiting Half Dome on the morning of day 4. Are there plenty of campsites near that junction? We want to be as close to the start of the Half Dome trail as possible so that we can get an early start before all the day hikers arrive and the cables get jammed up. Also are we allowed or is it safe to leave our tent up at our campsite that morning and leave our packs and bear vault (a safe distance away of course) there while we summit?? I was planning on taking a small packable daypack to use for just the essentials and using it for the climb. Any tips are appreciated and thank you so much for this amazing description!!! It has been SO HELPFUL in my planning!!!!
LikeLike
Hi Trista – There is a popular camping area near the Clouds Rest Trail and JMT junction, right by Sunrise Creek. It tends to get used a lot because it is near the creek and makes for a good basecamp for Half Dome hikers. If you camp there, just be prepared to have some neighbors. I don’t recall there being a ton of campsites here, but I think it was a large enough area that you can rely on camping there.
I believe it is fine to leave your tent up there while you summit Half Dome. My gut says it should be fine, but I honestly don’t remember. The whole Sunrise and Little Yosemite Valley area is popular with black bears, so make sure you take all scented items on your person or leave them in a properly stored bear vault (outside, away from your tent). Hope you have a great trip!
LikeLike
Amazing write up. I created an all trails map in case it can help save the next person some time. I am going to break the trip into a 5 day trip, with the camp on Day 3 the earlier campsites mentioned in the writeup. I also added in the campsite in the Echo valley in case you’re feeling frisky. I then added in camping at the little yosemite valley to break it into 5 days. I’m heading out tomorrow morning! Best of luck y’all.
LikeLike
In case the link didn’t come through…
https://www.alltrails.com/explore/map/map-june-20-2022-2-09-am-9cb67ff?u=i
LikeLike
Thank you so much for this writing this detailed trip!! For someone new to Yosemite it can be bewildering to know what to pick, and this was just the perfect trip. We did it in the order described, which I can only recommend, as you have Little Yosemite to look forward too!
Some notes. We did this in the first week of October. Parts of California, including Yosemite were experiencing a heat wave at that time: the 1,000 metres up on the first day were the hardest I’ve ever done on my life. The temperature was like 35°C, and the elevation gain meant quite a reduction in oxygen. We even had a headache at night, which went away late in the night, and we spoke to others we had experienced this too. The elevation should really be factored in as slowing you significantly, as also the next few days ups were harder to do than we had experienced with.
Given it was October, the pool on day 3 was empty, the other pool was surrounded by deadly mud, and indeed give that a pass at all times of the year. We went on a bit further and a bit down (about 1.5km?), and still found some stream which was filterable (having done the AZ we have significantly lowered thresholds for what counts as drinkable water 🙂 ).
Cons: plane traffic is insane. Take earplugs, as you are not getting a wilderness experience. At least 2 planes per minute flow over, day and night. Never experienced anything like this. You get less plane noise near an airport.
LikeLike