


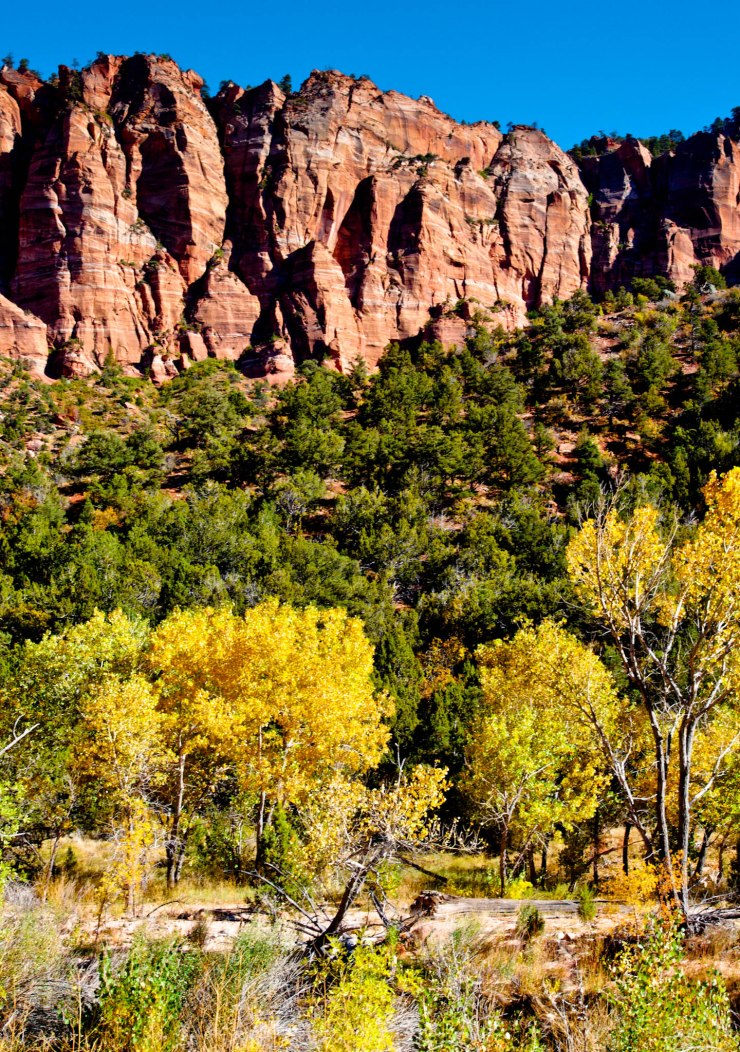
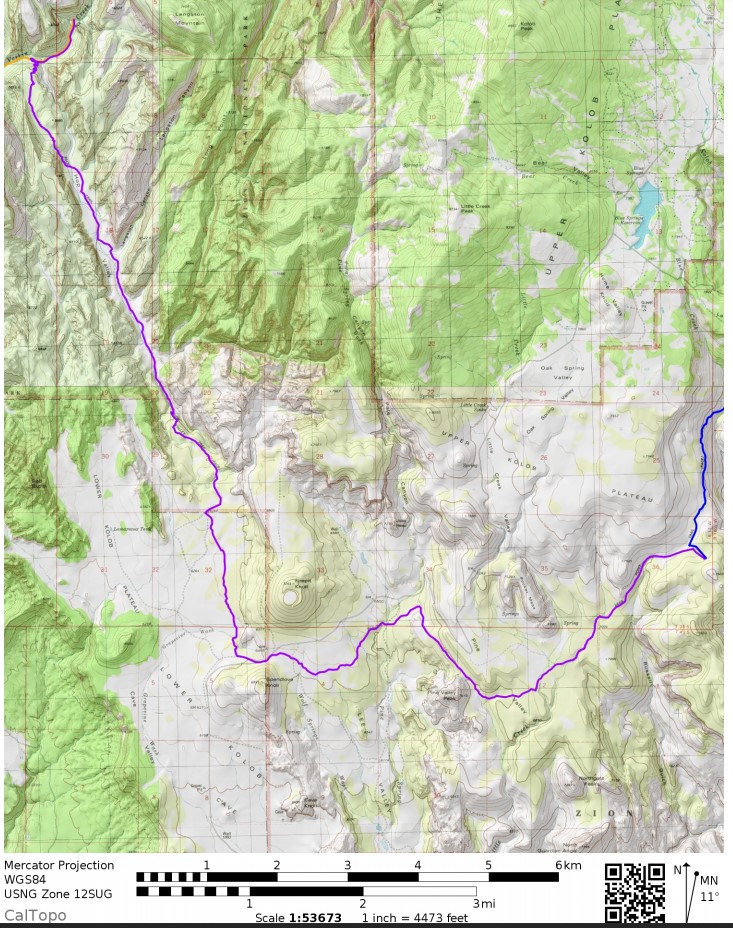
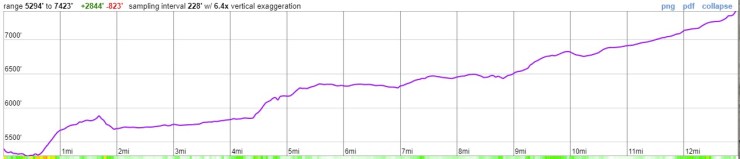
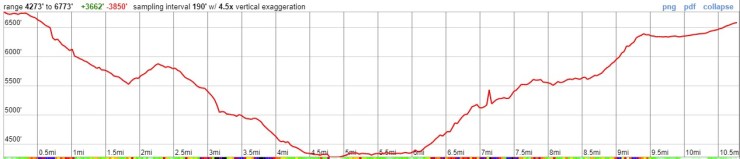
Trip Overview: The 51 mile Zion Traverse (aka Trans Zion Trek) backpacking trip combines several different trails to span the entirety of Zion National Park from northwest to southeast. Along this route you hike through several different regions of the park (Kolob Canyons, Wildcat Canyon, West Rim, Zion Canyon, and East Rim) and pass through narrow canyons, high deserts, plateaus, and ponderosa forests. Hikers are treated to views of natural arches, towering multi-colored rock structures, and a variety of unique sandstone structures. Roughly +/- ~10,000 feet of elevation across the course of this trek and a peak elevation of 7,450 feet.

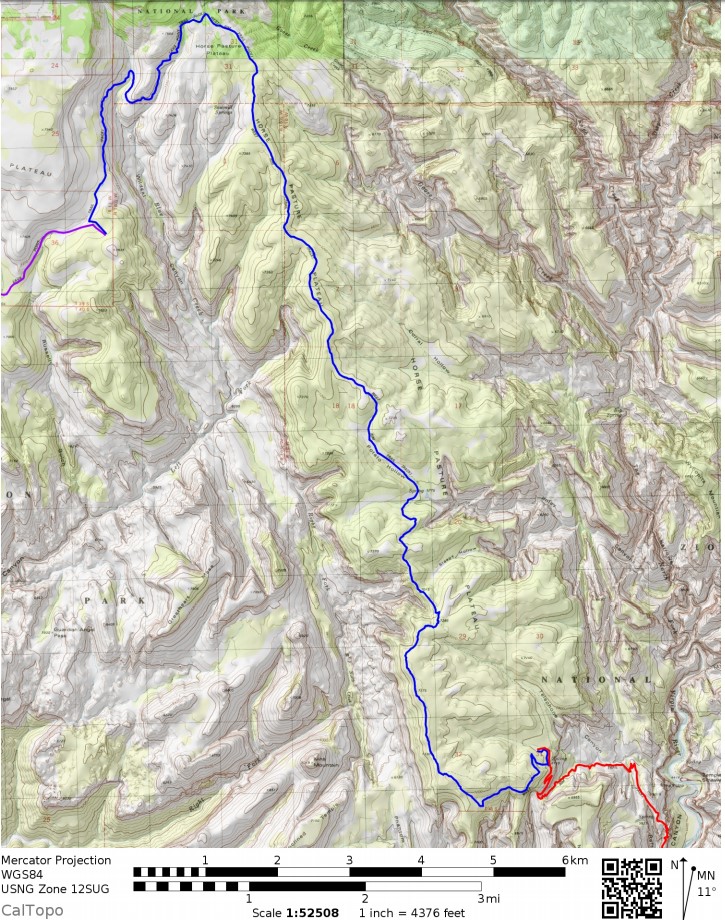
- Overall map for the Zion Traverse (Trans Zion Trek) (PDF)
- Topographic map of Zion National Park for purchase (REI link)
Jump to Day 1: Lee Pass Trailhead to La Verkin Creek campsite
Jump to Day 2: La Verkin Creek to Wildcat Spring
Jump to Day 3: Wildcat Spring to West Rim (Cabin) Spring
Jump to Day 4: West Rim (Cabin) Spring to East Rim (Stave) Spring
Jump to Day 5: Stave Spring to East Rim Trailhead
Shop Deal of the Day at REI Outlet (up to 50% off)!
NOTE: Due to a large rockfall in August 2019, the East Rim Trail between Weeping Rock and Observation Point is closed. Check the NPS webpage for updates on this trail closure if you intend to hike the full Zion Traverse.
Preparations:
Click here to read more about Permits
Permits: Wilderness Permits are required for all overnight backpacking trips in Zion National Park. Competition for permits has been increasing lately, so backpackers should either reserve permits in advance or have flexibility built into their trip if attempting to attain walk-in permits for this multi-day itinerary.
Advanced permit reservations for a given trek start date open up three months in advance starting at 10am MST on the 5th day of the month. As an example, if you want to start a trek on April 20th, you would try to get a reservation at 10am MST on February 5th. All available permits for start dates that month are released at the same time and the permits are given out on a first-come, first-serve basis. Attempt to log as close to 10am as possible to give yourself the best odds of snagging your desired permit.
You apply for the permits online and a separate reservation is required for each night you are backcountry camping. Each reservation requires a $5 non-refundable charge. When you go to reserve a permit, you must select a specific campsite, choose an available date, specify the size of your party, and then specify your entry and exit trailhead. The system nicely shows availability on a calendar, but the process of booking a multi-day itinerary can be stressful and challenging. It may be best to have multiple people book campsites for the different nights so that one person does not need to go through the checkout process 4 times in a row. If you are lucky enough to get a permit reservation, you then must go the permit desk or visitor center the day before your trek to pick up the actual permit.
If you are not able to reserve a permit in advance, you may be able to get a walk-in permit the day before your trip starts. About 1/3 of all campsites are reserved for walk-ins. These walk-in campsites do not even show up in the advanced reservation system and are exclusively for walk-in backpackers. That said, there is no guarantee that you will get the permit you are looking for. It is best to arrive early the day before your trek for the best odds (the wilderness permit desk opens at 7am).
For this Zion Traverse (Trans Zion Trek) itinerary, we cover the ~50 miles over 5 days and 4 nights. Campsite locations were chosen to keep the daily mileage as close to 10 miles as possible while still placing the camps near springs or water sources. A nice map showing the locations of the backcountry campsites in Zion National Park can be found here. Before trying to reserve a permit, you will want to study the map and have an idea of which campsites will work best for your daily mileage.
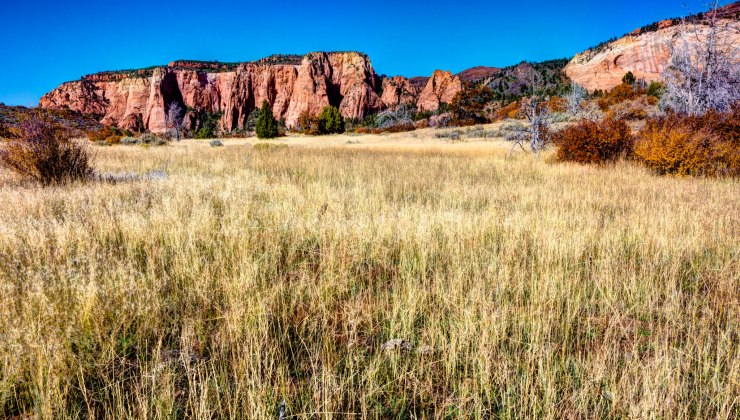
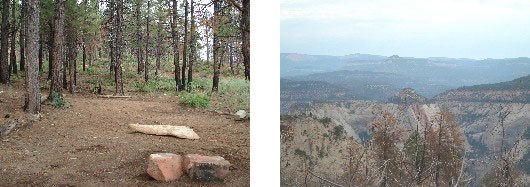
For the specific itinerary described in this report, the first night you camp at either site #11 or #12 along the La Verkin Creek Trail. Site #11 can be reserved online and accommodates up to 4 people, while site #12 is available for walk-ins only and accommodates up to 8 people. Both sites are located near the creek (flows year round) and are just past the junction with the Hop Valley Trail. For the second night, you camp in the at-large, dispersed camping zone to the southwest of Wildcat Spring (flows year round). In the at-large camping zones, you must place your site at least 200 feet from the trail and 1/4 mile from natural springs. The third night, you hike along the West Rim Trail and then camp at either campsite #1 or #2 near the West Rim (Cabin) Spring (flows year round). Site #1 is for walk-ins only and accommodates up to 12 backpackers and site #2 is a small reservable site that works for 2 backpackers. On the 4th and final night, you camp in the at-large dispersed area along the East Rim Trail near the Stave Spring (seasonal flow).
Click here to read more about Logistics
Logistics: The Zion Traverse is a point-to-point trek and thus presents a logistical challenge. The start and end points are roughly 55 miles apart or 80 minutes driving. Backpackers will either need two cars (one placed at each trailhead), will need to swap keys with another hiking party, or will need to arrange for a private shuttle. Unfortunately, the public shuttle bus service in Zion National Park does pick up and drop off at the starting/ending trailheads for this trek.
If you plan to hire a private shuttle or taxi, you have a couple options. It is probably best to arrange for the shuttle ride the morning you start your trek. You can park your personal vehicle at the East Rim Trailhead and then have the shuttle drive you to the Lee Pass Trailhead. This way your vehicle is waiting for you when you finish your hike 5 days later. Zion Adventures runs a Zion Traverse that costs roughly $75 per person, Zion Guru has a shuttle that varies from $100 to $40 per person depending on group size, and Zion Rock Guides operates some shuttles in the park. Be sure to inquire about current prices and ask about shuttle availability before making any concrete plans.
Click here to read more about Difficulty
Trail Conditions and Difficulty: Overall the Zion Traverse is a challenging hike due to the length, elevation change, and the lack of water in several sections of the trail. The trails are moderately well marked, though there are abundant game and cattle trails that can sometimes lead hikers astray. You will want a topographic map and/or GPS device to ensure you stay on trail. Getting off trail in Zion National Park can be dangerous given that there are not many reliable water sources in the park.
This trek should only be undertaken in the spring (April-May) or fall (mid September through early November). In the winter, snow and ice blankets much of trails and makes the trek dangerous. In the summer, temperatures are hot and many of the natural springs dry up. If you plan to hike the trek in the summer, you should work with the park rangers to develop a water plan for the trek. This may require caching water at the Hop Valley Trailhead, Wildcat Canyon Trailhead, or other areas of the trail before starting your trek. Note that only experienced desert backpackers should attempt the Zion Traverse in the summer. Most everyone else should focus on the spring or fall, which will provide the most enjoyable and safest experience.
Backpackers must also be careful with water sanitation and purification in Zion National Park. The National Park Service recommends treating Zion spring and river water with both filtration and chemical disinfection or by boiling the water for longer than 3 minutes. In addition, water in the Hop Valley section of the park should be avoided entirely because this is an active grazing area with animal contamination in the water. I recommend using both a Sawyer filter and iodine tablets to treat water.
The other main danger in the park is flash floods. Hikers should avoid entering narrow canyons if the weather is ominous or if it recently down poured. There are rattlesnakes and mountain lions in the park as well. Mountain lions are rarely seen and not a large safety concern and hikers should be aware and on the lookout for rattlesnakes. Hikers do not need to worry about bears, but should still consider hanging food to avoid having small critters break into their food stashes.
Supplies: Temperatures can vary widely within the park in the spring and fall. It is best to bring layers because lows can sometimes reach down into the 30s at night. During the day, sun protection is important. Backpackers should be prepared with sun screen and/or a hat, long sleeves, and pants.
Below is a list of the gear recommended for backpacking the Zion Traverse:
Hiking clothes
- a lightweight hiking rain jacket (North Face Venture 2 Jacket)
- fast drying synthetic hiking pants (prAna Zion Pants)
- a quick drying long sleeve hiking shirt (Columbia Silver Ridge L/S Shirt)
- wool outer socks (People Socks Moreno 4-pack)
- thin blister preventing base socks (WrightSock double layer Coolmesh)
- quick drying synthetic boxer briefs (ExOfficio Give-N-Go)
- Gore-tex hiking shoes (adidas Outdoor Terrex Fast R Gore-Tex Shoe)
Clothes for camp
- wool leggings (Minus33 Merino Wool Kancamagus Midweight Bottom)
- wool base layer shirt (Minus33 Merino Wool Chocorua Midweight Crew)
- warm wool overshirt (Pendleton Long Sleeve Classic-Fit Board Shirt)
- lightweight down jacket (Patagonia 800-fill Down Jacket)
- lightweight camp shoes (Xero Z-Trail lightweight sandal)
Hiking gear
- topographic map (Nat Geo topographic map)
- trekking poles (Black Diamond Trail Ergo Cork Trekking Poles)
- 2 liter hydration bladder (Platypus Big Zip Water Reservoir)
- 65 liter backpack (Osprey Atmos 65 Liter pack)
- water filtration system (Platypus gravity filtration system)
Camp gear
- strong tent with rain-fly (Alps Mountaineering Chaos 2 Tent)
- inflatable sleeping pad (Therm-a-Rest Trail Pro Sleeping Pad)
- sleeping bag (REI Co-op Igneo 25 Sleeping Bag)
- inflatable camping pillow (Ultralight Inflating Pillow)
- lightweight backpacking chair (Helinox Chair Zero)
- lightweight lantern (MPOWERD Luci Outdoor 2.0)
- headlamp (Black Diamond Cosmo Headlamp)
- multi-tool with knife (Gerber MDime Mini Multi-Tool)
- Ursack (Ursack Major bear bag) or bear canister (BearVault BV500)
- lightweight stove (MSR PocketRocket 2)
- lighter (BIC plastic lighters)
- 2 liter pot (GSI Outdoors Halulite Boiler Pot)
- coffee cup (GSI Outdoors Glacier Stainless Cup)
- lightweight spork (Snow Peak Titanium Spork)
- small, quick drying towel (REI mutli towel mini)
Random
- wet wipes (Stall Mates individually wrapped wipes)
- mole skin for blisters (Blister medic kit)
- lightweight trowel (GSI Sanitation Trowel)
- small amount of duct tape for gear repairs
- chapstick and sun screen
Food and drink
- a variety of my favorite dehydrated meals
- electrolyte replacement (NUUN Hydration Tablets)
- quick snacks (Clif Shot Bloks and Clif energy bars)
- instant coffee (Starbucks VIA)
- small plastic water bottles filled with whisky 🙂
……….
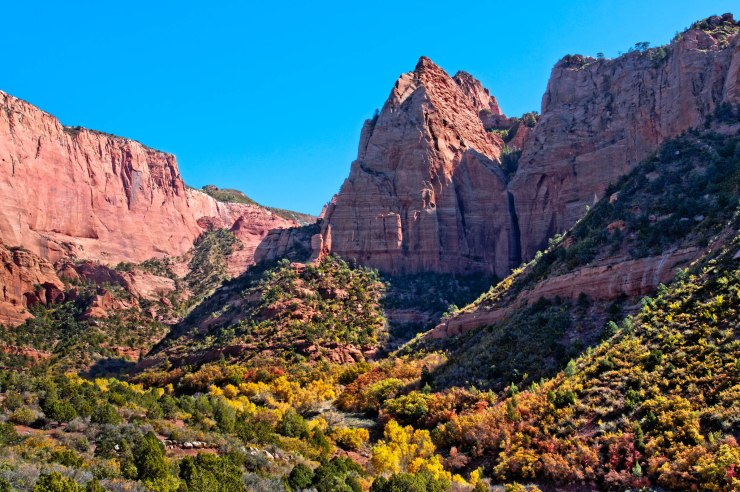
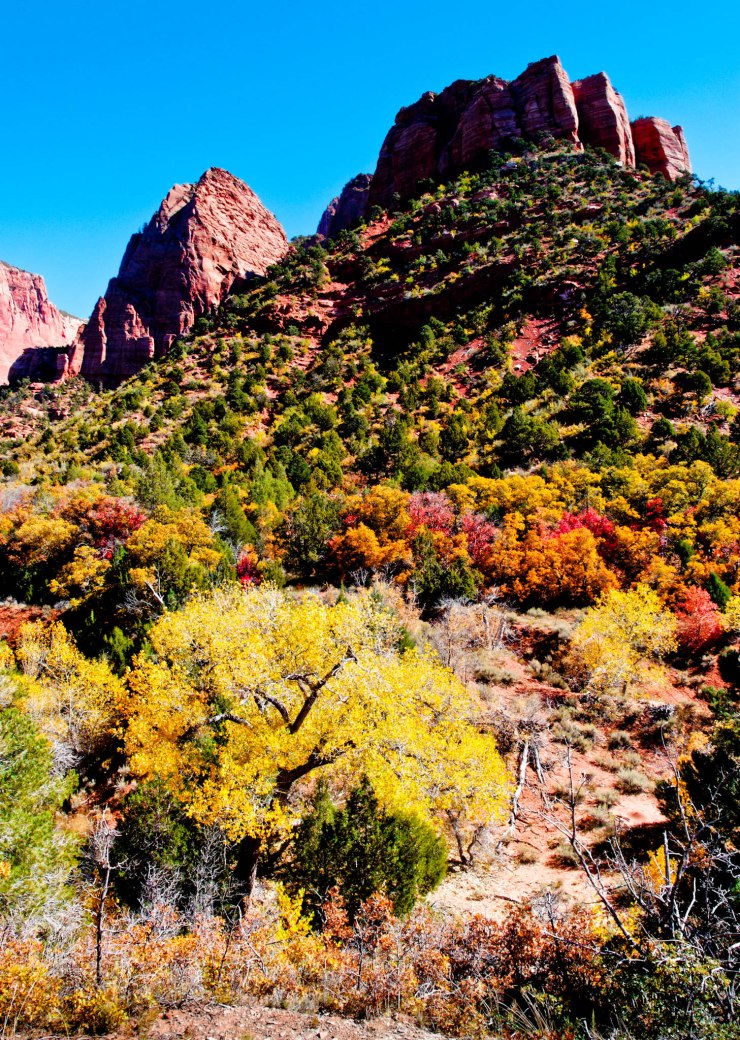
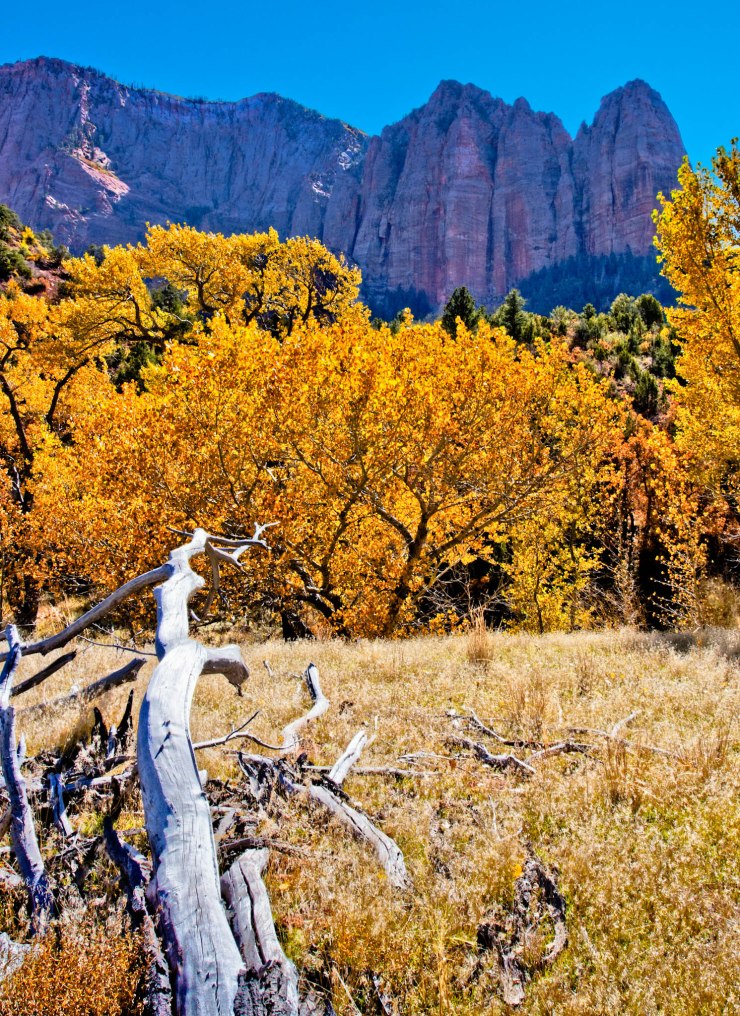
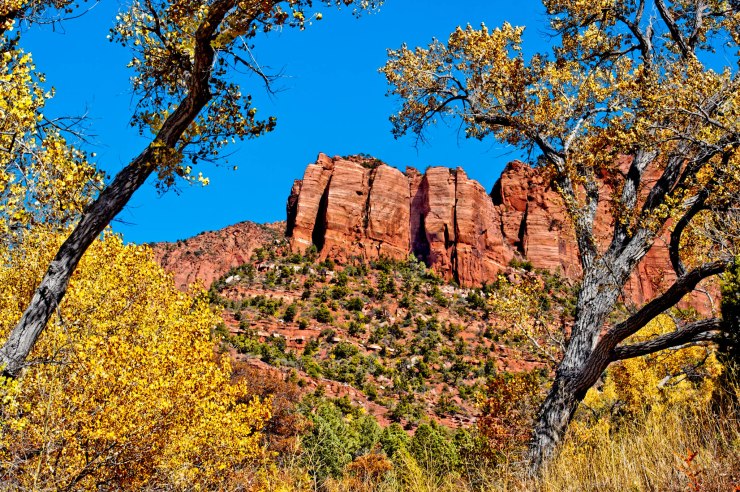
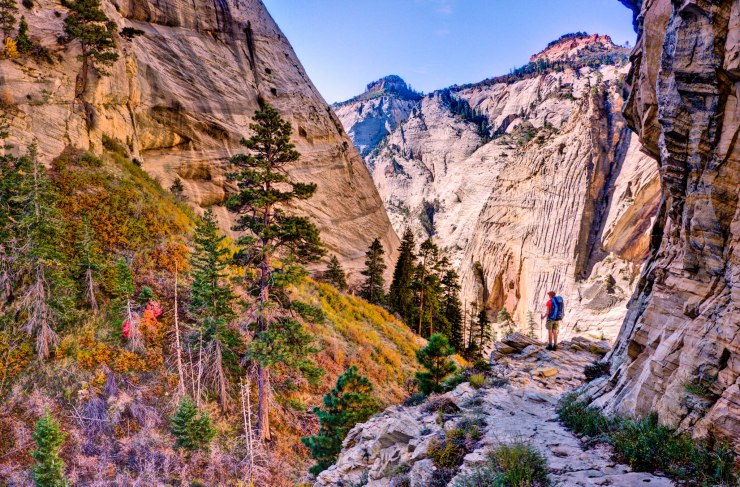
Day 1: 7.4 miles; +870 feet / -1,540 feet; Lee Pass Trailhead to La Verkin Creek Trail, campsite #11 or #12

PDF map of the Day 1 hike on the Zion Traverse

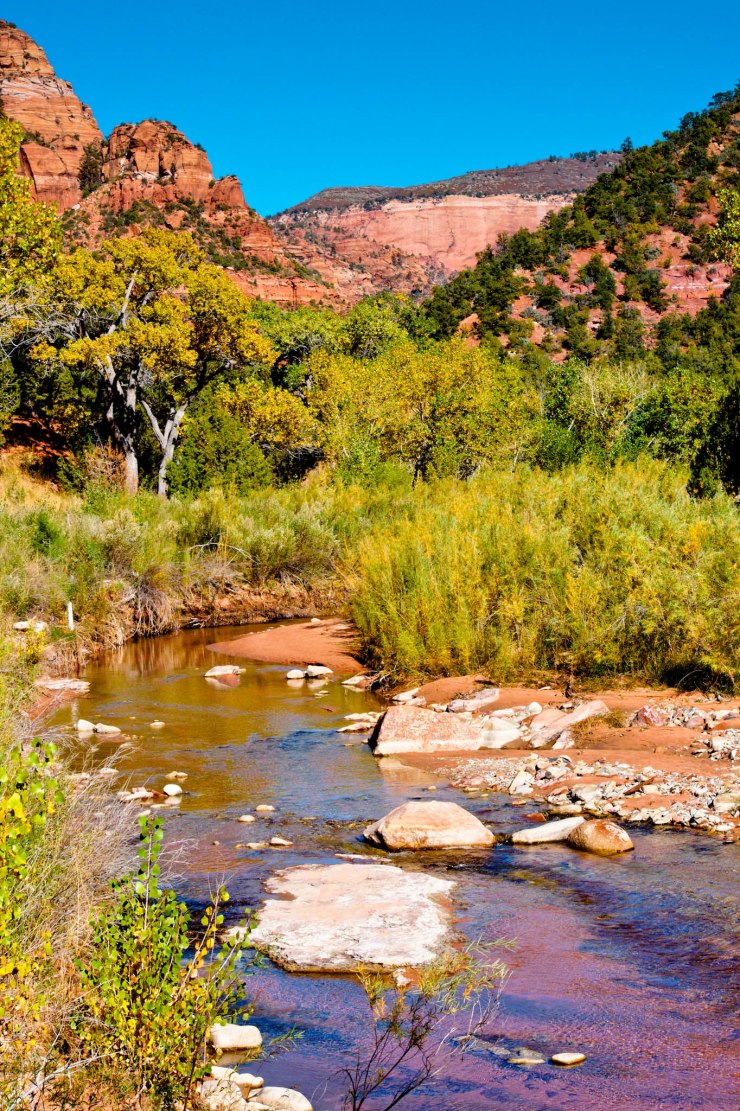
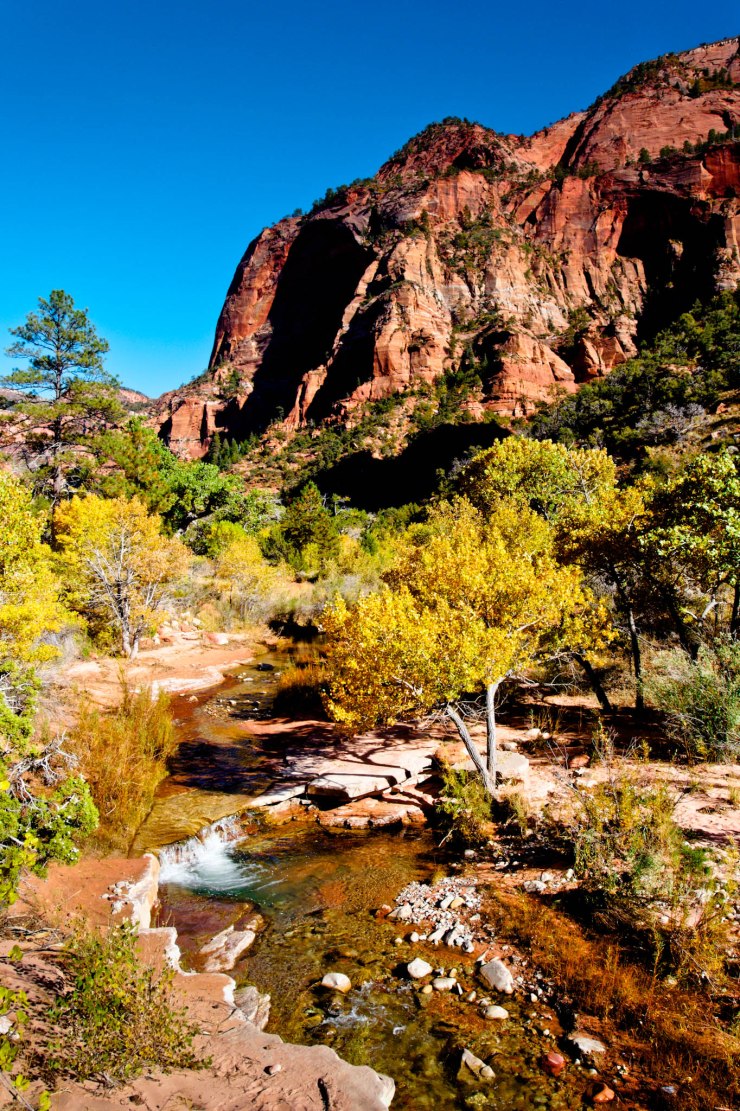
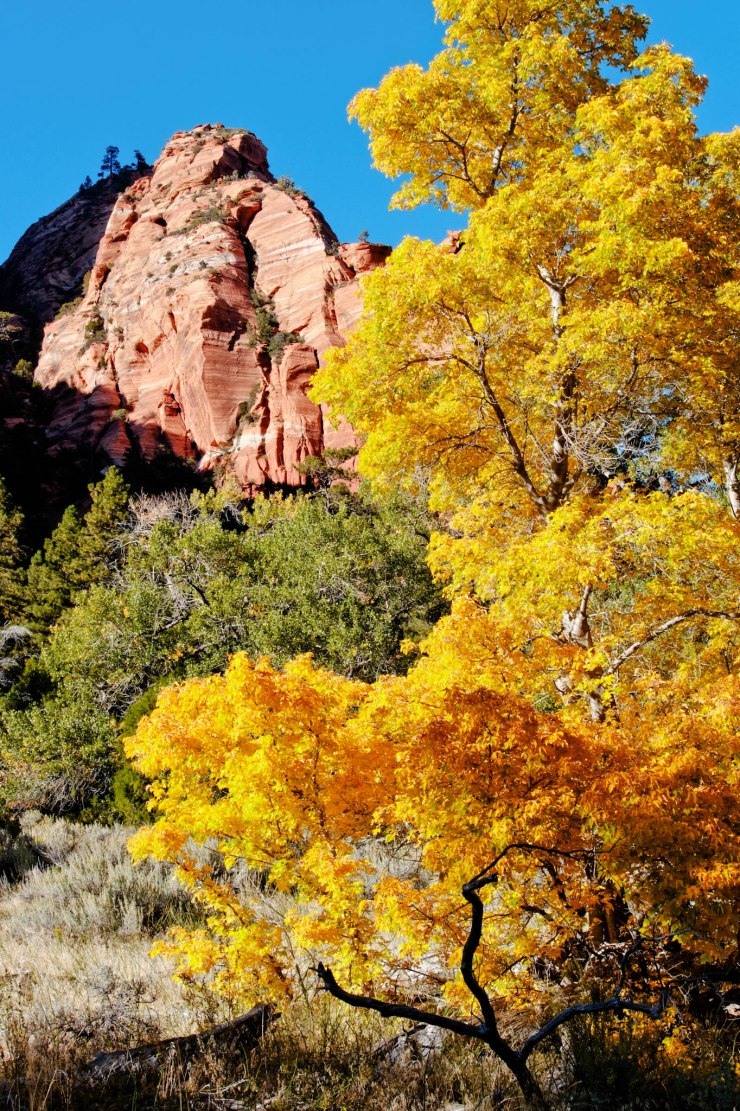
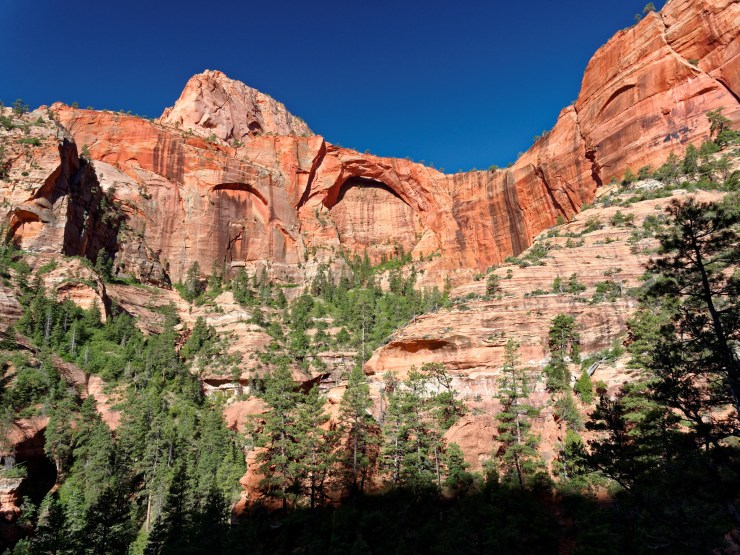
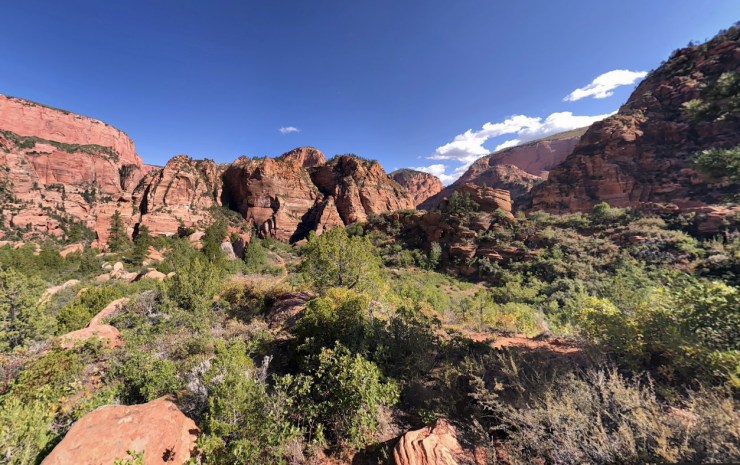
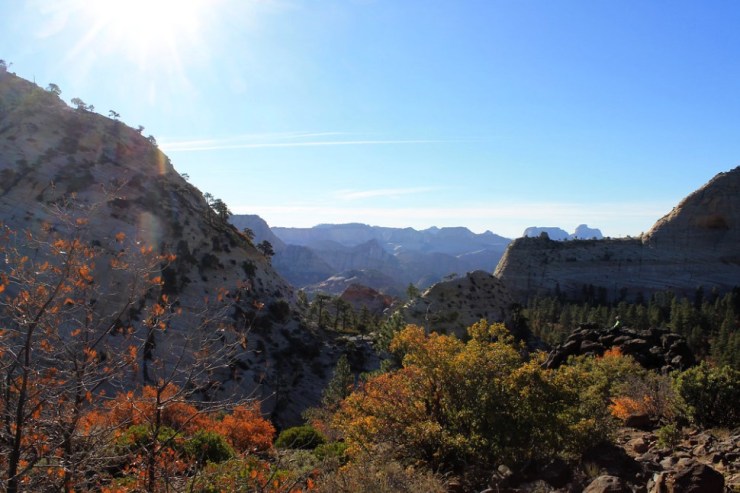
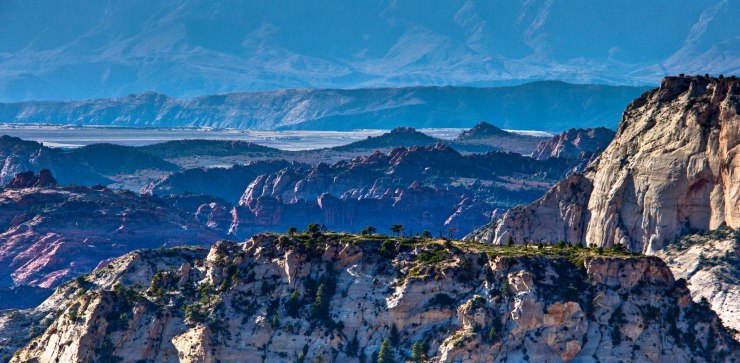
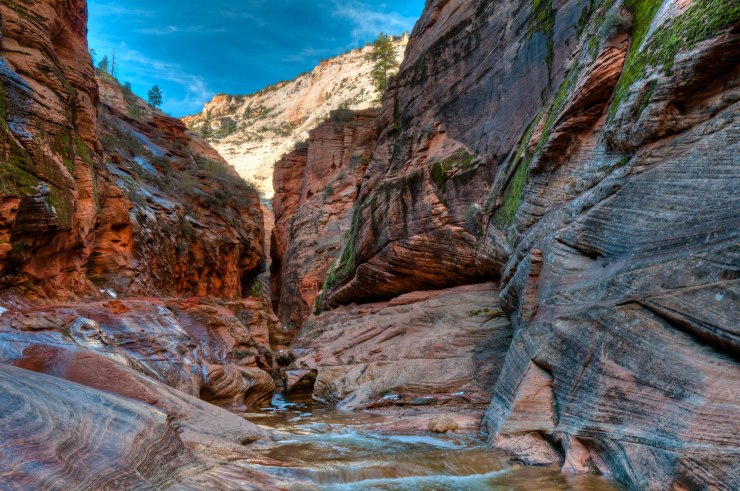
The first day of the Zion Traverse (Trans Zion Trek) starts with a relatively modest ~7.5 mile hike with less than 1,000 feet of elevation gain. From the Lee Pass Trailhead, you follow the La Verkin Creek Trail towards the junction with the Hop Valley Trail. The beginning of the trail follows Timber Creek and passes by several open canyons and rock cliffs while descending roughly 750 feet in the first 4.5 miles. After the 4.5 mile mark, the trail begins to follow La Verkin Creek as it gradually ascends. In this section you have nice views of cliffs on either side of the trail.
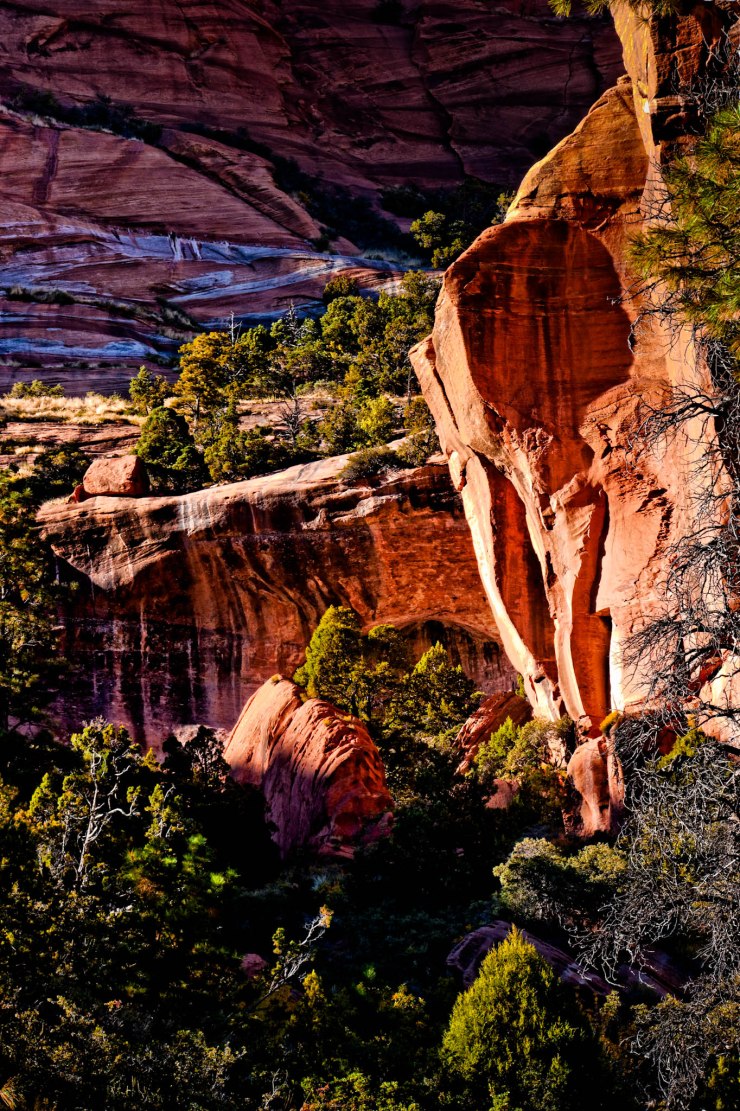
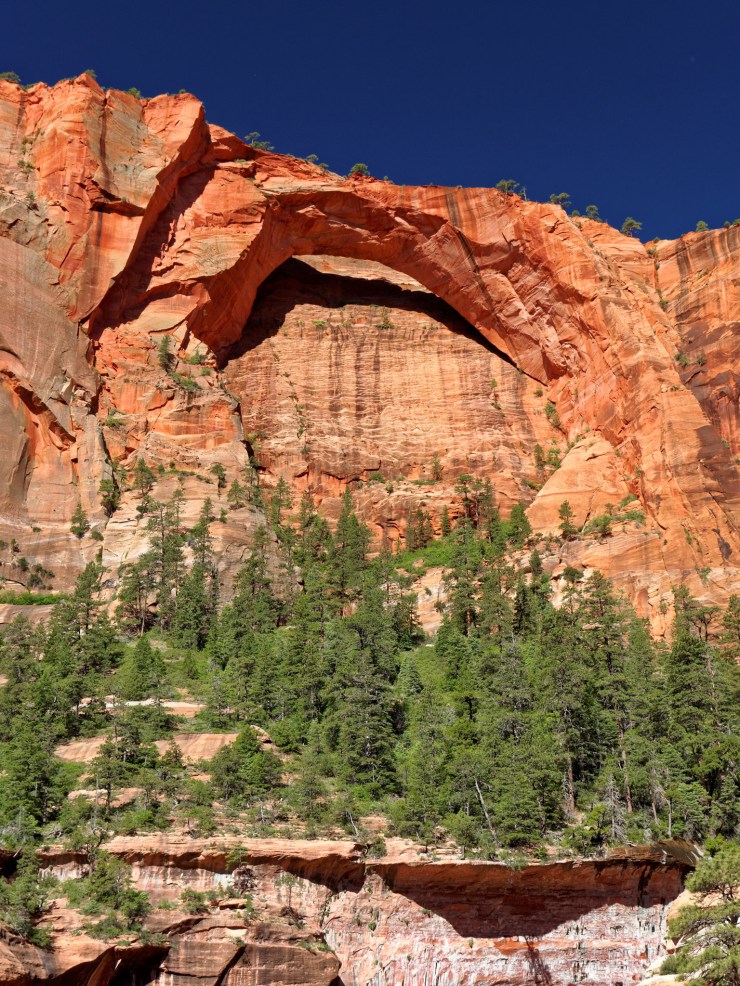
At the 6.5 mile mark, there is a junction with a short trail that leads to the Kolob Arch. This arch is one of the largest free-standing rock arches in the world and is worth a short side-trip. The hike to the Kolob Arch from the La Verkin Creek Trail is only 1 mile round trip and +/- 100 feet elevation.
After the sidetrip to Kolob Arch, continue another mile or so northeast along the La Verkin Creek Trail to reach campsites #11 and #12. Note that you will pass by the junction to the Hop Valley Trail. These campsites are near the creek and have nice views of the surrounding cliffs.


……….
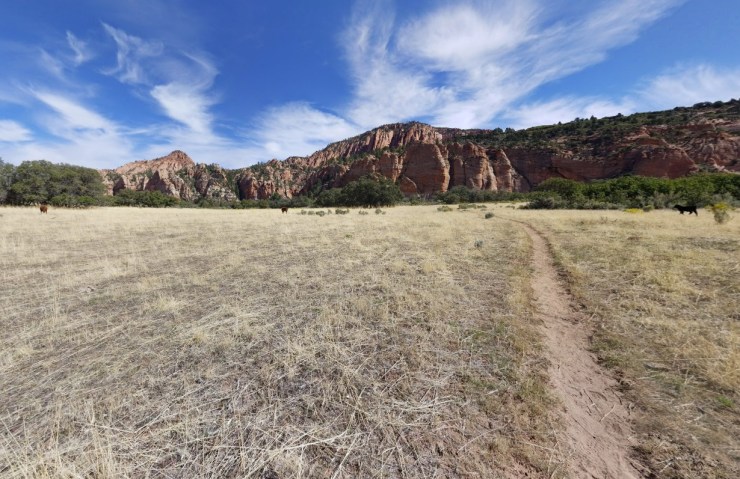
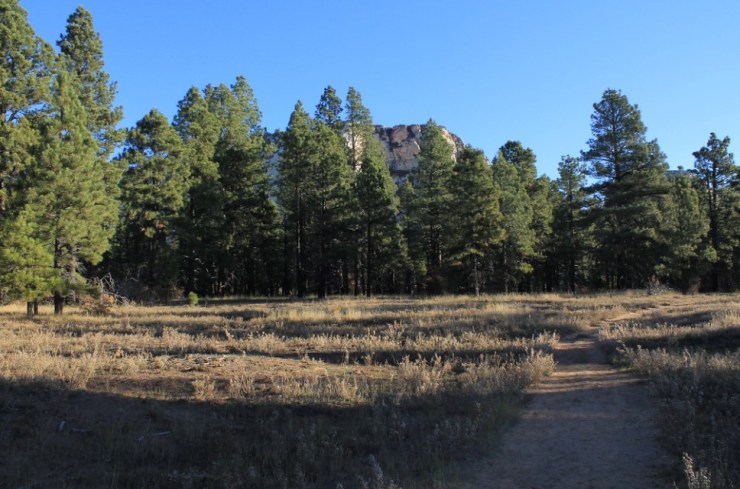
Day 2: 13 miles; +2,840 feet / -820 feet; La Verkin Creek to Wildcat Spring, at-large camping
PDF map of the Day 2 hike on the Zion Traverse
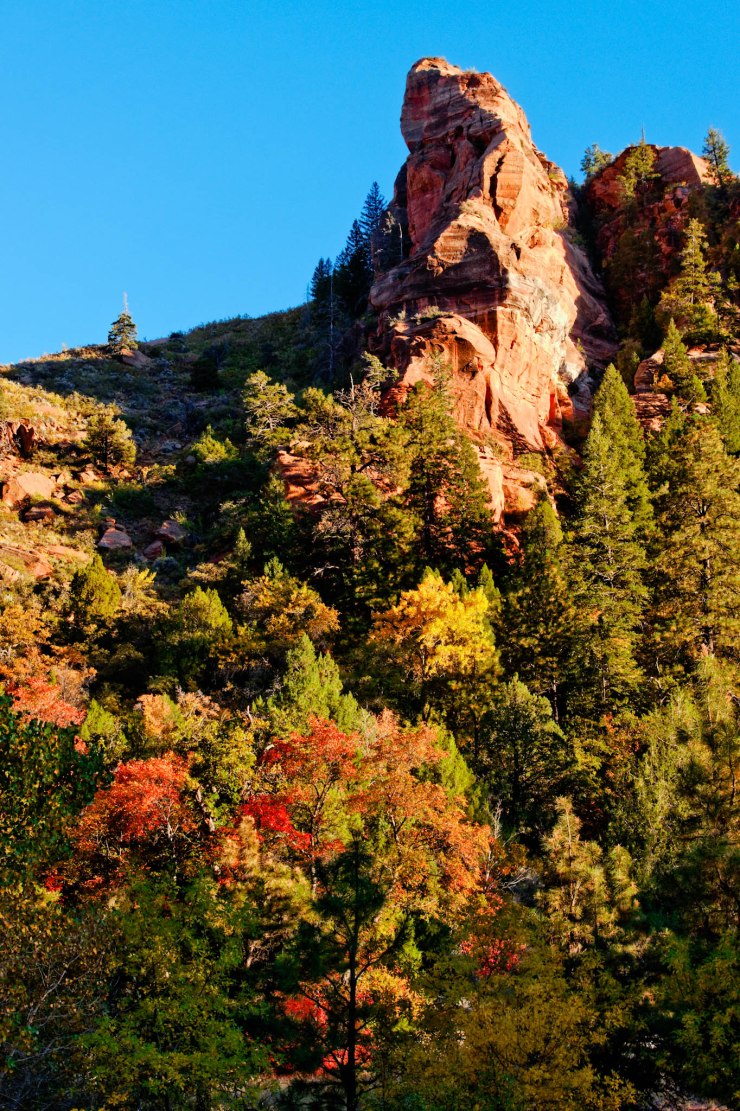
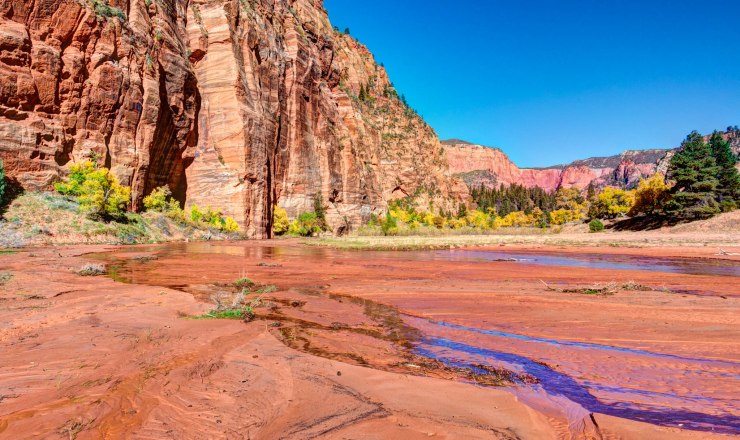
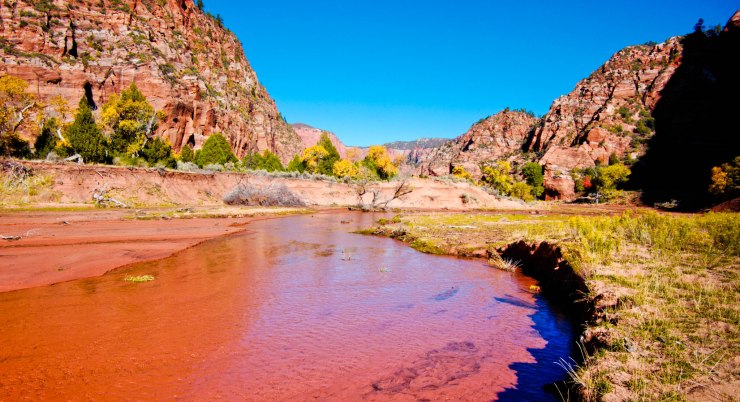
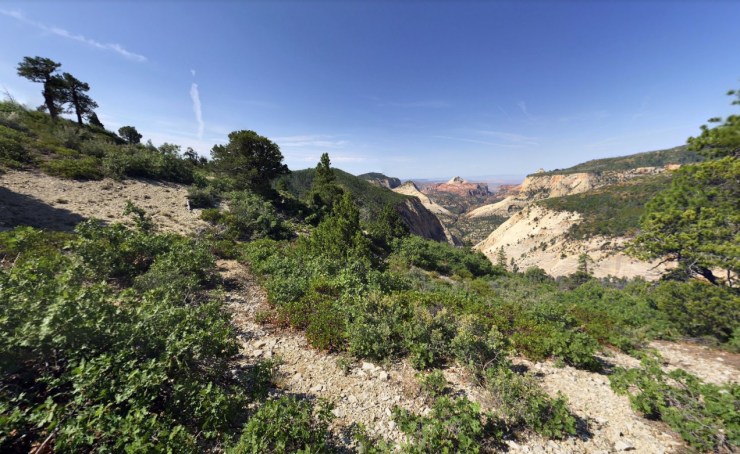
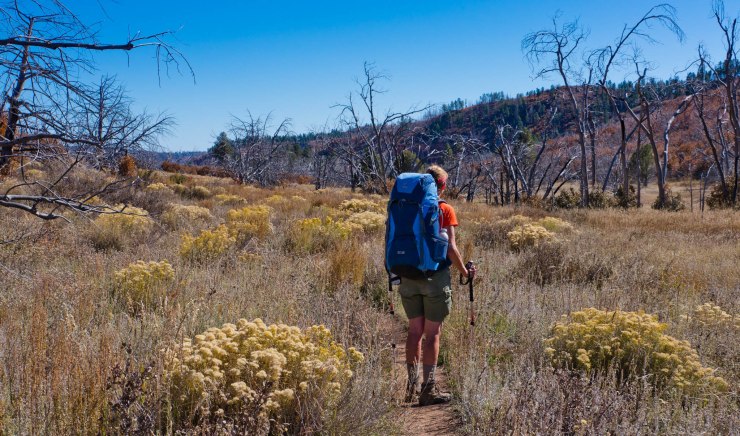
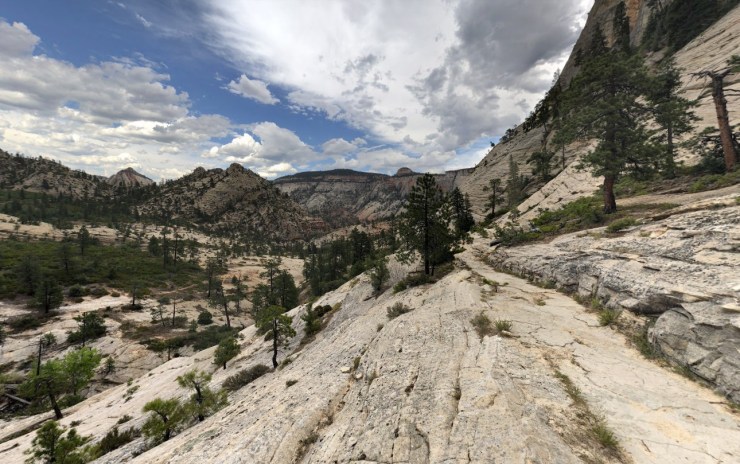
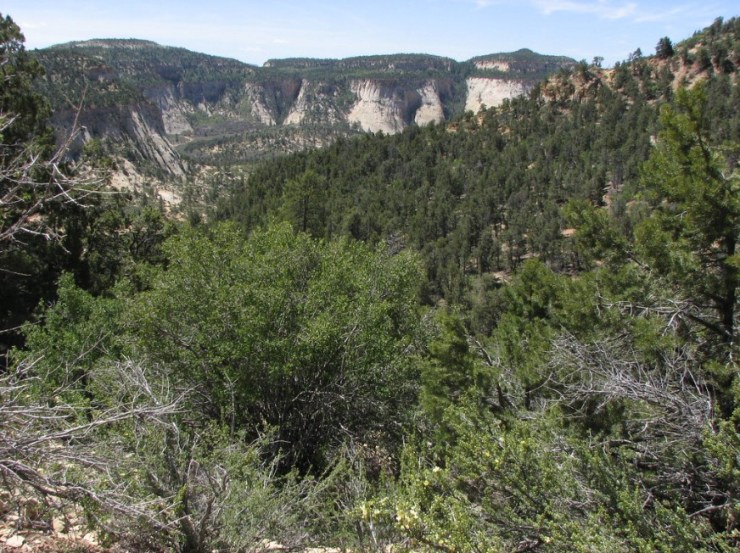
On the second day of the Zion Traverse (Trans Zion Trek) you have a difficult 13 mile hike with over 2,500 feet of elevation gain. Over the course of the day you hike along the entirety of the Hop Valley Trail, the Connector Trail, and then roughly two thirds of the Wildcat Canyon Trail. The Hop Valley Trail provides some great views. You start out in a wide valley with rock walls on either side. The trail then starts meandering along side the creek as the canyon narrows. By mile 5 or so, the trail opens up again as you hike out of Hop Valley and apprach the Hop Valley Trailhead and Connector Trail.
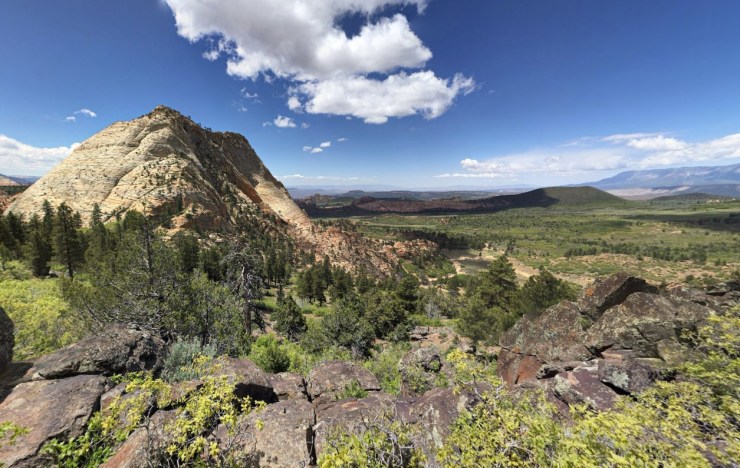
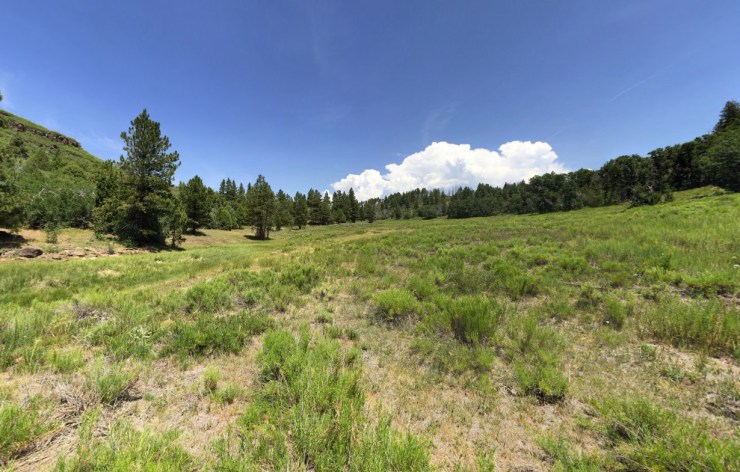
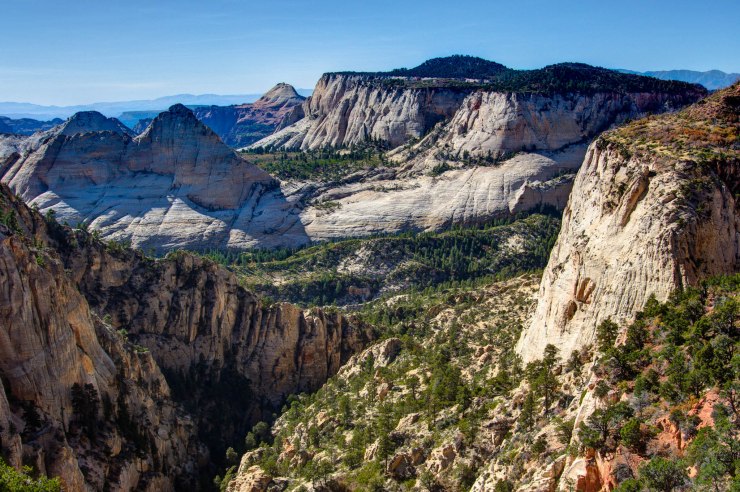
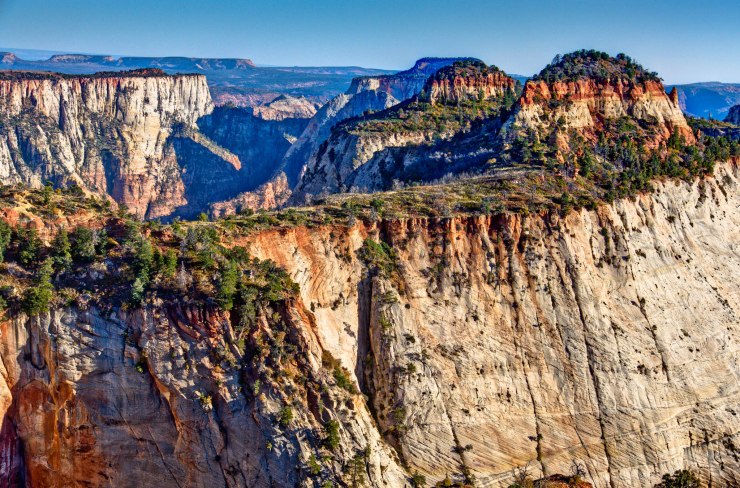
At the 7 mile mark, you reach the trailhead and begin hiking east on the Connector Trail. This section of the trail is not the most remarkable, but provides some nice expansive views. At the ~10.5 mile mark, you reach a junction with a trail that leads to the Wildcat Canyon Trailhead. At this point, you begin hiking northeast along the Wildcat Canyon Trail. However, shortly after the junction there is a side trail that leads south to the Northgate Peaks viewpoint. If you have the energy, this side trip is definitely worth the effort. From the viewpoint you get a great expansive view of the West Canyon and several prominent rock structures. This sidetrip is 2.1 miles roundtrip with +/- 190 feet of elevation change.
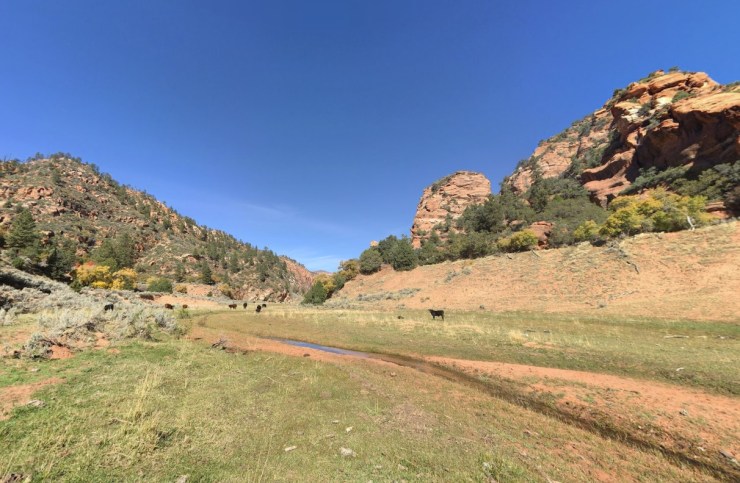
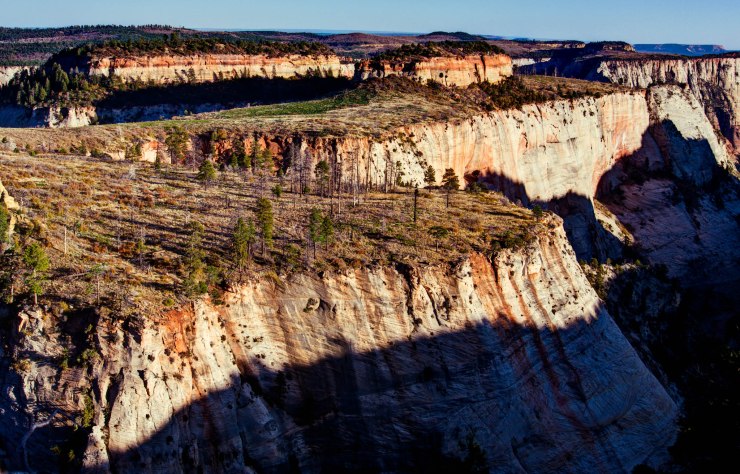
After viewing Northgate Peaks, continue on the Wildcat Canyon Trail for ~2 miles. The trail traverse through a Ponderosa Pine forest and then the views begin to open up as the trail approaches a meadow and a ridge above Wildcat Canyon. This meadow area is all part of the at-large camping area. Once you get close to the Wildcat Spring, you can find your campsite and call it a day. The approximate location of Wildcat Spring is (N 37°22.207′ W 113°02.299′).


……….
Day 3: 13.3 miles; +1,890 feet / -2,520 feet; Wildcat Spring to West Rim (Cabin) Spring, campsite #1 or #2
PDF map of the Day 3 hike on the Zion Traverse

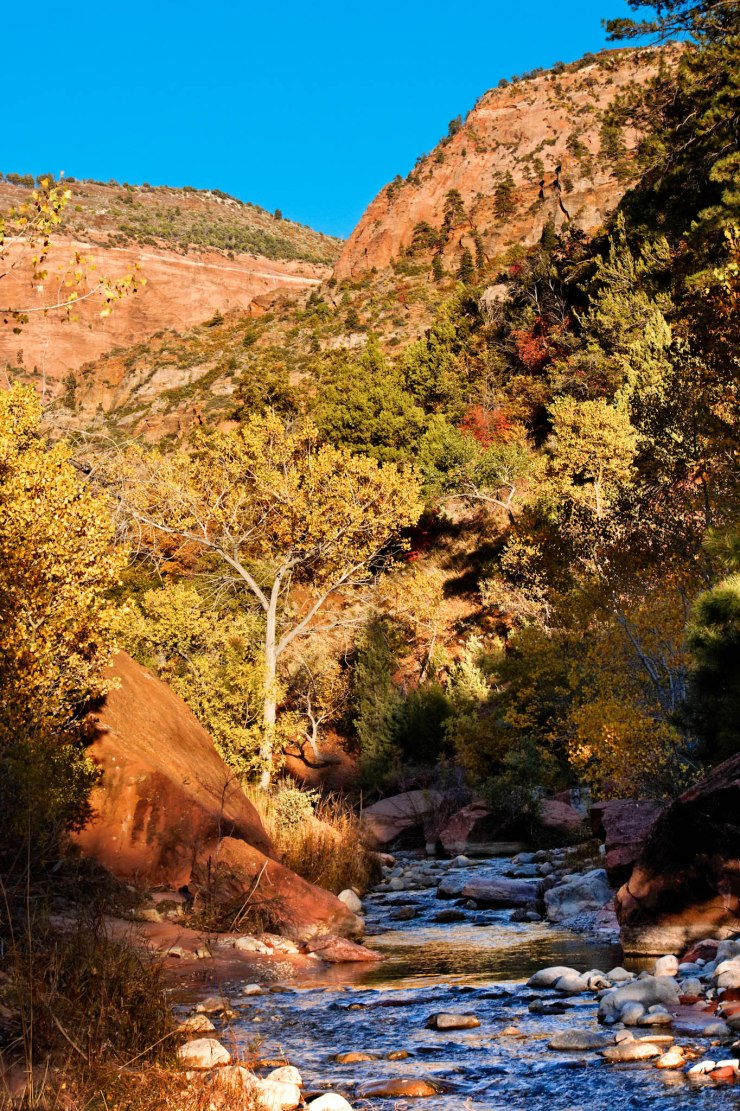
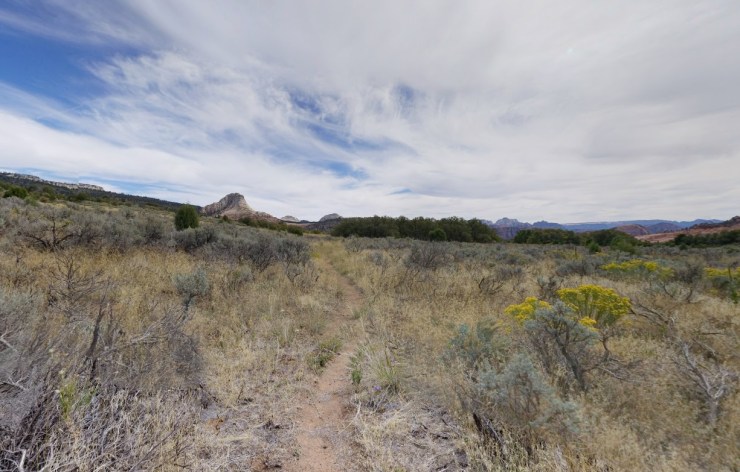
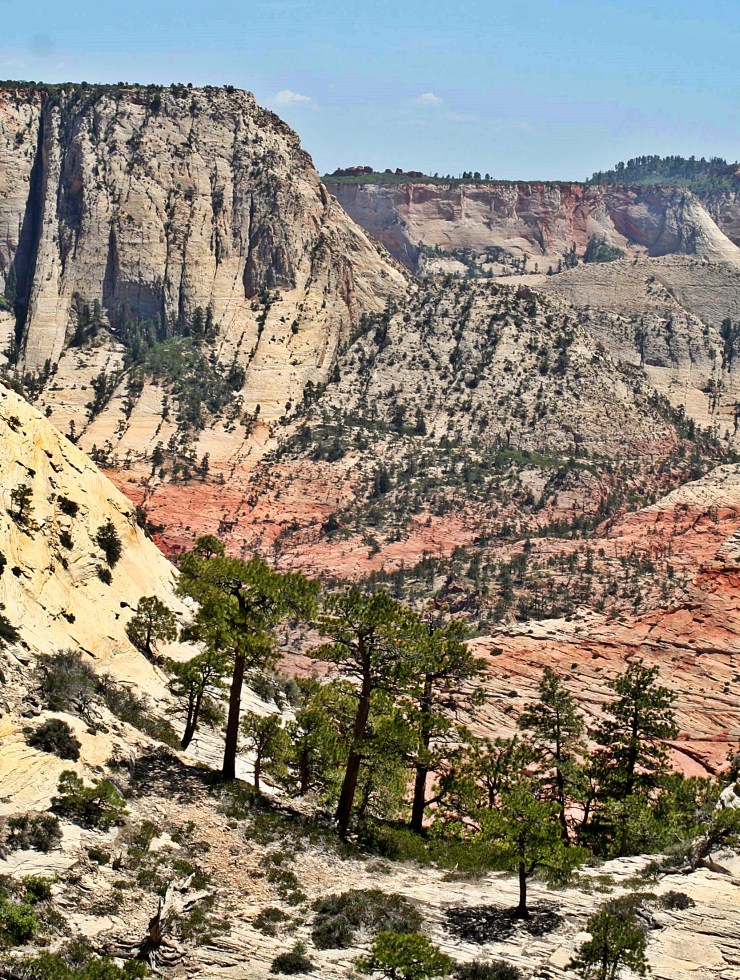
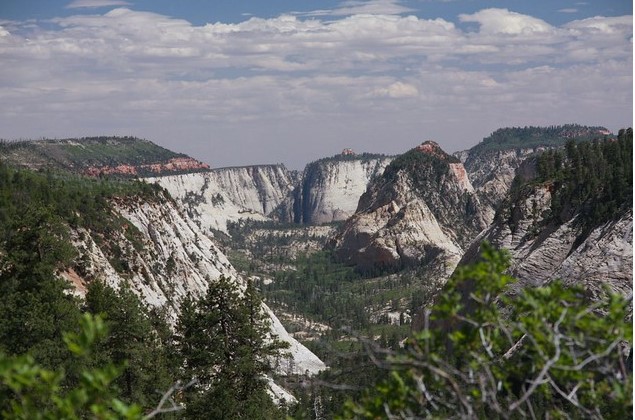
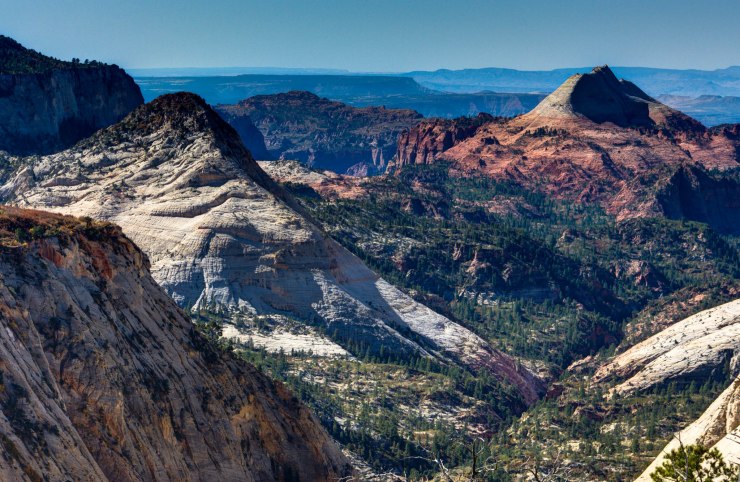
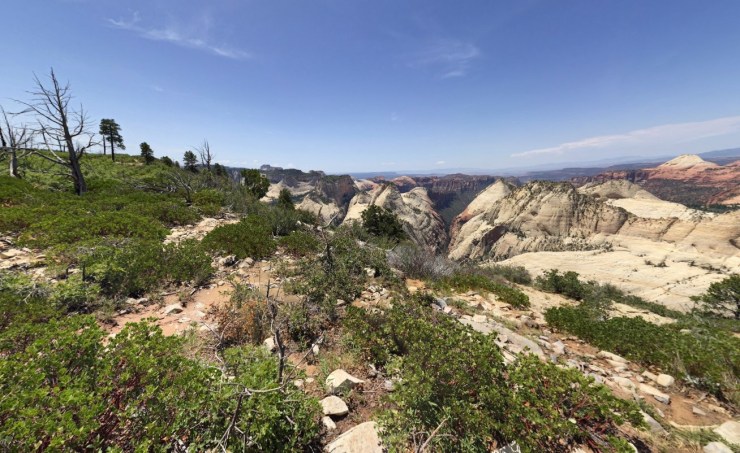
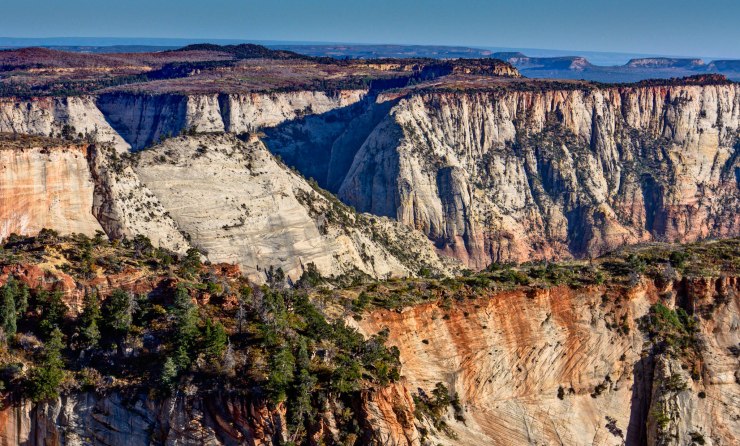
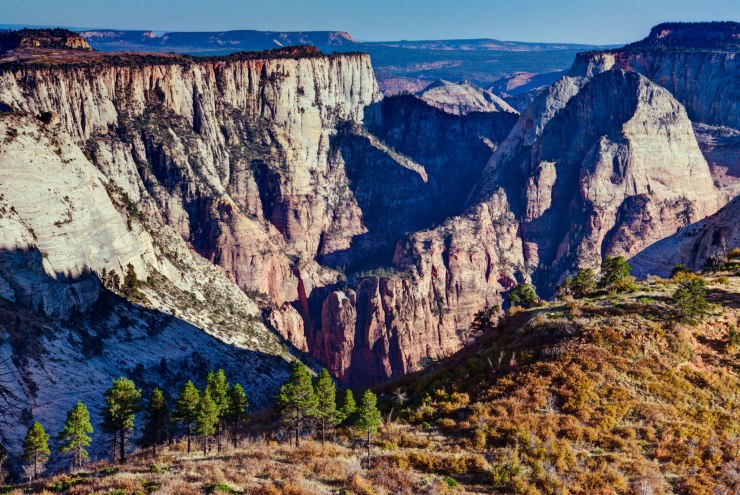
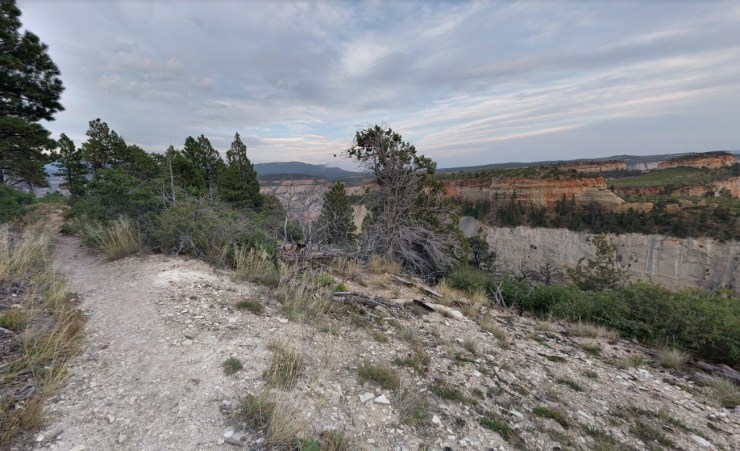
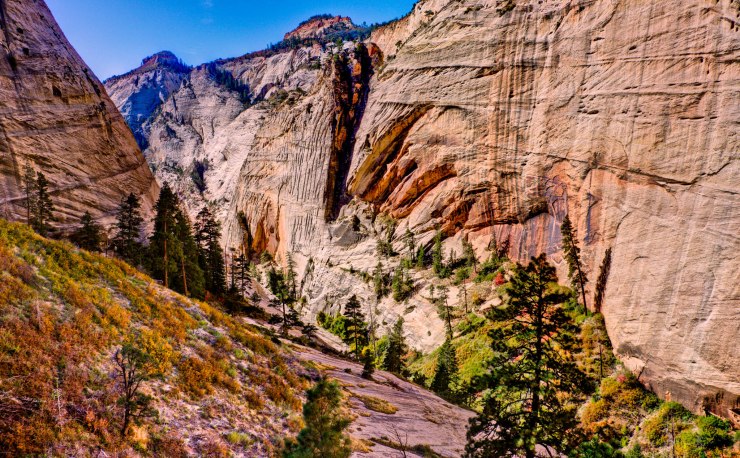
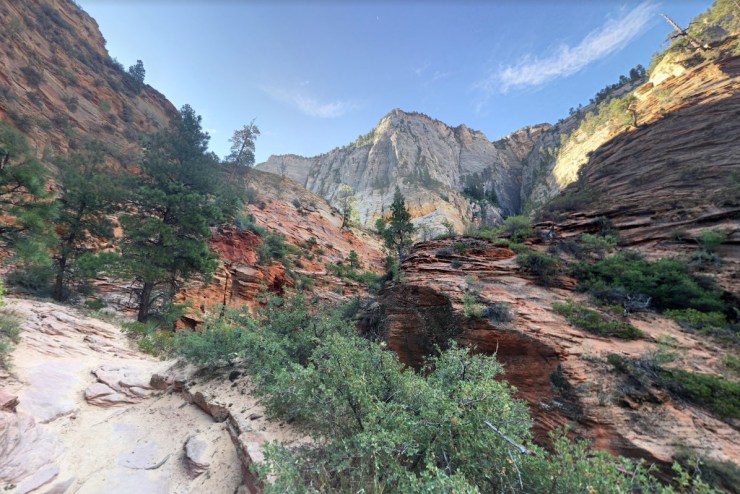
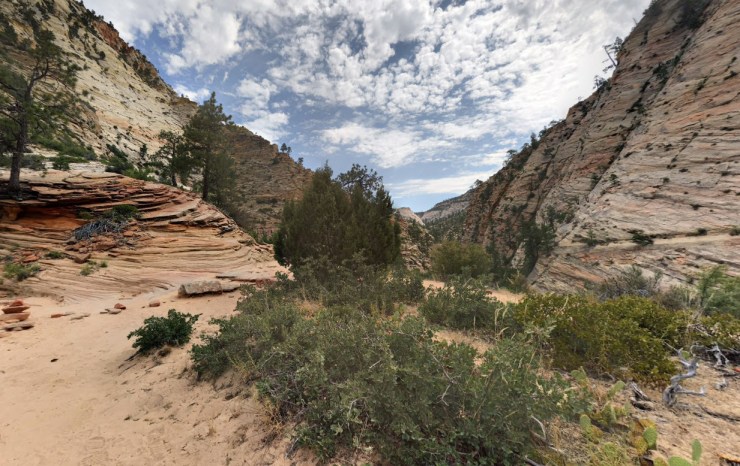
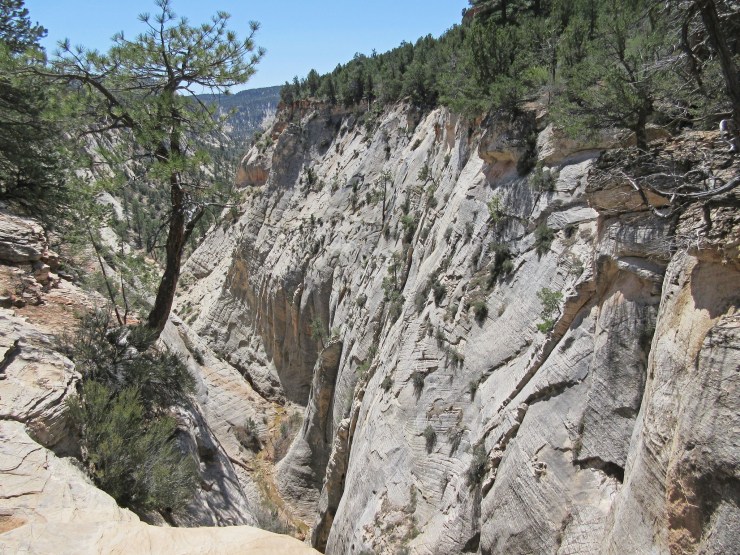
Day 3 of the Zion Traverse (Trans Zion Trek) is another tough day of hiking. You will cover roughly 13 miles and climb close to 2,000 feet. For the first 3.5 miles you continue along the Wildcat Canyon Trail. In this section, the trail skirts along the edge of Wildcat Canyon and provides great views of the deep canyon. The trail crosses the canyon at the 2 mile mark and then ascend over the next mile before reaching the junction with the West Rim Trail.
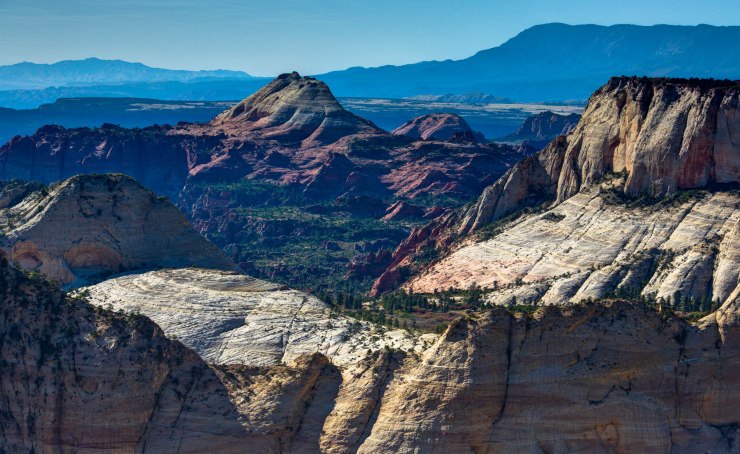
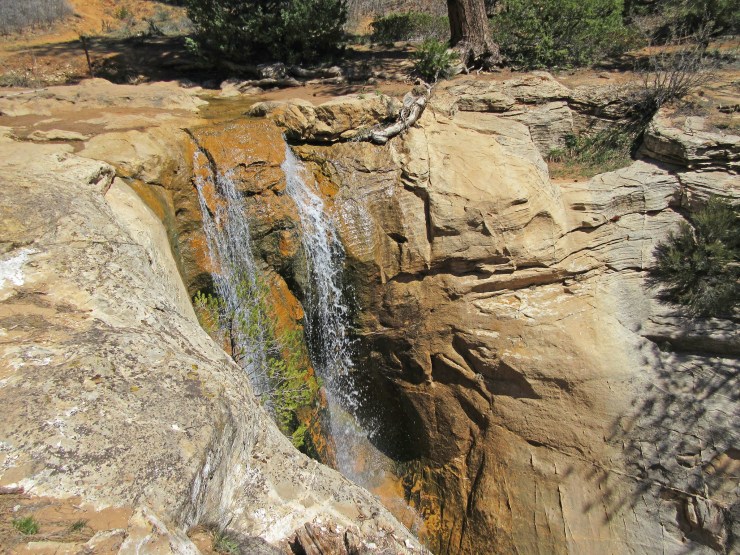
From mile 3.5 onward, you hike south along the West Rim Trail until you reach the West Rim (Cabin) Spring. The first 4 miles of the West Rim Trail gradually descend as the trail traverse across the Horse Pasture Plateau. Along the way you have nice views of Wildcat Canyon. At the 7.5 mile mark, the trail descend down into Potato Hollow. At the 8.5 mile mark you reach the bottom of Potato Hollow. Depending on the time of year, you may be able to refill your water at Potato Hollow Spring (N 37°19’15.0″ W 112°59’14.4″) while you take in the views of Imlay Canyon to the east.
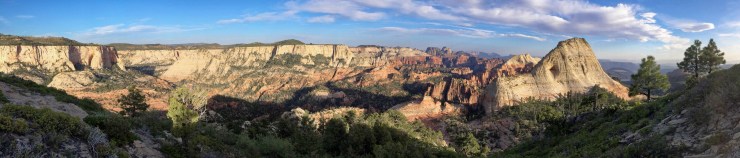
From there, the trail continues south. Over the next 1.5 miles, the climb climbs out of Potato Hollow before reaching a junction between the West Rim Trail and the Telephone Canyon Trail. Continue hiking on the West Rim Trail, which heads south along a ridge overlooking Phantom Valley. The two miles hiking along the ridge provide some really great views of the canyons to the south. Once you reach the 11.5 mile mark, the trail turns to the east and begins a descent down towards Telephone Canyon. Near the 13 mile mark, you will reach Campsite #2 and the West Rim (Cabin) Spring (N 37°17’15.2″
W 112°58’04.2″). To reach Campsite #1, head north slightly along the Telephone Canyon Trail.


……….
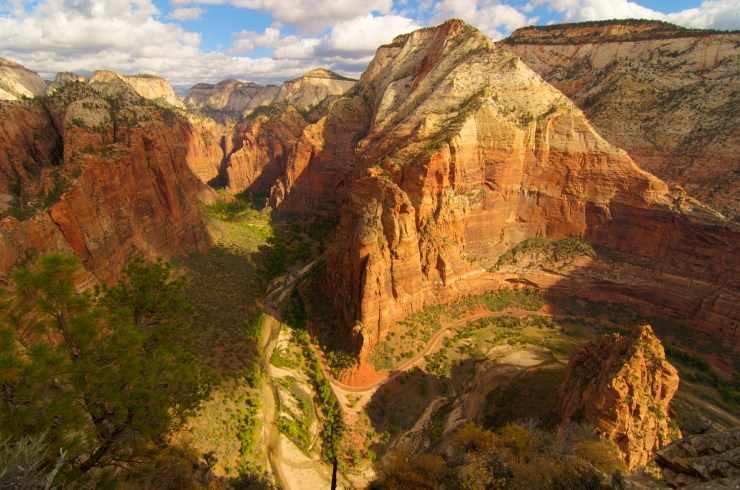
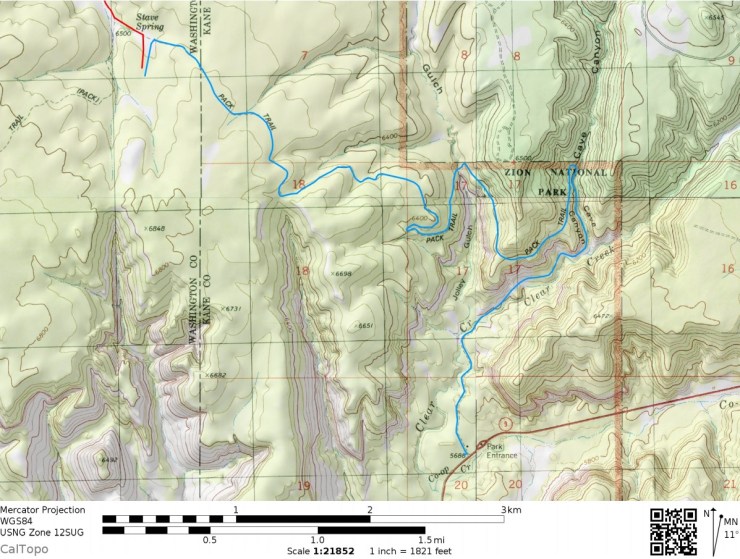
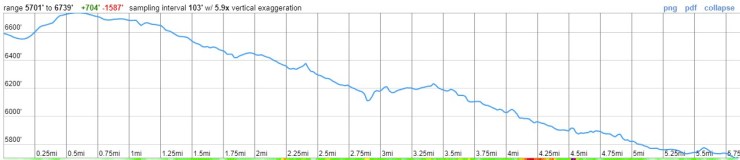
Day 4: 10.8 miles; +3,660 feet / -3,850 feet; West Rim (Cabin) Spring to East Rim (Stave) Spring, at-large camping

PDF map of the Day 4 hike on the Zion Traverse
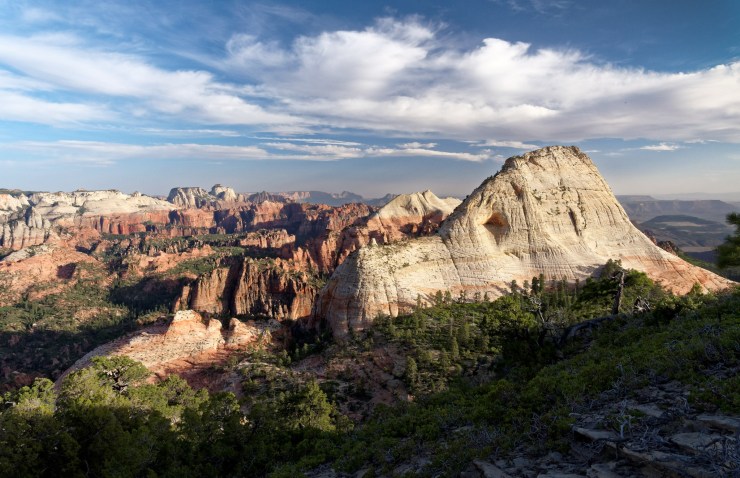
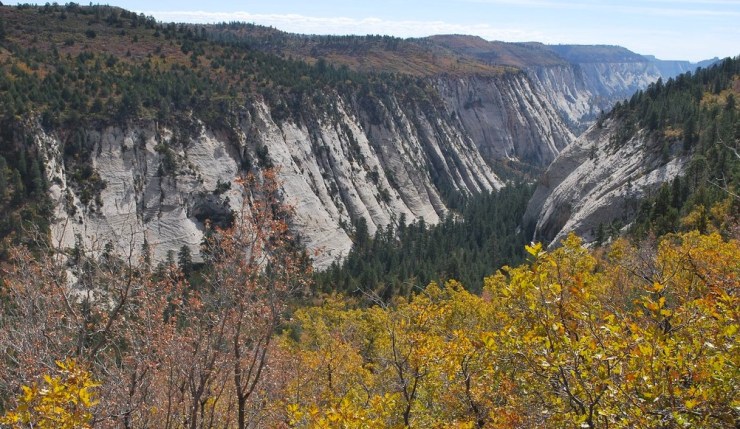
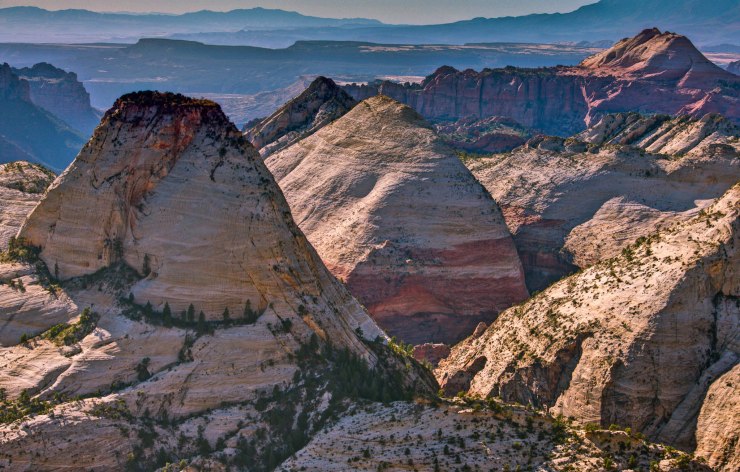
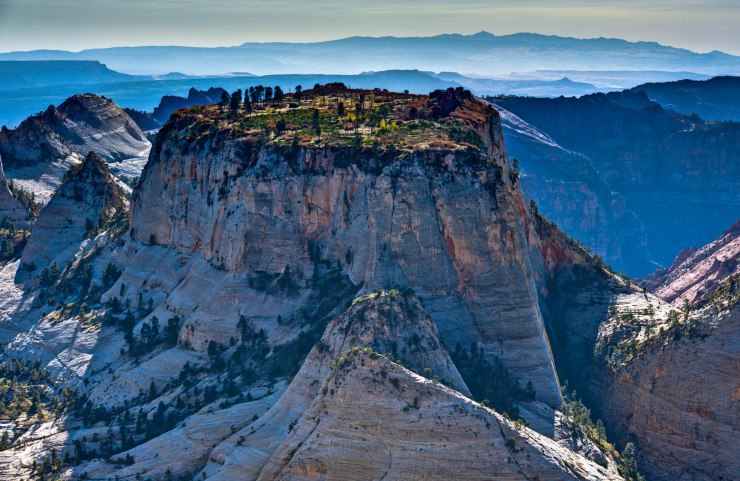
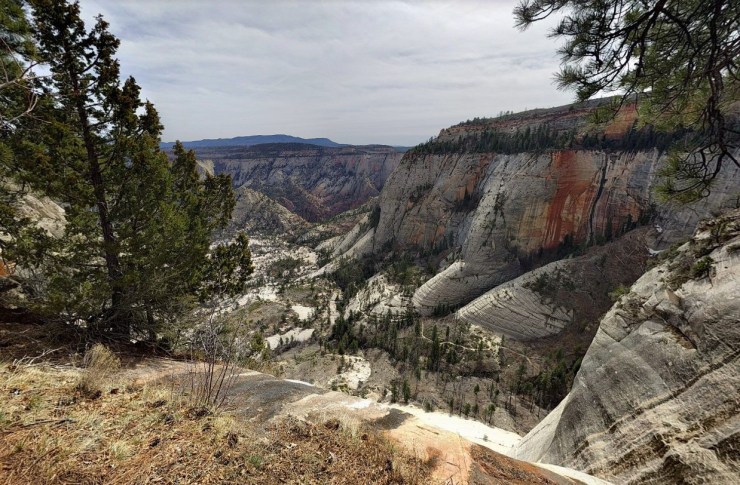
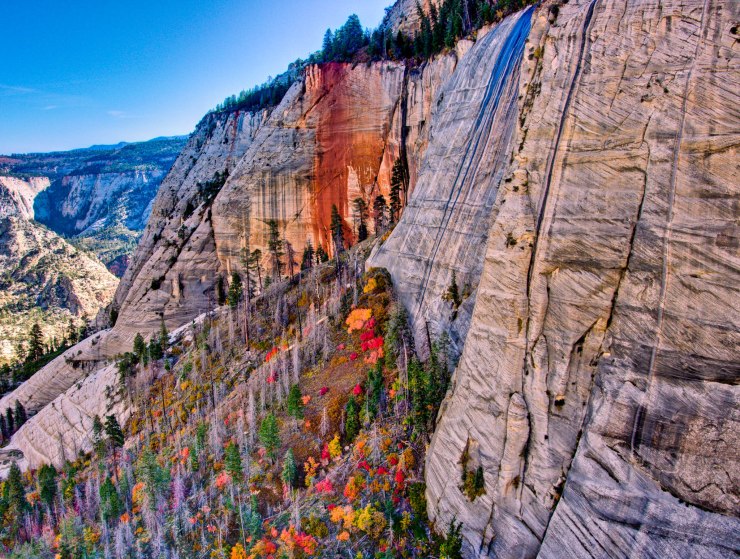
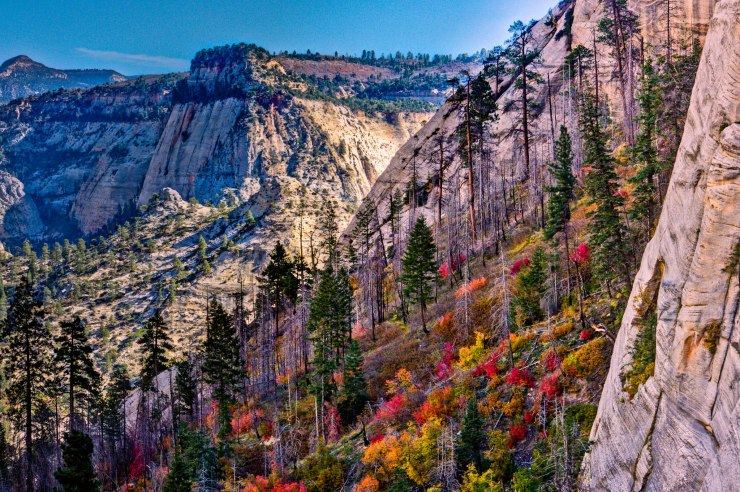
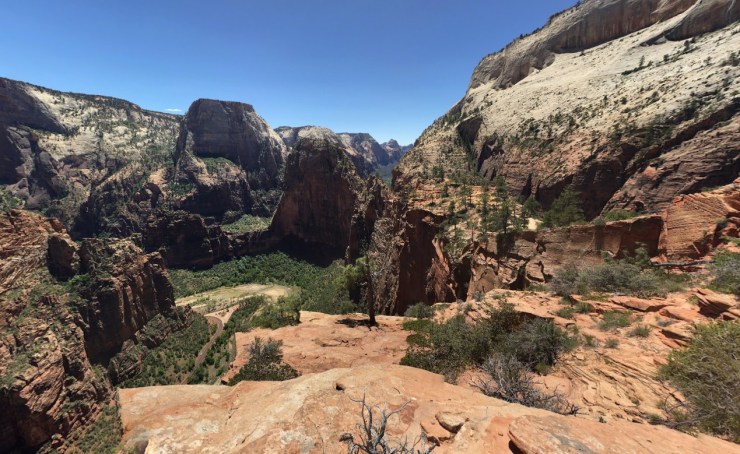
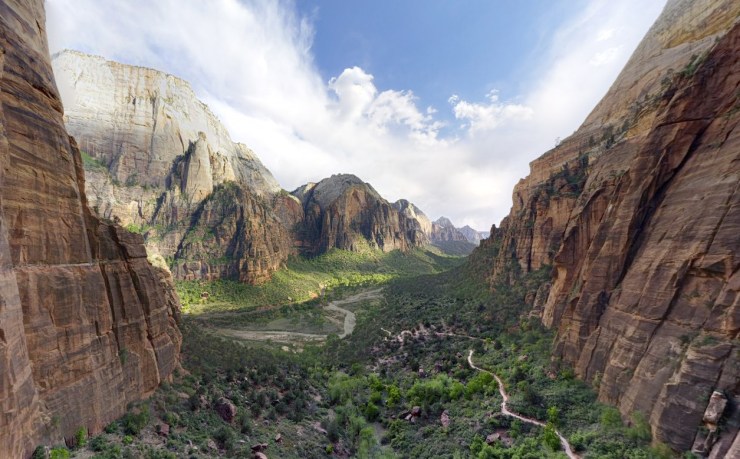
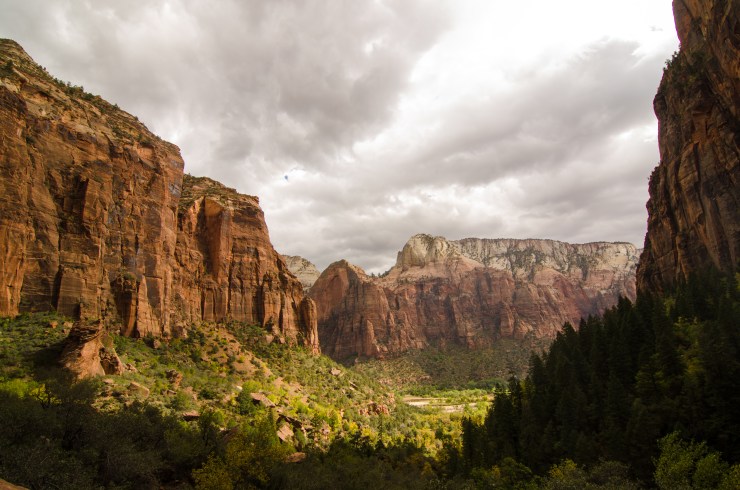
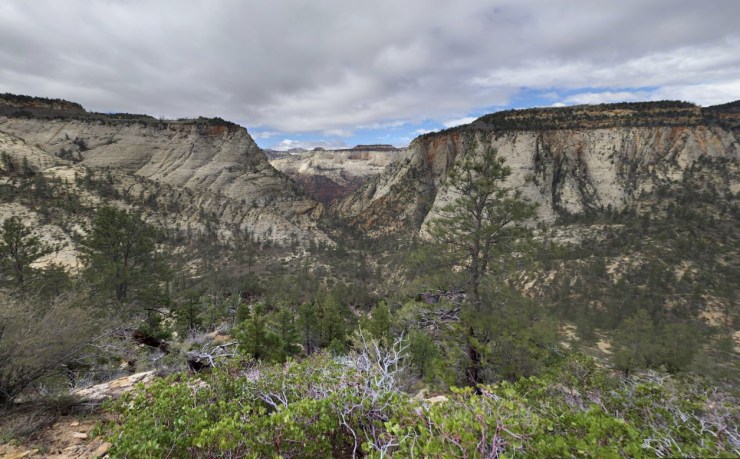
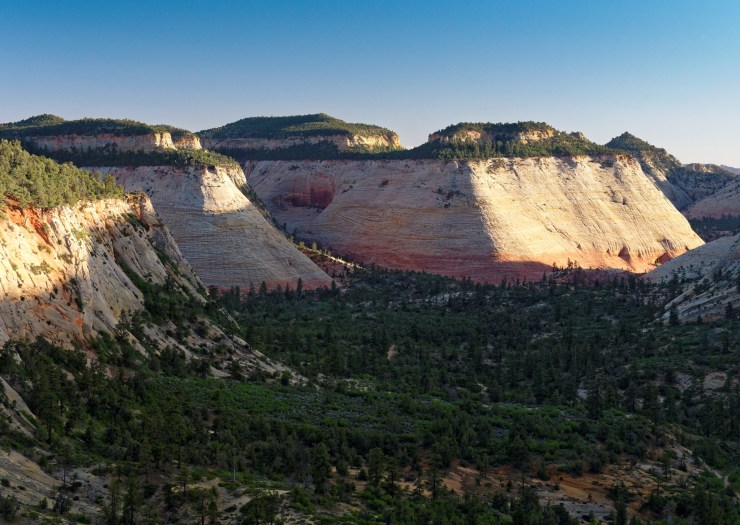
Day 4 of the Zion Traverse is roughly 11 miles long and requires close to 4,000 feet of climbing. This will be arguably the toughest day of the trek. That said, the views here are really spectacular. The hike starts with a ~2.5 mile and 1,200 foot descent down into Telephone Canyon. The views here are great as you are surround by multi-colored rock walls. From miles 2.5 to 3 the West Rim Trail skirts along a ridge above Zion Canyon, providing more great views.
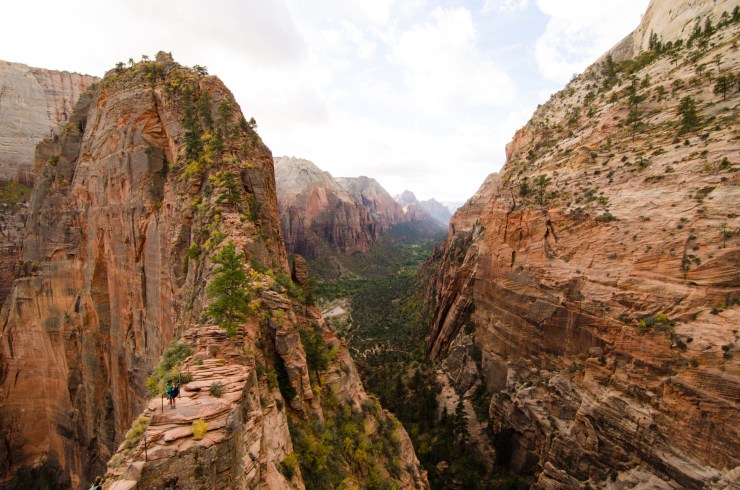
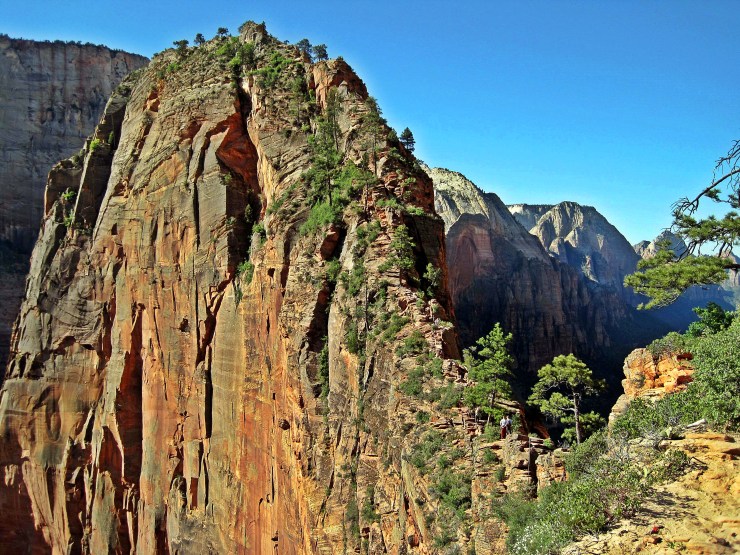
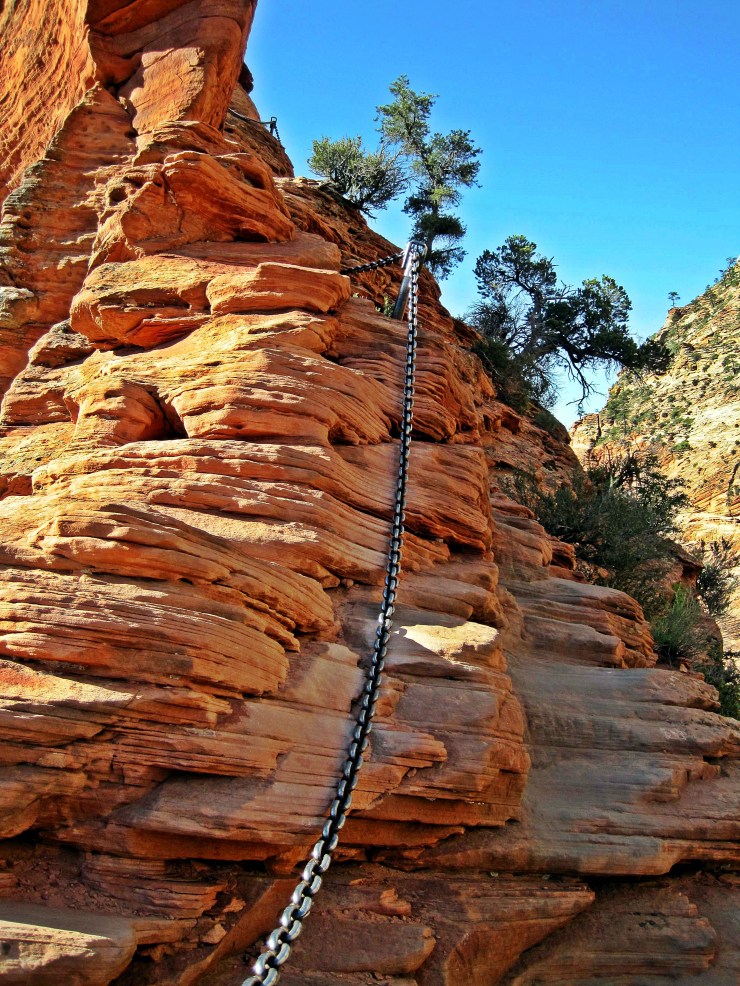
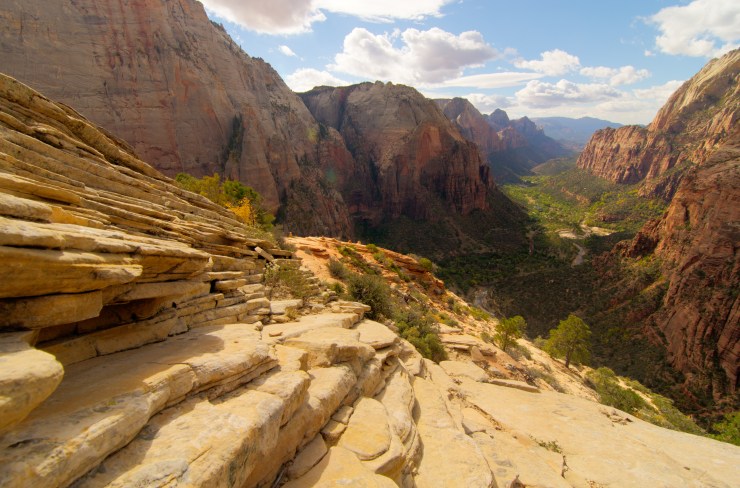
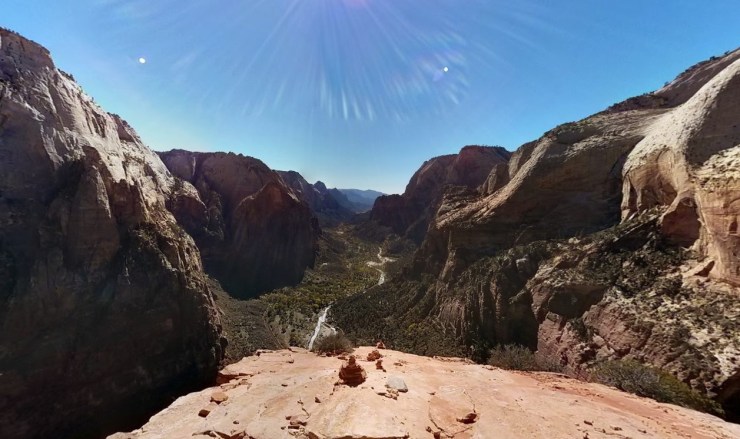
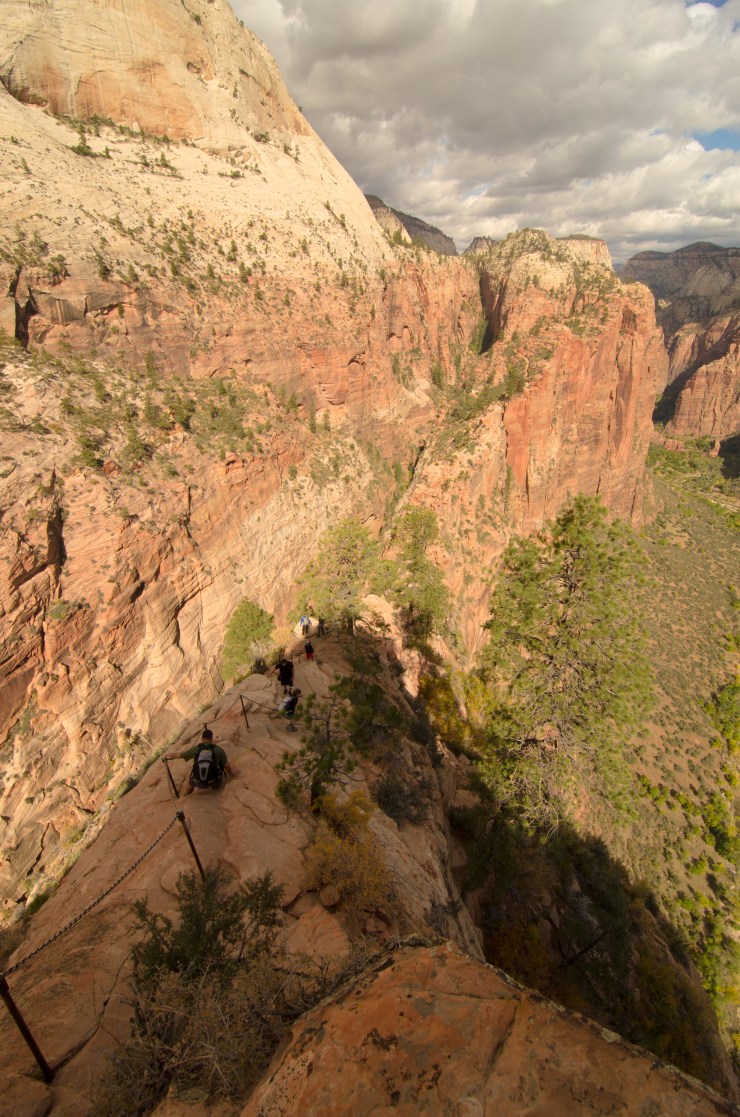
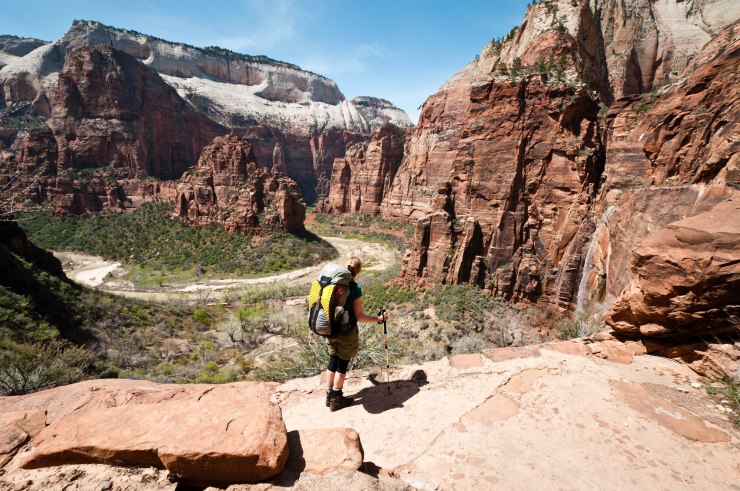
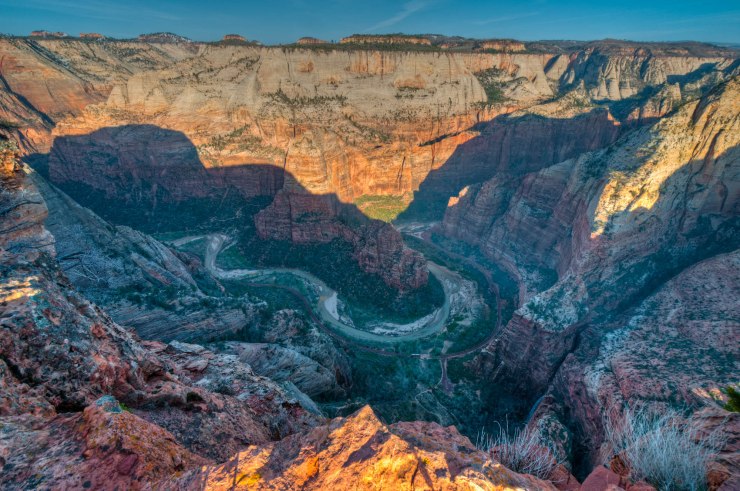
At the 3 mile mark, you reach the Scout Lookout and junction with the Angel’s Landing Trail. If you have energy and are not afraid of heights, Angel’s Landing is a can’t miss side trip. You may want to leave your backpack at the junction since the trail to Angel’s Landing is very steep and narrow. The sidetrip is only ~1 mile roundtrip, but climbs nearly 800 feet. You hike along a narrow rock formation which ultimately leads to an amazing viewpoint that looks out over Zion Canyon.
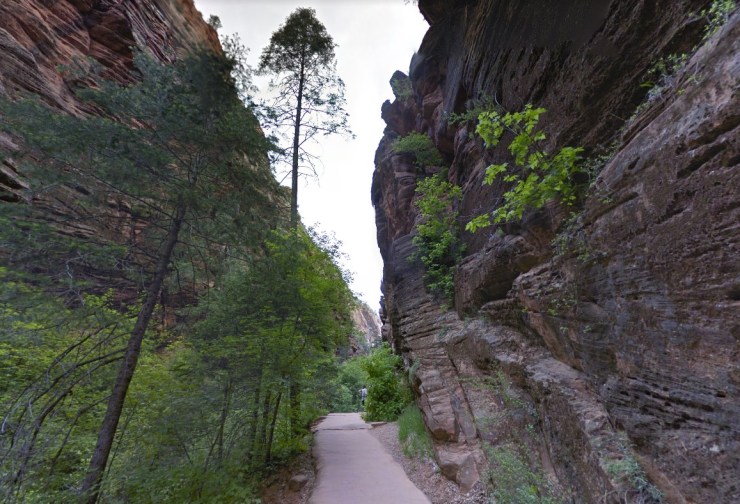
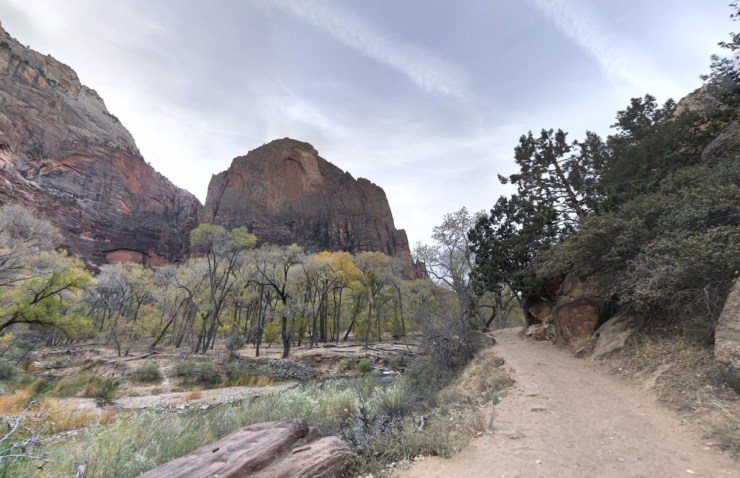
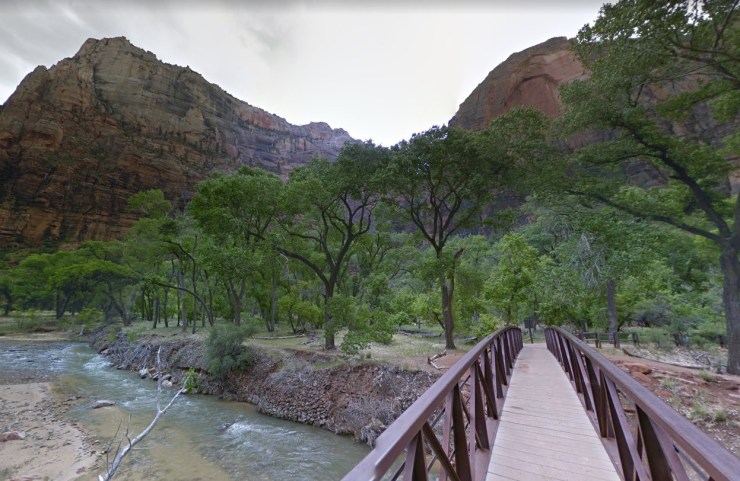
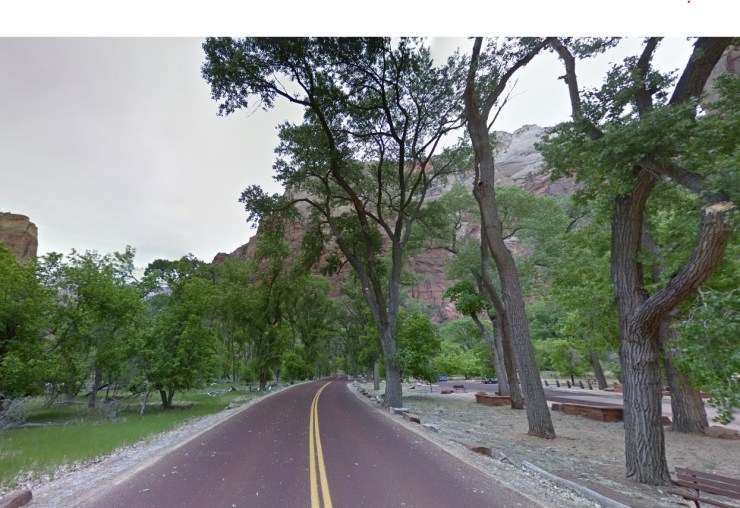
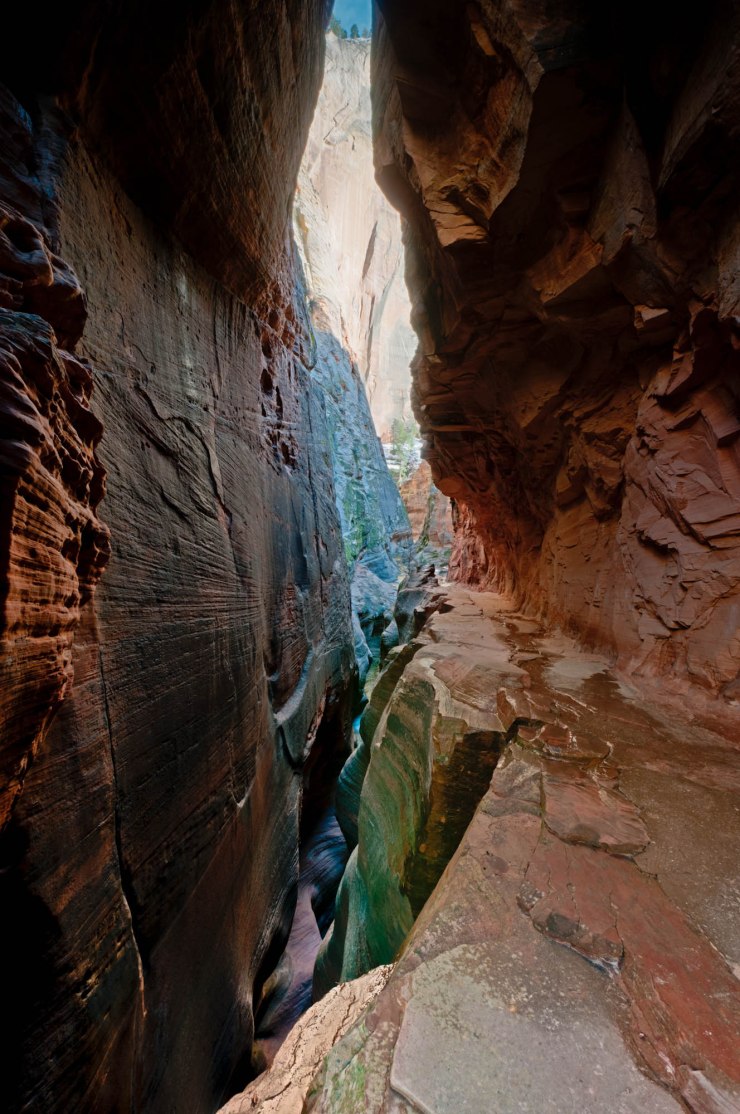
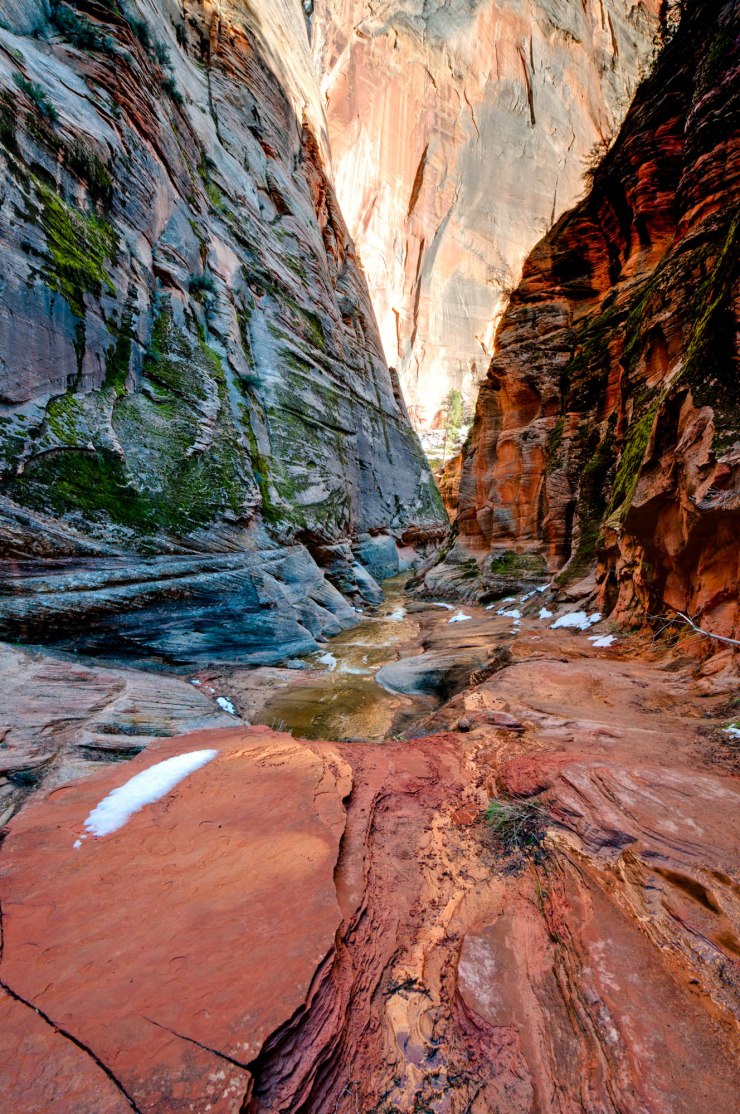
After Angel’s Landing, the trail continues descending into Zion Canyon. It passes through Refrigerator Canyon between miles 3 and 4 and makes a final descent to the Virgin River. At the roughly 5 mile mark, you cross the footbridge over the Virgin River and then can grab some water at The Grotto picnic area. After refilling water, hike north along the Floor of the Valley Road for roughly 1 mile.
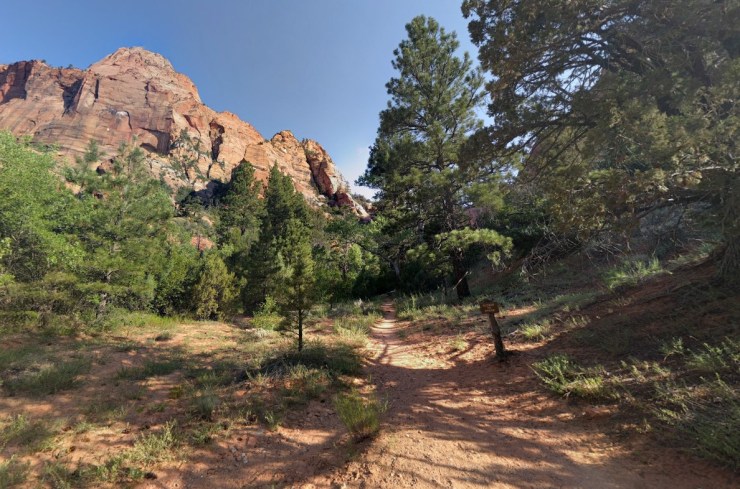
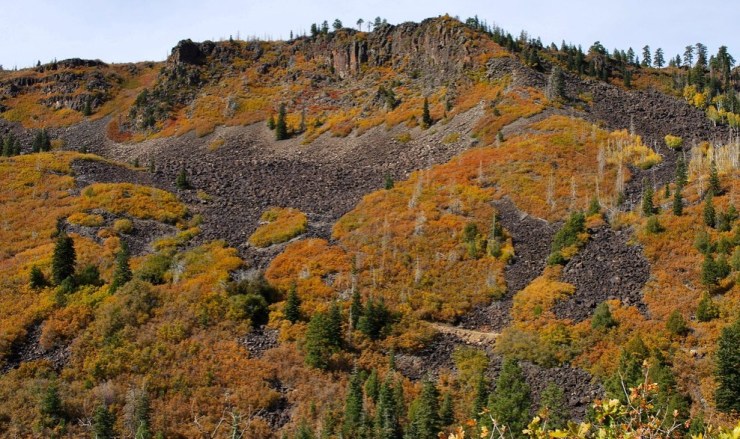
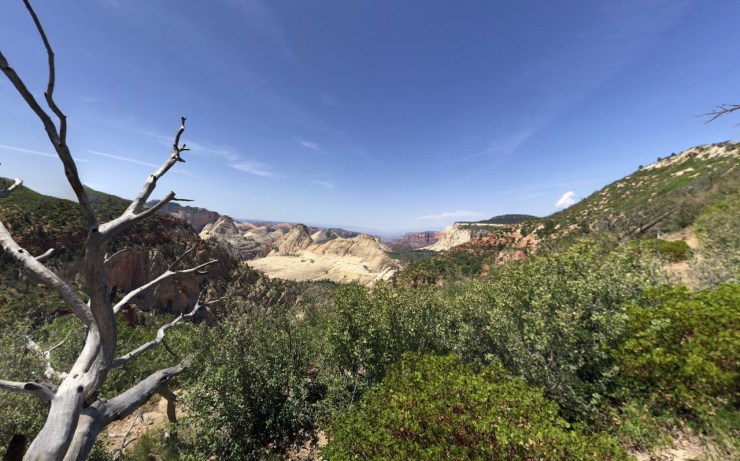
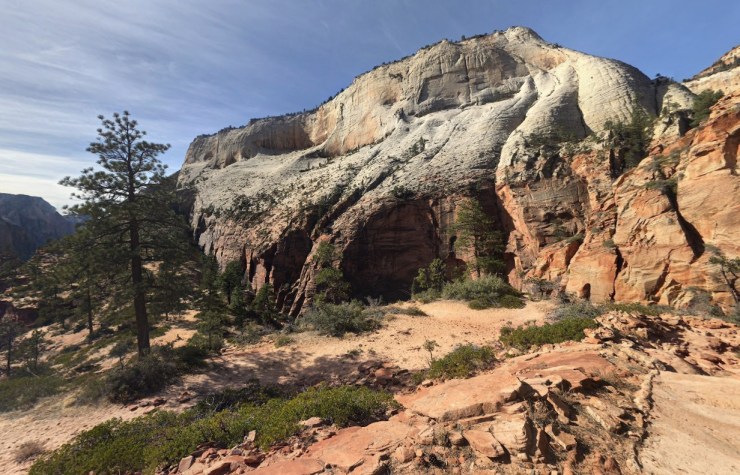
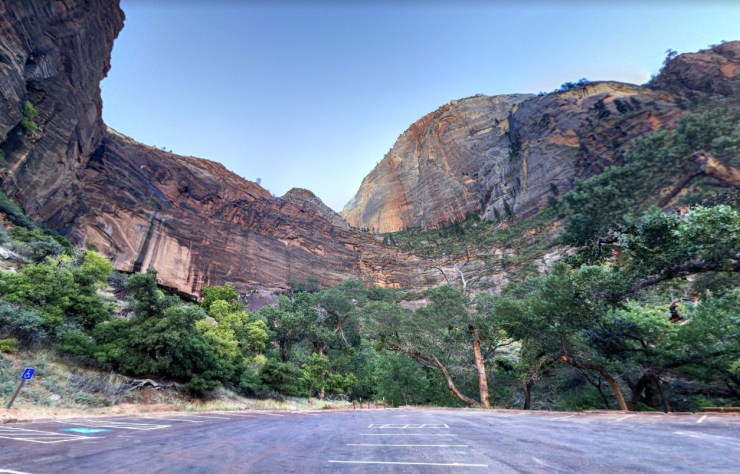
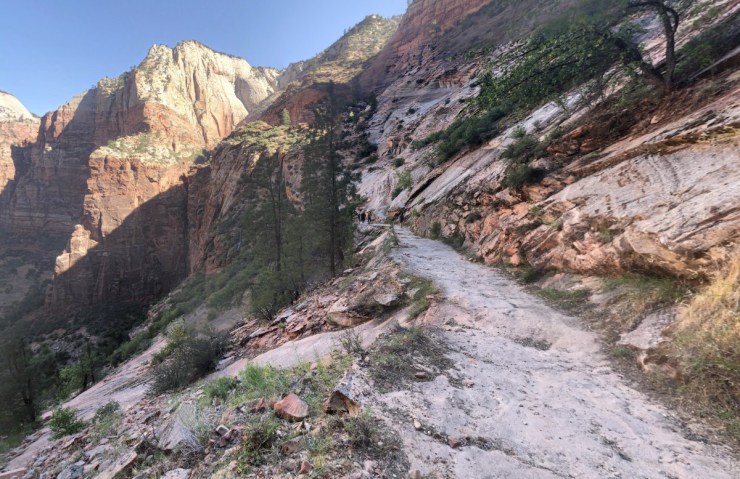
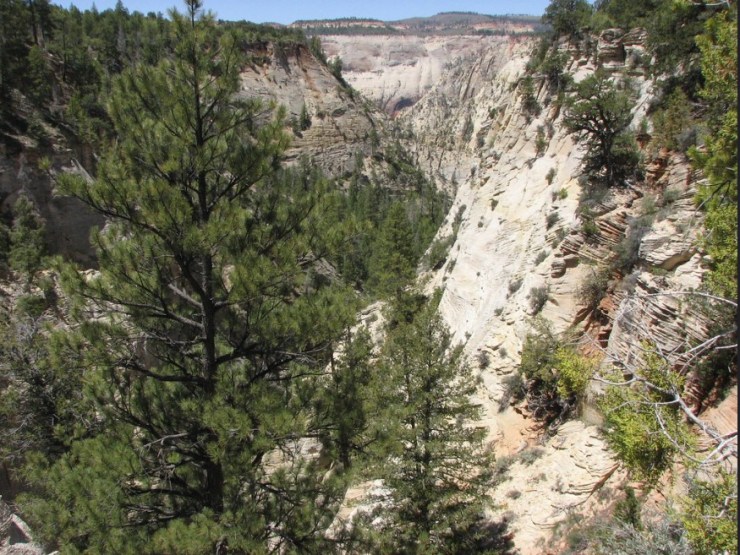
At this point (roughly the 6 mile mark, not including Angel’s Landing), you begin a steep climb up through Echo Canyon and towards the East Rim Trail. You hike through many switchbacks as you climb 2,500 feet over the next 3.5 miles. While challenging, the hike through Echo Canyon has amazing views. You can see Zion Canyon behind you and then get to pass between impressive canyon walls as you climb. At the ~8 mile mark, there is a junction. Continue east on the East Rim Trail to head straight to camp. There is an observation point ~2 miles to the north, but this sidetrip may be challenging towards the end of a long day.
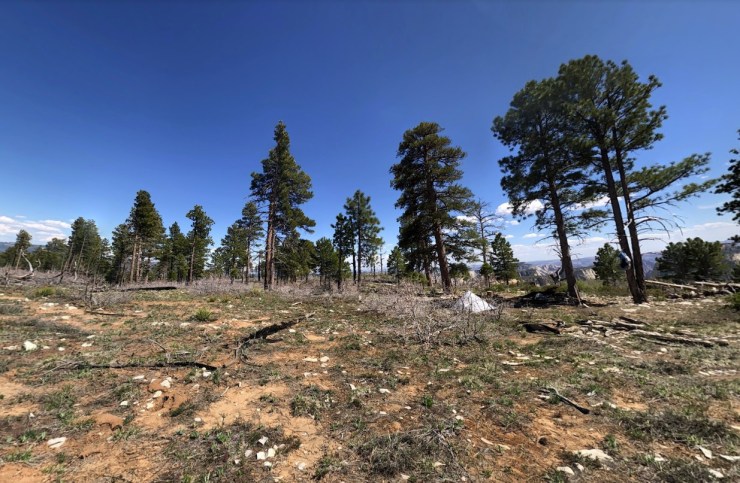
Once you emerge from Echo Canyon, the last 1-2 miles on the East Rim Trail go across a forest on a high plateau. This area is all part of the at-large camping zone. Near the 11 mile mark, you set up camp nearby Stave Spring (N 37°15’40.2″ W 112°54’17.1″).
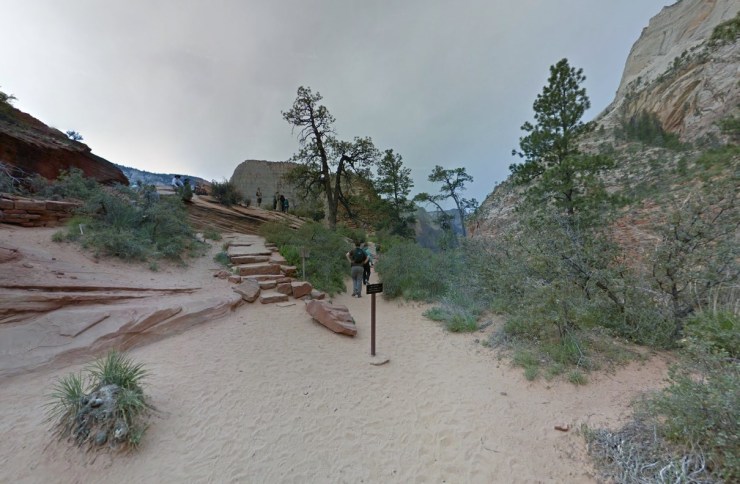


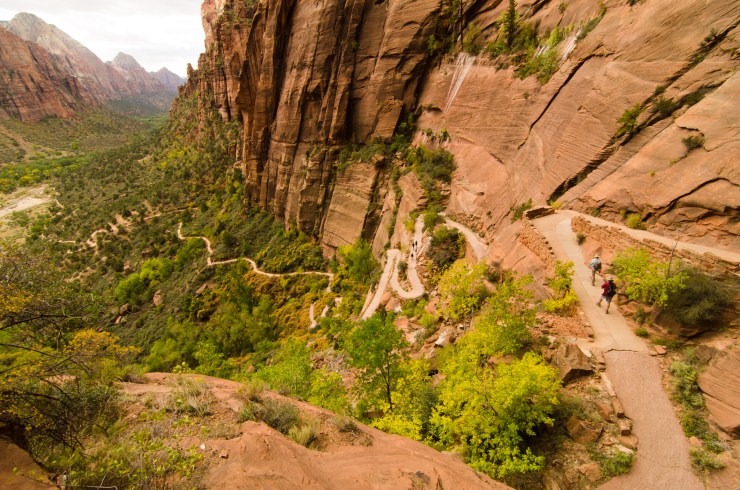
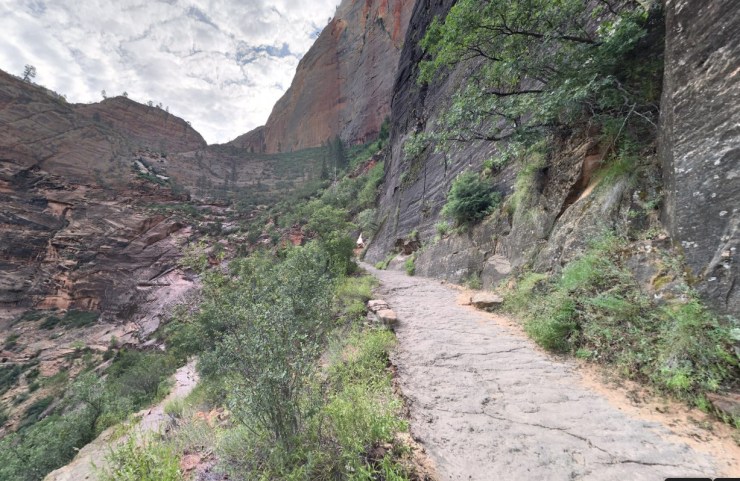
The trail to Echo Canyon starts with an ascent up a series of switchbacks (credit: Yves Engetschwiler)

……….
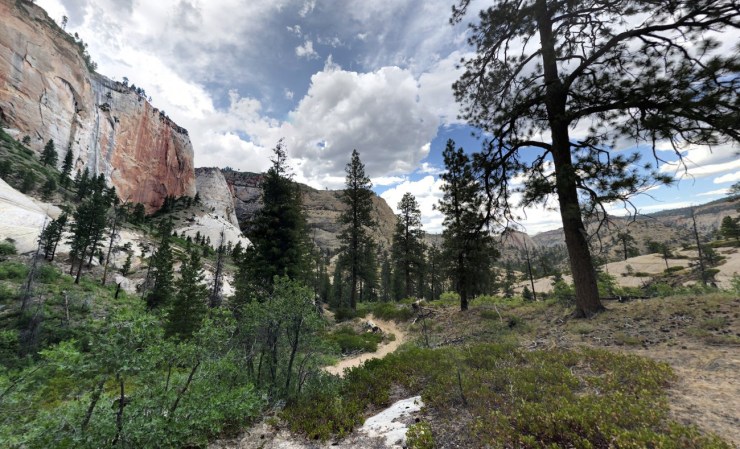
Day 5: 5.9 miles; +700 feet / -1,590 feet; East Rim (Stave) Spring to East Rim Trailhead
PDF map of the Day 5 hike on the Zion Traverse
The hike on the final day of the Zion Traverse is relatively modest with only 6 miles to travel. You can either hike directly to your car at the East Rim Trailhead or can start the morning with a day hike sidetrip to either Cable Mountain (6 miles, +/- 1,000 ft roundtrip) or Deertrap Mountain (8 miles, +/- 1,300 feet roundtrip). Both sidetrips lead to nice viewpoints that overlook Zion Canyon, but given their length they can be easily be skipped if you are tired.
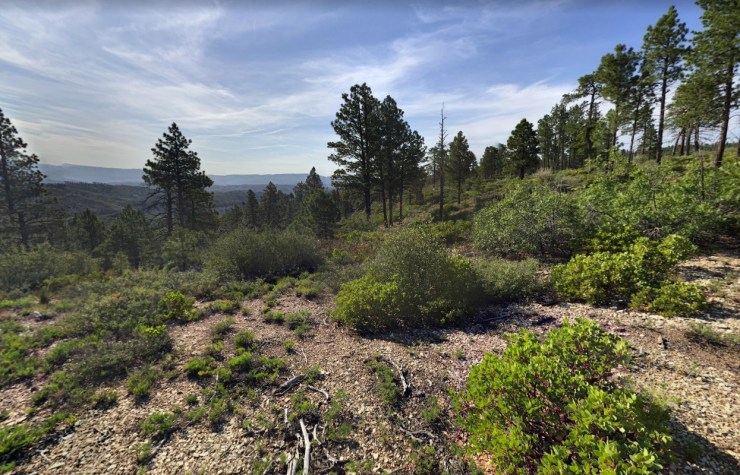
From the campsite, the East Rim Trail continues across the plateau for a mile before descending down to Jolley Gulch. From miles 2-5, the trail makes its way across Jolley Gulch and Cave Canyon. The views in this section are nice, but not spectacular. From mile 5 on, the trail gradually descends until you reach the trailhead where you car is hopefully parked and ready to drive you home!


Here are some similar trip reports!
North Circle Loop – Glacier National Park (52 mile loop)
Yosemite Highlights Loop – Yosemite National Park (40 mile loop)
Teton Crest Trail – Grand Teton National Park (48 mile loop)
Rae Lakes Loop – Kings Canyon National Park Backpacking (41 mile loop)
Continental Divide Loop – Rocky Mountain National Park (45 mile loop)

I did this hike 2 years ago. The trail from zion canyon to the east rim th is not super interesting. You can make the trek shorter by ending in zion canyon and skipping the last day (you dont miss much). Then you have an extra day to check out the narrows.
LikeLiked by 1 person
Fantastic! I’ve done portions of this, but not all of it. Did The West Rim Trail 50 years ago, then again about 25 years ago. One of the finest I’ve ever done, anywhere. Thanks much for posting all this.
LikeLiked by 1 person
What dates did you go for this? I see a lot of fall colors! Also, for the camping spots do you need to reserve or just have permits? Thanks!
LikeLiked by 1 person
The majority of the photos are from a trip in October. Some areas of the trail I did not have good photos, so those are filled in with photos from other trips at various times of the year! When you get your permit, you will need to reserve the specific campsites you will stay at. Hope that helps!
LikeLiked by 1 person
Love the guide! I found your blog from my initial research and I was so impressed by how easy to read and organized it was. I just had one question. I’m not sure if this specific closure affected your hike. I recently saw this notice while on the website and wanted to know if this would affect the route? “The Weeping Rock Trailhead is CLOSED indefinitely due to a significant rockfall. The East Rim Trail from Weeping Rock through Echo Canyon is also CLOSED indefinitely. East Rim at-large camping is only accessible from the eastside trailheads. At this time it is not possible to connect the West Rim and East Rim trails.” Thanks for the headsup.
LikeLike
Hi Mervin – Yes, if the section of trail at Weeping Rock is closed, you cannot complete the full Zion Traverse. You would need to stop your hike at the Weeping Rock Trailhead (at this point you have already traversed a lot of the park!). The only way to access the trails east of Weeping Rock is to drive out to the East Park Entrance and hike west from there. This could only be done as an out and back though since you cannot get back down into the main Zion Canyon with the trail closure.
My advice would be to just shorted it to a 3 night trip and end at Weeping Rock!
LikeLike
I am heading out to do this trip next month! in looking at your maps, it seems that your campsite in Wildcat Canyon was about a mile away from Wildcat Spring (based on the coordinates). Was there water at your campsite trickling down, or did you hike to the spring and backtrack to your camp?
LikeLike
Hi Jerad – The issue is that camping is not allowed closer to Wildcat Spring. Plus there are not great camping options close to the Spring (Even if it was allowed). This map shows the area where you can camp (https://www.nps.gov/zion/planyourvisit/upload/Zion_Wilderness_Map2021-2.pdf).
There is a somewhat open meadow area near the campsite location I propose in this itinerary. I would not expect to have water flowing at your camp. We just hiked up to the Wildcat Spring to fill water and brought it back to camp. That part of it sucked, but we did not want to hike much further that day.
An alternative would be to camp a site #9 in the West Rim area.
LikeLike