


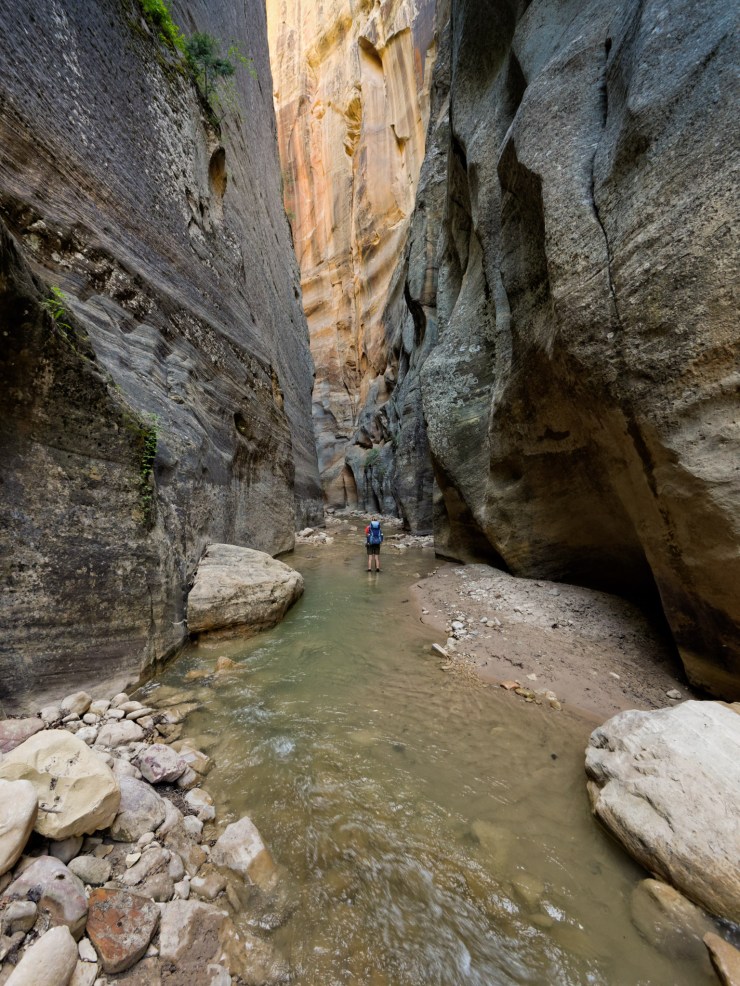
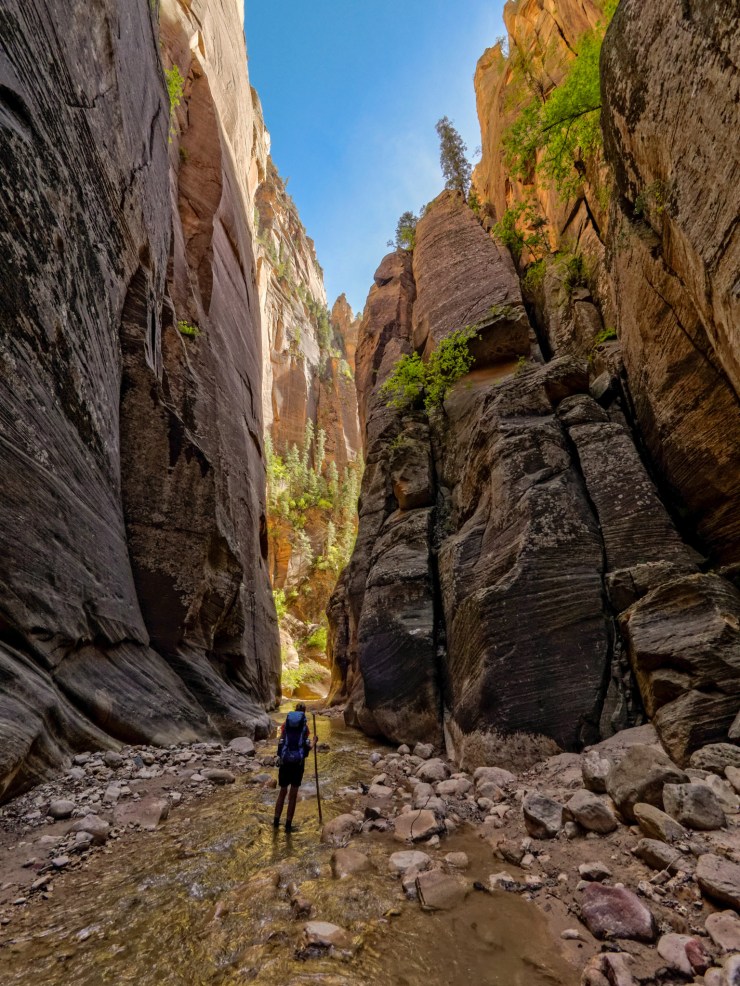
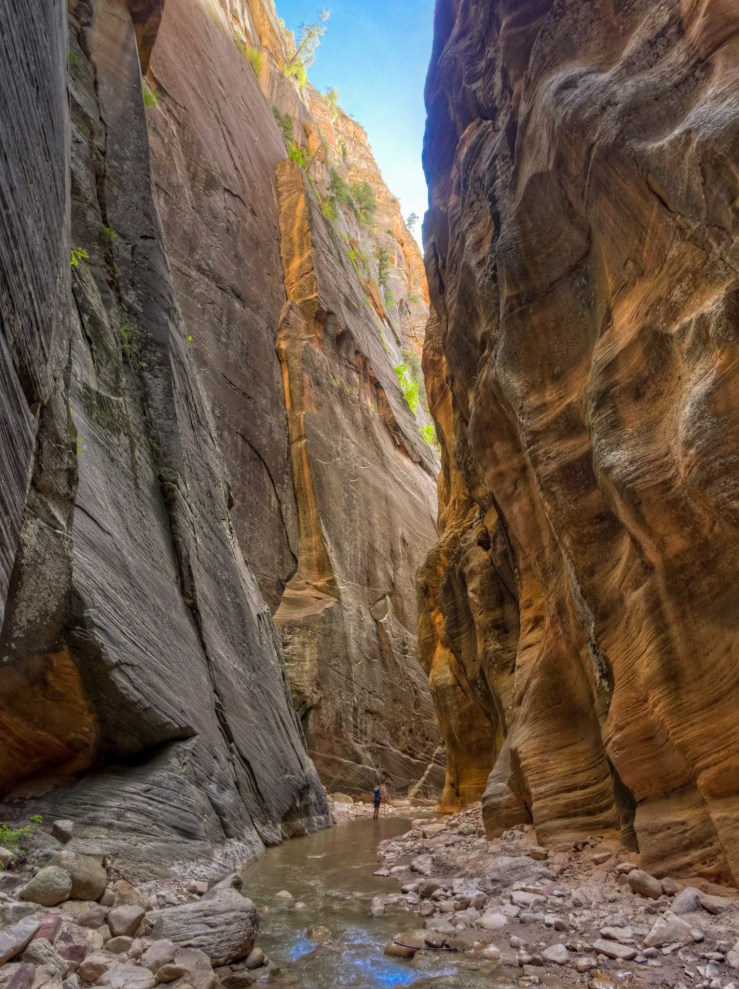
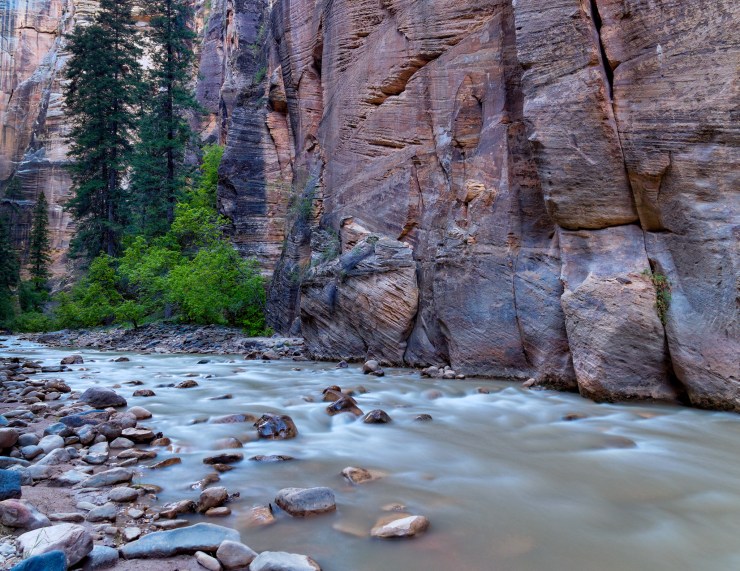
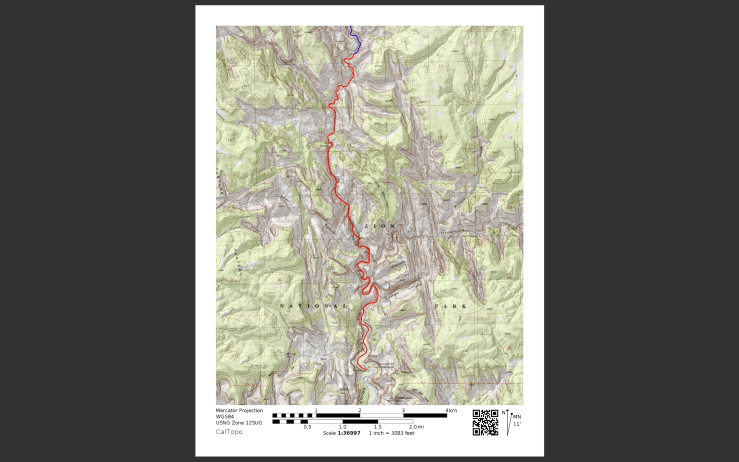
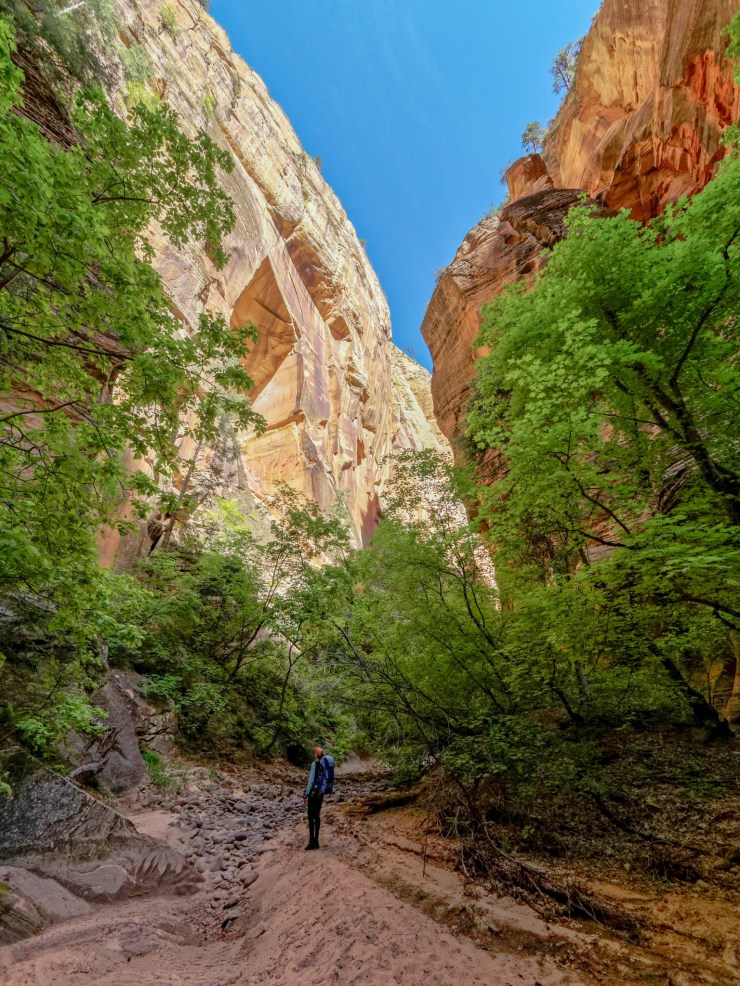
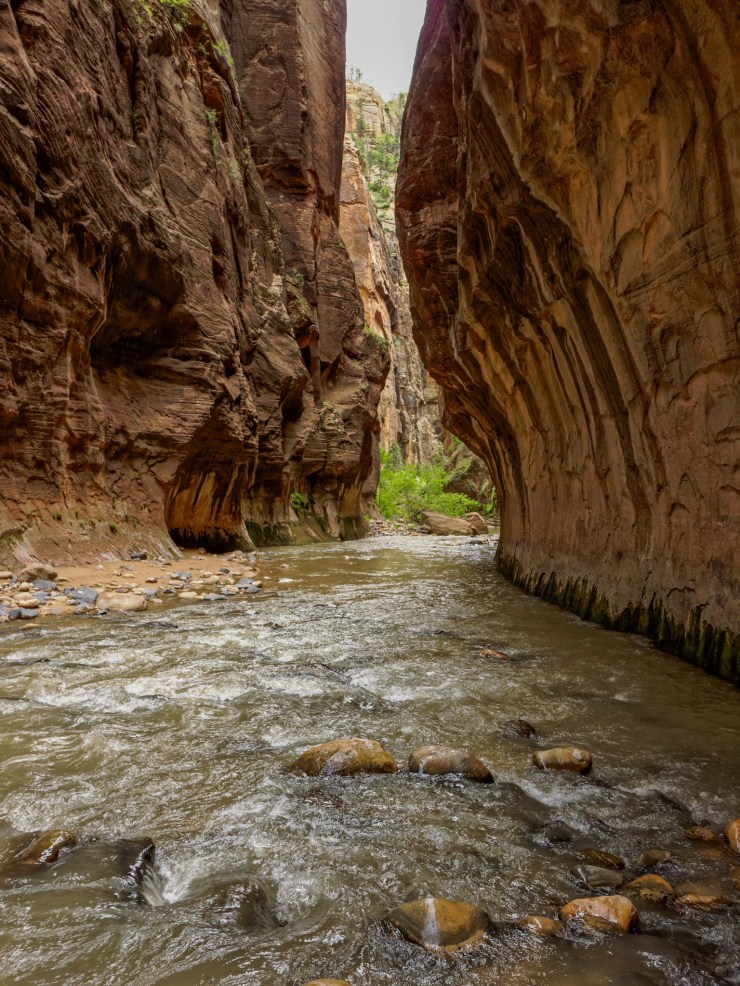
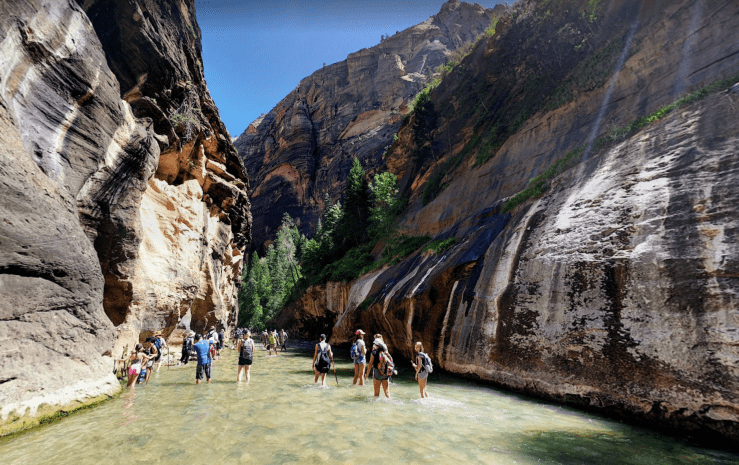
Trip Overview: The 17 mile top-down Narrows backpacking trek in Zion National Park is a truly unique route. Backpackers follow the Virgin River as it traverse through tall, narrow slot canyons and gorges. Expect to spend plenty of time wading through the river and enjoy views of soaring canyon walls, sandstone grottos, and hanging gardens. The Narrows is one of the most sought after areas to hike and overnight camp in Zion National Park. The majority of the images here are from a trip in mid May.
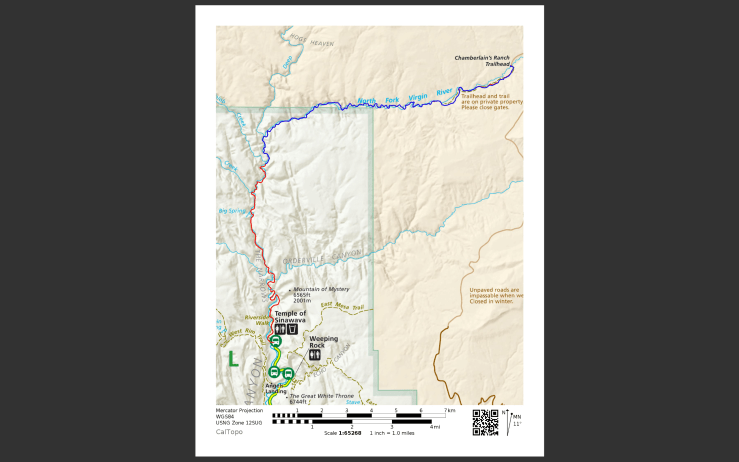
- Higher resolution version of the overall map for The Narrows trek (PDF)
- Topographic map of Zion National Park for purchase (REI link)
Jump to Day 1: Chamberlain’s Ranch to Campsite #5
Jump to Day 2: Campsite #5 to Temple of Sinawava
Shop Deal of the Day at REI Outlet (up to 50% off)!
Preparations:
Click here to read more about Permits
Permits: Wilderness Permits are required for all overnight backpacking trips in Zion National Park. Competition for permits has been increasing in recent years, so backpackers should either plan to reserve permits in advance or have flexibility built into their trip if attempting to attain walk-in permits for this itinerary.
Advanced permit reservations for a given trek start date open up three months in advance starting at 10am MST on the 5th day of the month. As an example, if you want to start a trek on April 20th, you would try to get a reservation at 10am MST on February 5th. All available permits for start dates that month are released at the same time and the permits are given out on a first-come, first-serve basis. Attempt to log as close to 10am as possible to give yourself the best odds of snagging your desired permit. You apply for the permits online and a separate reservation is required for each night you are backcountry camping.
If you are not able to reserve a permit in advance, you may be able to get a walk-in permit the day before your trip starts. About 1/3 of all campsites are reserved for walk-ins. These walk-in campsites do not even show up in the advanced reservation system and are exclusively for walk-in backpackers. That said, there is no guarantee that you will get the permit you are looking for. It is best to arrive early the day before your trek for the best odds (the wilderness permit desk opens at 7am).
A map with showing the campsites in The Narrows is below. Campsites 1, 3, 5, 7, 9, and 12 can be reserved in advance and the rest are for walk-ups only. For the itinerary described in this report, we use campsite #5 as our mileage reference. Descriptions of each campsite can be found here. Note that you could extend the trip to 2 or 3 nights if you want to explore additional canyons or travel more slowly, but you need to get a wilderness permit for each night you will stay.

Click here to read more about Logistics
Logistics: The top-down Narrows route is a point-to-point hike and thus requires either a taxi/shuttle ride or two vehicles (one parked at each trailhead). The most common and recommended itinerary is to arrange for a paid shuttle ride the morning you start your trek. You can park your personal vehicle at the Zion National Park Visitor Center and have the private shuttle services pick you up there in the morning and drive you to the Chamberlain’s Ranch Trailhead. When you finish your Narrows trek you exit at the Temple of Sinawava. From there, ride the Zion NPS Shuttle System back to the Visitor Center where your vehicle is parked. Zion Guru has a shuttle that costs $47 per person, and Zion Rock Guides operates some private shuttles in the park. Be sure to inquire about current prices and ask about shuttle availability before making any concrete plans. It is likely that your shuttle service also rents any gear you will need for the trek.
Click here to read more about Difficulty
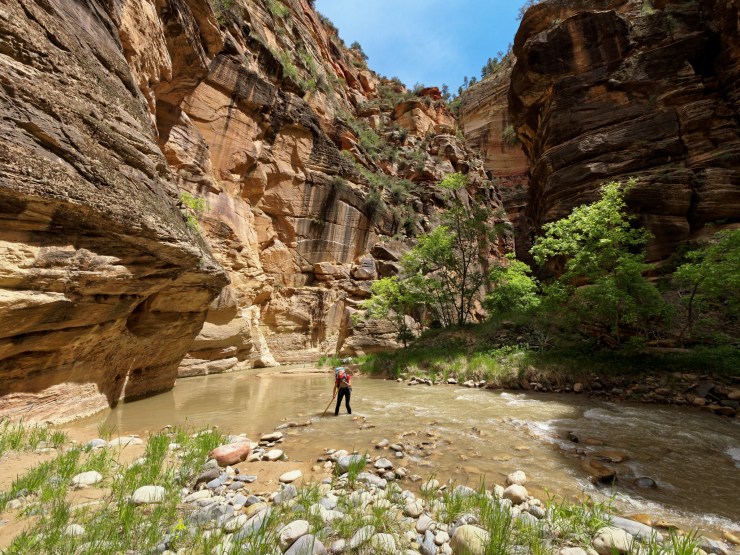
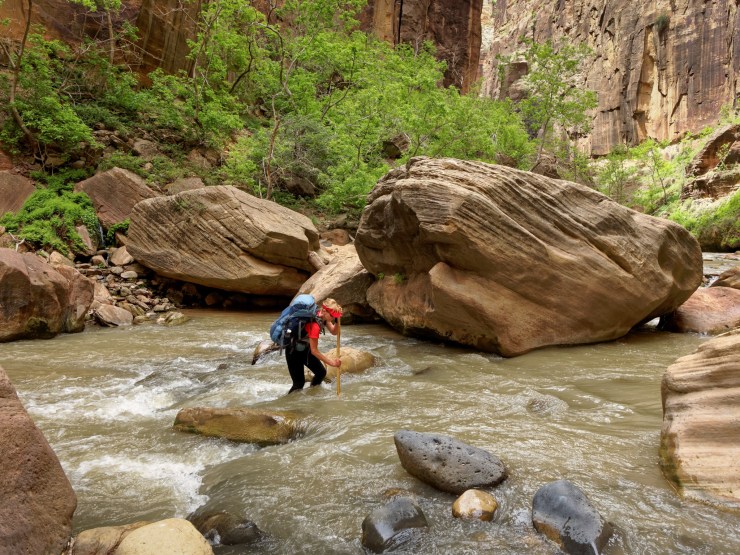
Trail Conditions and Difficulty: Backpacking and hiking in The Narrows at Zion National Park presents some unique challenges. When conditions are favorable, the top-down Narrows trek is of moderate difficulty for experienced backpackers. The daily mileage is not overly extensive and there is not much elevation change. However, much of the hike involves wading through water and there can be deep and swift crossings. The river bed is also full of large, slippery rocks, so progress can be slow. That said, the hike is all downhill and likely will not test your cardio as much as mountain passes will (expect sore feet and stabilizer muscles though!).
When conditions are not ideal, backpacking in The Narrows is more challenging/dangerous and backpackers should use caution. In the fall and winter, the water in the river is cold and thus extra protective gear should be used (e.g. dry suit). High water levels and swift currents can be an issue after the snow melt in early spring and flash floods can be dangerous during the summer. Whenever you are planning to hike through The Narrows, you should contact the park rangers and inquire about the current conditions. They will provide an honest assessment of the current risk level.
In general late spring and summer are the most popular months to hike The Narrows because the water is warmer and water levels are more manageable. Note that summer is also when flash floods are most likely, so you must keep an eye on weather forecasts. Fall is also a good time to hike The Narrows because the weather is stable. The downside is that days are shorter and the water will be cooler.
Supplies: Bears and mosquitoes are not a major issue at Zion National Park so you can leave the bear canister at home and likely need just a small amount of bug repellent (if any). You may still wish to pre-treat your clothes with permethrin spray repellent to be protected in the event there are a few mosquitoes in the canyon. Mice can be a problem at some campsites, so be sure to store your food well.
You will want a sturdy hiking stick or trekking poles since they are extremely helpful for balance while wading across the rocky river bottom. Many backpackers have noted that a single tall, sturdy hiking stick is better than trekking poles for this route. In a swift, chest-high water crossing, trekking poles may not be tall enough for optimal support. Trekking poles also can break when lodged between rocks and stressed. A sturdy, tall hiking stick can be very useful in these situations and is unlikely to snap.
The other supplies commonly used when hiking The Narrows are neoprene socks, canyoneering shoes, potentially dry pants or a dry suit. Some backpackers report that the combination of neoprene socks and simple mesh running shoes works well. Others highly recommend renting canyoneering shoes for the extra stability. Most everyone recommends avoiding sandals (e.g. Chacos or Tevas) and other open-toe footwear because the base of the river is very rocky and the water can be cloudy. Whether or not you want dry pants or a dry suit likely will depend on the river water level and temperature when you are hiking. In the summer when the water is warm you may be ok in simple synthetic shorts. However, when the water is cool you should be cautious and bring proper equipment to avoid hyperthermia. The local outfitters in Springdale rent gear for affordable prices, and can provide advice on what you will need to be safe and comfortable.
To keep your pack and gear dry during your hike, you will want to use either a dry bag or will want to put your clothing and supplies in garbage bags inside your pack. When going across a deep river crossing, expect that your backpack will be partially submerged, so protecting your clothing and sleeping bag from water is essential.
Below is a list of the gear recommended for backpacking The Narrows:
Hiking clothes (note that wool and synthetic fabrics are important due to their quick dry ability)
- a lightweight hiking rain jacket (North Face Venture 2 Jacket)
- fast drying synthetic hiking pants (prAna Zion Pants)
- a quick drying long sleeve hiking shirt (Columbia Silver Ridge L/S Shirt)
- neoprene socks (neoprene socks)
- quick drying synthetic boxer briefs (ExOfficio Give-N-Go)
- dry pants or a dry suit (rent locally if needed)
Clothes for camp (note that wool and synthetic fabrics are important due to their quick dry ability)
- wool leggings (Minus33 Merino Wool Kancamagus Midweight Bottom)
- wool base layer shirt (Minus33 Merino Wool Chocorua Midweight Crew)
- wool outer socks (People Socks Moreno 4-pack)
- lightweight down jacket (Patagonia 800-fill Down Jacket)
- lightweight camp shoes (Xero Z-Trail lightweight sandal or Teva Original)
- Additional warm clothing may be needed when hiking outside summer
Hiking gear
- topographic map (Nat Geo topographic map)
- sturdy hiking stick (rent locally) or trekking poles (Black Diamond Trail Ergo Cork Trekking Poles)
- 2 liter hydration bladder (Platypus Big Zip Water Reservoir)
- 65 liter backpack (Osprey Atmos 65 Liter pack)
- water filtration system (Platypus gravity filtration system)
- Garbage bags or a dry bag (Sea to summit 65L dry bag)
Camp gear
- strong tent with rain-fly (Alps Mountaineering Chaos 2 Tent)
- inflatable sleeping pad (Therm-a-Rest Trail Pro Sleeping Pad)
- sleeping bag (REI Co-op Igneo 25 Sleeping Bag)
- inflatable camping pillow (Ultralight Inflating Pillow)
- lightweight backpacking chair (Helinox Chair Zero)
- headlamp (Black Diamond Cosmo Headlamp)
- multi-tool with knife (Gerber MDime Mini Multi-Tool)
- lightweight stove (MSR PocketRocket 2)
- lighter (BIC plastic lighters)
- 2 liter pot (GSI Outdoors Halulite Boiler Pot)
- coffee cup (GSI Outdoors Glacier Stainless Cup)
- lightweight spork (Snow Peak Titanium Spork)
- small, quick drying towel (REI mutli towel mini)
Random
- wet wipes (Stall Mates individually wrapped wipes)
- mole skin for blisters (Blister medic kit)
- lightweight trowel (GSI Sanitation Trowel)
- small amount of duct tape for gear repairs
- chapstick and sun screen
Food and drink
- a variety of my favorite dehydrated meals
- electrolyte replacement (NUUN Hydration Tablets)
- quick snacks (Clif Shot Bloks and Clif energy bars)
- instant coffee (Starbucks VIA)
- small plastic water bottles filled with whisky 🙂
……….
Day 1: 10 miles; +100 feet / -1,000 feet; Chamberlain’s Ranch to Campsite #5
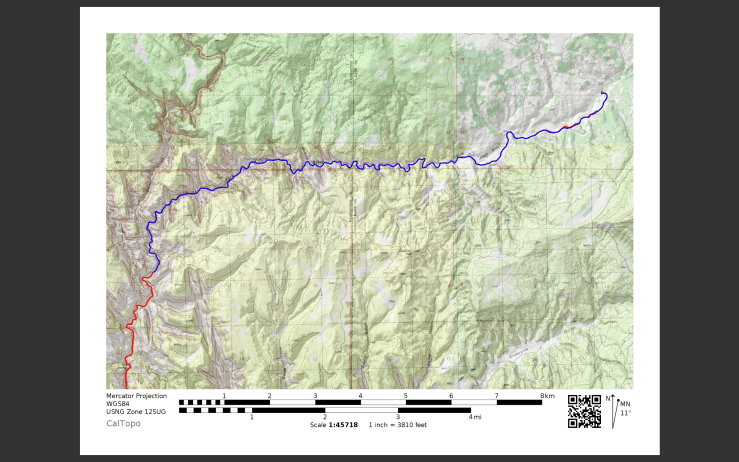
Zion Narrows Trek Day 1 Map (PDF)
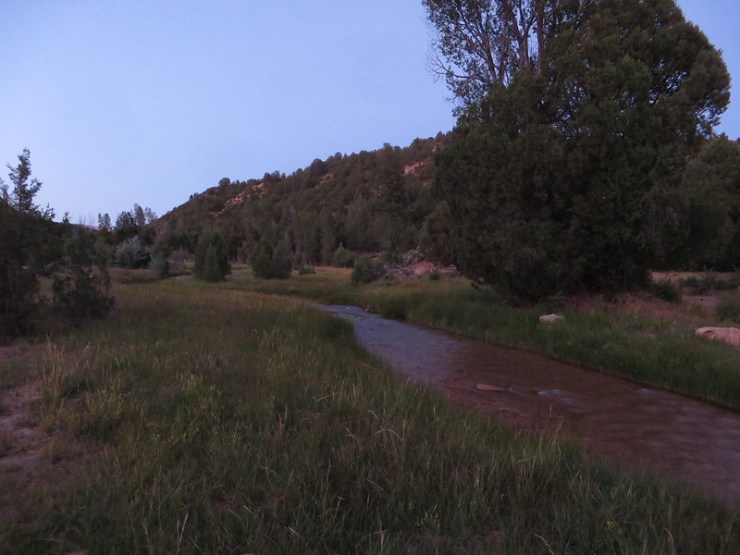
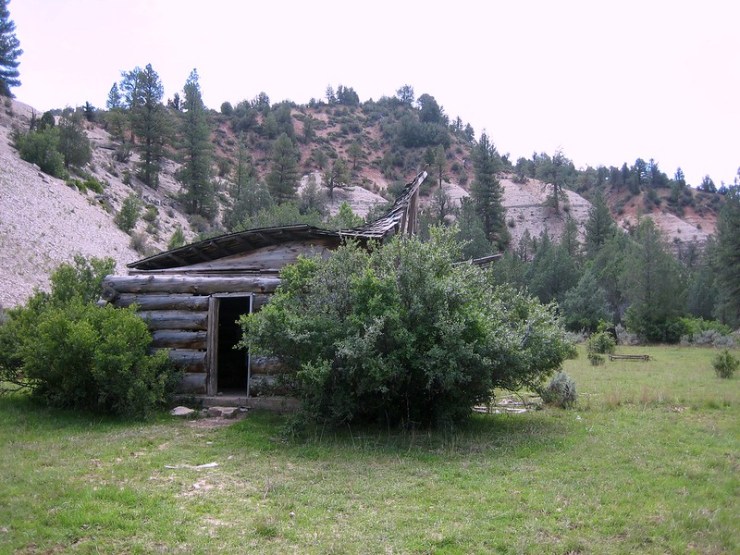
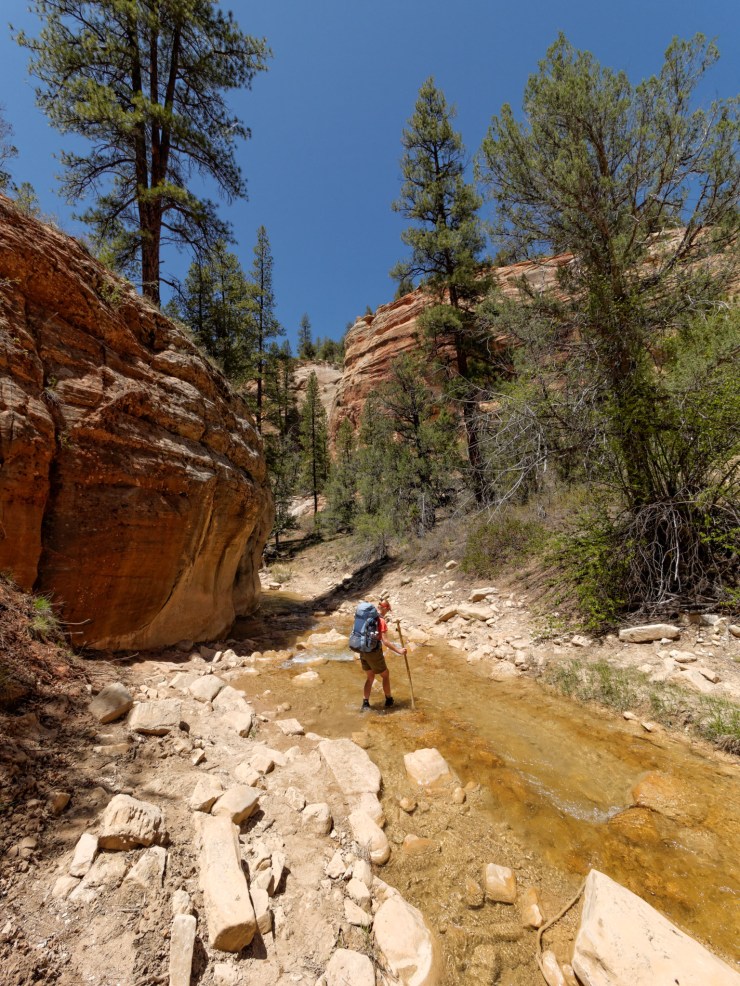
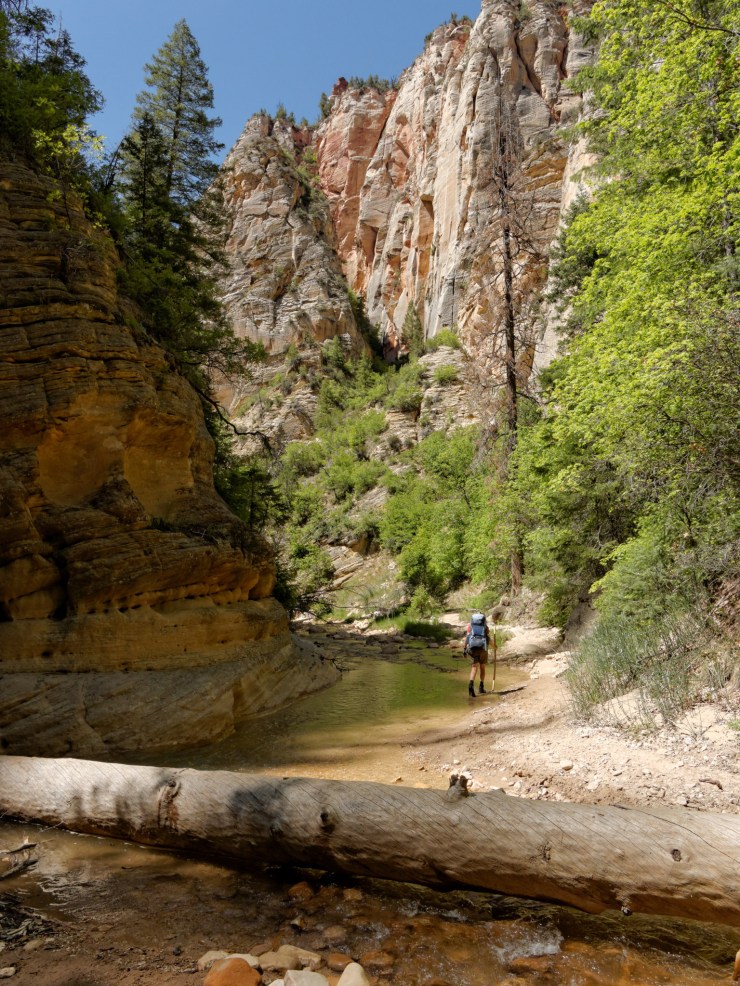
On day 1, you likely will be dropped off by your shuttle at the Chamberlain’s Ranch parking area. The first ~2.5 miles of the trek are on dry ground, following a dirt trail that meanders along the south side of the North Fork Virgin River. This section of trail where you cross the upper plateau is a nice contrast to the canyon you will soon be traveling through (though it’s not as beautiful). At the 2.5 mile mark, you pass an old cabin (Bulloch’s Cabin). Shortly thereafter the trail merges with the North Fork Virgin River and you begin to follow the river into the canyon.
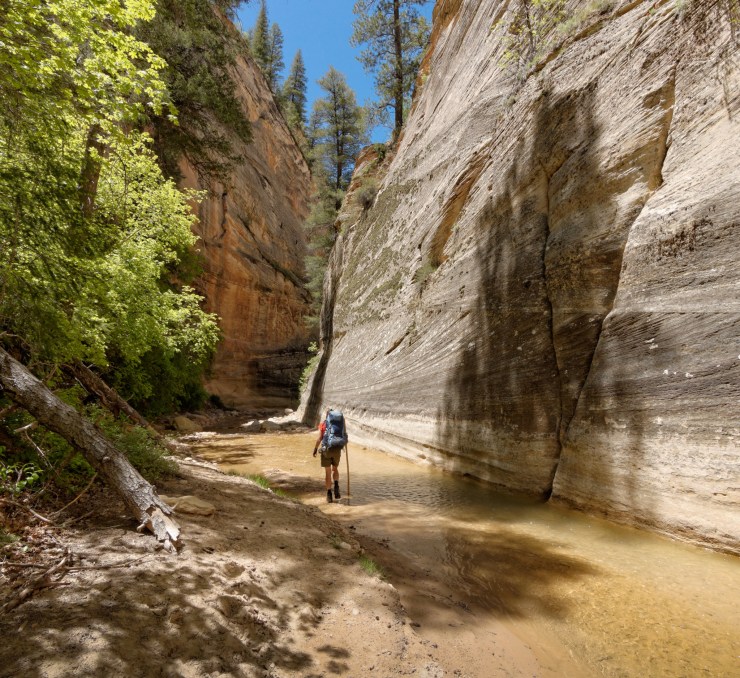
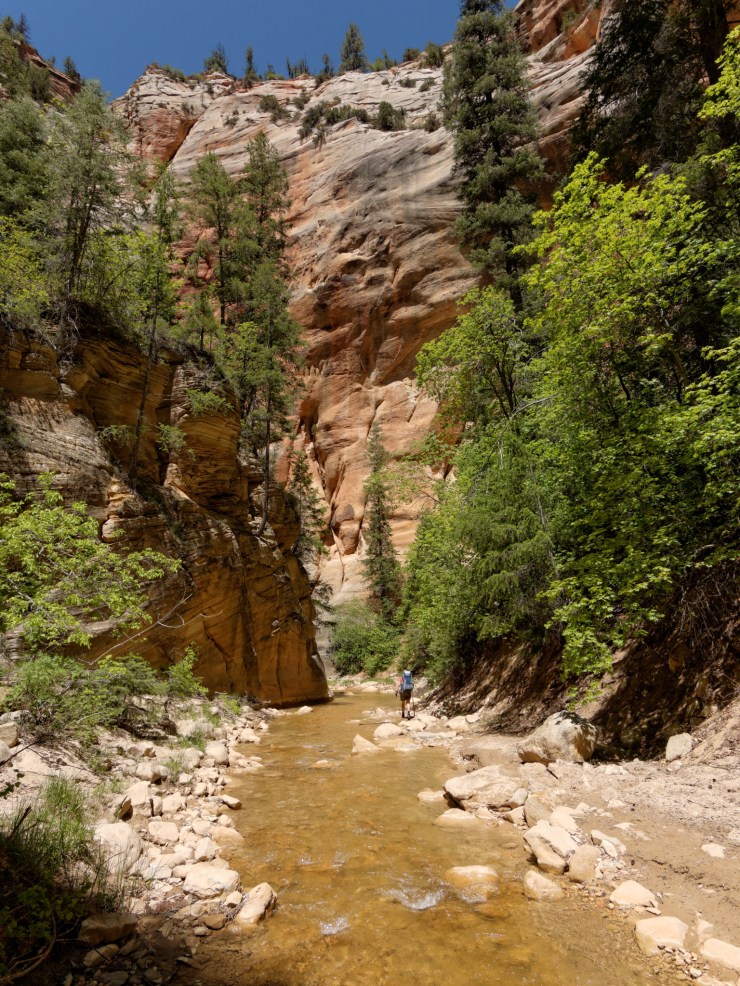
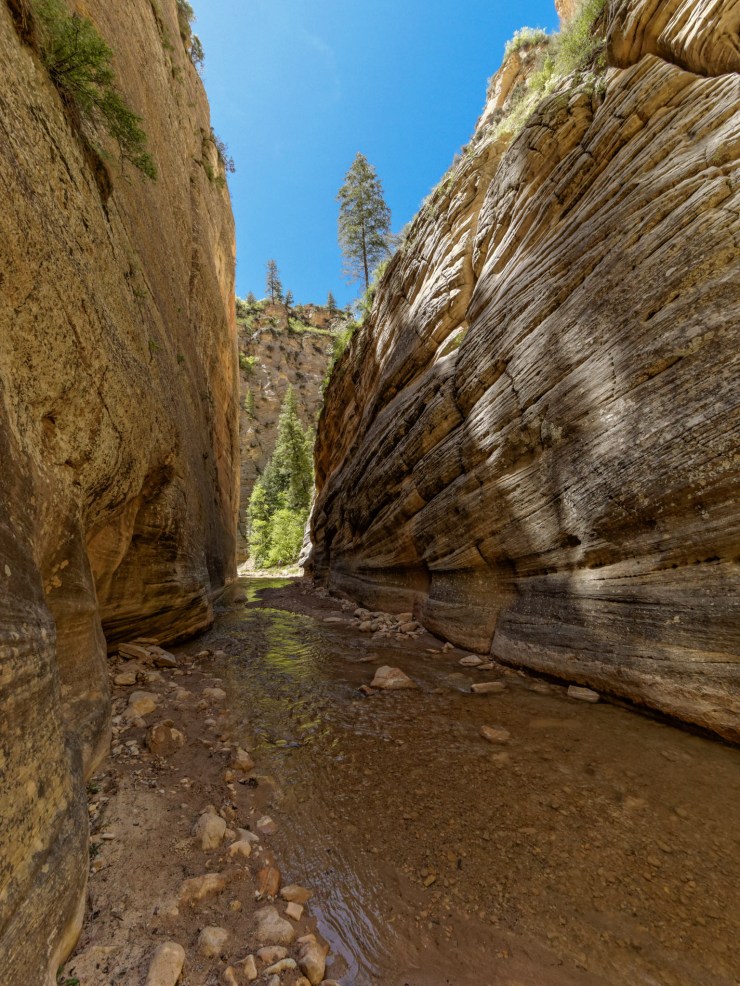
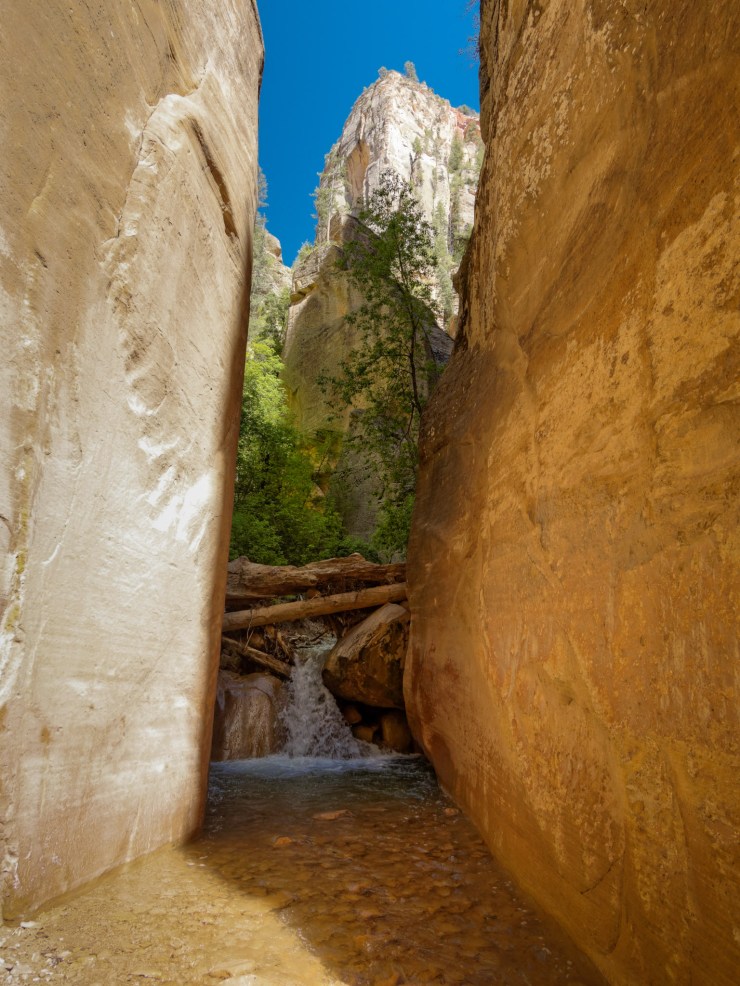
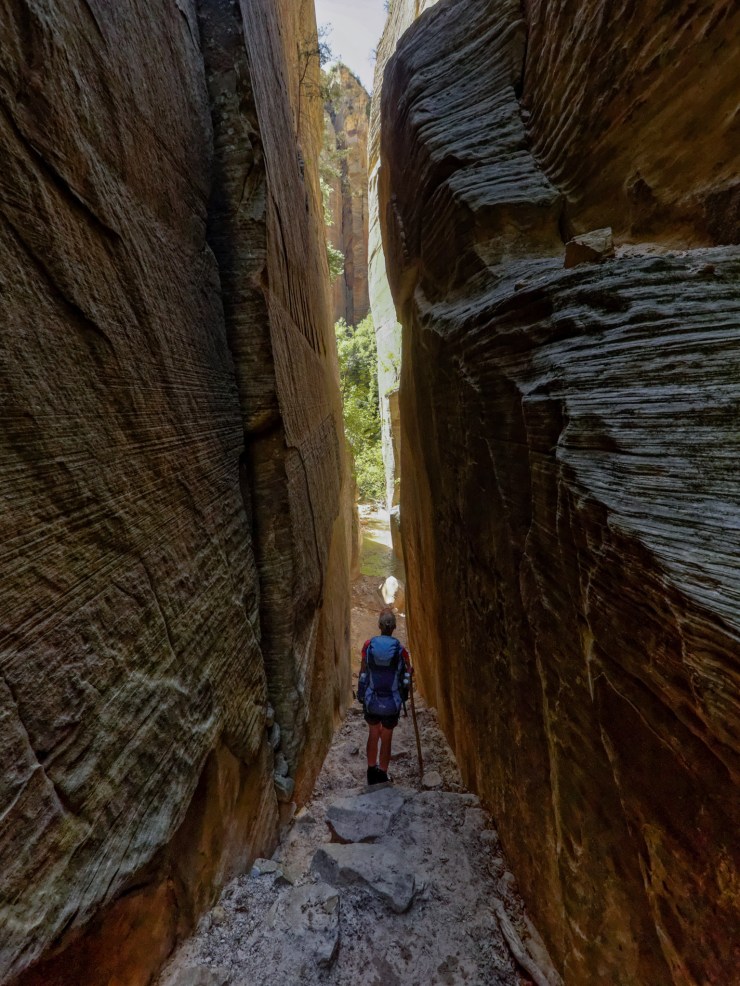
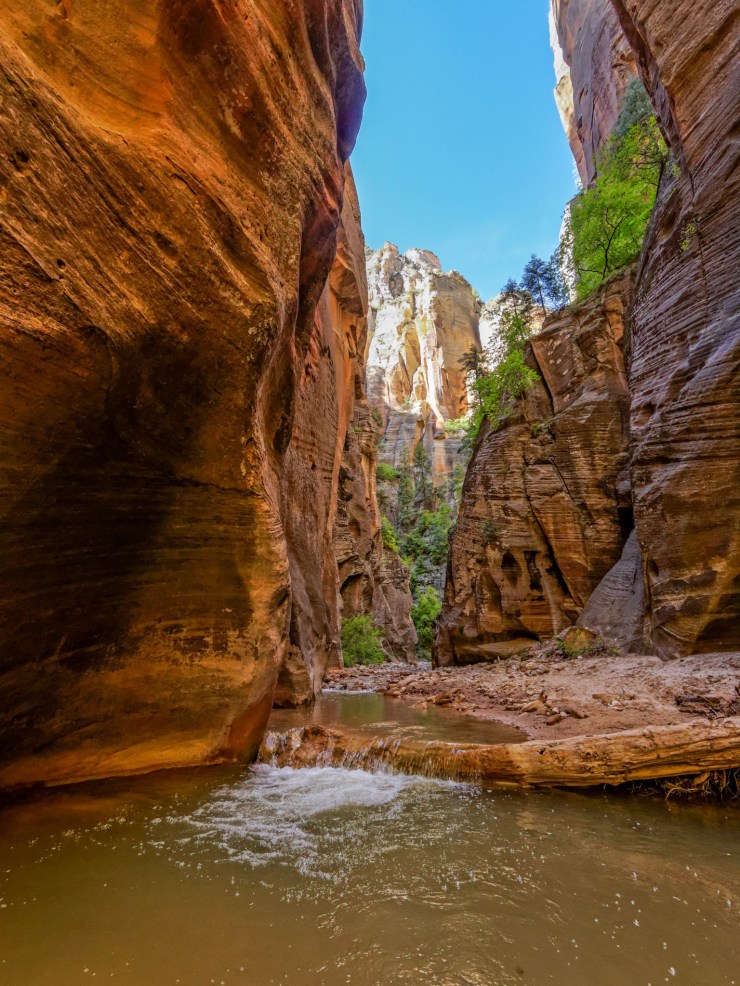
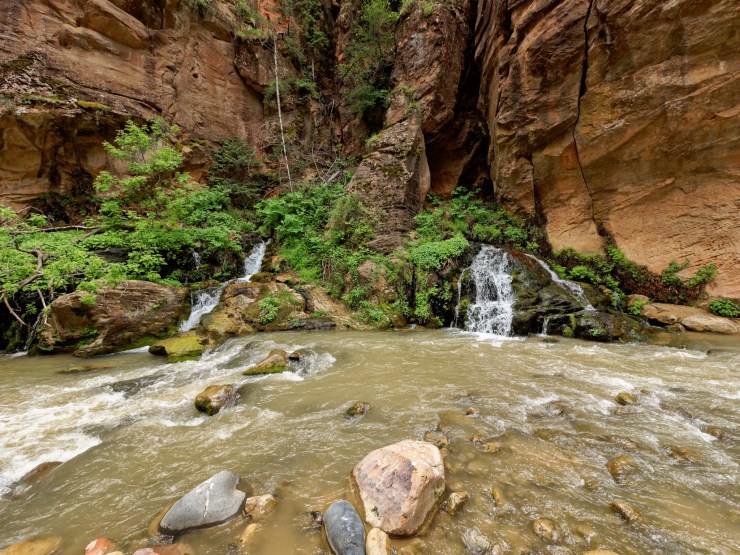
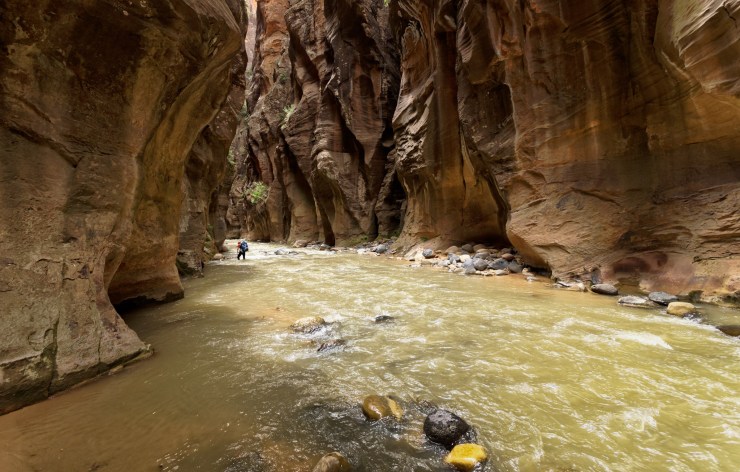
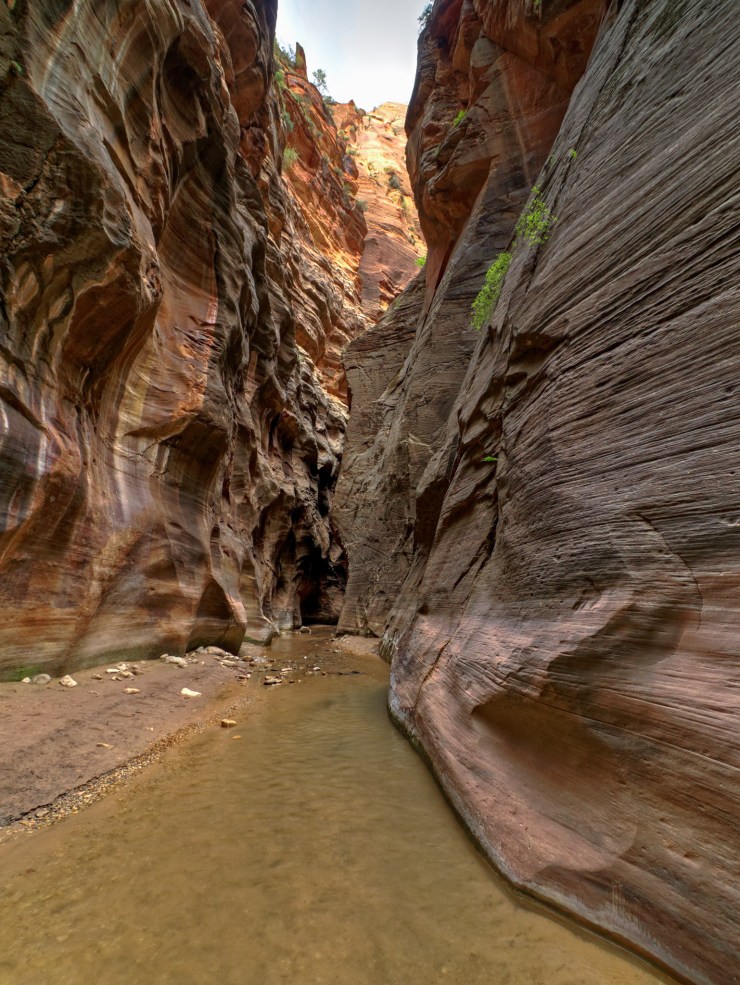
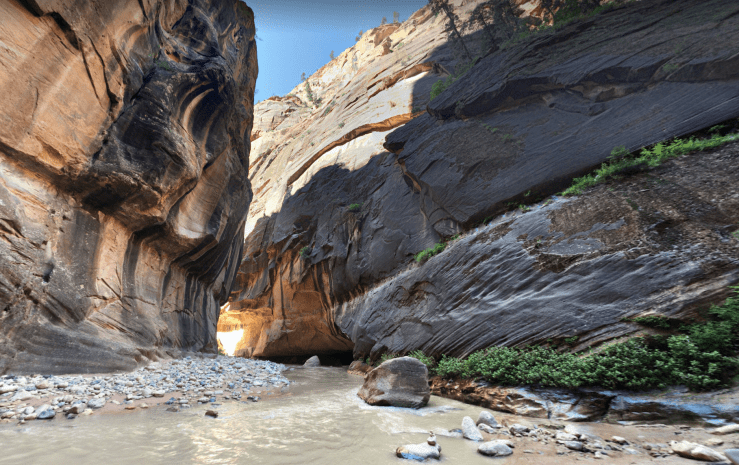
From miles 3 to 7, the trail goes through a more shallow section of the river and a more open, shorter canyon. The further you travel, the higher the canyon walls will become. When you reach the ~7 mile mark, you start to enter a more dramatic portion of The Narrows hike where the canyon walls get steeper and higher. From thereon out, you will be hiking through the impressive canyons. At the ~8.5 mile, you will encounter a waterfall that blocks the main canyon. You do not need to climb over the falls and should instead use a small passage on the south side of the canyon to bypass the blockage. After the falls, the canyon becomes more and more dramatic and the water levels are likely to increase. From that point onward, you are hiking through prototypical section of the The Narrows that everyone loves.
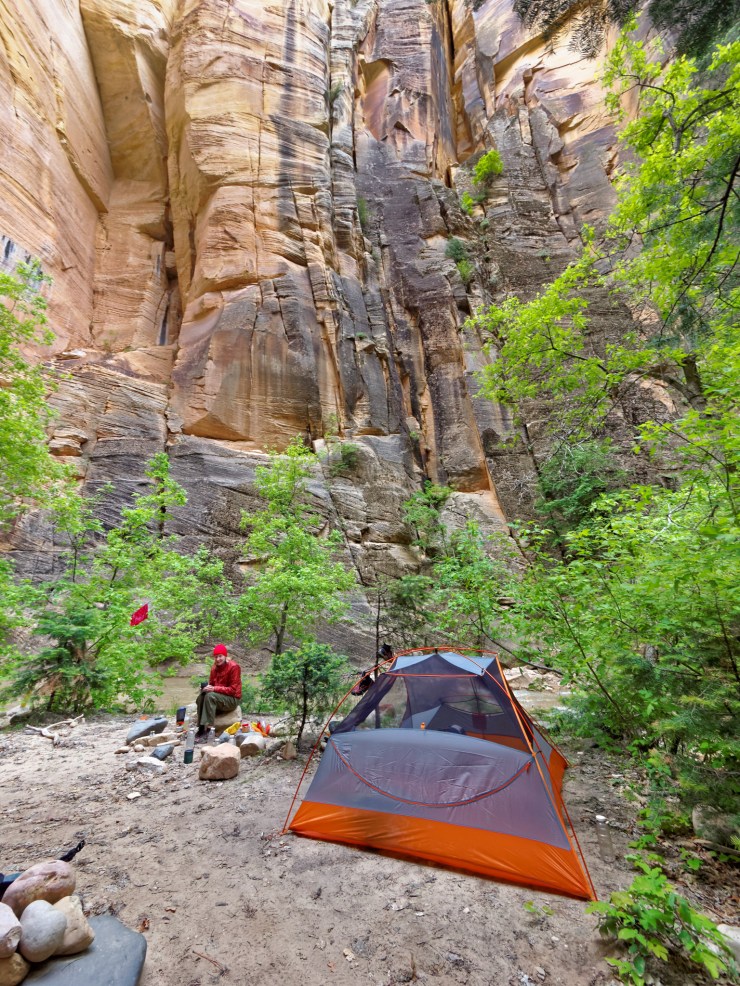
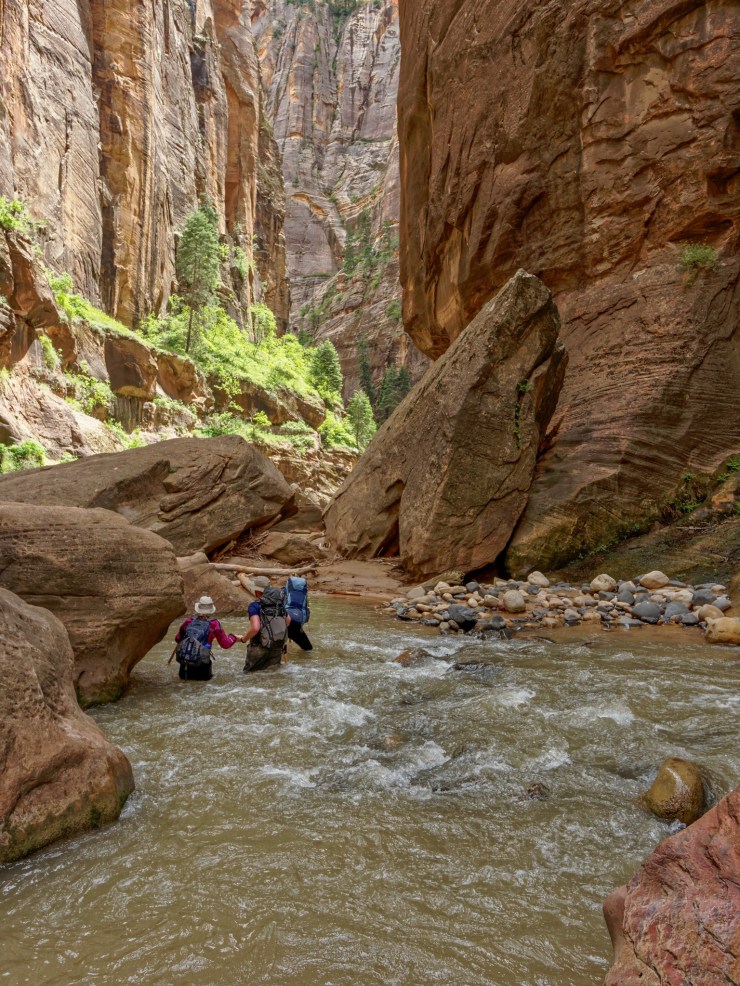
At the 9 mile mark, you reach the confluence between Deep Creek and the North Virgin River. This is a fun area to explore where the two canyons meet. After this confluence, you will start to pass by the 12 campsites within The Narrows. The sites are marked by numbered yellow poles so keep an eye out for your permitted campsite. The water level in this part of the canyon is higher, so expect to begin to wade through relatively deep water. Campsite #5 sits at the ~10 mile mark near the confluence of Kolob Creek and the North Virgin River.

……….
Day 2: 7 miles; +100 feet / -400 feet; Campsite to Temple of Sinawava
Zion Narrows Trek Day 2 Map (PDF)
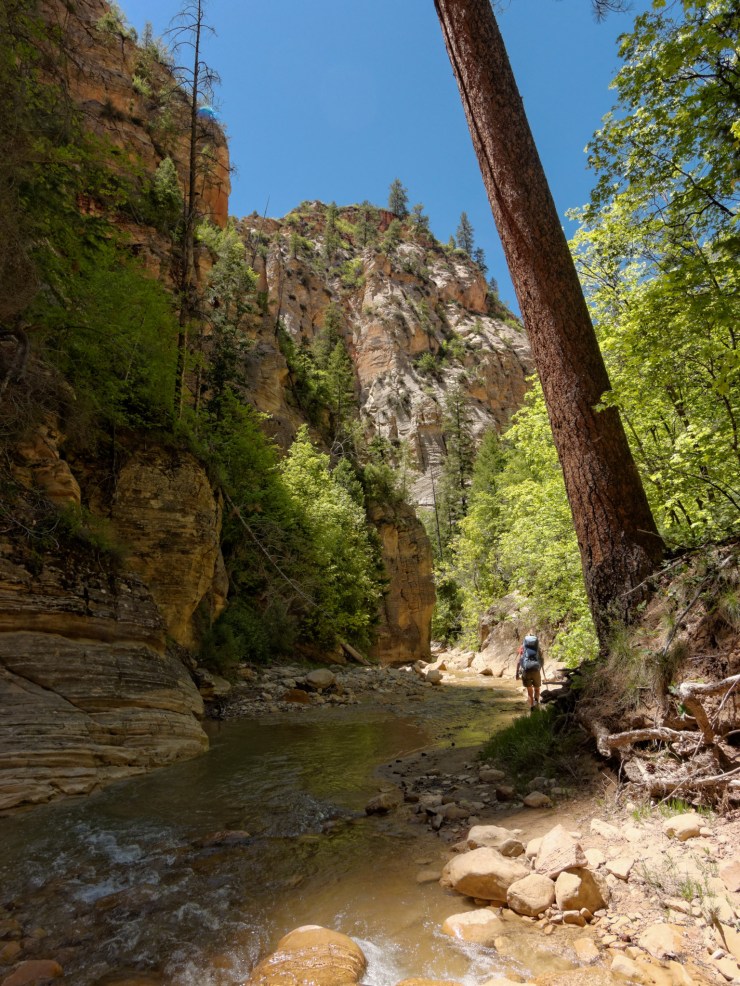
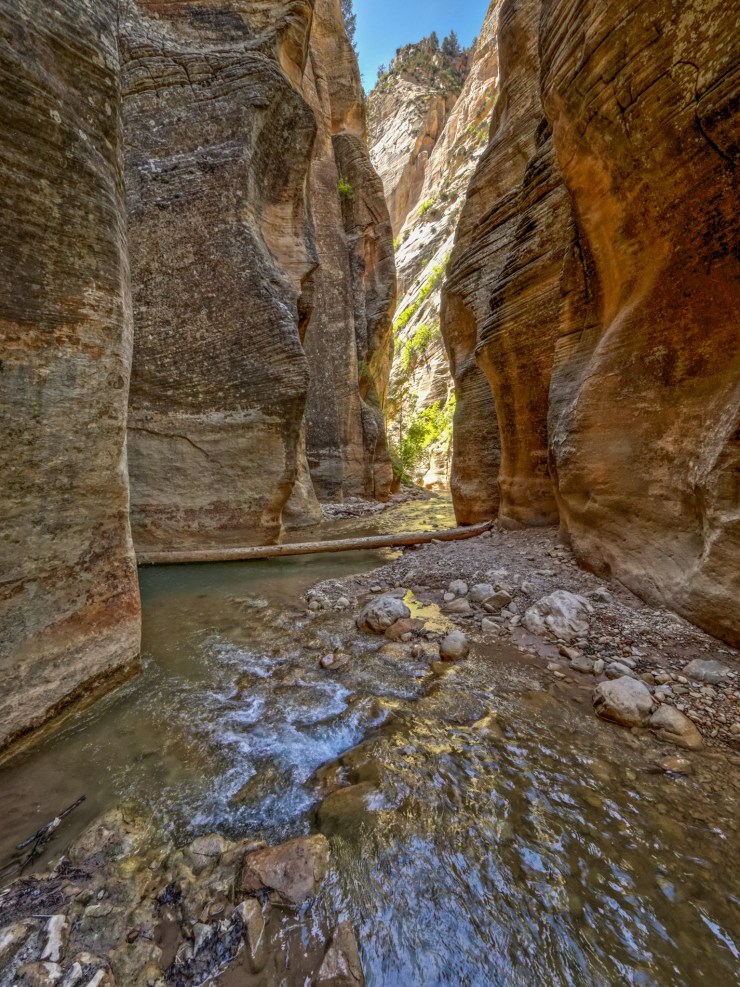
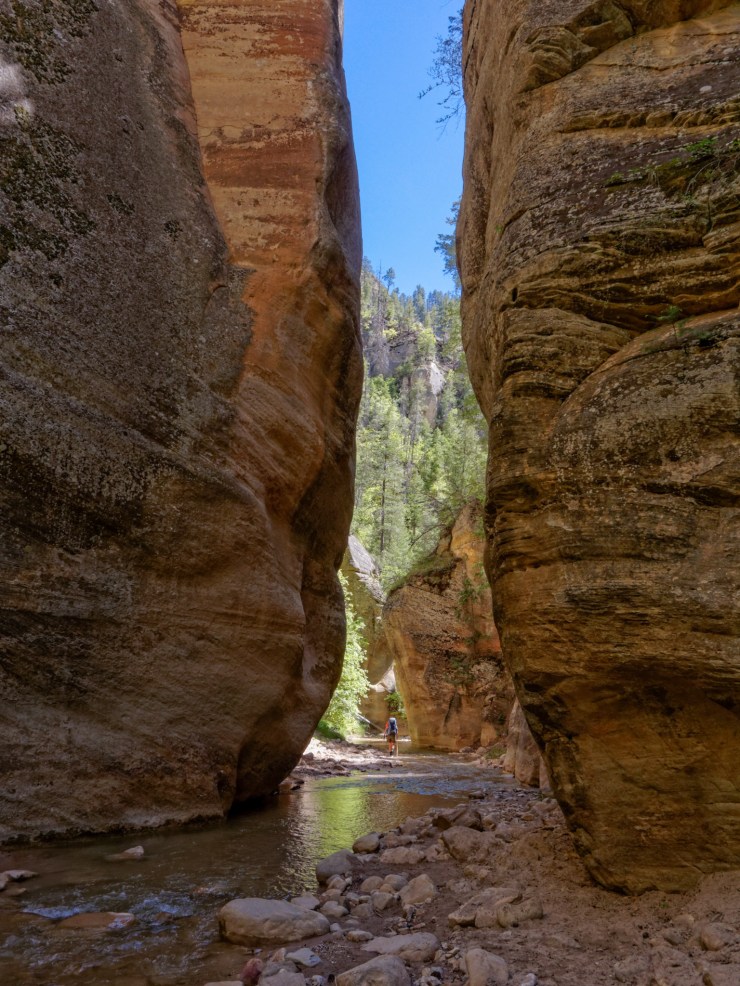
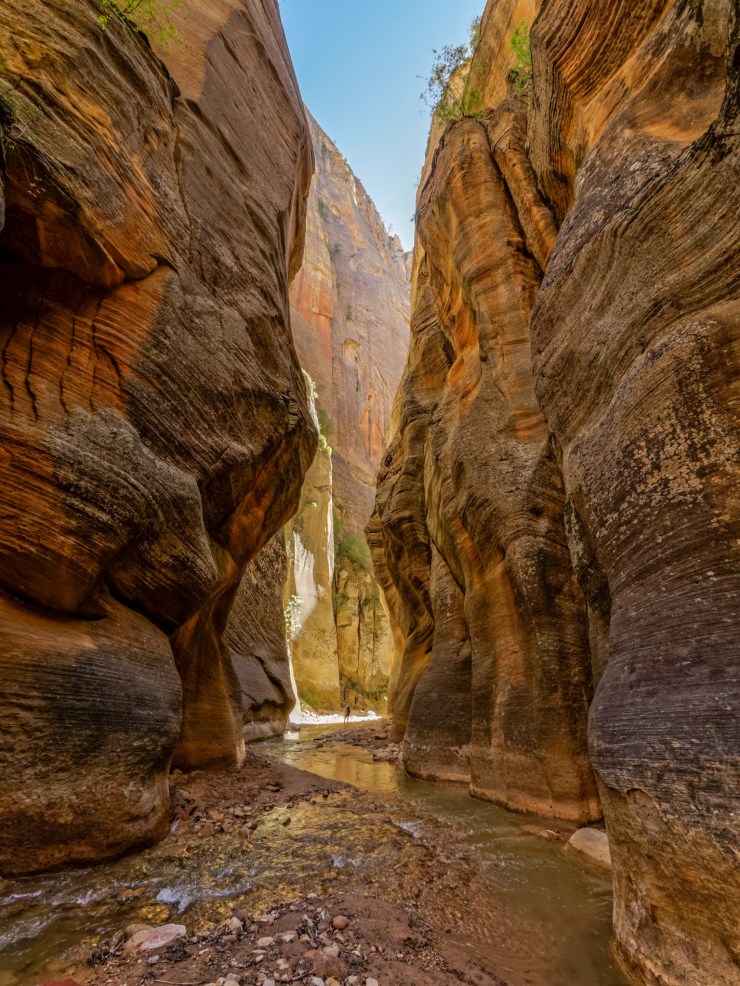
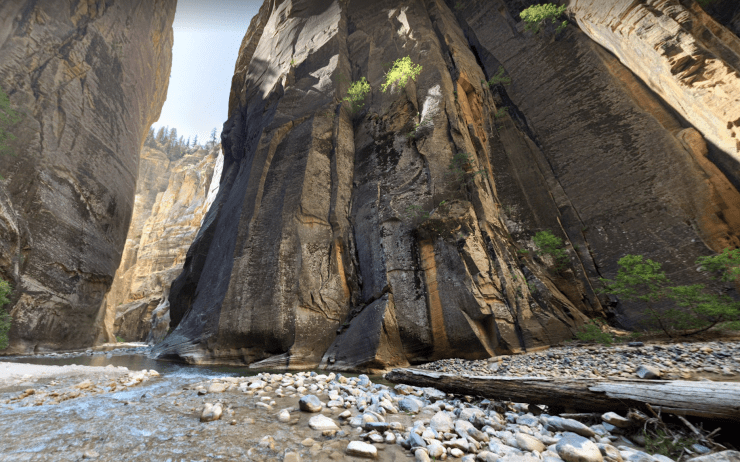
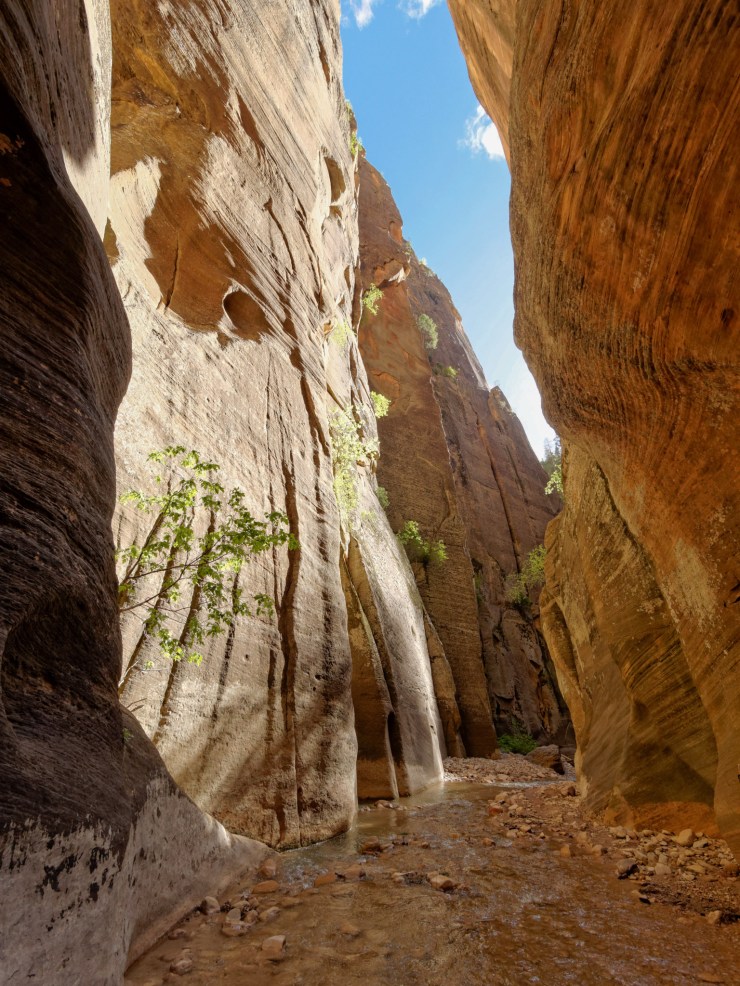
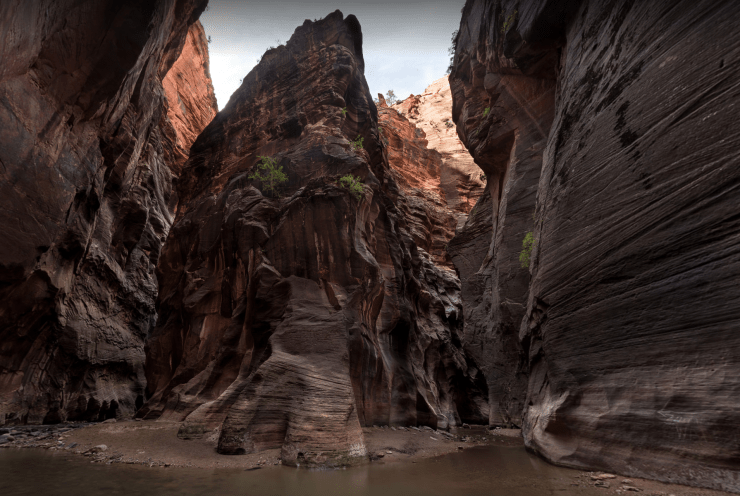
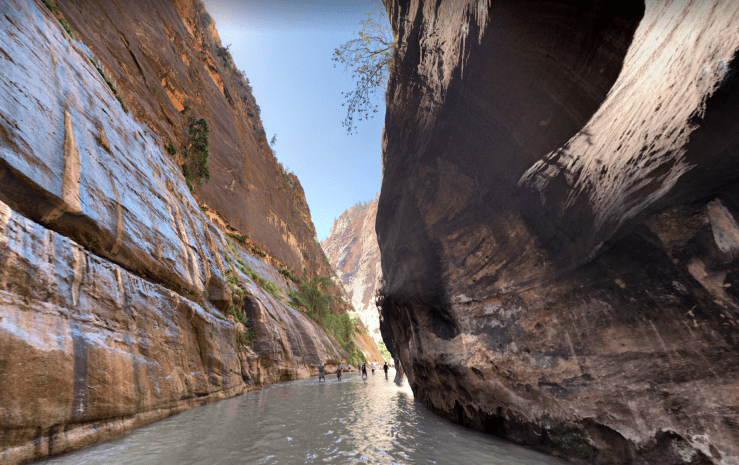
On Day 2, you hike roughly 7 miles through the primary section of The Narrows. The canyon views are most dramatic here. Along the way, you pass Imlay Canyon and Orderviller Canyon, both of which can be fun to explore if you have time. The further you get down the trail, the more likely you are to encounter increasing numbers of day hikers. This can degrade the scenery a bit, but the dramatic canyons are still awesome! You continue hiking through the river and Narrows until the ~15 mile mark. At that point, you can exit the Virgin River and hike along the Riverside Trail. This trail leads all the way to the Temple of Sinawava, where you pick up the Zion NPS Shuttle bus to get back to the Visitor Center.


……….
Here are some similar trip reports!
Zion Traverse – Zion National Park (51 mile point-to-point)
The Escalante Route – Grand Canyon National Park (32 mile trek)
