


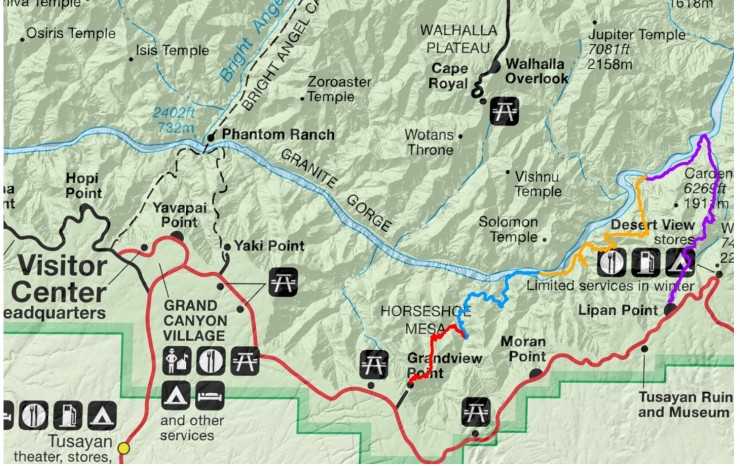
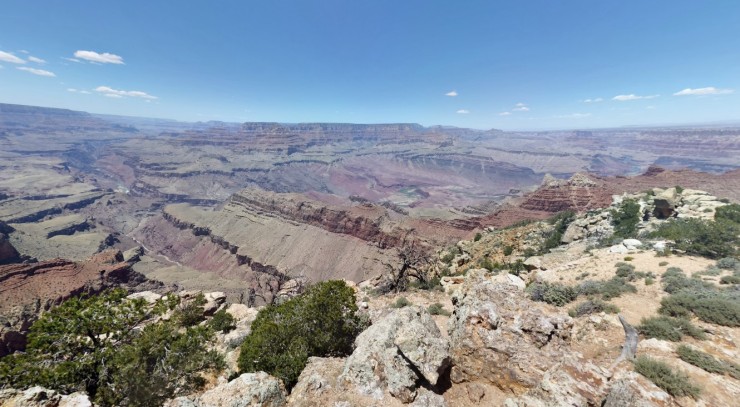
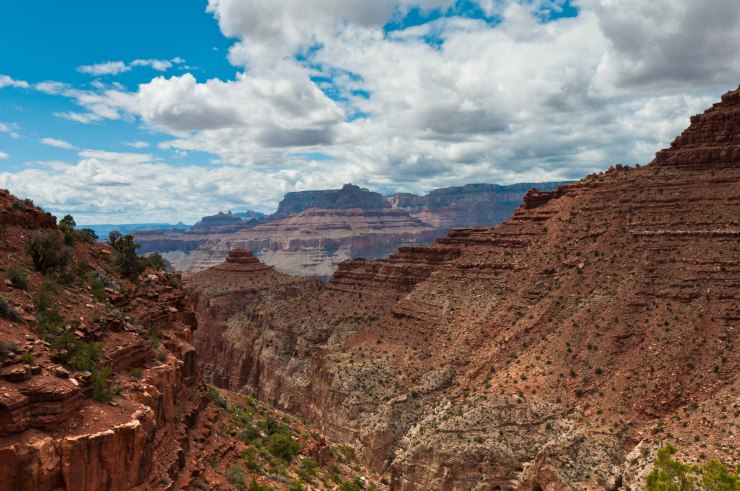
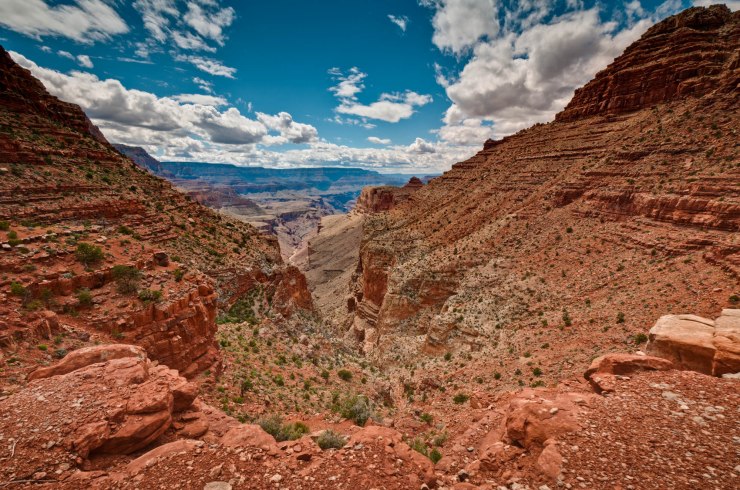
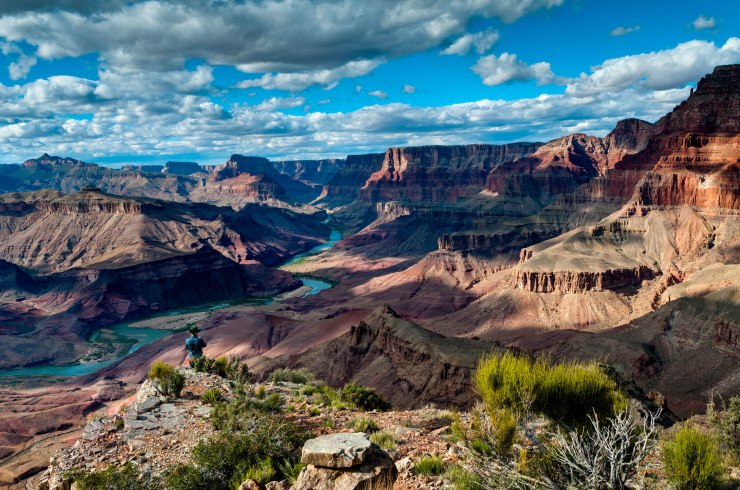
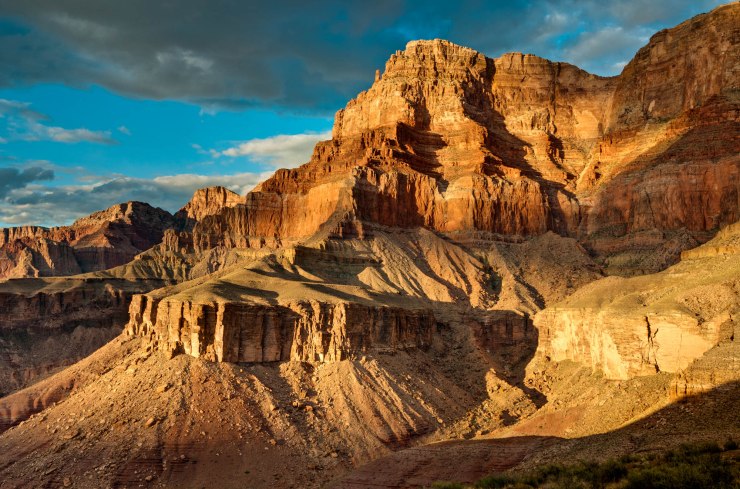
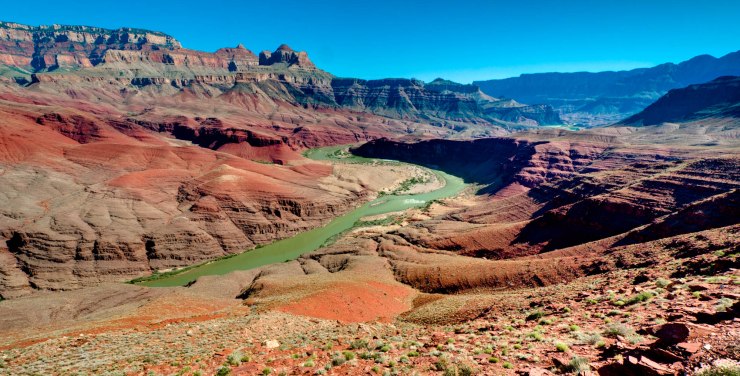
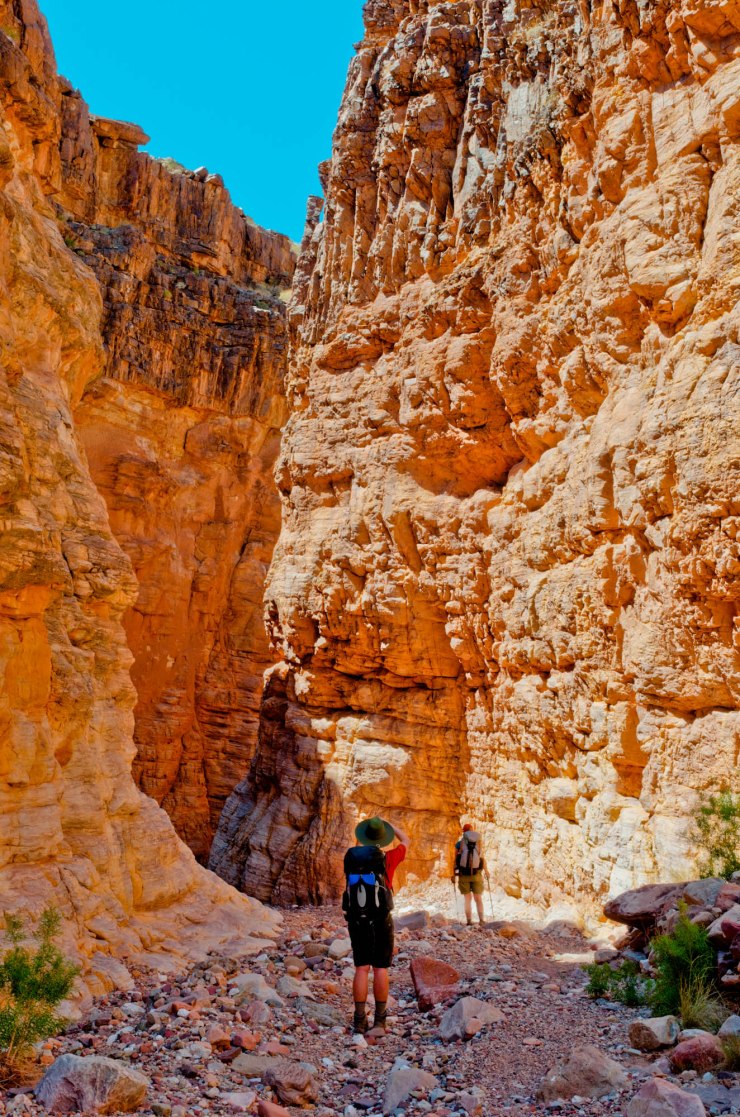
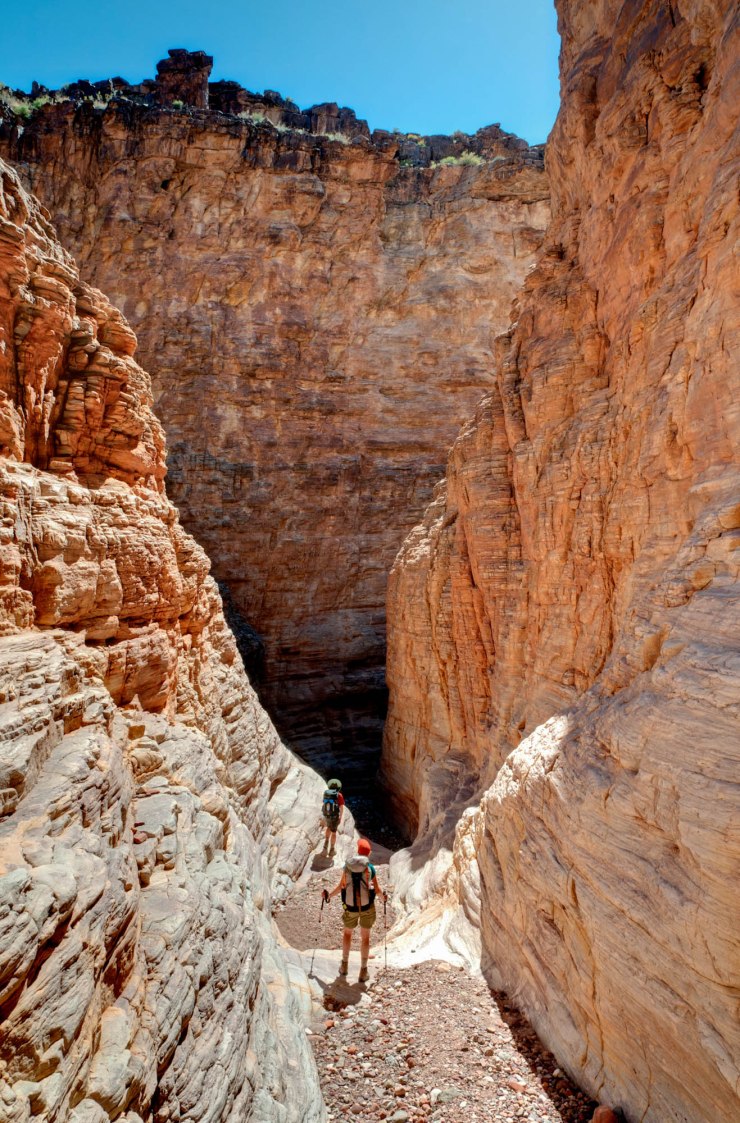
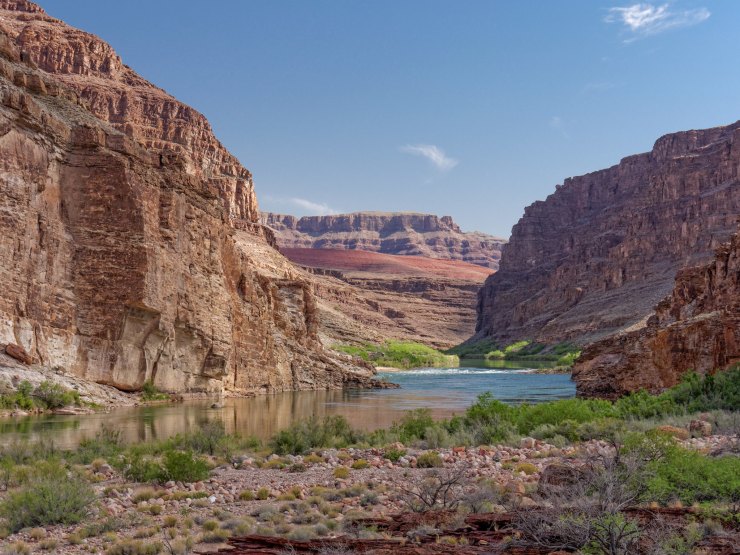
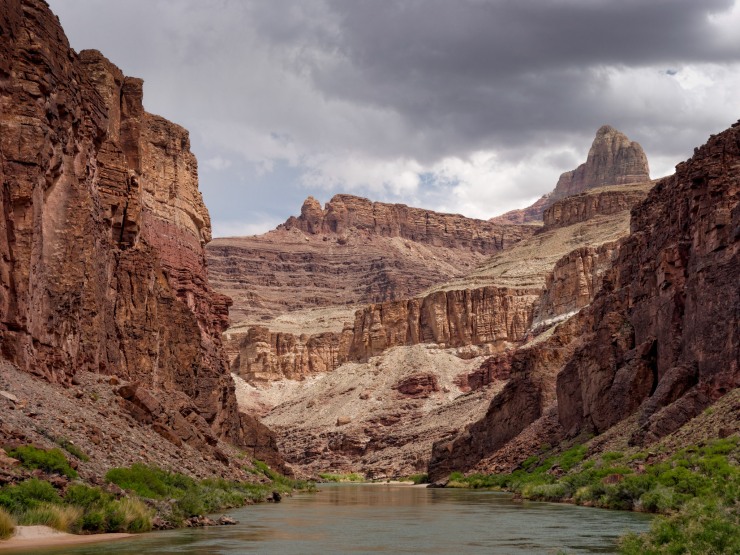
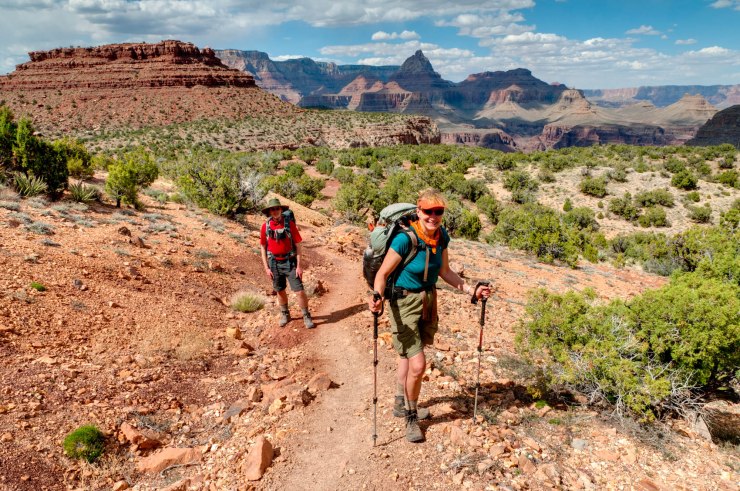
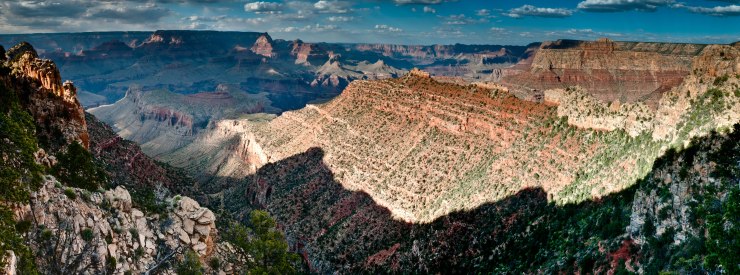
Trip Overview: The ~32 mile Escalante Route is a challenging, yet extremely beautiful one way trek in Grand Canyon National Park. The trek starts and ends on the South Rim of the Grand Canyon and includes over 10 miles of hiking on Escalante Trail along the Colorado River. Highlights include the SeventyMile Creek and Slot Canyon, Nevills and Hance Rapids, climbing the Papago Wall, Red Canyon, and wide open views of the Colorado River and Grand Canyon. This trek is best for backpackers with prior experience because it has some steep, exposed trails and requires scrambling and route finding in a couple sections. In this itinerary you enter the canyon via the Tanner Trail and exit via the Tonto and Grandview Trails.
- Higher resolution version of the overall map for The Escalante Route trek (PDF)
- Topographic map of Grand Canyon National Park for purchase (amazon link)
Jump to Day 1: Lipan Point to Cardenas Creek
Jump to Day 2: Cardenas Creek to Red Canyon
Jump to Day 3: Red Canyon to Hance Creek
Jump to Day 4: Hance Creek to Grandview Point
Shop Deal of the Day at REI Outlet (up to 50% off)!
Preparations:
Click here to read more about Permits
Permits: Permits are required for overnight camping in Grand Canyon National Park. Permits cost $10 plus an additional $8 per person per night camped. Competition for permits along the Escalante Route is less intense than for sights along the rim-to-rim (“Corridor”) route, but backpackers should still plan to secure permits ahead of time.
The backcountry permit reservation system for Grand Canyon National Park is a bit convoluted. You must fax or mail in your permit application, and the application must arrive at the Backcountry Office within a specific time period in order to be considered for the permit lottery. The table below shows when permit applications are considered for various trek start dates.
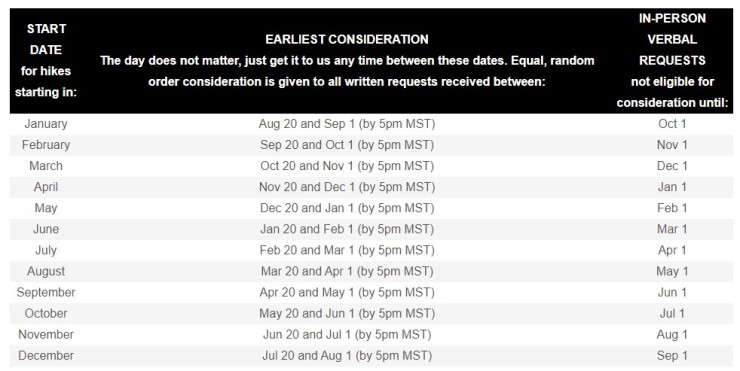
If you plan to hike the Escalante Route during May, you need your application to be received between Dec 20th and Jan 1st. All applications received within this time frame are then entered into a permit lottery. Winners of the lottery are typically notified ~3 weeks after the first of the month. If you miss the lottery application period, you can still submit a permit application. All late applications are considered on a first-come, first-serve basis after the lottery, assuming there are still permits available. There is also a waitlist and some last minute permits available to hikers who apply at the backcountry office in person before their trek. There is a complete explanation of the permit process and all available options on the Grand Canyon NP website. For this specific itinerary, you camp at Cardenas Creek on night 1, Red Canyon on night 2, and Hance Creek on night 3.
Click here to read more about Logistics
Logistics: If you would like to camp the night before and/or after trekking the Escalante Route, there are two campgrounds in Grand Canyon National Park on the South Rim near the trailheads. Mather Campground is a large campground (327 sites) located near the Grand Canyon Visitor Center. It has lots of amenities including showers and access to the park shuttle system. Campsites at Mather can be reserved up to 6 months in advance of your stay date. The Mather campgrond is ~22 miles from the Lipan Point (start of the Escalante Route Trek) and ~11 miles from Grandview Point (end of the Escalante Route Trek). The Desert View Campground is another option and it is located only ~3 miles from Lipan Point and ~14 miles from Grandview Point. However, there are only 50 campsites at Desert View and they are all first-come, first-serve.
No matter where you camp before your trek, you will need to figure out a way to shuttle between the two trailheads before or after you trek. Unfortunately, the free park shuttles do not travel far enough east to access the Escalante Route trailheads. If your group has two vehicles you can simply leave a car at each trailhead. For those with only one vehicle, it is generally easiest to drive Grandview Point the morning or your trek and leave your car there. Then, take a taxi to Lipan Point to start your trek on the Tanner Trail. This allows you to simply drive back to camp after you finish your trek. For info on how to schedule a taxi within the park, you can consult the NPS website, which lists phone numbers for taxi service.
Click here to read more about Difficulty
Trail Conditions and Difficulty: Backpacking and hiking within Grand National Park can be very difficult given the high summer temperatures and lack of water in some sections of the trail. The Escalante Route is no exception. Backpackers should be prepared for exposed and narrow trails and will encounter the Papago Wall, which requires some exposed hand and toe climbing. Backpackers also will need to carry several liters of water since there are only a few water sources between the campsites. It is also advisable to avoid hiking during the heat of the summer.
The trails along this route are generally well marked and you will encounter fewer other hikers compared the more popular Bright Angel and South Kaibab Trails. That said, backpackers should have a map and compass and should be prepared for the extremes offered by the Grand Canyon. For info on the Escalante Route provided by the National Park Service, check out this info sheet.
Supplies: The main concerns with backpacking in the Grand Canyon are related to heat, sun exposure, and water. Thus, hikers should wear clothing (or sunscreen) that protects them from the sun and should have proper layers that allow for temperature regulation over a wide range of temperatures. Lastly, a large water bladder and proper water filtration system are essential. Many hikers also use trekking poles since they help your knees on the steep climbs and descents.
Below is a list of the gear recommended for backpacking The Escalante Route:
Hiking clothes
- a lightweight hiking rain jacket (North Face Venture 2 Jacket)
- fast drying synthetic hiking pants (prAna Zion Pants)
- a quick drying long sleeve hiking shirt (Columbia Silver Ridge L/S Shirt)
- wool outer socks (People Socks Moreno 4-pack)
- thin blister preventing base socks (WrightSock double layer Coolmesh)
- quick drying synthetic boxer briefs (ExOfficio Give-N-Go)
- Gore-tex hiking shoes (adidas Outdoor Terrex Fast R Gore-Tex Shoe)
Clothes for camp
- wool base layer shirt (Minus33 Merino Wool Chocorua Midweight Crew)
- lightweight down jacket (Patagonia 800-fill Down Jacket)
- lightweight camp shoes (Xero Z-Trail lightweight sandal)
Hiking gear
- topographic map (Nat Geo topographic map)
- trekking poles (Black Diamond Trail Ergo Cork Trekking Poles)
- 2 liter hydration bladder (Platypus Big Zip Water Reservoir)
- 65 liter backpack (Osprey Atmos 65 Liter pack)
- water filtration system (Platypus gravity filtration system)
Camp gear
- strong tent with rain-fly (Alps Mountaineering Chaos 2 Tent)
- inflatable sleeping pad (Therm-a-Rest Trail Pro Sleeping Pad)
- sleeping bag (REI Co-op Igneo 25 Sleeping Bag)
- inflatable camping pillow (Ultralight Inflating Pillow)
- lightweight backpacking chair (Helinox Chair Zero)
- lightweight lantern (MPOWERD Luci Outdoor 2.0)
- headlamp (Black Diamond Cosmo Headlamp)
- multi-tool with knife (Gerber MDime Mini Multi-Tool)
- lightweight stove (MSR PocketRocket 2)
- lighter (BIC plastic lighters)
- 2 liter pot (GSI Outdoors Halulite Boiler Pot)
- coffee cup (GSI Outdoors Glacier Stainless Cup)
- lightweight spork (Snow Peak Titanium Spork)
- small, quick drying towel (REI mutli towel mini)
Random
- wet wipes (Stall Mates individually wrapped wipes)
- mole skin for blisters (Blister medic kit)
- lightweight trowel (GSI Sanitation Trowel)
- small amount of duct tape for gear repairs
- chapstick and sun screen
Food and drink
- a variety of my favorite dehydrated meals
- electrolyte replacement (NUUN Hydration Tablets)
- quick snacks (Clif Shot Bloks and Clif energy bars)
- instant coffee (Starbucks VIA)
- small plastic water bottles filled with whisky 🙂
……….
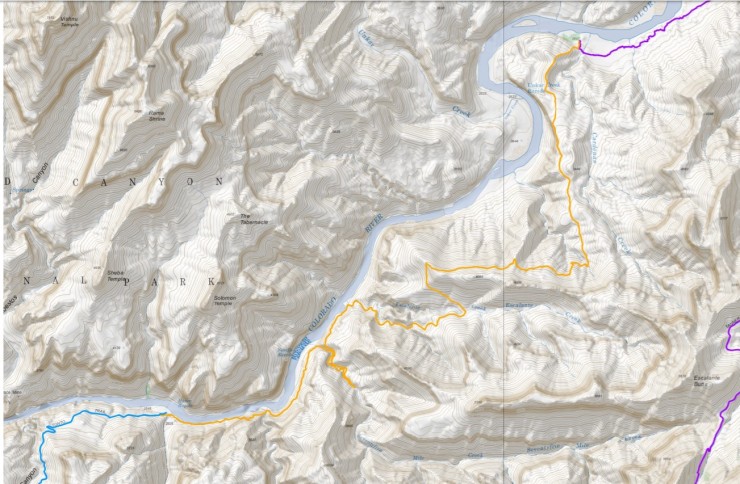
Day 1: 12 miles; +790 feet / -5,520 feet; Lipan Point to Cardenas Creek via Tanner Trail
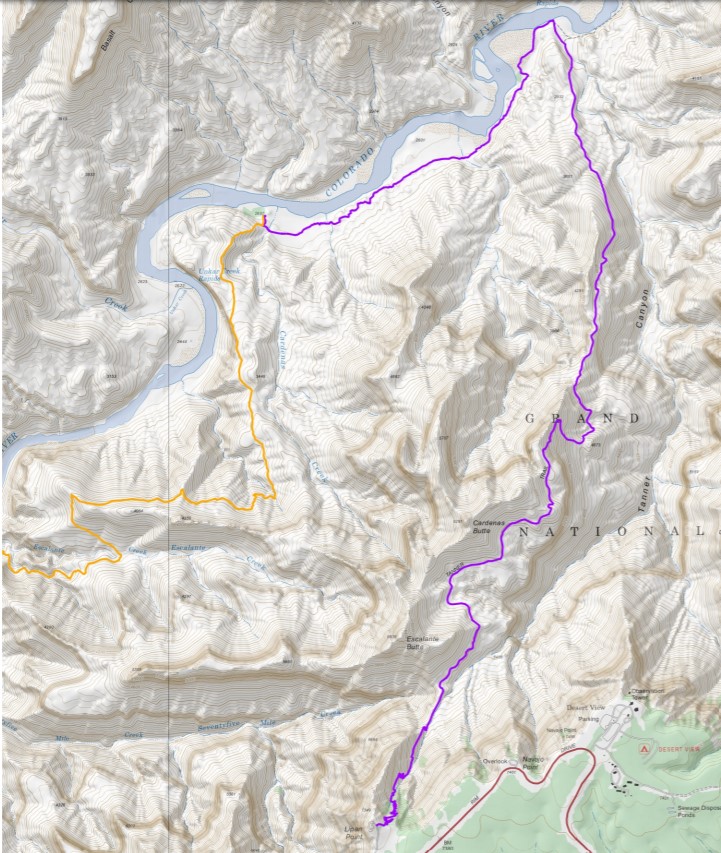
Map of the Day 1 hike along the Escalante Route
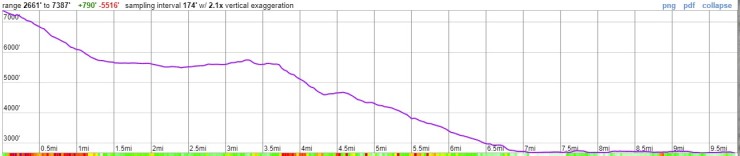
The hike on the first day is the longest of the trek at roughly 12 miles in distance. The majority of the hike is downhill, so while your knees will be tired, you will not be climbing any significant elevation. Given the length, it is best to start hiking early in the morning. This will allow you to get close to the Colorado River (your first water access point) before the temperatures really heat up.
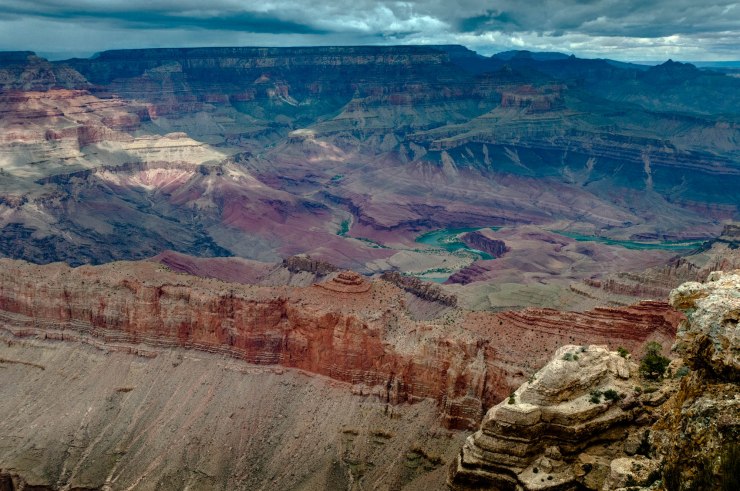
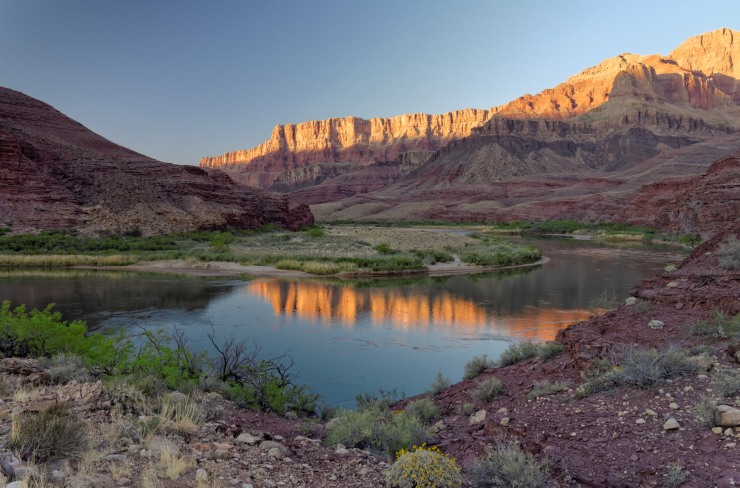
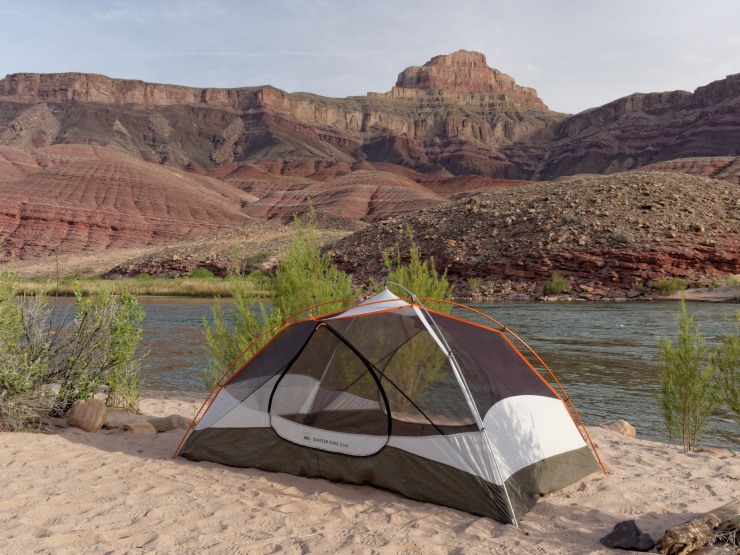
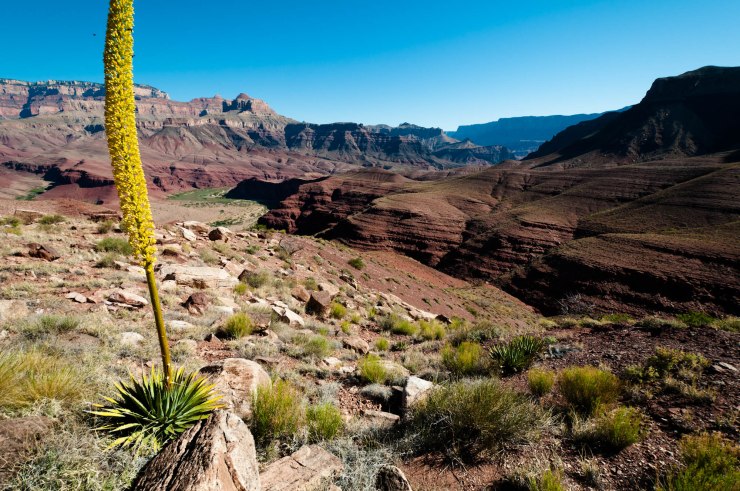
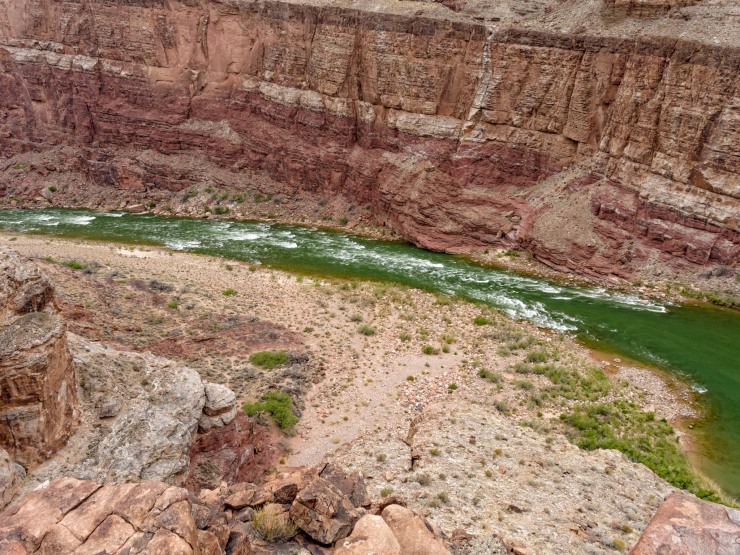
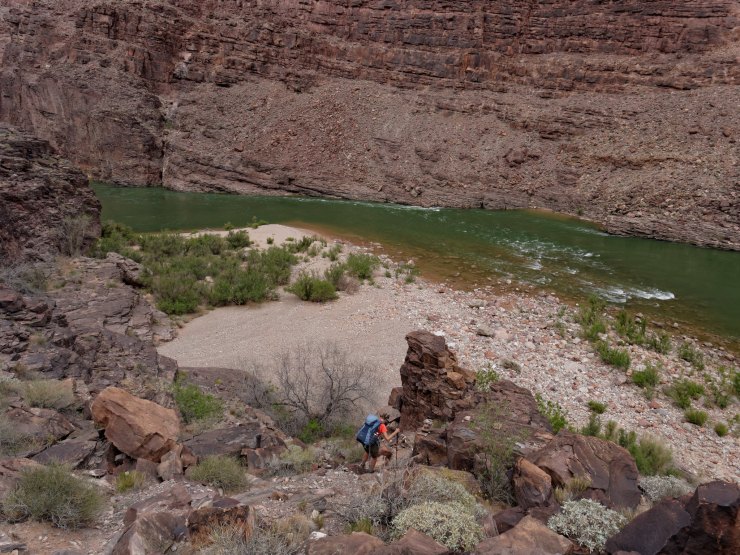
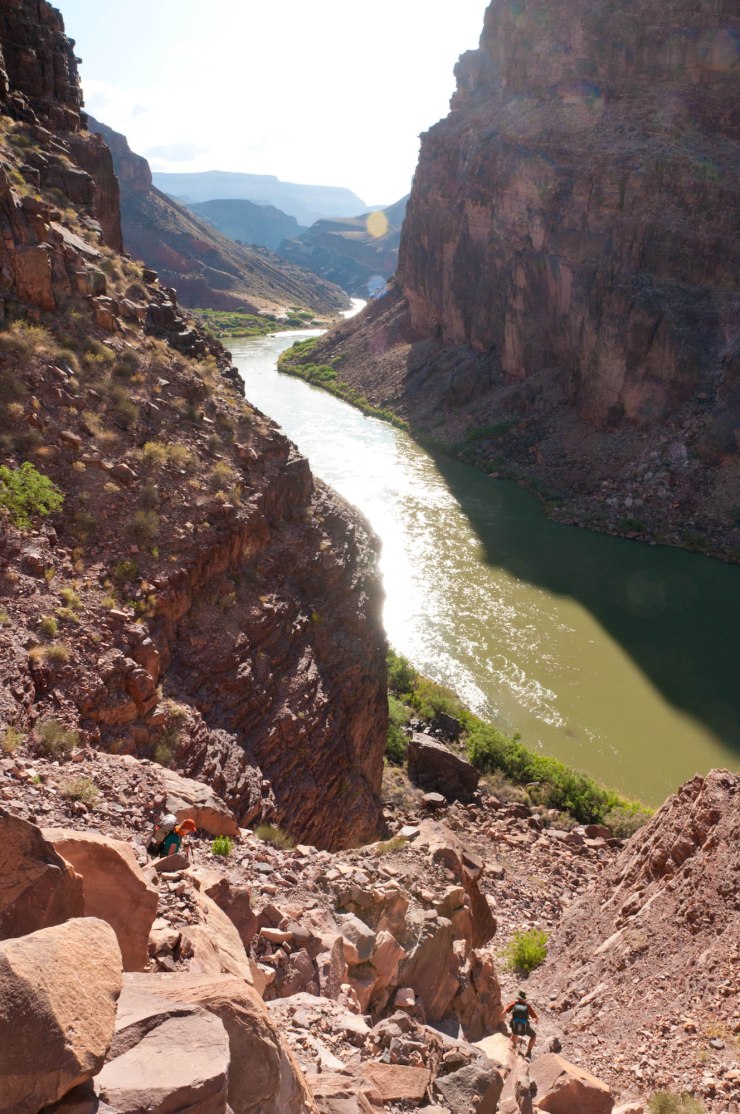
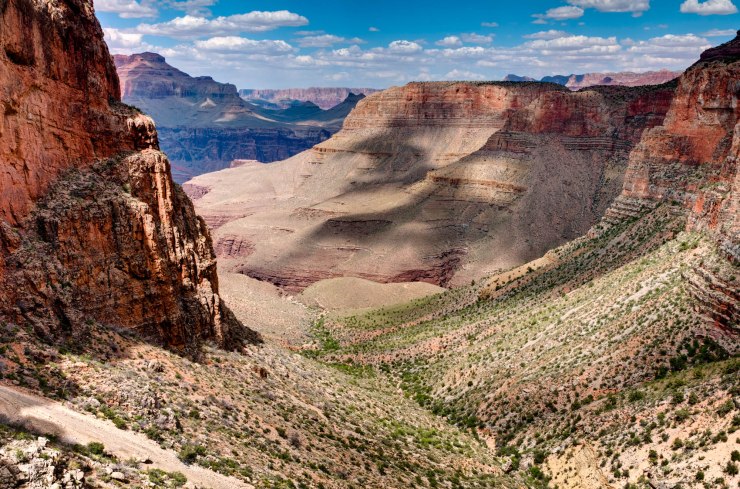
The Tanner Trail starts at Lipan Point and leads roughly 9 miles down to the shore of the Colorado River. Along the route you are treated to some great views of the Grand Canyon. Once you reach the Colorado River, you have a ~3 mile hike southwest along the Escalante Trail before reaching the Cardenas Creek drainage area. There is a small beach here that makes for a good camping spot for your first night.


……….
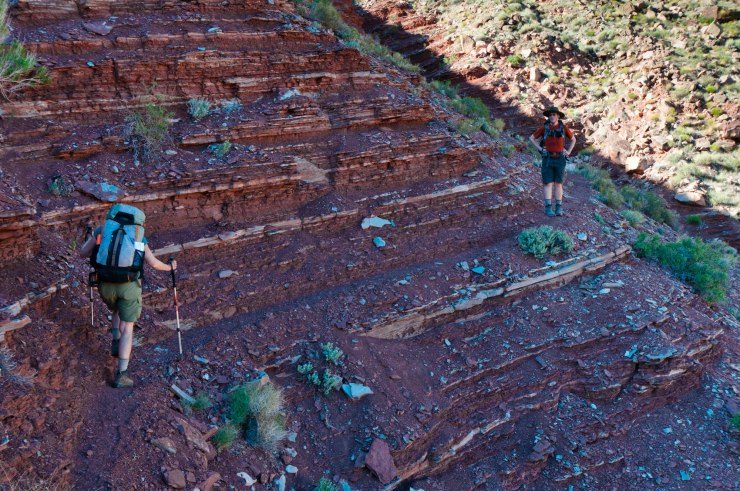
Day 2: 9 miles; +2,890 feet / -2,920 feet; Cardenas Creek to Red Canyon via Escalante Trail
Map of the Day 2 hike along the Escalante Route
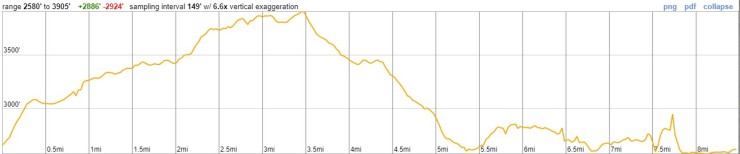
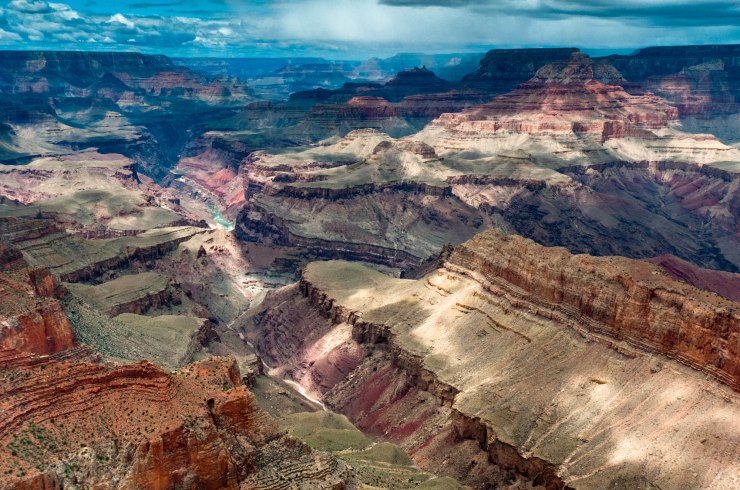
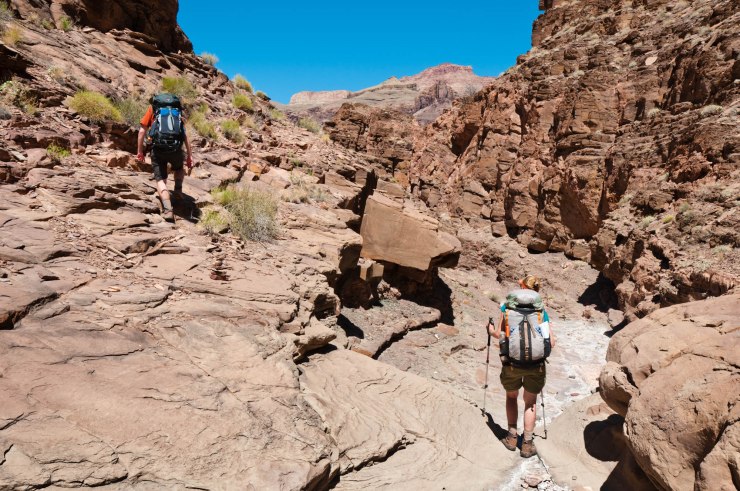
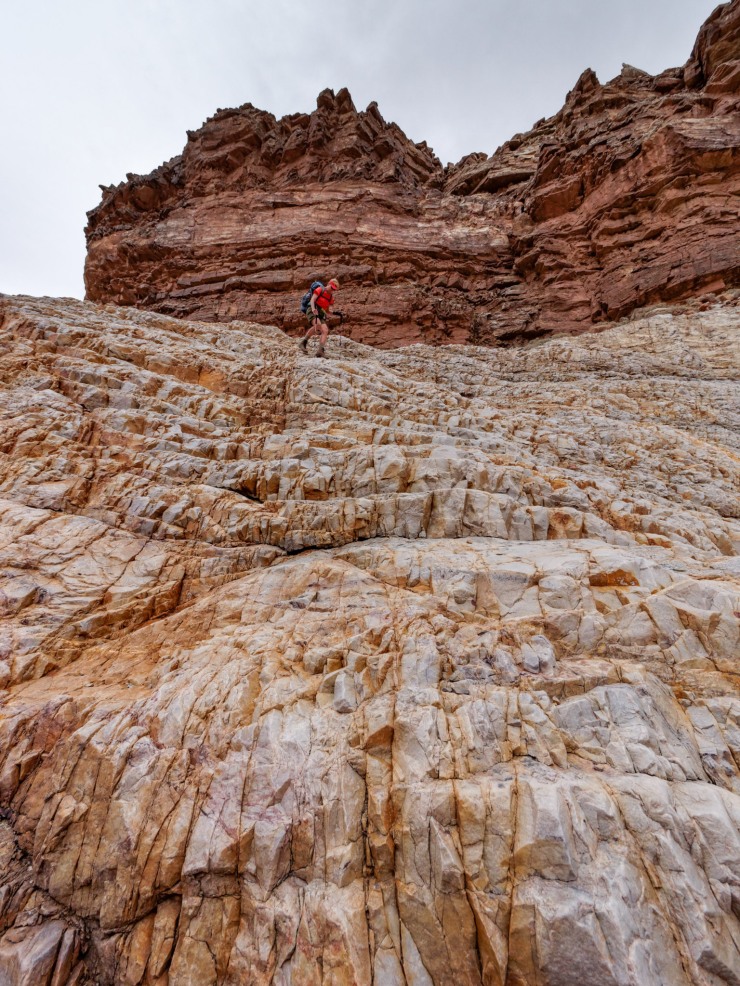
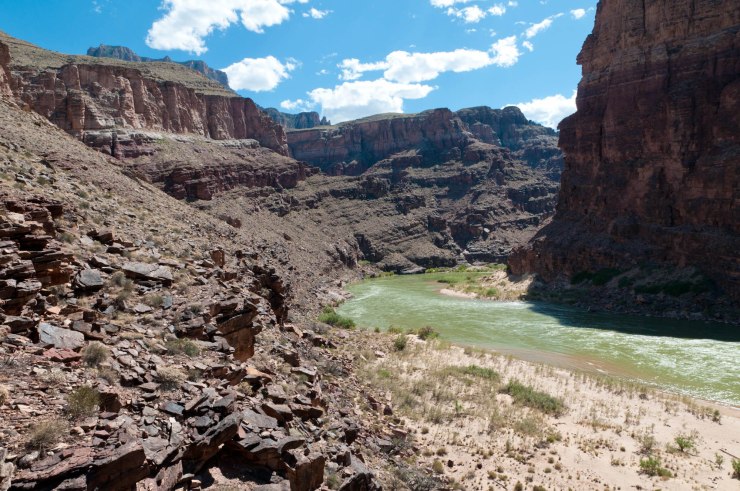
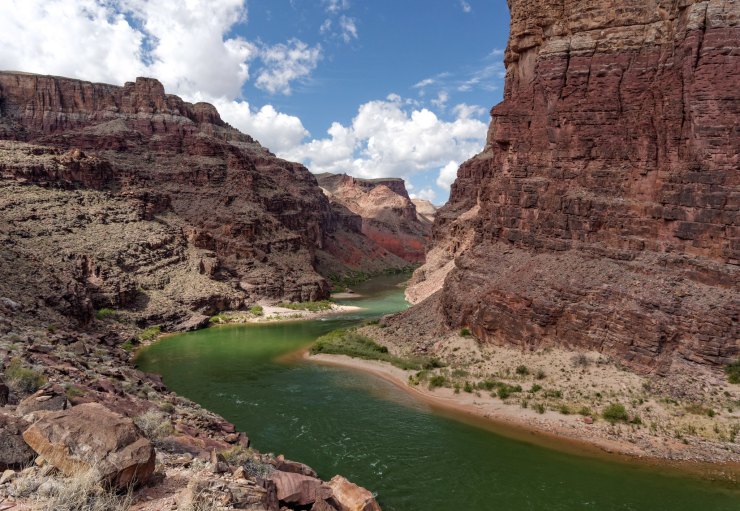
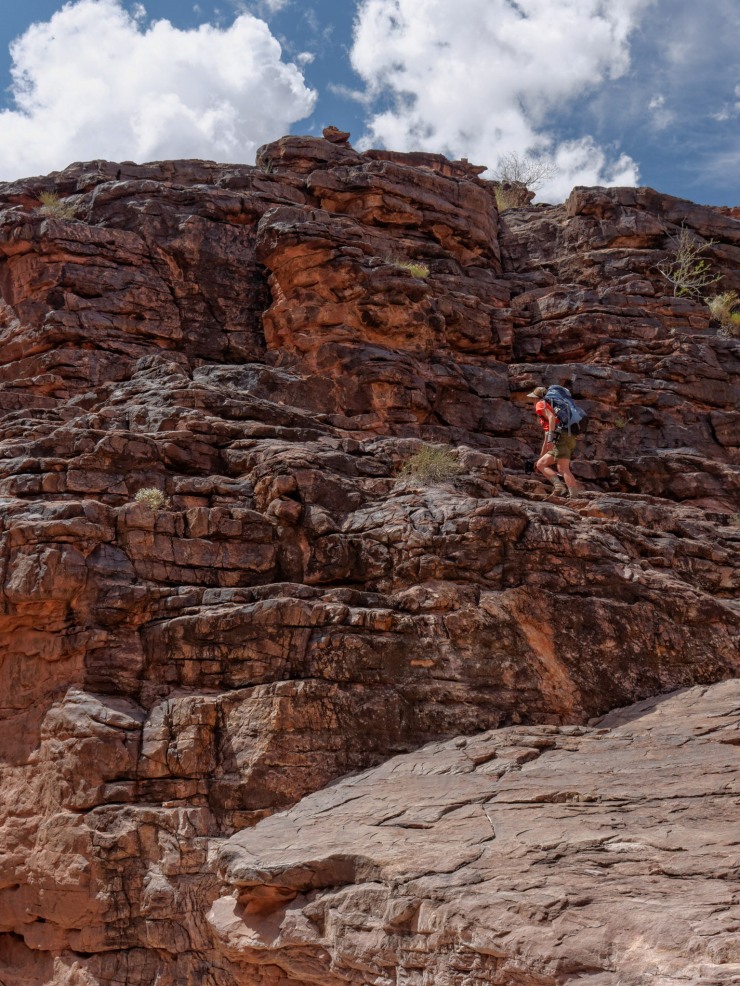
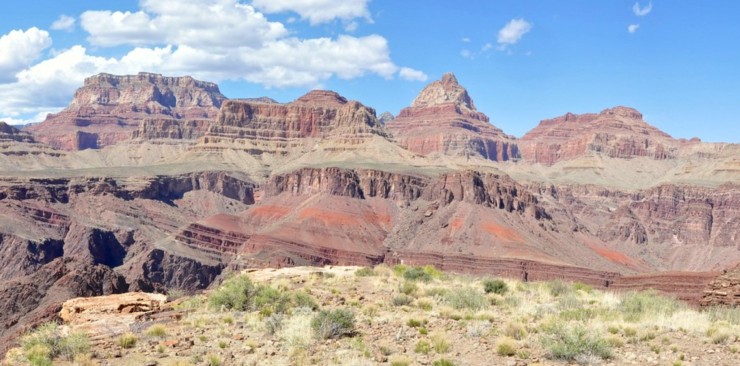
On day 2 you tackle a moderately difficult hike of 9 miles with roughly 2,500 feet of elevation gain/loss. This hike follows the Escalante Trail along the Colorado River, so you get very nice views of the canyon and river. Since the trail gets close to the shore in a couple sections, you should not need to carry more than 2-3 liters of water at any given time. The main challenge of this hike is climbing up the Papago Wall at the ~7 mile mark. This requires some basic climbing with hand and toes holds. No technical climbing is required (i.e. no harnesses, pins, and ropes), but you must be comfortable scaling a few exposed ledges. At the end of the hike you reach a small beach at the outlet of Red Canyon, which makes for a nice camp site.


……….
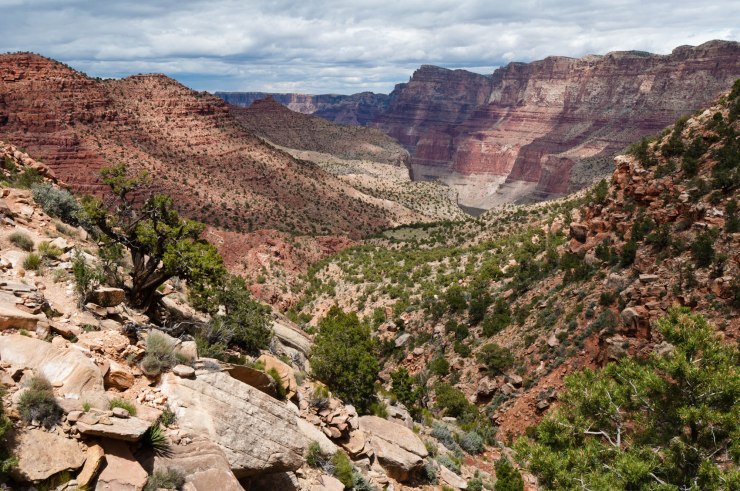
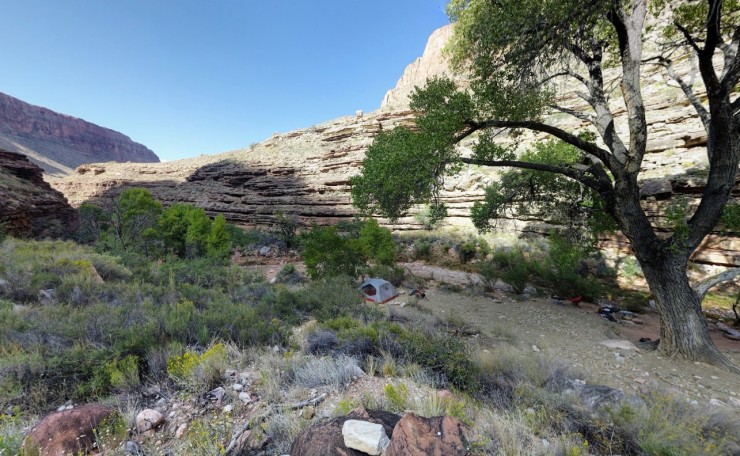
Day 3: 6.5 miles; +1,840 feet / -760 feet; Red Canyon to Hance Creek
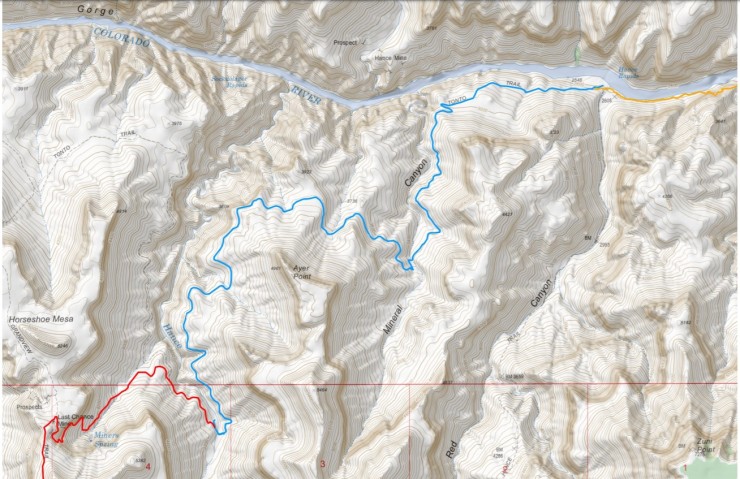
Map of the Day 3 hike on the Escalante Route
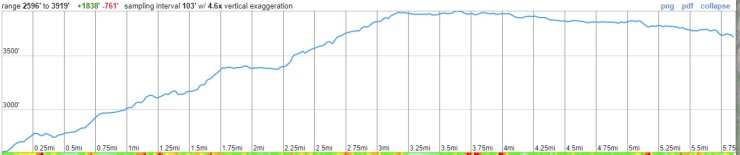
The hike on Day 3 is short at 6.5 miles in length and only climbs ~1,500 feet. A strong and fit backpacker could combine days 3 and 4 and hike all the way to Grandview Point in one day. However, it is safest to split this day into two and not try to hike all the way from the Colorado River to the South Rim in one day. Doing the full ~11 mile hike from Red Canyon to Grandview Point would be a very long day and would want to leave camp quite early in the morning to avoid climbing up Grandview Trail in the mid-day sun.
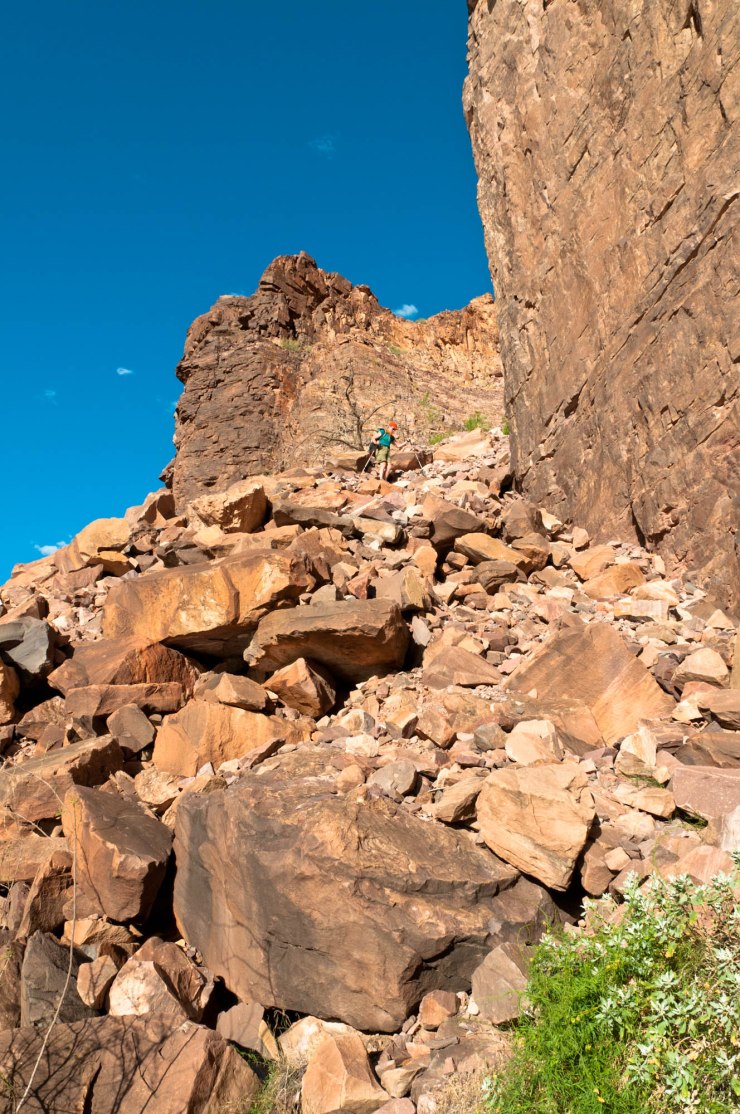
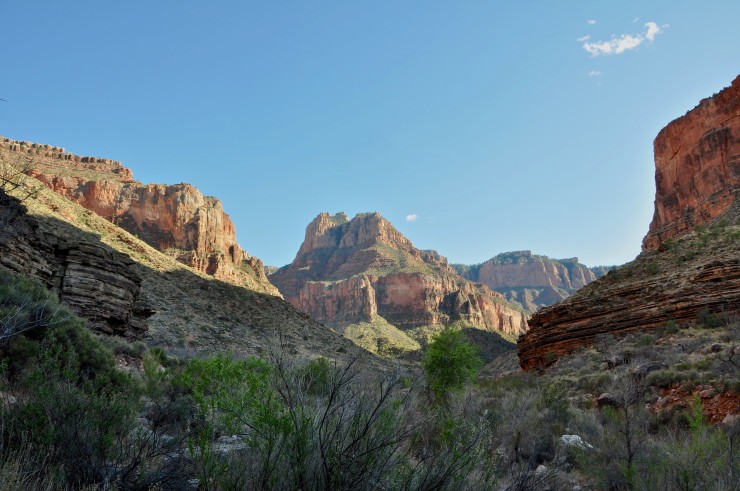
From camp, you take the Tonto Trail southwest towards Ayer Point. After climbing for ~3 miles, the trail will flatten out as it traverses around Ayer Point. When you reach Hance Creek, find a nice campsite and refill your water from the creek, which typically runs year round.

……….
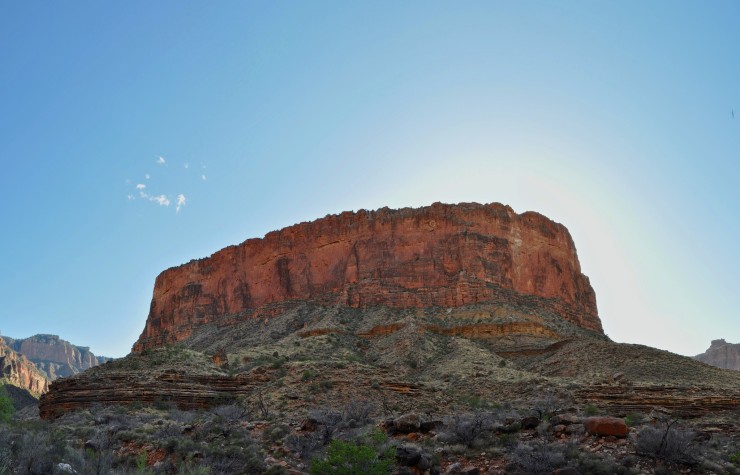
Day 4: 4.9 miles; +4,360 feet / -650 feet; Hance Creek to Grandview Point
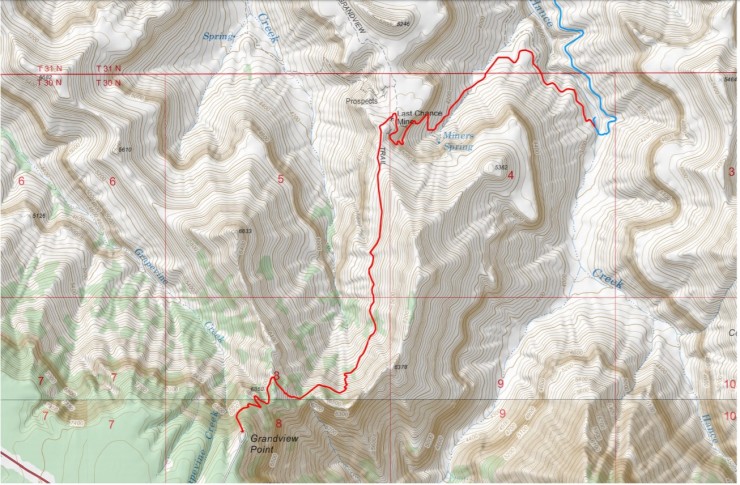
Map of the Day 4 hike along the Escalante Route
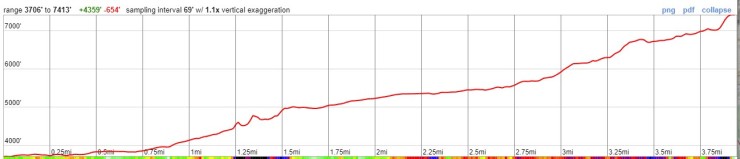
The final hike leads from Hance Creek to Grandview Point over the course of ~5 miles. There is a fair amount of climbing on this hike, so plan to hike relatively slow. The Grandview trail provides some great views so be sure to stop and look around once in while. At the 1.5 mile mark, you reach a junction with the Grandview Trail. If you have extra time and energy, you can do a side trip out to Horseshoe Mesa (i.e. head north on the Grandview Trail). Otherwise, head south along the Grandview Trail which climbs steadily up to Grandview Point. Ideally you should have a car parked at the Grandview Point, so you can drive back to camp (or home) after finishing your trek. There is one water source along this route. It is Miners Spring (aka Page Spring) and it is located neat the junction between the Tonto Trail and Grandview Trail. Since this is only ~1.5 miles from camp at Hance Creek, you likely will just fill your water at camp and hike all the way to the trailhead without refilling.


……….
Here are some similar trip reports!
Zion Traverse – Zion National Park (51 mile point-to-point)
North Circle Loop – Glacier National Park (52 mile loop)
Grand Canyon Hiking – South Kaibab and Bright Angel Trails (17 mile hike)
Continental Divide Loop – Rocky Mountain National Park (45 mile loop)
Rae Lakes Loop – Kings Canyon National Park Backpacking (41 mile loop)

We are doing this exact route in March- How long did it take you to do the 12 miles down Day 1.
LikeLike
The hike down is not too bad considering it is all downhill. The biggest issue is just strain on your thighs and knees as you descend (trekking poles help!).
We got to camp about 7 hours after setting off, though we stopped for pictures quite often and did a lunch break. It could be done significantly faster by a fit hiker if you don’t take many breaks and leave early in the morning when it is cool. I would give yourself plenty of time to take in the views though!
LikeLike
What a fantastic write-up. I really appreciate how informative it is; will really make planning easier. Two friends and I are planning to tackle this hike in April 2021.
LikeLiked by 1 person
Beautiful Pictures! What kind of camera do you use? What time of year did you hike this trail?
LikeLike
Hi Cate – The majority of the photos were taken with a Nikon D300S (photo credit to John Strother) and are from a trip in early May several years ago.
LikeLike
What are you thoughts on doing this hike with a dog? My biggest concern being the Papago wall. Also, what are the ideal months for this hike?
LikeLike
Hi Dan – I believe the best time of year to backpack in the Grand Canyon is Spring and Fall. It’s possible to go in Summer, but you need to be prepared for very hot temperatures! Winter is possible, but trails can be icy.
As far as a dog goes, Grand Canyon National Park is does not allow dogs on the trails below the canyon rim. You’ll have to leave your dog at home for this route.
LikeLike
What a great resource you’ve provided for those of us planning our canyon crawl. Thank you so much for all of the helpful information! Myself and 3 other backpacking bandits are going in at Tanner Trail April 29th 2022. We’re all looking forward to our big adventure along the Colorado River!
LikeLike
Hi Chris – I hope you have an awesome trip. If you remember, please come back an leave a comment letting us know any tips for other folks looking to do the same hike!
LikeLike
I would love to do this with my son, but we would be two novice hikers out alone. I am nearly 60 but still pretty fit and mobile. After watching a couple of videos of climbing the Papago wall, I think that looks doable. But, my bigger concern would be recognizing and navigating the trails. I assume they aren’t marked with a lot of signage!! Lol.. Any thoughts or suggestions you might have would be appreciated!!
LikeLike
Hi Andy – this trail great, but it can be challenging for novice backpackers. With the Grand Canyon you need to prepared for big changes in temperature, for lack of water, and to navigate desert terrain. The trails are marked, but this portion of the national park does not get nearly as much foot traffic as the main area. Thus, you may be alone for sections and may not be able to ask for help if you get lost. If you go, definitely bring a good topo map, a compass, and probably a GPS device. I would also give the ranger station a call and ask their opinion. They can provide the best advice on whether or not an itinerary is too ambitious for your experience level. Good luck!
LikeLike
You might want to change your advice regarding watering at Page Spring. It has arsenic and hikers should not drink it.
LikeLike
Doing this route late September
Day 1 to Cardenas Creek Camp (12 Miles)Day 2 to Horseshoe Mesa Camp (Hard 17 Miles)Day 3 to Granville Point (3~ish Miles UP!)
How much water should we each carry from Cardenas Creek Camp to Horseshoe Mesa Camp?
LikeLike