

")


")

Trip Overview: ~46 mile hiking trek starting near Mollepata (a 3 hour bus ride from Cusco) and ending at Machu Picchu. +10,750 feet / -14,000 feet with a starting elevation of 11,000 feet and peak elevation of 15,100 feet. At Machu Picchu we hiked an additional +/- 3,500 feet of elevation over the course of ~10 miles. Highlights include mountain peaks, glaciers, glacial melt lakes, lush green valleys, and Machu Picchu. We completed this trip over 5 days in May of 2016.
Jump to Day 0: Acclimating in Cusco
Jump to Day 1: Marcocasa to Soraypampa
Jump to Day 2: Soraypampa to CColpapampa
Jump to Day 3: CColpapampa to La Playa
Jump to Day 4: La Playa to Aguas Calientes
Jump to Day 5: Exploring Machu Picchu
Shop Sale & Clearance Items at REI.com (up to 50% off)!
Preparations:
Click here to read more about Permits
Permits: There is no permit needed to hike the Salkantay Trek. This is different than the Inca Trail which requires a permit and is limited to only 200 tourists hiking per day (plus 300 cooks, porters, and guides). For this reason, the Salkantay Trek is a great alternative to the Inca Trail (in addition to the fact that the Salkantay Trek is very beautiful in its own right!).
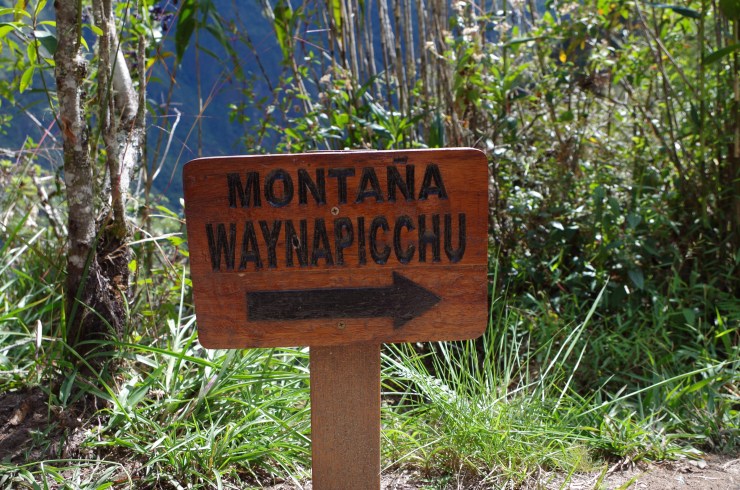
However, a ticket is required to enter Machu Picchu, and additional special tickets are needed to hike up either Huayna Picchu or Montana Machu Picchu. As of 2017, there are now several different ticket types you can buy which specify what areas you can visit and at what time you can visit them. According to the government ticket sales website, the quotas, prices, and times are as follows (note that these may change over time):
- Machu Picchu 1st; you must enter and leave between 6am – 12pm, limited to 3,267 tickets, foreigner adult cost is 152 Sol (~$47)
- Machu Picchu 2nd; you must enter and leave between 12pm – 5:30pm, limited to 3,267 tickets, foreigner adult cost is 152 Sol (~$47)
- Machu Picchu + Montana Machu Picchu, 1st; you must present yourself to the Montana trailhead between 7am-8am, limited to 400 tickets, foreigner adult cost is 200 Sol (~$62)
- Machu Picchu + Montana Machu Picchu, 2nd; you must present yourself to the Montana trailhead between 9am-10am, limited to 400 tickets, foreigner adult cost is 200 Sol (~$62)
- Machu Picchu + Huayna Picchu, 1st; you must present yourself to the Huayna trailhead between 7am-8am, limited to 200 tickets, foreigner adult cost is 200 Sol (~62)
- Machu Picchu + Huayna Picchu, 2nd; you must present yourself to the Huayna trailhead between 10am-11am, limited to 200 tickets, foreigner adult cost is 200 Sol (~$62)
You must purchase your Machu Picchu ticket in advance. Tickets are not sold at the Machu Picchu gate and they will sell out during popular times. In addition, there is now a requirement that you hire a guide in order to enter Machu Picchu. There are some reports saying this guide rule is not being enforced, so you could risk it and then hire a guide at the gate if need be.
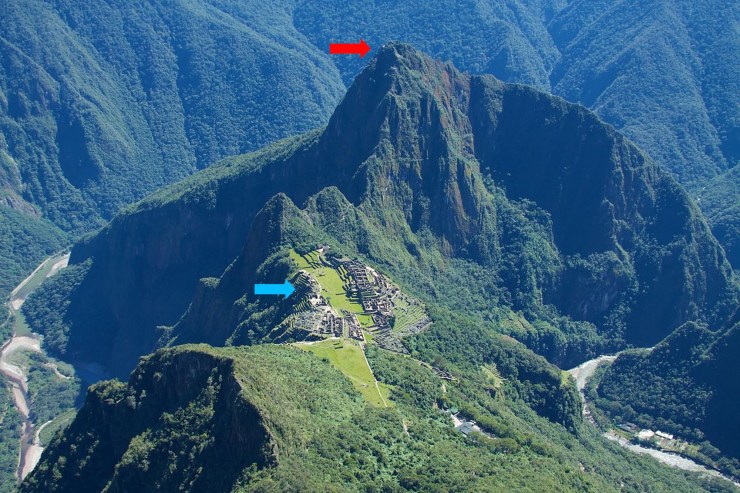
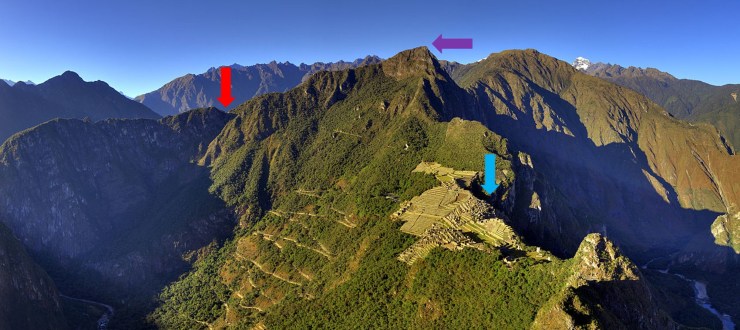
If you book a guided Salkantay Trek, the Machu Picchu ticket will likely be included in the price and the local agents will buy the ticket for you. You most likely will only be responsible for deciding whether or not to hike Huayna Picchu or Montana Machu Picchu. We went to the top of Huayna Picchu and thought it was well worth it.
Huayna Picchu and Montana Machu Picchu are on opposite sides of the Machu Picchu site and thus provide different views. The Montana hike is longer (~3 hrs) and more of a hike along a trail. The hike up Huayna Picchu takes about 2 hrs and is more of steep climb up many stairs. Most people say Huayna Picchu is the more scary hike since the stairs are very narrow. Both hikes have spectacular views though!
Click here to read more about Salkantay Logistics
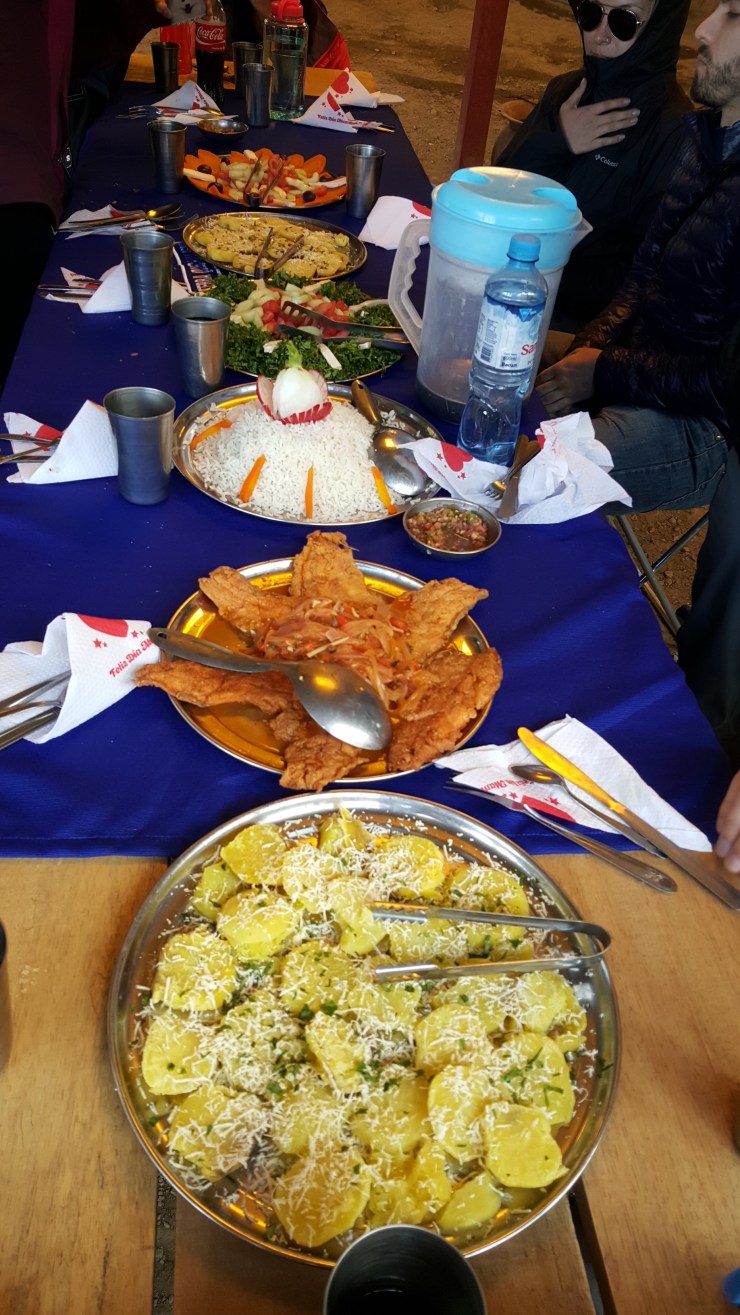
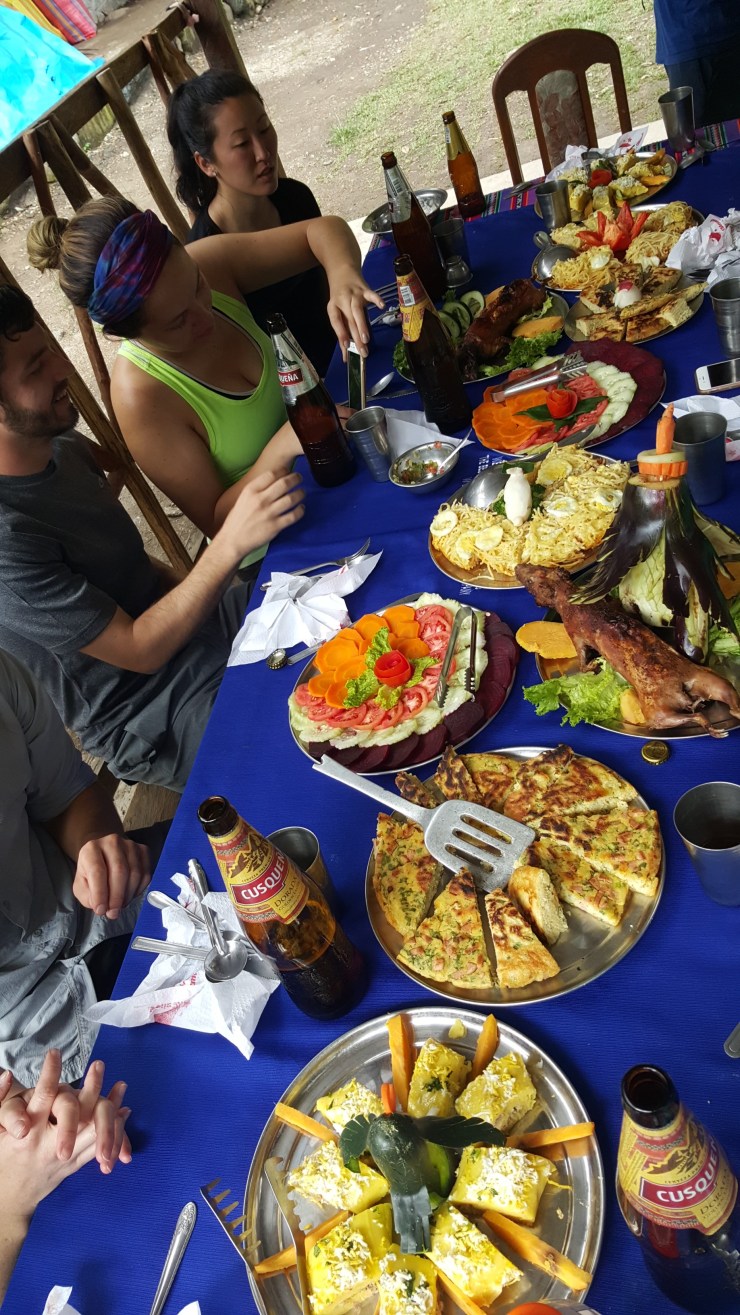
Trek Logistics: Your trip on the Salkantay Trek to Machu Picchu will be vastly simplified by hiring a guide service. Assuming you can afford it, this is definitely the way to go. Guided treks can be found for anywhere between ~$300-100 per person (plus tip) and include most of your meals, your Machu Picchu ticket, most gear, and your camping/housing for 4 nights. On the trek I did, the only extra charges were for the Huayna Picchu ticket, entrance to a hot spring, beer along the trail, and a few meals. While it is certainly not roughing it or true backpacking, it really is an amazing experience to have the guides, cooks, and porters take care of all the gear hauling, tent set up, cooking, cleaning, and route finding. Rather than eating freeze dried meals and worrying about filtering water, you can sit back and relax and enjoy several course meals each night!
Assuming you do a guided tour, the main logistical things you need to worry about are as follows. 1) Find a tour group that fits your budget/needs and book before things sell out. 2) Figure out if your tour group requires a pre-trek meeting or info session and plan your arrival to Cusco accordingly. 3) Make sure you have the appropriate amount of cash to pay for your trek and to tip the porters, cooks, and guide. 4) Check the provided gear list for your trek and then decide what remaining gear, if any, you need to bring or rent.
If you decide to do the Salkantay Trek on your own, you will be responsible for bringing all the necessary gear and food. Much of the supplies you can buy/rent in Cusco, so it is not necessary to fly with everything. This blog has a good description of doing the trek unguided. I have not done the hike this way, but it seems as though you do not need to book campsites in advance and are able to find small places to camp on private property for a small fee. There are also some small markets along the trail, so you can buy snacks and some beverages every now and then. The trail is fairly well marked and there are other tour groups, so the odds of getting lost are low. You will miss out on the guide commentary, but you likely can find a guide book that includes most of the information.
Click here to read more about Machu Picchu Logistics
Machu Picchu Logistics: When you get to Aguas Calientes the night before you go to Machu Picchu, you will need to decide whether you want to hike up to Machu Picchu or take the bus. Getting up to the entrance gate early is a good idea if you want to get pictures of the ruins when they are not overrun with tourists. You generally want to either be on the first bus that goes up or, if hiking, want to be in line by the time the first bus arrives. The first bus leaves at ~5:30am and gets up to the gate around 5:50am. To catch the first bus you will want to buy your tickets ($12 each way) the night before and then get in line at the bus station in the very early morning (4:30-5am).
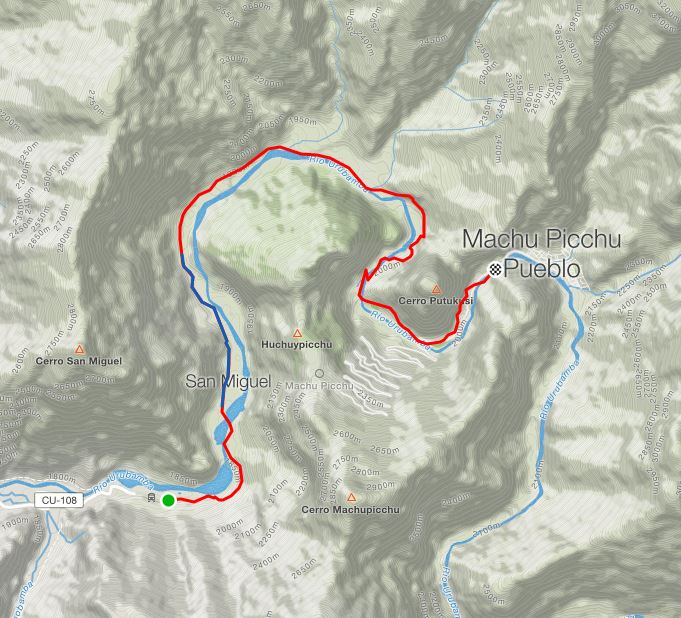
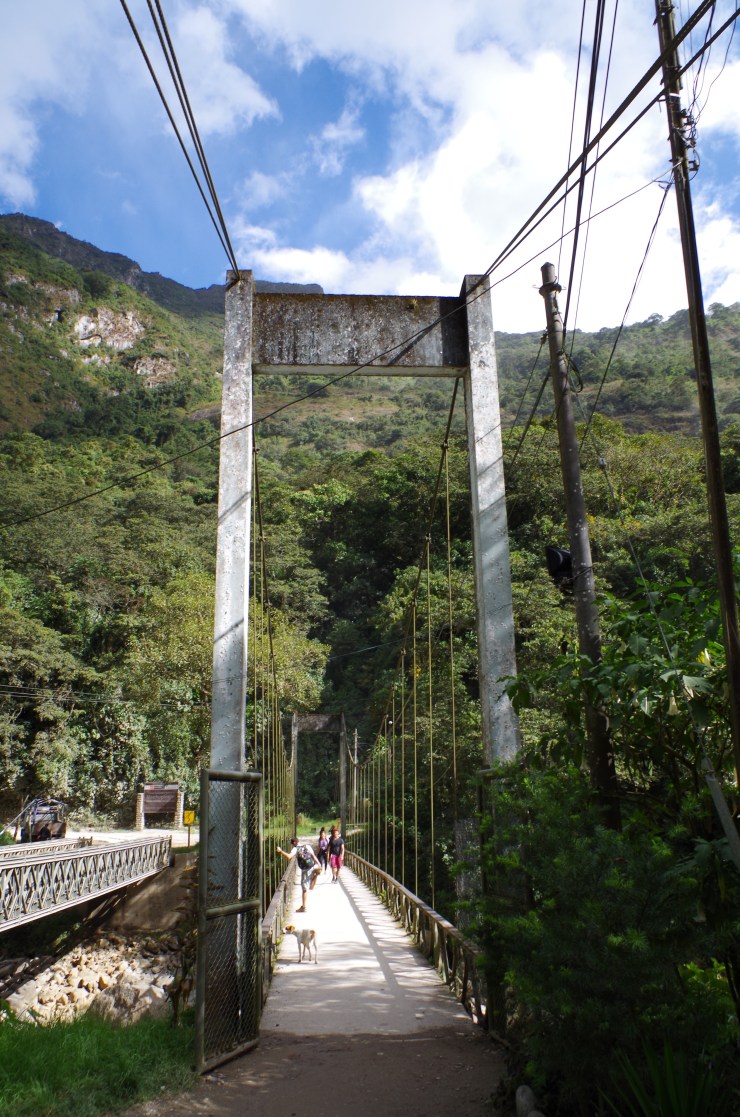
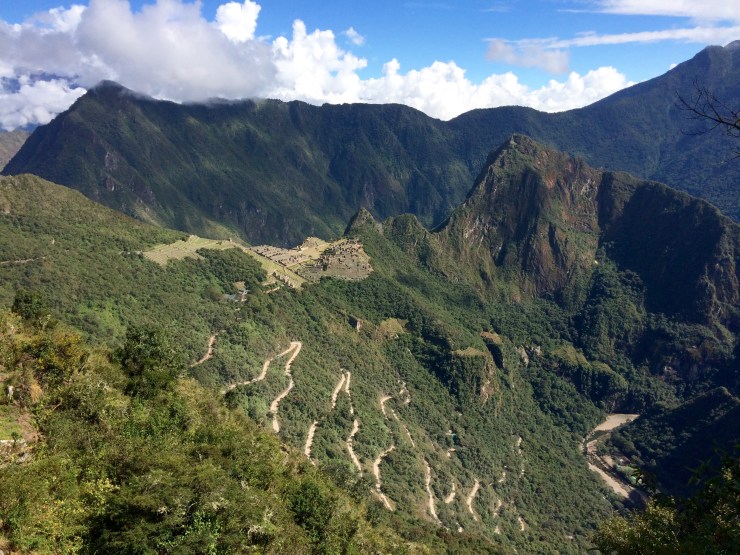
We did not want to wait in line for the bus at 5am, so we decided to hike up to Machu Picchu. The hike up starts at the bridge over the Urubamba River (~1 mile from downtown Aquas Calientes). It is roughly 1 mile long and climbs ~1,300 feet up countless stairs. Expect to hike for at least 45 minutes. The downside of this option is that you will be sweaty when you get to the Machu Picchu gate. The upside is that it’s a pretty neat trail and you are moving the whole time vs waiting in line and riding in a bus.
Once you get to the Machu Picchu gate, you will want to use the restroom. There are no restrooms in the ruins, so you want to take care of that before you start exploring. Once you are in the ruins, the only way to get to the restroom is to leave the site and then reenter.
You will likely want to bring a small backpack with some snacks and a reusable water bottle. The only place to buy food at Machu Picchu is near the gate, so we just brought our own snacks in. Technically you are not supposed to eat at the ruins, but there are plenty of places to “hide” and have a snack (the Sun Gate is one such spot). Note, however, that there is a restriction on backpack size (<20 liters) so bring a day pack or make your large backpack appear as small as possible. One thing you cannot bring up to the Machu Picchu is trekking poles. These are only allowed for elderly/disabled visitors.
To get back to Aguas Calientes after you finish exploring Machu Picchu, you have the same options: bus or hike. When we finished up, there was a massive line for the buses, so we ended up hiking down as well. The hike down was actually pretty easy and quick, so this is a simple way to save a bit of money and avoid waiting in line for an hour.
Click here to read more about Weather and Trail Conditions
Weather and Trail Conditions: Luckily we did not encounter any bad weather on our trek. However, we brought rain jackets and ended up wearing them as wind breakers in the cold sections of the trail. As I stated before, be prepared for temperatures ranging from freezing to warm. Largely this depends on what time of year you go. The dry season between May and August has the clearest weather, but is also the coldest.
Click here to read more about Difficulty
Difficulty: Given that we did a guided trek, this hike was not too difficult for us (I would consider us in good backpacking shape). The porters carry most of your gear, so you only hike with a day pack. Plus, most days are only ~10 miles of hiking. The main challenge for us was hiking up hill at high altitude (>13,000 feet).
If you are used to backpacking and in decent hiking shape, no special training is need for this trek. If you are not used to hiking long distances, definitely train for this trek! The guide and group have to hike together, so the slowest person slows the whole group down. Plus, you want to be in fairly good cardio shape so that you do not suffer while hiking at high elevation. We had 2 members of our party who did not do any training at all, and our group was constantly waiting for them. One women even needed to get oxygen while hiking over Salkantay Pass. Everyone was fine and we made it, but do yourself a favor and train before the trek!
Supplies: For our Salkantay Trek, we brought our own sleeping bags and trekking poles to avoid renting those. The trekking poles were very useful, so I would highly recommend bringing or renting those. Your tour guide will provide the tent, inflatable sleeping pad, utensils for eating, water, and most food. You will want to bring a headlamp
for getting around in the dark, and will want some basic first-aid supplies like band-aids and moleskin
. In addition, you need water bottles or a camelback to carry water while hiking. Lastly, some hand sanitizer is useful because some bathrooms had no soap, and no rinse bathing wipes
are useful because you will not always have great access to places to rinse off.
Your tour guides will provide water at every lunch and dinner stop, so purification tablets are not necessarily needed (we brought them just in case!). If you are used to any hiking snacks like shot bloks
or clif bars
, you will want to bring those. Our trekking company did not give us great hiking snacks, so we ate our own snacks between meals.
For clothing, typical backpacking layers are needed. The temperature varied from near freezing at 15,000 feet to hot when hiking through hydroelectrica. We found Natrapel bug repellent was useful for the middle of the trek when we hiked through a jungle area. We also treated our hiking clothes with permethrin insect repellent
before going on the trek. A good pair of broken-in waterproof hiking shoes or boots is essential as well.
Below is a list of suggested clothing for the trek:
Hiking clothes
- a lightweight hiking rain jacket (North Face Venture 2 Jacket)
- fast drying synthetic hiking pants (prAna Zion Pants)
- a quick drying long sleeve hiking shirt (Columbia Silver Ridge L/S Shirt)
- wool outer socks (People Socks Moreno 4-pack)
- thin blister preventing base socks (WrightSock double layer Coolmesh)
- quick drying synthetic boxer briefs (ExOfficio Give-N-Go)
- light bandana for sun protection (Levi’s printed bandana)
- mesh back trucker hat (Patagonia LoPro Trucker Hat)
- adjustable fabric belt (Bison designs belt)
- Gore-tex hiking shoes (adidas Outdoor Terrex Fast R Gore-Tex Shoe)
Clothes for camp
- wool leggings (Minus33 Merino Wool Kancamagus Midweight Bottom)
- wool base layer shirt (Minus33 Merino Wool Chocorua Midweight Crew)
- warm wool overshirt (Pendleton Long Sleeve Classic-Fit Board Shirt)
- lightweight down jacket (Patagonia 800-fill Down Jacket)
- lightweight camp shoes (Xero Z-Trail lightweight sandal)
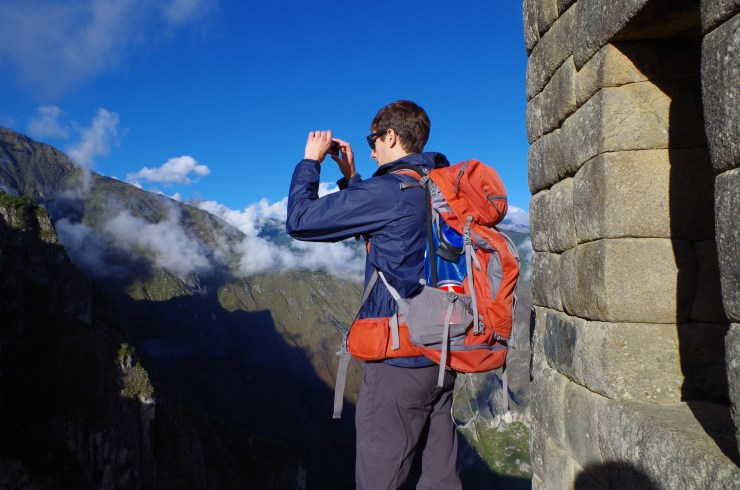
A final and more vain suggestion is to bring a clean set of clothes for your day at Machu Picchu. Odds are you will be in several pictures this day, and you may want a nice clean shirt! If hiking up to Machu Picchu, I recommend changing into the new shirt after the hike up to the gate, since you will work up a sweat after climbing the 1,300 feet up.
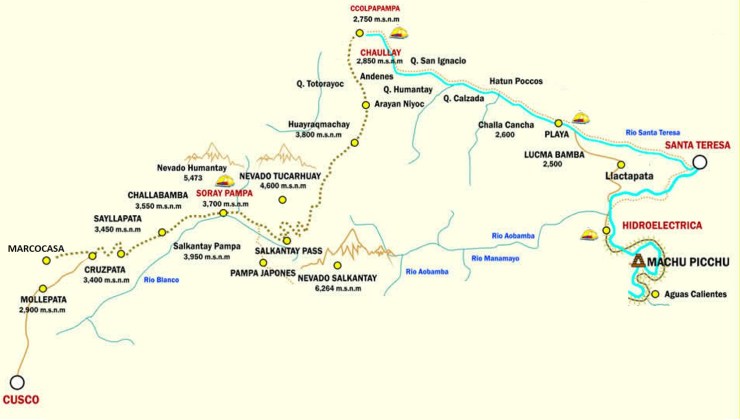
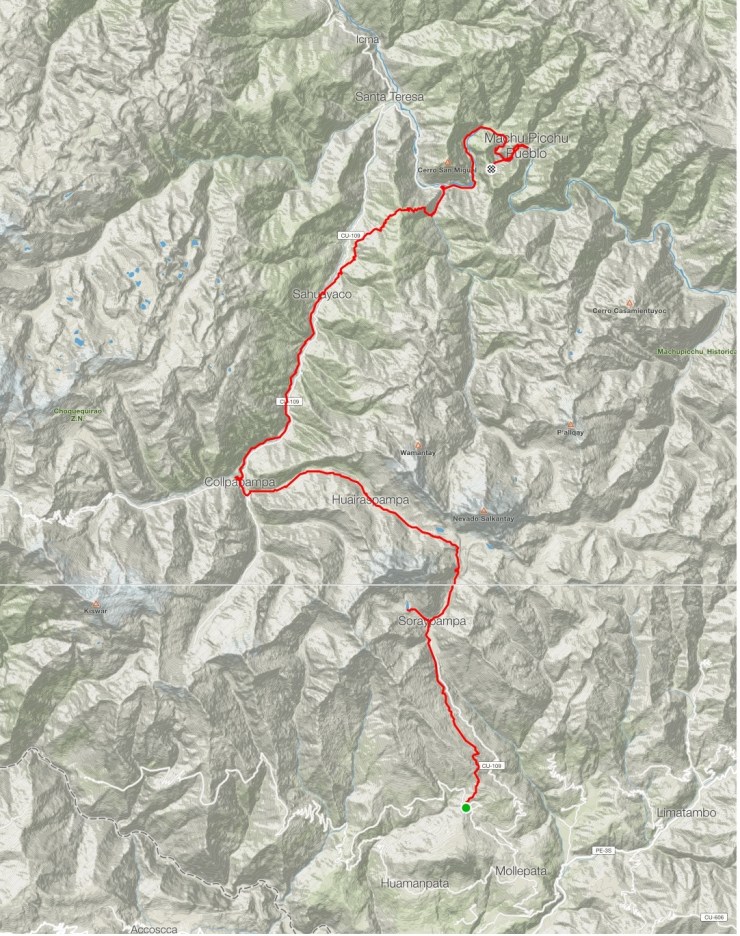
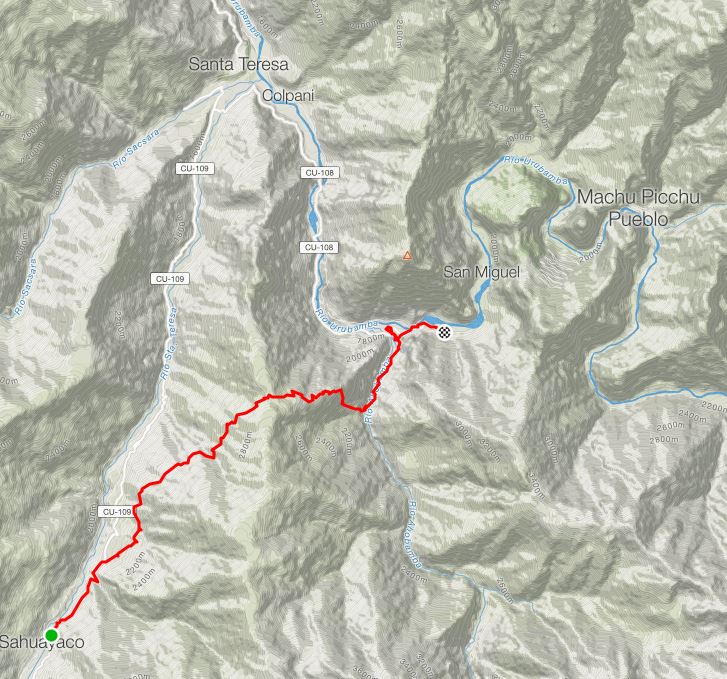
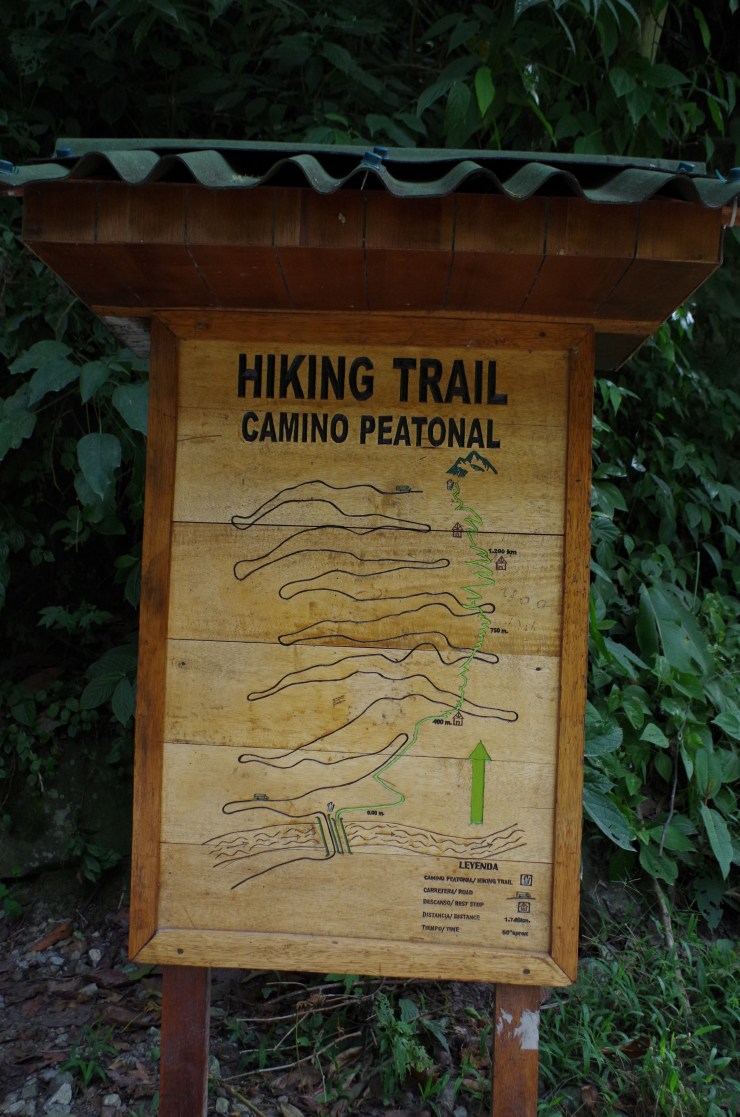
Maps:

Day 0: Acclimating in Cusco and attending the info session for our Salkantay Trek
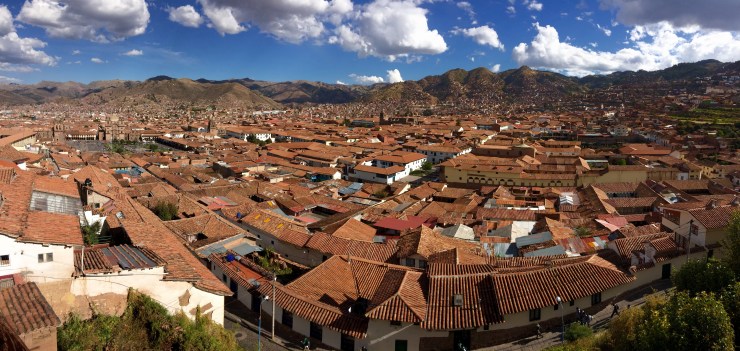
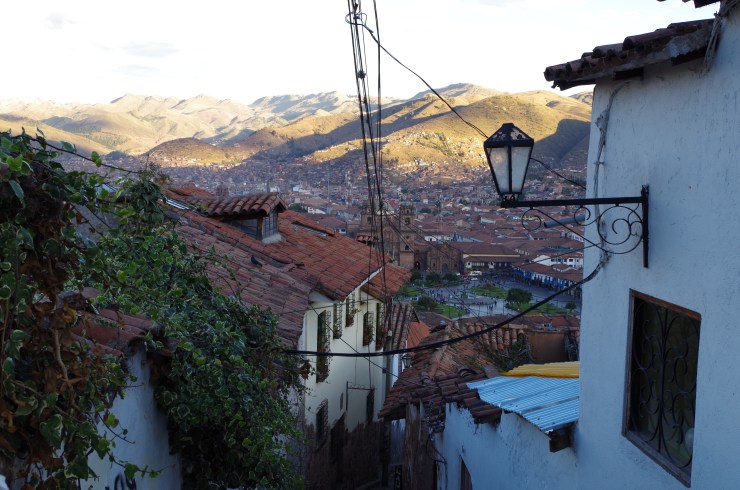
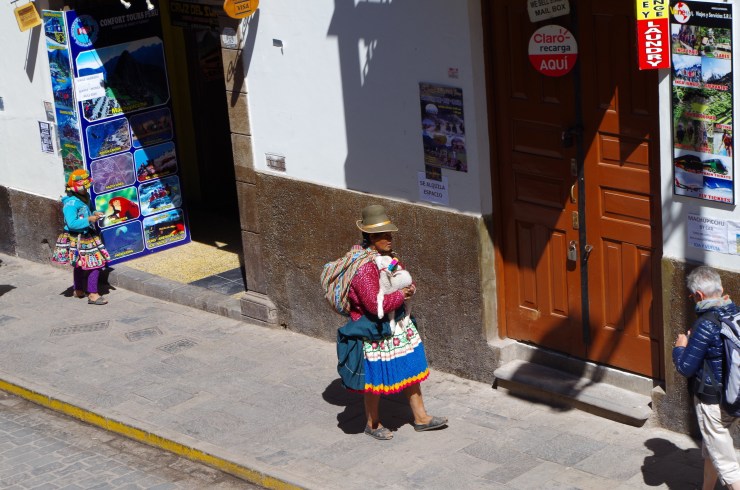
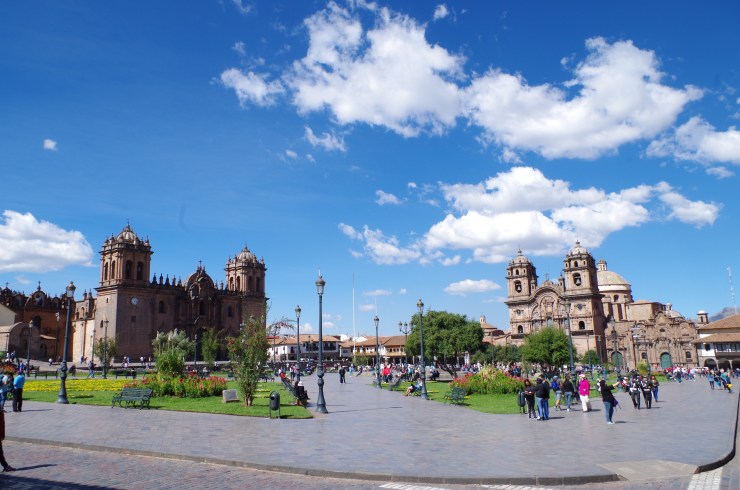
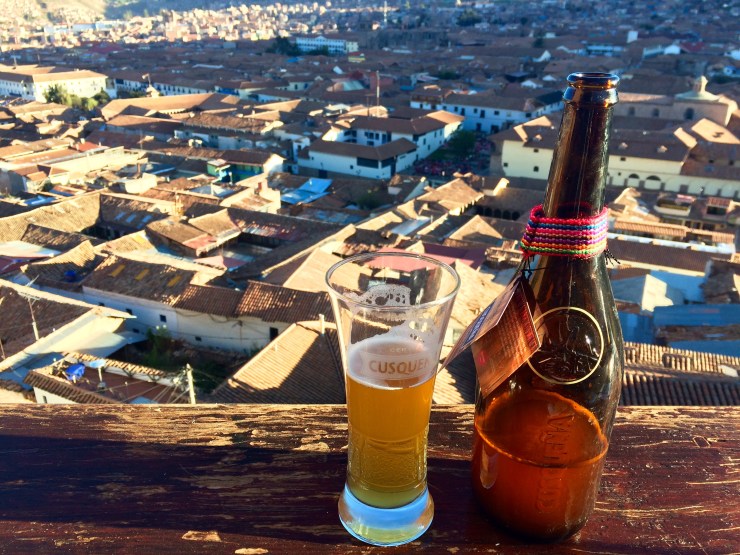
On the day before we left for the trek, we just hung out in Cusco. The two main things we had to do the day before our trek were pay the guides for the remainder of the trek (we had already paid a deposit via Western Union) and attend an info session where we met the trek guide and the rest of our group. We had flown into Cusco the day before, so we were a little bit acclimated to the altitude. But, walking around the city was still tiring given all the little hills and steps in Cusco. It is important to remember that Cusco sits at 11,100 feet elevation, so your body likely will not be in top shape the first day you arrive. It’s best to not plan anything too ambitious on the first day because you want to let your body adjust to the altitude.
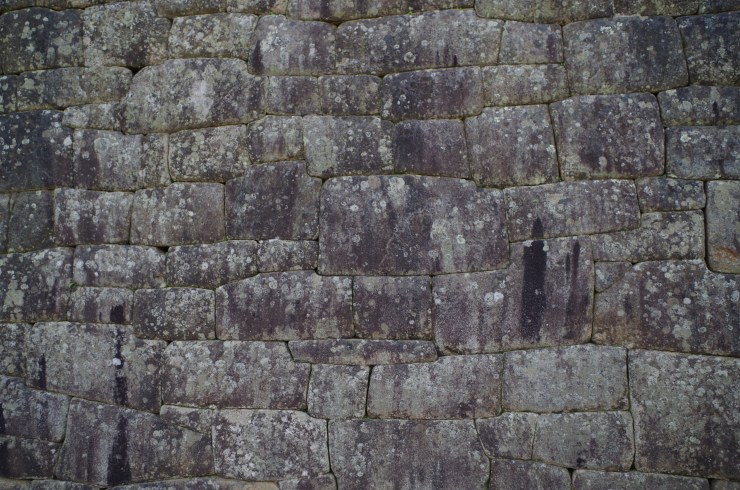
I would recommended getting to Cusco at least two days before you start the trek. This gives you a bit of time to acclimate, get your things in order, and getting ready before leaving on the trek. Having some extra time is Cusco is great anyways because the city is beautiful and there is a lot to do. There are plenty of things to do around Cusco including exploring the Saqsaywaman and Pisac ruins.
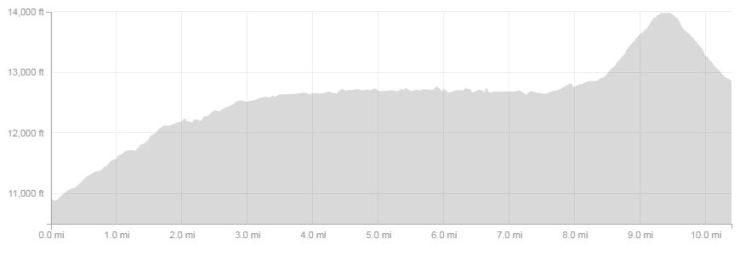
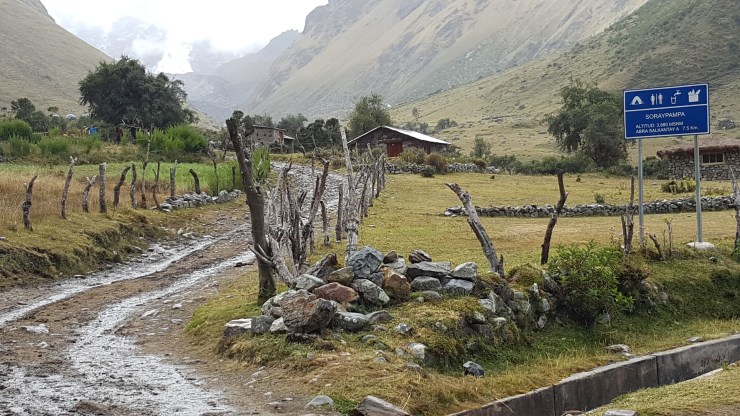
Day 1: ~10.3 miles; +3,350 feet / -1,500 feet (approximately); Marcocasa to Soraypampa
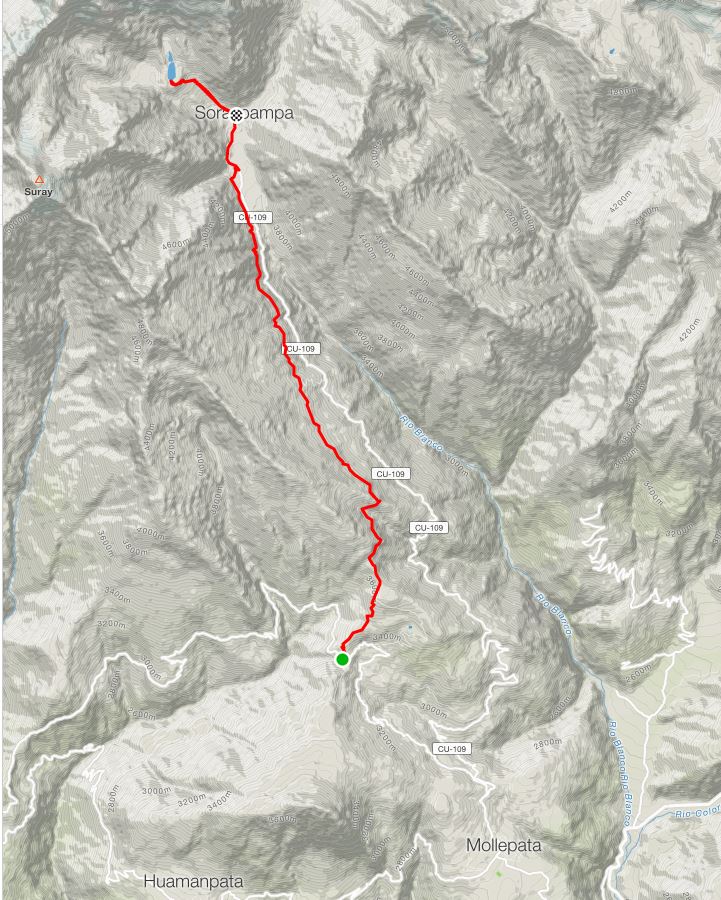
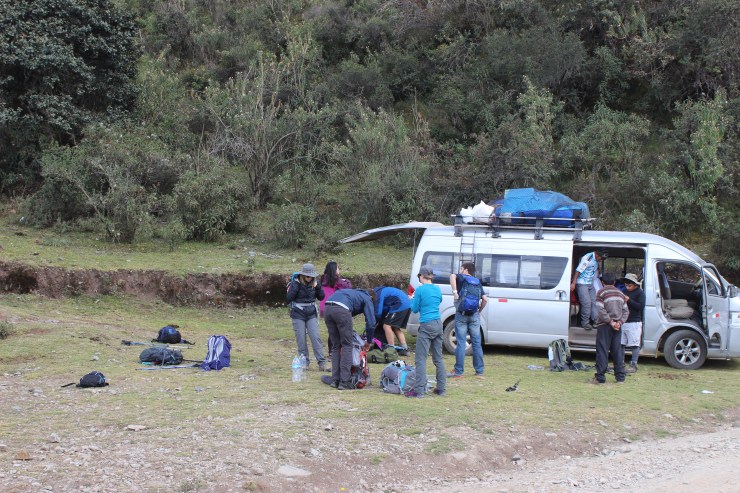
The morning of our trek, our tour guide picked us up from our hostel at ~5am. Everyone in our group fit into a fairly small van and we drove ~3 hours to Mollepata. We stopped at a restaurant and had breakfast and used the restroom. Breakfast was mediocre, so do not expect much from the food in Mollepata. We then got back into the van and drove a bit more until we reached Marcocasa. Some treks start at Mollepata, so do not be surprised if you start hiking from here. The main difference is just how long of a hike you have on the first day and whether or not the tour guide wants to hike along parts of the road or not.
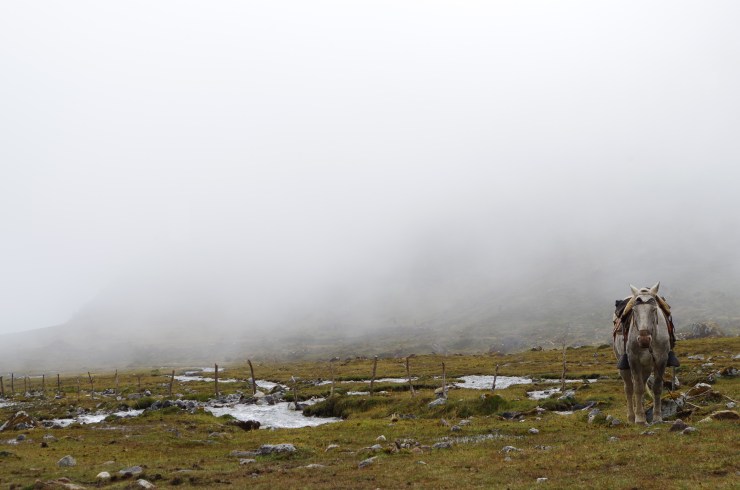
At Marcocasa, we all got out of the bus and got our gear ready for the trek. Since the guides had horses to carry most of the gear, we made sure to only carry the essentials in our day pack. You want to carry your water and snacks and want to have things like first aid supplies and a head lamp. There is no need to carry your sleeping bag or many of your clothes.
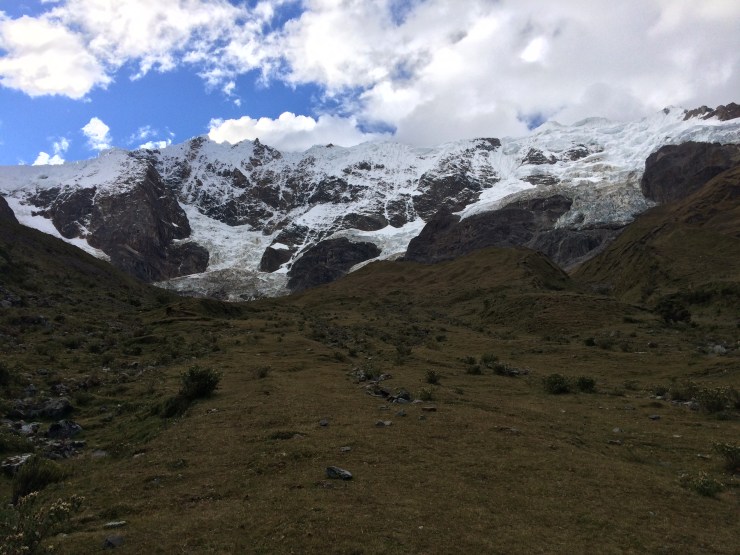
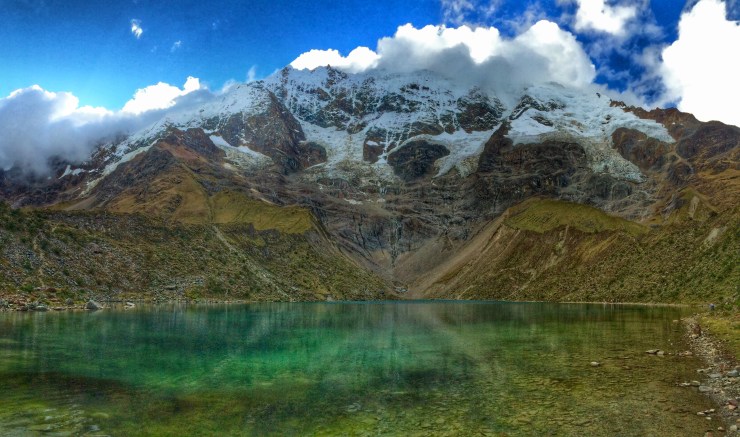
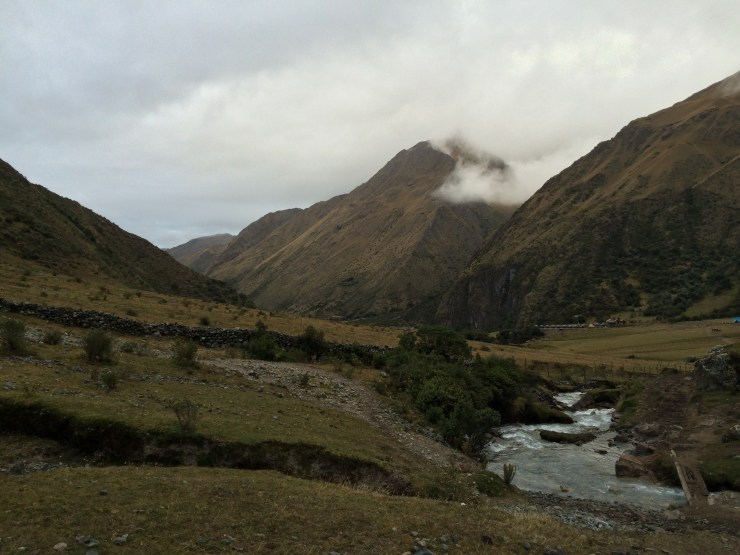
The Marcocasa trailhead starts at roughly 11,000 feet and the trail goes up to the campsite area at Soraypampa, which sits at ~12,800 feet and is ~8 miles from the trailhead. After reaching the camp area, you will have the option to do a side trek up to Lake Humantay (14,000 feet). The side trek up to Lake Humantay is a steep 1,200 foot gain in ~1 mile. This short trek is totally worth the view at the top!
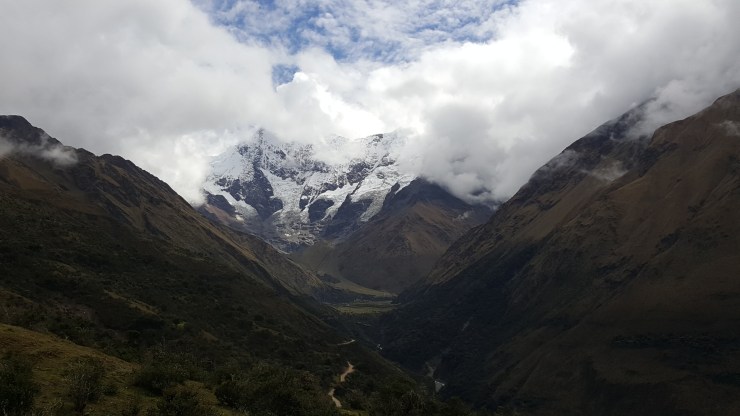


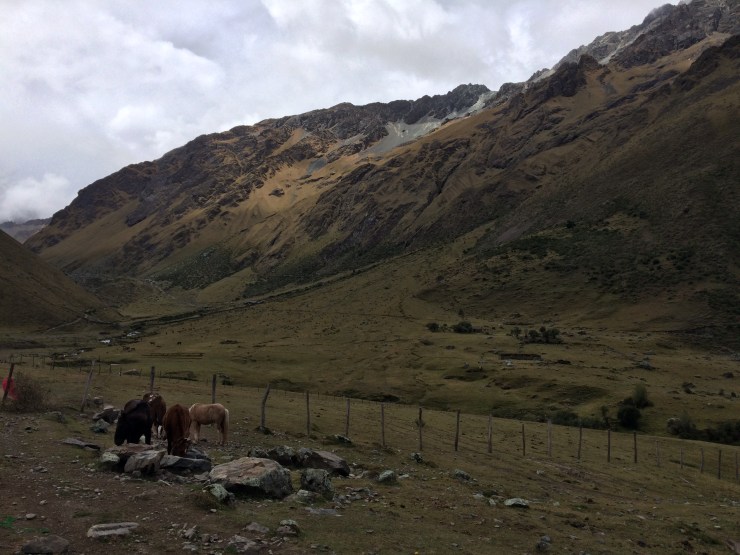
After eating lunch and taking a break to digest, we set out on the short hike up to Humantay Lake. This lake sits at the bottom of Nevado Humantay and is full of crystal clear glacier melt. The hike goes up 1,200 feet in a mile and was fairly tough because we were tired and the lake sits at about 14,000 feet elevation. But, the views are great when you reach the lake. I recall getting a headache when I pushed to hike quickly, so I went up fairly slow. While we were at the lake we saw a couple glacier calvings. It sounds like thunder when the ice falls down the mountain!


When we got back from the side trip up to the lake we had dinner. As with lunch, dinner was excellent. We then retired to our tents to get a good nights sleep before waking up early the next day. The great thing about doing a guided trek is that the guides and porters set up the tents and air mattresses for you, so everything is in order when you go to your tent. You also do not need to worry about cooking or cleaning!
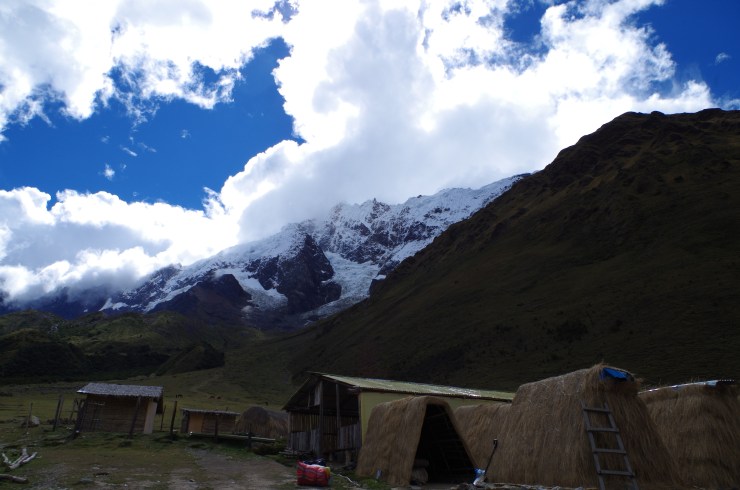
Since Soraypampa is at ~12,800 feet, this was the coldest night of the trek. You should be prepared for cool temperatures that can get down to 0 degrees Celsius.
Day 2: ~15 miles; +2,700 feet / -6,000 feet (approximately); Soraypampa to CColpapampa
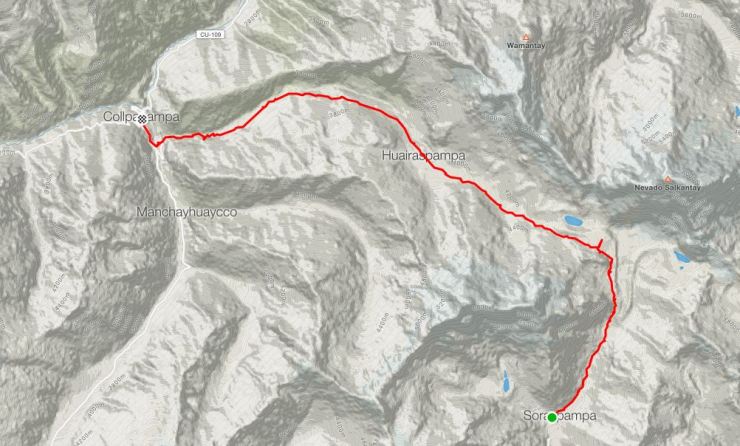
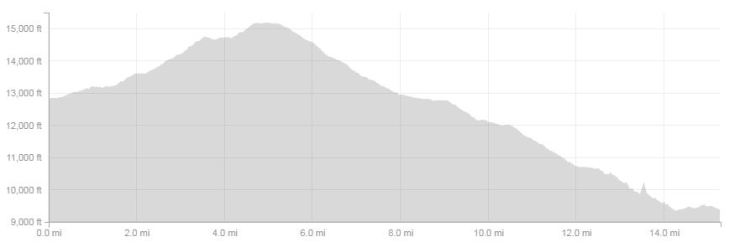
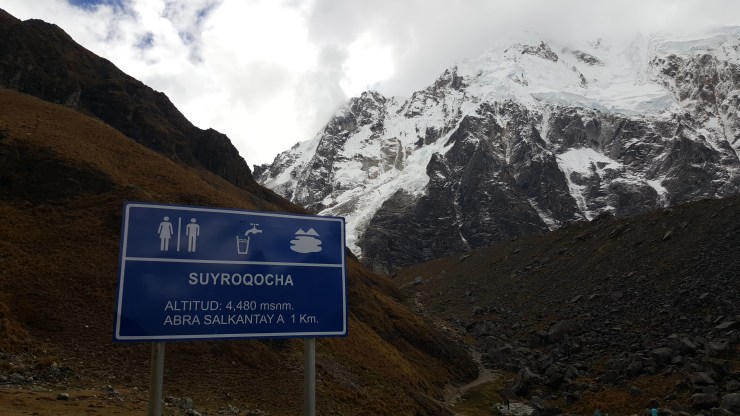
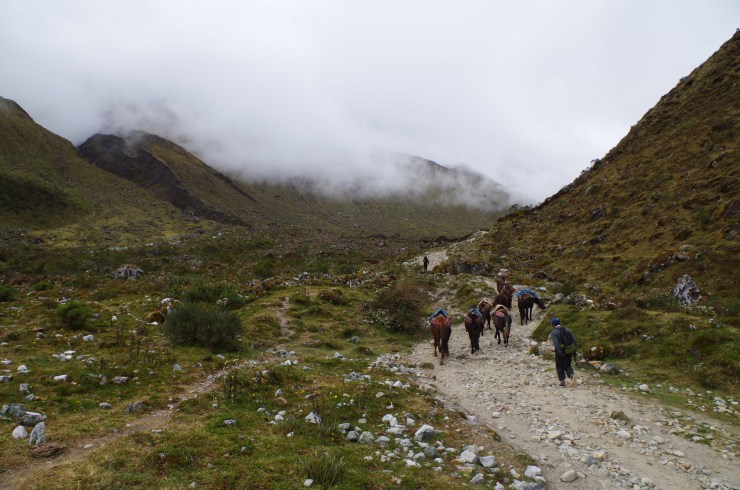
The hike on the second day is the toughest because it is the longest and because you must climb over the Salkantay Pass. Our guide had us wake up early in the morning so we could be ready to hike by 7:00am. The guides will wake you up and serve you tea in your tent and will have breakfast ready shortly after. This hike started with a ~700 foot climb from Soraypampa to Suyroqocha in the first ~1.5 miles.
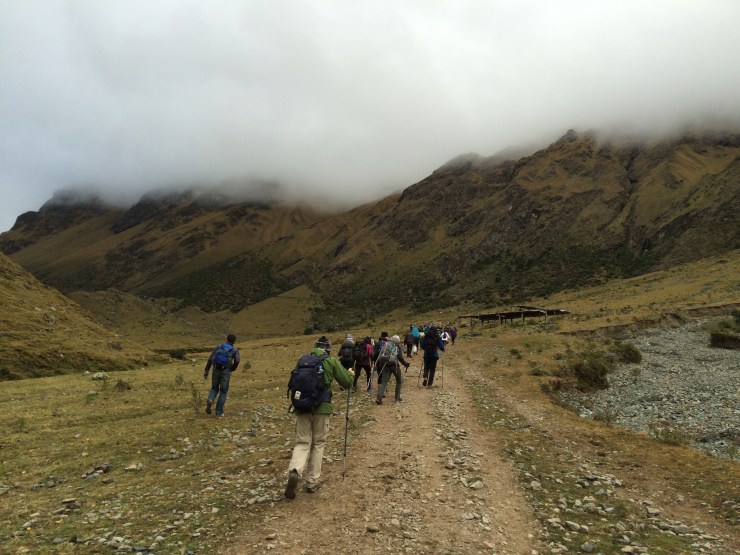
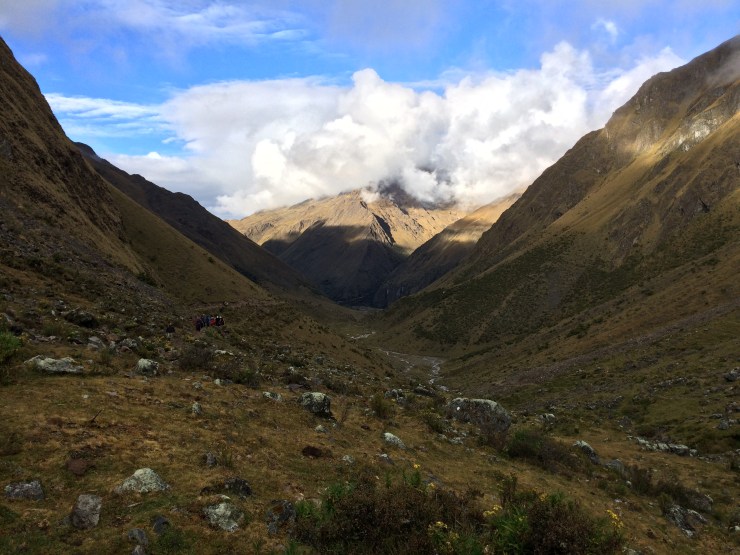

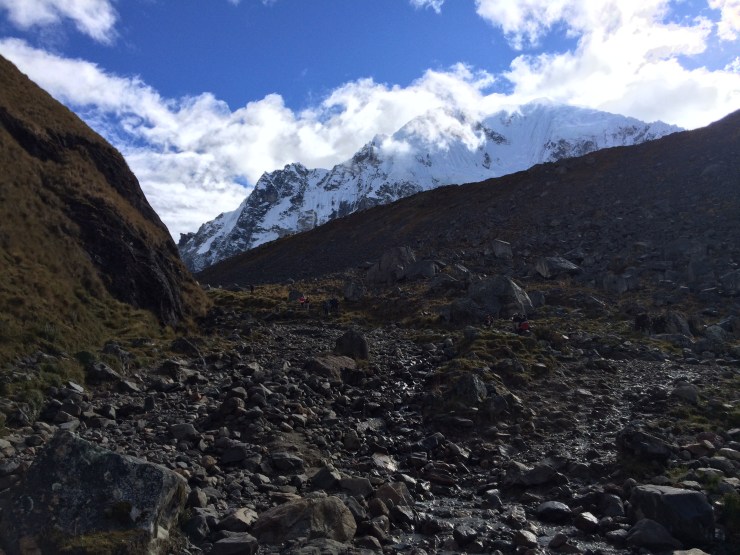
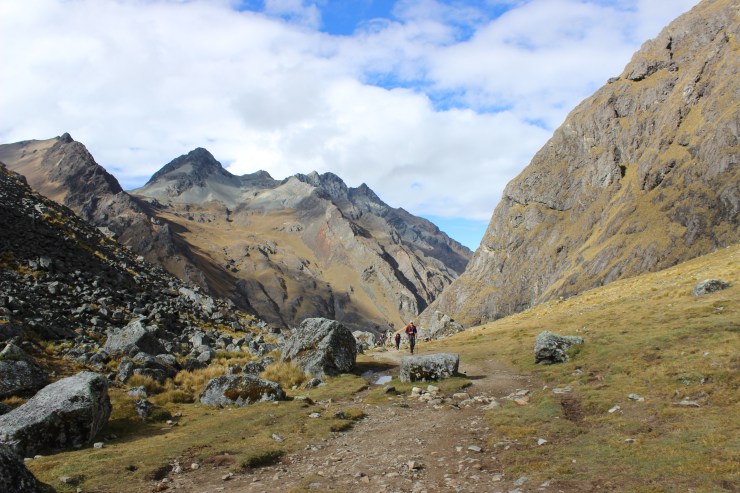
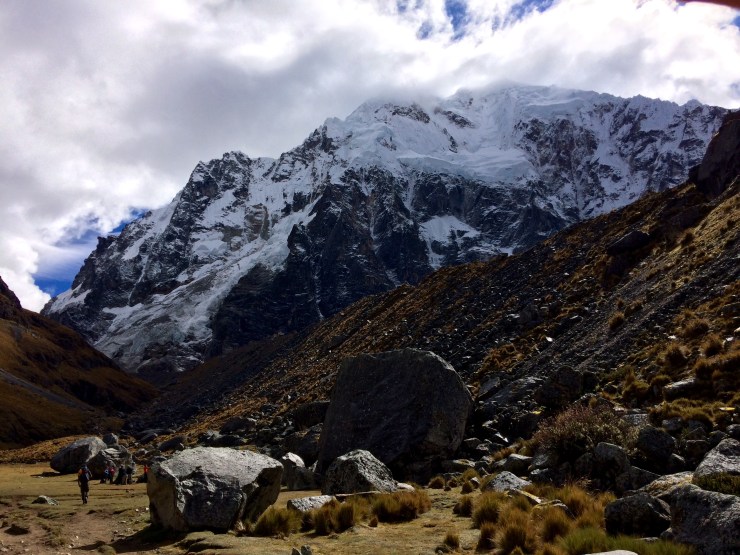
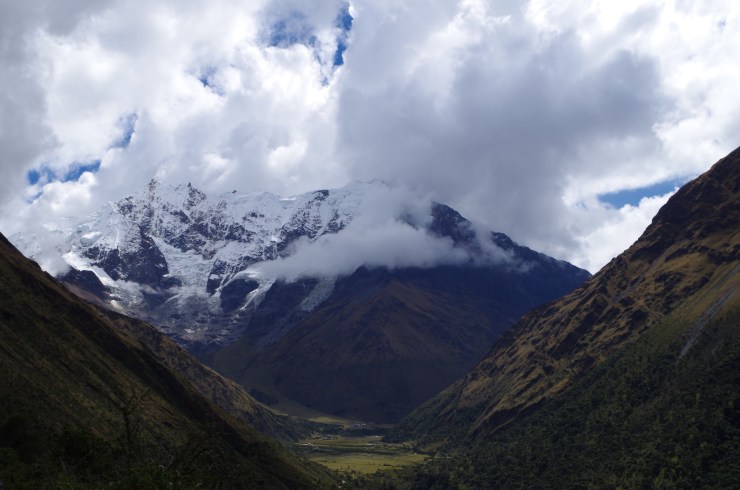
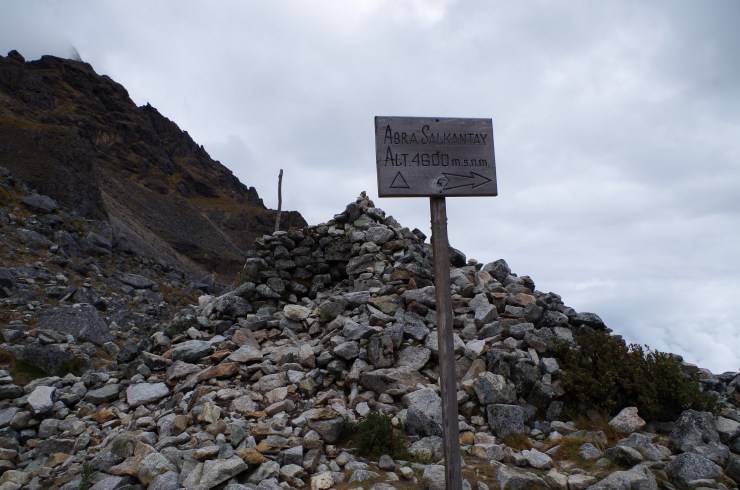
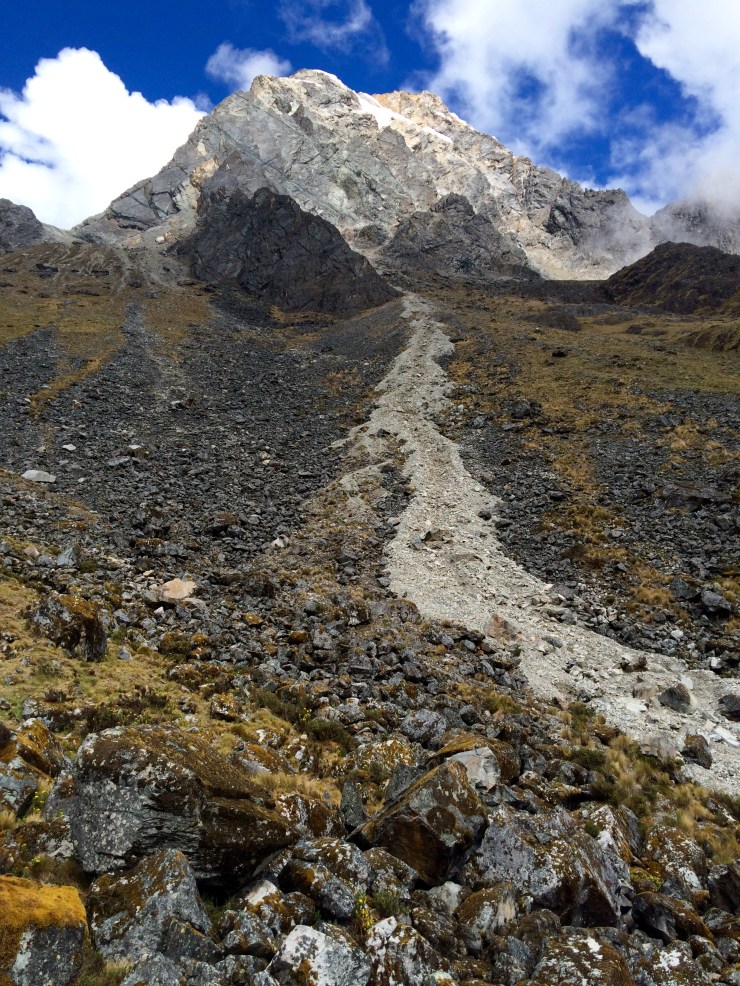
The next portion of the hike takes you up to the Salkantay Pass, which sits at 15,100 feet. This section of the trail is ~2.5 miles long and has great views of the surrounding mountains. Be sure to pace yourself here because the altitude can really start to affect hikers. If you feel dizzy, slow down and take a break.
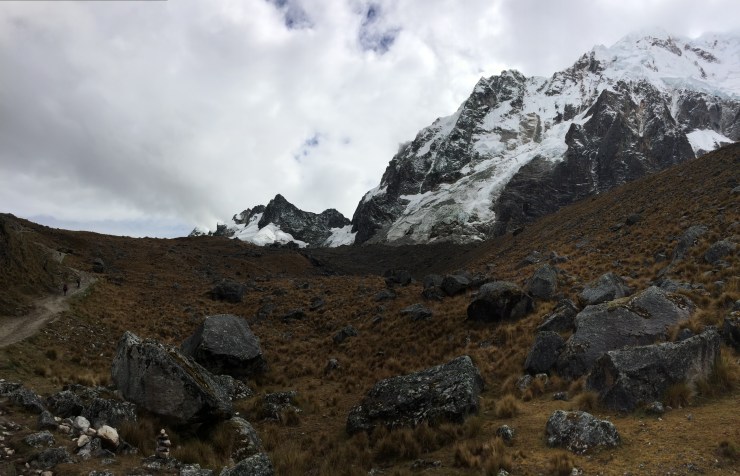
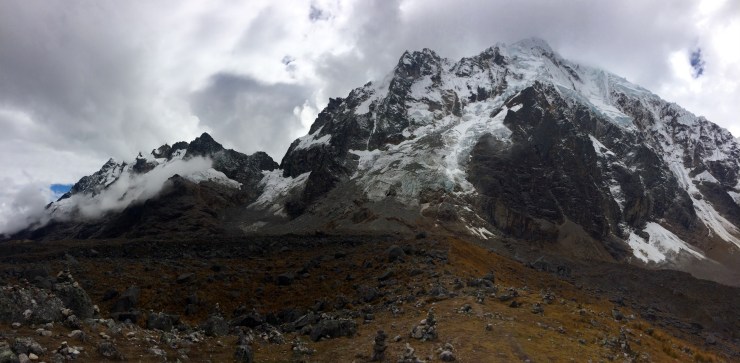
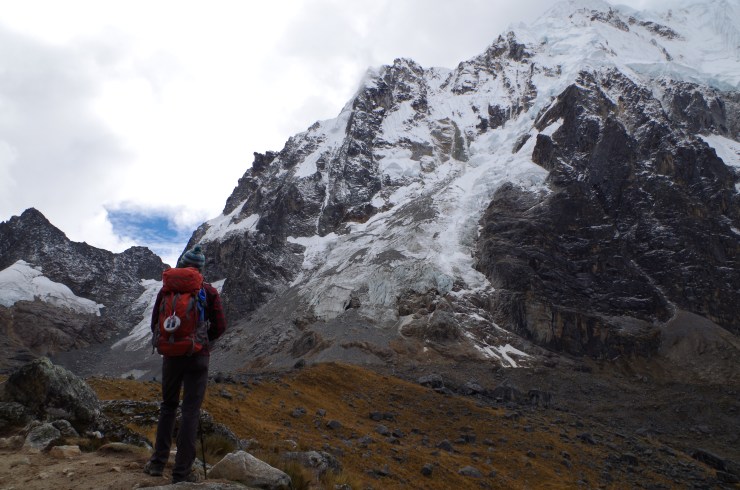

At the top of the pass, you likely will want a lightweight down jacket or outer shell to wear since it can be quite windy and cold. This is where your backpacking layers will come in handy. After looking around the pass and taking some pictures, we took a short side trip off the trail and over to the Laguna del Salkantay, which is a turqoise lake filled with glacial melt from Salkantay. Sitting above the laguna made for a great lunch spot. Some tour groups skip this side trip and eat lunch near the trail by the pass. Going over to the laguna was totally worth it, so I highly encourage it!


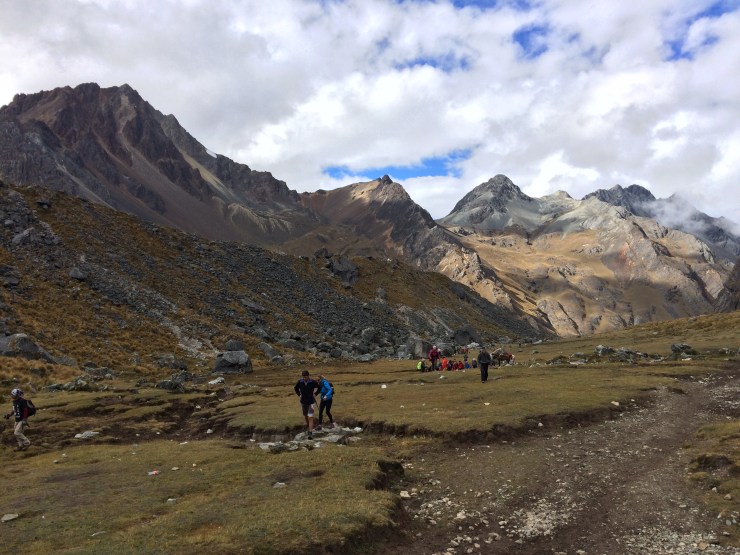
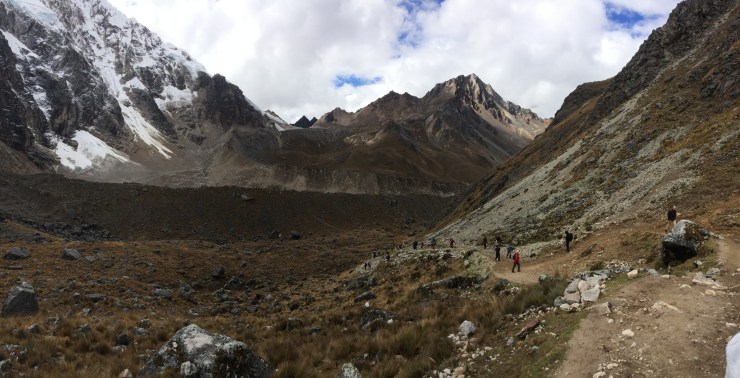
We then set off on the Salkantay Trail again and went downhill towards our lunch spot for the day, Huayracpunku. This section of the hike was about 3 miles long and dropped roughly 2,200 feet in elevation. The lunch spot was in a large green valley next to a river. Our porters had a tent set up and served us a nice 3 course lunch.


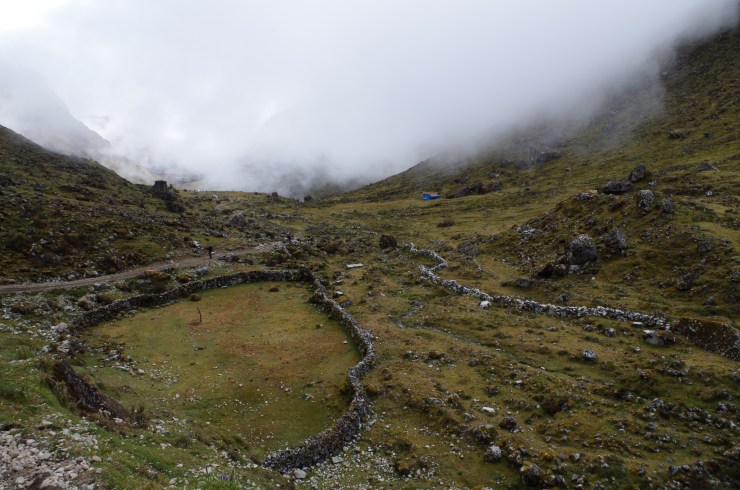


After lunch, we hiked for another ~6 miles (down ~3,400 feet) to our camp for the 2nd night at (CColpapampa). The sun set during this last portion of the hike and we had to hike the last 2 miles with head lamps on. The views along this portion of the hike were nice, but less spectacular.


We were all exhausted after the ~14 mile hike. So, we purchased some beers from a small store at the camp and then relaxed until dinner. Dinner was great as usual though we all were huddled in a dark tent because it was very late and dark outside. Our headlamps and solar lantern ended up being essential for this day of the trek.
Day 3: ~11 miles; +1,500 feet / -4,000 feet (approximately); CColpapampa to La Playa
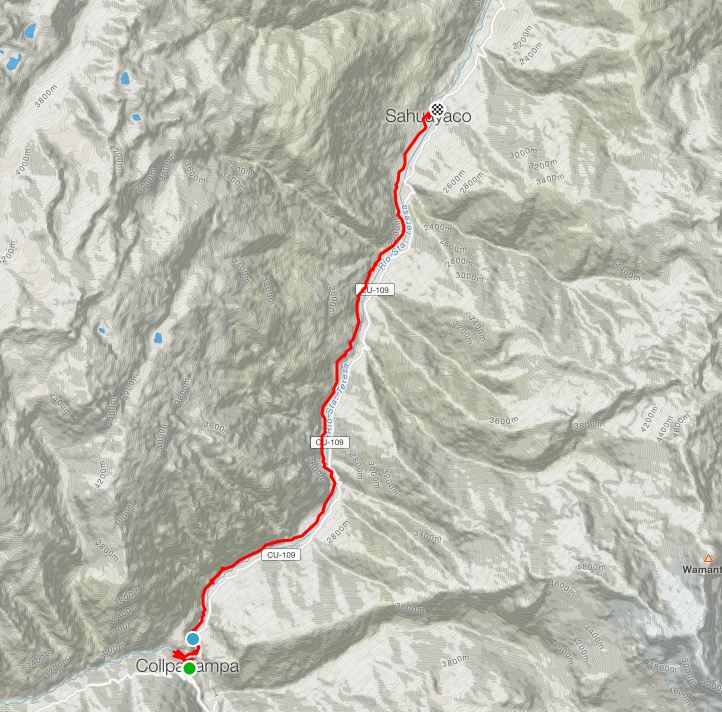
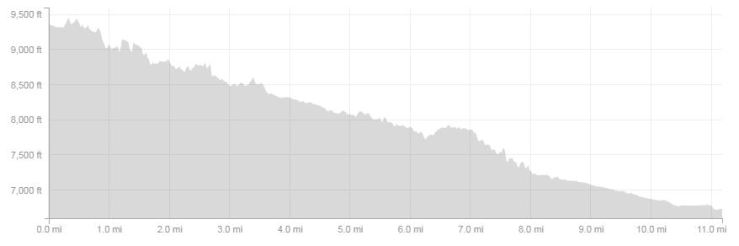
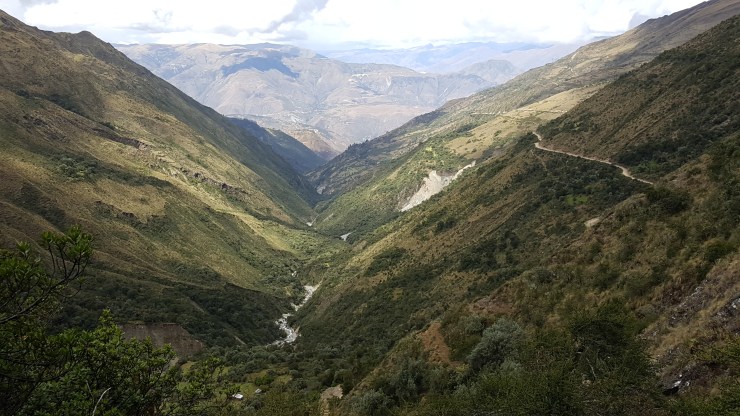
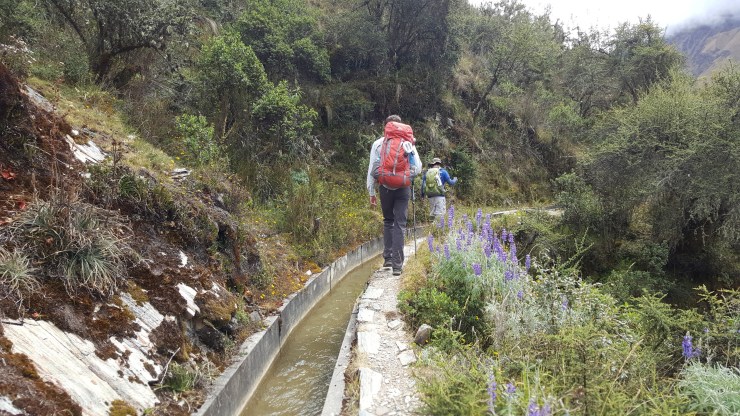
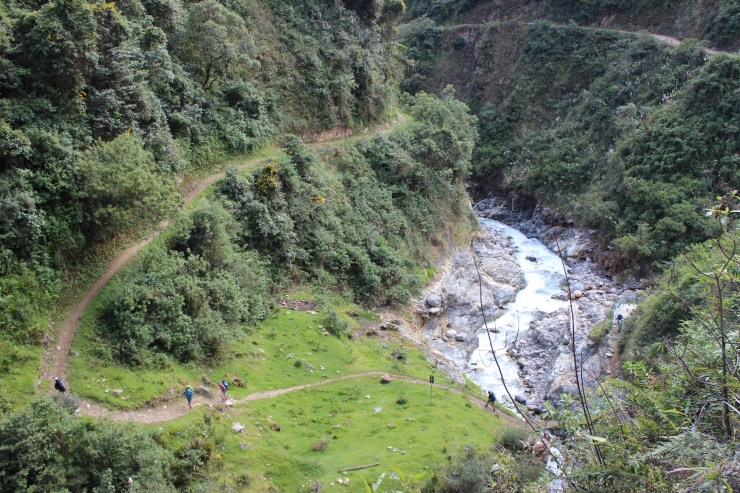
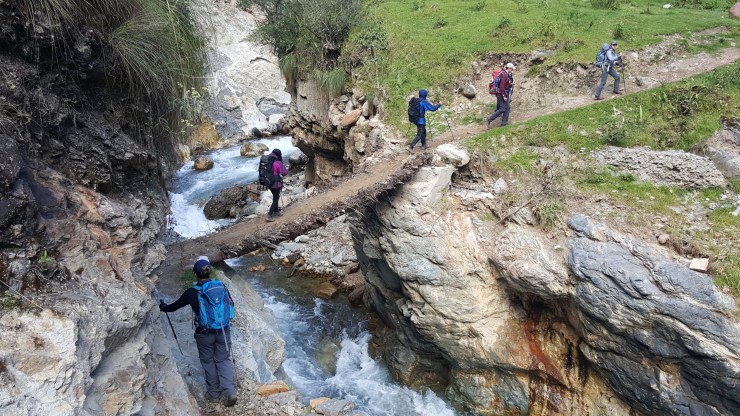
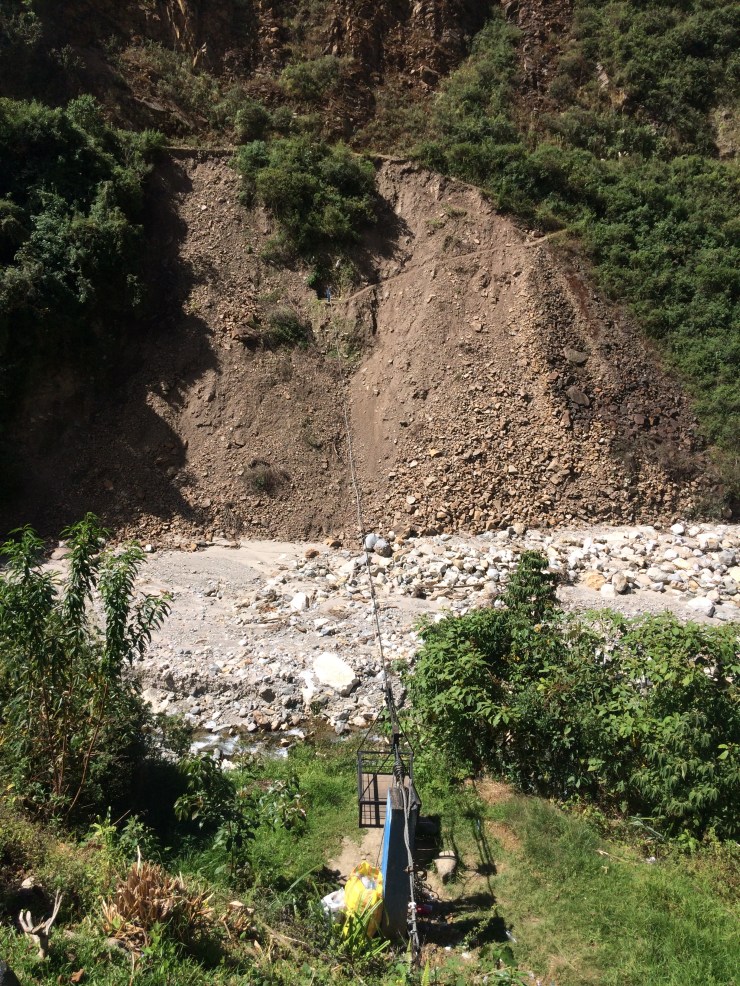
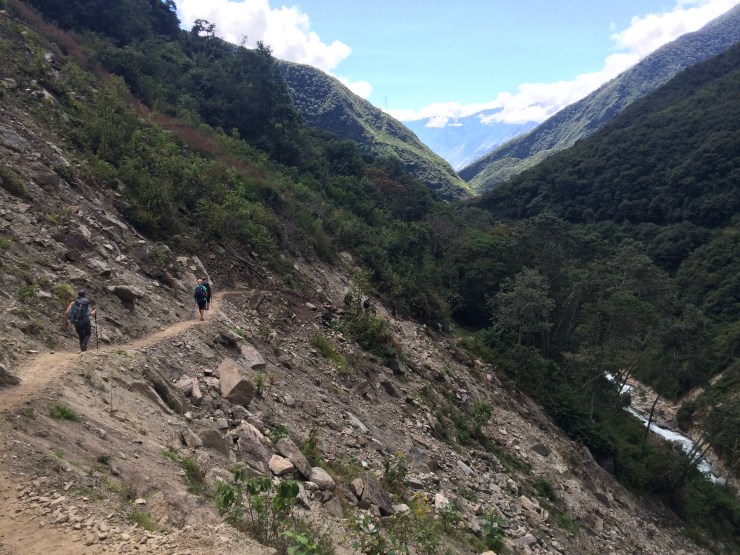
The third day of the trek was the least interesting hike of the trip (in my opinion). The trail was mostly through a jungle/forest alongside the Santa Teresa River. This was the day that bug repellent was the most important. We started out at CColpapampa at 9,400 feet elevation and ended up at our camp in La Playa at 6,800 feet elevation.
Along the way you pass a couple small markets that sell fruit and snacks. You also pass through the small town of La Playa. We camped at a site that seemed like a popular place for tour groups. They had kitchens for the cooks and had a nice covered eating area. It was not secluded or beatiful, but it got the job done.
Some tours will continue on a bit further from La Playa and camp at one of the coffee plantations in the area. We ended up staying in La Playa and just got a tutorial on coffee harvesting and roasting near the campsite. It was interesting, but nothing to get too excited about. You do have the opportunity to buy locally grown coffee here though.
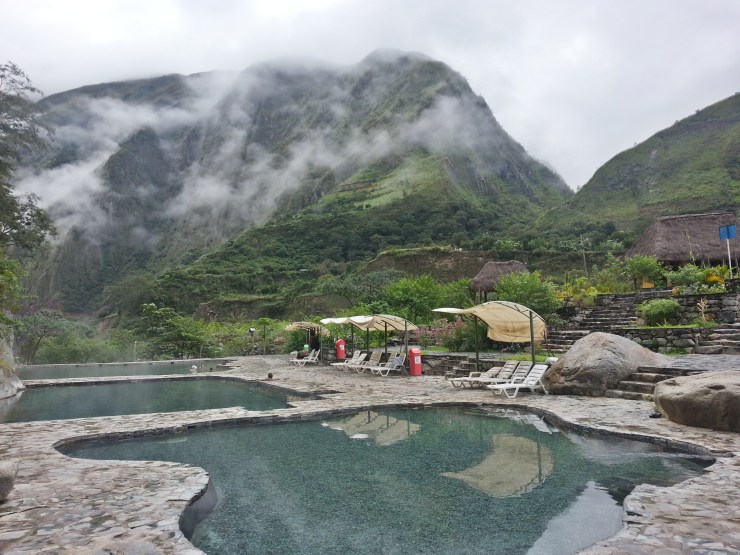
The best part of this day was our side trip to the hot springs in Santa Teresa. This was optional, but most members of the group decided to go. We took a taxi bus along a fairly scary and narrow road down to Santa Teresa, a nearby town. There is a hot spring there and for a small fee you can hang out in the warm water and take in a mountain view. They have cold showers as well, so you can rinse off when you are finished. The cost of the taxi and entrance to the hot springs was extra and was not included in the price of the trek. We all thought the extra cost was well worth it though.
We then got back in the bus and drove back to camp. At camp we had another dinner and then relaxed over a couple beers before retiring for the night.
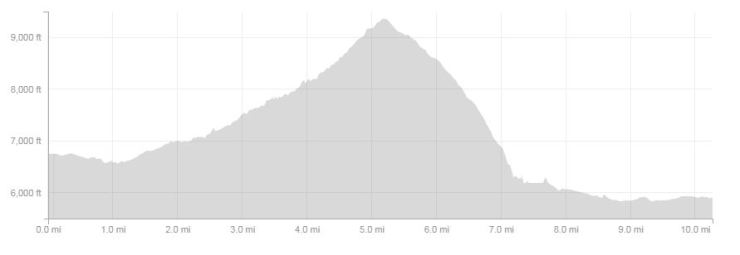
Day 4: ~10 miles (option to hike up to 16 miles) ; +3,200 feet / -3,500 feet (approximately); La Playa to Hydroelectrica and then train Aguas Calientes
On the 4th day, we were awoken with tea in the morning as usual. Our cooks then presented us with breakfast and said goodbye as this was the last meal they would prepare for us. From hereon out we just ate at restaurants.
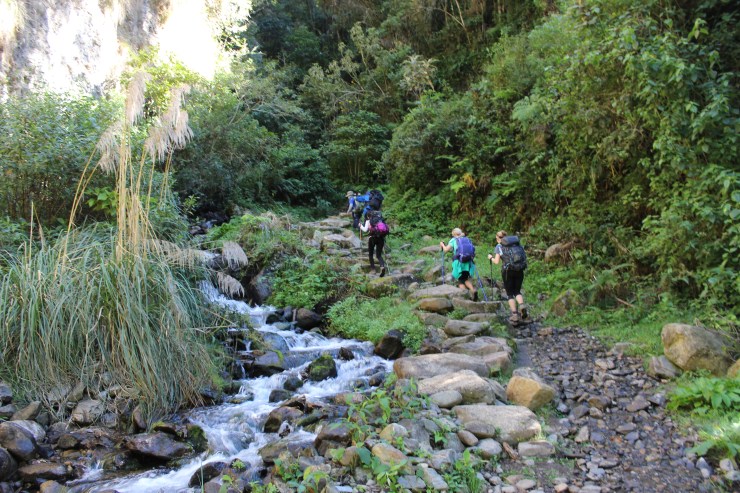
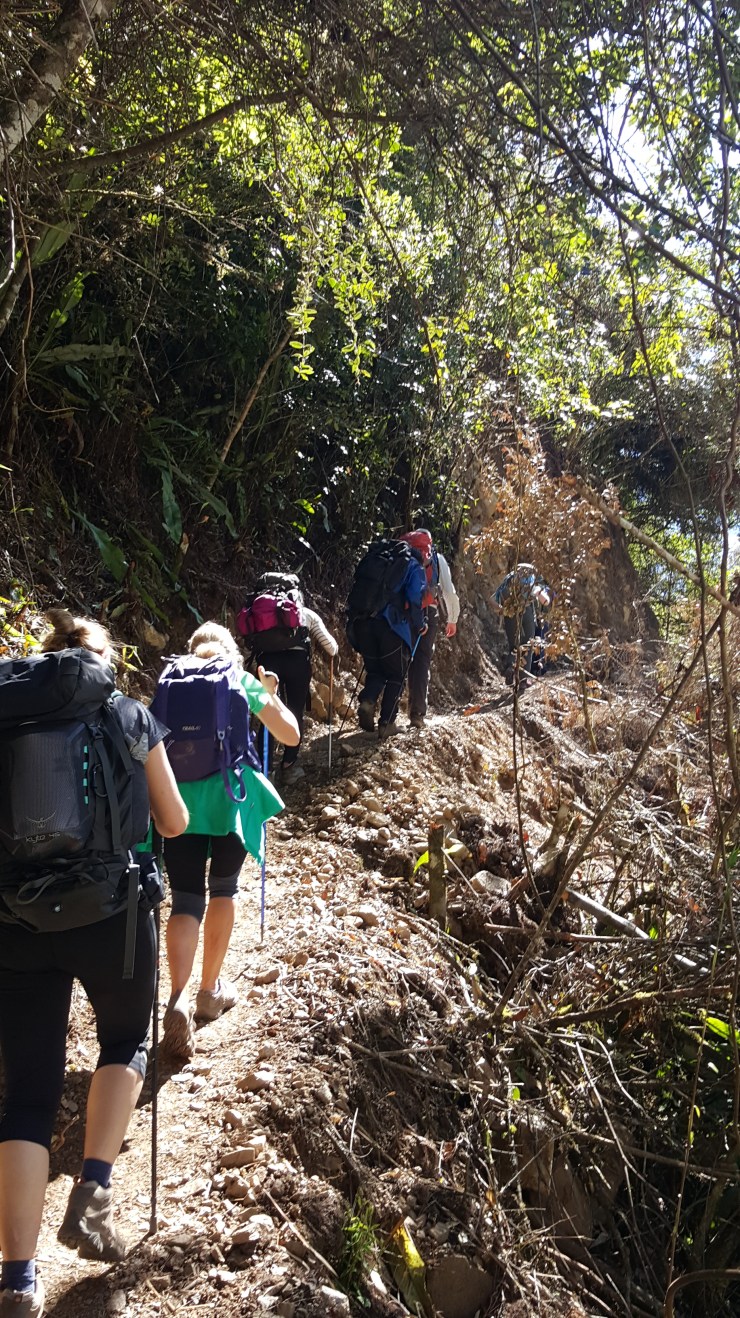
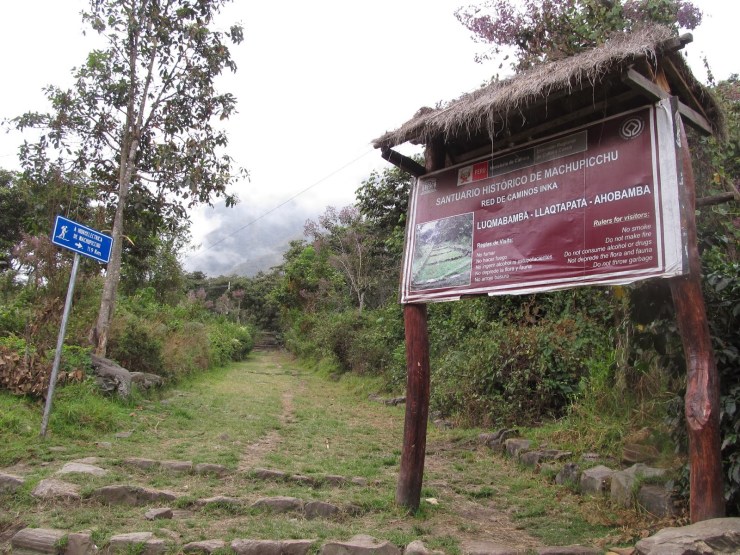
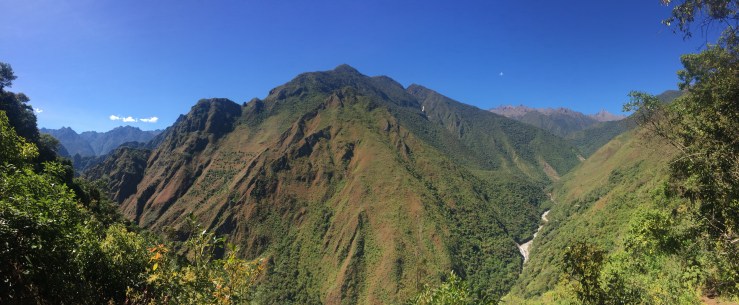
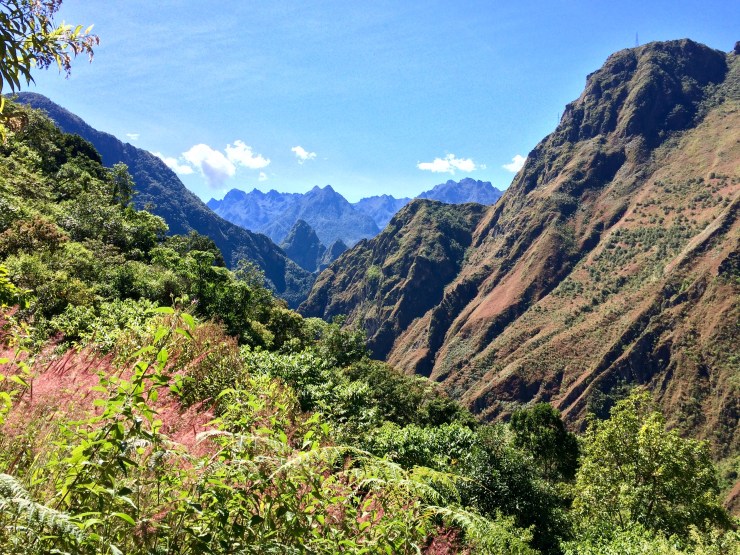
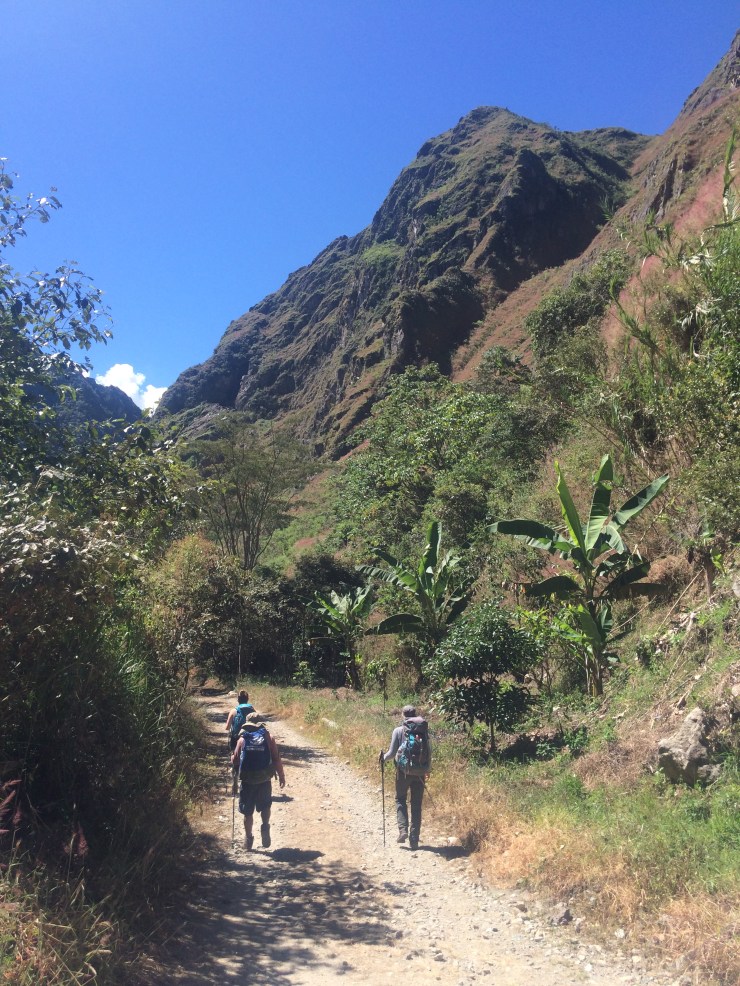
The day’s hike begins with a 2 mile walk along the road until you reach Luqmabamba. Here you turn off the road and begin to hike along an old Inca Trail. The trail is very nice and has many stone steps. You encounter some ruins along the way and there are some nice mountain views. The trail climbs 2,400 feet over the next 4 miles.

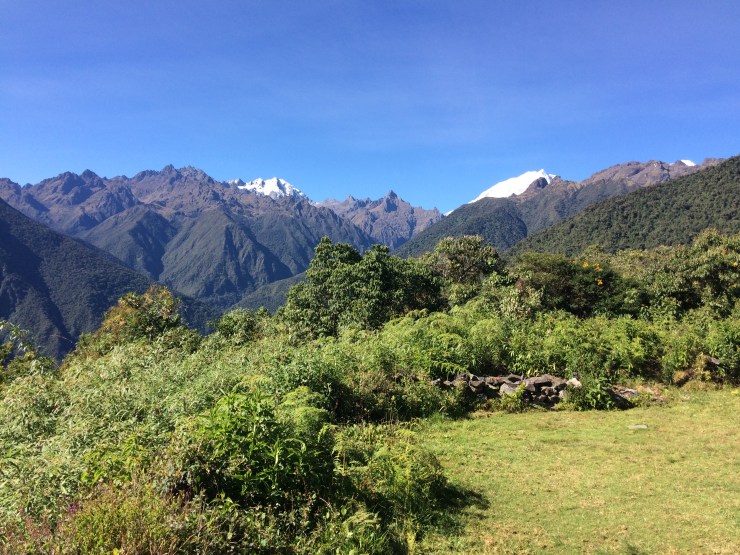

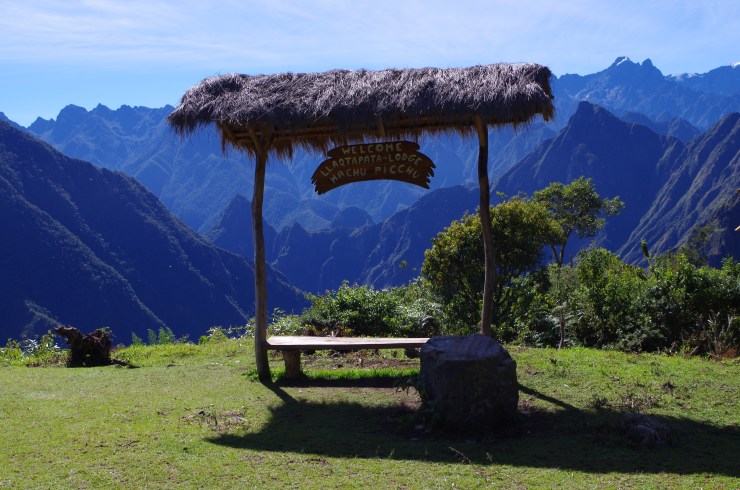
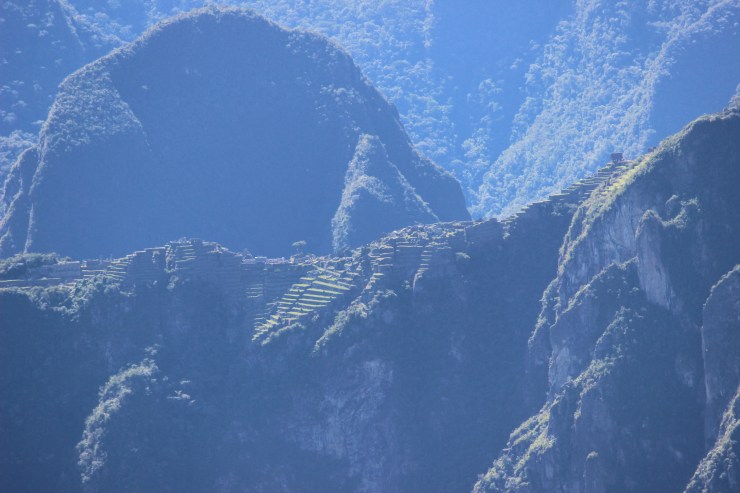
At the 6 mile mark, you reach the Llaqtapata Lodge. Here there are some benches and a small restaurant/market. There are restrooms available for use too. This is a nice place to have a snack and to get your first glimpse of Machu Picchu in the mountains in the background.
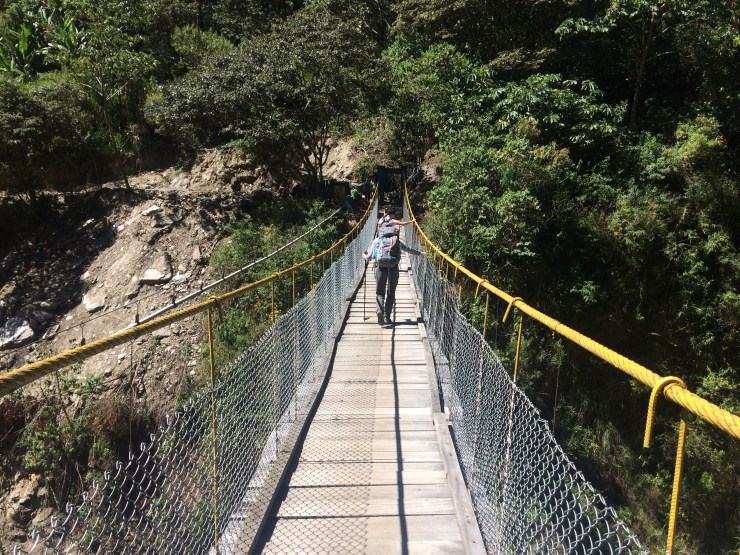
You then begin a steep 2,400 feet descent over the next 1.5 miles. The hike descends through the jungle until you reach a bridge that crosses the Rio Ahobamba.
At this point we took a short break and waited for everyone to make it across the bridge. Then, we continued on a road towards our lunch spot in Hydroelectrica, which was roughly 2 miles away. This portion of the hike was flat and had some nice views. Be prepared for hot temperatures though because the road is exposed to the sun.


When we arrived in Hydroelectrica, we met by one of our porters and were given box lunches. The food was mediocre, which was a bummer after eating very good lunches during the trek. After eating, we then relaxed for a bit and had a beer.
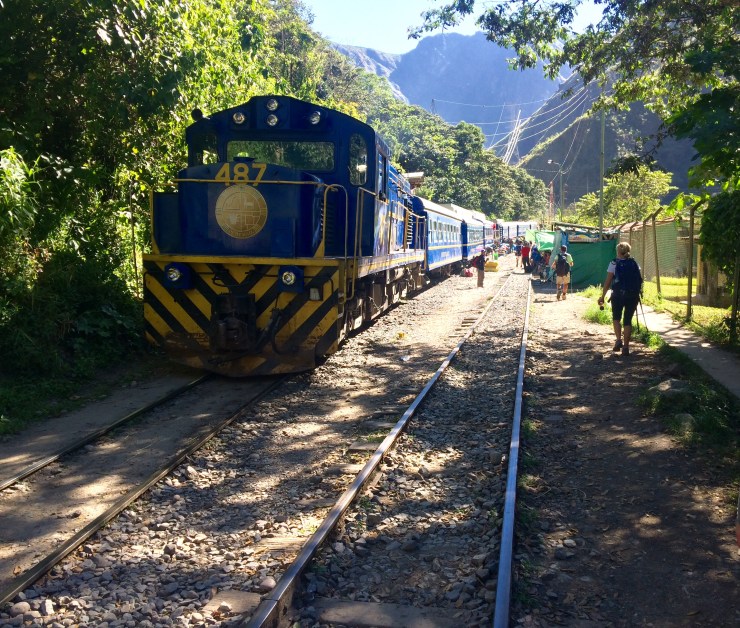
Our tour guide then told us we had two options. We could either hike another 6.5 miles to Aguas Calientes or we could take a train. The hike follows along the train tracks and is easy to follow. After lunch and a beer, we were lazy and decided to take the train which cost about $25 per person. The views along the train tracks were really nice, so the hike would provide good scenery. It really just depends on whether you want to do the extra hiking so you can say you hiked the whole way! The process of getting on the train was pretty hectic, but our guide took care of most of the logistics.
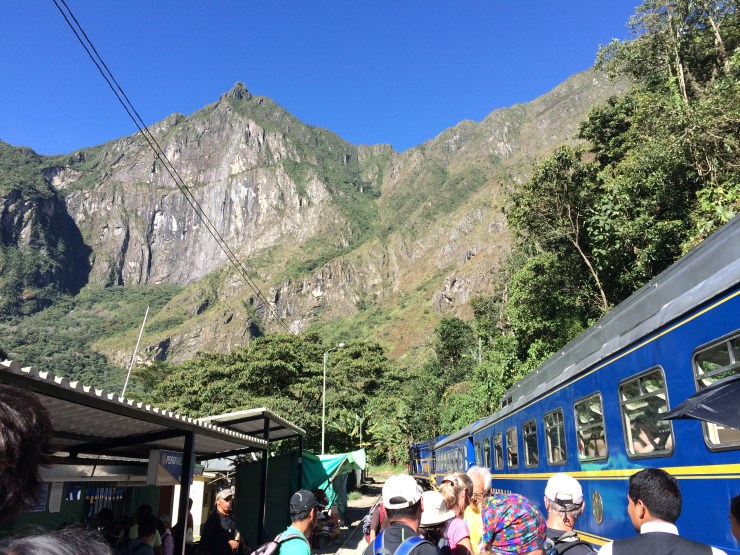
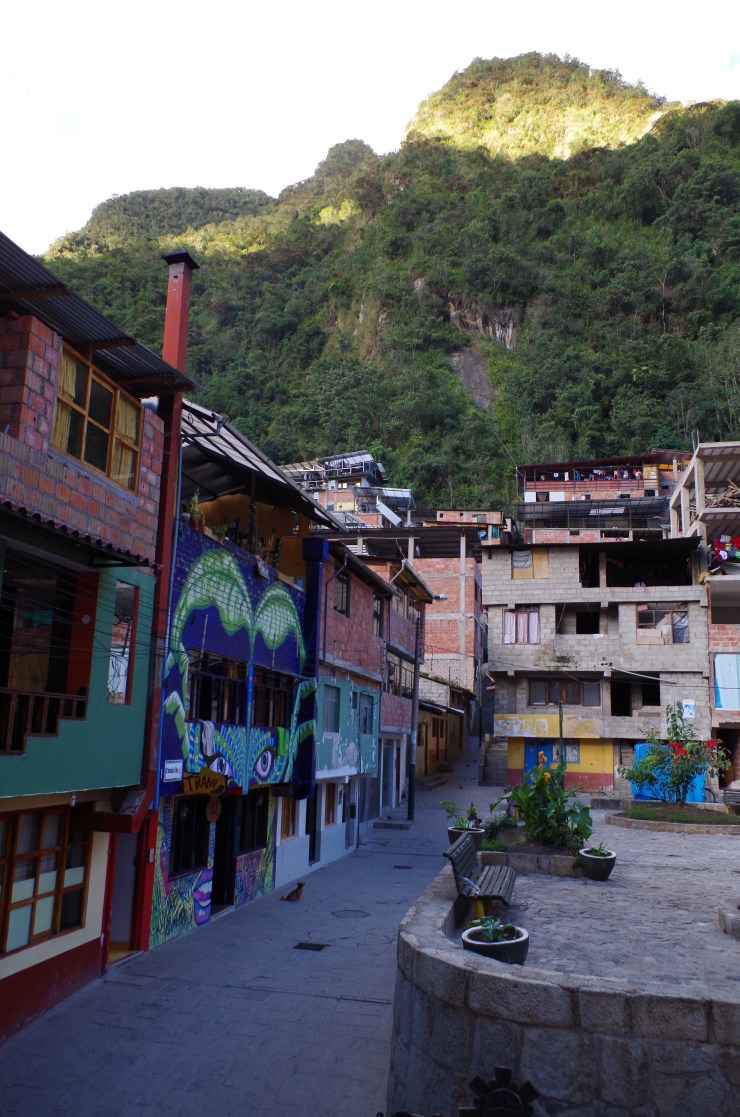
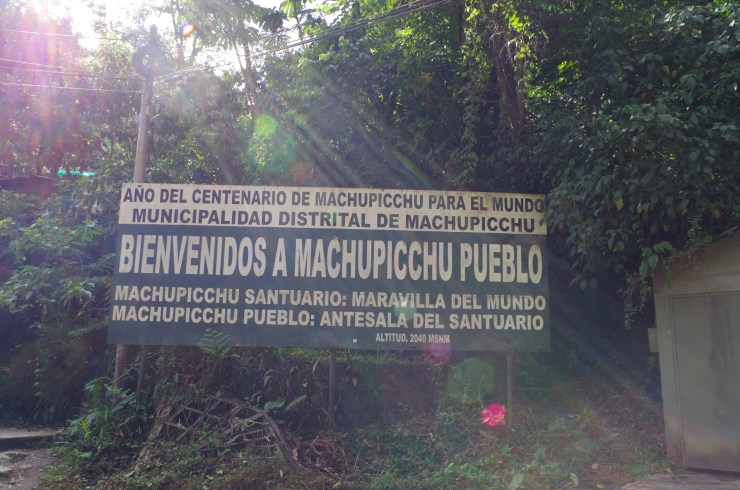
After the scenic train ride, we arrived in Aguas Calientes, and then had a short walk to our hostel. We showered and cleaned up and then met with our group for a dinner in a local restaurant. Our guide explained the options for getting to Machu Picchu (bus or hike) and told everyone to wake up very early. After dinner we went to a market and bought some snacks to eat the next day at Machu Picchu. We then went to the hostel, made sure to charge the batteries on our cameras, packed up our day pack, and tried to get some sleep.
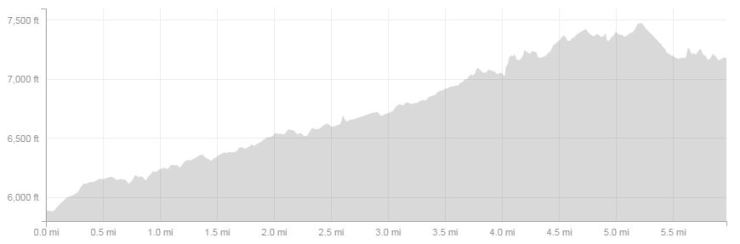
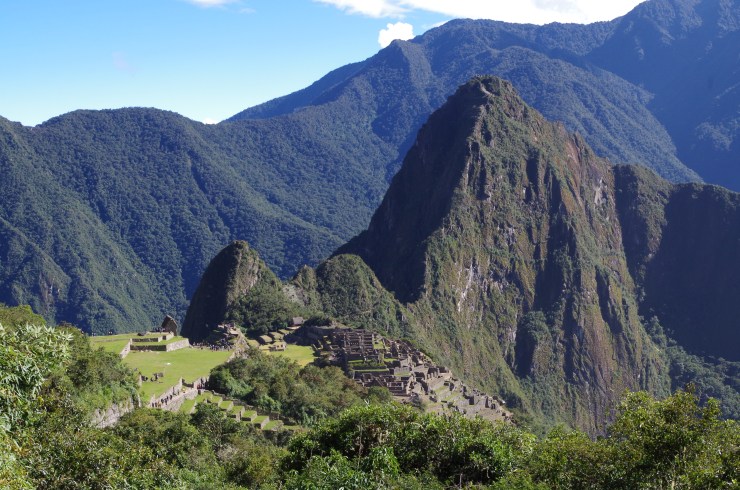
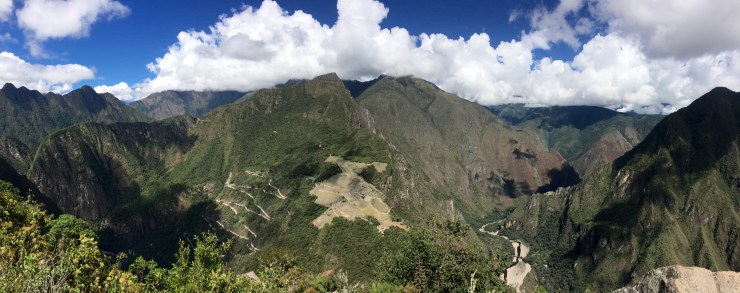
Day 5: ~10 miles; +3,500 feet / -3,500 feet (approximate); Aguas Calientes to Machu Picchu, to the Sun Gate, to Huayna Picchu, and back to Aguas Calientes
On the final day we left the hostel at around 4:15am and walked to the bridge at outside Aguas Calients at the Urubamba River. This is a flat ~1 mile walk and takes about 15-20 minutes. In hindsight we left too early and should have left at 4:30am. There is a gate at the bridge and they do not open it until 5:00am. So, we ended up queued in a line from ~4:30 until 5:00am. On the plus side, we ended up near the front of the line and thus were able to enter Machu Picchu before many others did.
When they open the gate at 5am, you begin the steep 1,300 foot climb up to Machu Picchu. This part of the hike is ~1 mile long and will likely be fairly crowded. The trail is mostly stairs for a mile and really burns the quads. Remember you can also take the bus if you do not want to hike up.
When you reach the top of the climb you will feel like you really accomplished something, but will likely stand in another queue until they open the gates at Machu Picchu at 6:00am. This is a good chance to cool down and change into a fresh shirt.
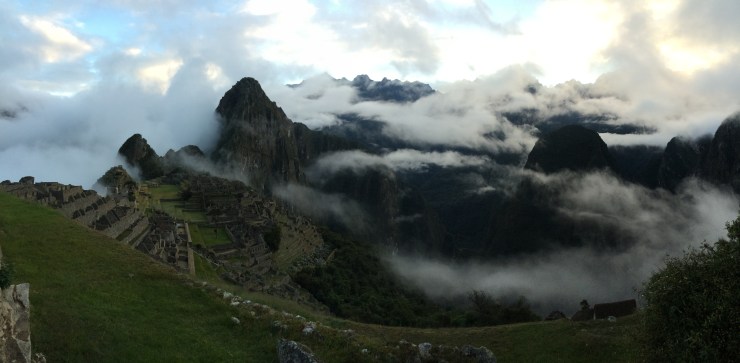
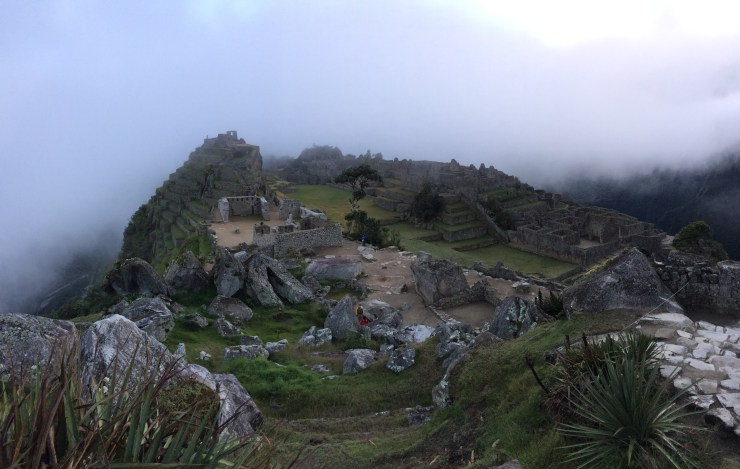
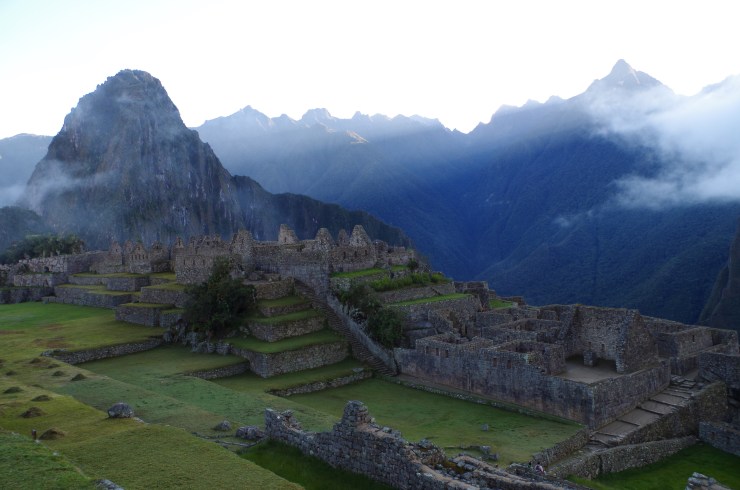
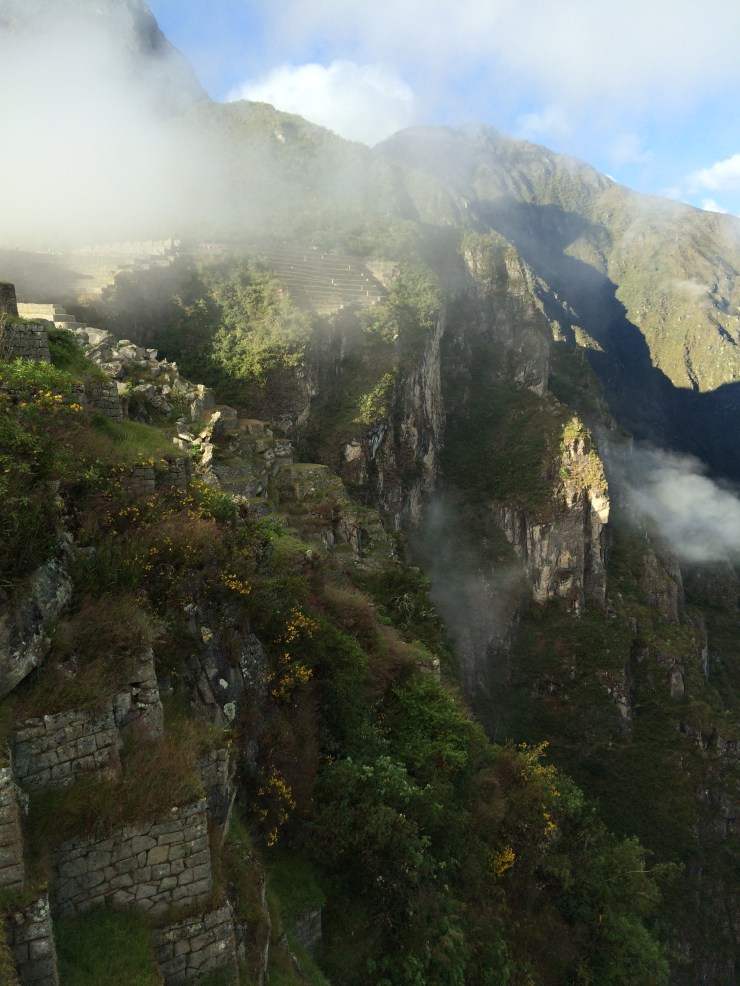
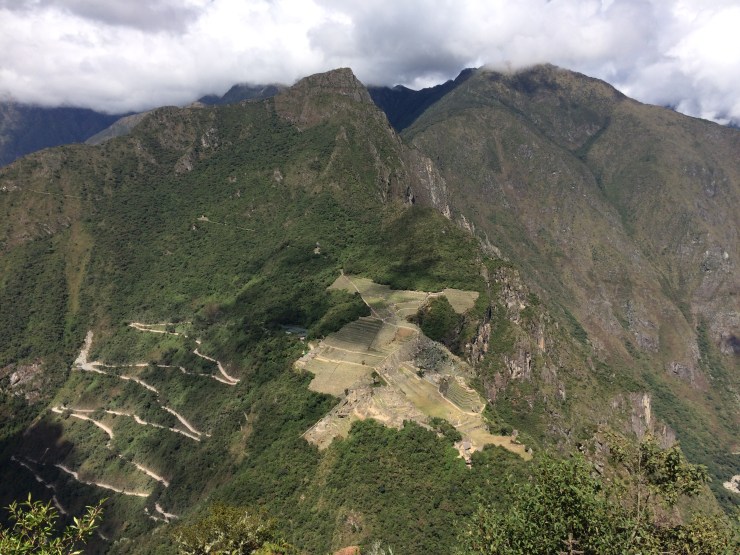
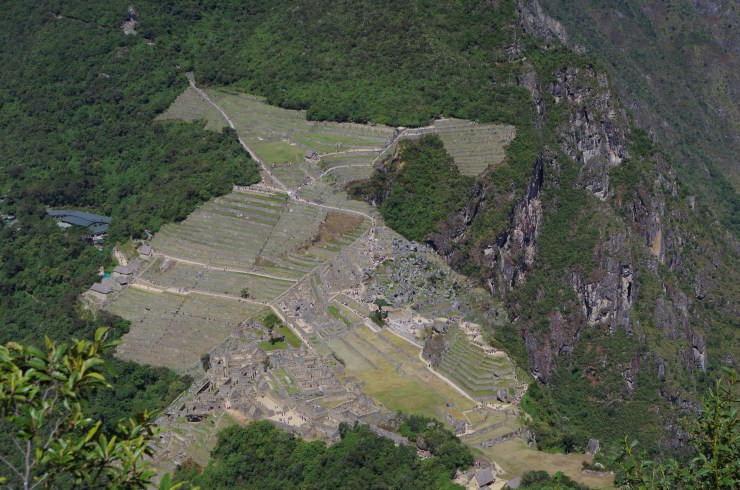
When the gate opens, you will want to hurry up the best areas to take photos of the site before the other tourists cover the site. Your tour guide should be able to tell you where the best photo spot is. On the day we visited, we made it up to the photo spot before many others and were able to get some nice pictures. The only downside was that fog rolled in shortly after we arrived and blocked the ruins for about 20 minutes.

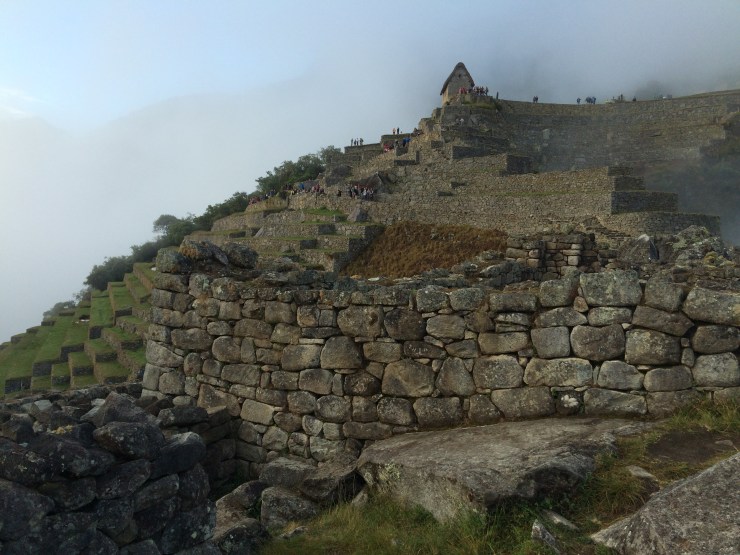
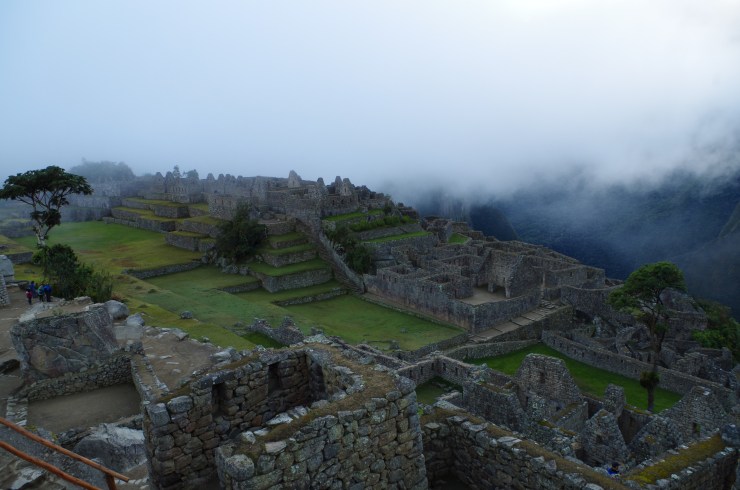
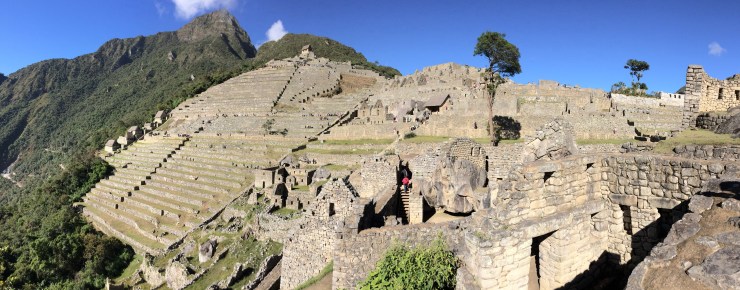
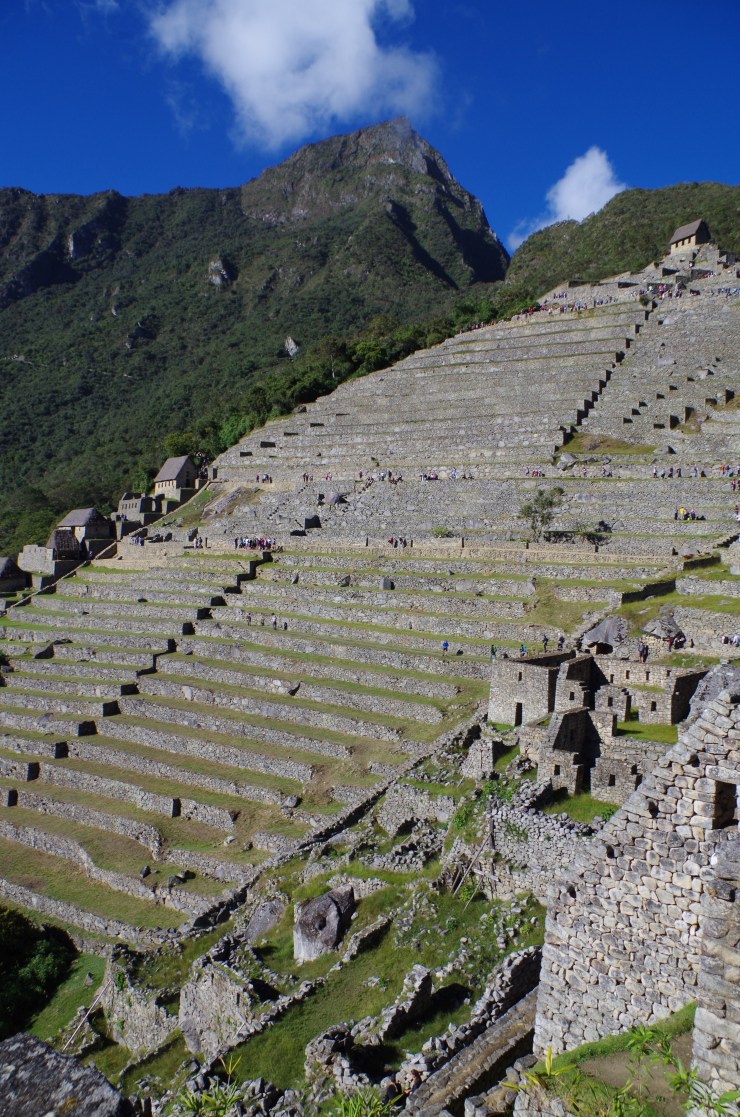
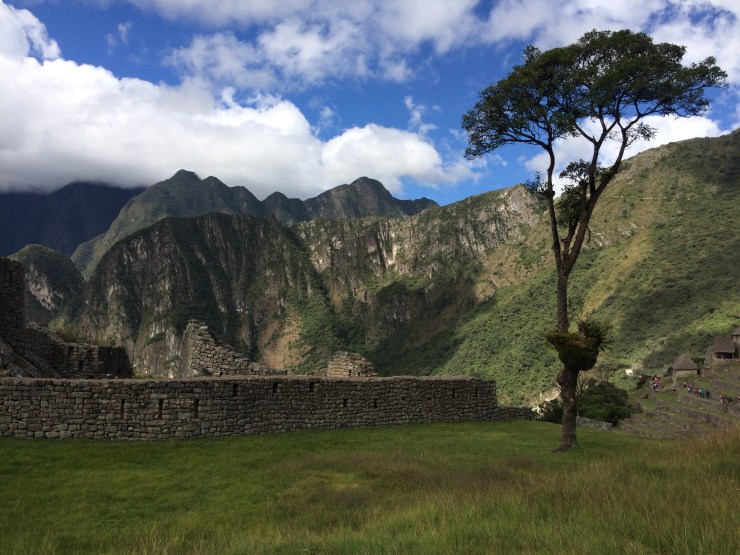
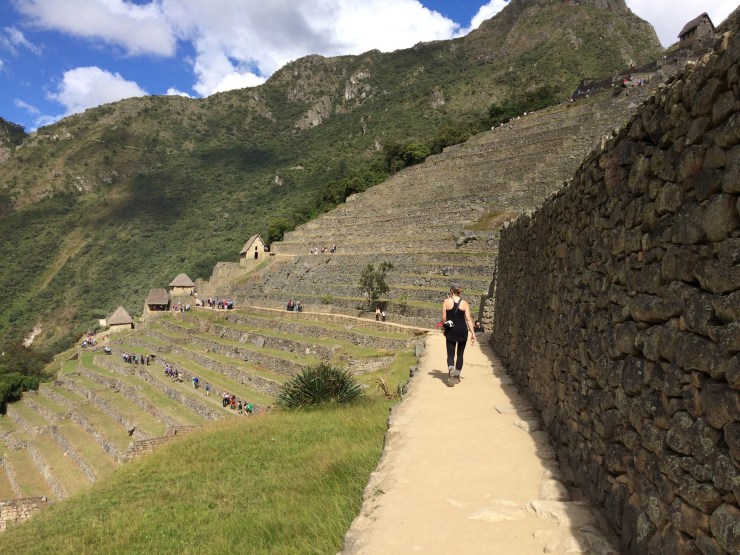
After taking initial photos, our guide took us on a ~1-2 hour tour of the ruins. The site is larger than expected and you can spend quite a while walking around. After the tour, the guide said goodbye and we were left on our own for the rest of the day. During this time make sure to keep track of when you need to be at Huayna Picchu or Montana Machu Picchu.

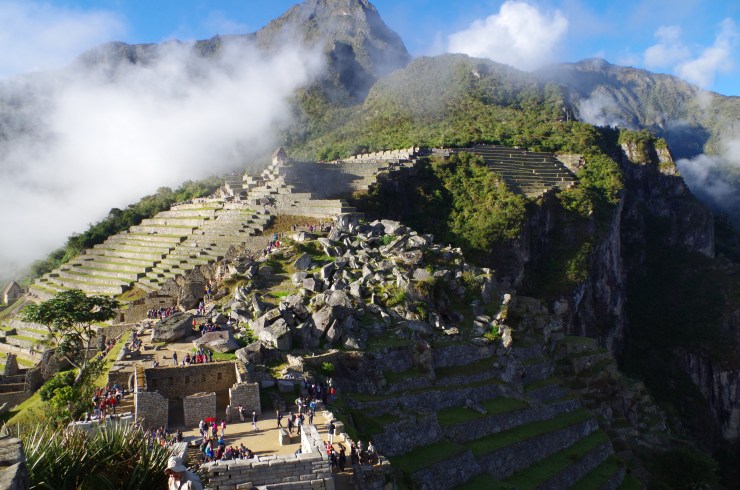
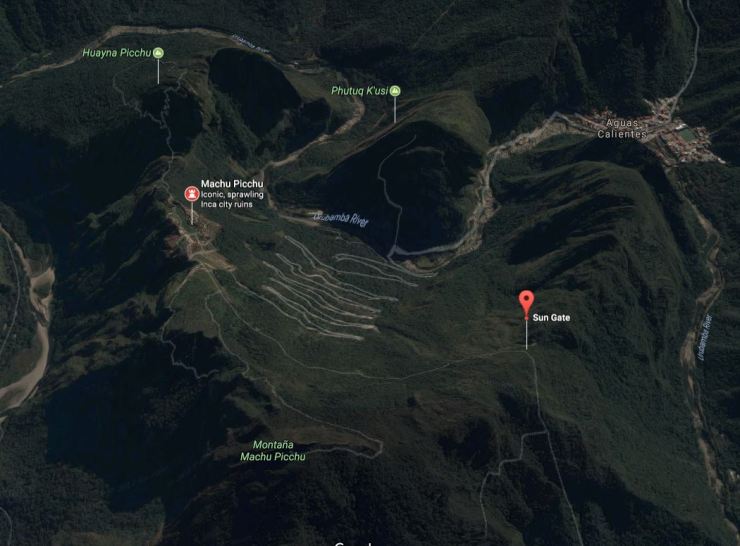
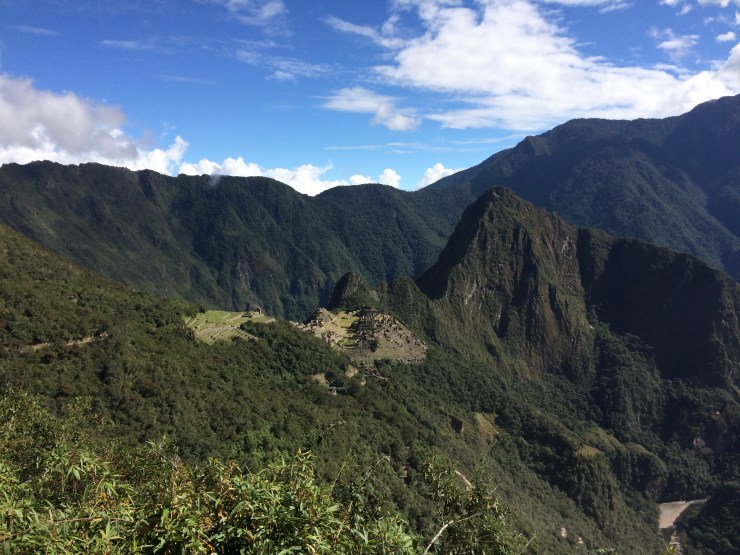
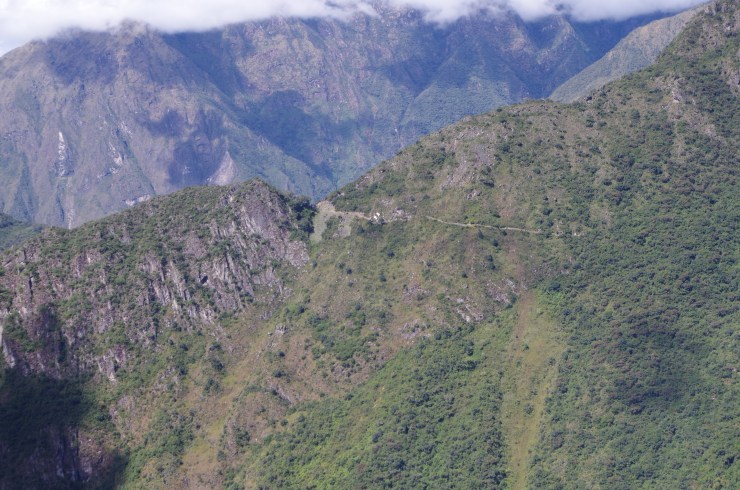
After walking through most of the main ruins, we decided to hike up to the Sun Gate. The walk up to the Sun Gate and back took about 2 hours. When you get to the gate, there is a nice terraced area that you can sit on and take in the view. This was a nice hike and the views are great. No special ticket is required to go up and as you walk up the trail you get to watch Machu Picchu increasingly shrink in the distance.
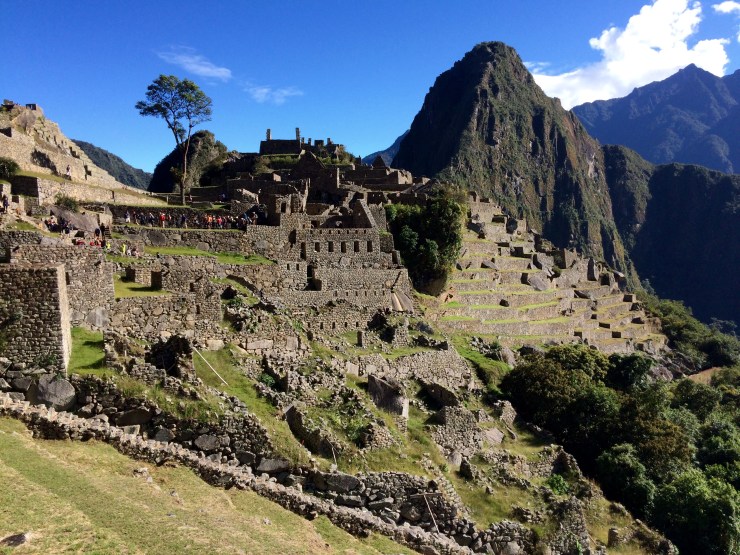
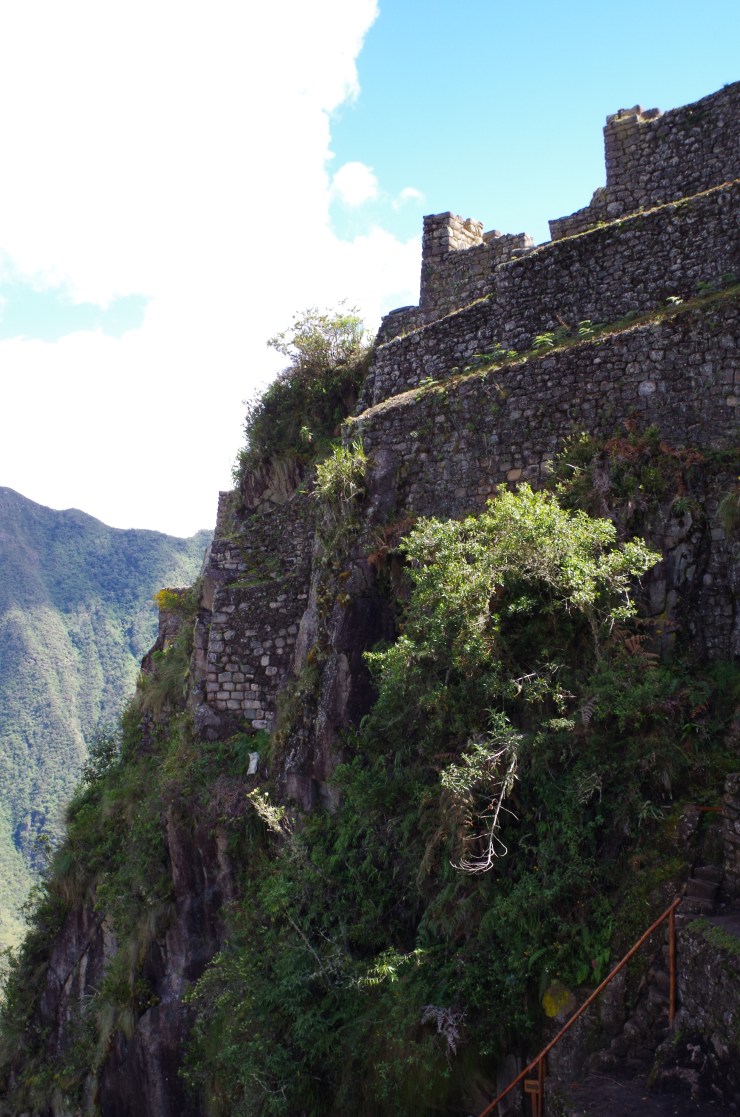
By this time we needed to make it back to Huayna Picchu so we could climb up in our allotted time slot. We hiked down from the Sun Gate and then quickly meandered through the Machu Picchu ruins again. We arrive at Huayna Picchu in time and then hiked up to the top. This was a really neat hike, but is not for the faint of heart. Some of the stairs are very narrow and you need to trust your footing.
After coming down from Huayna Picchu, we then slowly worked our way towards the exit.

When we reached the exit, there was a huge line of people waiting to take the bus down to Aguas Calientes. We didn’t want to stand around and just decided to hike back down. It took less than an hour to get down and we met up with other members of our trek to grab lunch.
Later that day we met our tour guide at the Aguas Calientes train station and he provided us with our tickets for the trip back. We took the train from Aguas Calientes to Ollantaytambo, which took about 1.5 hours. From Ollantaytambo, we took a taxi to Cusco which took another ~1.5 hours.
Day 6: Relaxing in Cusco; 0 miles
Here are some similar trip reports:
Torres del Paine National Park, Patagonia – Circuit Trek (~80 mile loop)
Los Glaciares National Park, Patagonia – Mount Fitz Roy, Cerro Torre, and the Perito Moreno Glacier
Sequoia National Park Backpacking – Mineral King Area – Sawtooth Pass and High Sierra Trail

I went with my wife and we used TerraQuecha as our guide service. The cost was a little over $400 each plus tips. We were part of a group of about 10 hikers. The guide was not perfect, but we liked the trek and the food was good!
LikeLike
This is awesome post, very informative. Which hostel did you stay at?
LikeLike
Thanks! We stayed at Hostal Wara Wara.
LikeLike
Great article. My fiance and spent 16 months backpacking the world and also wrote an entire post about this. You can read about it here: https://www.ditchthemap.com/travel-blog/2015/10/3/5-days-hiking-the-salkantay-trek-to-machu-picchu-peru
LikeLike
Which trekking company did you use?
LikeLike
We went with Terra Quechua.
LikeLike
Great review! Thanks for all the detail. Why did you choose Salkantay over the classic Inca Trail and are you glad you did? Thanks!
LikeLike
We chose Salkantay because the Inca Trail was fully booked. We loved the Salkantay Trek though and had no regrets!
LikeLike
Thanks! From your pictures I’d say that the Salkantay looks more appealing to me than the Inca Trail so it is currently my first choice even though it’s still 10 months until I go. Would you recommend the trekking company you used?
LikeLike
We overall enjoyed our trek with Terra Quechua, but everything was not perfect. We chose a provider that was on the lower end of the price spectrum. Things like the food and tents were great. However, it seemed like they cut some corners on transportation (some crowded vans and unsafe taxi rides) and a couple of the campsites.
I would just advise figuring out your expectations and then choose a guide in the price range that matches your expectations. If you like everything to be perfect, a cheap operator will probably let you down. If you are fine with solid food and a less than perfect accommodations, a cheaper operator will work for you. Trip advisor is probably the best place to look for ratings on many of the tour operators.
LikeLike
Thanks for the detailed response. I did look them up on TA and many others have provided similar feedback to you. I will do my homework!
LikeLike
I also chose Salkantay because it was booked. I loved every moment of it. We’re actually planning on doing it again. I think you get a different crowd for the Salkantay. I imagine the people that do the Inca Trail are on shorter vacations that were planned many many months in advance. People hiking the Salkantay are more of your ‘long-term’ traveler.
LikeLike
Thanks, I think I’d prefer the less touristy option so Salkantay is looking good.
LikeLike
I really enjoyed your report , only thing is I now have to assess my stamina and fitness
LikeLike
I greatly appreciate this article and the information provided. I wrote a reviews, maybe you can help us to change,
LikeLike
Amazing summary! Beautiful pictures! I have a handful of questions if you have a few minutes.
What time of year we’re you there? We’re planning on going beginning of June.
We’ve heard the Salkantay trail can get crowded because it’s not limited by passes. What was your experience in terms of crowding?
What range of temps did you experience along the way – just trying to finalize our packing options.
How many hours were you hiking each day? Curious how altitude like 15,000 feet hit your group.
Thanks and greatly appreciate this blog.
LikeLike
Hi Keith! We did our trip in late May and the weather was quite good. I imagine June would be similar. There were some crowds on the trails in certain areas. Some areas were worse than others, but it mostly did not bother us. We did not hike the Inca Trail, so I cannot compare the two. For temperatures, the coldest was roughly 30 degrees F at night on the first night and the warmest was roughly 90 degrees F hiking into Hydroelectrica. On the longer days, we probably hiked upwards of 6 hours. It will really depend on how fast or slow your group is. Your speed is kind of limited to the slowest people in your group. Just remember that if you have guides, you do not need to carry all your gear and can pack most of the heavy stuff for the mules to carry. The altitude was a modest issue for some. Mostly just feeling light-headed and having a headache. No one got truly altitude sick or had any major issues. The guide has some oxygen in case of a major issue. The good thing is that after the pass you descend pretty quickly, so you can get to lower elevation if you are having an issue. Hope you have a good trip!
LikeLike
If you did the salkantay hike again, would you still use the guides? I’m thinking of doing the trip without a guide.
LikeLike
Hi Dan – we really enjoyed using a guide service for the Salkantay trek. The biggest advantage was having hot and tasty meals cooked by our chef. It was so much better than typical dehydrated backpacking. It was also really nice to have someone else carry the bulk of our gear and set up our tents and sleeping pads each night.
I think we would still use a guide service if we did the trek again. That said, you can totally manage the Salkantay Trek on your own without a guide. It’s best if you have prior backpacking experience though. Just realize that the guides don’t cost THAT much and they really provide an excellent service. Hope you have a good trip.
LikeLike
Me and my husband did this hike last year and used a guide service. We are very experienced backpackers and could have hiked it by ourselves. The guides were awesome and absolutely worth every penny!
LikeLike
Thank you for the article, very informative with beautiful pictures. My friends and I are going to do this hike in the beginning of May 2020 and we are using the Salkantay trek. I love your article, wonderful summary. Thanks again.
LikeLike
Hi! My husband and I are going at the end of April. We hike often but use hiking shoes, not boots. Do you think this is okay? I saw on your list of clothes you had trekking tennis shoes.
LikeLike
Any comfortable hiking shoes will be ok. You do not need ultra rugged boots. Have a good trip!
LikeLike