Los Glaciares National Park, Patagonia – Mount Fitz Roy, Cerro Torre, and the Perito Moreno Glacier


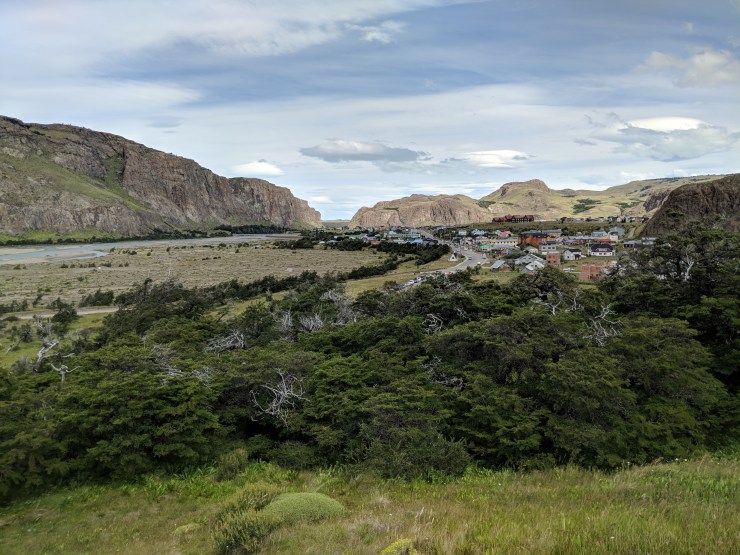
Trip Overview: 5 day/4 night trip hiking and exploring in Los Glaciares National Park in Argentina. We spent two nights in El Chalten and hiked to Laguna de Los Tres (13.6 miles, +/- 3,200 feet of elevation) and to Laguna Torre (12.6 miles, +/- 1,700 feet of elevation). Then, we spent two nights in El Calafate and explored around the Perito Moreno Glacier. Highlights included much of what Patagonia offers including: massive glaciers, dramatic mountain peaks, glacier fed lakes, and green forests. We completed this trip in late December 2017.

Jump to: Day 1, travel
Jump to: Day 2, Laguna de Los Tres and Mount Fitz Roy Hike
Jump to: Day 3, Laguna Torre and Cerro Torre Hike
Jump to: Day 4, the Perito Moreno Glacier
Jump to: Day 5, travel

Shop Sale & Clearance Items at REI.com (up to 50% off)!

Preparations:

Permits and reservations: For the day hikes described in this post, no advanced permits are needed. In El Chalten, you do not even need to pay any entrance fees to hike in Los Glaciares National Park. When visiting the Perito Moreno Glacier in El Calafate, there is a park entrance fee of 500 Argentine Pesos per person. When we visited the park in 2017, the fee needed to be paid in cash.

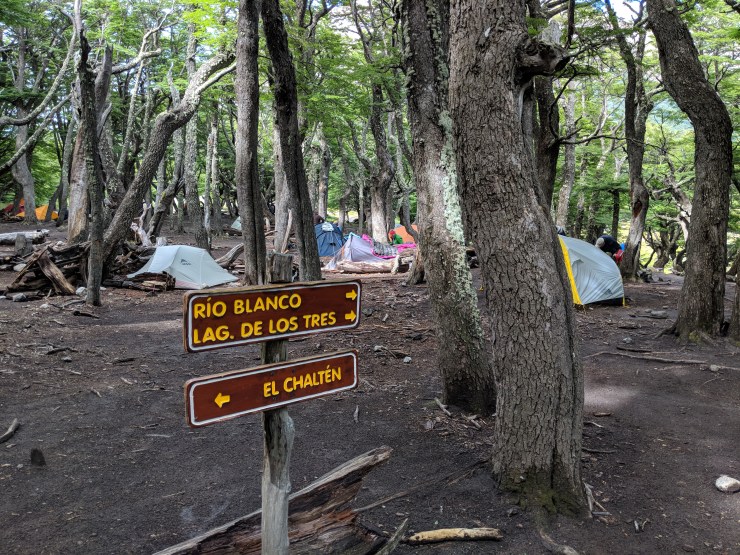
It is wise to book your accommodations in both El Chalten and El Calafate in advance. This can easily be done through tripadvisor, booking.com, or many other websites. While in El Chalten and El Calafate we stayed at small hosterias because we wanted a break from camping. If you wish to backpack along either of the El Chalten hikes described in the post or just want to camp to save money, there are three government run campsites in the area. The Laguna Capri and Poincenot campsites are along the Laguna de Los Trail and the D’Agostini campsite sits along the Laguna Torre Trail. These sites are free and require no reservation.  More info can be found here.

Logistics: Before starting this trip, we were based in Puerto Natales, Chile. To get from Puerto Natales to El Calafate (Argentina), we took a bus. It is wise to book bus tickets in advanced during the summer months so that you have a reserved seat. This can be done online or in person at the bus station a day or two before you wish to leave. You could also drive a rental car from Puerto Natales to El Calafate (and then El Chalten), but keep in mind that you must cross the Chile-Argentina border, which can be a hassle (extra fees and forms are required). To get from El Calafate to El Chalten, we took another bus. Once in El Chalten, you should be able to walk to your accommodations because the town is quite small.

Alternatively, you can fly directly into El Calafate and then either rent a car or take the bus to El Chalten. Flights into El Calafate are typically expensive, but it simplifies your itinerary.

Supplies: We had a several hour wait between buses in El Calafate and used this time to get cash from an ATM. Various sources told us the ATMs in El Calafate are more reliable and more likely to have cash when compared to the ATM in El Chalten. Certainly your results may vary, but it is wise to grab some cash before arriving in El Chalten.

For food, there are markets in both El Chalten and El Calafate. There are are also several restaurants in both towns. Just keep in mind that not all establishments accept credit card.

We just did day hikes and thus did not need all of our backpacking gear. I did bring a daypack (Osprey Daylite Daypack) so that we could carry snacks and water. For snacks, I always like Clif Shot Bloks, which are easy to eat while hiking and provide a nice boost of energy. We also brought more typical lunch stuff like granola, fruit, and sandwiches. You also want to bring sunscreen, since there is high UV exposure in Patagonia. Given the relatively high winds, we did not need bug repellent.

For clothes, you want to bring different layers and you want a rain shell on the outside. The temperature can change quickly so having easy to take off and put on layers allows you to quickly adapt. On these hikes I wore a long sleeve hiking shirt as a base, then wore a lightweight down jacket, and used my rain shell as the final layer. You also want a beanie cap that will stay on your head in high winds and you may want some lightweight gloves.  Here is a list of various layers I brought.

Jump to top of page

Day 1: Lots of time in buses… traveling from Puerto Natales, Chile to El Chalten, Argentina

Overall map of the region of Argentina where El Calafate and El Chalten reside.

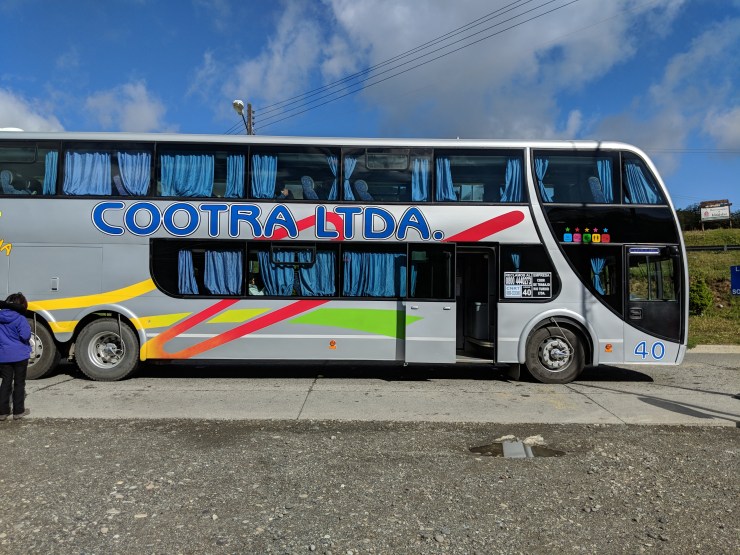
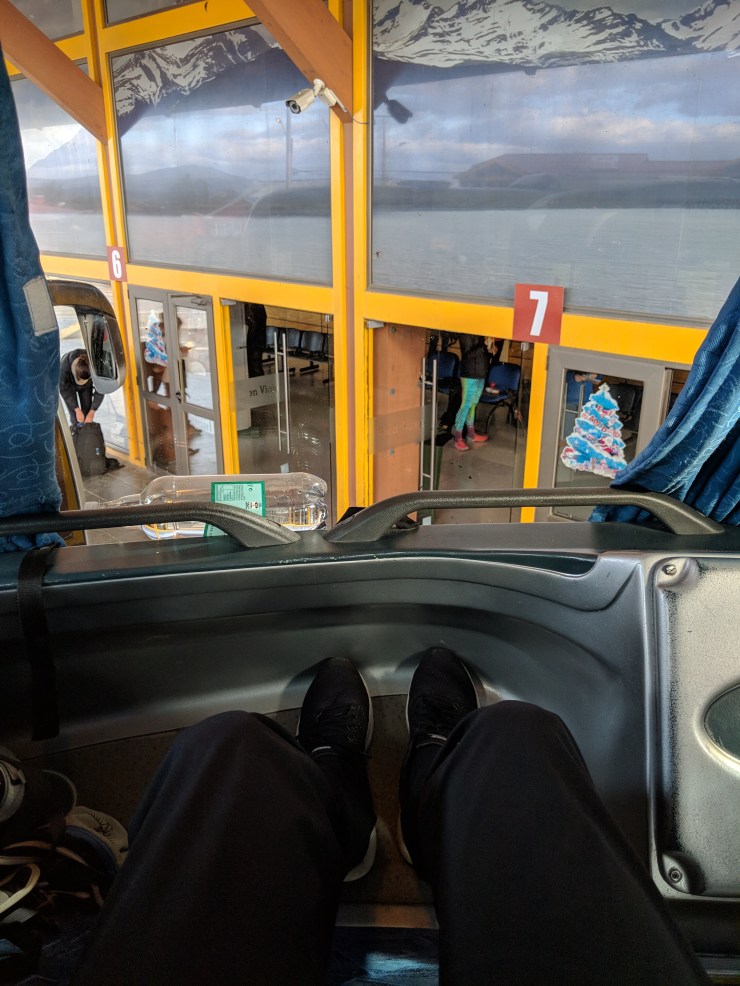
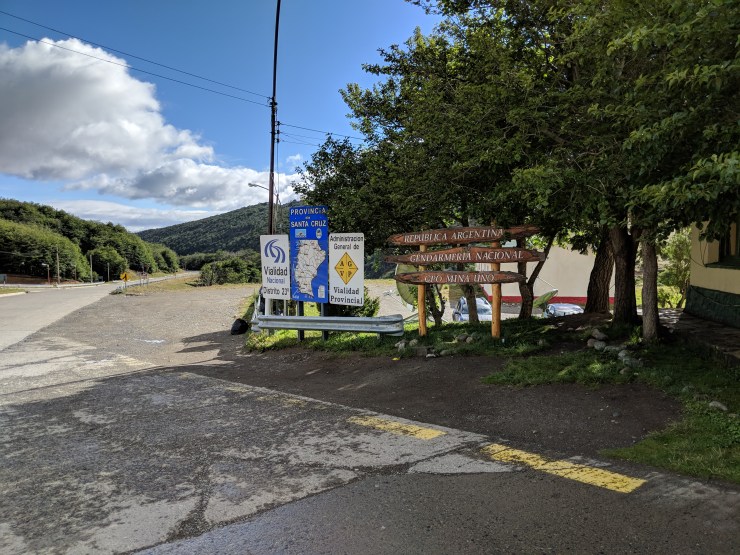
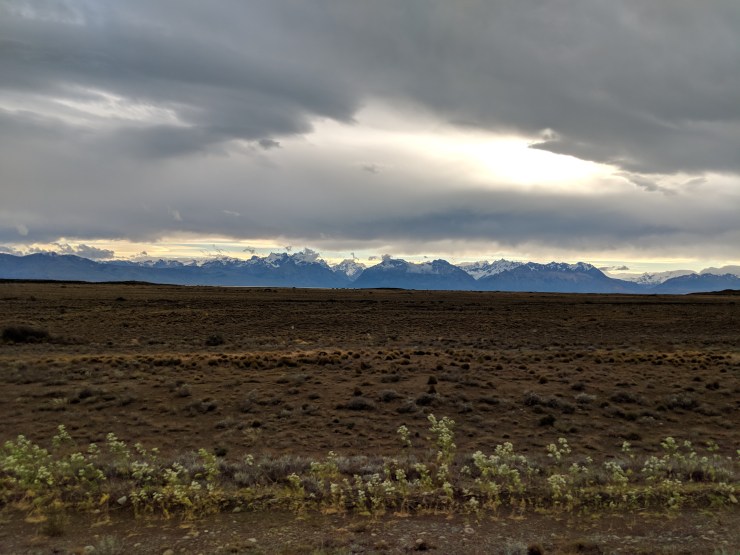
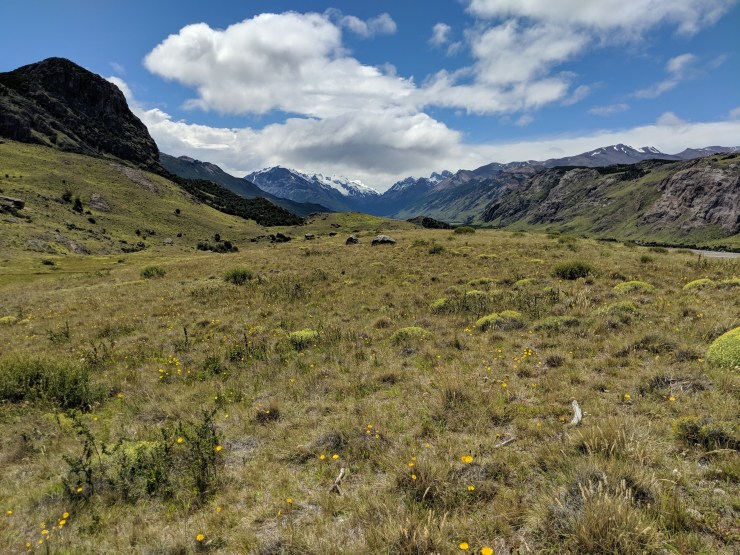
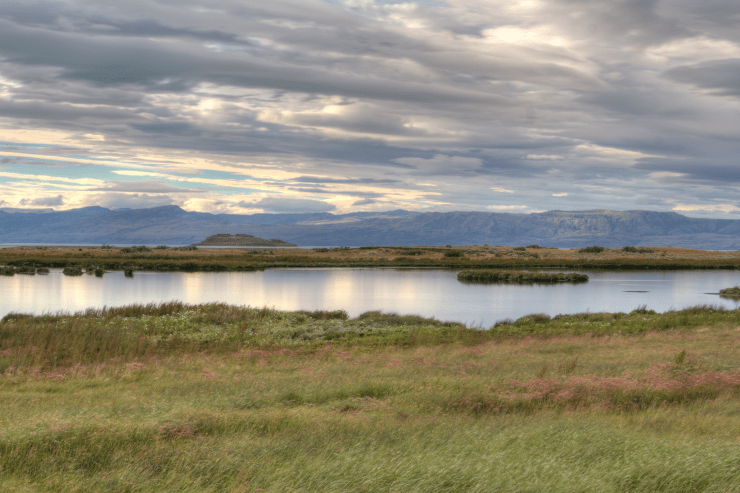
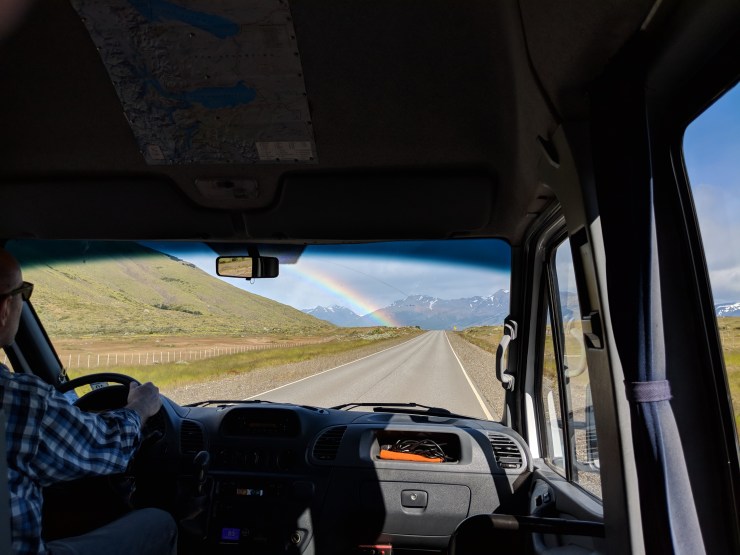
On the first day, we started things out with a 7 hour bus ride from Puerto Natales to El Calafate. Our bus left the Puerto Natales bus station (located here) at 7:00 am and we arrived at the El Calafate bus station (located here) at ~2 pm. The ride was supposed to be only 5 hours long, but we had a long wait at the Chile-Argentina border and had several other unplanned short stops. If you booked your bus tickets in advance, I advise reserving the seats in the front of the top row. These seats give you a lot of leg room and have a great view out of the window at the front of the bus. It is also wise to build some flexibility into your schedule in case you have a longer anticipated bus ride like we did.

The bus that took us from Puerto Natales to El Calafate.
View of the seat in the front of the top row of seats in the bus (pictured: Nike Air Zoom Pegasus Running Shoe
Maker:L,Date:2017-8-29,Ver:5,Lens:Kan03,Act:Kan02,E-ve
At the first border station you must exit the bus and present your passport to Chilean immigration officials.
You then get back in the bus, drive a bit further, and do the same thing at the Argentina customs office.

Our bus to El Chalten was not planned to leave until 6 pm, so we walked downtown to an ATM (located here) to take out enough cash for our trip and then grabbed some lunch. The downtown El Calafate area is a little over a mile west of the bus station. We walked there, but you can also grab a taxi from the bus station. The downtown is pretty touristy and there are plenty of restaurants and shops.

We then went back to the bus station and board our 6 pm bus to El Chalten.  This bus ride took roughly 3.5 hours. The bus station in El Chalten is located here and is walking distance from most places in town. There is an ATM next to the bus station, but it can sometimes be out of cash or out of service (the internet is often down).

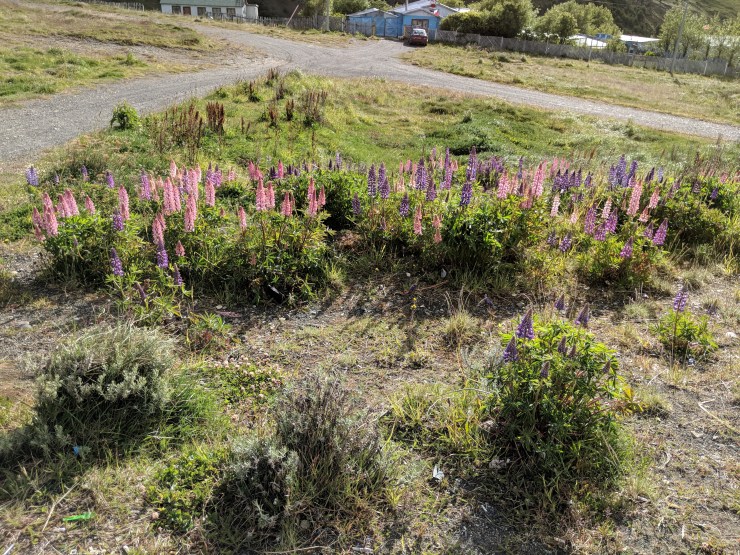
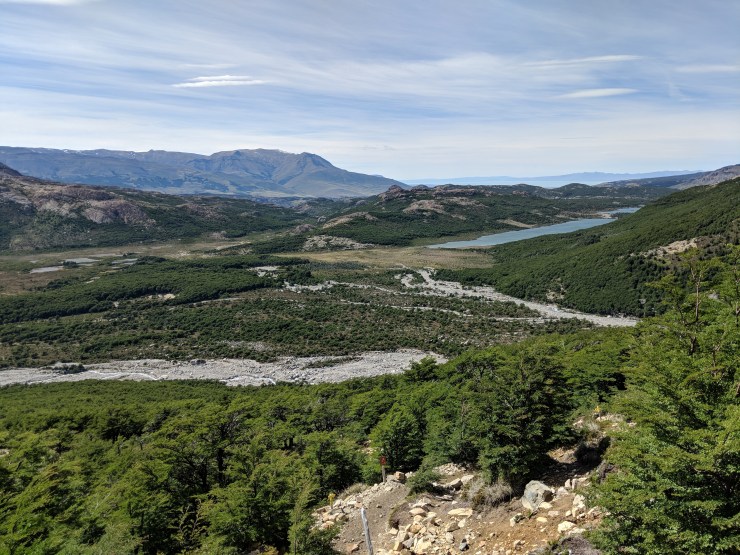
Both of these bus rides provided some great views of the varying terrain in Patagonia.

Along the ride from Puerto Natales to El Calafate, we saw many wild flowers.
The ride from El Calafate to El Chalten has views of the Patagonia Steppe and the mountains in Los Glaciares National Park.

Jump to top of page


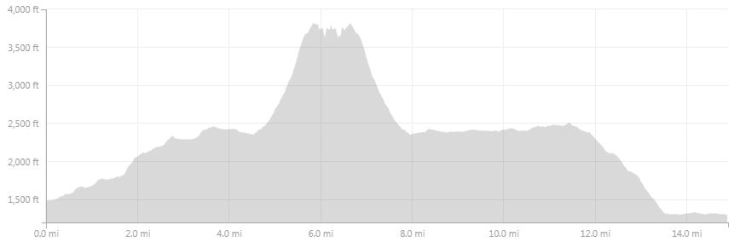
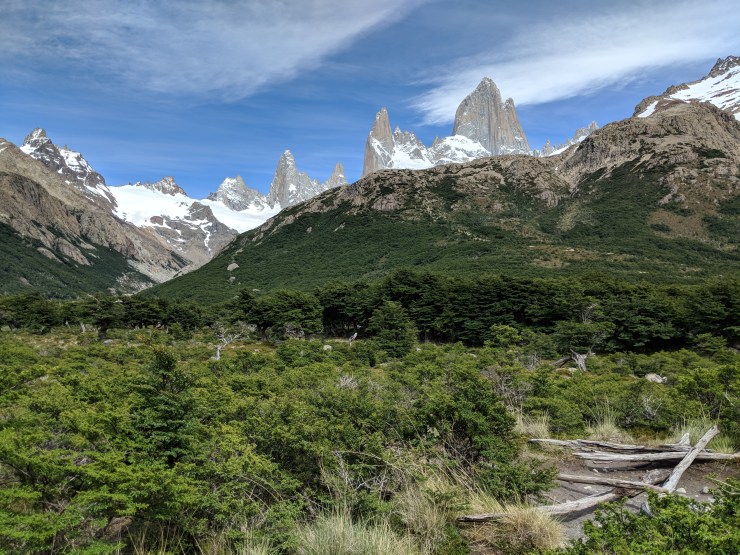
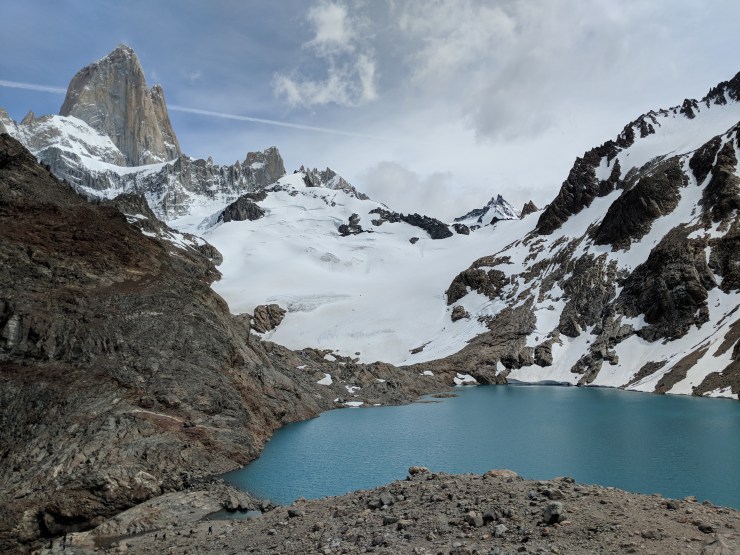
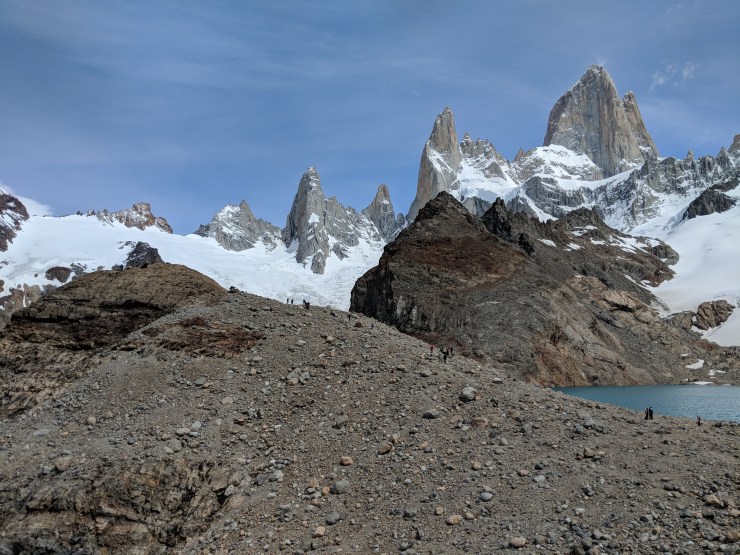
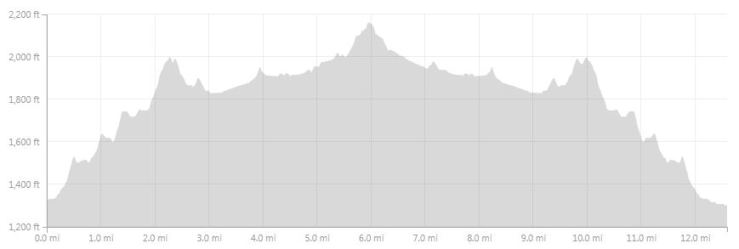
Day 2: 13.6 miles; +/- 3,200 feet of elevation; Hosteria El Pilar –> Laguna de Los Tres and Mount Fitz Roy –> El Chalten

Map of the route along the Laguna de Los Tres trail that leads to the base of Mount Fitz Roy in Los Glaciares National Park.
Map of the route along the Laguna de Los Tres trail that leads to the base of Mount Fitz Roy in Los Glaciares National Park. We first took a shuttle from El Chalten to the Hosteria El Pilar. We then hiked along the trail highlighted in blue and ended up back in El Chalten.
Elevation profile of the hike from Hosteria El Pilar to Laguna de Los Tres to El Chalten.

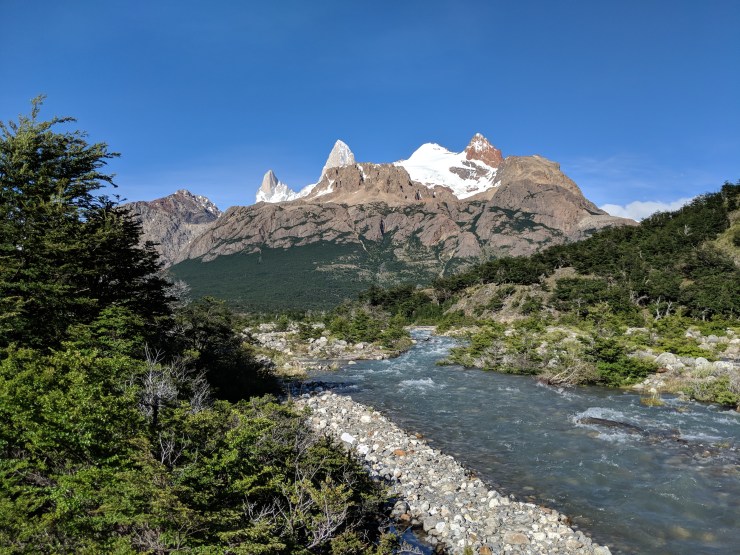
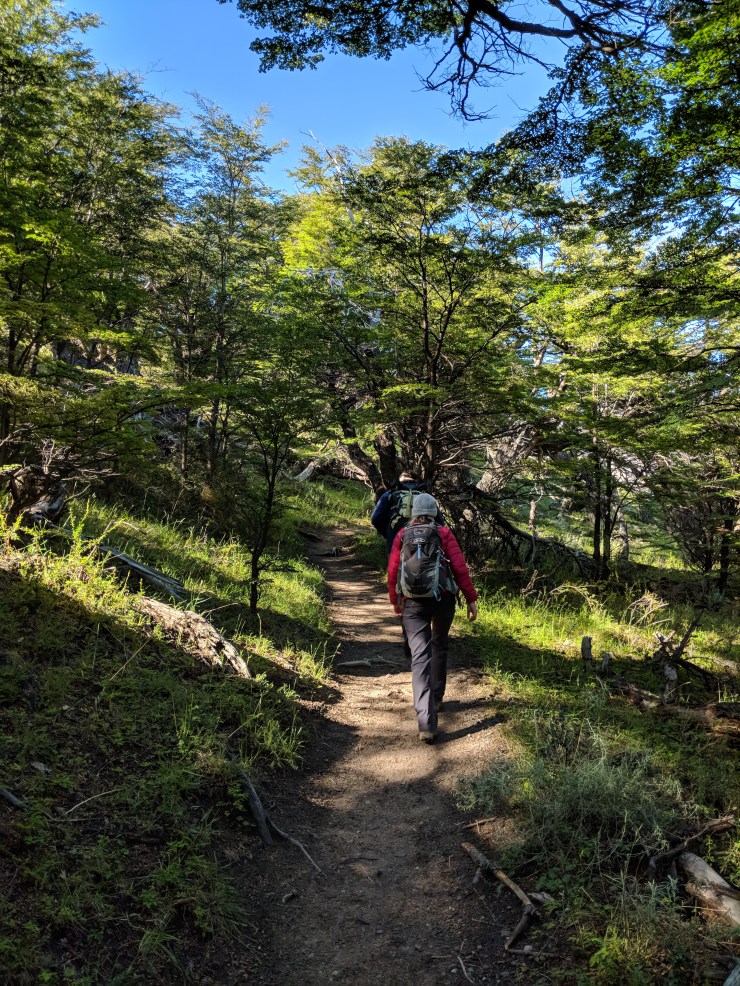
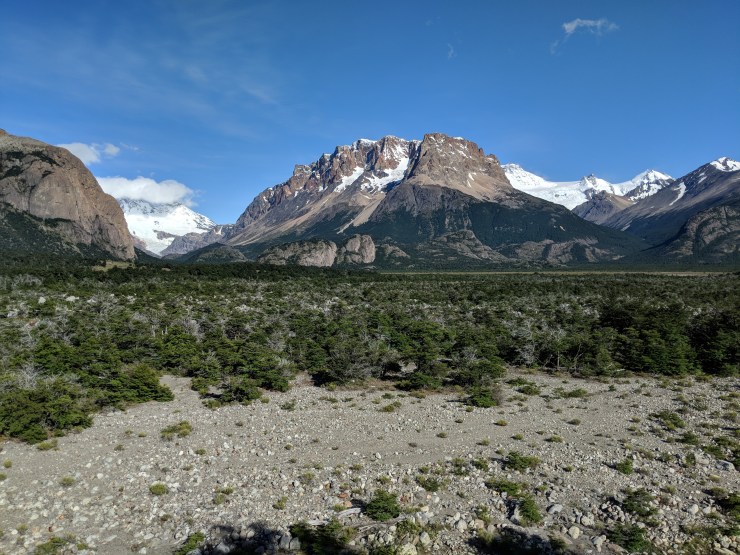
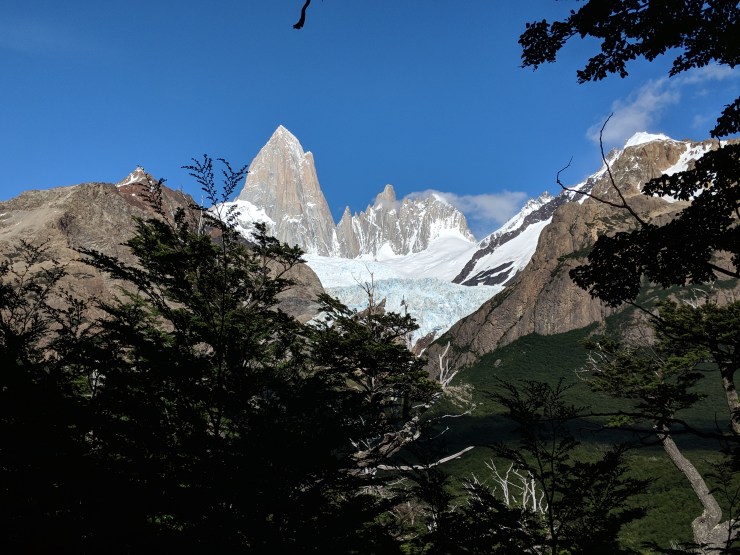
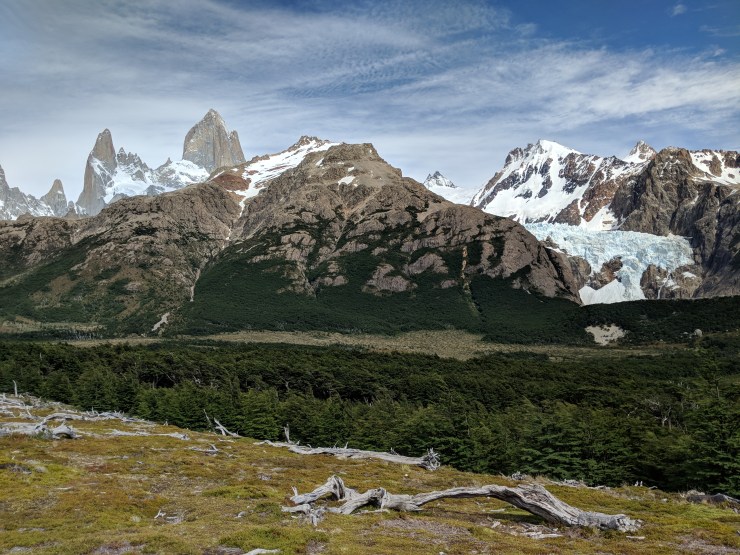
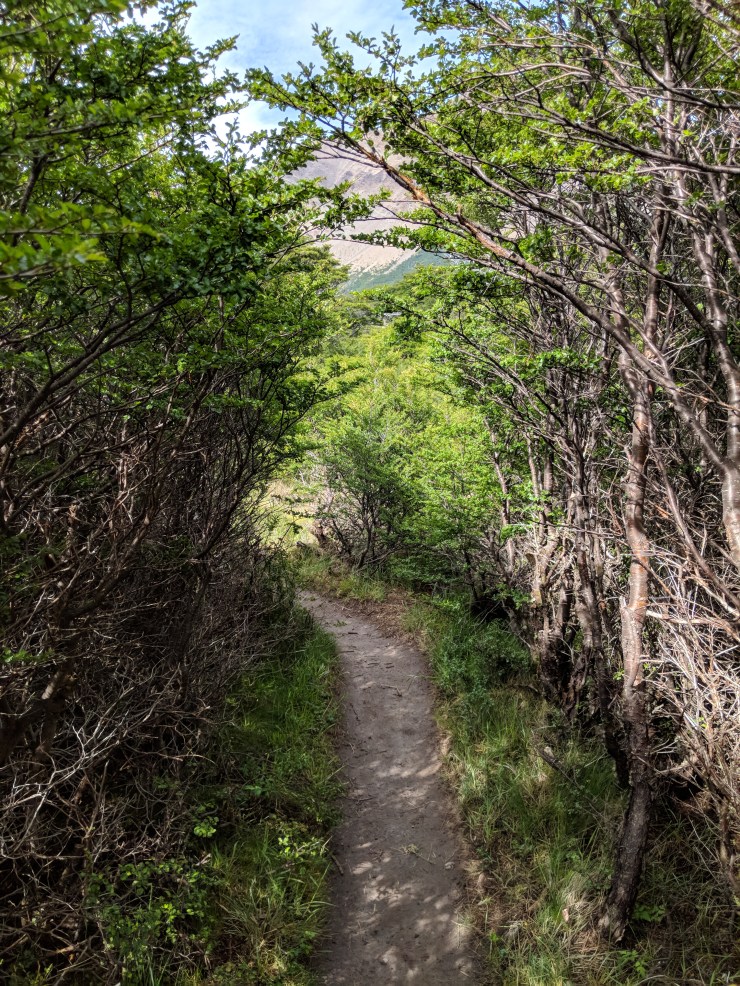
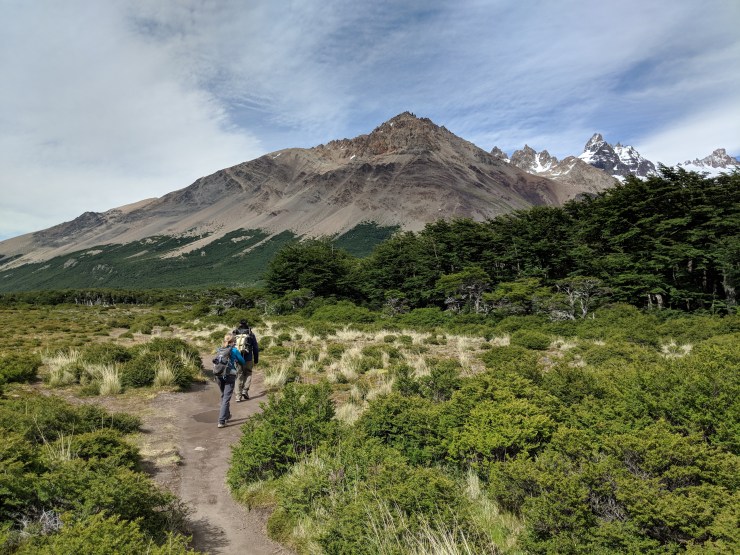
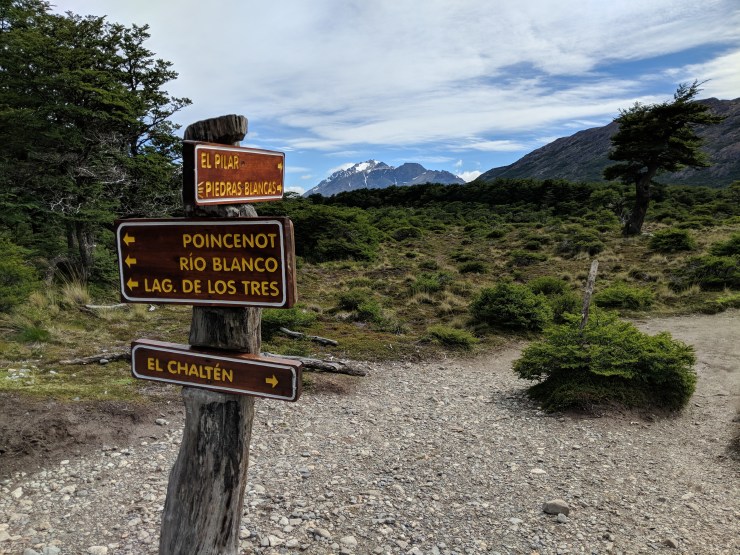
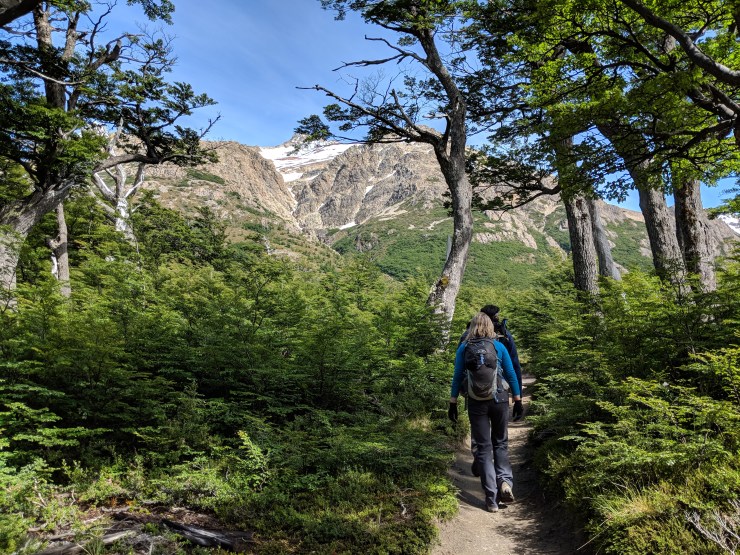
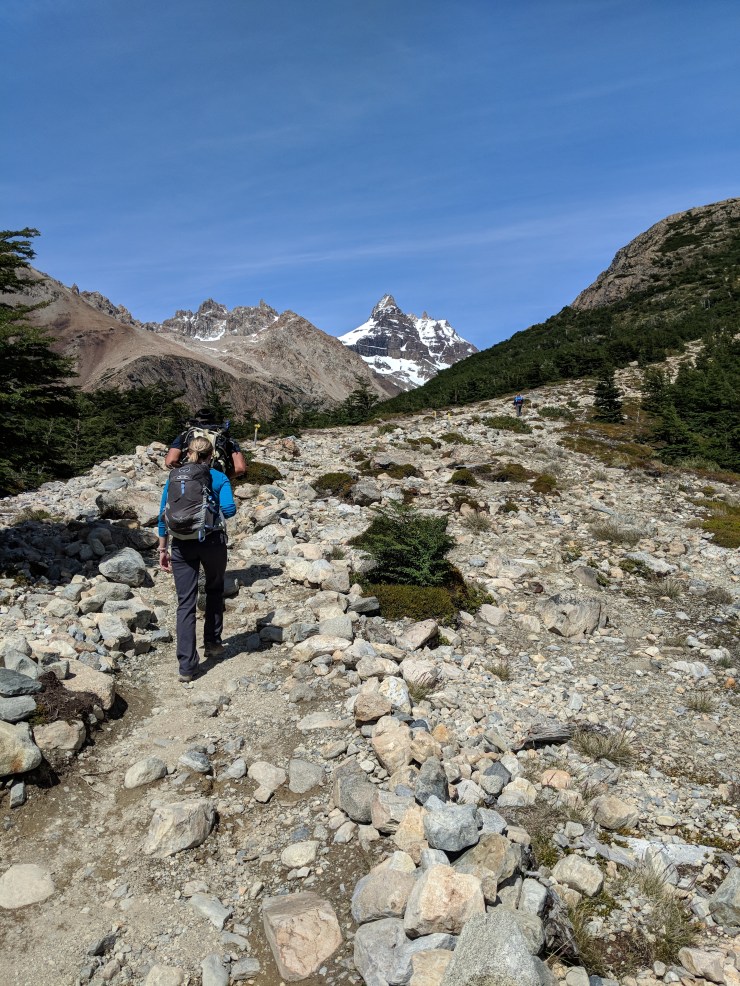
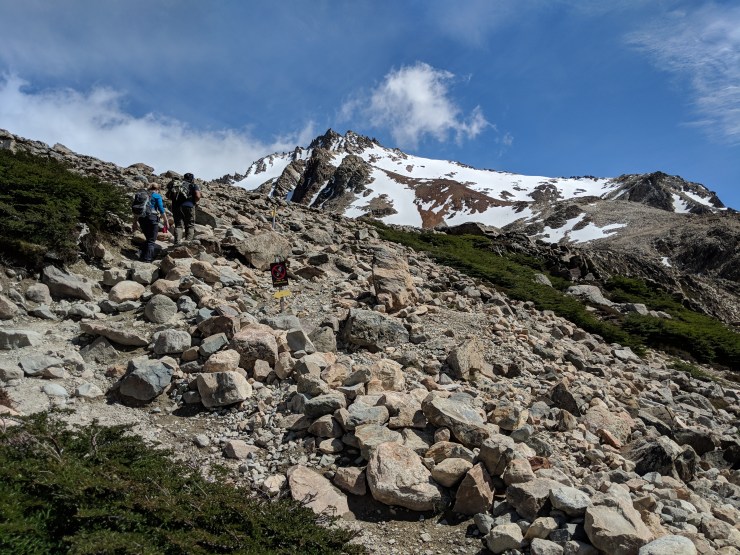
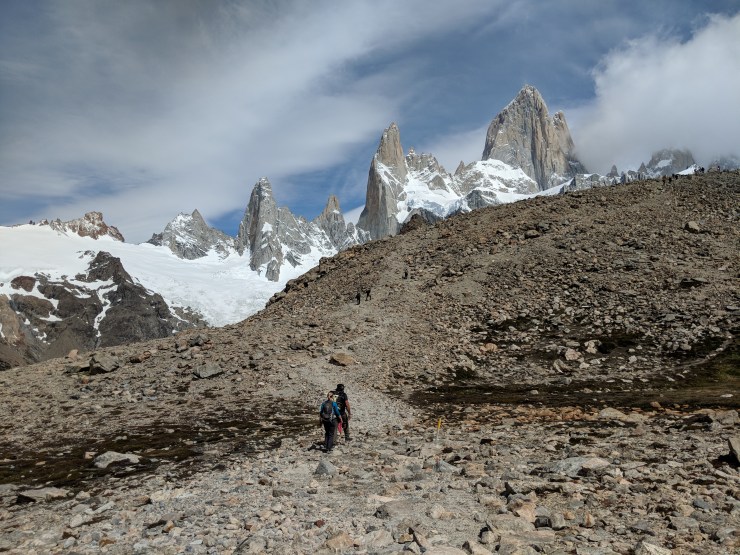
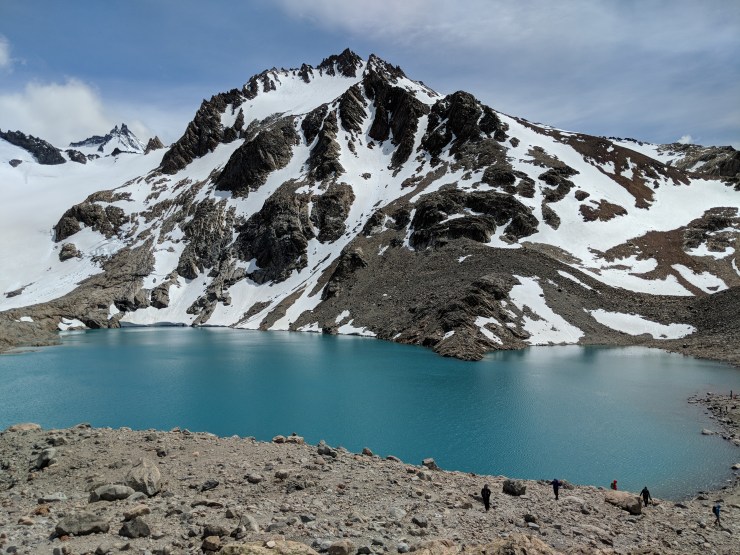
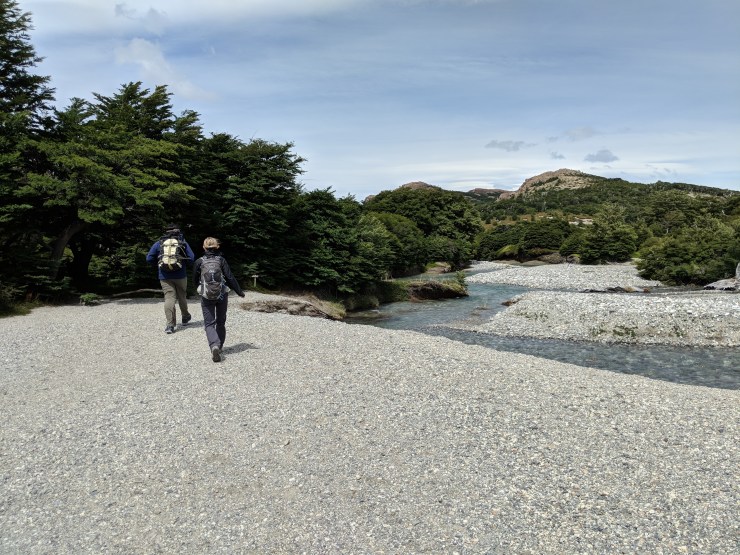
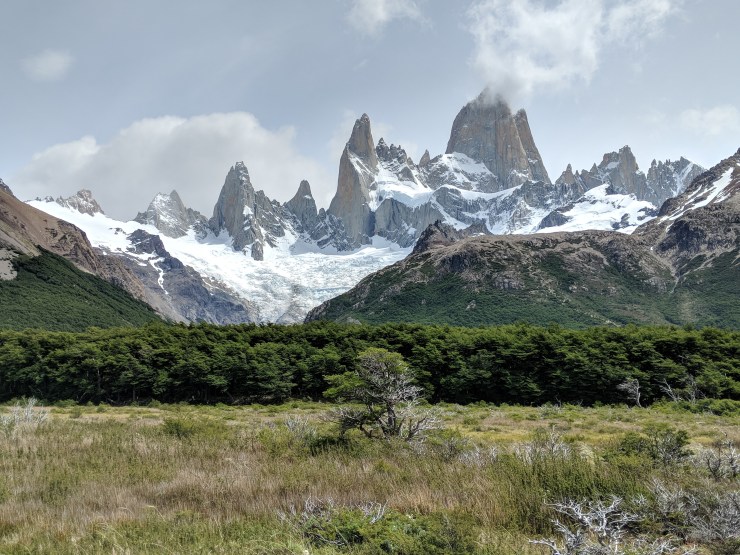
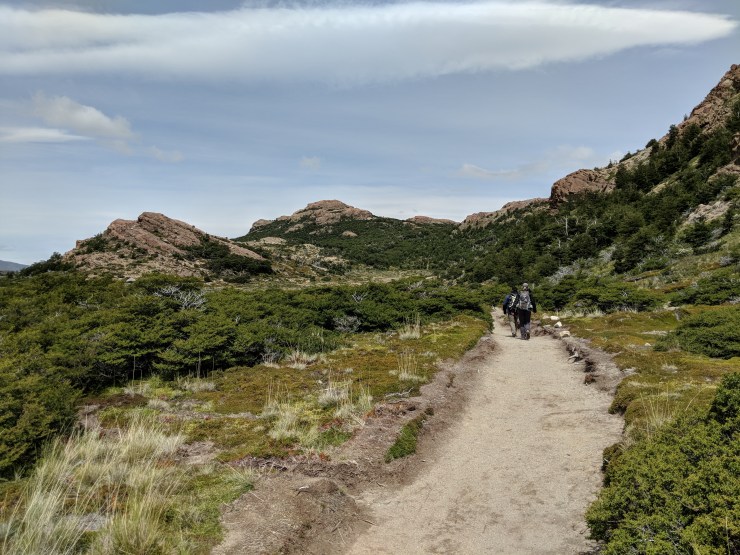
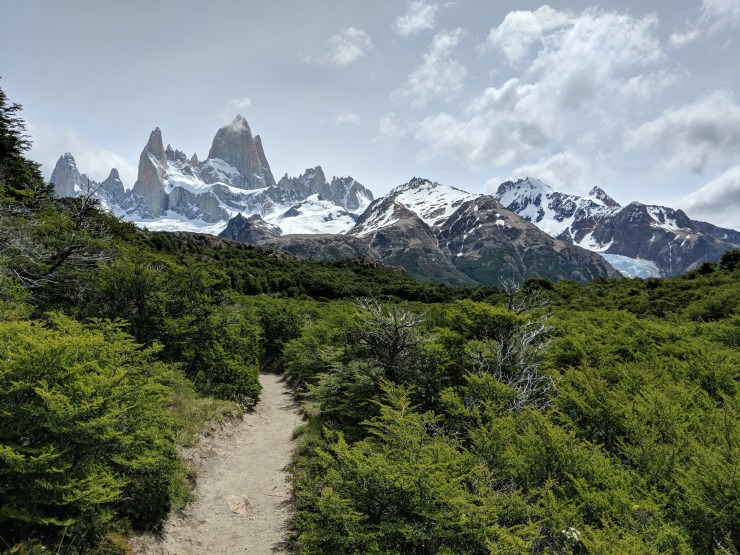
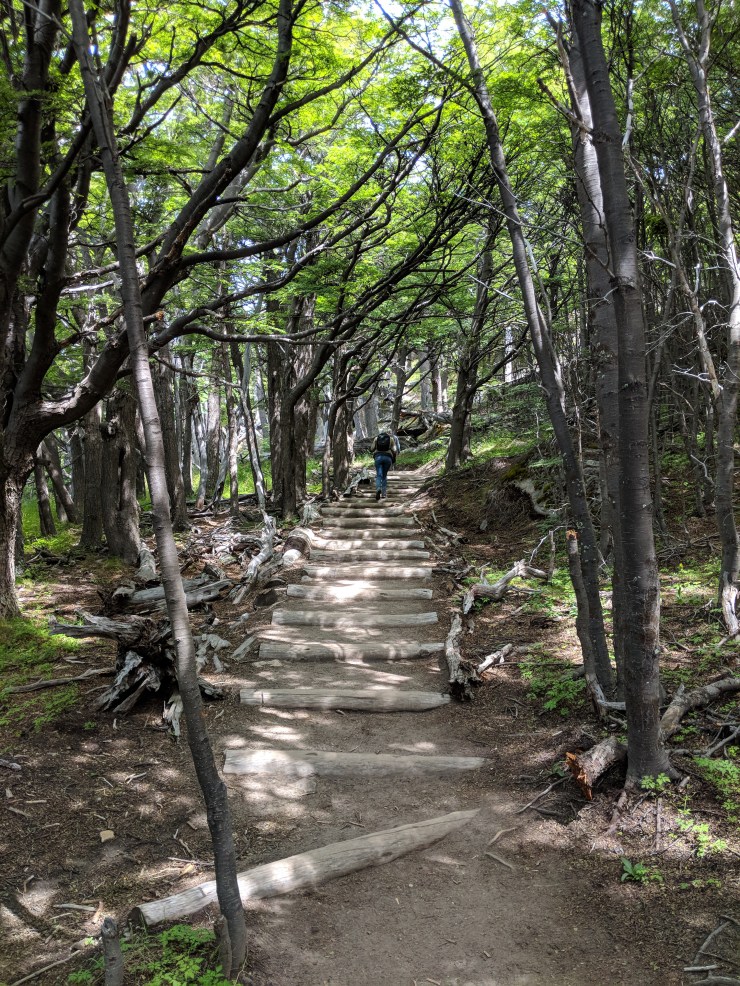
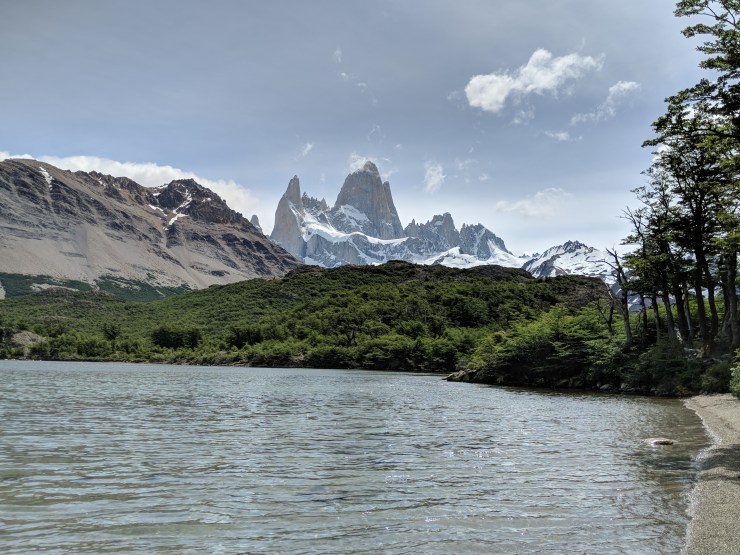
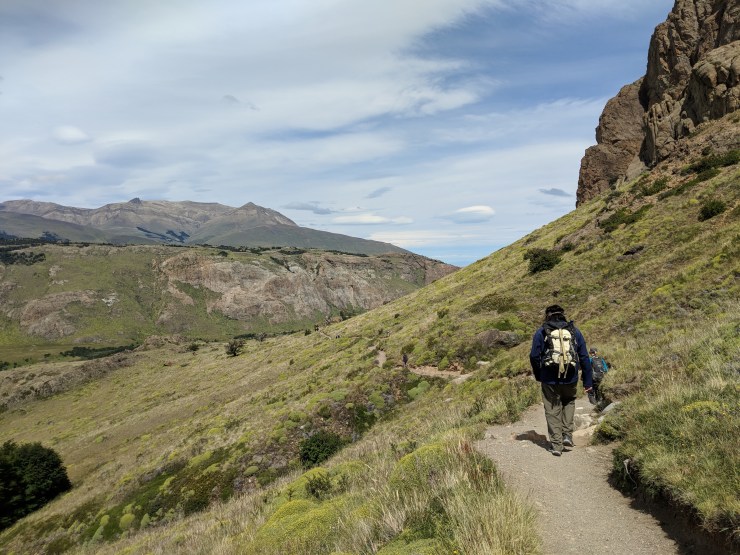
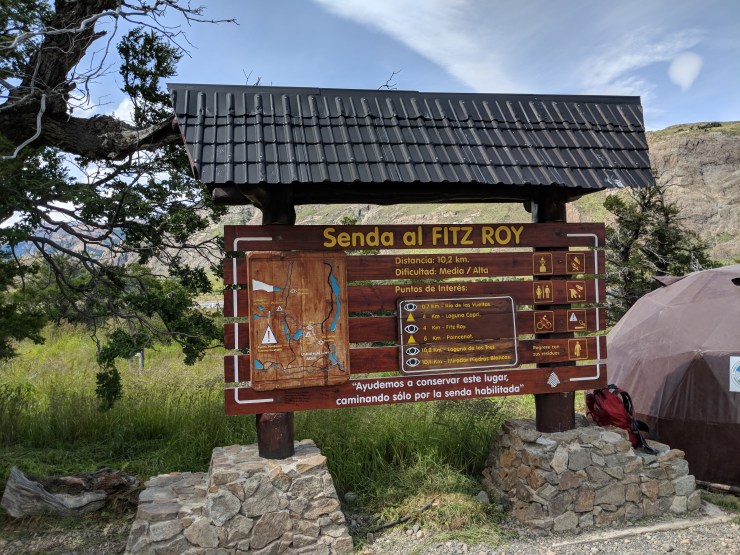
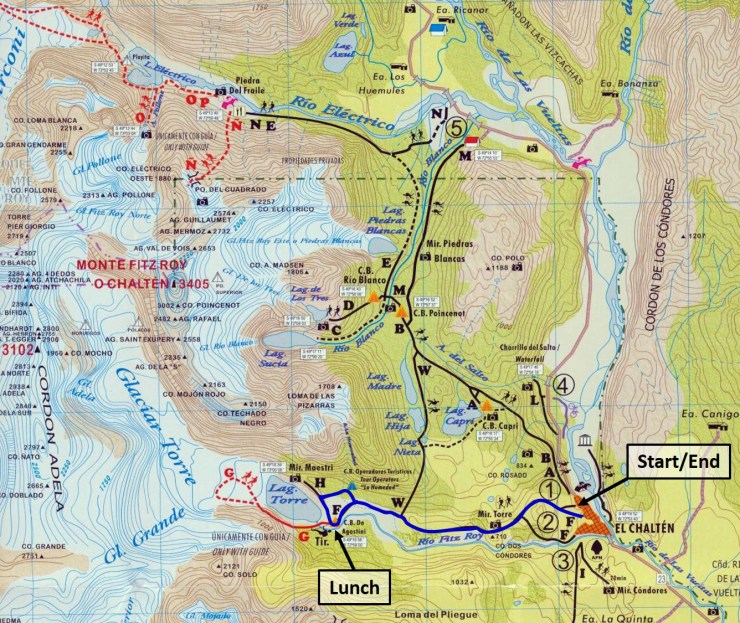
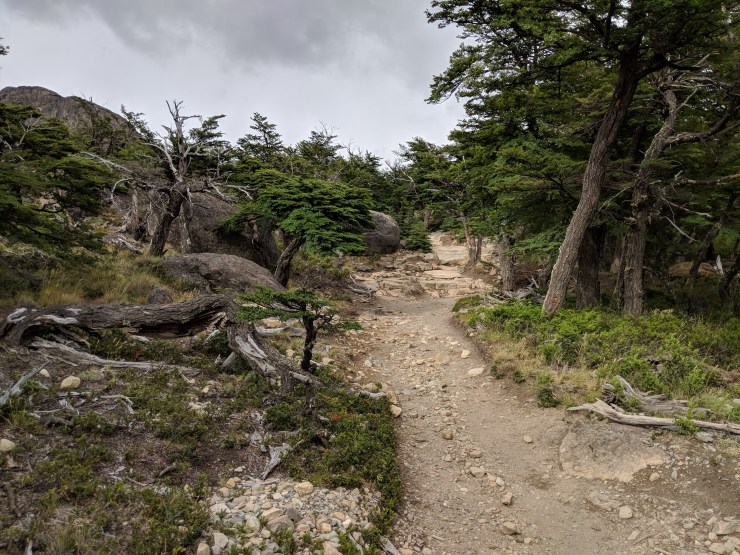
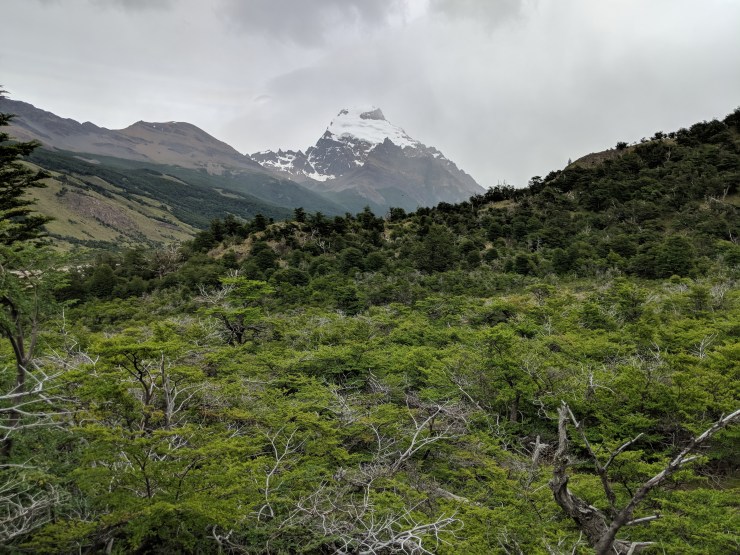
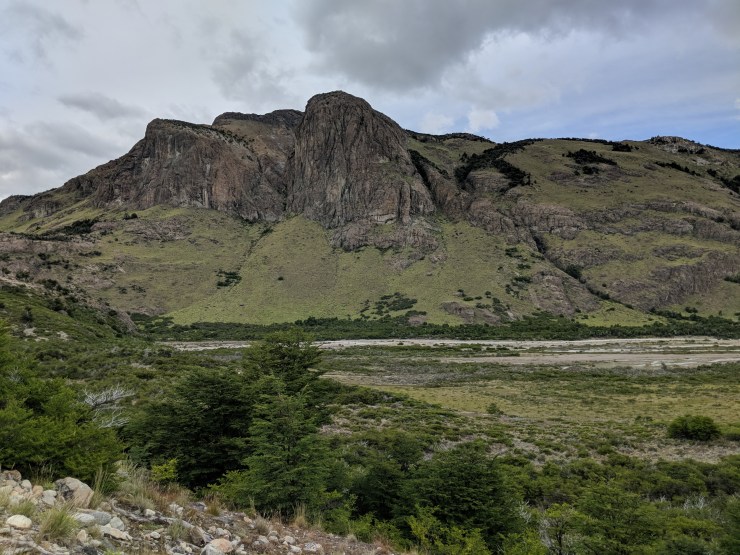
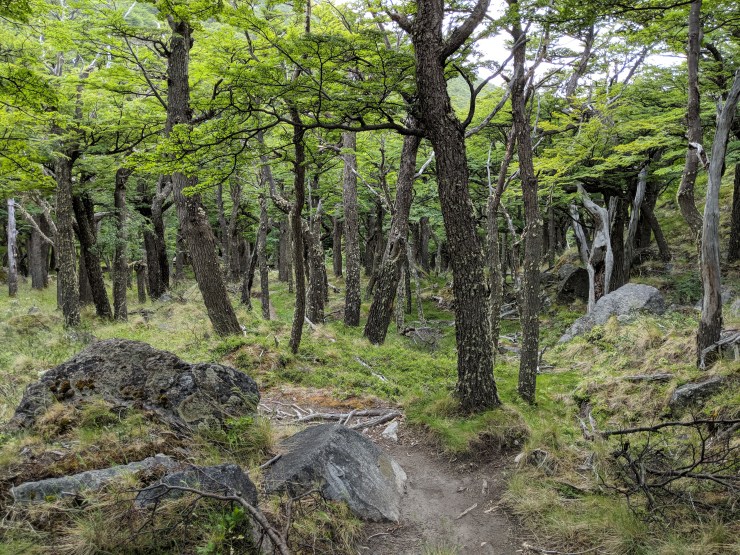
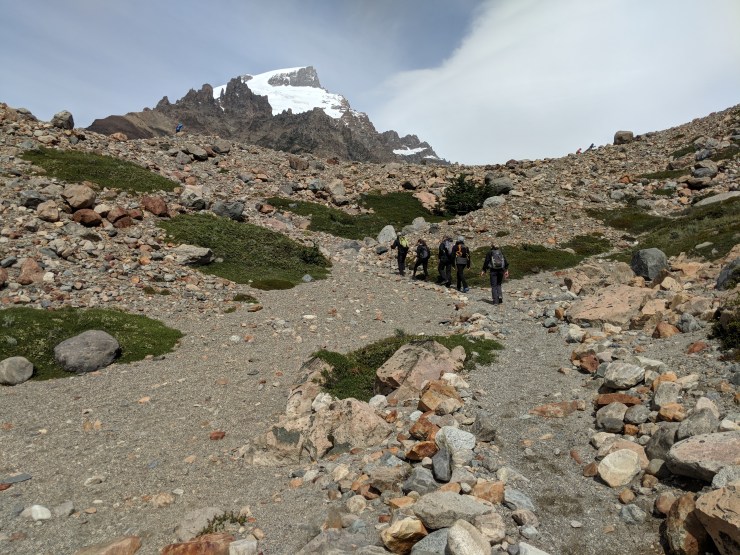
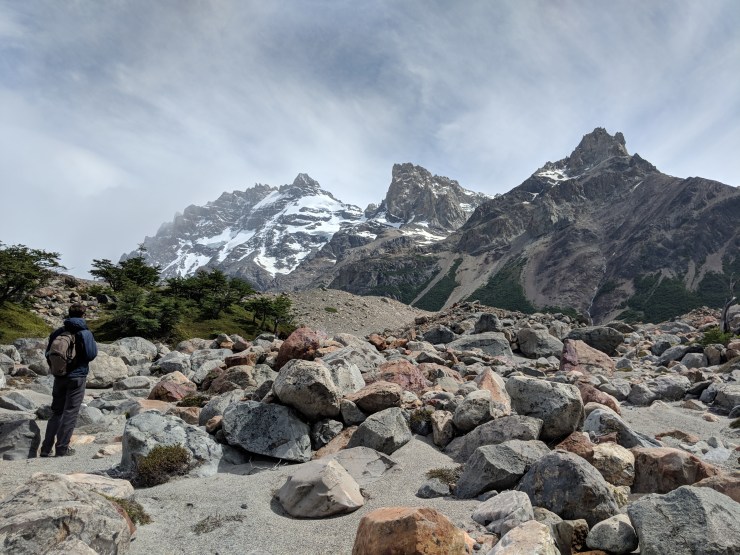
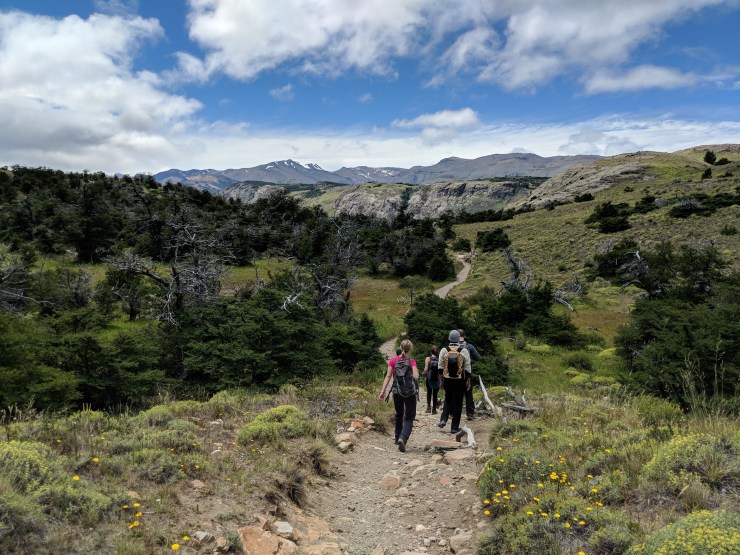
For our first hike in El Chalten, we chose to do the Laguna de Los Tres hike, which leads to a great view point below the base of Mount Fitz Roy in Los Glaciares National Park. There are two popular routes to get to Laguna de Los Tres. The first is to hike directly from El Chalten to Laguna de Los Tres and back to El Chalten via the same trail. This hike works out to a little over 14 miles and the trailhead is located at the North end of El Chalten (here). The alternative, which we chose to do, is to take a hired taxi or shuttle from El Chalten to the Hosteria El Pilar (located ~6 miles Northeast of Laguna de Los Tres). The drive is ~10 miles and takes between 30-45 minutes. The benefit of starting at Hosteria El Pilar and ending at El Chalten is that you do not need to hike the same trail twice. The disadvantage is that you must arrange and pay for a ride to the Hosteria.

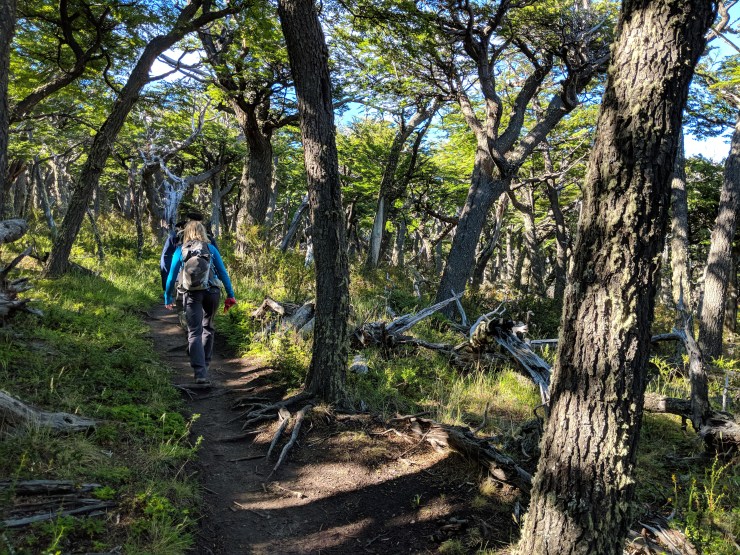
Both trails are very well marked and a guide is not needed. This is a popular trail, so leave early if you want any solitude. The trail can be particularly crowded in the afternoon, which can be frustrating when hiking the final climb up to Laguna de Los Tres. This last ~1 mile of trail is narrow and you often need to stop to let other hikers pass. If you leave early you can miss the crowd on the way up and only have to wait for people while descending. We left El Chalten in our shuttle at around 8 am and were starting the hike at 8:45 am. The hike took us around 7.5 hours including several breaks for photos and for lunch. We had great weather with clear skies and little wind. Overall this hike was really spectacular and the views of Mount Fitz Roy were great. The only downside was the crowds.

At the start of the hike you can see the top of Mount Fitz Roy in the distance
The trail begins by following the Rio Bianco South towards Fitz Roy
Maker:L,Date:2017-8-29,Ver:5,Lens:Kan03,Act:Kan02,E-ve
After about a half mile, the trail enters the forest (pictured: North Face Denali Thermal Beanie and prAna Lyra Down Jacket)
Maker:L,Date:2017-8-29,Ver:5,Lens:Kan03,Act:Kan02,E-ve
Occasionally the trail leaves the forest and you get a great view of the mountains to the North
Maker:L,Date:2017-8-29,Ver:5,Lens:Kan03,Act:Kan02,E-ve
Eventually you catch your first glimpse of the Piedras Blancas Glacier through the trees
Maker:L,Date:2017-8-29,Ver:5,Lens:Kan03,Act:Kan02,E-ve
The trail then heads back into the forest as you approach a nice mirador (pictured: Icebreaker Oasis Wool Long Sleeve Crew and prAna halle Pant)
The view from the Mirador Glaciar Piedras Blancas
As the trail continues South, you get great views of Mount Fitz Roy and the Piedras Blancas Glacier
Maker:L,Date:2017-8-29,Ver:5,Lens:Kan03,Act:Kan02,E-ve
The next section of the trail begins to go in and out of trees and brush
Eventually the trail opens up and leaves the forest.  At this point you are near the Poincenot campsite
Maker:L,Date:2017-8-29,Ver:5,Lens:Kan03,Act:Kan02,E-ve
The trail is pretty well marked, though there are not always mileage markers
After hiking a bit through a forest, you reach the Poincenot campsite
After hiking a bit through a forest, you reach the Poincenot campsite (pictured: MSR Free Lite 2 Tent)
You head West from the camp and are treated to a view of Fitz Roy and a view of the climb (up over the hill in front of Fitz Roy) that you will soon embark on
Maker:L,Date:2017-8-29,Ver:5,Lens:Kan03,Act:Kan02,E-ve
Before starting to climb, you cross a small bridge across the Rio Bianco
Maker:L,Date:2017-8-29,Ver:5,Lens:Kan03,Act:Kan02,E-ve
Then the trail meanders through a small forest (pictured: Osprey Tempest 20 Backpack)
Maker:L,Date:2017-8-29,Ver:5,Lens:Kan03,Act:Kan02,E-ve
At around the 5 mile mark you begin a steep climb that goes up ~1,500 feet in just over 1 mile (pictured: KEEN Targhee II Waterproof Hiking Boot)
The view looking North while on the ascent to Laguna de Los Tres
The view looking South while on the ascent to Laguna de Los Tres
Maker:L,Date:2017-8-29,Ver:5,Lens:Kan03,Act:Kan02,E-ve
The trail on the ascent is narrow and not super well maintained. It is important to stay on the trail so that you do not send rocks rolling down onto people below.
Maker:L,Date:2017-8-29,Ver:5,Lens:Kan03,Act:Kan02,E-ve
When you get over the hill, you catch your first glimpse of the gorgeous Laguna de Los Tres with Mount Fitz Roy behind it.
Looking across the Laguna de Los Tres
Another view of the Laguna de Los Tres and Mount Fitz Roy
Maker:L,Date:2017-8-29,Ver:5,Lens:Kan03,Act:Kan02,E-ve
Then you will want to climb up the hill shown in this picture, which leads to a great mirador
Maker:L,Date:2017-8-29,Ver:5,Lens:Kan03,Act:Kan02,E-ve
From the mirador you can see Laguna Sucia and the Glaciar Sucia hanging above it.
Maker:L,Date:2017-8-29,Ver:5,Lens:Kan03,Act:Kan02,E-ve
Taking in the view of Laguna Sucia (pictured: prAna Lyra Down Jacket and Pentax K-50 16MP DSLR Camera)
Maker:L,Date:2017-8-29,Ver:5,Lens:Kan03,Act:Kan02,E-ve
When we turned around to head back to El Chalten, we noticed that many more people were up on the ridge to the left.
Maker:L,Date:2017-8-29,Ver:5,Lens:Kan03,Act:Kan02,E-ve
On the trail heading East away from Laguna de Los Tres
After a slow, steep descent (because we had to let many people hiking up the trail pass on the narrow trail), the trail finally levels out and you get great views of Fitz Roy when you turn around.
Maker:L,Date:2017-8-29,Ver:5,Lens:Kan03,Act:Kan02,E-ve
We then started hiking back to El Chalten via the main trail that goes between El Chalten and Laguna de Los Tres (pictured: North Face Venture 2 Jacket)
Another great view of Mount Fitz Roy
Maker:L,Date:2017-8-29,Ver:5,Lens:Kan03,Act:Kan02,E-ve
The view heading Southeast towards El Chalten
Maker:L,Date:2017-8-29,Ver:5,Lens:Kan03,Act:Kan02,E-ve
The trail goes through some brush and you get another great view of Mount Fitz Roy if you turn around
Maker:L,Date:2017-8-29,Ver:5,Lens:Kan03,Act:Kan02,E-ve
The trail then goes back into the forest shortly before you approach Laguna Capri
Maker:L,Date:2017-8-29,Ver:5,Lens:Kan03,Act:Kan02,E-ve
Laguna Capri is a nice spot to have a short break
Maker:L,Date:2017-8-29,Ver:5,Lens:Kan03,Act:Kan02,E-ve
Mount Fitz Roy as seen from the shore of Laguna Capri
Maker:L,Date:2017-8-29,Ver:5,Lens:Kan03,Act:Kan02,E-ve
As you leave Laguna Capri, the trail heads back into the forest and then begins to descend
Maker:L,Date:2017-8-29,Ver:5,Lens:Kan03,Act:Kan02,E-ve
For the last couple miles the trail leaves the forest and you get some great views of the valley and river below
Maker:L,Date:2017-8-29,Ver:5,Lens:Kan03,Act:Kan02,E-ve
Looking North at the view
Maker:L,Date:2017-8-29,Ver:5,Lens:Kan03,Act:Kan02,E-ve
A rock formation along the trail. The terrain is quite different in this section of the hike
Maker:L,Date:2017-8-29,Ver:5,Lens:Kan03,Act:Kan02,E-ve
The view from the Mirador Rio de Las Vueltas
Maker:L,Date:2017-8-29,Ver:5,Lens:Kan03,Act:Kan02,E-ve
The view of El Chalten as we make the final descent
Maker:L,Date:2017-8-29,Ver:5,Lens:Kan03,Act:Kan02,E-ve
The sign at the trailhead in El Chalten

Jump to top of page


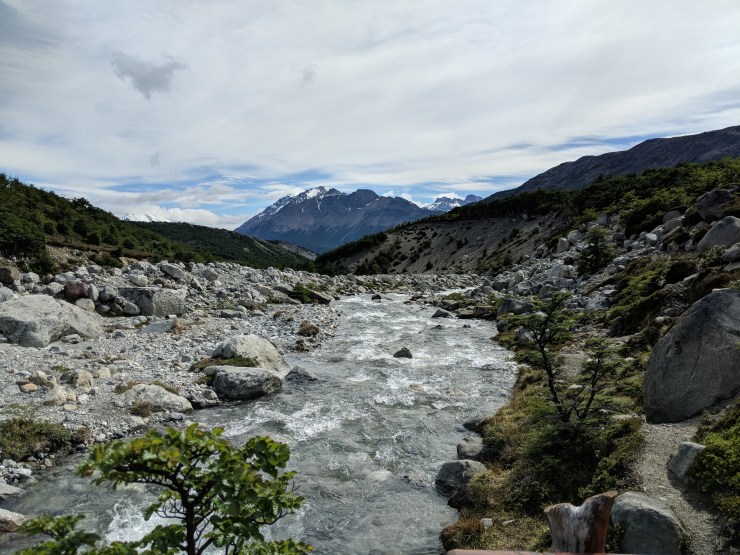
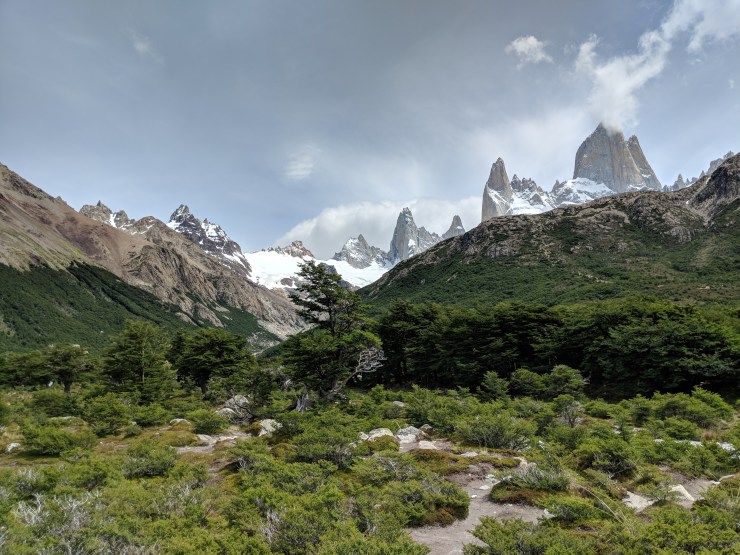
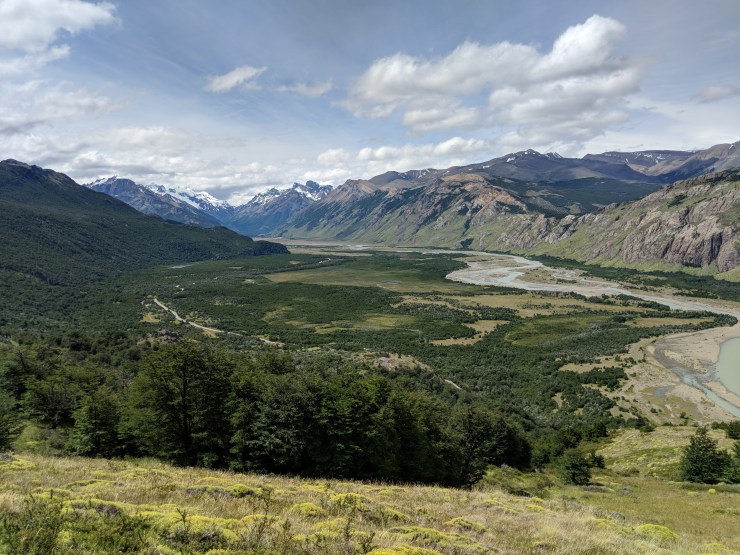
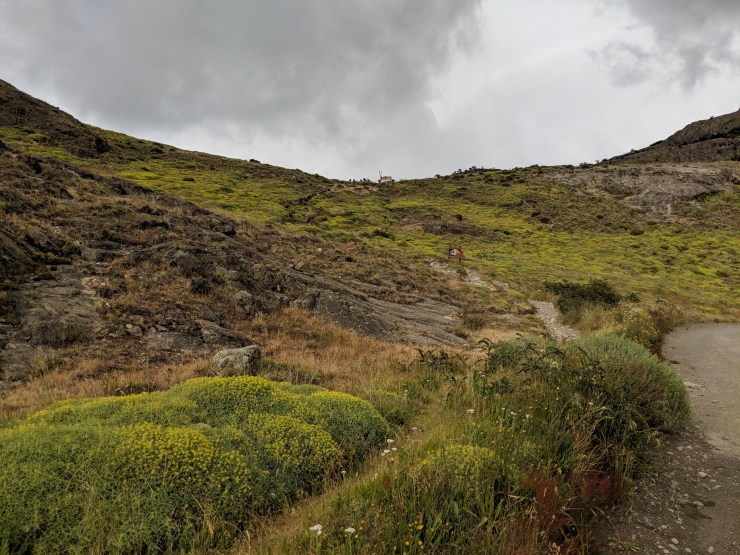
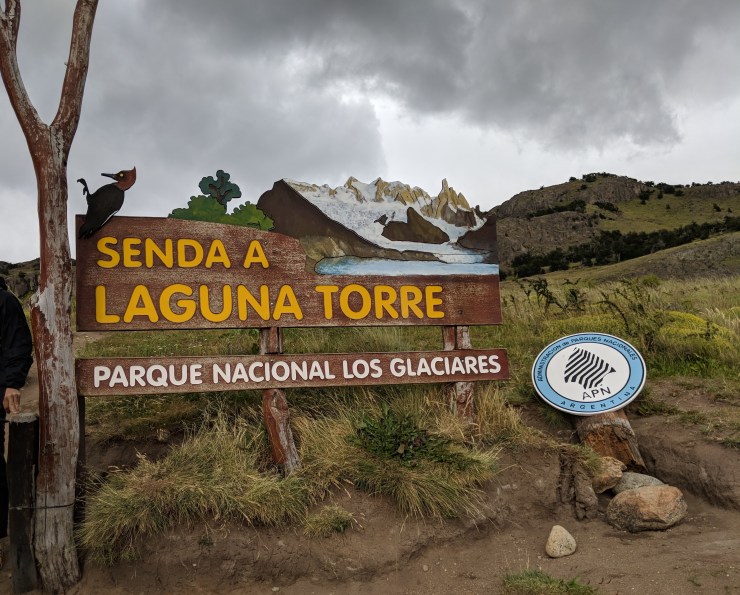
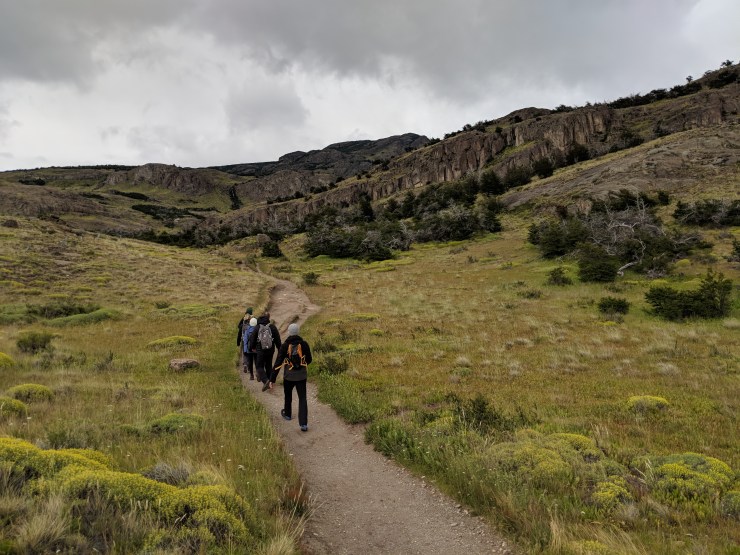
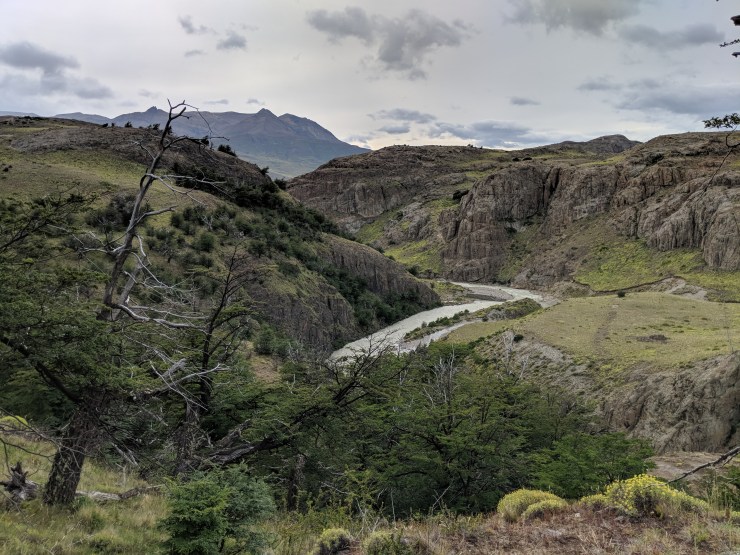
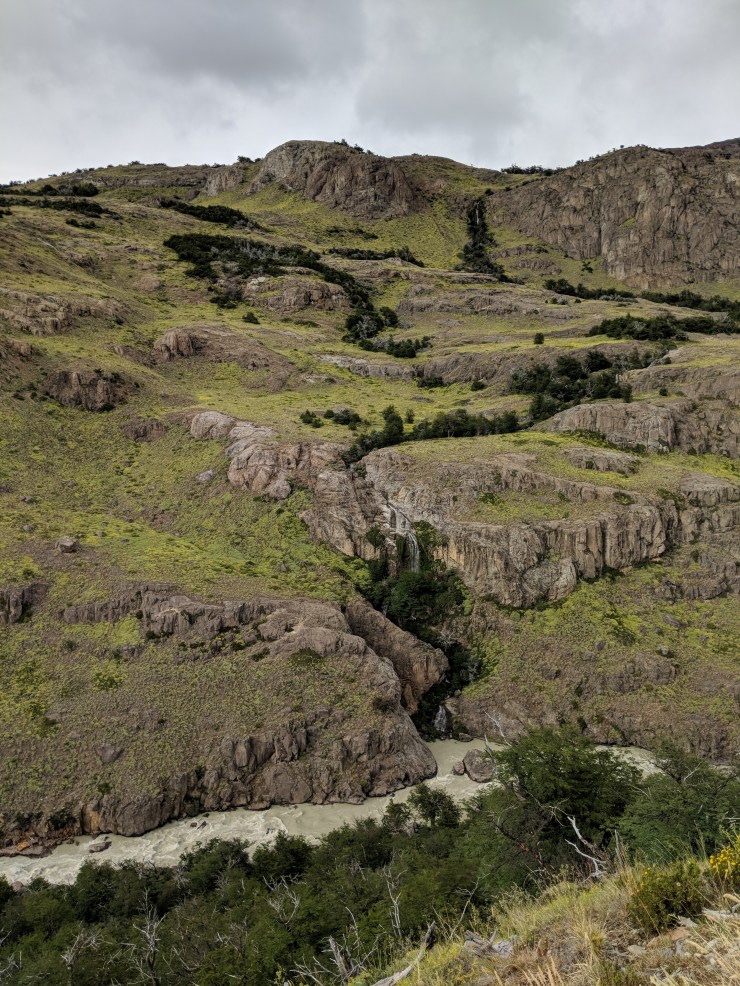
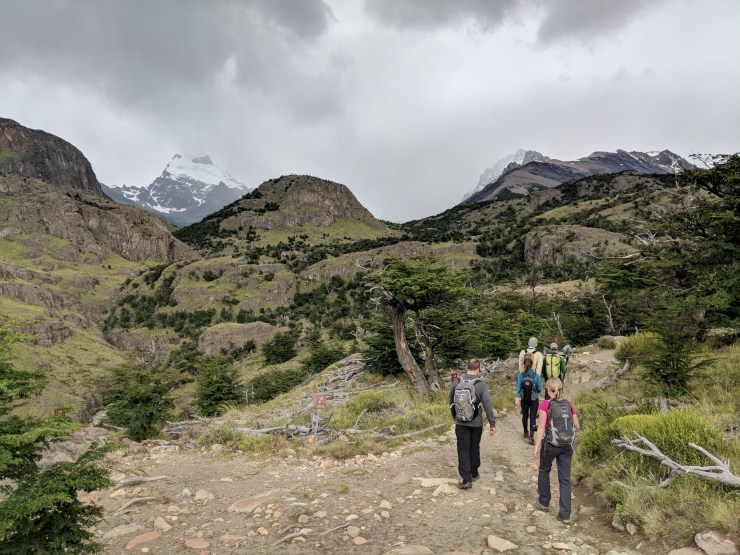
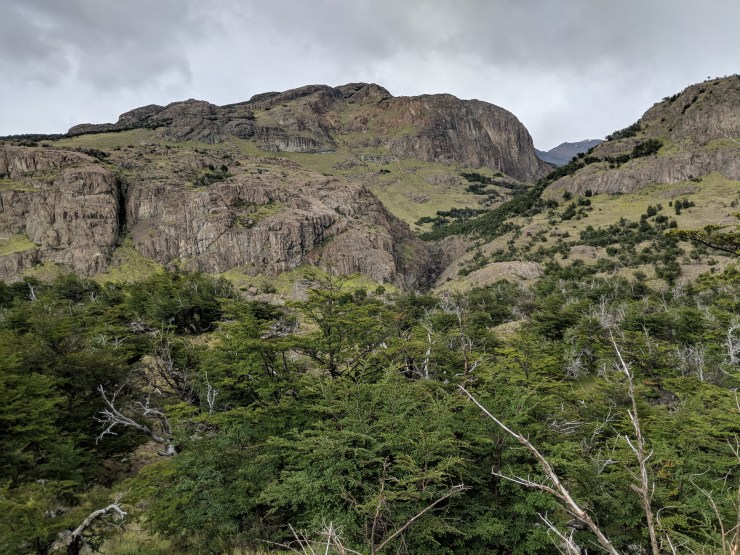
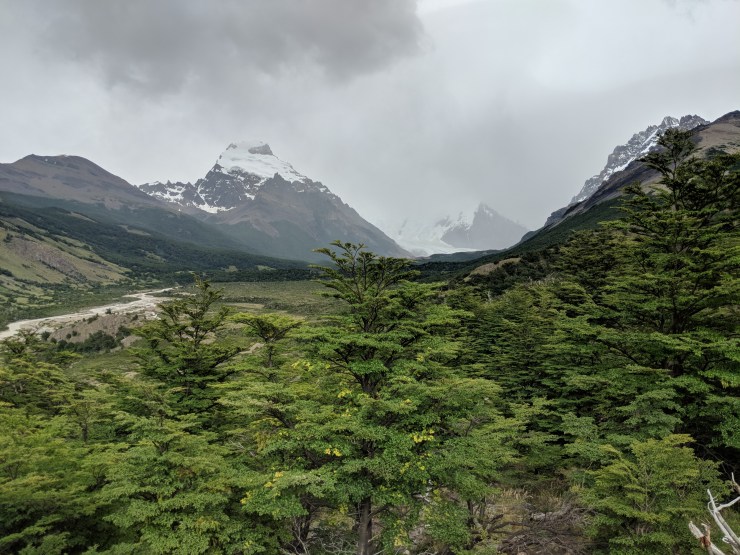
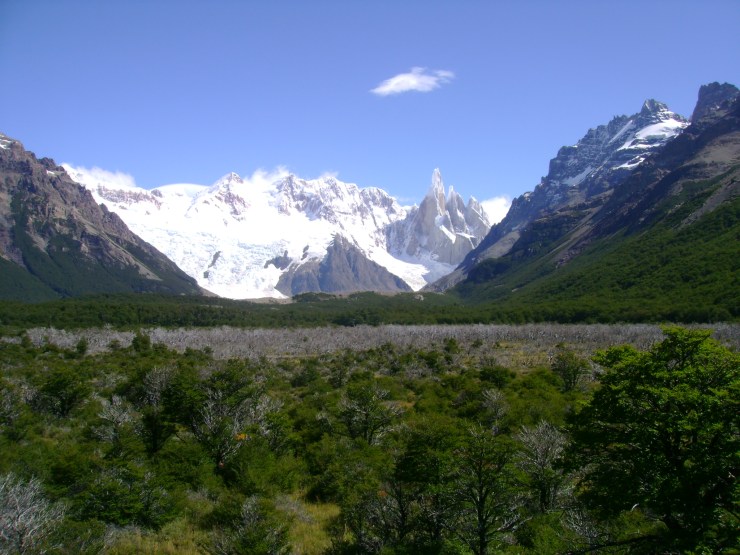
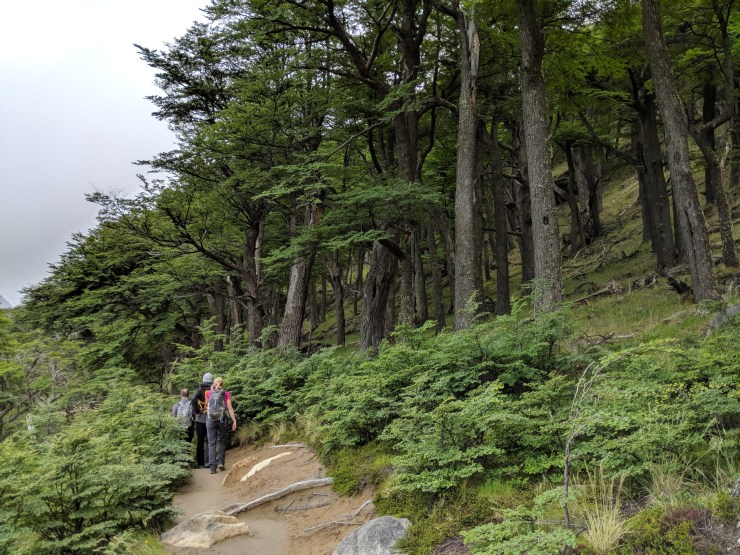
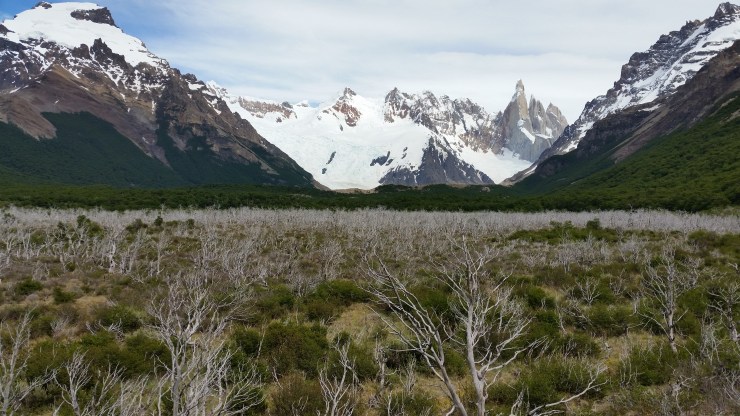
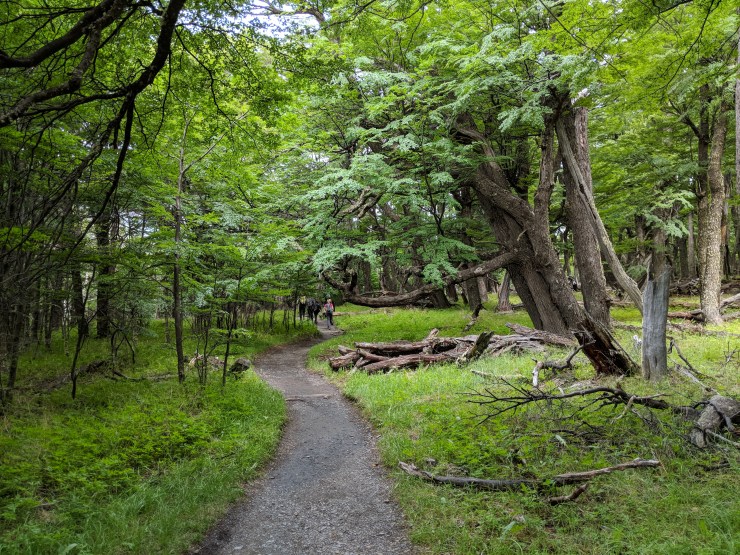
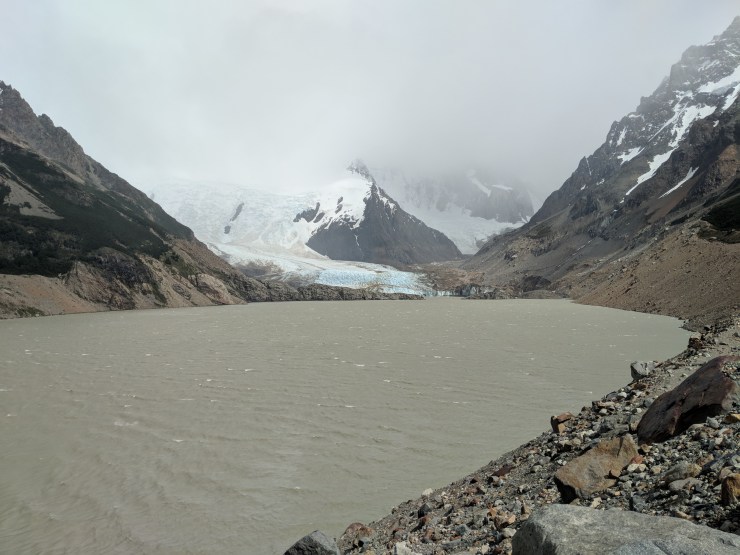
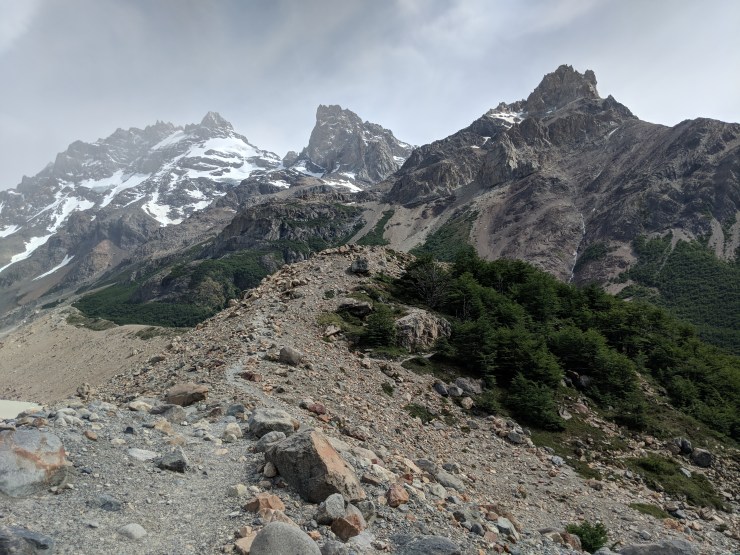
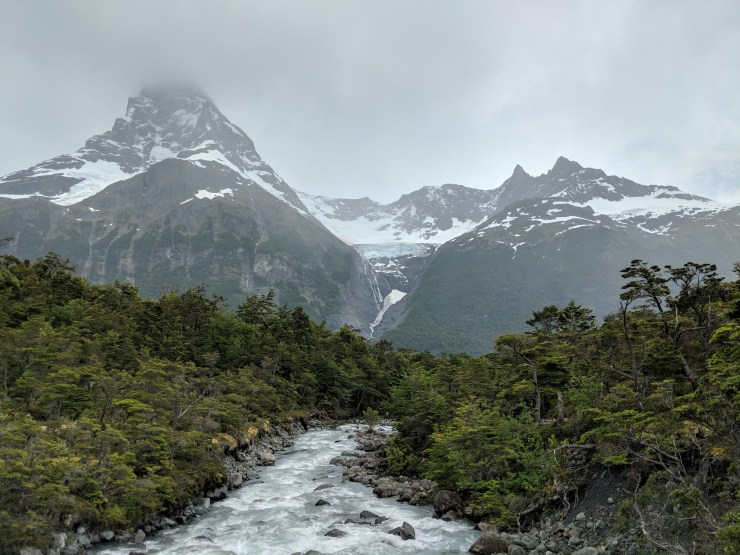
Day 3: 12.6 miles; +/- 1,700 feet of elevation; El Chalten –> Laguna Torre –> El Chalten

Map of the route along the Laguna Torre trail in Los Glaciares National Park that leads to Laguna Torre and a great viewpoint of Cerro Torre.
Map of the route along the Laguna Torre trail in Los Glaciares National Park that leads to Laguna Torre and a great viewpoint of Cerro Torre. The trail is marked in blue and we hiked directly from the trailhead on the Northwest end of El Chalten.
Approximate elevation profile of the Laguna Torre hike in Los Glaciares National Park

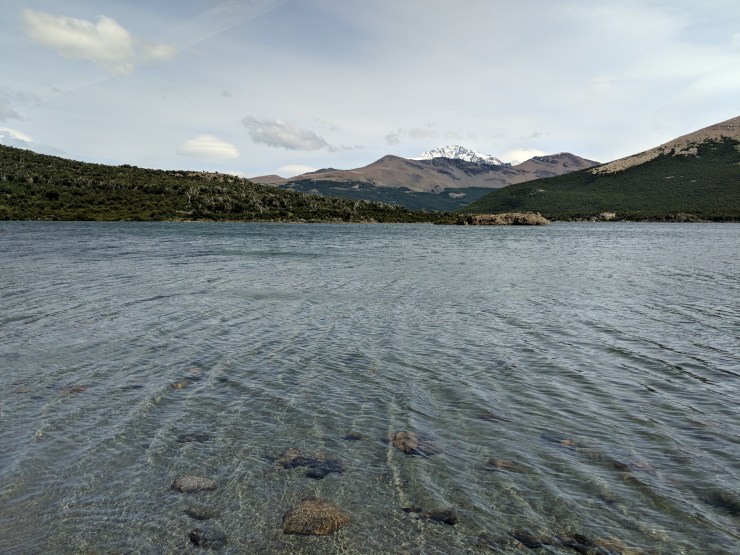
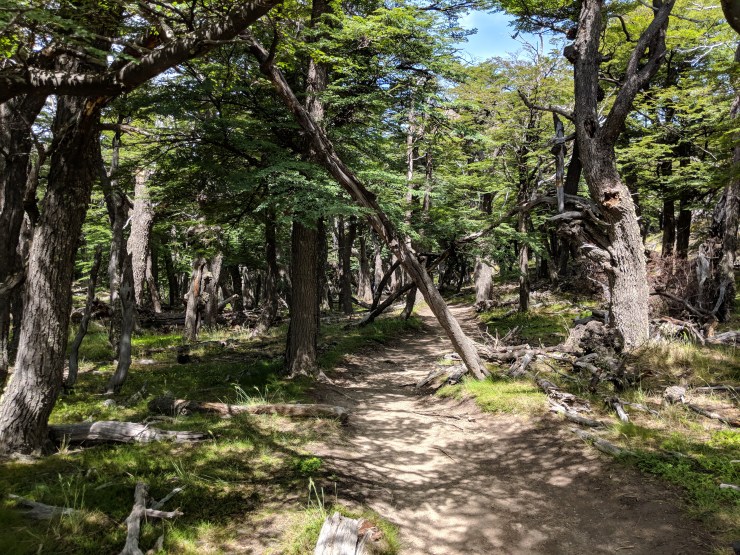
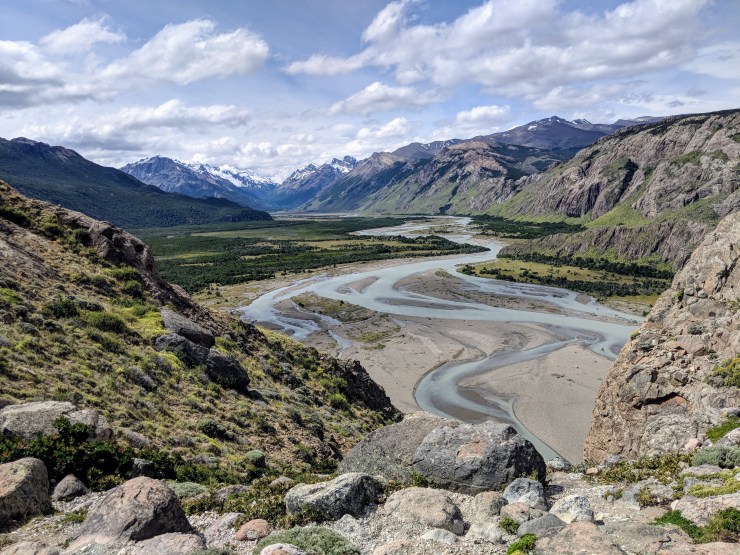
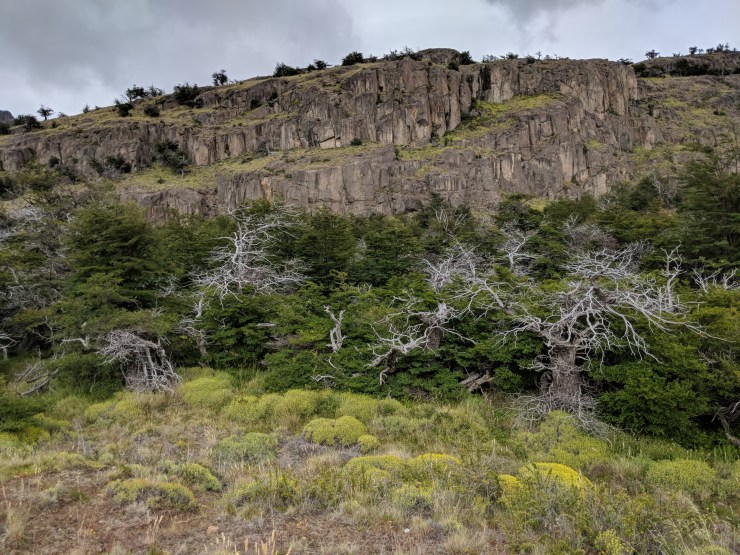
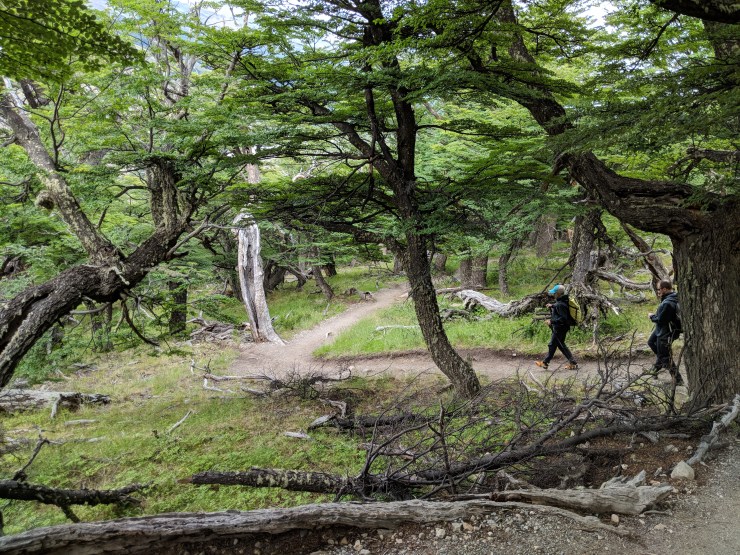
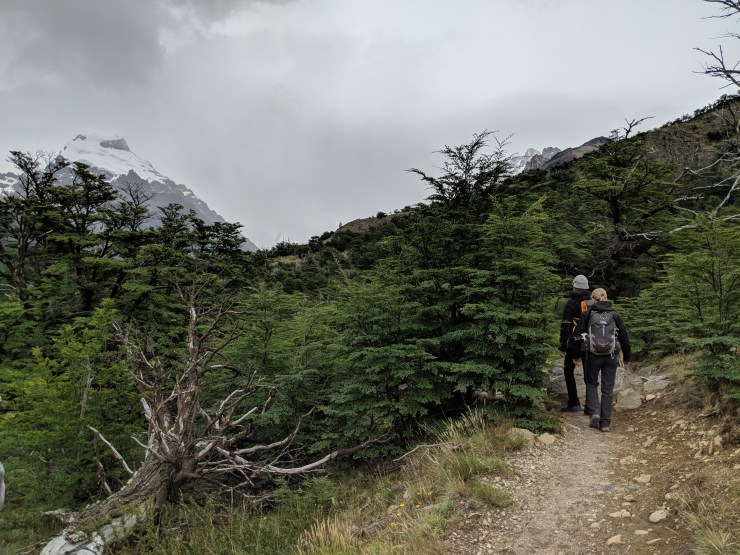
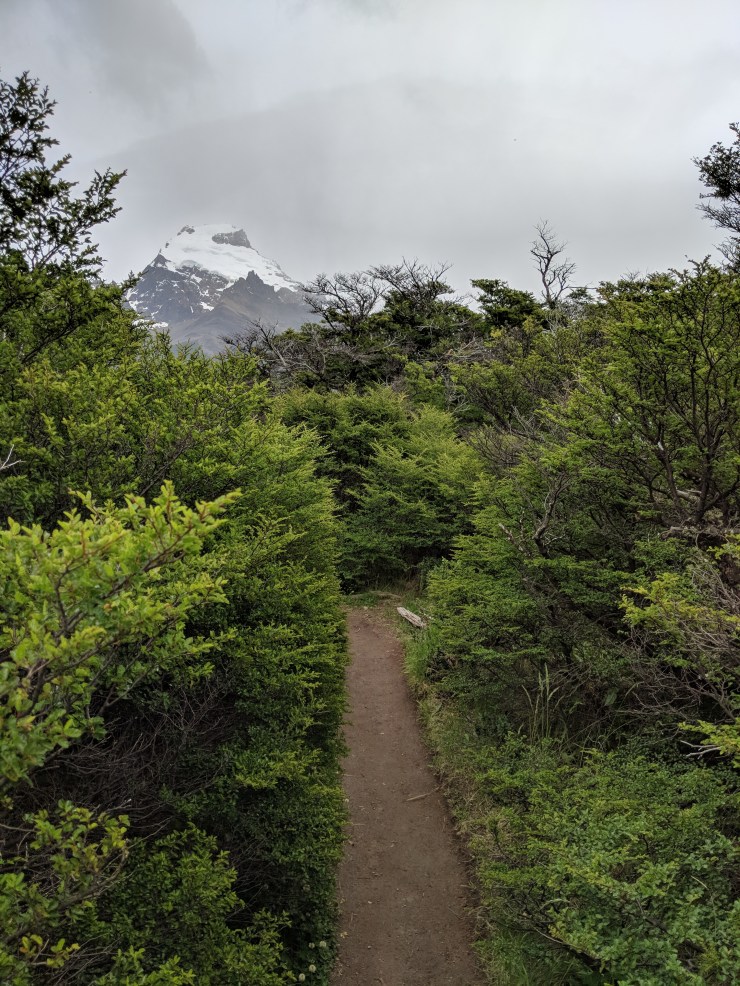
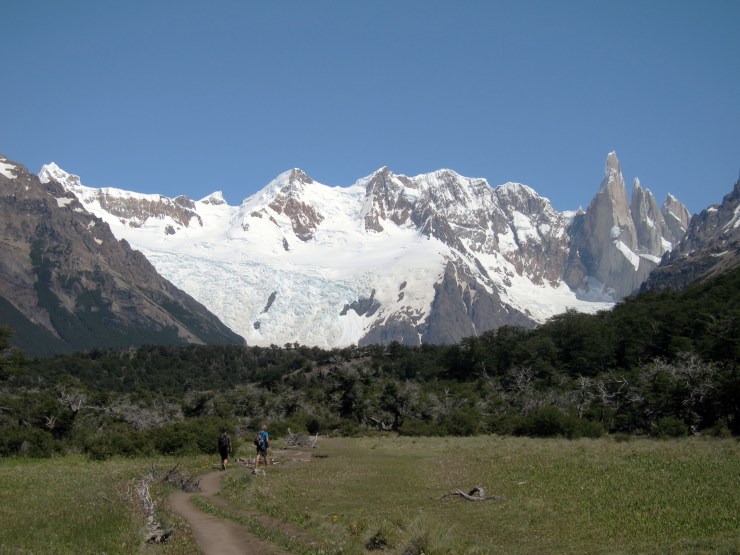
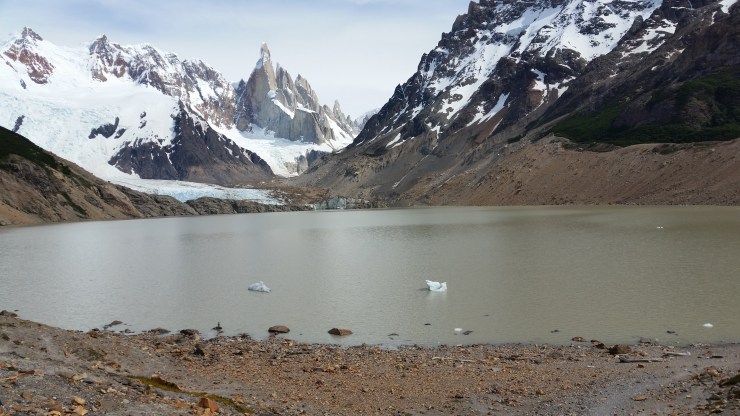
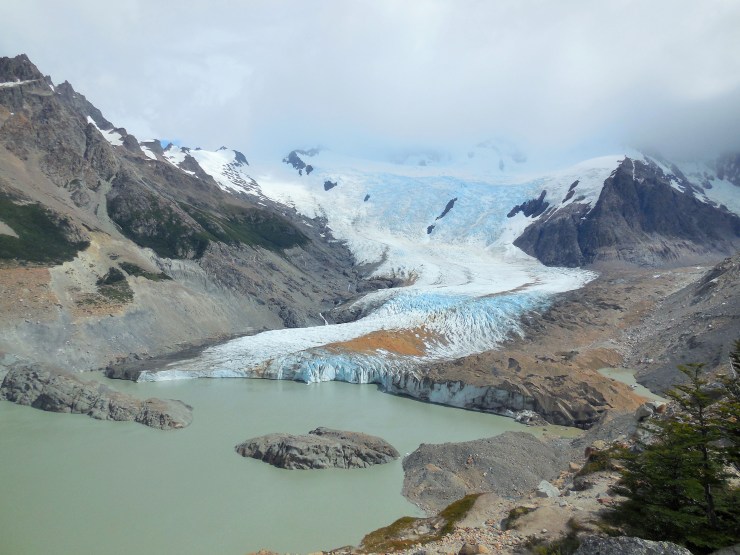
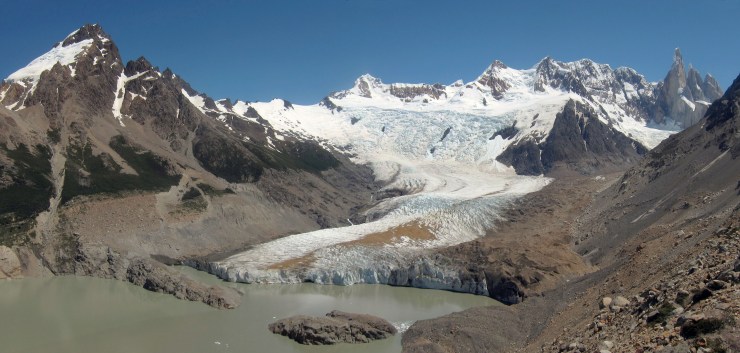
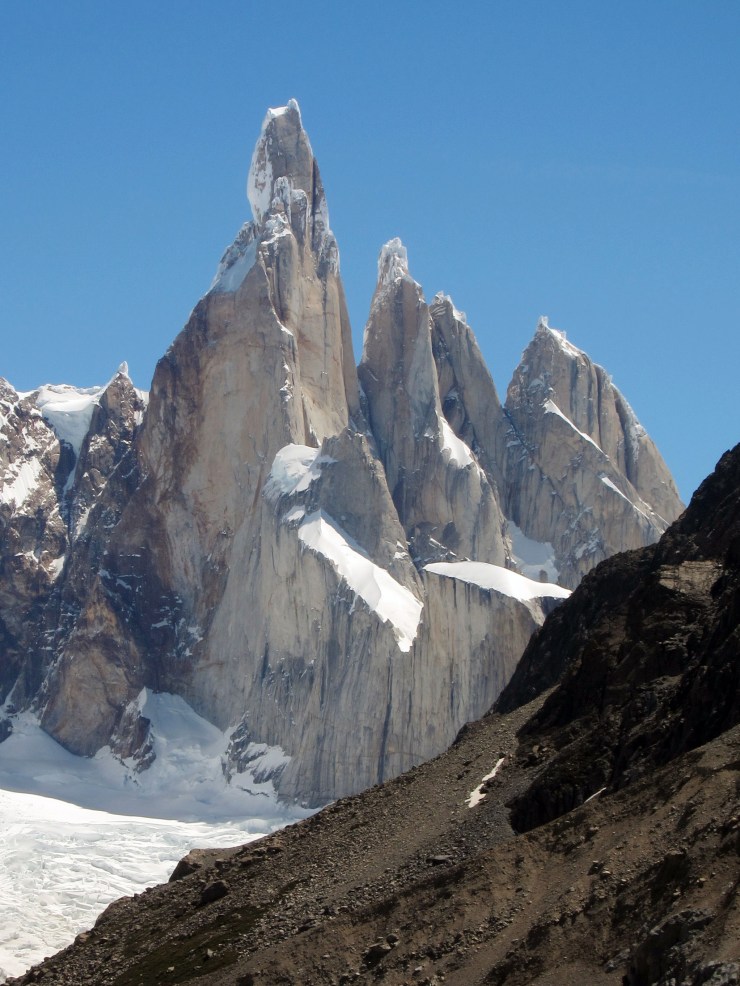
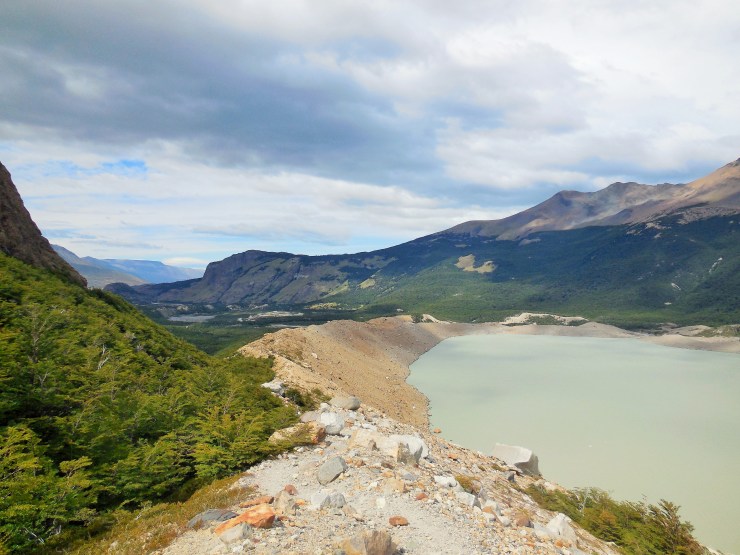
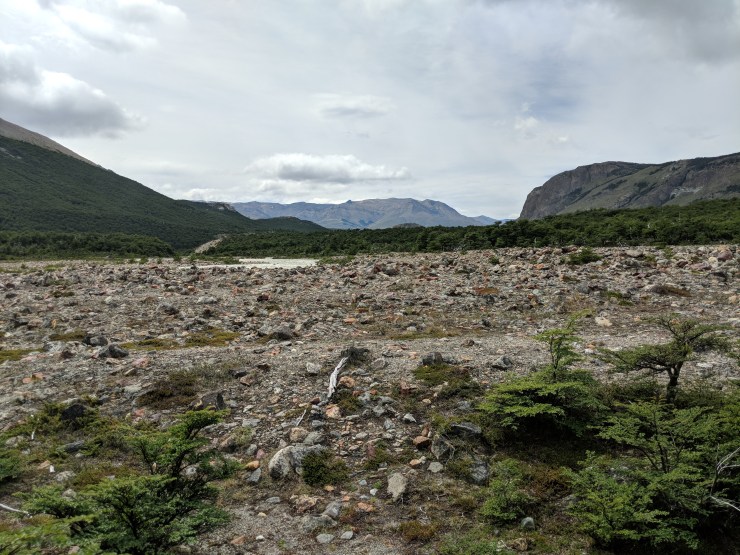
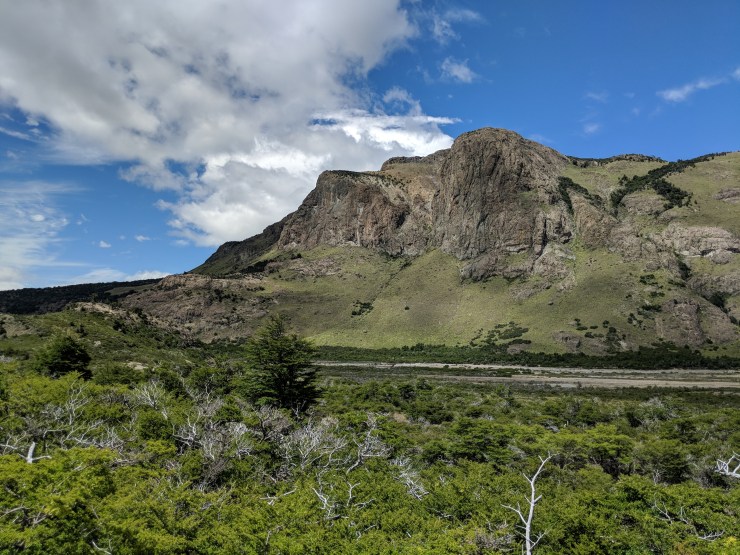
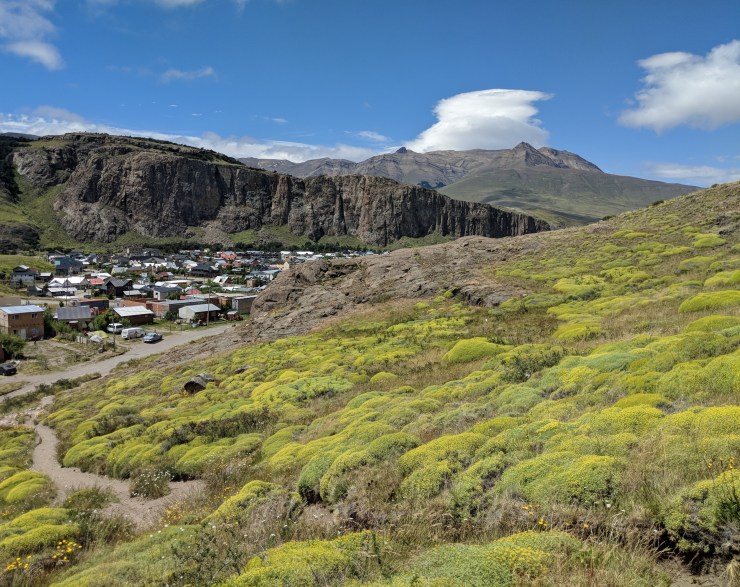
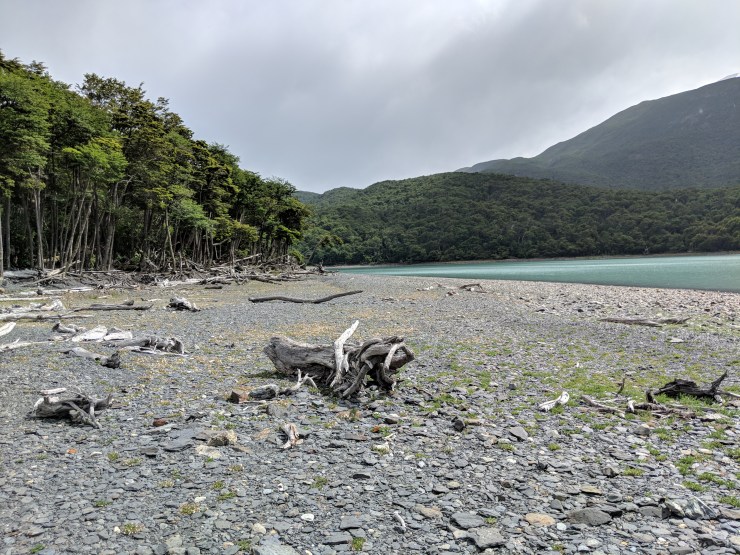
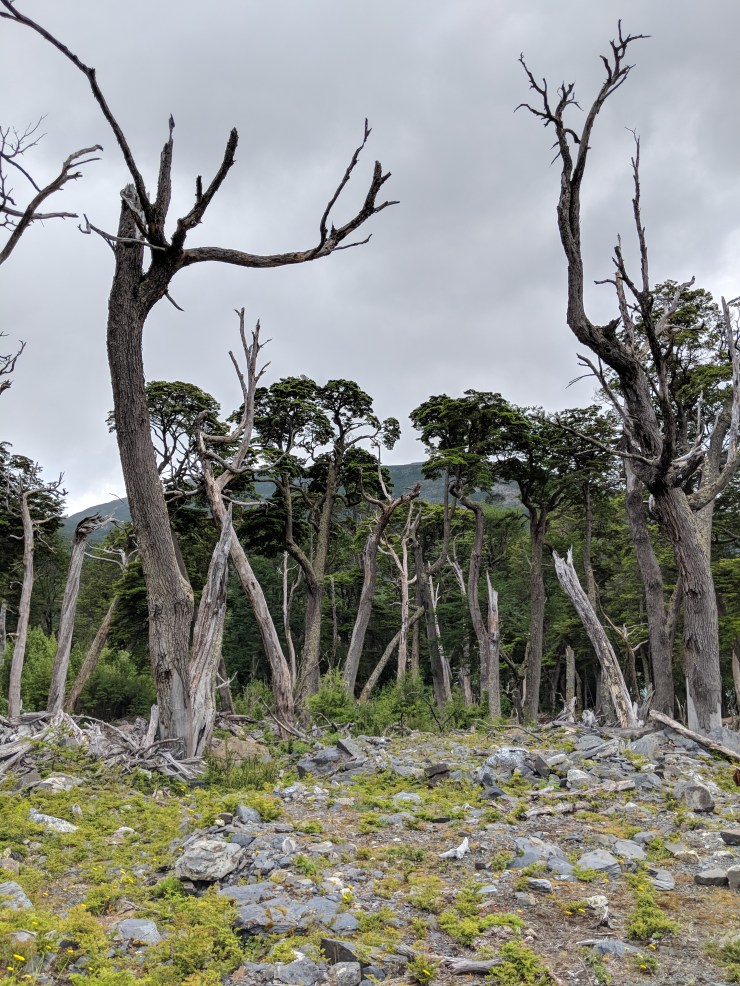
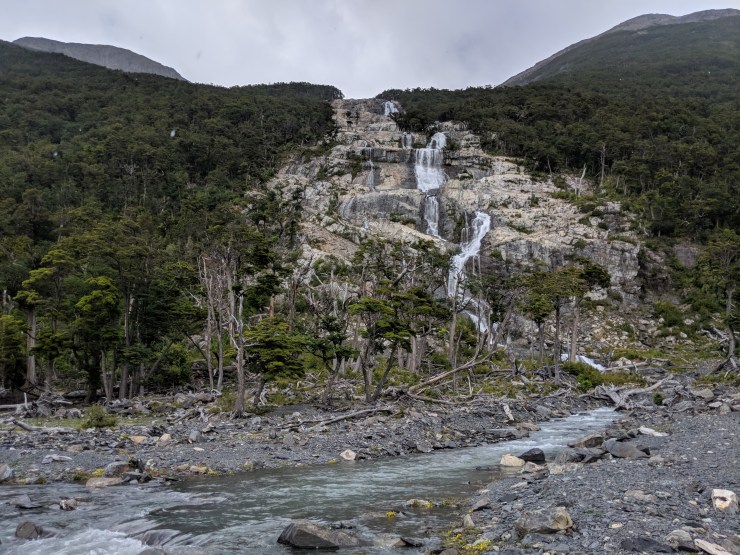
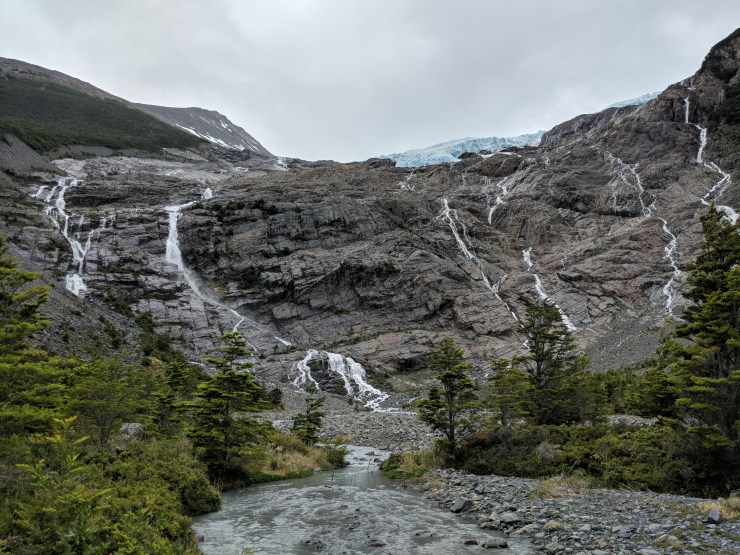
On our 2nd day in El Chalten, we hiked along the well-marked trail that leads to the Laguna Torre. The hike is a simple out and back and you reach the trailhead via a short walk from the center of El Chalten. Unfortunately, it was cloudy the day we hiked, so we were not able to catch a great view of Cerro Torre and the surrounding mountain. The hike was still beautiful, and we were able to see Laguna Torre and Glaciar Torre and Glaciar Grande behind it. Throughout this post I will include pictures of the hike taken by others, which show the view on clear days. On clear days, the view of the imposing Cerro Torre is quite impressive! You also can see the top of Mount Fitz Roy while on this trail.

Compared to the Laguna de Los Tres hike, the hike to Laguna Torre is much easier on your legs.  The hike is a bit shorter and has much less elevation gain. We started the hike at 8 am and made it back to El Chalten around 2:30 pm.

Maker:L,Date:2017-8-29,Ver:5,Lens:Kan03,Act:Kan02,E-ve
As you leave El Chalten, the trail ascends up a small hill to the trailhead.
Maker:L,Date:2017-8-29,Ver:5,Lens:Kan03,Act:Kan02,E-ve
You then reach a sign marking the start of the trail and the boundary of the park
Maker:L,Date:2017-8-29,Ver:5,Lens:Kan03,Act:Kan02,E-ve
Our group hiking on the trail to Laguna Torre. At the beginning, the trail is fairly open.
Maker:L,Date:2017-8-29,Ver:5,Lens:Kan03,Act:Kan02,E-ve
An interesting rock structure on the North side of the trail.
Maker:L,Date:2017-8-29,Ver:5,Lens:Kan03,Act:Kan02,E-ve
Along the way you get nice views of the Rio Fitz Roy
Maker:L,Date:2017-8-29,Ver:5,Lens:Kan03,Act:Kan02,E-ve
Shortly into the hike you reach the Mirador Margarita, which has a nice view of the Cascada Margarita
The trail then continues West towards Laguna Torre (pictured: Brooks Women’s Short Sleeve and prAna halle Pant)
Maker:L,Date:2017-8-29,Ver:5,Lens:Kan03,Act:Kan02,E-ve
More interesting rock structures along the trail
Maker:L,Date:2017-8-29,Ver:5,Lens:Kan03,Act:Kan02,E-ve
Before reaching the next mirador the trail begins to enter the trees
The view from the Mirador del Cerro Torre on our cloudy day
mirador_cerro_torre_dan_lundberg.jpg
The view from the Mirador del Cerro Torre on a clear day. You can see both Cerro Torre and the top of Mount Fitz Roy (credit: Dan Lundberg)
Maker:L,Date:2017-8-29,Ver:5,Lens:Kan03,Act:Kan02,E-ve
After the mirador, the trail descends through a forest for a bit (pictured: Patagonia P6 Lopro Trucker Hat)
Maker:L,Date:2017-8-29,Ver:5,Lens:Kan03,Act:Kan02,E-ve
Eventually the forest changes from large trees to shorter trees and brush as the trail skirts around the edge of a basin (pictured:  Osprey Tempest 20 Backpack)
The view of Cerro Solo, the mountain just to the South of Laguna Torre
Maker:L,Date:2017-8-29,Ver:5,Lens:Kan03,Act:Kan02,E-ve
Looking south across the basin through which the Rio Fitz Roy runs
Maker:L,Date:2017-8-29,Ver:5,Lens:Kan03,Act:Kan02,E-ve
The trail then meanders through a bunch of short trees and brush
1_miguel_viera.jpg
Then it opens up again and you get great views of the area. This is what it looks like in a clear day (credit: Miguel Vieira).
Torre_from_scrub_flopisubmarina
The trail then skirts around on the right edge of this large flat area filled with small trees, some of which were burned in a forest fire. This is the view on a clear day (credit: flopisubmarina)
Maker:L,Date:2017-8-29,Ver:5,Lens:Kan03,Act:Kan02,E-ve
In this area, the trail has small, scrubby trees on the left side and larger trees on the right side (pictured: Brooks Women’s Short Sleeve)
View of Cerro Torre and Cerro Solo and a view of the burned area of the scrub forest
View of Cerro Torre and Cerro Solo and a view of the burned area of the scrub forest (credit: Allan Farrell)
IMG_20171227_102500.jpg
The trail then ducks back in the forest. It was interesting because there was one species of tree on the left side of the trail and much larger trees on the right side.
Maker:L,Date:2017-8-29,Ver:5,Lens:Kan03,Act:Kan02,E-ve
Then you reach a fork in the trail. This section of the trail makes a small loop that ends at Laguna Torre. We turned right here and then return via the trail on the left.
Maker:L,Date:2017-8-29,Ver:5,Lens:Kan03,Act:Kan02,E-ve
This section of the trail goes through a forest that has many rocks left by the previous glacier that went through the area.
Maker:L,Date:2017-8-29,Ver:5,Lens:Kan03,Act:Kan02,E-ve
In this section of the trail, you must hike over a few hills that are moraines. These moraines, or large piles of debris, were left here by the previous glacier that carved out the valley. This moraine is covered in trees, but some are just gravel piles (pictured:  Osprey Tempest 20 Backpack)
Maker:L,Date:2017-8-29,Ver:5,Lens:Kan03,Act:Kan02,E-ve
Heading up over the last moraine before reaching Laguna Torre (pictured: prAna halle Pant)
After climbing to the top of the last moraine we got our first glimpse of Laguna Torre and Cerro Torre.
After climbing to the top of the last moraine we got our first glimpse of Laguna Torre. It was extremely windy so we didn’t stay too long. Unfortunately, Cerro Torre was hidden in the clouds.
A view of Laguna Torre and Cerro Torre on a clear day
A view of Laguna Torre and Cerro Torre on a clear day (credit: Allan Farrell)
Maker:L,Date:2017-8-29,Ver:5,Lens:Kan03,Act:Kan02,E-ve
After reaching Laguna Torre, you have the option to climb up further to Mirador Maestri for a nice view. You can see the trail going up the ridge in the center of this photo.
View of Glacier Grande from the Mirador Maestri
View of Glacier Grande from the Mirador Maestri (credit: Juliane Schultz)
2_miguel_vieira
Panoramic picture from the Mirador Maestri with Cerro Solo on the left, Gracier Grande in the middle, and Cerro Torre on the right (credit: Miguel Vieira)
View of Cerro Torre from the Mirador Maestri
View of Cerro Torre from the Mirador Maestri (credit: Miguel Vieira)
View looking back towards the trailhead from the Mirador Maestri
View looking back towards the trailhead from the Mirador Maestri (credit: Juliane Schultz)
Maker:L,Date:2017-8-29,Ver:5,Lens:Kan03,Act:Kan02,E-ve
We then turned around and headed back a little bit to find a lunch spot that was protected from the wind.  Before sitting down for lunch we had to get a last view of the mountains (pictured: Nike Brasilia Backpack and North Face Venture 2 Jacket)
Maker:L,Date:2017-8-29,Ver:5,Lens:Kan03,Act:Kan02,E-ve
After lunch, we continued back to El Chalten via the section of the loop we had not yet traversed. This part of the trail skirts between a moraine and the river before meeting back up with the trail we came in on. (pictured: KEEN Targhee II Waterproof Hiking Boot)
Maker:L,Date:2017-8-29,Ver:5,Lens:Kan03,Act:Kan02,E-ve
Looking East across the valley and the Rio Fitz Roy
Maker:L,Date:2017-8-29,Ver:5,Lens:Kan03,Act:Kan02,E-ve
On the way out you can better appreciate some of the rock structures you may have missed on the way in
Maker:L,Date:2017-8-29,Ver:5,Lens:Kan03,Act:Kan02,E-ve
The weather started to clear up on the way back, so we had some nice views looking East (pictured: prAna halle Pant)
Maker:L,Date:2017-8-29,Ver:5,Lens:Kan03,Act:Kan02,E-ve
View from the trail near El Chalten
Maker:L,Date:2017-8-29,Ver:5,Lens:Kan03,Act:Kan02,E-ve
El Chalten in the distance as we finished the hike.

After our hike, we headed to the La Cerveceria brew pub for some beer and appetizers (located here). The food was great and I highly recommend stopping by! After our snack, we checked out of our hotel and took a shared shuttle to El Calafate (~3 hrs). We checked into out hotel there and then grabbed a late dinner before going calling it a night.

Jump to top of page


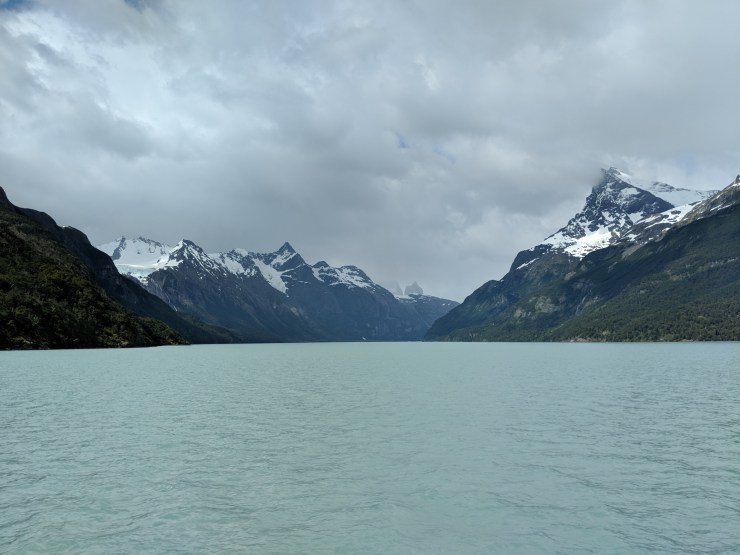
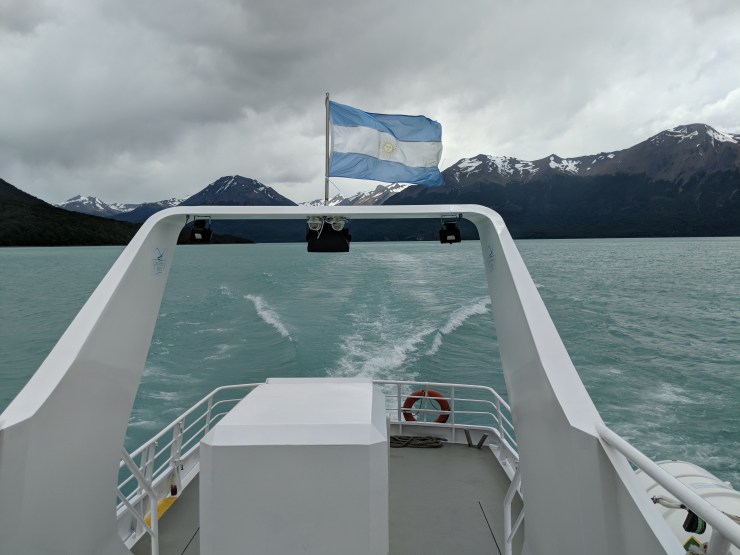
Day 4: Perito Moreno Glaciar and boat trip through the Canal de los Tempanos and the Seno de Mayo

glacier_road_map
Overall map of the Perito Moreno and El Calafate area. The blue line shows the driving route from El Calafate to the Perito Moreno Glacier. If you take a boat cruise, you drive instead to Puerto Bandera where there is a port. The red dotted line shows the route our boat cruise took.

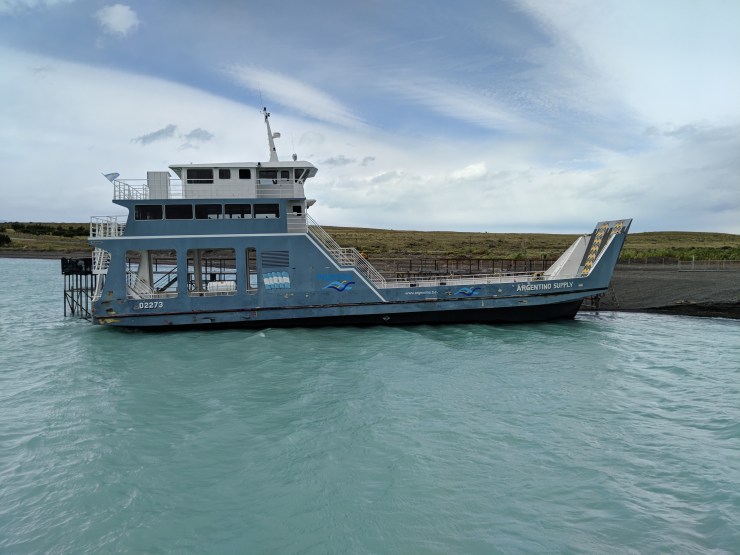
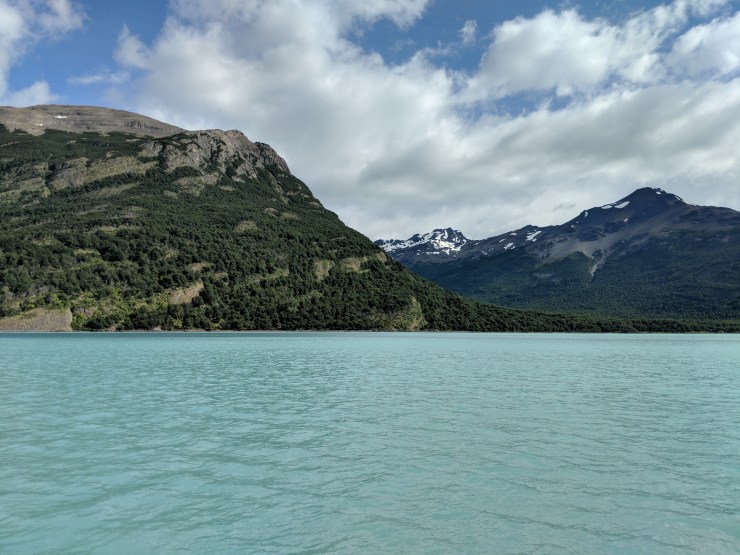
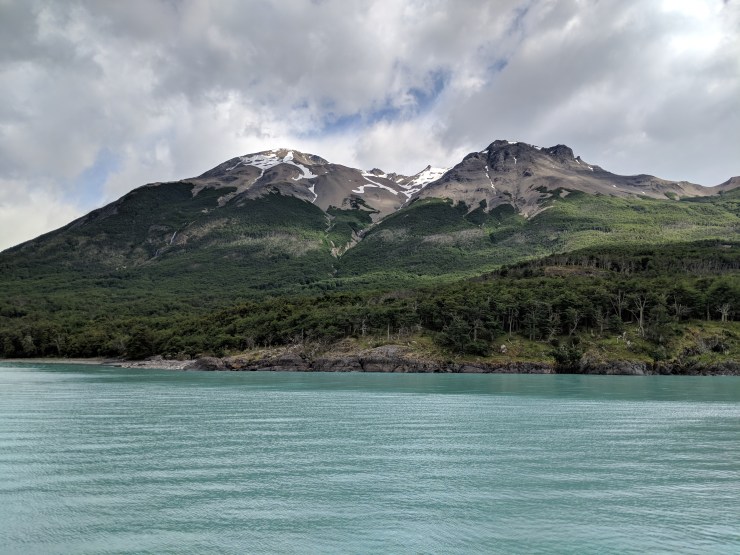
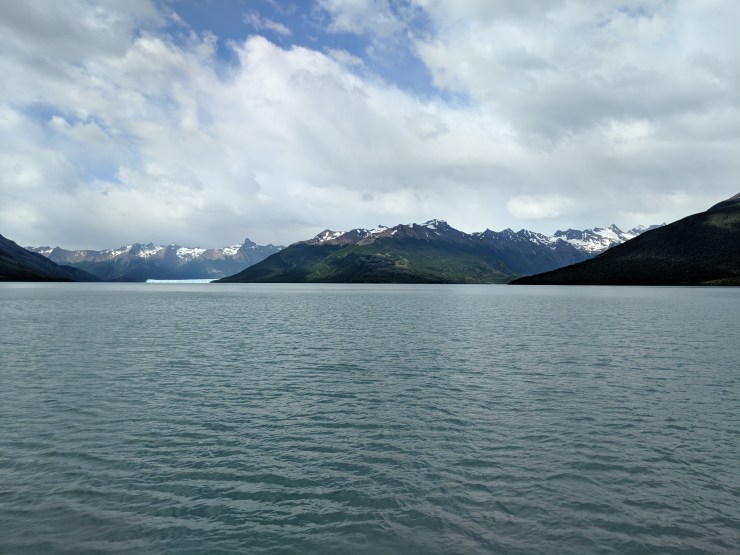
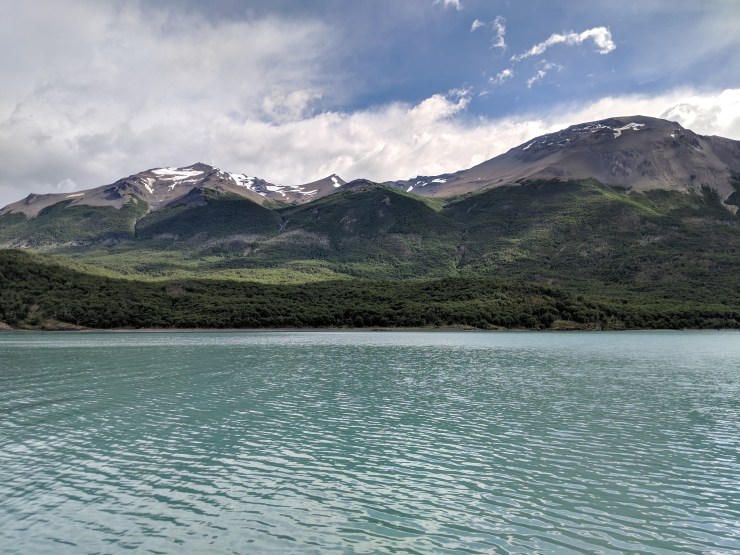
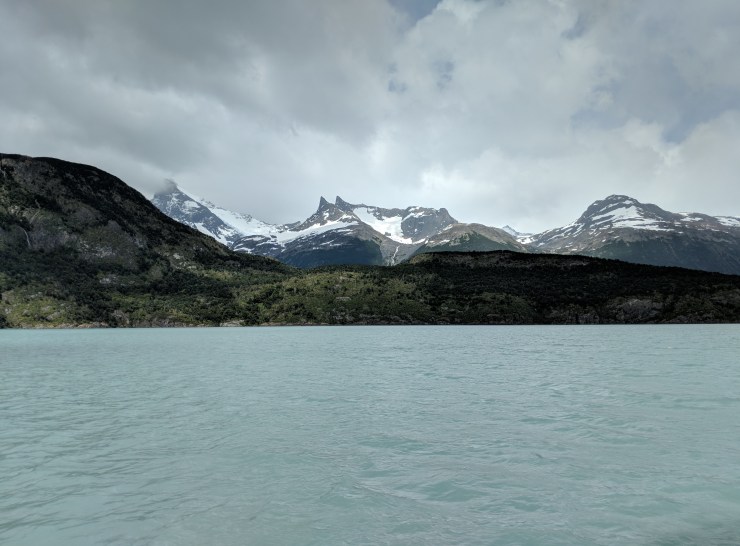
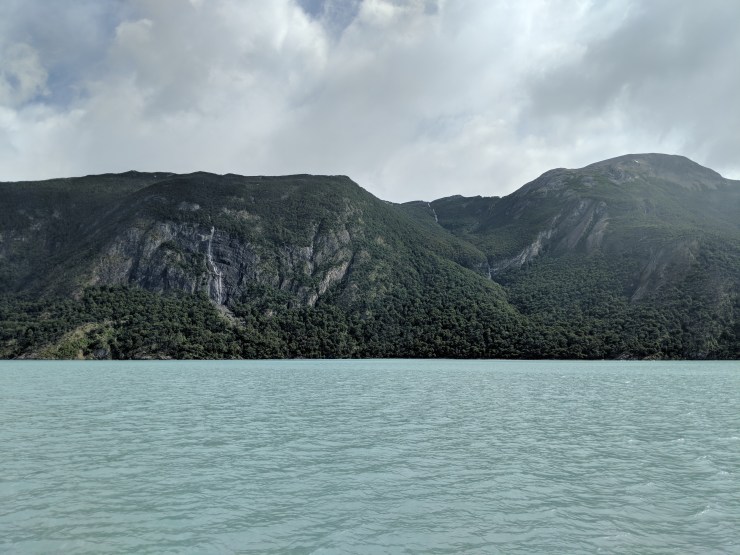
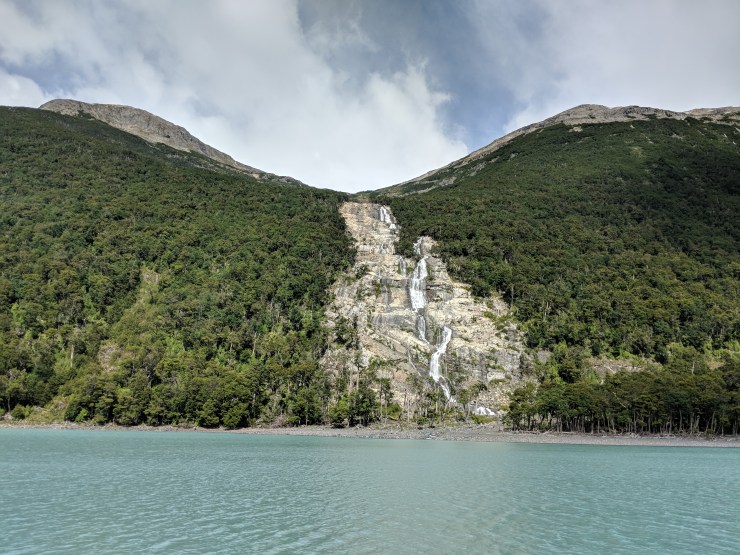
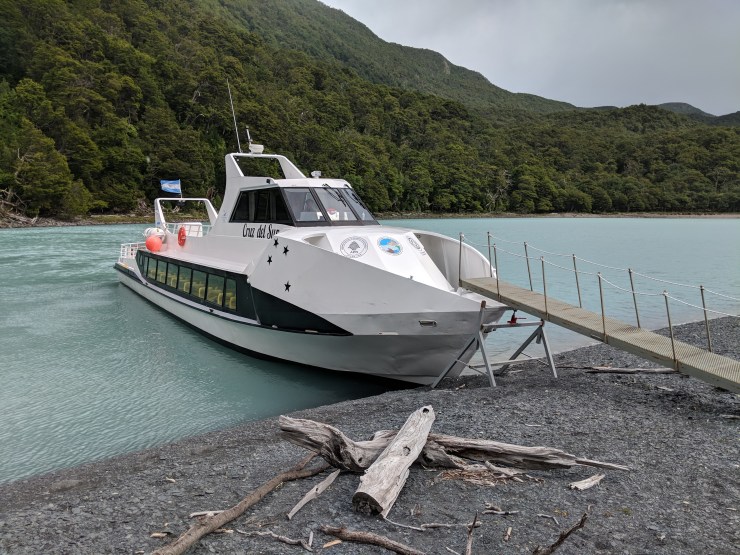
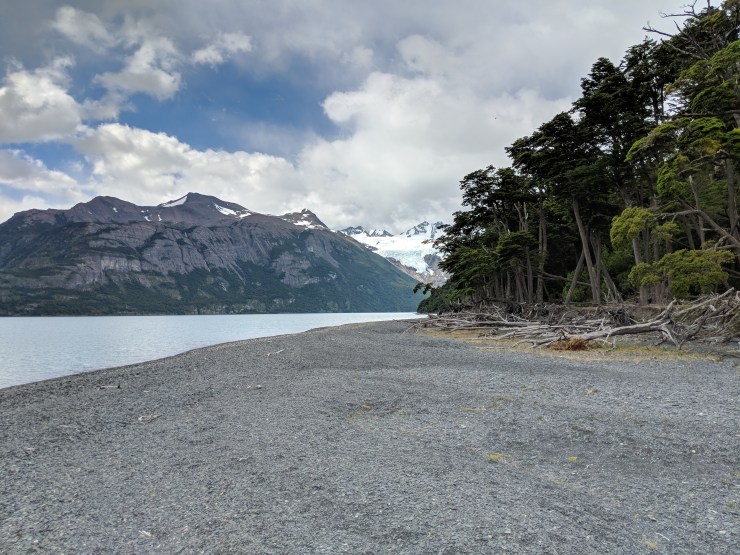
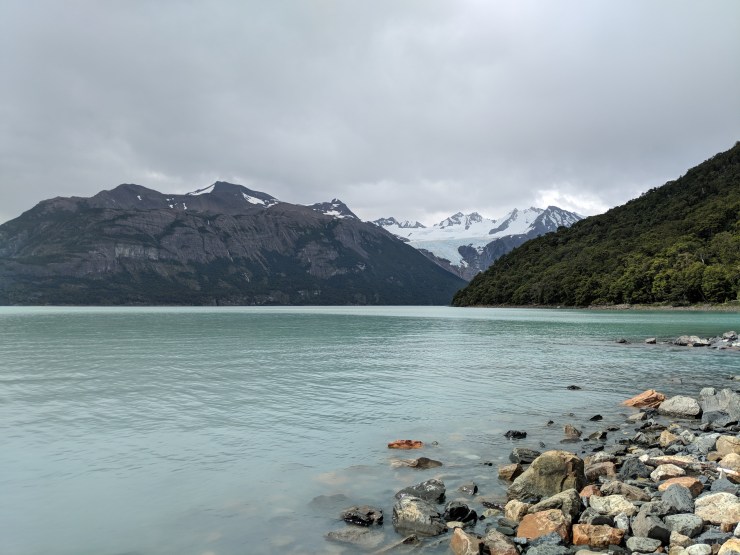
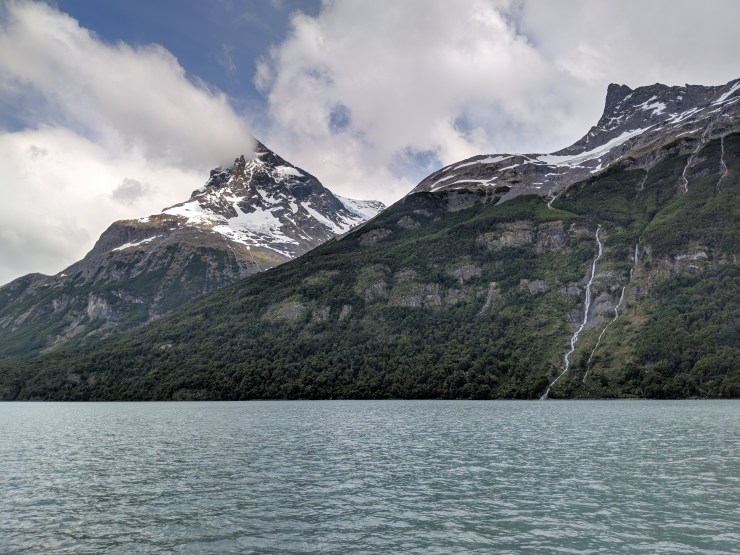
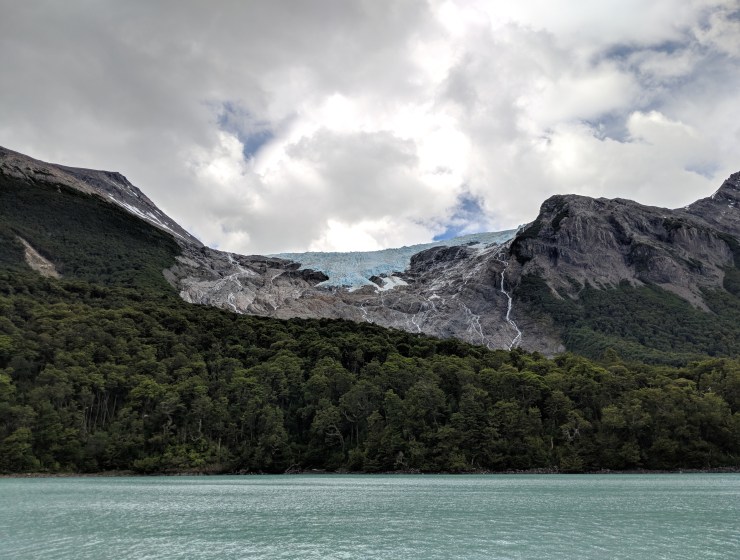
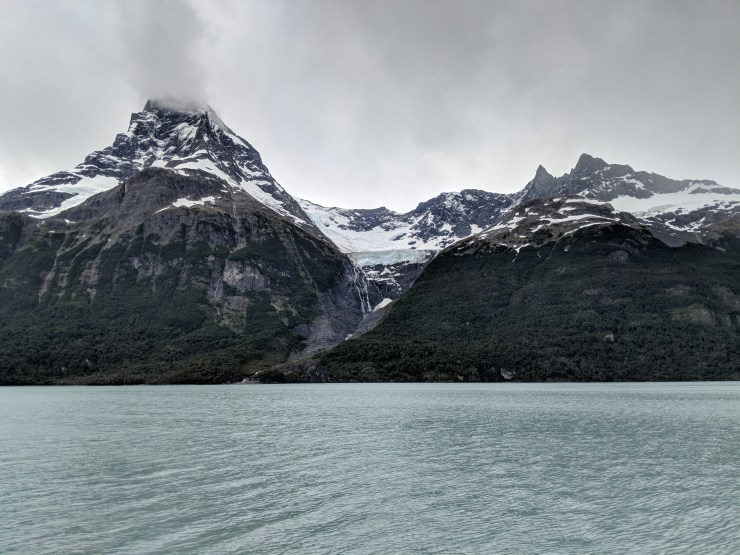
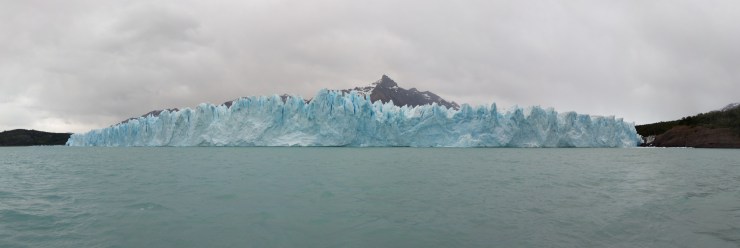
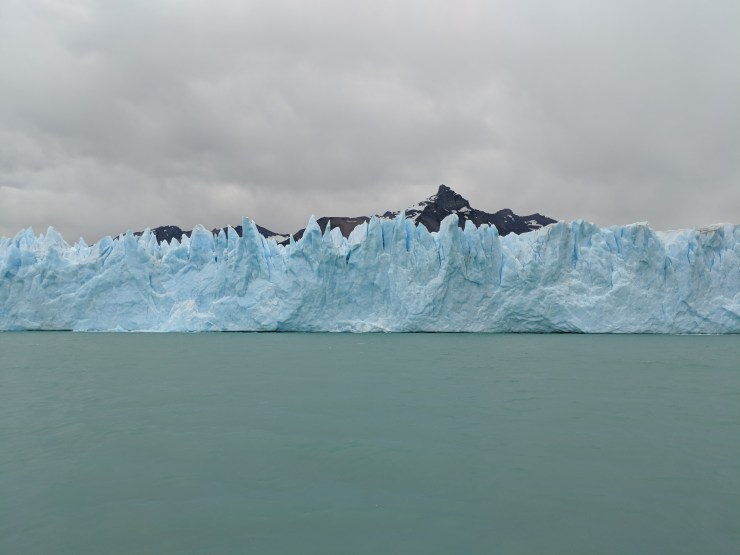
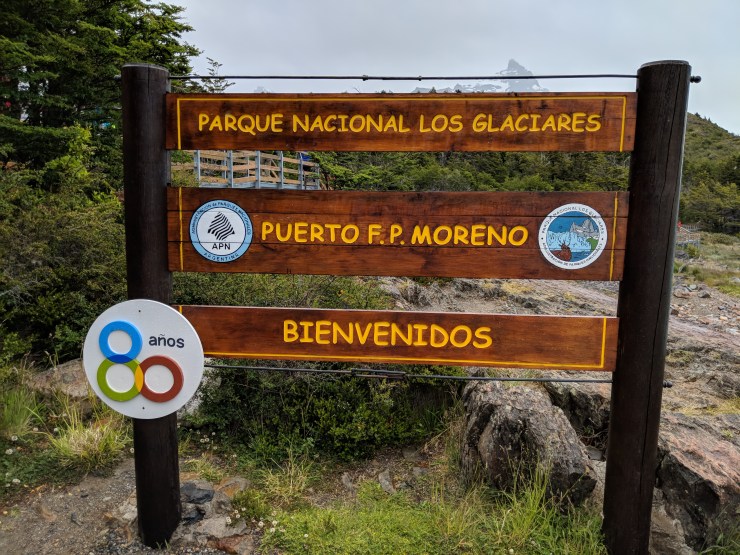
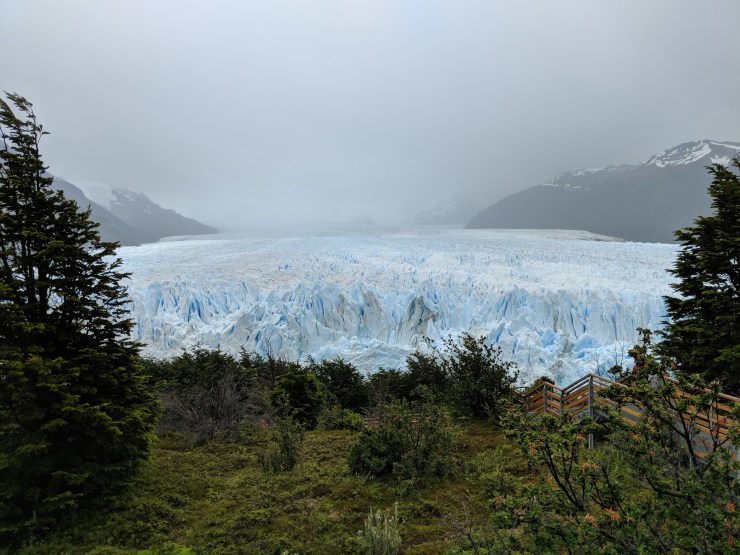
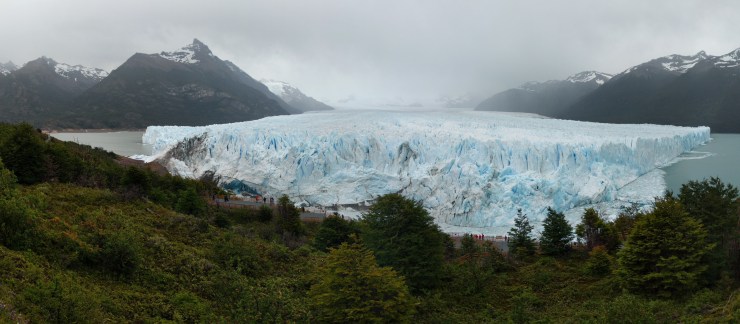
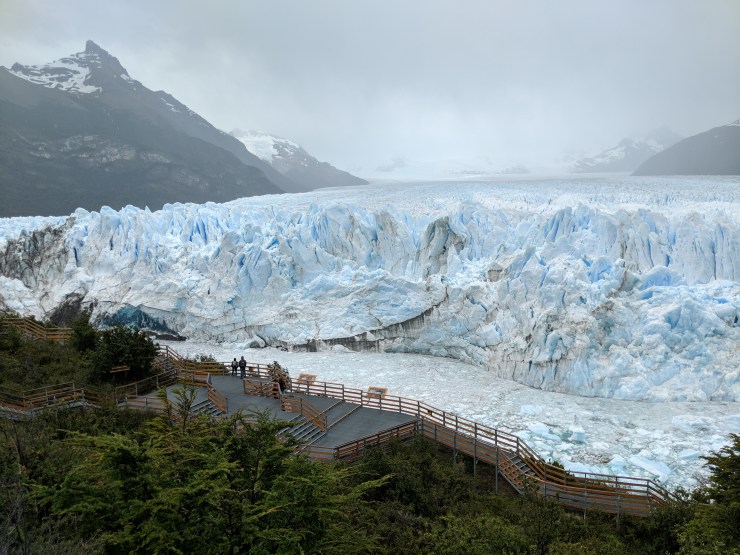
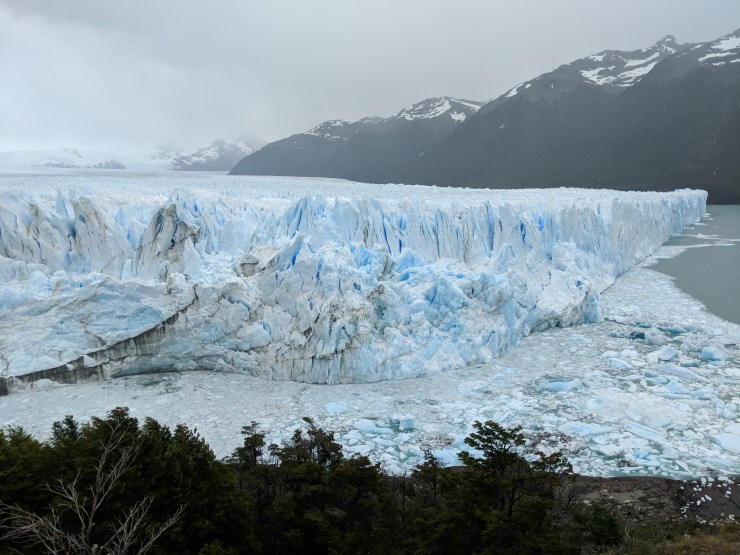
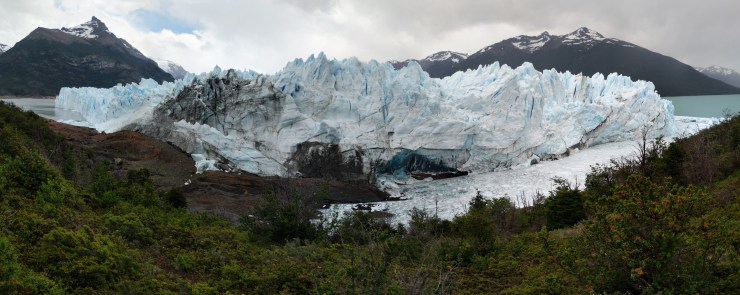
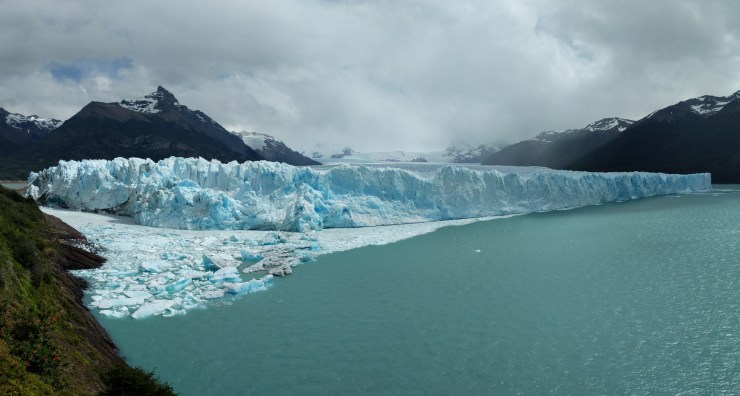
On our first full day in El Calafate, we decided do a boat tour of the area around the Perito Moreno Glacier. The boat traveled through the Canal de los Tempanos, stopped off at a couple viewpoints, and then drove up next to the face of the Perito Moreno Glacier. After that, we were dropped off at the visitor center and allowed to explore the observation deck at the Perito Moreno Glacier for ~1 hour. Then we had to get back on the boat to be driven back to the port where our shuttle was waiting.

Overall the experience was nice and it was great to see several different glaciers. Our main gripe was that we only had ~1 hour to explore the observation deck at the Perito Moreno Glacier. This was hardly enough time to walk along the face of the glacier and take pictures. In hindsight, we would have liked ~3 hours at the glacier. The observation deck is quite long, and you could easily walk a few miles if you covered it all. It is also very cool to just sit and watch the ice calve off the glacier and fall into the water! Either way, the Perito Moreno Glacier is a great sight and totally worth the a visit.

The drive from El Calafate to the Puerto Bandera (where the boat left from) was ~45 minutes long. There seemed to be several shuttles that picked everyone who was on the boat tour up from their hotel. If you are just going straight to the Perito Moreno Glacier observation deck from El Calafate, the drive is ~1 hour and 15 minutes. You park in a lower parking lot and then take a short shuttle ride up to the observation deck. There are food courts and bathrooms next to both the lower parking lot and the observation deck.

lAGO_wybren
View of the scenery along the drive from El Calafate to the Perito Moreno Glacier (credit: wybren)
Maker:L,Date:2017-8-29,Ver:5,Lens:Kan03,Act:Kan02,E-ve
We caught a nice rainbow from our shuttle
Maker:L,Date:2017-8-29,Ver:5,Lens:Kan03,Act:Kan02,E-ve
A boat docked at the port
Maker:L,Date:2017-8-29,Ver:5,Lens:Kan03,Act:Kan02,E-ve
After arriving at the port, we paid our 500 peso entrance fee, boarded the boat, and then set off onto the water.
The views while traveling through the Canal de los Tempanos are great.
Eventually we got our first view of the Perito Moreno Glacier far in the distance.
View of the Perito Moreno Glacier and the Canal de los Tempanos
Maker:L,Date:2017-8-29,Ver:5,Lens:Kan03,Act:Kan02,E-ve
A nice view along the way
Maker:L,Date:2017-8-29,Ver:5,Lens:Kan03,Act:Kan02,E-ve
A nice view along the way
Maker:L,Date:2017-8-29,Ver:5,Lens:Kan03,Act:Kan02,E-ve
We saw several tall waterfalls along the way
The boat eventually turned off into the Seno Mayo and headed towards the Cerro Negro area.
Maker:L,Date:2017-8-29,Ver:5,Lens:Kan03,Act:Kan02,E-ve
The boat docked near this waterfall and we hiked around for a bit.
Maker:L,Date:2017-8-29,Ver:5,Lens:Kan03,Act:Kan02,E-ve
Our boat for this excursion
Maker:L,Date:2017-8-29,Ver:5,Lens:Kan03,Act:Kan02,E-ve
The waterfall is reached via a short walk along this beach
Maker:L,Date:2017-8-29,Ver:5,Lens:Kan03,Act:Kan02,E-ve
The area is very pretty and makes for a nice short stop
Maker:L,Date:2017-8-29,Ver:5,Lens:Kan03,Act:Kan02,E-ve
Some more scenery
Maker:L,Date:2017-8-29,Ver:5,Lens:Kan03,Act:Kan02,E-ve
Close up of the waterfall
View of the Cerro Negro Glacier across the Seno Mayo
We then boarded the boat and headed across the Seno Mayo towards Cerro Negro
The Cerro Negro Glacier and we approached the next landing area
A hanging glacier on Cerro Mayo
Maker:L,Date:2017-8-29,Ver:5,Lens:Kan03,Act:Kan02,E-ve
The boat then docked and we took a short hike from the shore to a lunch spot at the base of the Cerro Negro Glacier.
Maker:L,Date:2017-8-29,Ver:5,Lens:Kan03,Act:Kan02,E-ve
Along the hiking trail looking North towards Cerro Mayo
Our beautiful lunch spot with a view of the Cerro Negro Glacier
Maker:L,Date:2017-8-29,Ver:5,Lens:Kan03,Act:Kan02,E-ve
After lunch, we got back in the boat and headed to the Perito Moreno Glacier
We then reached the face of the impressive Perito Moreno Glacier
A close up view of some of the jagged ice on the face of the Perito Moreno Glacier
The Perito Moreno Glacier extends all the way to the land on the left side of this image, which is where the observation deck is located.
Maker:L,Date:2017-8-29,Ver:5,Lens:Kan03,Act:Kan02,E-ve
After taking in the views from the boat, we were dropped off so we could explore the Perito Moreno Observation Deck
Maker:L,Date:2017-8-29,Ver:5,Lens:Kan03,Act:Kan02,E-ve
There is a large network of pathways you can walk along.  The views along the way are great.
Panoramic view of the Perito Moreno Glacier from the first observation deck
Maker:L,Date:2017-8-29,Ver:5,Lens:Kan03,Act:Kan02,E-ve
From the decks, you can watch ice break off the front of the glaciers and crash into the water
Maker:L,Date:2017-8-29,Ver:5,Lens:Kan03,Act:Kan02,E-ve
A view of the face of the Perito Moreno glacier that our boat went up to
Another panoramic of the Perito Moreno Glacier from the lowest observation deck
PANO_20171228_155747
A view of the Perito Moreno Glacier showing its large size
Maker:L,Date:2017-8-29,Ver:5,Lens:Kan03,Act:Kan02,E-ve
View the glacier and watching the ice break off is really impressive (pictured: Osprey Tempest 20 Backpack and North Face Venture 2 Jacket)

We then scrambled back to our boat and sped to port. We hopped in our shuttle and were brought back to El Calafate. Overall we really enjoyed the excursion!

Jump to top of page


Day 5: Travel back from El Calafate to Puerto Natales and then to Punta Arenas

On our last day, we had to take another long bus ride from El Calafateto Puerto Natales. Again, our bus took 7 hours instead of the planned 5 hours. Much of the wait took place at the Chile-Argentina border. When crossing into Chile, everyone on the bus was required to bring all their bags into the customs office and declare all food items. The customs agents were even x-raying bags to ensure everyone was properly declaring items.

Eventually we reach Puerto Natales. We had an hour wait and then hopped on another bus taking us to Punta Arenas (~3.5 hours), where we spent one night before heading home!

Jump to top of page


Backpacking in Los Glaciares National Park:

You will also find the Huemul Circuit in El Chalten. This trek is a ~40 mile backpacking loop that provides some amazing views of the Southern Patagonia Ice Field. Some people say the scenery rivals that of the Circuit in Torres del Paine National Park. For a great description of the Huemul Circuit check out this post.

Here are some other trip reports from Backpackers-Review:

Torres del Paine National Park, Patagonia – Circuit Trek (~80 mile loop)

Machu Picchu – 5 Day Salkantay Trek

4 Replies to “Los Glaciares National Park, Patagonia – Mount Fitz Roy, Cerro Torre, and the Perito Moreno Glacier”

Leave a Reply

Fill in your details below or click an icon to log in:

WordPress.com Logo

You are commenting using your WordPress.com account. Log Out /  Change )

Twitter picture

You are commenting using your Twitter account. Log Out /  Change )

Facebook photo

You are commenting using your Facebook account. Log Out /  Change )

Connecting to %s

%d bloggers like this: