

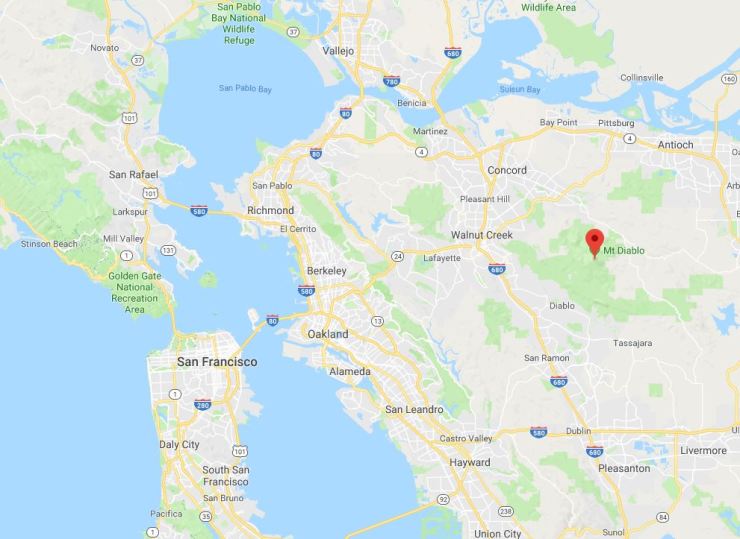
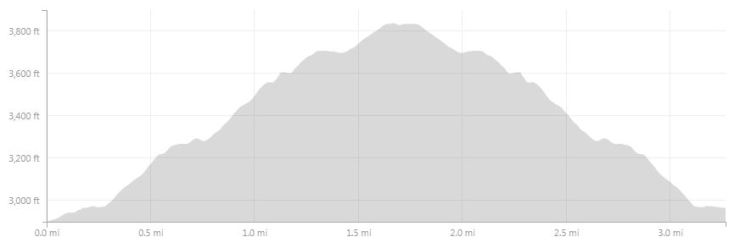
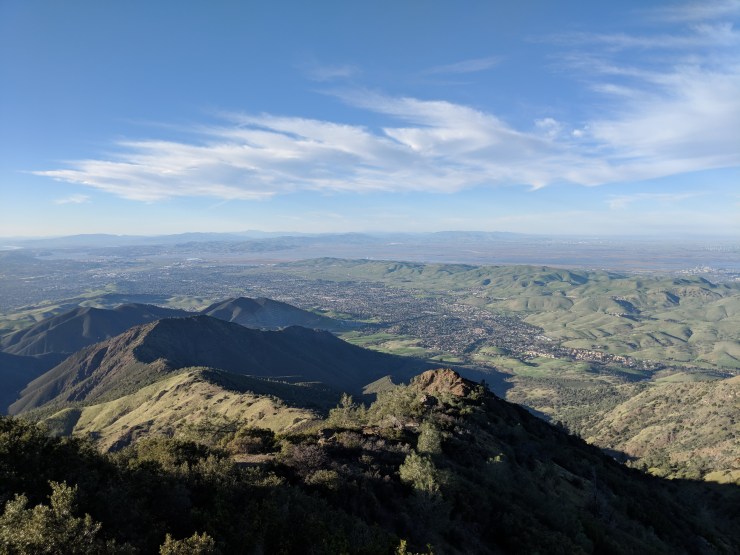
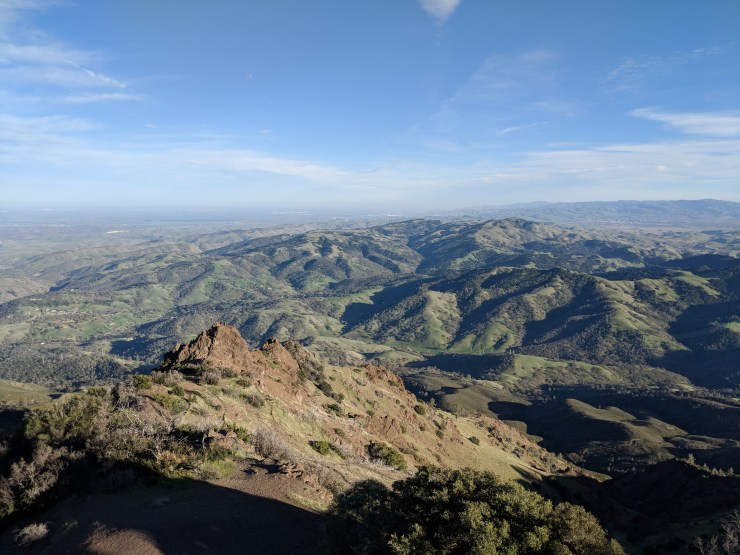
Trip overview: The summit of Mount Diablo stands 3,849 feet above the Bay Area in California and provides views of San Francisco and the Golden Gate bridge to the West and the Sierra Nevada to the East. On this short weekend trip, we camped at Juniper Campground which is the closest to the summit of Mount Diablo. The hike from the campground to the summit is 3.3 miles roundtrip with +/- 1,000 feet elevation a starting elevation of 2,900 feet and a maximum elevation of 3,840 feet. The views of the surrounding Bay Area, central valley, and Sierra Nevada are the primary highlights of this hike. We camped in February of 2018.
Preparations:
Permits and reservations: Campsites at the Juniper Campground in Mount Diablo State Park are reservable at the Reserve California website. Campsites are $30 per night plus fees and have potable water and restrooms. Note that you cannot reserve specific sites within the campground. Sites are chosen on a first come first serve basis, so to get the sites with the best views you will want to arrive early. No permits are needed to hike in the park.
Logistics: Mount Diablo State Park is located approximately an hour East of San Francisco. You will need to drive to the park. To get to the campsites you have the option of driving, cycling, or hiking. Most campers will simply drive up to the campsite given it is a long steady climb up the mountain to get there!
When you arrive at the park, you will check in at the ranger booth and get your camping permit. The South Gate ranger station is about a 10 minute drive from the South Entrance of the park. Then, you head up to the Juniper Campground and try to find a nice site. This drive is about 20-25 minutes up the mountain. Watch out for all the cyclists along the way!

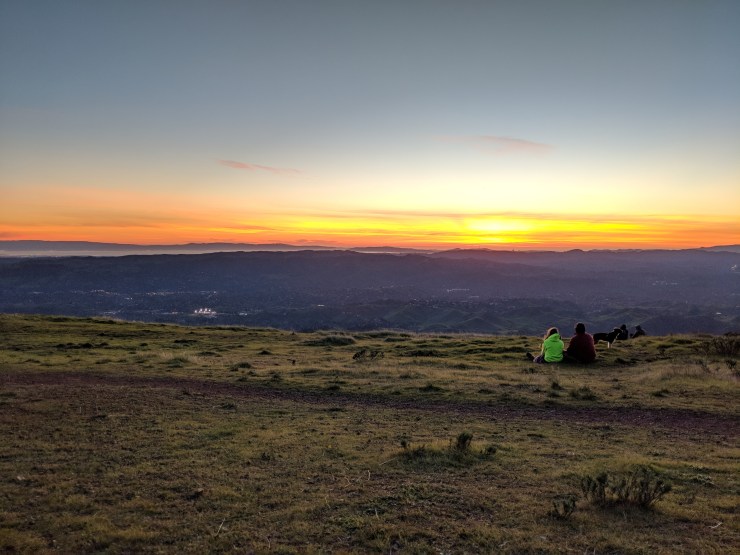
The campsites with the best views of San Francisco and the bay are 11, 13, 15, 16, and 17. Note that these sites are also very exposed to the sun and wind though. Some of the other sites are shaded beneath trees. You’ll just need to decide what you want out of your campsite: a view, seclusion, shade, or space! All the sites have a picnic table and fire pit. The sites also all seem to be frequented by raccoons, so store your food appropriately! If you are not able to get a site with a view, there is plenty of space to lay out a blanket and watch the sunset at the West end of the campground.

Supplies: Much of Mount Diablo State Park is exposed to the sun so bring ample sunscreen and consider wearing clothes that provide protection from the sun. If you are going to hike for an extended period of time, a large hydration bladder is a good idea as well. There are fire pits at the Juniper Campground, but no fire wood is sold there. If you want to have a fire, consider buying wood before entering the park. Alcohol is technically not allowed in the park. However, nearly everyone seemed to be drinking the night we camped so enforced does not seem to be a priority. It’s probably still advisable to drink out of generic cups and keep the partying to minimum though. Here are some suggested supplies.
Hiking clothes
- a lightweight hiking rain jacket (North Face Venture 2 Jacket)
- fast drying synthetic hiking pants (prAna Zion Pants)
- a quick drying long sleeve hiking shirt (Columbia Silver Ridge L/S Shirt)
- wool outer socks (People Socks Moreno 4-pack)
- thin blister preventing base socks (WrightSock double layer Coolmesh)
- quick drying synthetic boxer briefs (ExOfficio Give-N-Go)
- light bandana for sun protection (Levi’s printed bandana)
- mesh back trucker hat (Patagonia LoPro Trucker Hat)
- adjustable fabric belt (Bison designs belt)
- Gore-tex hiking shoes (adidas Outdoor Terrex Fast R Gore-Tex Shoe)
Clothes for camp
- wool leggings (Minus33 Merino Wool Kancamagus Midweight Bottom)
- wool base layer shirt (Minus33 Merino Wool Chocorua Midweight Crew)
- warm wool overshirt (Pendleton Long Sleeve Classic-Fit Board Shirt)
- lightweight down jacket (Patagonia 800-fill Down Jacket)
- lightweight camp shoes (Xero Z-Trail lightweight sandal)
Hiking gear
- 3 liter hydration bladder (Camelbak Antidote Reservoir)
- small backpack (Osprey Daylite Daypack)
- water filtration system (Sawyer Squeeze water filtration system)
Camp gear
- strong tent with rain-fly (Alps Mountaineering Chaos 2 Tent)
- inflatable sleeping pad (REI Co-op AirRail 1.5 Self-Inflating Sleeping Pad)
- sleeping bag (The North Face Furnace 20 degree Sleeping Bag)
- lightweight lantern (MPOWERD Luci Outdoor 2.0)
- headlamp (Black Diamond Storm Headlamp)
- multi-tool with knife (Gerber MP400 compact multi-plier)
- lightweight stove (MSR PocketRocket 2)
- lighter (BIC plastic lighters)
- 2 liter pot (GSI Outdoors Halulite Boiler Pot)
- coffee cup (GSI Outdoors Glacier Stainless Cup)
- lightweight spork (Snow Peak Titanium Spork)
- small, quick drying towel (REI mutli towel lite)
Random
- wet wipes (Stall Mates individually wrapped wipes)
- mole skin for blisters (Spenco 2nd Skin Adhesive)
- small amount of duct tape for gear repairs
- chapstick and sun screen
Weather and visibility: The best time to visit the park is likely in the spring or fall. In the summer, the park can be very hot and the view can be hazy. The visibility is best shortly after rain has fallen, which is most likely in the winter or spring. The surrounding hills are also green in the spring, which makes for colorful views. In the winter or spring, temperatures can get pretty chilly near the summit, so be prepared with warm clothes.
Our campsite: We unfortunately were not able to snag one of the sites with the great views. We ended up taking site number 3, which had a great view if you stood on top of the picnic table… The site was overall fine, though it got very windy in the evening.


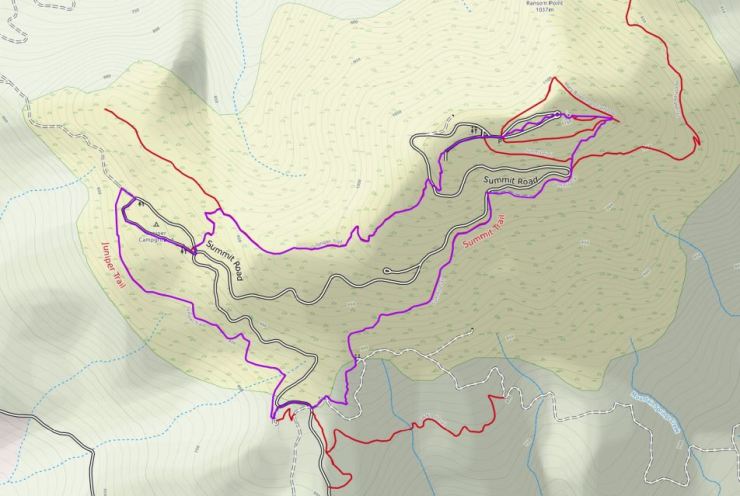
Juniper Campsite to Mount Diablo Summit: 3.3 miles; +/- 1,000 feet (round trip)

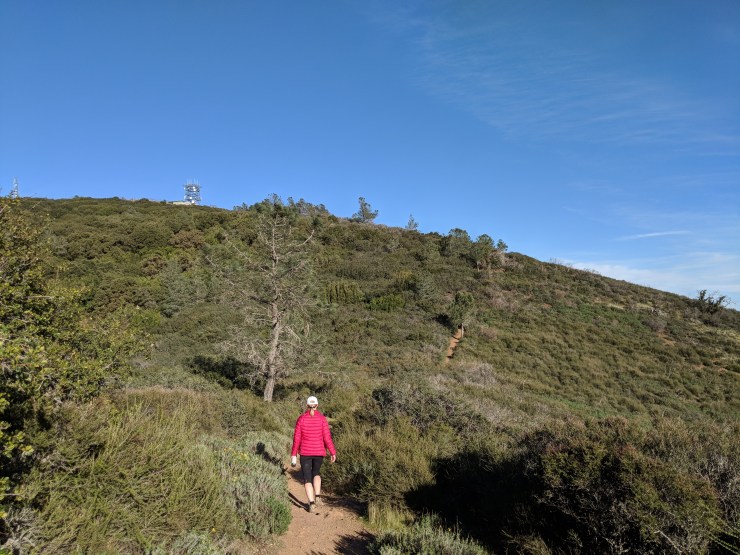
After setting up our tent at the Juniper Campground, we set off on a short hike to the summit of Mount Diablo. The trail is pretty well marked and sets off from the entrance to the campground. We took the Juniper Trail all the way to the summit and then followed the same trail back. This worked out to a little less than 3.5 miles. If you don’t want to hike back on the same trail, you could come back via the Summit Trail as shown below.
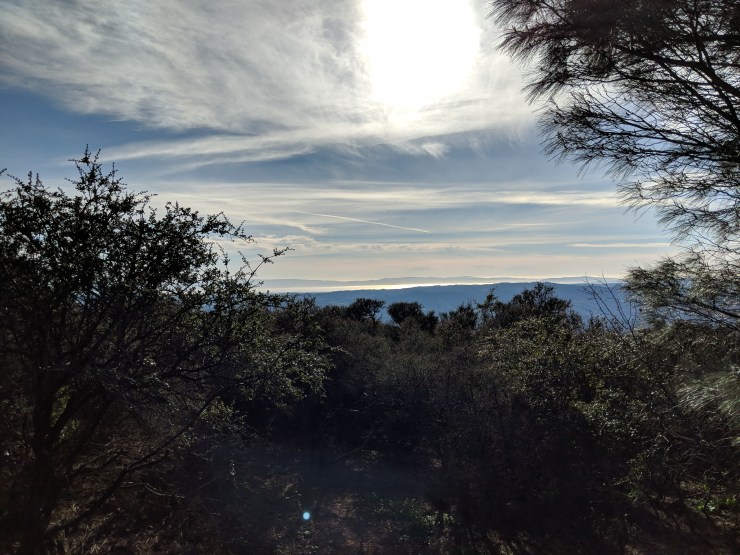
The hike to the summit provides some nice views, but it not too spectacular. The main views are seen from the visitor center located at the summit. For there, you can nice panoramic views of the surrounding area.
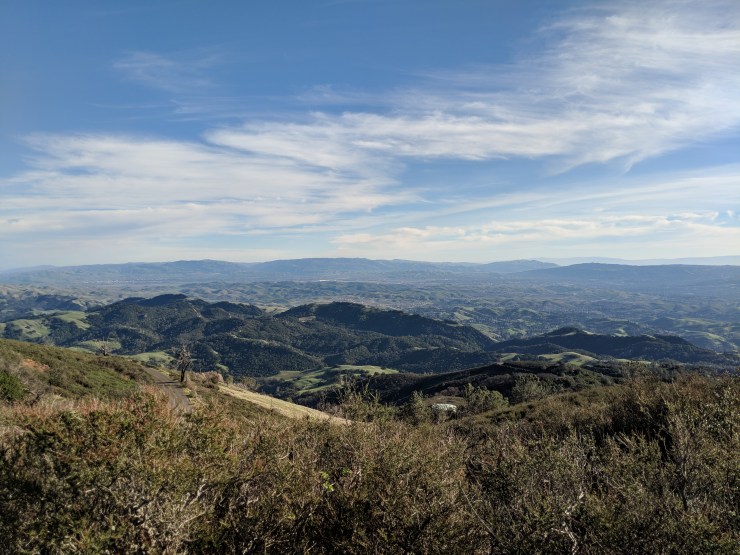


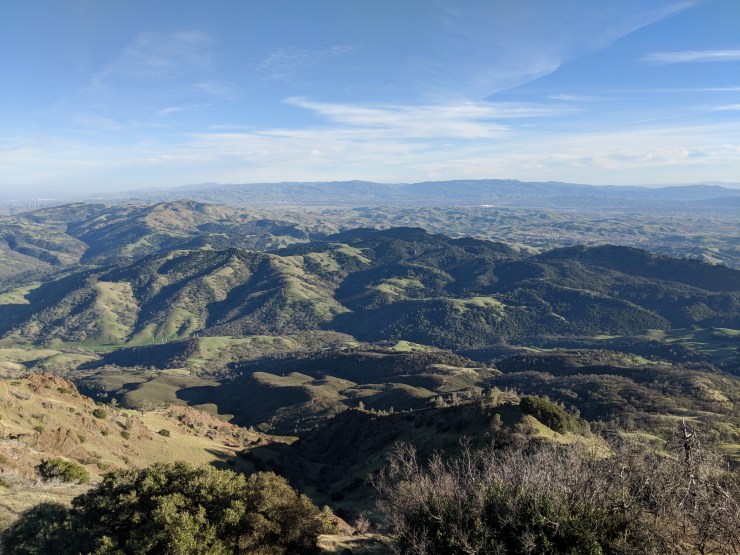
After hanging around the summit for a while, we headed back down the trail so we could get to the campsite and eat dinner before sunset. The hike from the summit to the campsite is nice because you continuously look towards San Francisco and the bay.


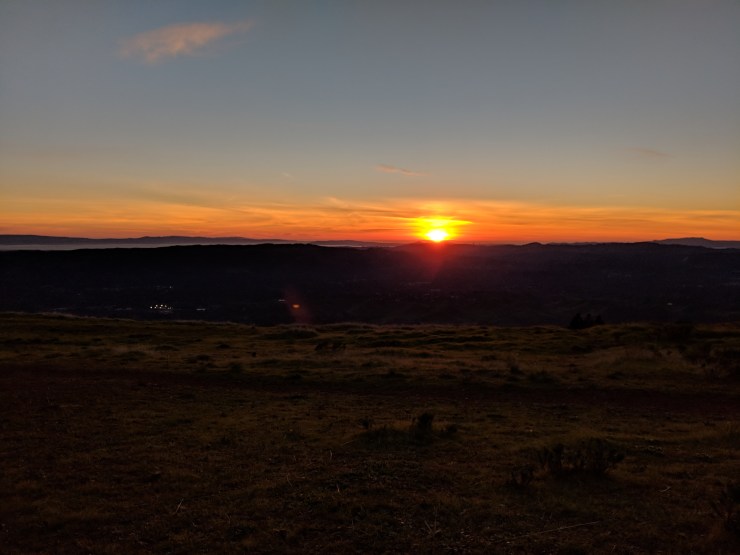
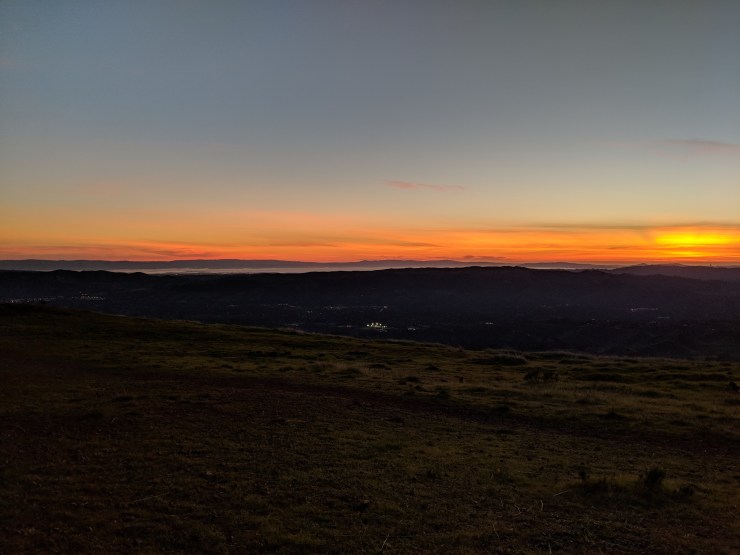
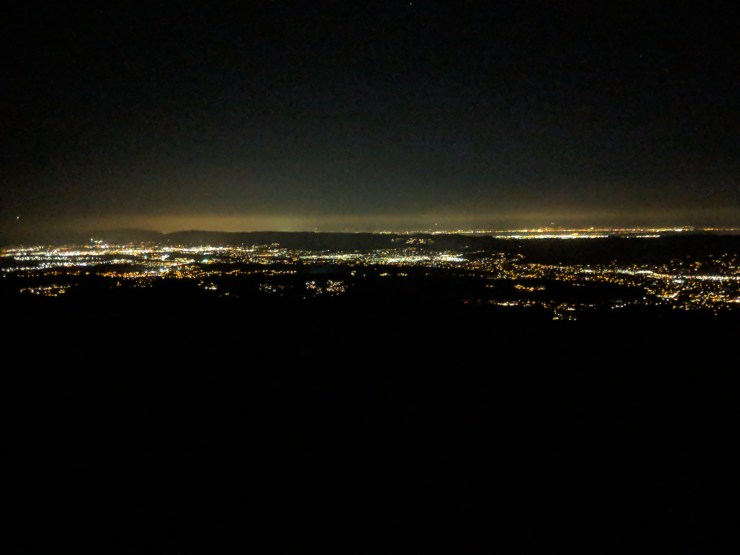
After arriving at the campsite and eating dinner, we took our sleeping pads to the West end of the campground and watched the sunset. The view is really spectacular as you get to see the sun setting directly over San Francisco and the bay.

Excellent write up. Thanks
LikeLike