


*This trek is also known as the “Paine Mastiff Circuit” and the “O” trek.
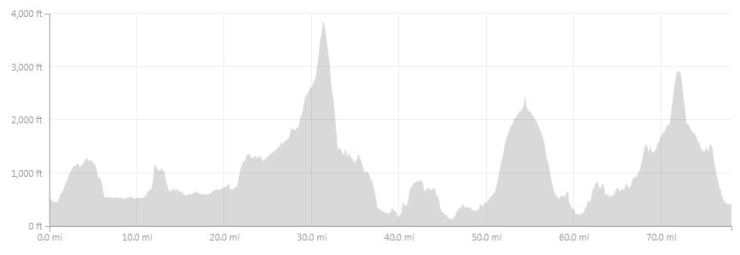
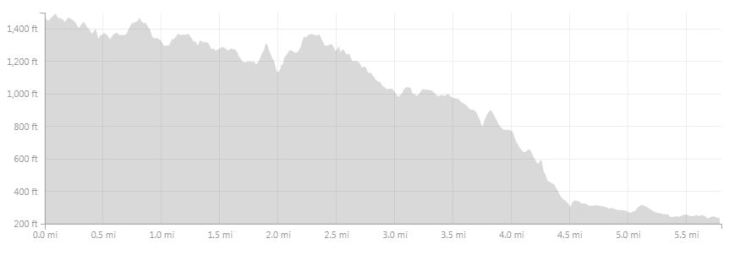
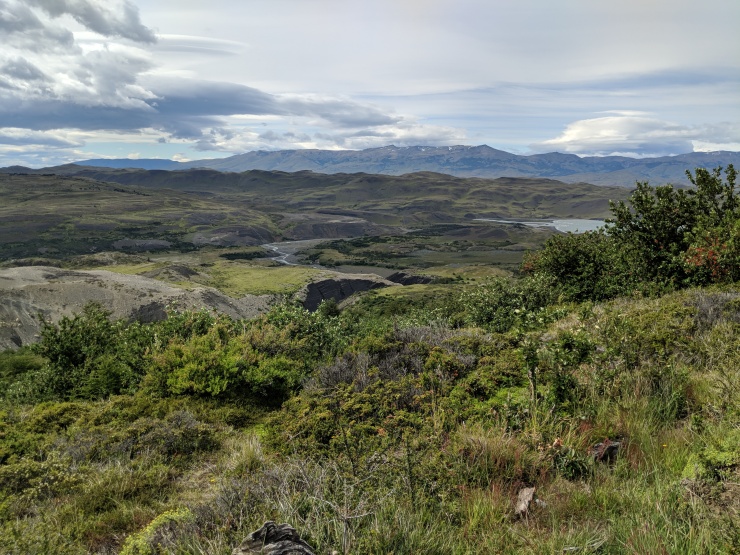
Trip Overview: ~80 mile backpacking loop in Torres del Paine National Park in the Patagonia region of Chile. The hike starts and ends at the Welcome Center near Hotel Las Torres. +/- 16,500 feet of elevation change with a starting elevation of 500 feet and a peak elevation of 3,800 feet. Highlights include dramatic granite peaks, massive glaciers, turquoise lakes, forested valleys, and views of the expansive Patagonia Steppe. We completed this trip over 9 days in December of 2017.
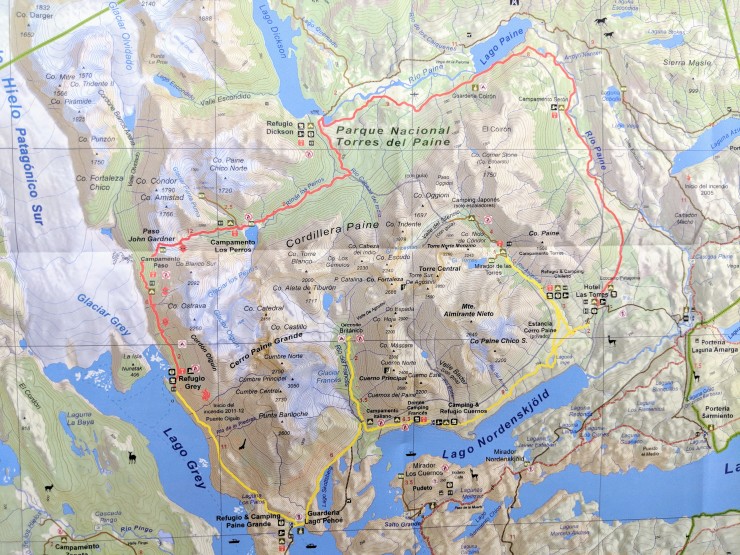
2017 CONAF map of Torres del Paine National Park (pdf)
*A note on maps, distances, and elevations: I have found that distance and elevation data for Torres del Paine National Park is highly variable depending on what resource you reference. Elevation change data is all over the place, and it is hard to find trustworthy numbers. Even the signs inside the park at often incorrect and deceiving. For this post I calculated distances and elevation data using GPS data, which I found to look reliable and match my expectations after completing the hike. A nice large map by SIG Patagon with great info about Torres del Paine can be purchased here.
Links to skip General Information and go straight to trip reports:
Jump to Day 1: Welcome Center to Camp Seron
Jump to Day 2: Camp Seron to Refugio Dickson
Jump to Day 3: Refugio Dickson to Camp Los Perros
Jump to Day 4: Camp Los Perros to Campamento Paso
Jump to Day 5: Campamento Paso to Refugio Grey
Jump to Day 6: Refugio Grey to Refugio Paine Grande
Jump to Day 7: Refugio Paine Grande to Camp Frances
Jump to Day 8: Camp Frances to Refugio Chileno
Jump to Day 9: Refugio Chileno to Welcome Center
Shop Sale & Clearance Items at REI.com (up to 50% off)!
General Information:
Click here to read more about Permits
Permits: It is mandatory to attain all reservations for camping and refugio shelters prior to entering Torres del Paine National Park. If you do not have reservations for your trek, you will not be able complete the Circuit trek. Reservations fill up fast for the prime season (November-March), so you should book several months in advance (for the Circuit trek, the number of trekkers is limited to 80 per day). Outside of your camping reservations there is no separate permit needed to hike the Circuit. You simply pay the 21,000 peso (~$35) entrance fee when you arrive at the park and show proof of your camping reservations at several spots along the trek.
Click here to read more about Refugios and Campsites
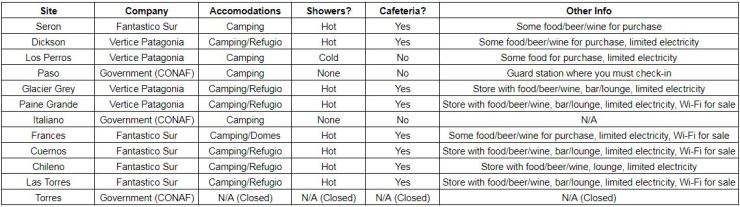
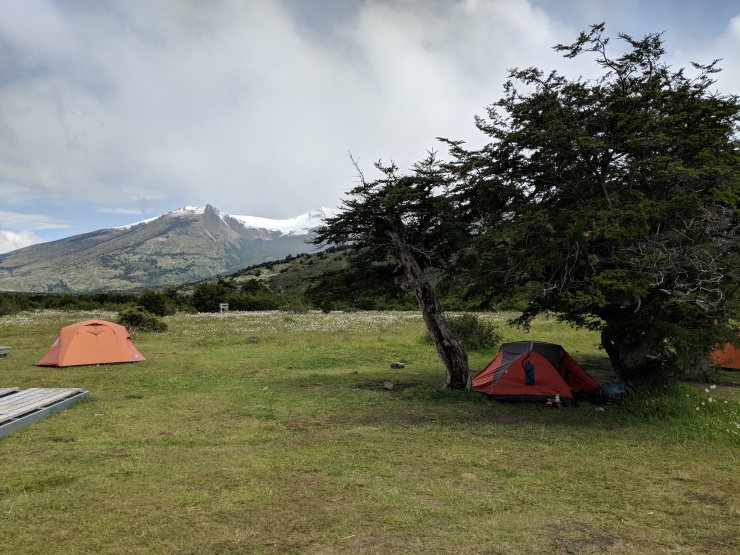
Refugios and Campsites: If you book your campsites early enough, you will have multiple options for itineraries and can decide to hike the circuit over anywhere from 6-9 days. A map with the various campsites and refugios highlighted is shown below. Note that there are free campsites run by the Chilean government (CONAF) and there are sites run by two different private companies (Fantastico Sur and Vertice Patagonia). Prices for the accommodations run by the private companies range from ~$10 per person per night for camping to over $75 per person per night for a bed and meals in the refugios. Some of the refugios are now requiring people to purchase meals, even if you camp (Chileno and Los Cuernos require full board meals in 2017-2018). This adds a lot of cost and is annoying, but the only other option is to not stay at these sites and adjust your itinerary. As stated above, all reservations must be made in advance of entering the park!
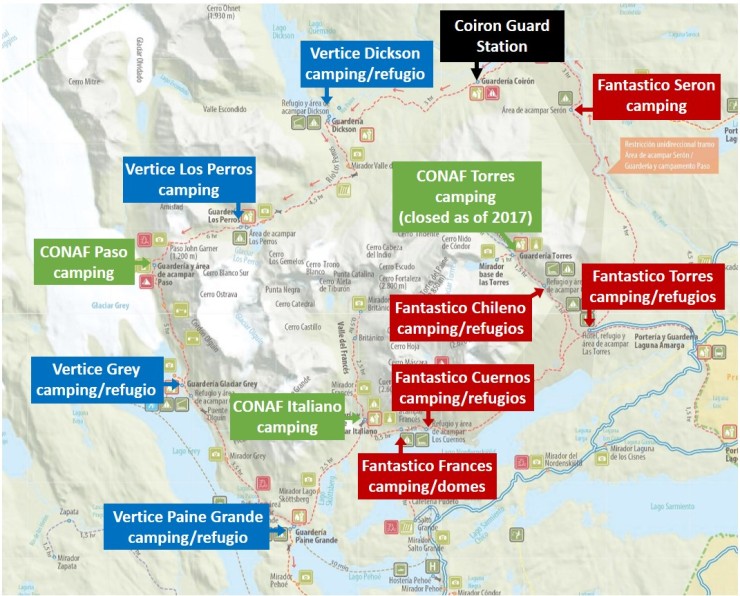
The government run CONAF campsites are free of charge, but have the fewest amenities. They largely consist of tent sites, a three sided communal cooking shelter, unclean pit toilets, and water access. These sites are booked through the CONAF website and you can book sites up to 6 months in advance. The privately run establishments have more amenities and are nicer (see table below for a rough analysis of amenities). To book any of these sites, you can go to the Fantastico Sur or Vertice Patagonia websites or e-mail the companies via the contact information on their websites. We tried to book our refugios using the company websites in April 2017 for our trip in December 2017, but both online booking systems were undergoing maintenance and did not work. We ended up e-mailing the companies a bunch of times and finally secured our accommodations in the middle of June. Hopefully in future seasons the companies will have better online booking systems in place!
Which camps you decide stay at will largely depend on how many days you have in the park, how much money you want to spend, and whether you prefer to camp or stay in shared bunks. A few example itineraries are as follows (we hiked the 9 day one):
- 9 days: Seron > Dickson > Los Perros > Paso > Grey > Paine Grande > Frances > Chileno or Las Torres
- 8 days: Seron > Dickson > Los Perros > Paso > Paine Grande > Frances > Chileno or Las Torres
- 7 days: Seron > Los Perros > Grey > Paine Grande > Frances > Chileno or Las Torres
- 6 days: Seron > Los Perros > Paine Grande > Frances > Chileno or Las Torres
- 5 days or fewer: good luck!
When planning your itinerary, I highly recommend including reservations at both Los Perros, and Paso (included in the 9 and 8 day itineraries above). I recommend this because you must hike over the John Garner Pass in order to get from Los Perros to Paso, and this mountain pass is occasionally closed due to bad weather (when we arrived at Los Perros, the pass had been closed for two straight days!). When the pass is closed, the CONAF rangers at Los Perros will not let you continue your trek. Since the weather over the pass is typically calmest early in the morning, you will want to stay a night at Los Perros so you can hike up the pass early the next morning. Booking a site at Paso the next day effectively builds an extra day into your itinerary. If all goes well and you make it over the pass as originally scheduled, you can stay at Paso and have a relatively easy hike from Los Perros to Paso. If the pass is closed one day and you need to stay at Los Perros an extra night, you can skip Paso the next day and hike directly from Los Perros to Grey or Paine Grande to get back on track with your itinerary. If you were hiking the 7 day itinerary, the extra day in your itinerary would be the stay at Grey. If you cannot make it over the pass one day, you would skip the night at Grey and hike all the way from Los Perros to Paine Grande. If you are hiking the 6 day (or a shorter) itinerary, you better hope the pass is open on the day you are scheduled to go over it…
We chose to do the circuit over 9 days and 8 nights because we did want not rush through the park wanted some flexibility in case the pass closed. Some people who had tighter itineraries were forced to turn around at Los Perros and head back to the Welcome Center because they did not have enough time to wait for the pass to open. This is the risk you take by planning a short itinerary.
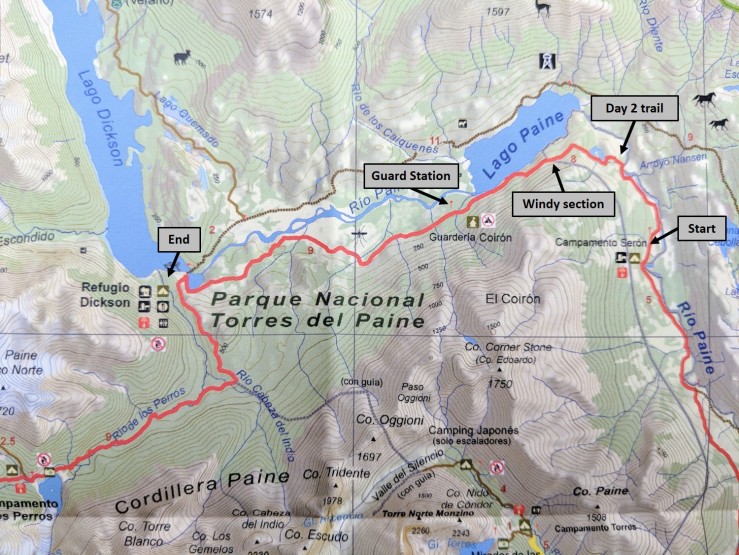
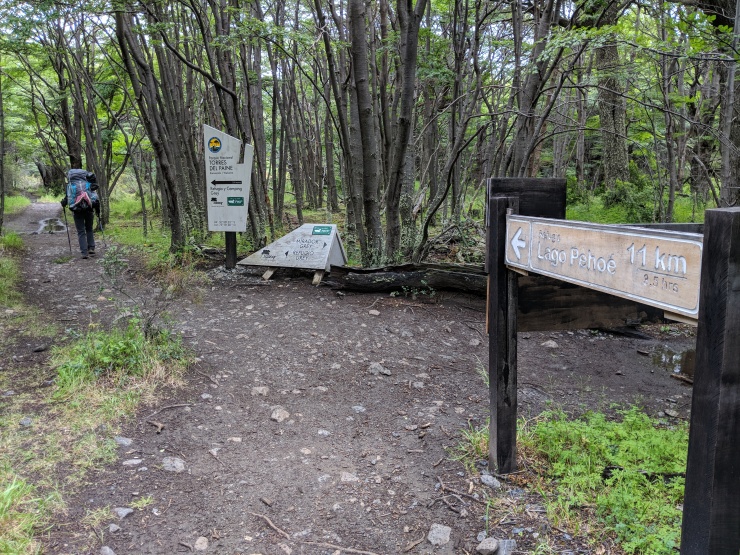
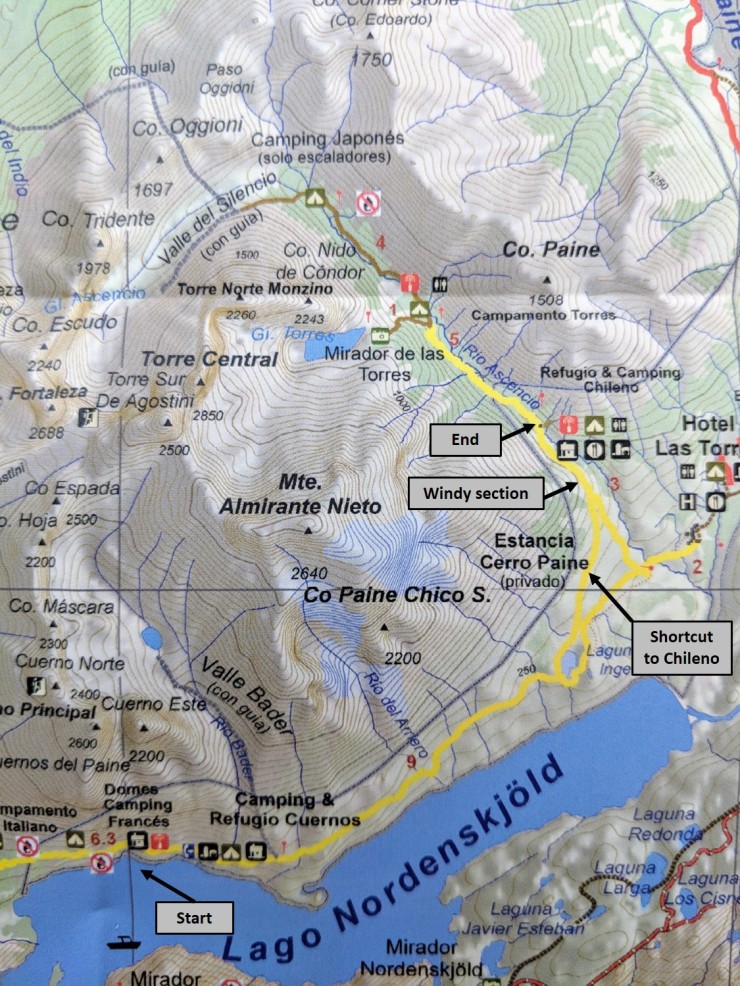
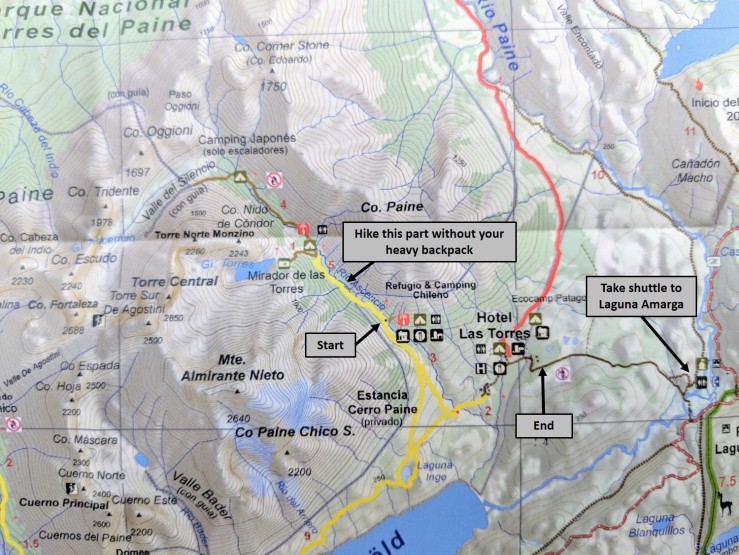
When hiking the circuit, you must go in the counter-clockwise direction from Seron to Paso. It is most popular to enter the park at the Laguna Amarga entrance and spend the first night at Seron. Shown below are the distances between all the campsites on the circuit and some common viewpoints (miradors). Note that there is a third CONAF campsite near the Mirador de las Torres, but this site was closed for the 2017-2018 hiking season. I am not sure if/when this site will reopen, but if it does, it can serve as a free replacement for Chileno. Note that it is also possible to start your Circuit trek at Paine Grande, but doing so requires you to take a longer bus ride and a catamaran trip. There is no reason to do this unless you must because of itinerary booking issues.
During the trek, the first guard station you will encounter (named Coiron) is located between Seron and Refugio Dickson. At this station you must sign a log book and show the ranger your reservation for either Refugio Dickson or Los Perros. If you do not have a reservation, the ranger will not let you through and will make you turn around. There are also guard stations at Refugio Dickson, Los Perros, and Paso. You sign a log book at these stations as well and must prove you have reservations for the Circuit trek. The afternoon before you are scheduled to go over the John Gardner Pass you should check-in with the rangers and ask if the pass is likely to be open in the morning. You can then prepare yourself accordingly.
Click here to read more about Logistics
Logistics: After securing your camping reservations, you should decide how you want to get to Patagonia and Torres del Paine National Park. There are two main routes to the park, and they both involve getting to Puerto Natales, which is the jumping off point for the park. Option 1 is to fly into Santiago, Chile, take a 3.5 hour connecting flight from Santiago to Punta Arenas, Chile, and then take a 3 hour bus ride to Puerto Natales. Option 2 is to fly into Buenos Aires, Argentina, take a 3 hour connecting flight to El Calafate, Argentina, and then take a 5 hour bus ride to Puerto Natales (this involves a border crossing, which can take a while).
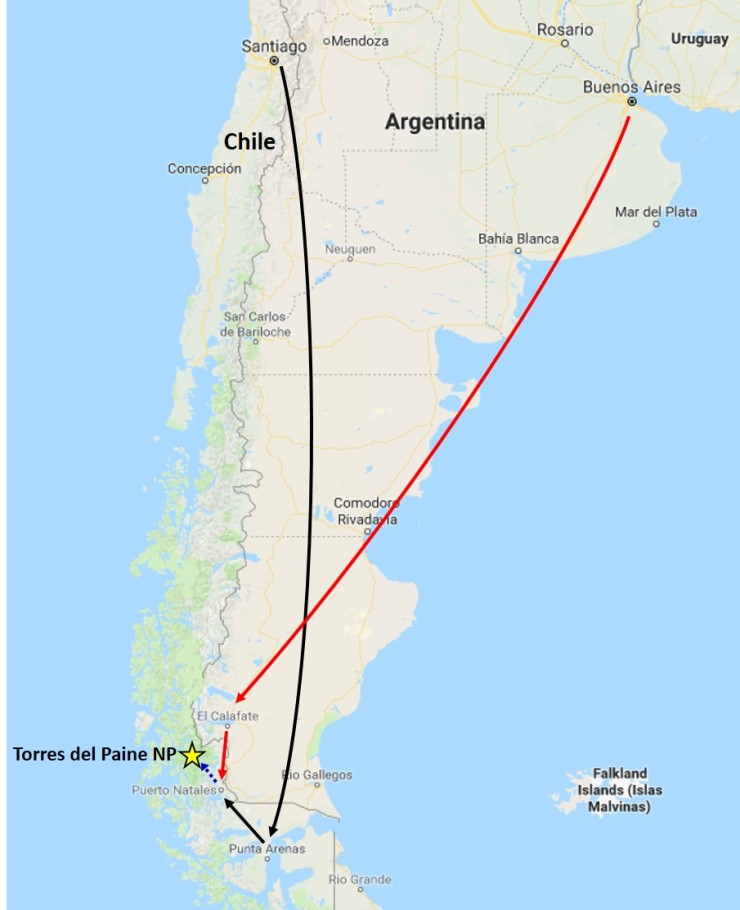
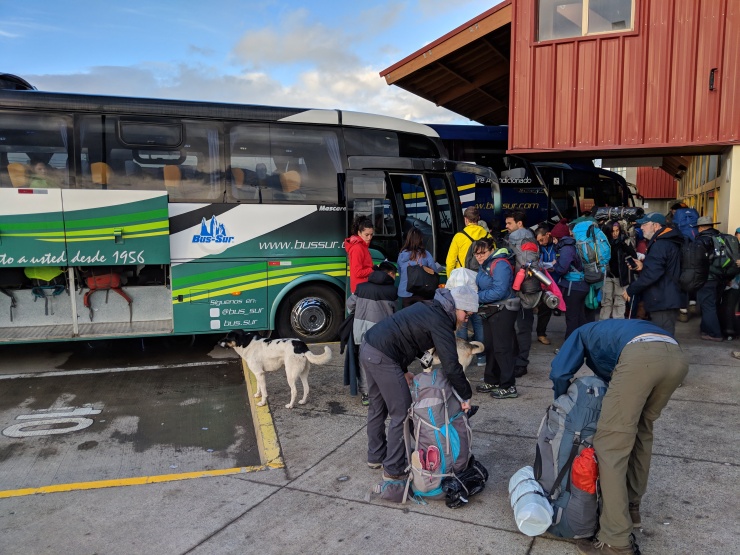
We chose option 1 and flew into Santiago in the morning (it was cheapest for us), grabbed an afternoon flight to Punta Arenas, and took an evening bus ride into Puerto Natales. When then stayed in Puerto Natales for two nights so we could rest up and buy supplies for the trek. LATAM and Sky Airline operate flights to Punta Arenas. Several companies run buses from the Punta Arenas airport to Puerto Natales and from what we could tell, the services were largely comparable between companies (Bus-Sur and Buses Fernandez are two options). It is advisable to book your bus tickets online before arriving to ensure you have a guaranteed seat.
Once in Puerto Natales, the final step in the journey is a ~2.5 hour bus ride that takes you to the Torres del Paine National Park entrance. You want to reserve your round-trip ticket to/from Torres del Paine at least the day before your trip to guarantee availability. The buses leave in the early morning so you can get to the park and start hiking on the same day. I highly recommend taking the earliest Bus-Sur bus to Torres del Paine, which leaves Puerto Natales at 7:00 am. This is the first bus that arrives at the park entrance, so you are able to avoid long lines at the Laguna Amarga park entrance.
When your bus arrives at the Laguna Amarga entrance, you will want to quickly grab your things, exit the bus, and get in line at the park office. In the office, you will fill out a couple forms, pay the entrance fee (21,000 CLP per person in cash), and watch a quick informational video about rules within the park. Once you finish that, hurry back over to the bus area and look for the Hotel Las Torres hiker shuttle. This shuttle costs 3,000 CLP (also cash, pay on board) and takes you from the Laguna Amarga park entrance to the Welcome Center (~1.2 km from Hotel Las Torres) where you will begin your hike. Note that a trail going from the Laguna Armarga Entrance directly to Camp Seron appears on some maps of the park. It more or less follows the Rio Paine and eventually meets up the trail that leads to Seron from the Welcome Center. If you take this trail, you can skip the Hotel Torres shuttle and start the trek right away. We did not take this trail though, so I cannot comment on whether or not it is well marked.

At the Welcome Center you can use the restroom and get ready to take off on the hike. They sell food and beer here, but you likely will not utilize these options until you arrive here again after finishing the hike! When ready, you begin hiking straight to Seron from the Welcome Center. Many other people may start hiking towards Hotel Las Torres, but do not follow these people (they are likely hiking the “W” trek) and instead head North on the trail that goes directly to Seron.
When you finish the Circuit, you will come back to the Welcome Center and wait for the Hotel hiker shuttle to take you back to the Laguna Amarga entrance. We had tickets for the 1:30 pm Bus-Sur bus from Torres del Paine to Puerto Natales, so we grabbed the first afternoon shuttle at 1 pm. I would advise booking an early afternoon bus ticket back to Puerto Natales (between 1:30-3:00 pm), because you will likely finish your hike early on the last day and will not want to wait around for your bus.
Click here to read more about Weather and Trail Conditions
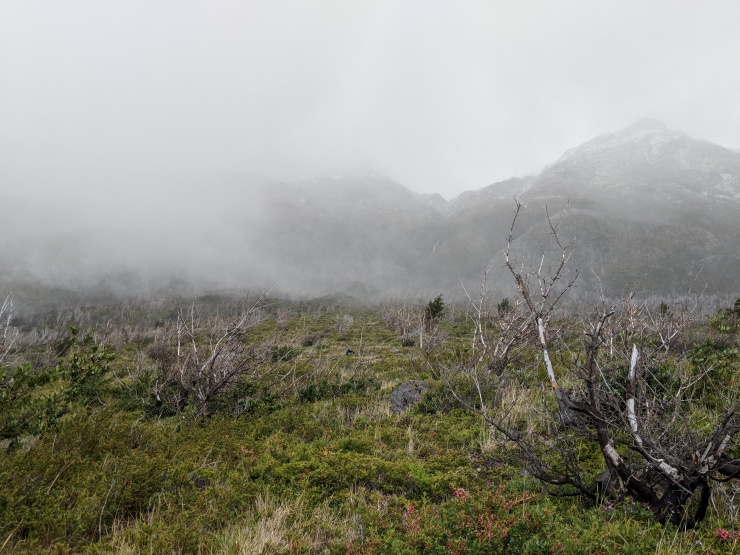
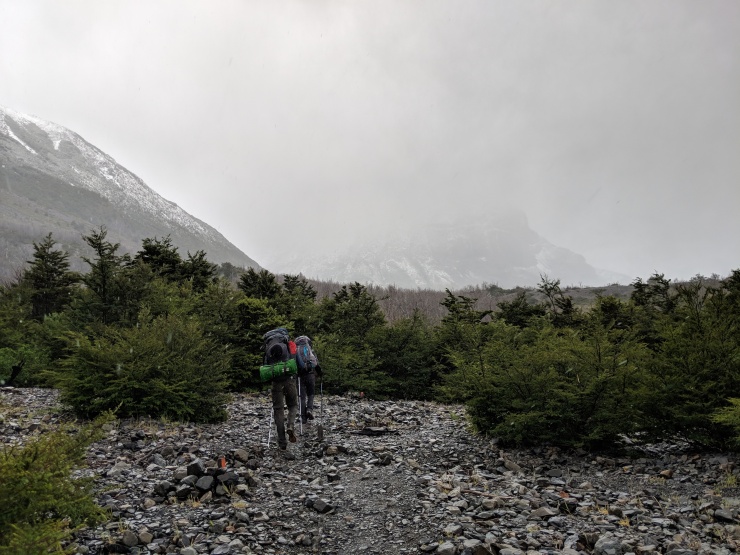
Weather and Trail Conditions: As I said previously, be prepared for all types of weather in Torres del Paine National Park. It was overall pretty cold for us in late December. Temperatures were comfortable while hiking, and we generally just wore a hiking shirt and a rain jacket. In the evening, however, the temperature dropped and the wind made things very cold. We typically ate dinner and then retired to our tent by ~8pm. It was also very cold in the mornings. Basically, do not expect to be comfortably lounging outside at camp until 11pm. It is more likely that you will seek shelter at night to escape the cold temperatures and wind.
Because the weather can change quickly, you should exercise some caution when hiking over the John Garner Pass and when hiking to the different miradors. Take the advice of the CONAF rangers and do not proceed if they advise against doing so. In bad weather conditions, the visibility can be terrible and it is easy to get lost. Also, do not get discouraged if you arrive at a lookout or mirador and the view is cloudy. Since the weather changes quickly, if you wait ~30 minutes odds are the clouds will temporarily clear!
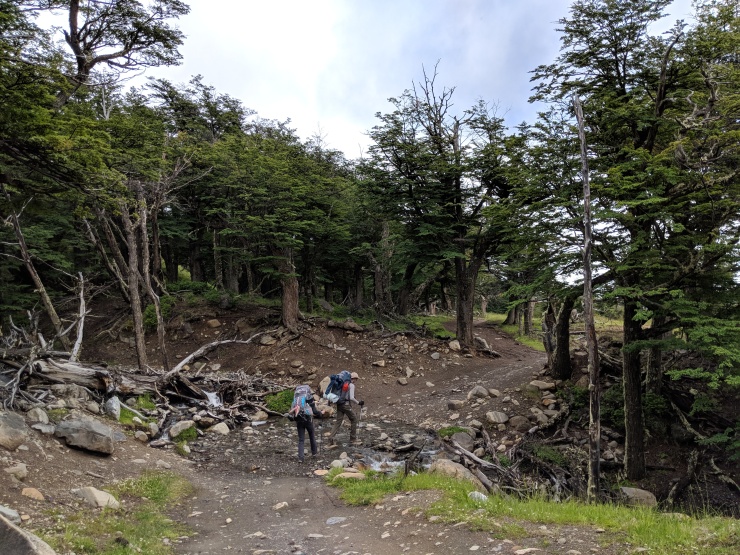
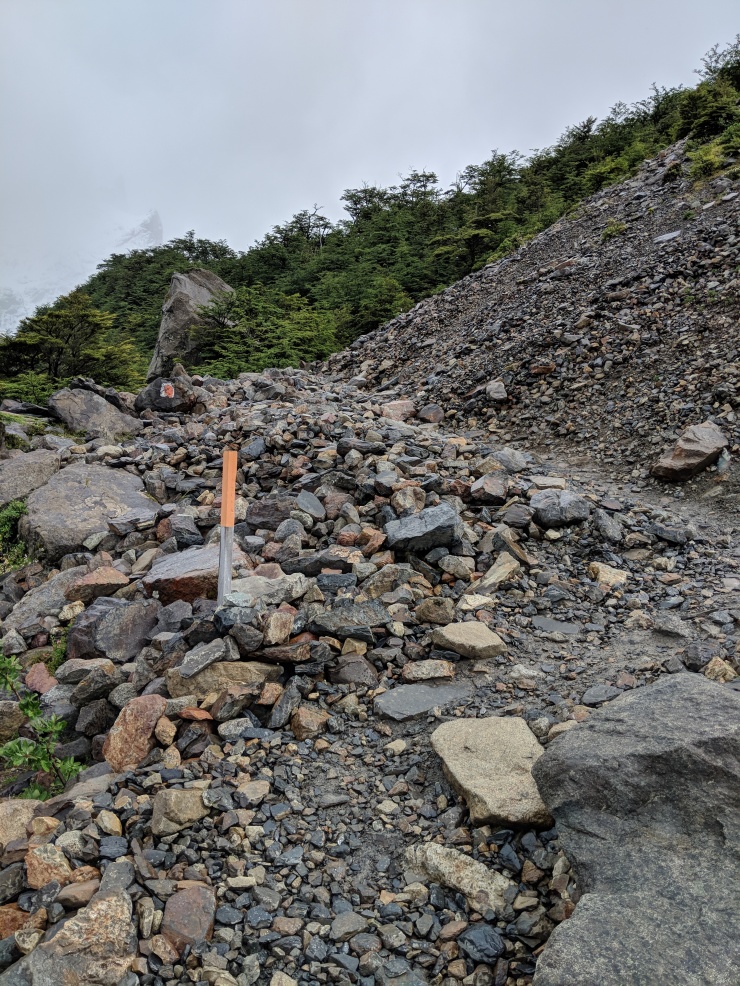
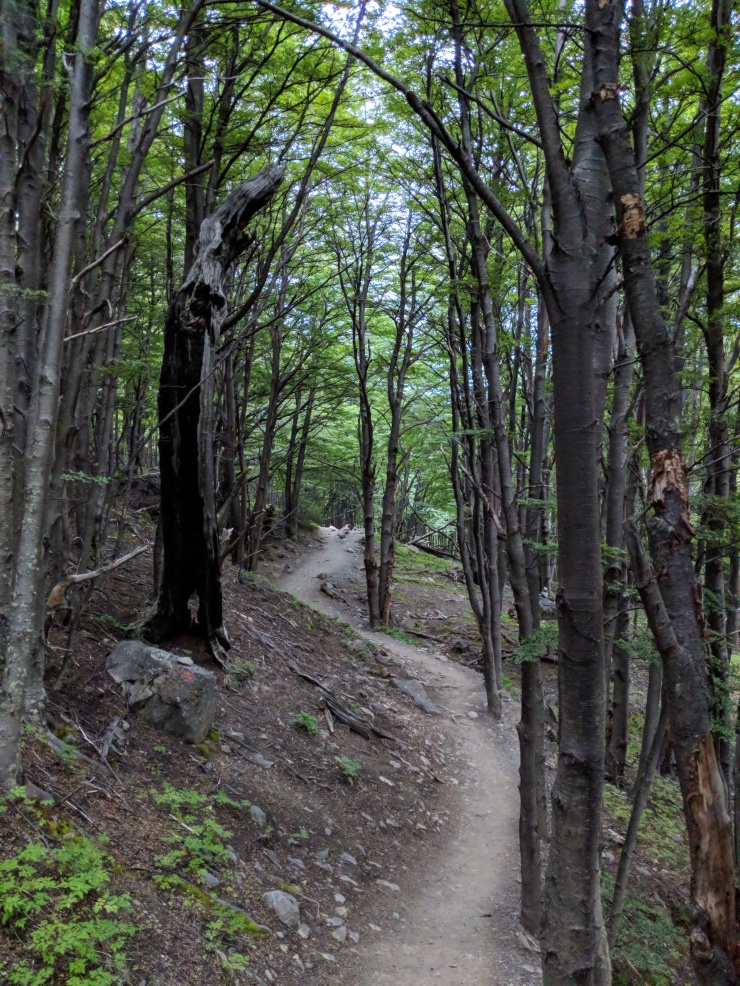
The trails in the park are not very well-marked, but we never had any issues getting lost. Keep an eye out for orange posts and rocks that are painted orange as these mark the trails. The trails often split into two lanes and then meet back together, so it can be a little annoying deciding which routes to take. That said, the Circuit is really the only major trail around the park, so it is difficult to get too far off trail. Some of the sections of the trail are very muddy, so be prepared to get dirty. There are also several stream crossings that you must rock hop across.
Click here to read more about Difficulty
Difficulty: Given that we did the trek over 9 days and averaged less than 10 miles a day, it was not too difficult overall. The most acutely difficult section was going up over the John Garner Pass and then coming back down (it was super steep each way). There was also strong wind in sections that made things challenging. The hikes up to the miradors were steep, but you can do these without your backpack. In general, if you are used to multiday backpacking trips, you will likely be fine on the Circuit. There are no issues with high altitude, there is no technical climbing, and there is no advanced route finding required.
However, if you are new to backpacking, you will want to take precautions when hiking the Circuit. I would plan your itinerary such that you have 9 days to do the trek, and I would hike the trail with a group (hopefully with someone who has backpacking experience). The conditions can be extreme along the trail, so you need to be comfortable with steep trails and strong winds. At times the wind was so strong it was necessary to kneel down for stability, and we had to guard our faces from flying sand. One person even had a panic attack on the trail and had to be closely guided by two strangers. If you are inexperienced, not prepared for Patagonia weather, and go on the hike alone, you end up making strangers worry about you and take care of you. Know what you are getting into beforehand!
Supplies:
When backpacking in Patagonia, you need to be prepared for all types of weather. We hiked right at the start of Summer and encountered rain, sleet, snow, beautiful sunshine, howling winds, and cold nights. The most important thing is to bring two sets of clothing – one set of hiking clothes and one set of dry, warm clothes for camp.
Hiking clothes:
- a lightweight hiking rain jacket (North Face Venture 2 Jacket)
- fast drying synthetic hiking pants (prAna Zion Pants)
- a quick drying long sleeve hiking shirt (Columbia Silver Ridge L/S Shirt)
- wool outer socks (People Socks Moreno 4-pack)
- thin blister preventing base socks (WrightSock double layer Coolmesh)
- quick drying synthetic boxer briefs (ExOfficio Give-N-Go)
- Gore-tex hiking shoes (adidas Outdoor Terrex Fast R Gore-Tex Shoe)
- Thin gloves (SmartWool liner gloves) and a hat securely stays on your head (Everest Designs Earflap Wool Hat)
For optimal comfort it is important to avoid cotton garments and only wear hiking clothes that dry out quickly. There is a high probability that you will get wet while hiking in Torres del Paine, and you want your clothes to dry out by the next morning. Some gear that you can probably skip and not bring includes: waterproof rain pants, gaiters , and plastic ponchos. Since the rain stops and starts quickly you will not want to constantly put this gear on and off. It is much easier to just wear a rain jacket and synthetic pants and expect to get a little wet. Since it is usually windy, you dry off quickly when it stops raining.
For your dry set of camp clothes, I highly recommend wool-based clothes. Wool is great because it doesn’t pick up funky stenches as fast at cotton or synthetic clothes. I had all wool layers for camp and didn’t have to wash any of my camp clothes for a full 9 days.
Clothes for camp:
- wool leggings (Minus33 Merino Wool Kancamagus Midweight Bottom)
- wool base layer shirt (Minus33 Merino Wool Chocorua Midweight Crew)
- warm wool overshirt (Pendleton Long Sleeve Classic-Fit Board Shirt)
- lightweight down jacket (Patagonia 800-fill Down Jacket)
- lightweight camp shoes (Xero Z-Trail lightweight sandal)
Hiking gear
- high quality topographic map (Torres del Paine map by SIG Patagon)
- topographic map (Nat Geo topographic map)
- trekking poles (Black Diamond Trail Ergo Cork Trekking Poles)
- 2 liter hydration bladder (Platypus Big Zip Water Reservoir)
- 65 liter backpack (Osprey Atmos 65 Liter pack)
- water filtration system (Platypus gravity filtration system)
- sunglasses (to protect from the sun and from wind and flying sand/dust)
- garbage bags (to put your sleeping bag and camp clothes in so they stay dry if your pack gets wet)
Camp gear
- strong tent with rain-fly (Alps Mountaineering Chaos 2 Tent)
- inflatable sleeping pad (Therm-a-Rest Trail Pro Sleeping Pad)
- sleeping bag (REI Co-op Igneo 25 Sleeping Bag)
- inflatable camping pillow (Ultralight Inflating Pillow)
- lightweight backpacking chair (Helinox Chair Zero)
- lightweight lantern (MPOWERD Luci Outdoor 2.0)
- headlamp (Black Diamond Cosmo Headlamp)
- multi-tool with knife (Gerber MDime Mini Multi-Tool)
- lightweight stove (MSR PocketRocket 2)
- lighter (BIC plastic lighters)
- 2 liter pot (GSI Outdoors Halulite Boiler Pot)
- coffee cup (GSI Outdoors Glacier Stainless Cup)
- lightweight spork (Snow Peak Titanium Spork)
- small, quick drying towel (REI mutli towel mini)
- power adapters for Chilean outlets (to charge your camera/smartphone at the refugios)
Random
- wet wipes (Stall Mates individually wrapped wipes)
- mole skin for blisters (Blister medic kit)
- lightweight trowel (GSI Sanitation Trowel)
- small amount of duct tape for gear repairs
- chapstick and sun screen
There was also some gear we brought that we ended up not really using. If we went again I would not bring the following:
- solar powered lantern (the sun was up from 5am-10:30pm)
- backpack rain cover (the wind is so strong it can easily tear off your cover)
- backpacking chairs (we either hung out in our tent because it was cold at night or used the tables/chairs provided in the cooking tents or refugios)
- bug repellent (never used it since it was always too windy for bugs)
Food: We brought all of our dehydrated meals into Chile from the US. We declared the food on the customs form and had no issue bringing it in. Our favorite meals are biscuits and gravy for breakfast and pasta primavera, chana masala, and chicken casserole for dinner. We also brought in Shot Bloks (these provide a nice energy boost while hiking), tea, and some Nuun electrolyte tablets (nice for recovery after hiking). For morning coffee, Starbucks VIA is by far the best instant option. We did not want to risk bringing dried fruit or salami into the country and having it confiscated at customs, so we bought our lunch food in Puerto Natales.
Since we did not want to carry around 9 days worth of food, we ate meals at two of the refugios. We bought dinner at Refugio Grey and we bought meals at Chileno. The dinners at the refugios are overpriced but they taste decent and are hot! If you want to buy dinner, you just need to tell the refugio front desk before ~4 pm to reserve a spot. You can also order box lunches from the refugios, but we found these to be very mediocre. The refugios also sell dry food if you want to supplement your supply along the way. Note that they do not carry dehydrated backpacking meals, and instead carry things like pasta, beans, and packaged snacks.
Trip Report for 9 Day Circuit Trek in Torres Del Paine:
Day 0: Preparing and resting in Puerto Natales
The day before our trek we took it easy and got ready. We first bought our lunch food and then bought the gas for our camping stove. For dried fruit and nuts, we found a small shop in downtown Puerto Natales with great dried apricots and tasty cashews. We then went to the grocery store and purchased salami, Pringles, cookies, and other snacks. For the camp gas, we stopped at one of the several stores that sell outdoor supplies downtown. If you want to rent any backpacking gear, this would be the time do so as well.
In the afternoon, we attended an info session at Erratic Rock Hostel that talked about what to expect on the trek. The info session was helpful, but was not necessarily a must attend if you already feel prepared. While there I also purchased a map of the park. It is not totally necessary to have a map of the park, but it is good practice to always know the route you are hiking. The Laguna Amarga entrance did not have any maps when we arrived at the park the next day, so I was happy to have purchased one beforehand.
In the evening, we got a nice dinner and then headed home to pack up our backpacks. We made sure to put our sleeping bags and dry clothes in garbage bags before putting them in our backpacks. This was a tip we learned at the info session, and it helped keep our gear dry over the course of the whole trek. Simple relying on your backpack cover to keep things dry is risky because these covers are often pulled off by the strong wind.
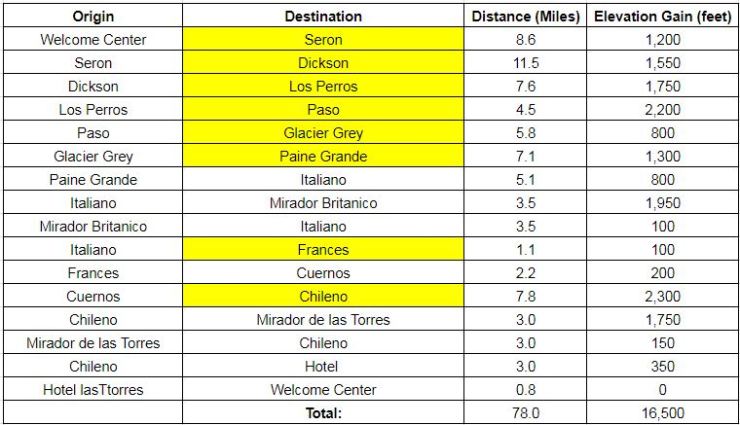
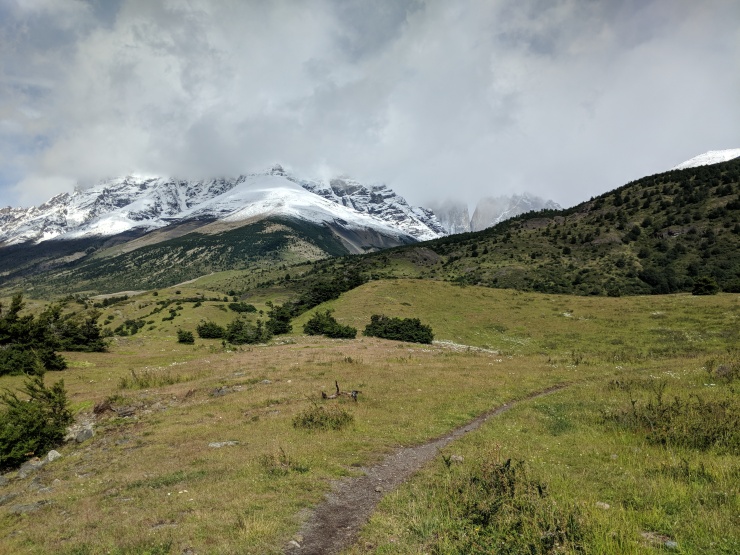
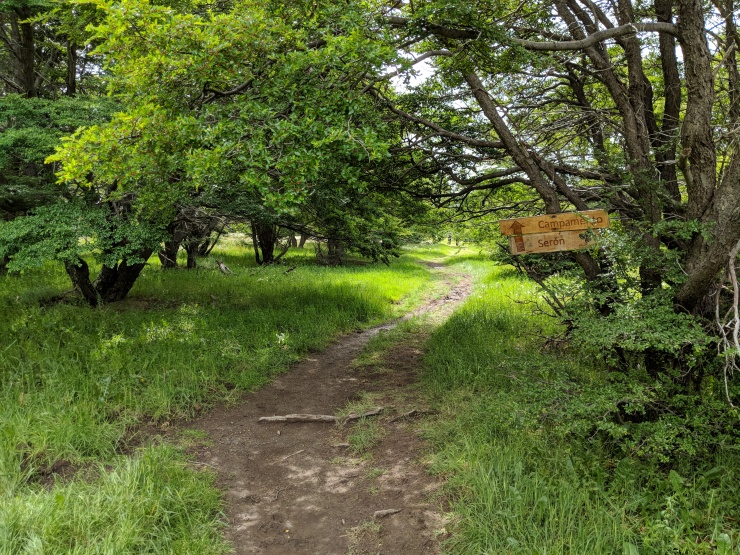
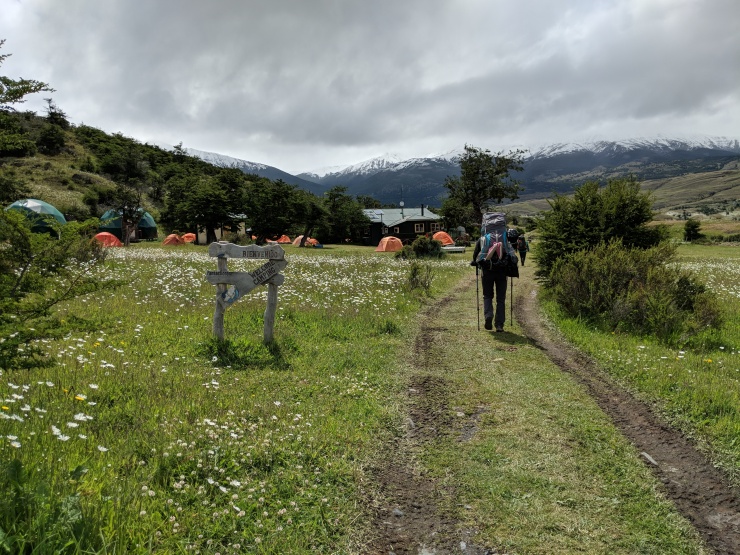
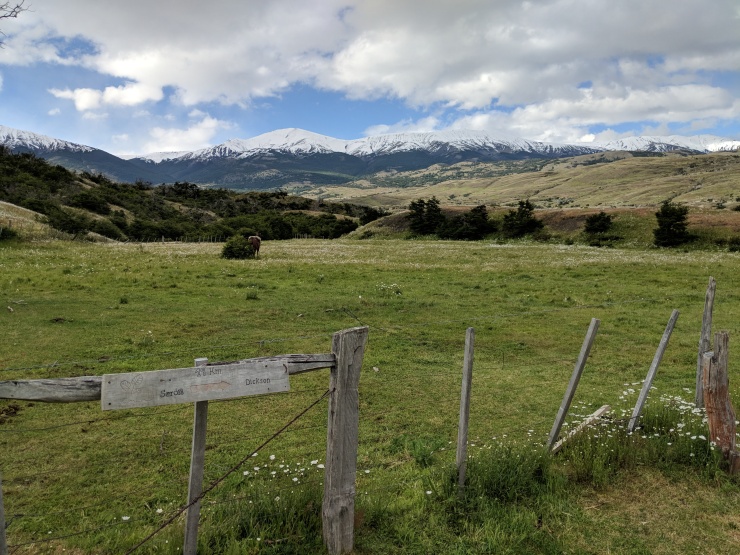
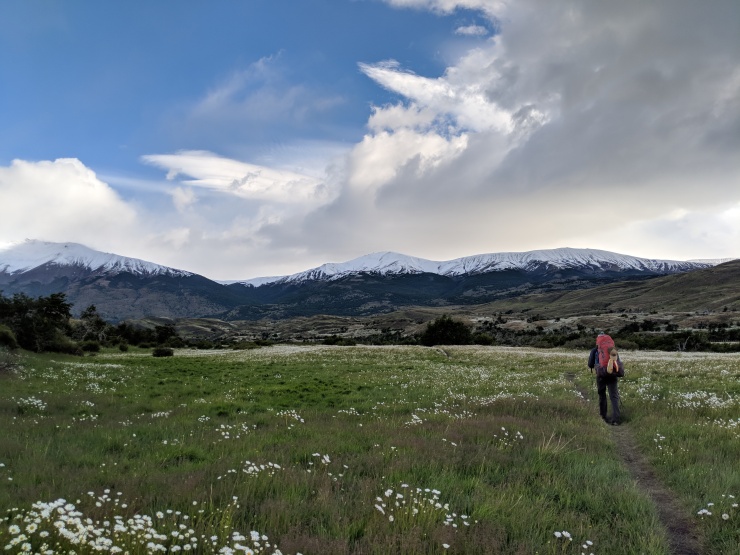
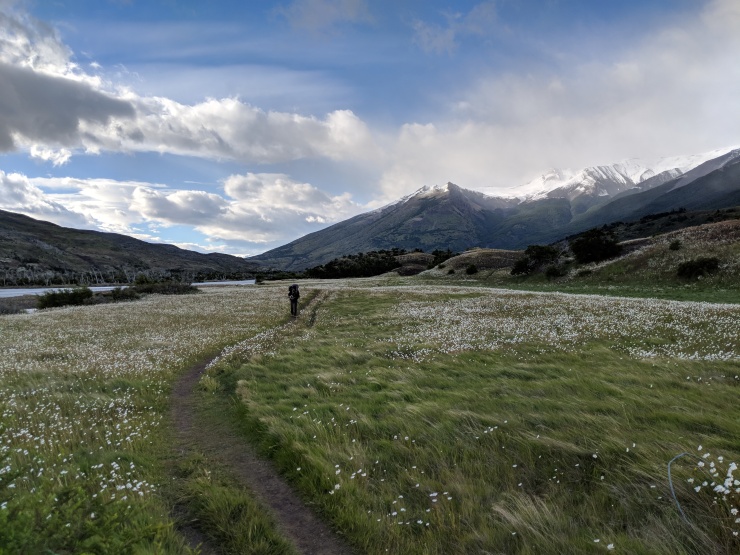
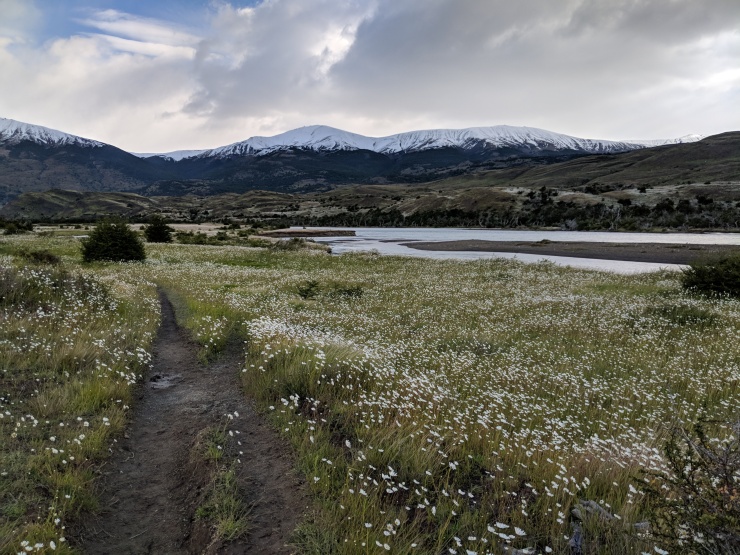
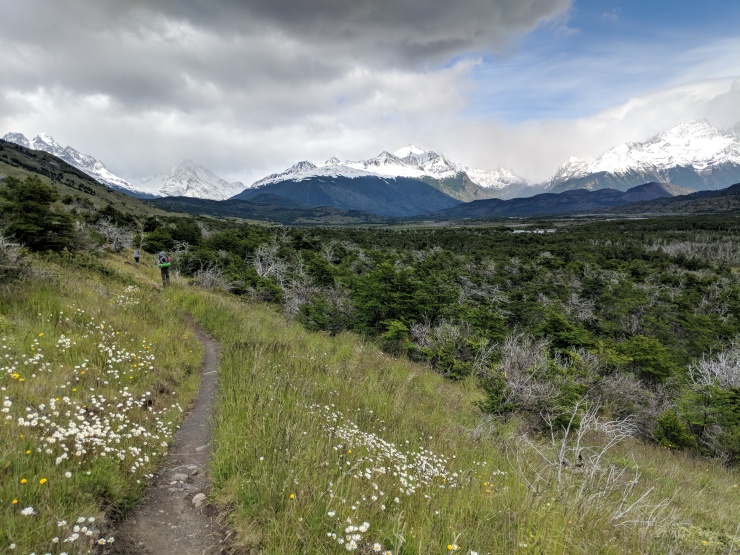
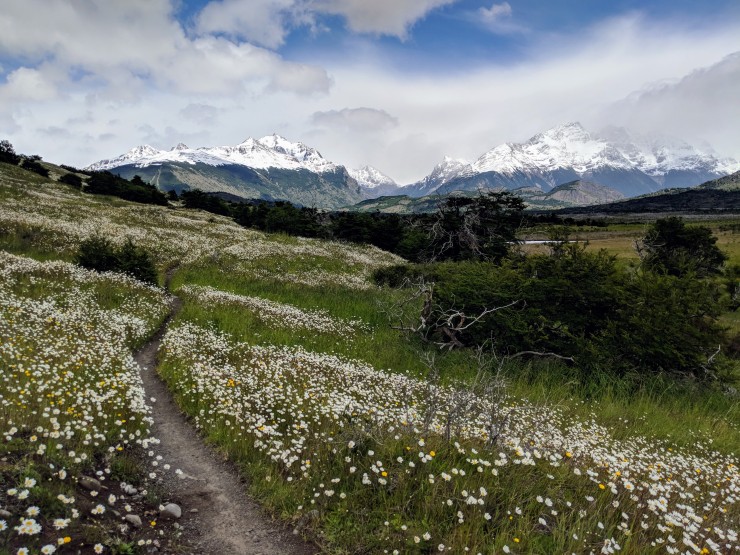
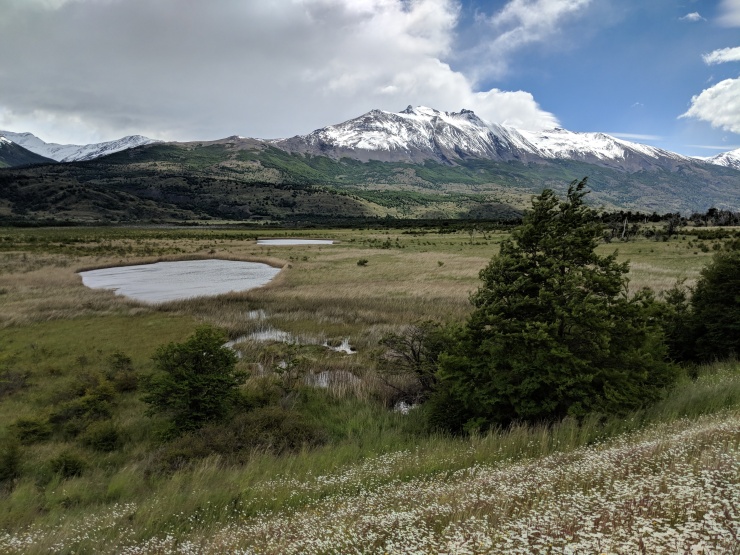
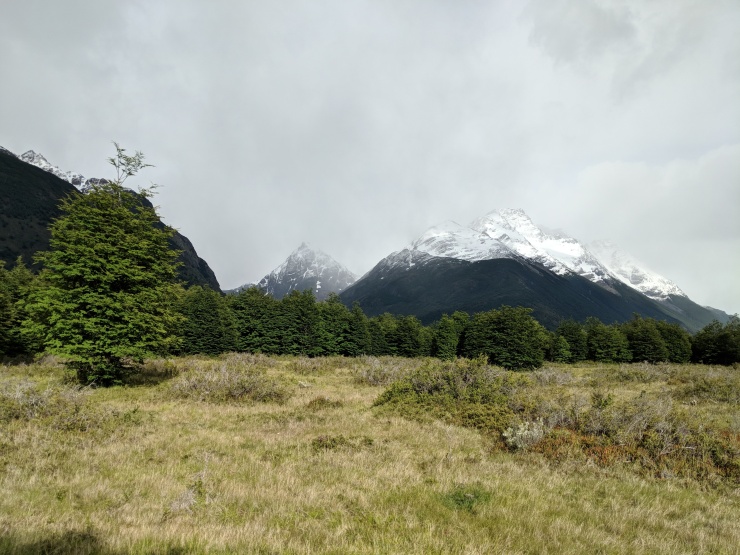
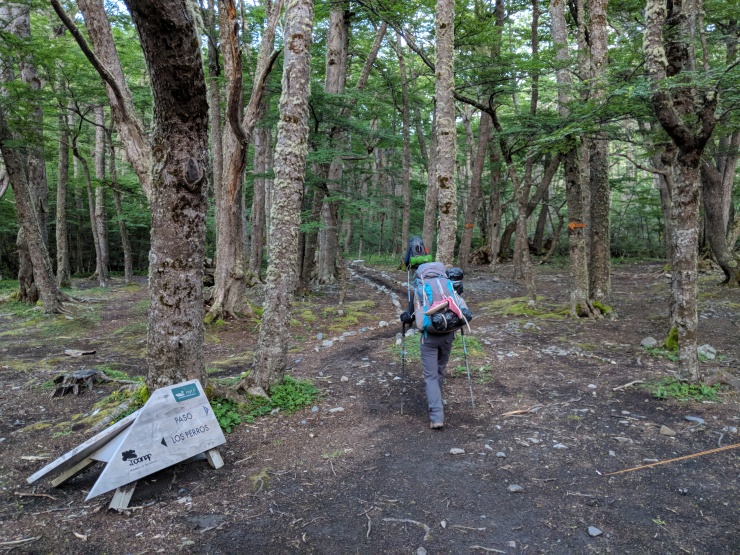
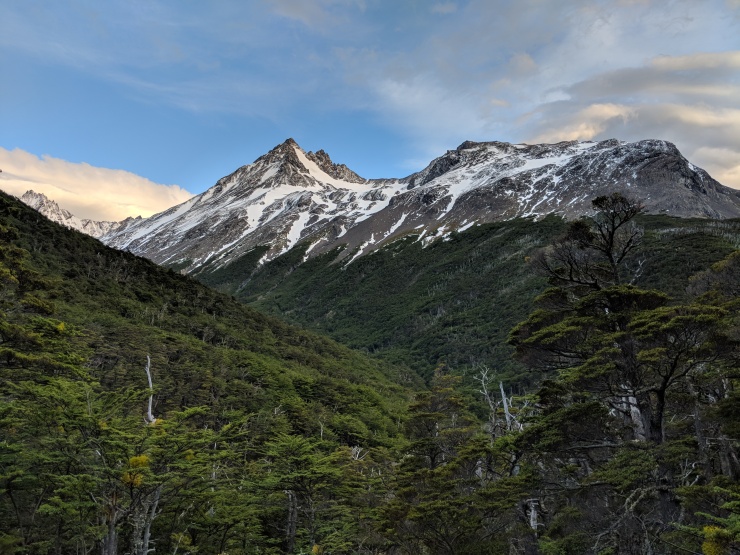
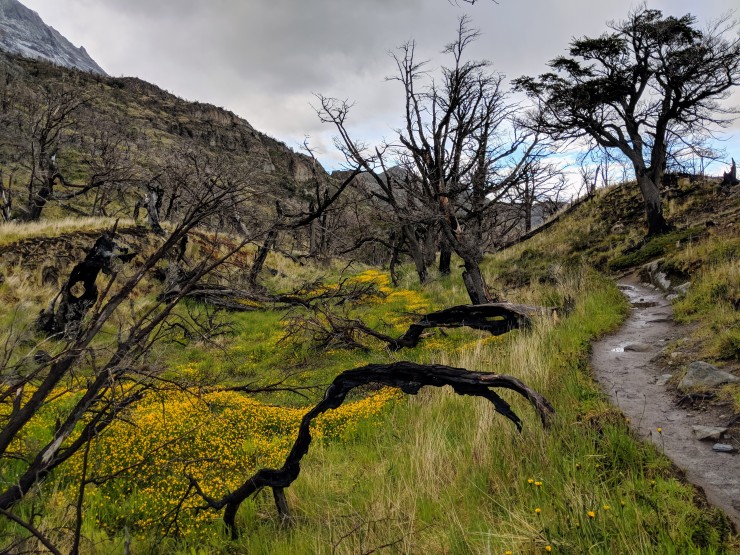
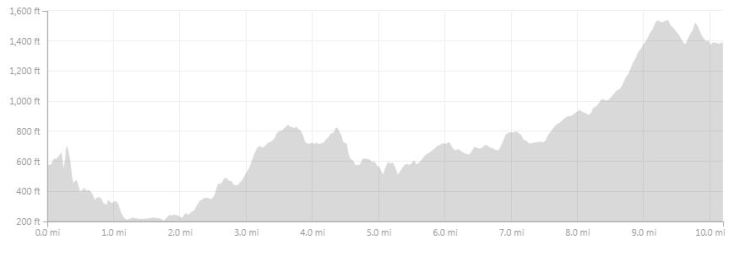
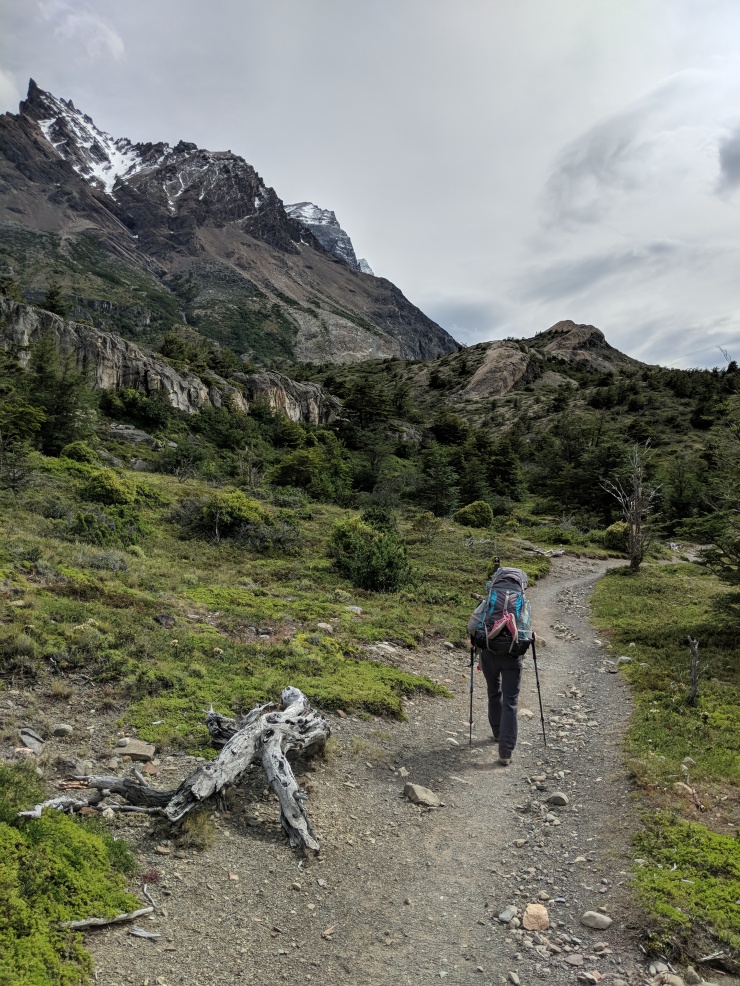
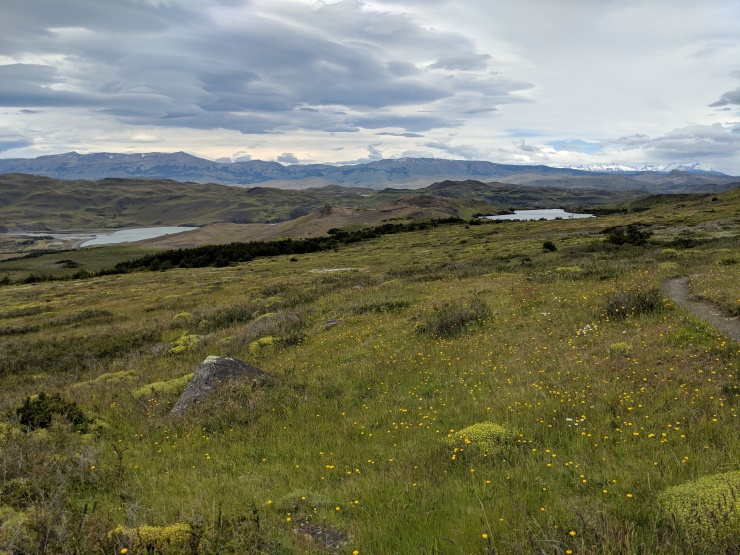
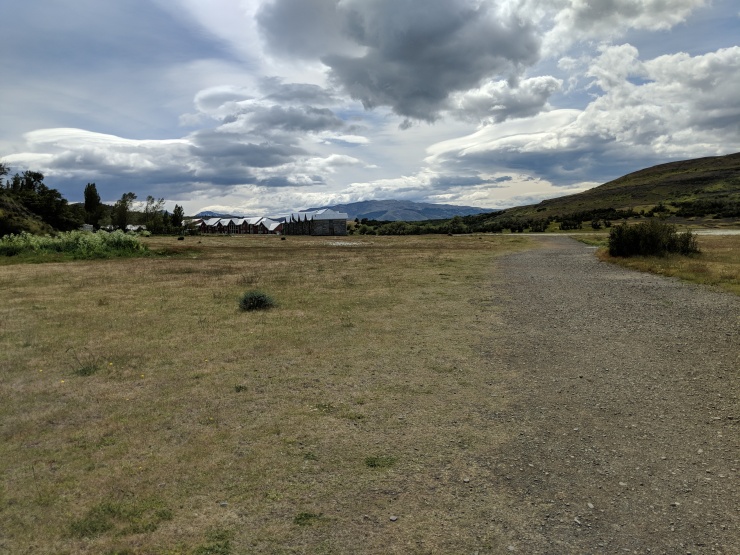
Day 1: ~8.6 miles; +1,200 feet; Torres del Paine Welcome Center to Seron Campsite
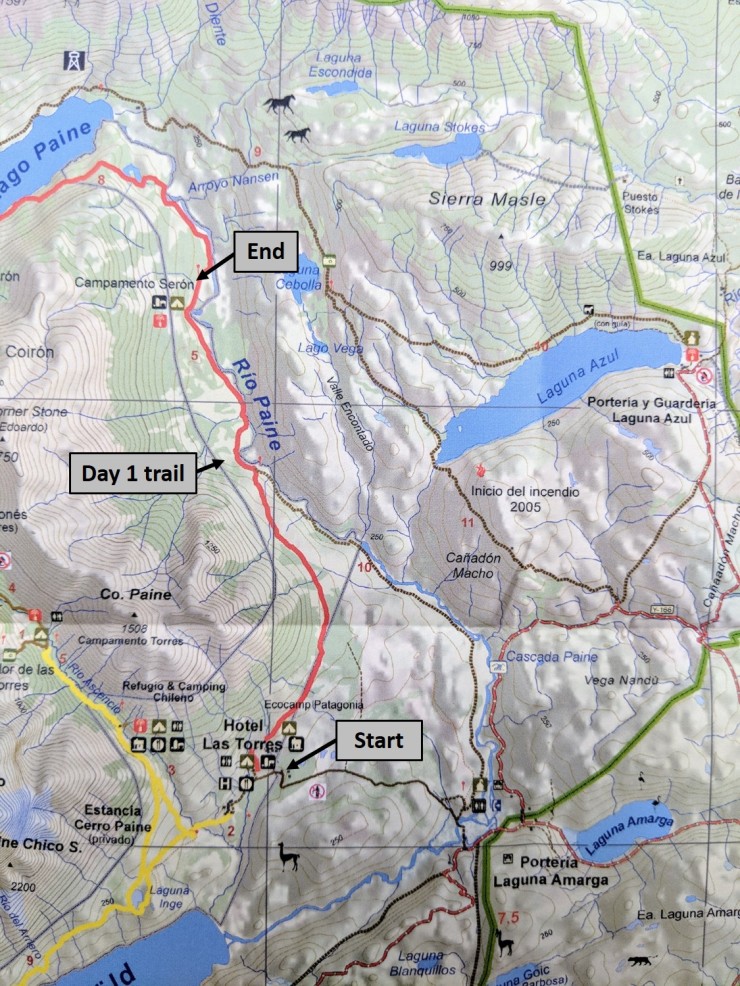
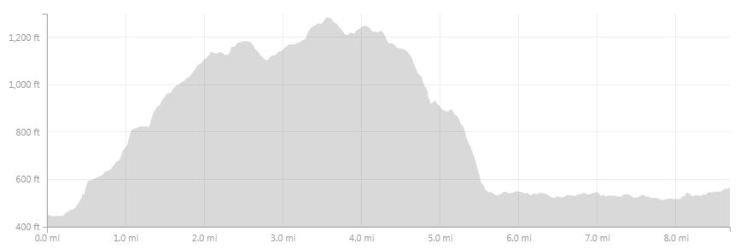
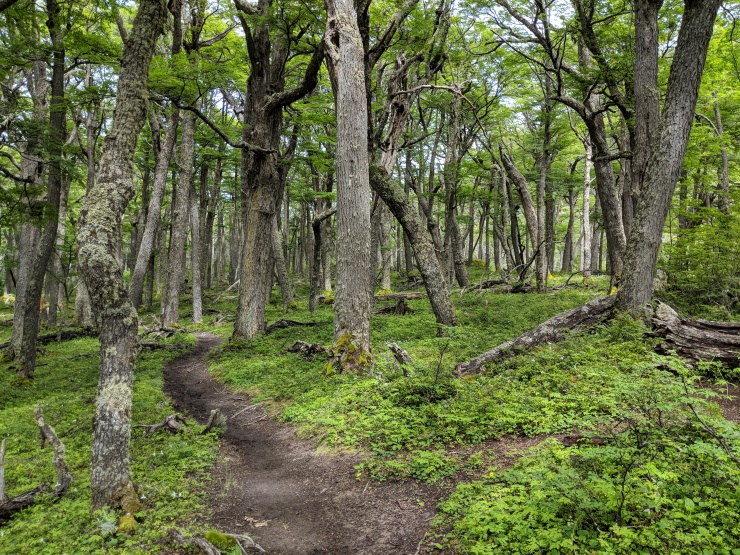
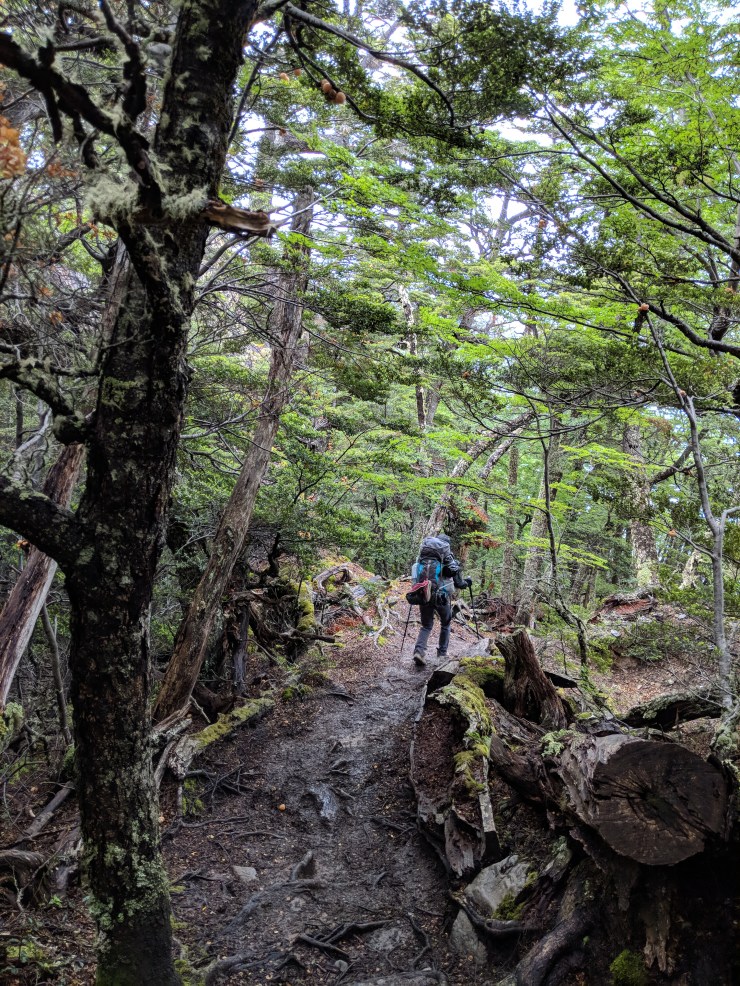
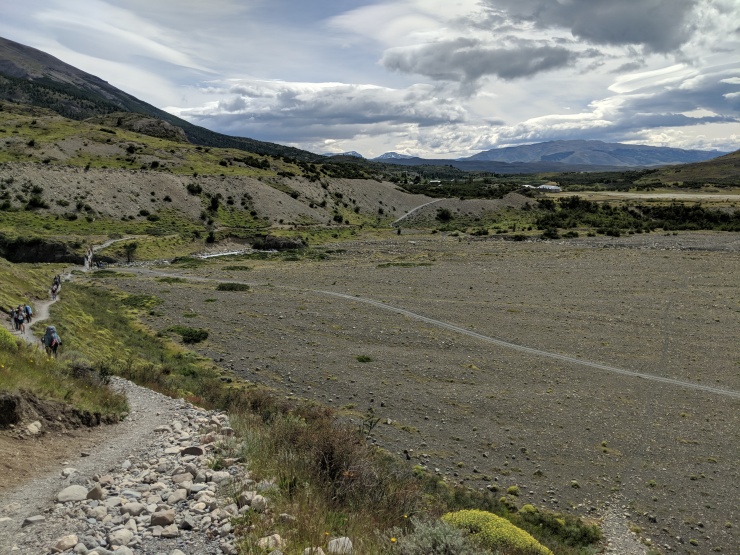
The hike on the first day is not too difficult and comes in at just under 10 miles. After an initial steady climb in the first 4 miles, the trail descends and then levels out. The views along the trail are nice but not as spectacular as what you see in the next 8 days. The trail skirts around the mountains on this day, and in different sections you hike through meadows, a mossy forest, and along a river. This day’s hike took us about 4.5 hours. We got on the trail at ~10:00 am and arrived at camp Seron at ~ 2:30 pm. Along the way, we stopped for pictures several times and took a modest lunch break.


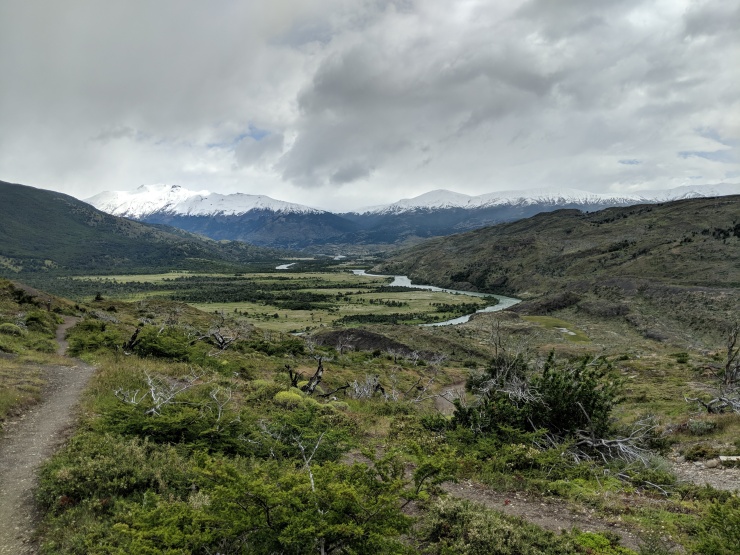


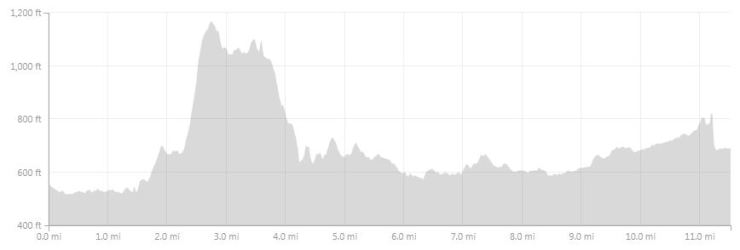
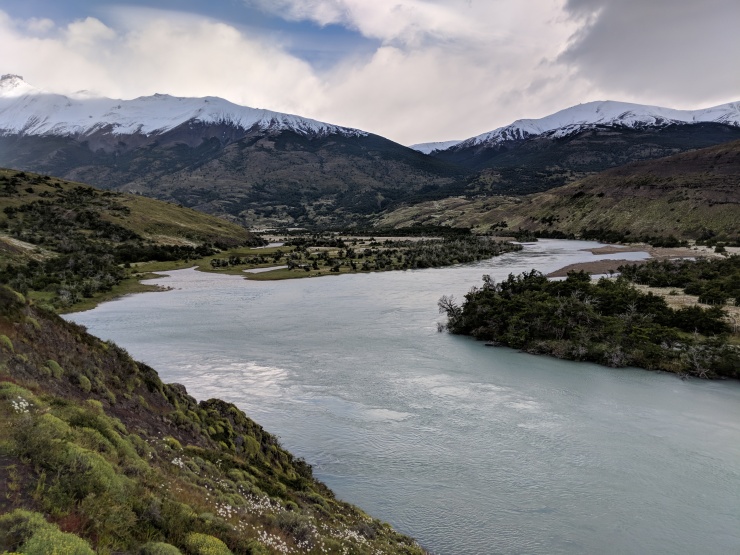
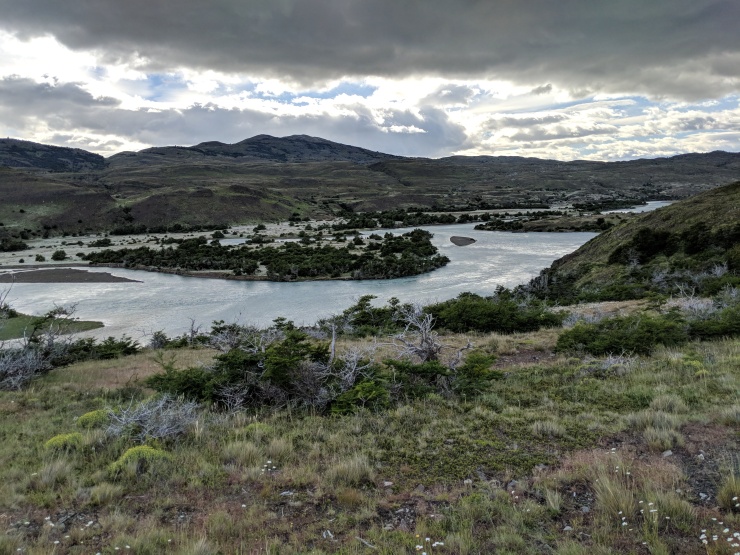
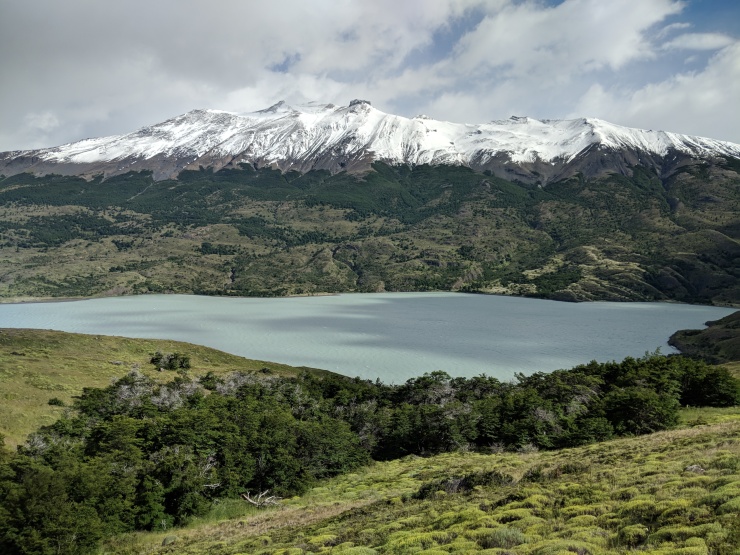
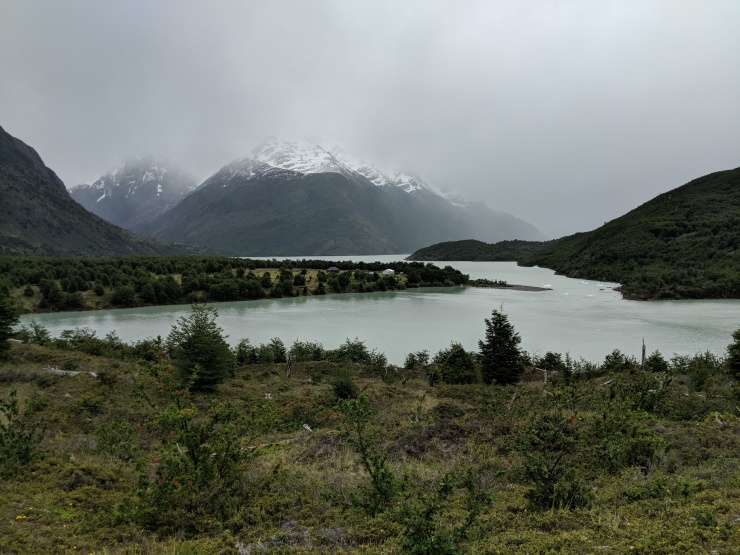
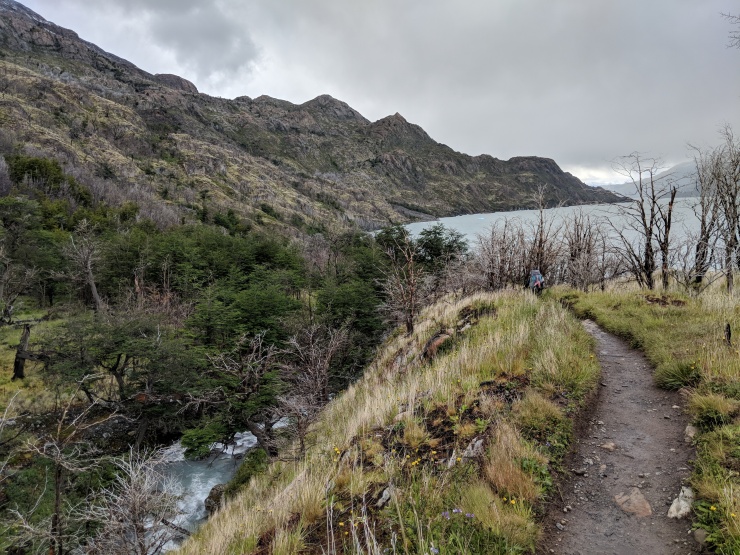
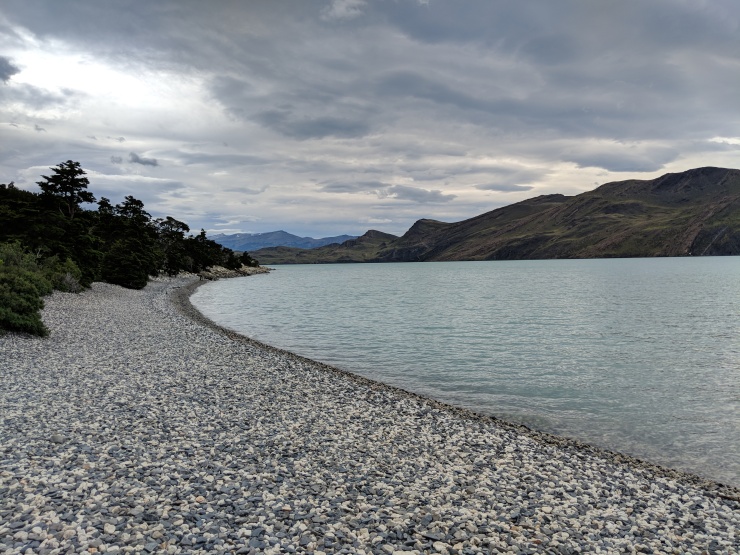
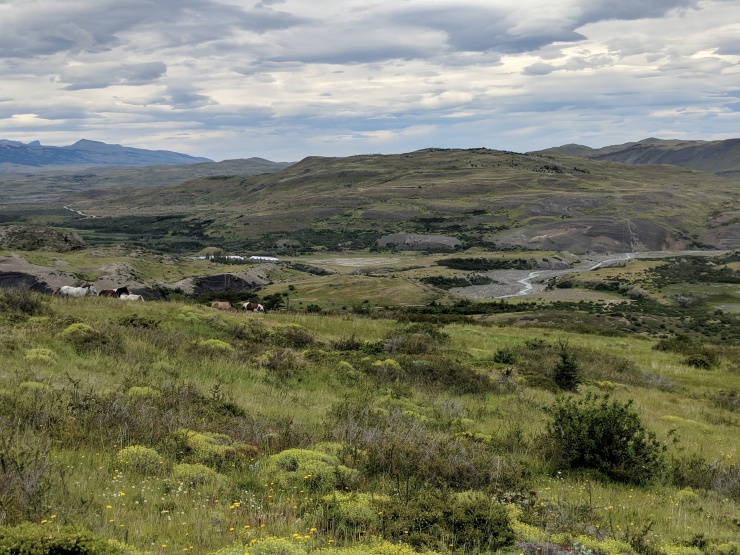
Day 2: ~11.5 miles; +1,550 feet; Seron Campsite to Refugio Dickson
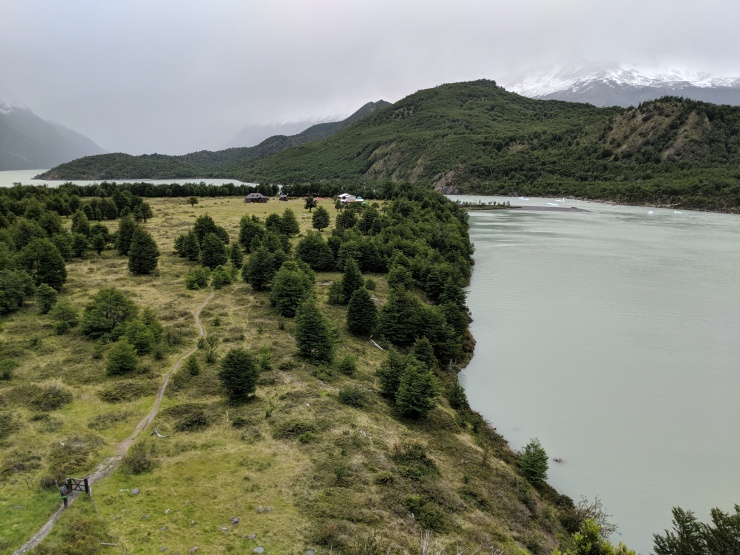
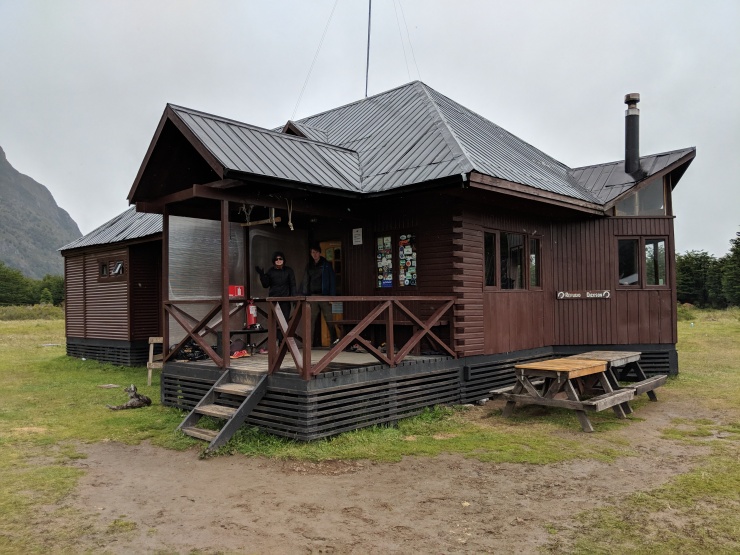
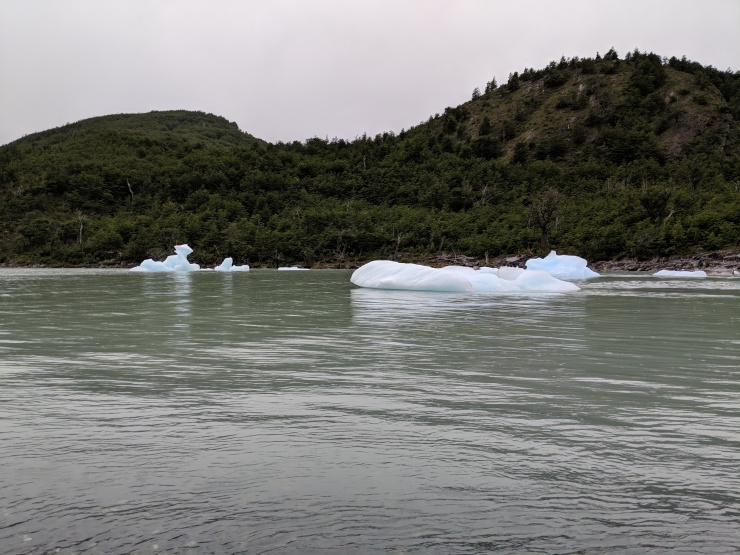
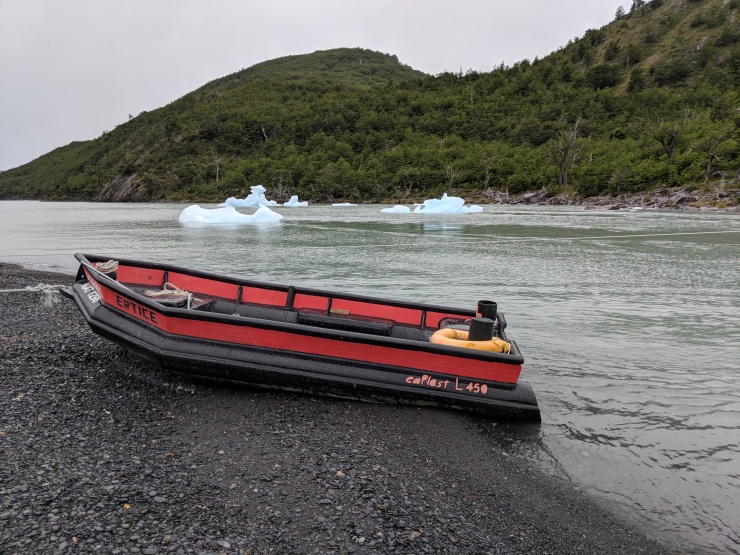
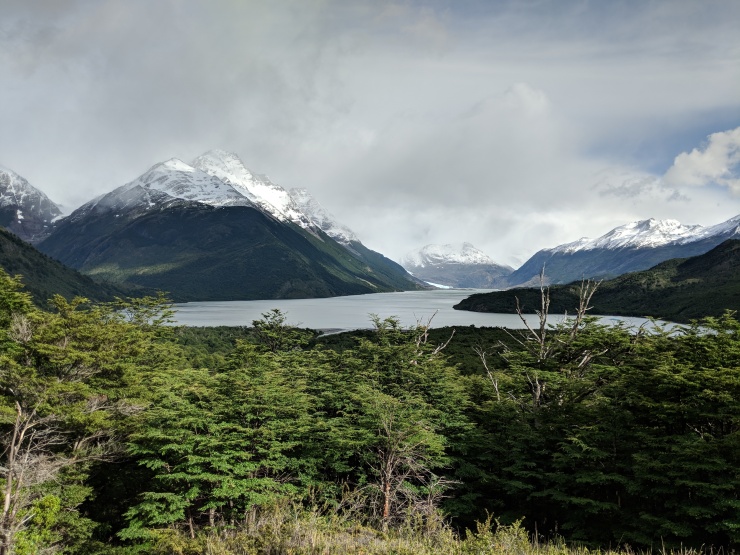
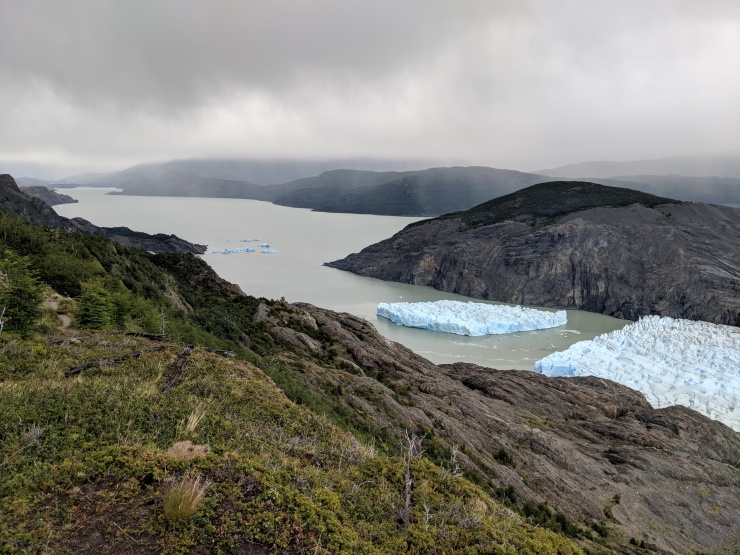
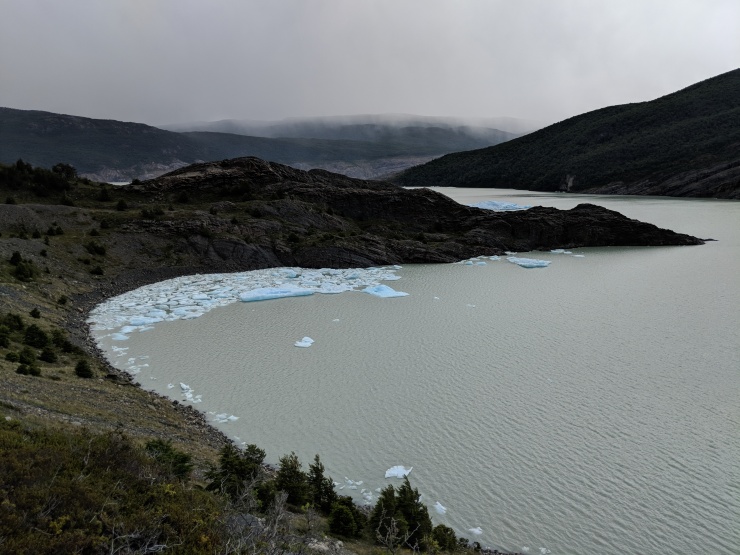
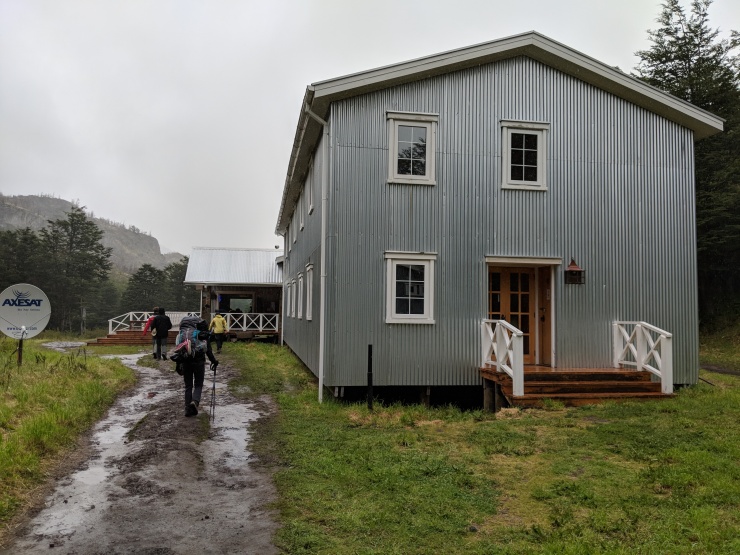
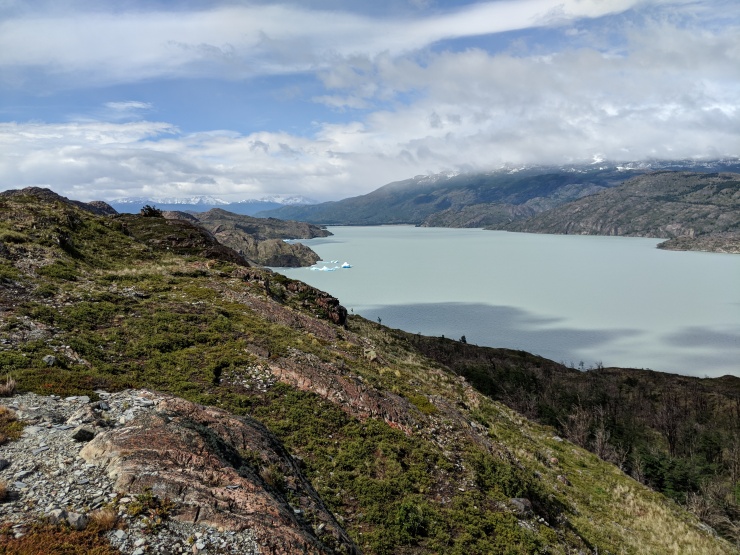
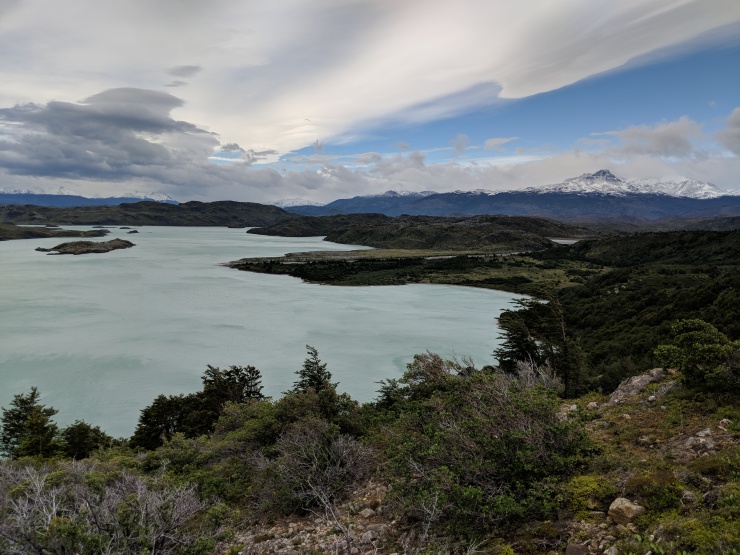
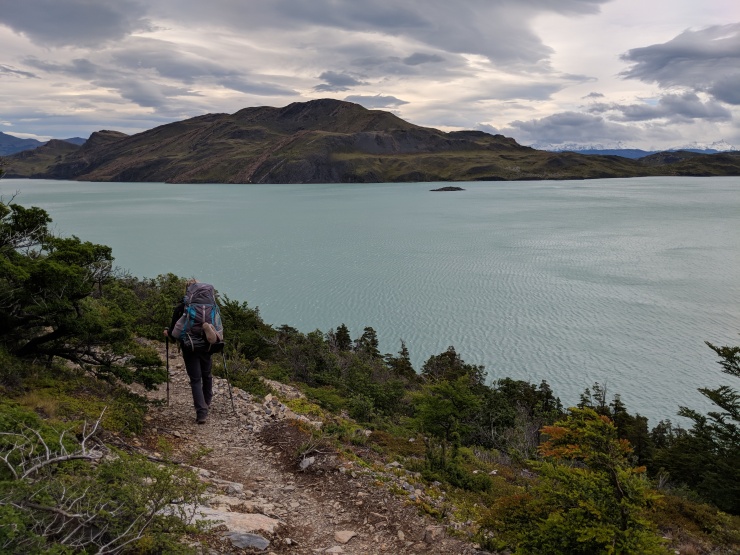
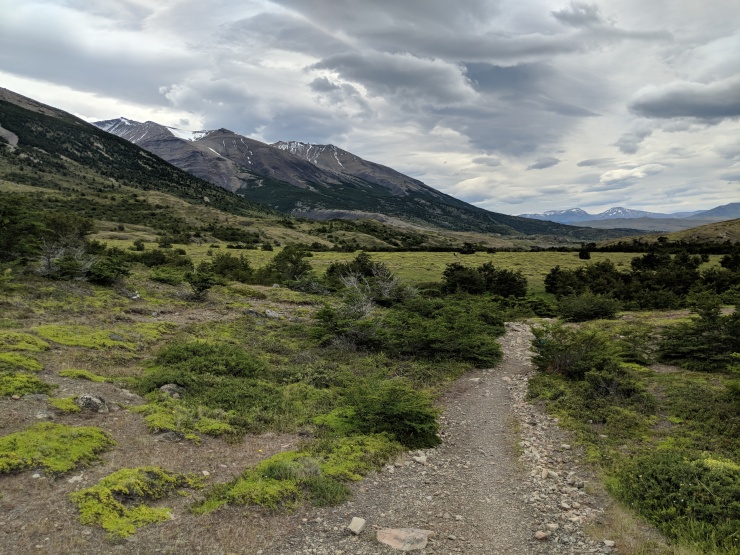
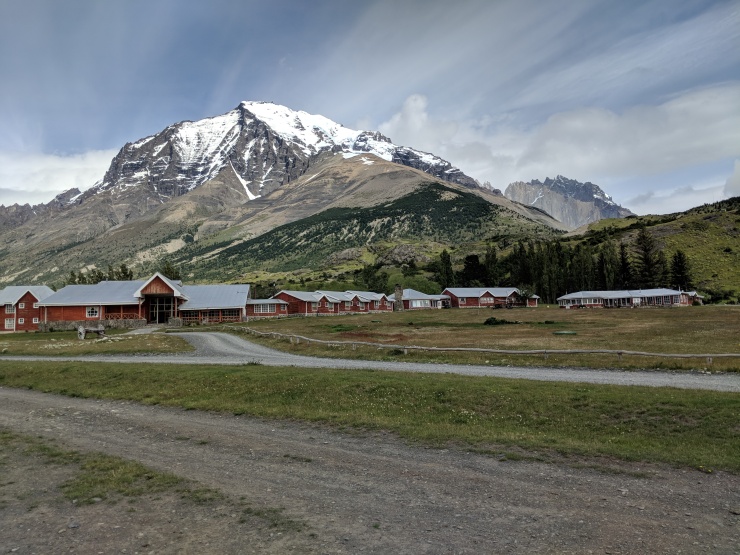
On the second day of the Circuit trek, you hike to Refugio Dickson, which sits at one of the most beautiful locations on the trek. The refugio and campsite sit on a flat meadow that is adjacent to Lago Dickson and is surrounded by mountain peaks on North and South. The hike from Seron to Dickson is quite beautiful, and you follow Rio Paine almost the whole way. Along the trail you go over a modest pass and get awesome views of Lago Paine. Just be prepared for windy conditions as you traverse a ledge above Lago Paine. The day we hiked the winds were so strong we could hardly stand up straight without trekking poles. Luckily the wind died down once we descended closer to the level of the water. When you arrive at the refugio, you will first encounter a guard station. You check in there and prove you have a reservation. Then, you go to either the campground check-in or the refugio check-in. After checking in, I would advise taking a walk to the shore of Lago Dickson to see the floating icebergs and surrounding scenery.
We stayed in the refugio on this night to take a short break from camping. Having a bed was nice, but there are some logistical challenges of sharing a room with 5 other backpackers. It can be a hassle to quietly go in and out of the room and it is tough to pack and unpack your backpack in such a small space. The major benefit of the refugio was being able to play cards indoors next to a warm wood-burning stove in the evening. They also had power for a couple hours in the evening, which allowed us to charge our cameras. There were a couple things we didn’t like about the refugio experience though. If you want to cook your own food, you are forced to walk over to the campsite cooking area (which was in disrepair) and prepare your food there. We were allowed to bring our cooked food into the refugio to eat, but the staff made us feel like we were intruding on them by doing so. It also felt like the staff was waiting for all the hikers to go to bed, so that they could take over the common area and hang out among themselves. In hindsight, I would probably camp here since it’s a small refugio and feels a little cramped (Refugio Grey and Paine Grande are much larger).
This hike took us about 7 hours. We got on the trail at ~8:00 am and arrived at Dickson at 3:00 pm. Along the way, we stopped for pictures several times, took a modest lunch break, and took at a short break at the Coiron Guard Station.


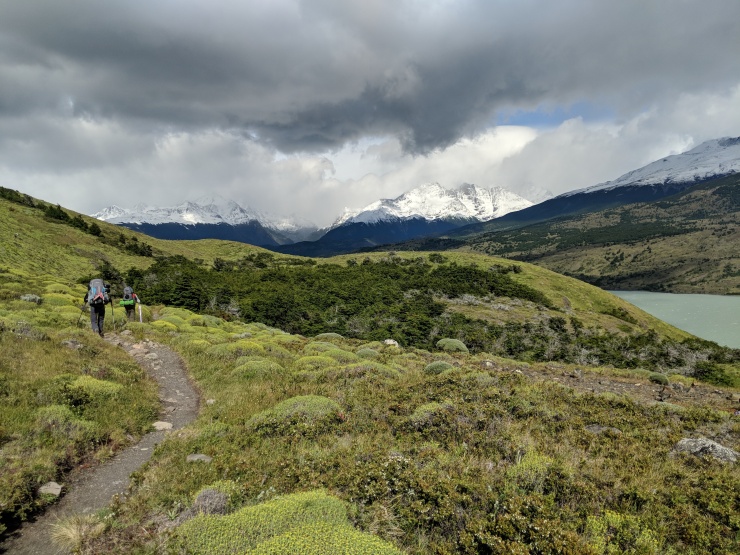

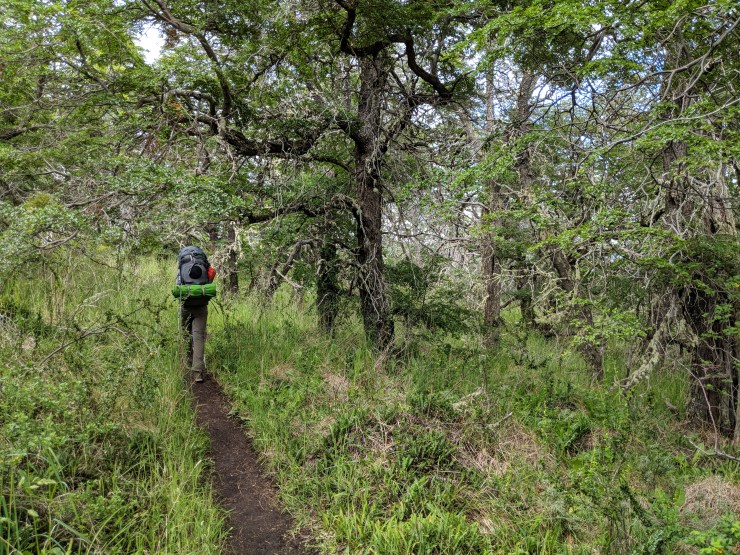

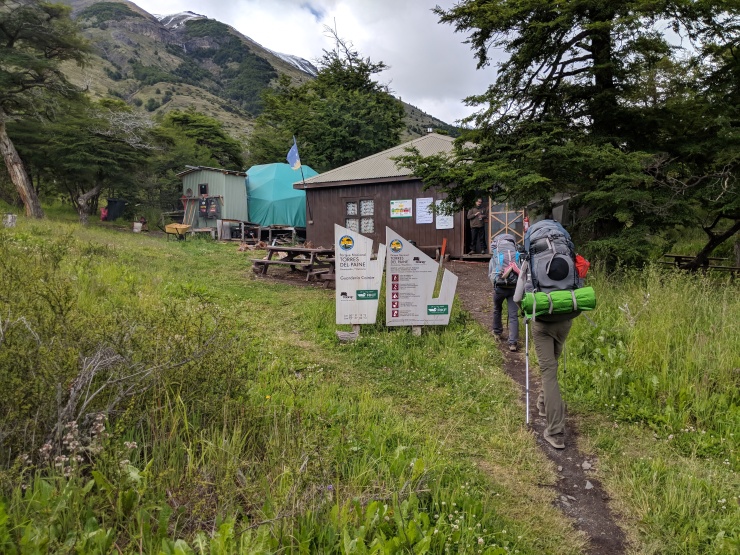


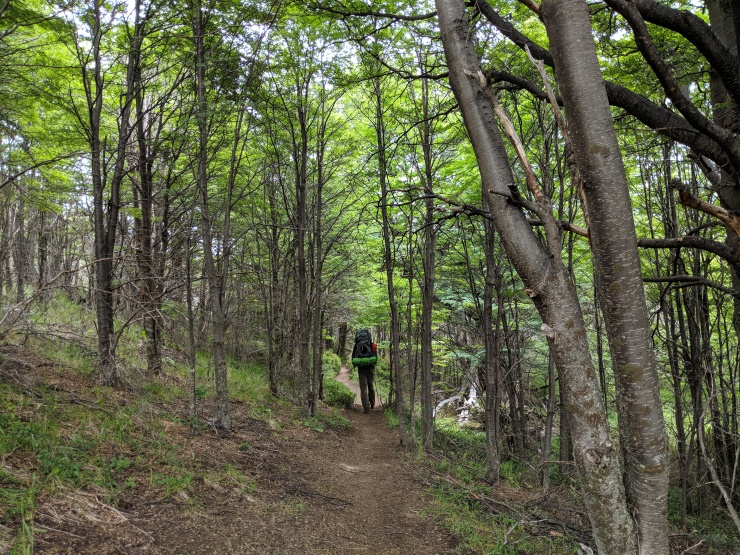


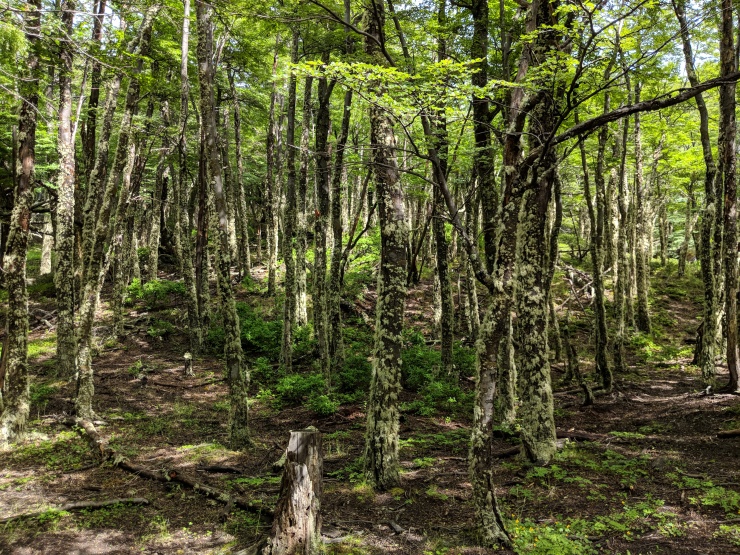
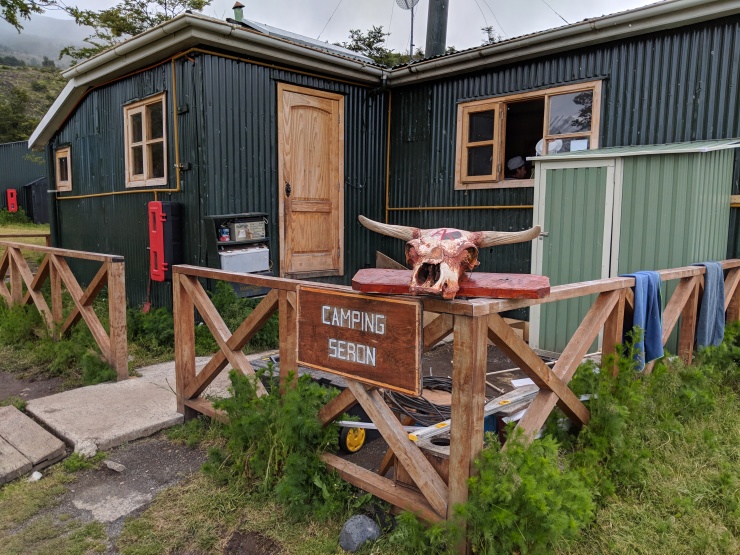
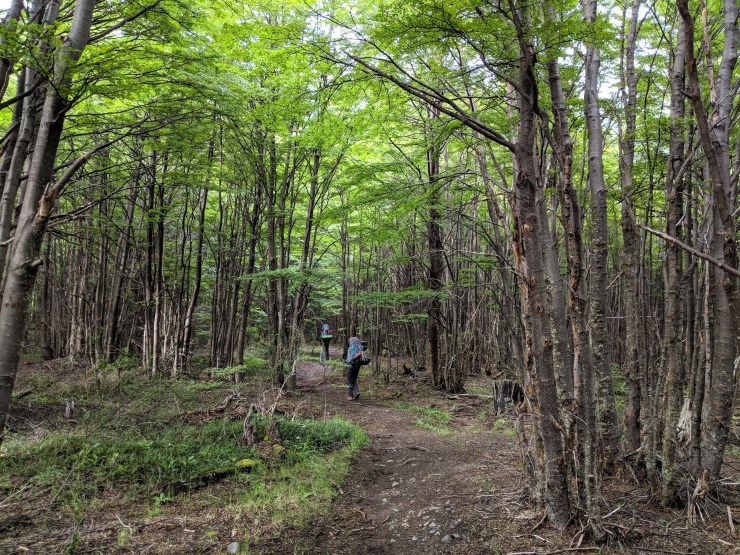
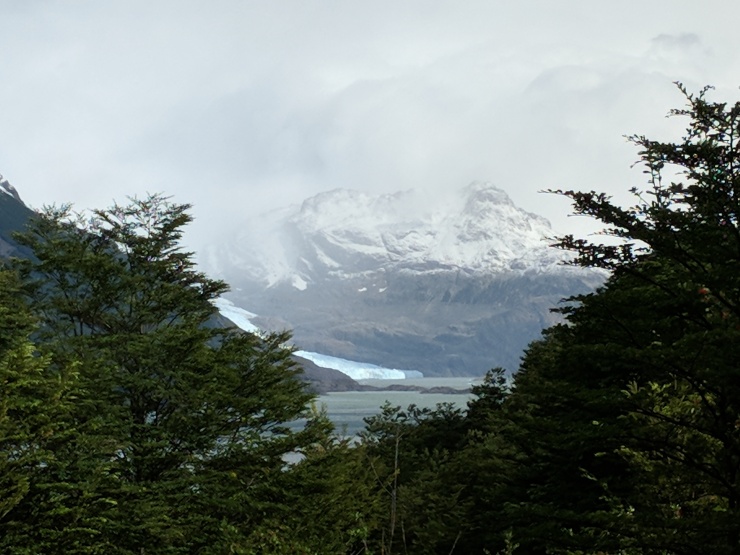
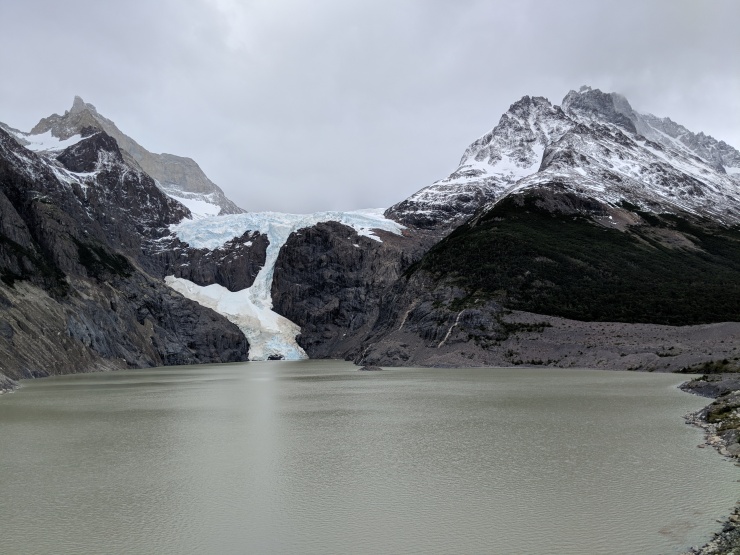
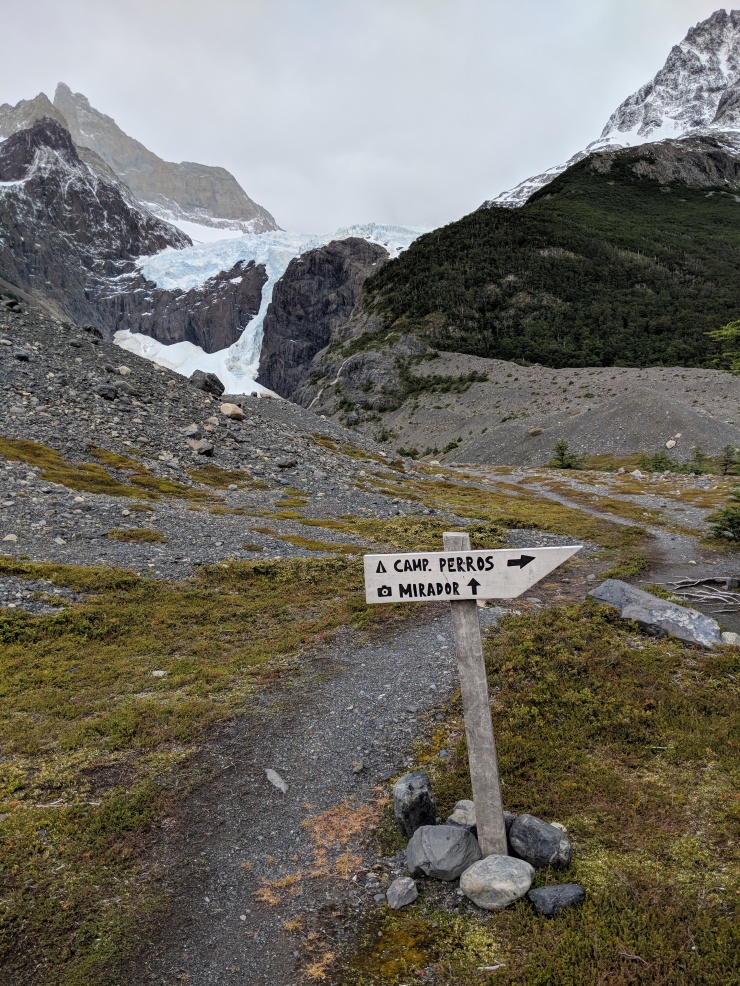
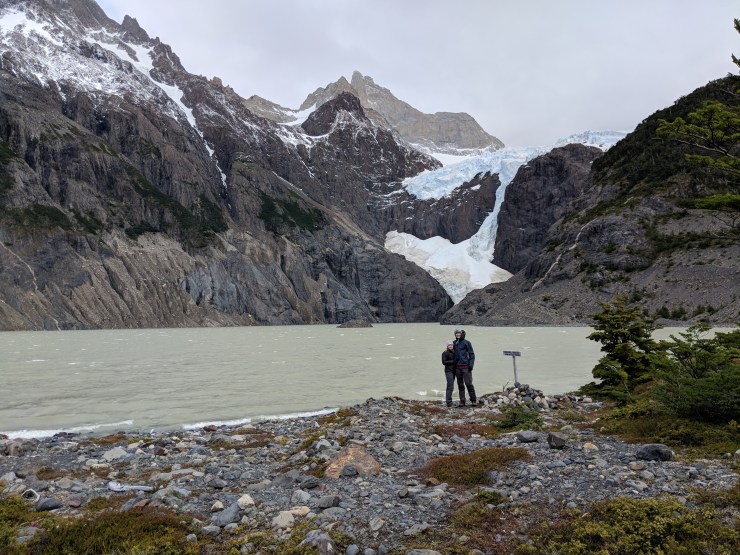
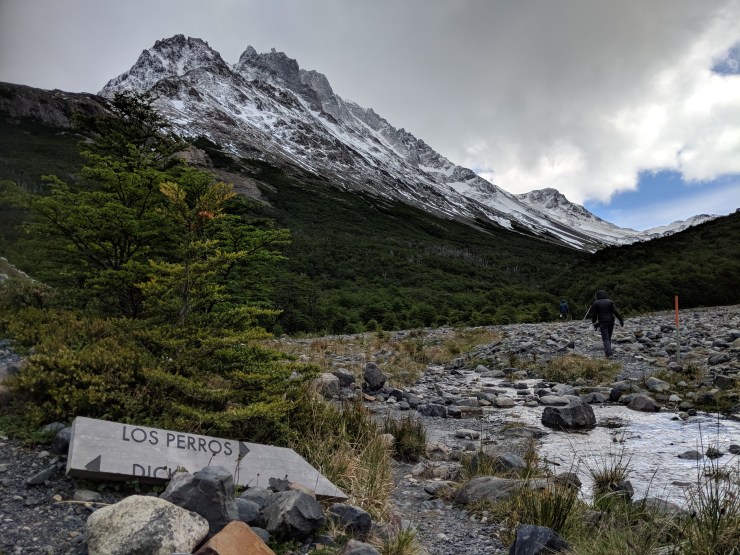
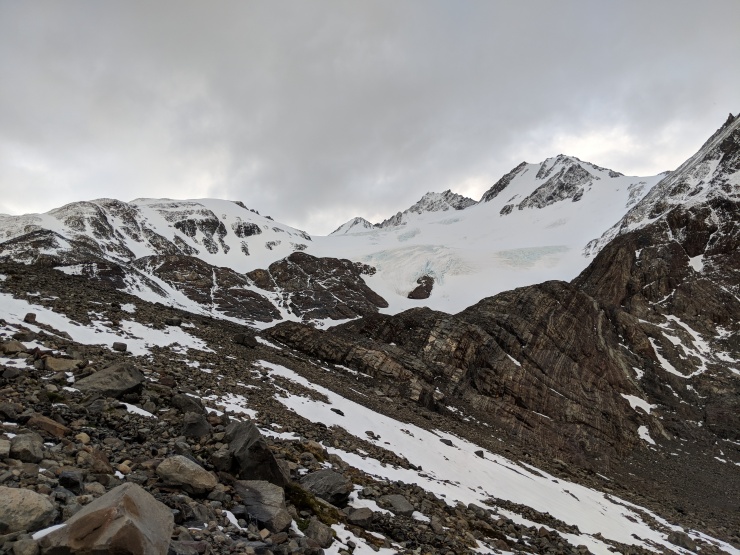
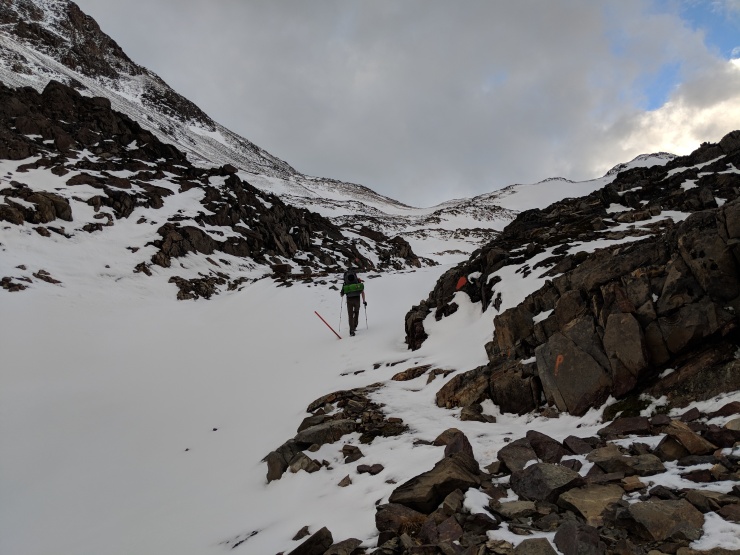
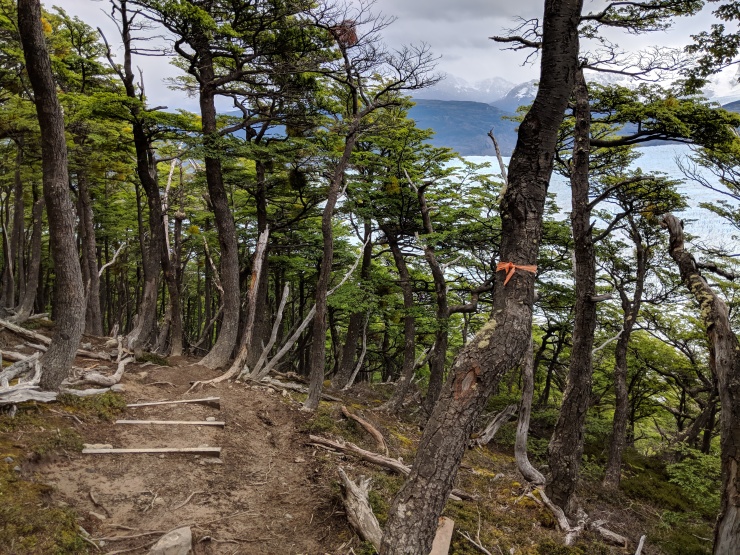
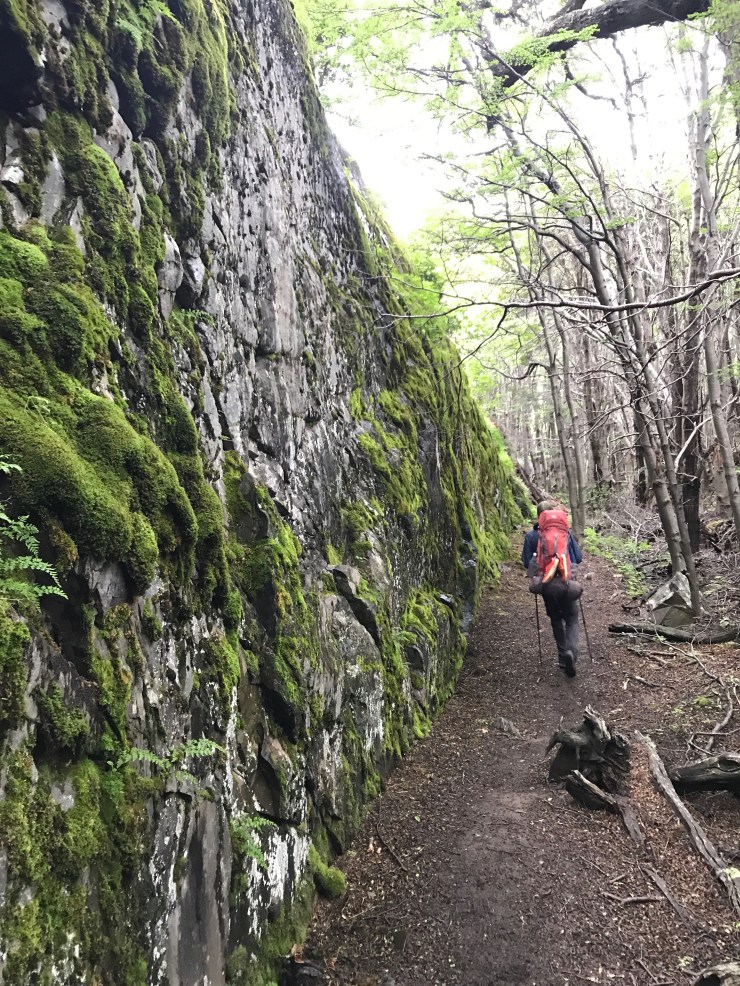
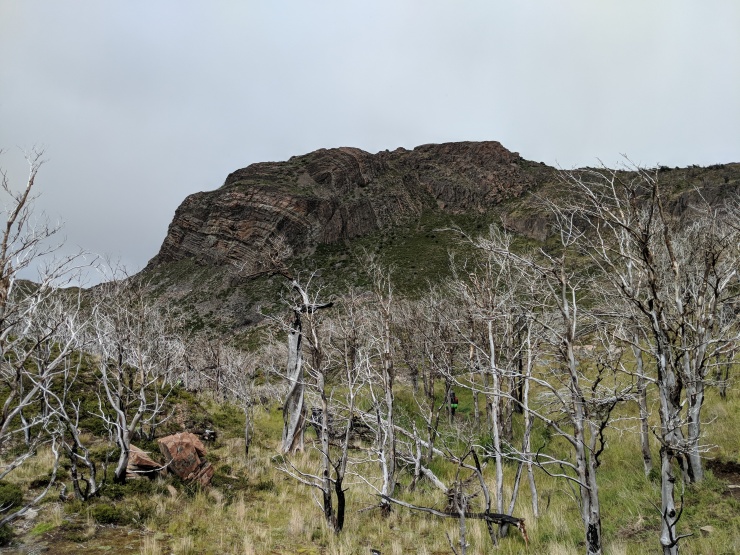
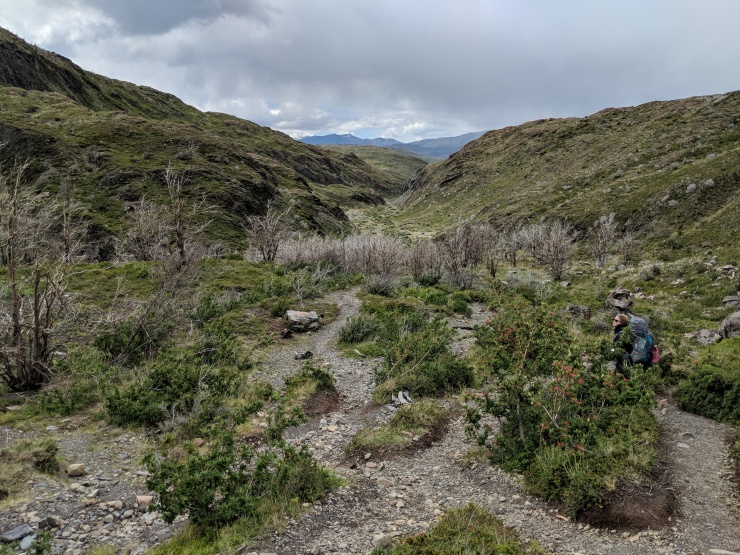
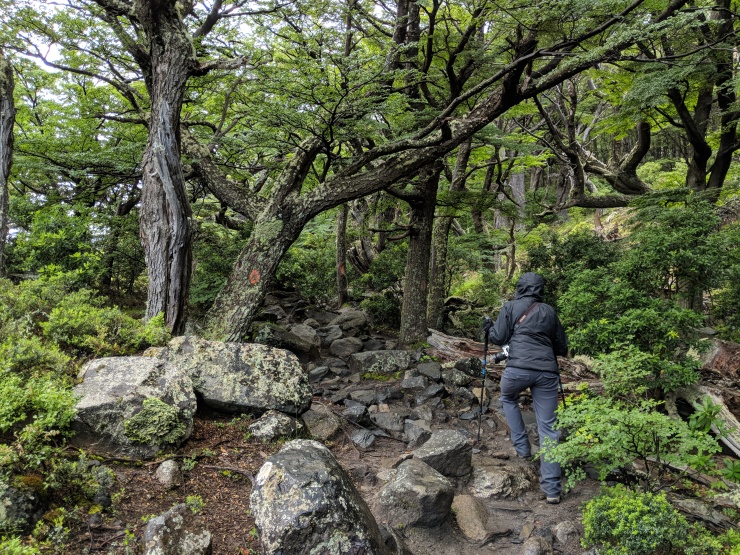
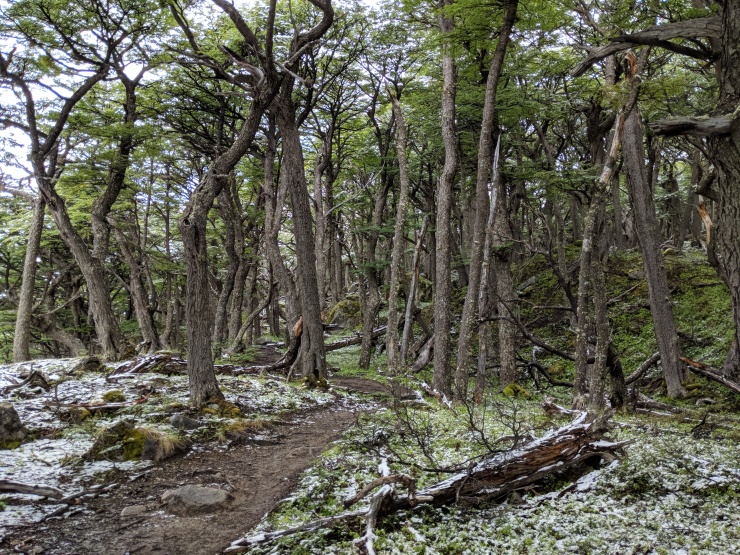
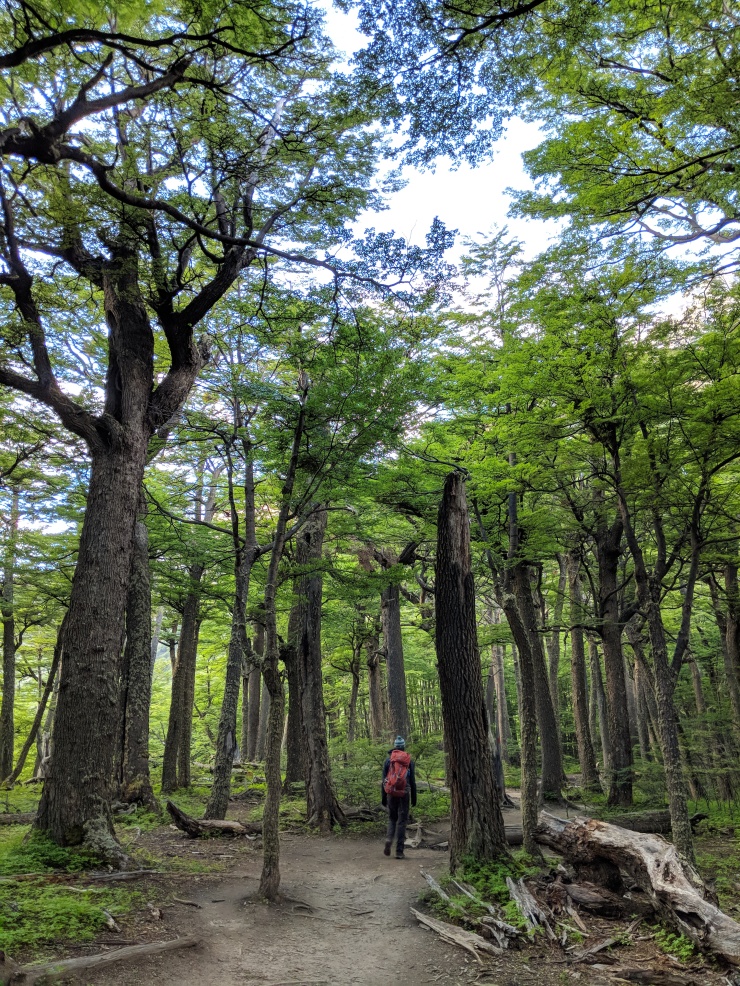
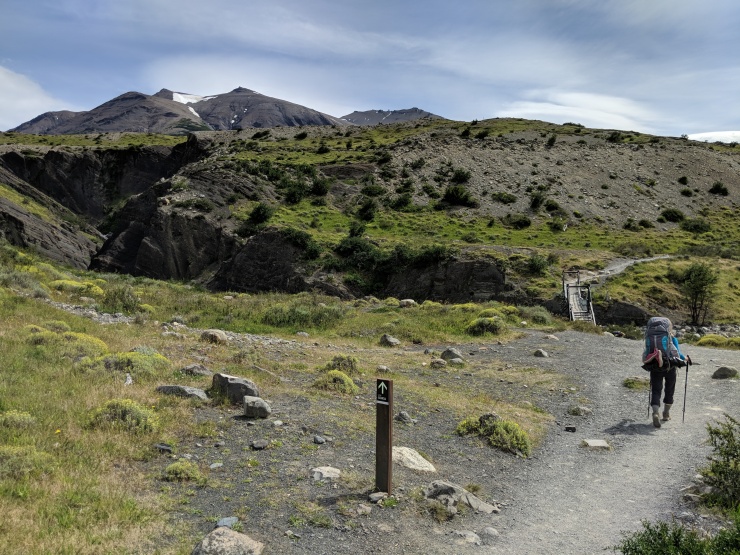
Day 3: ~7.6 miles; +1,750 feet; Refugio Dickson to Los Perros Campsite
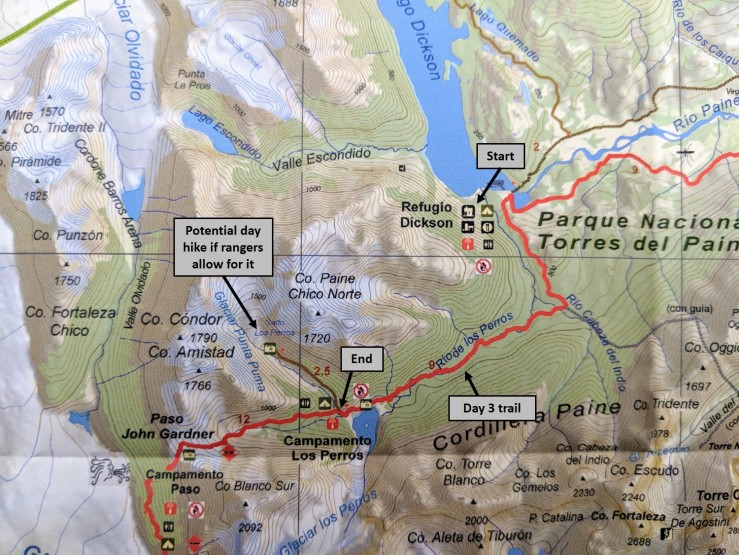
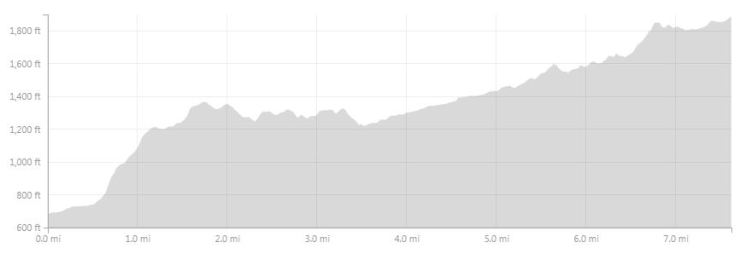
On day 3 we had a relatively short hike that was not too difficult. There is a decent elevation gain, but you can finish the hike before lunch. Much of the hike goes through a beautiful mossy forest. Along the way there are a few lookouts that provide nice views of mountain peaks and glaciers. When you get close to the Los Perros camp, you are treated to a great view of the Glaciar Los Perros and its lagoon. After arriving at Los Perros you register at the guard station. The guards will tell you when you should be ready to leave in the morning to get over the John Gardner Pass (for us this was 6:30 am).
If you arrive at camp early and the weather is nice, you can also ask the rangers if they would be willing to guide you to the Glaciar Punta Puma. This glacier is ~2 hours away from Los Perros and can be reached on a day hike. We were told the trail is not well marked, so you need a guide or ranger to take you on the hike (this may or may not be true). We heard this was a fun hike because you can get very close to the front of the glacier and touch the ice! Unfortunately, the rangers were not hiking to Glaciar Punta Puma on the afternoon we arrived, so we decided not to go.
The camp at Los Perros is situated in a forest and does not have many amenities. Since we arrived to camp fairly early, we burned some time by hiking back to the Glaciar Los Perros to take some more pictures. We then retired to bed fairly early so that we could get an early start the next morning. This day’s hike took us about 4.5 hours. We got on the trail at ~8:20 am and arrived at Los Perros at ~12:50 pm.


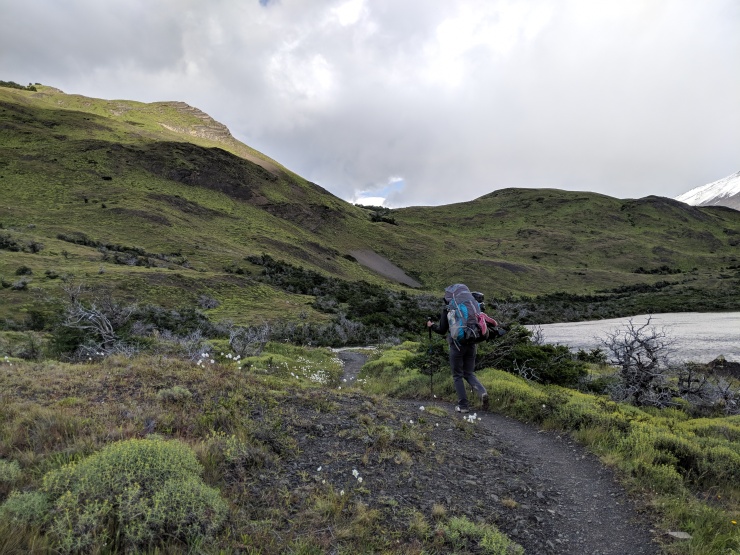
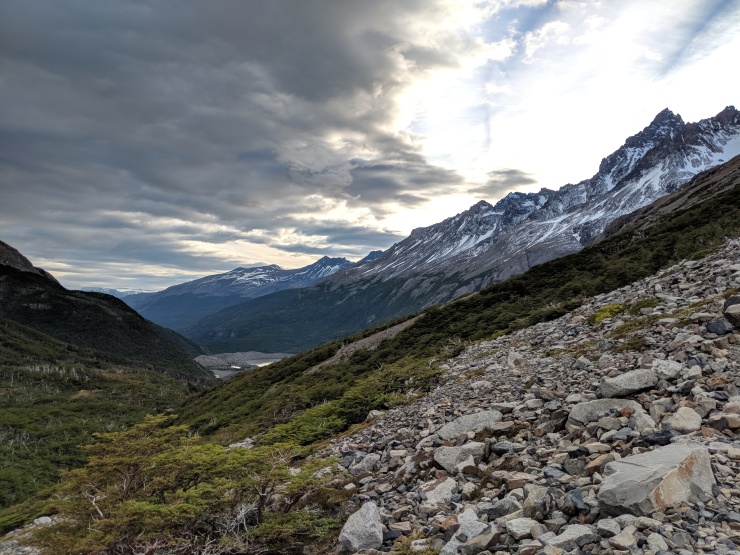
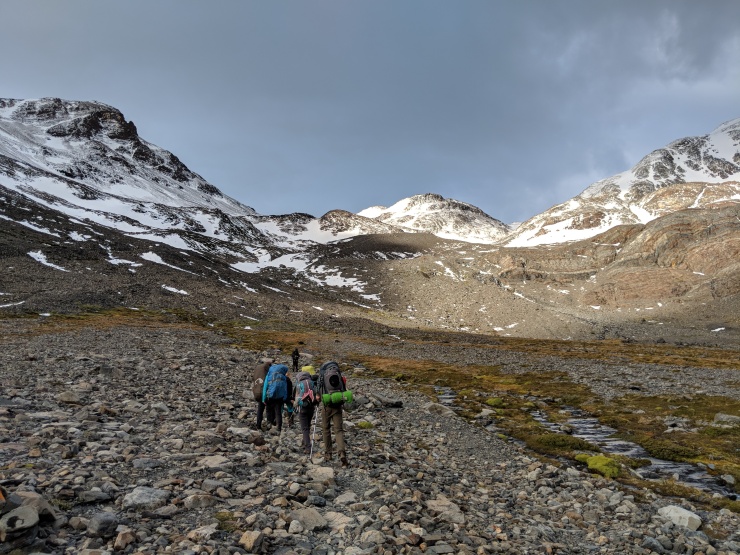
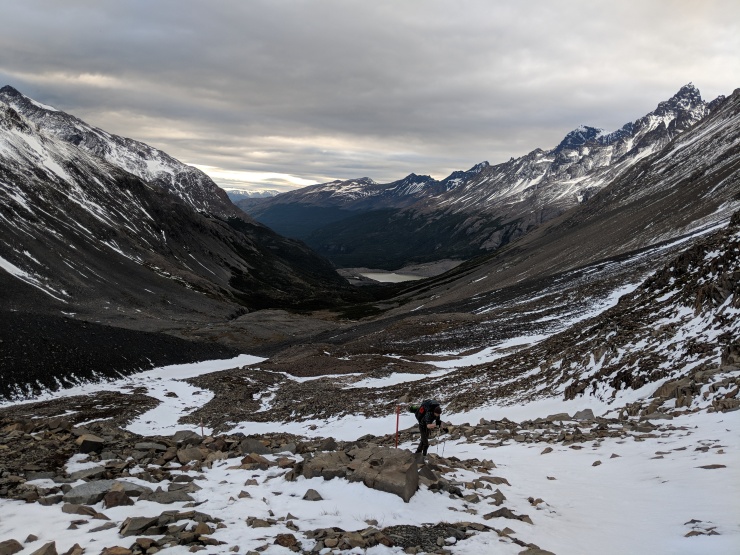
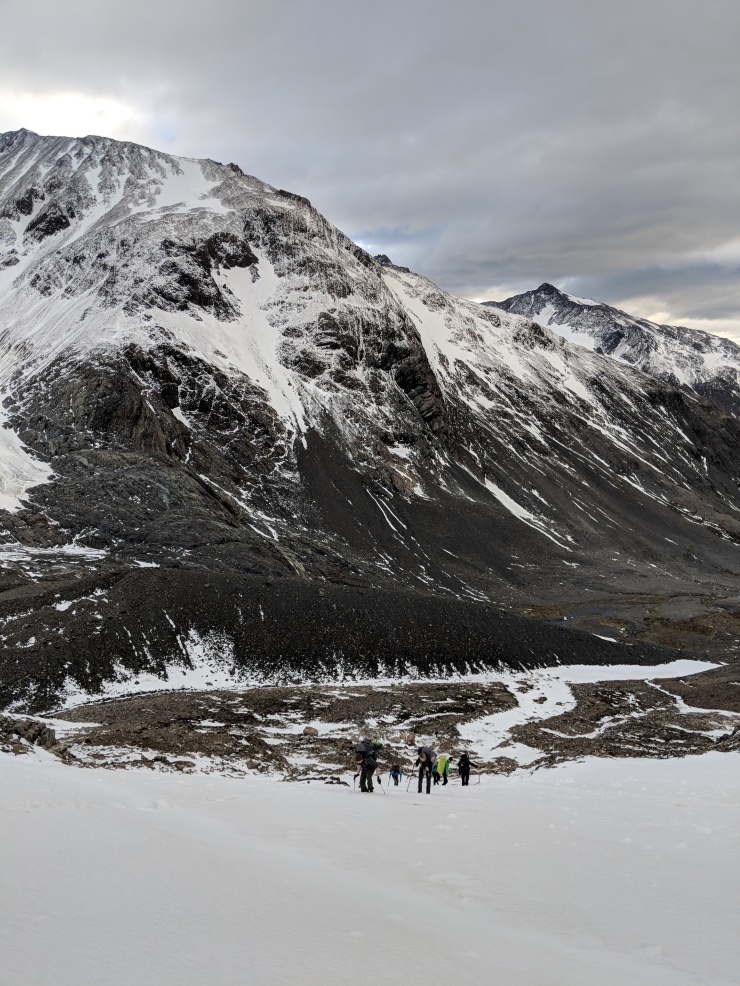
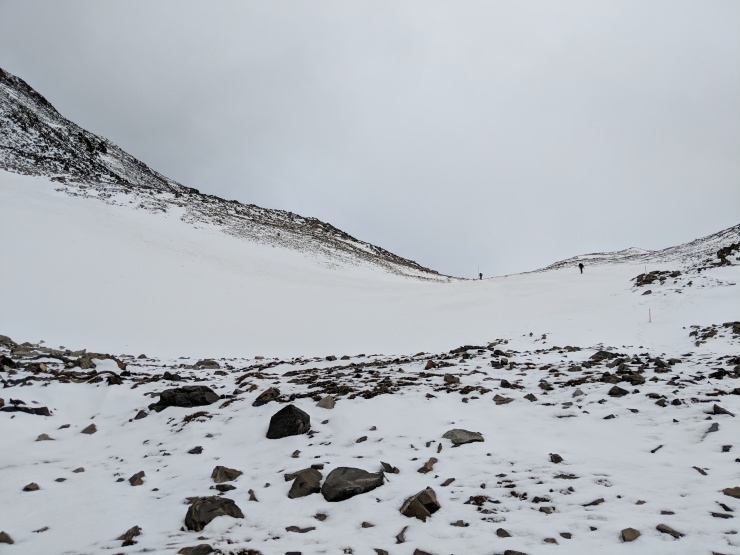
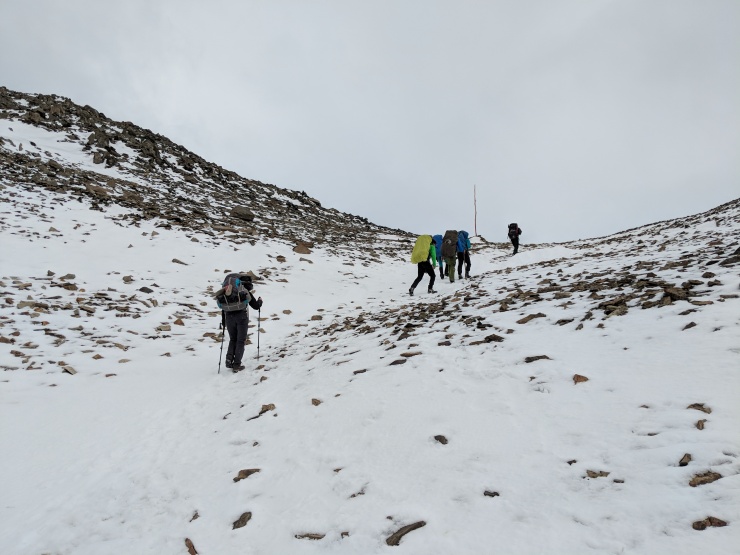
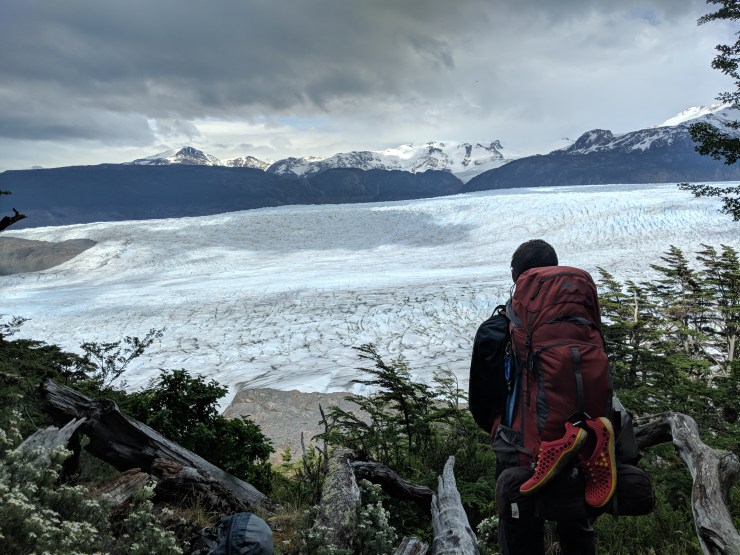
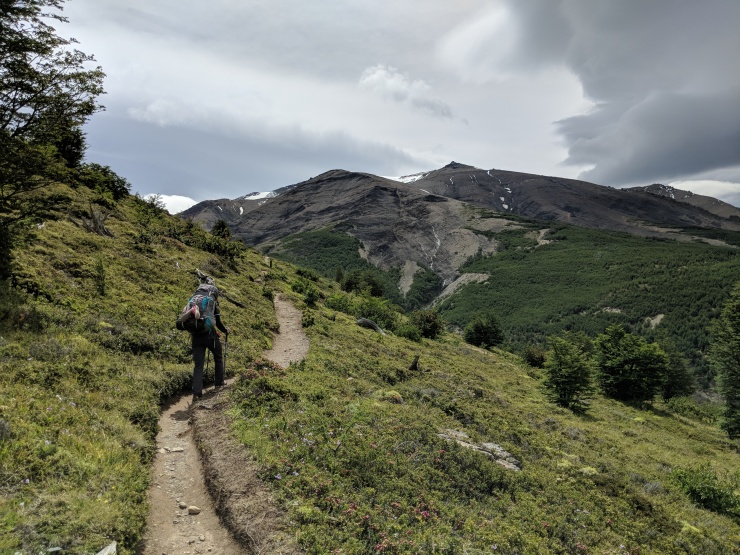
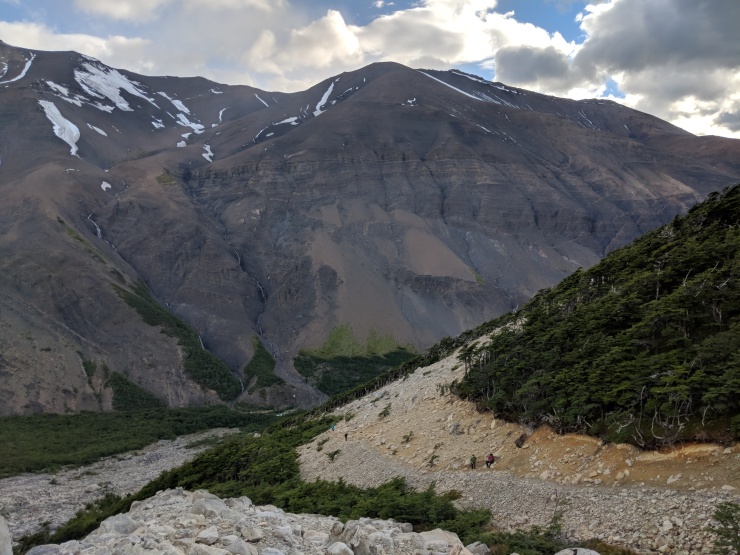
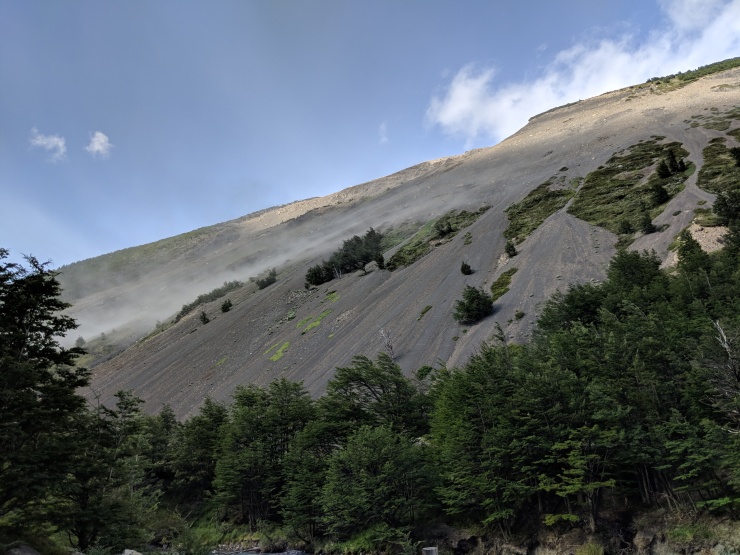
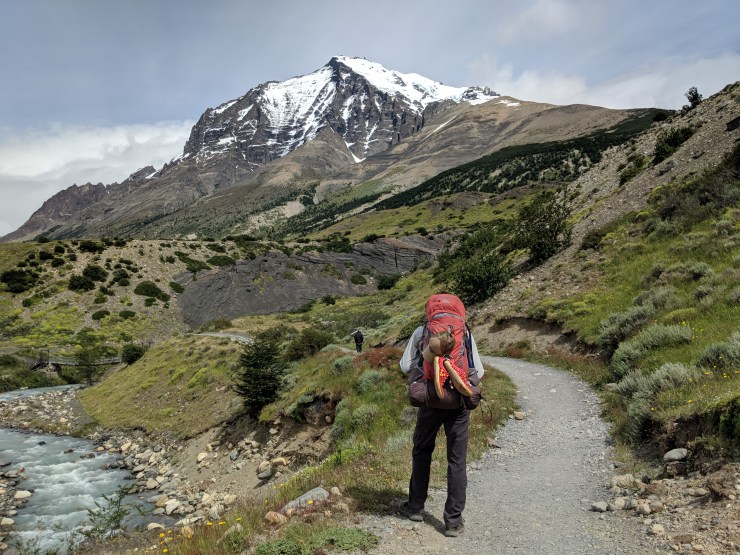
Day 4: ~4.5 miles; +2,200 feet; Los Perros Campsite to Campamento Paso
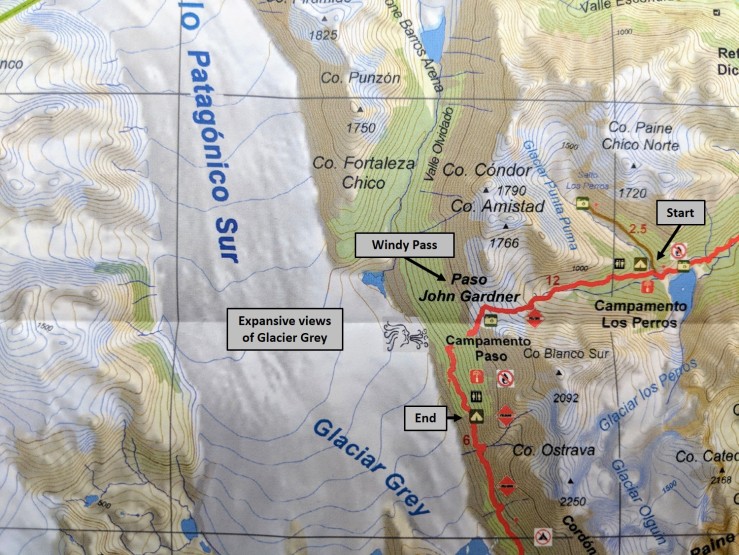
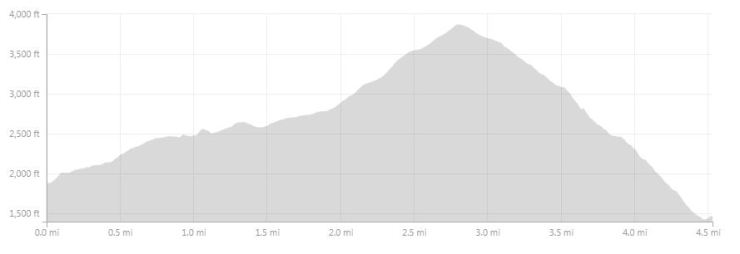
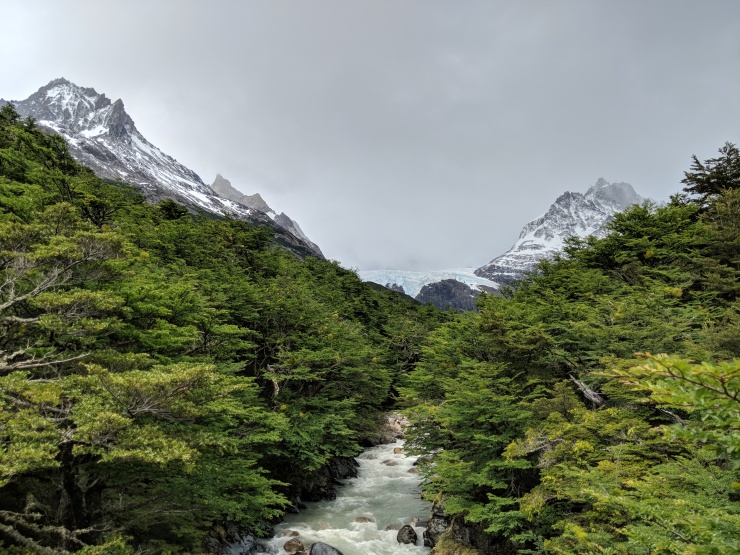
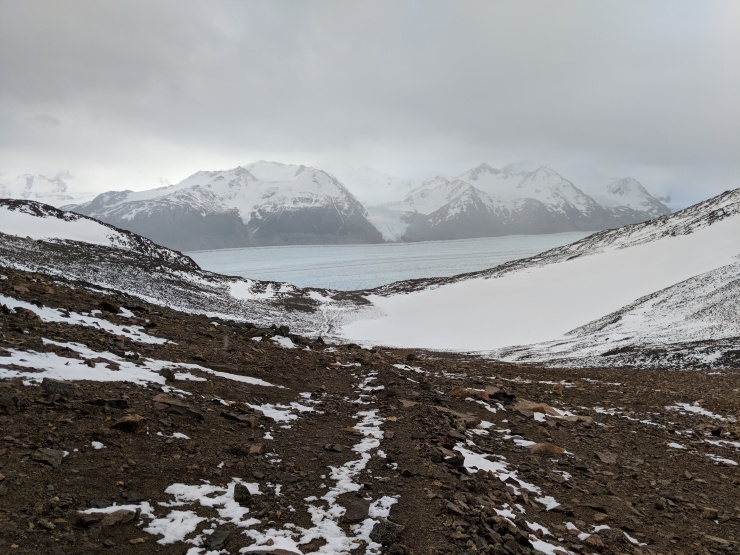
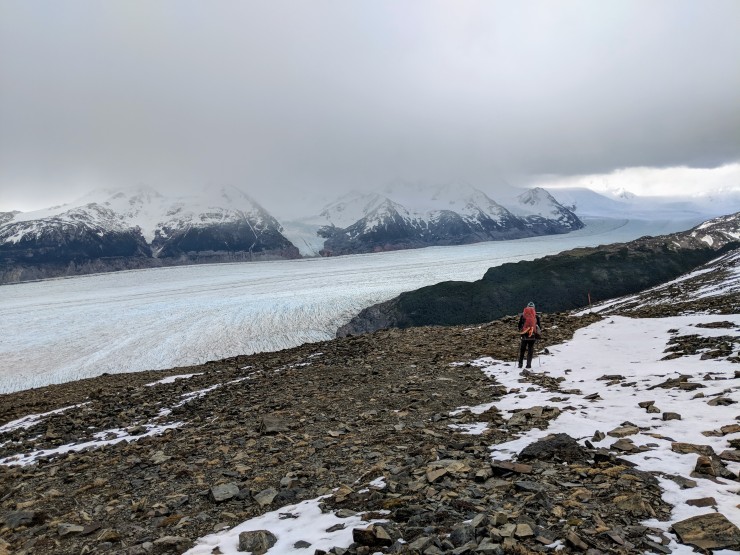
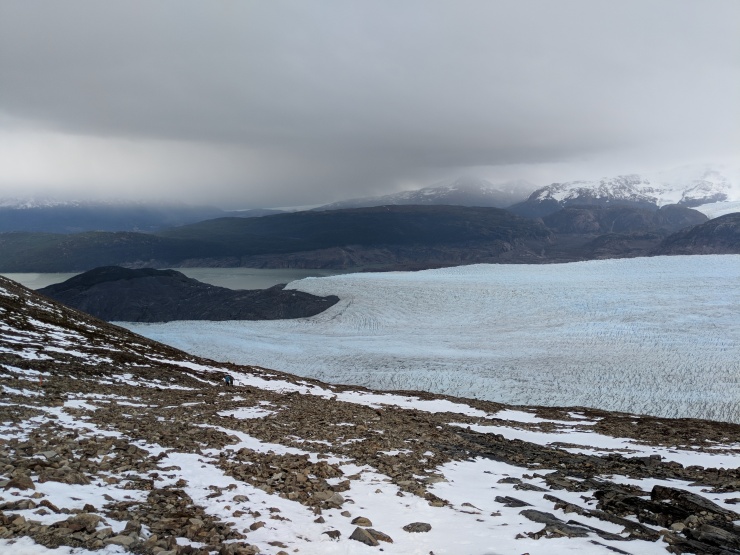
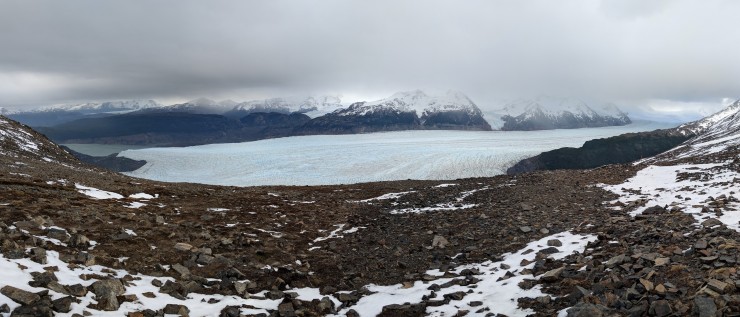
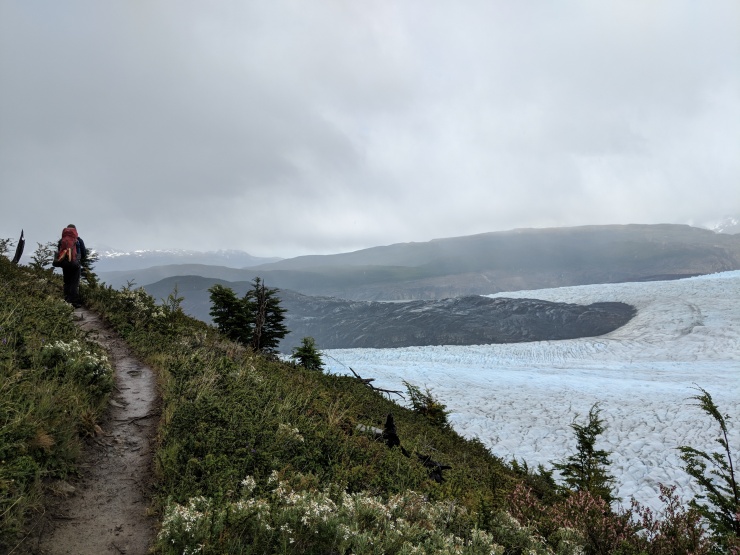
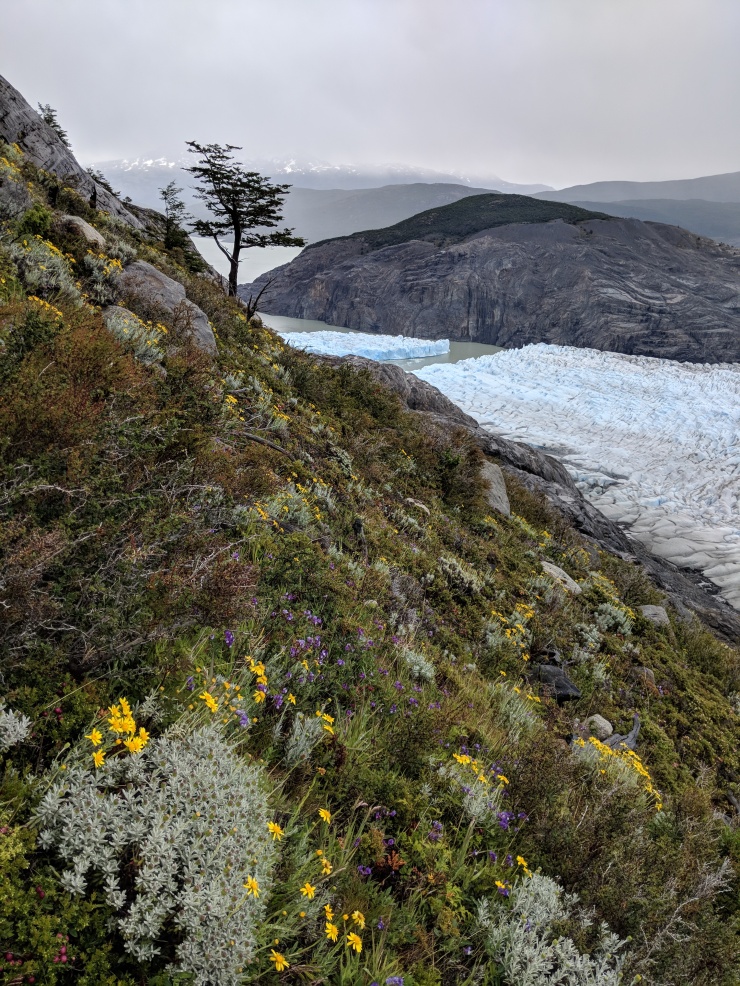
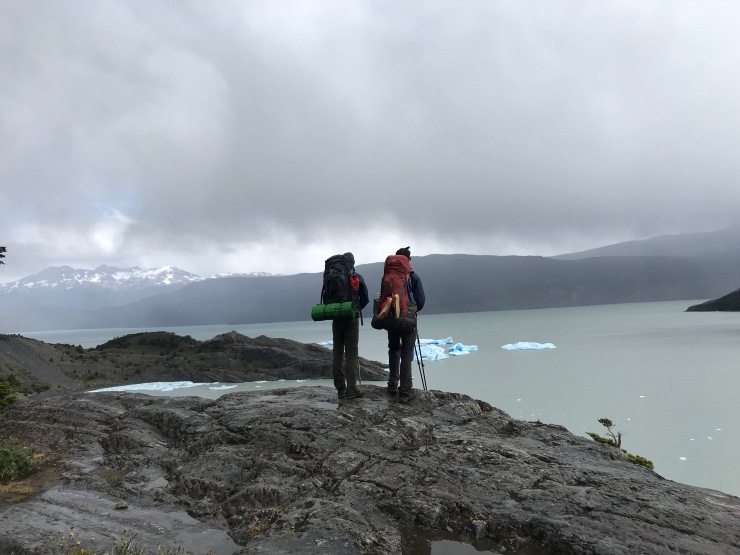
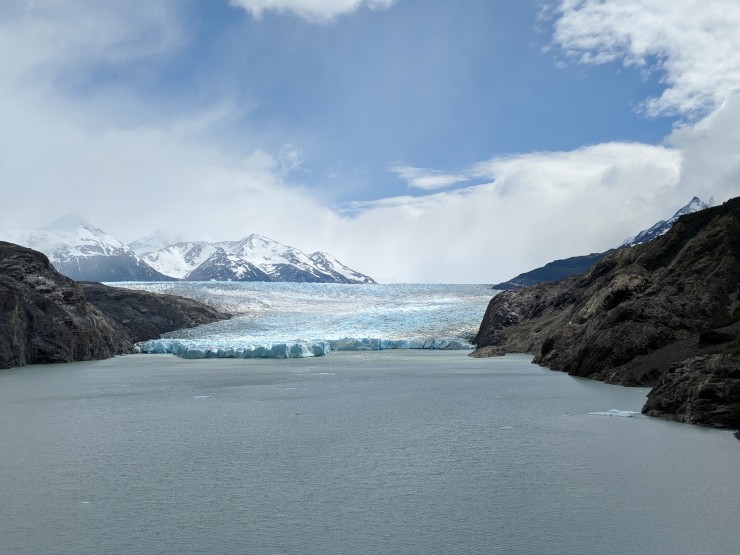
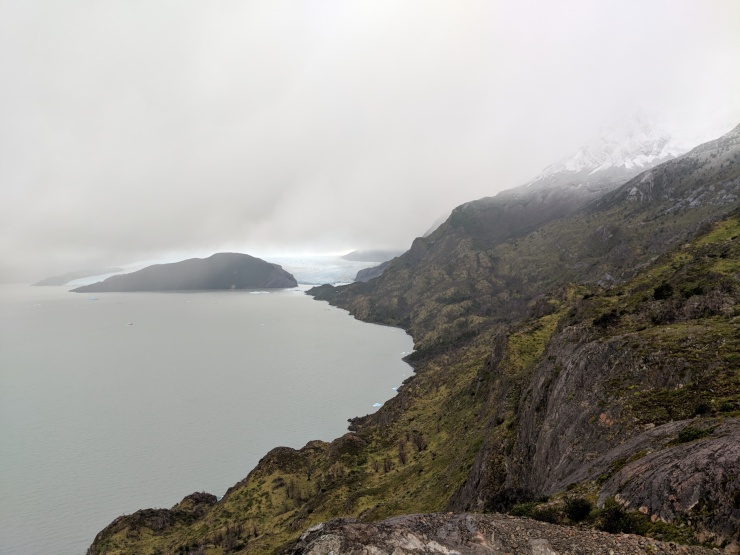
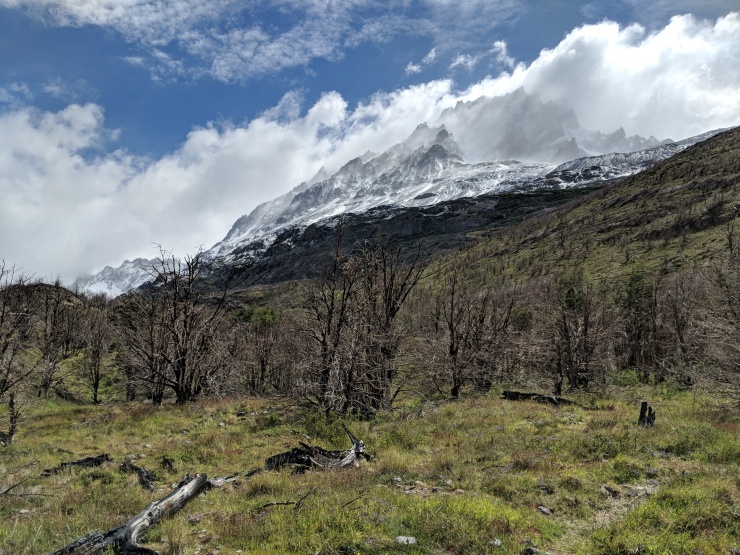
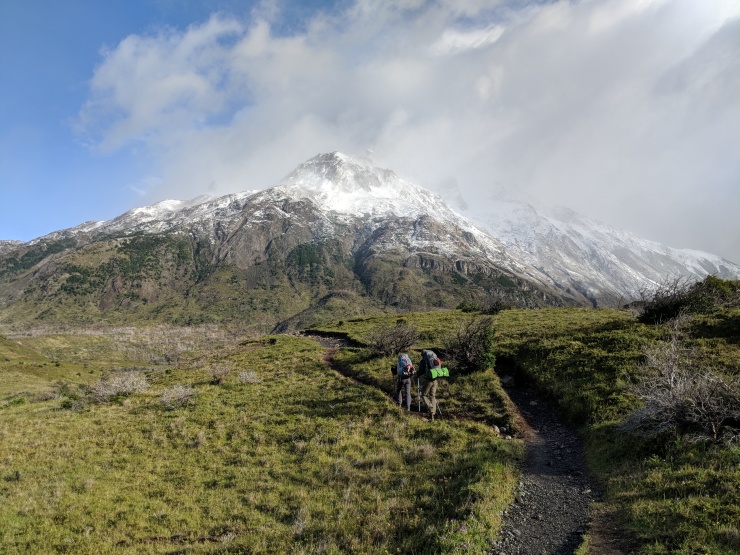
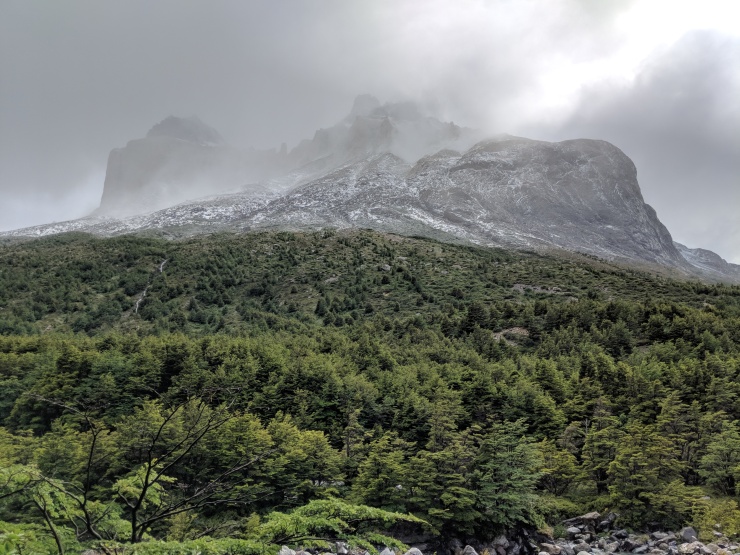
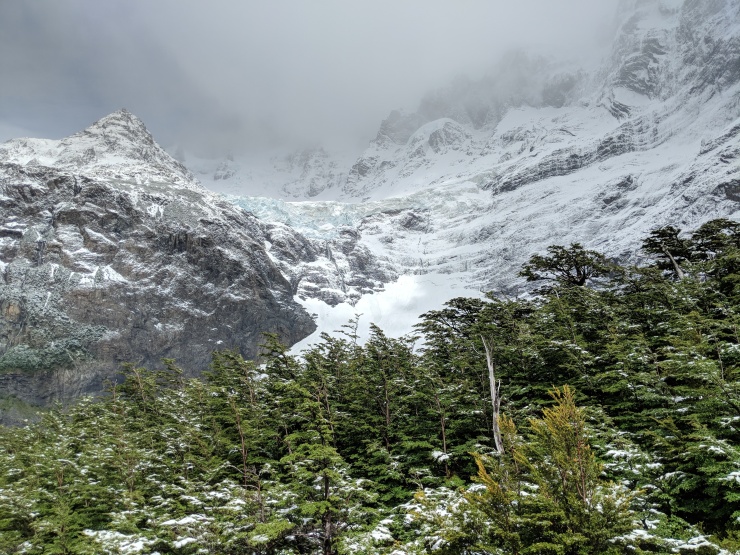
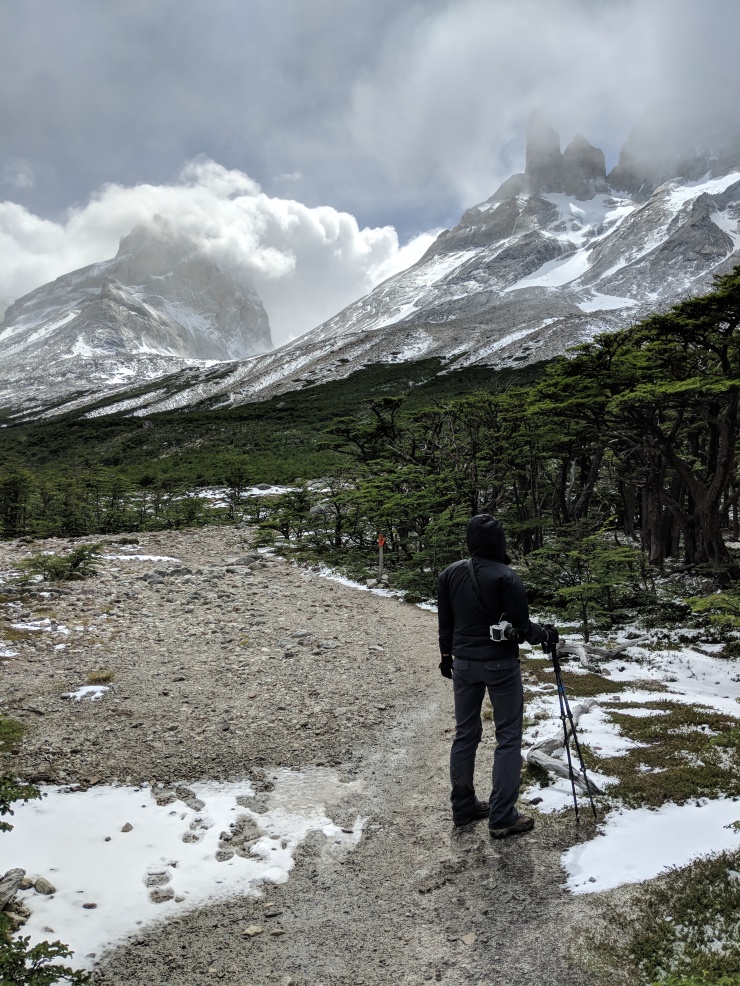
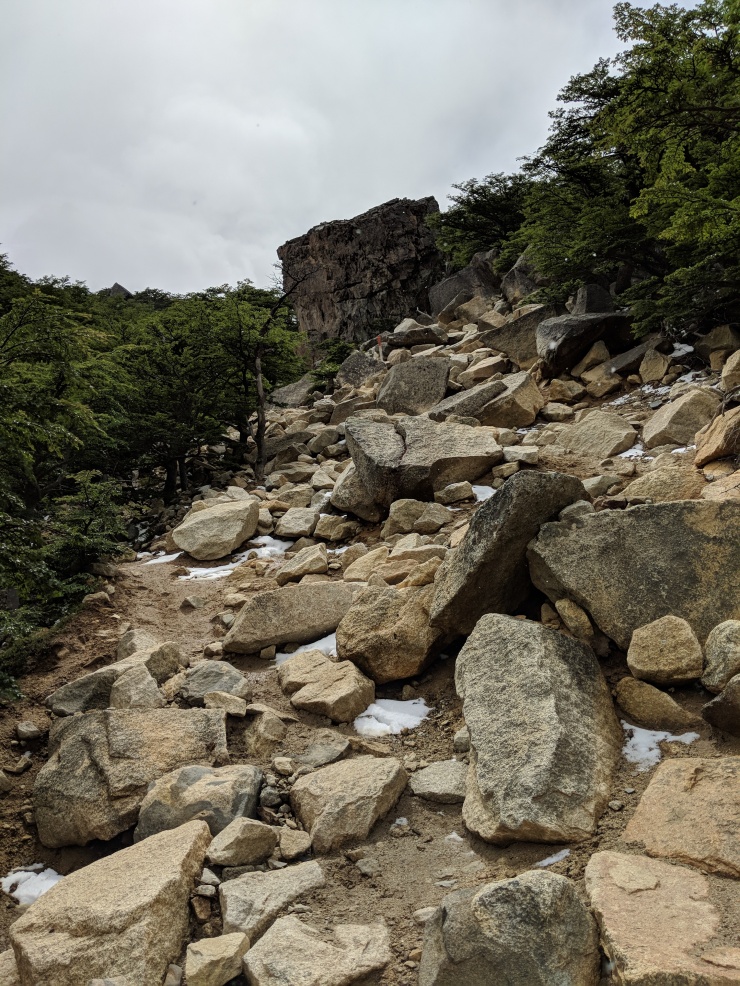
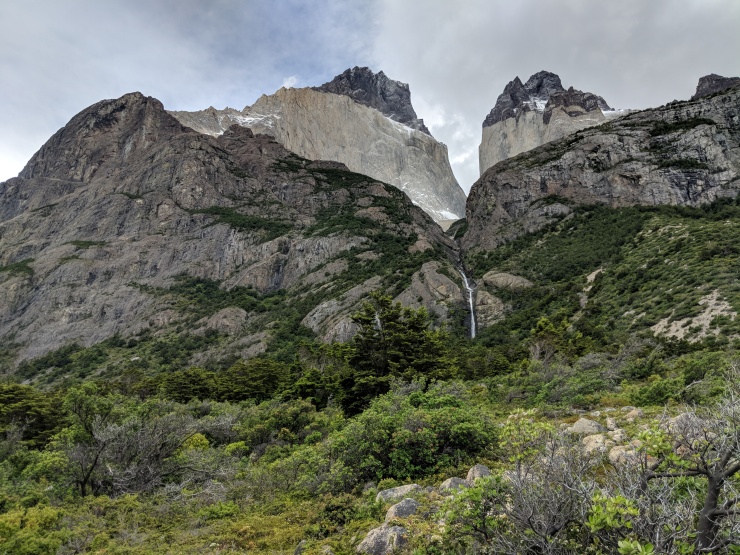
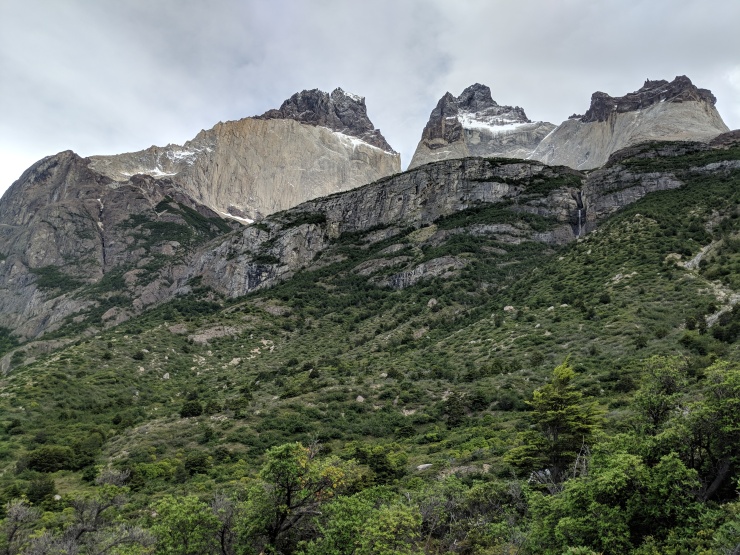
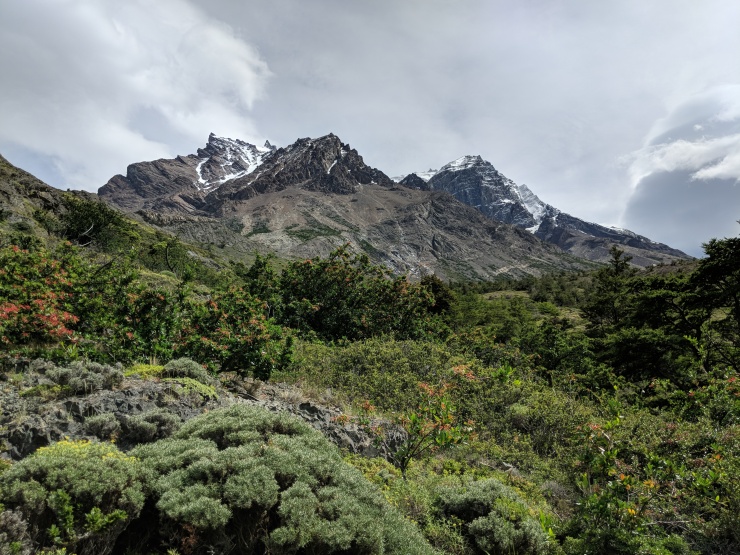
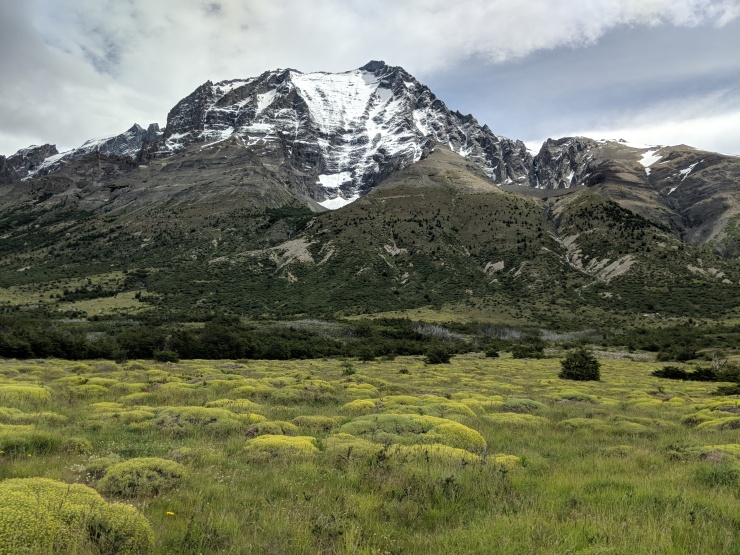
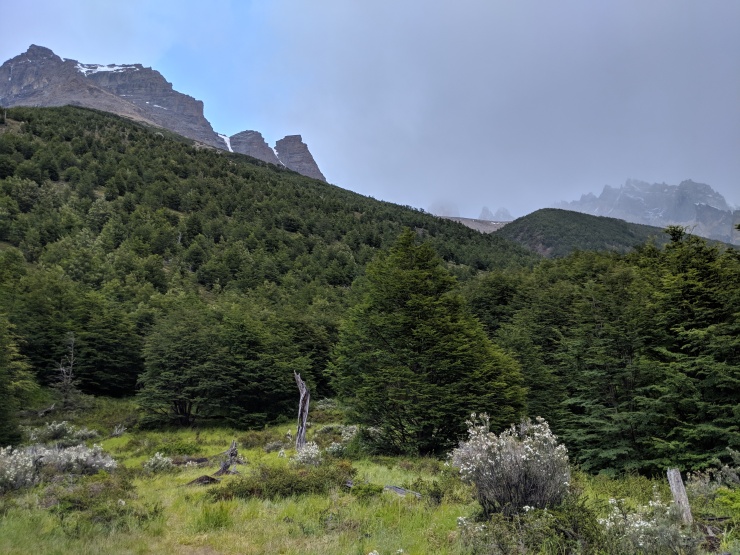
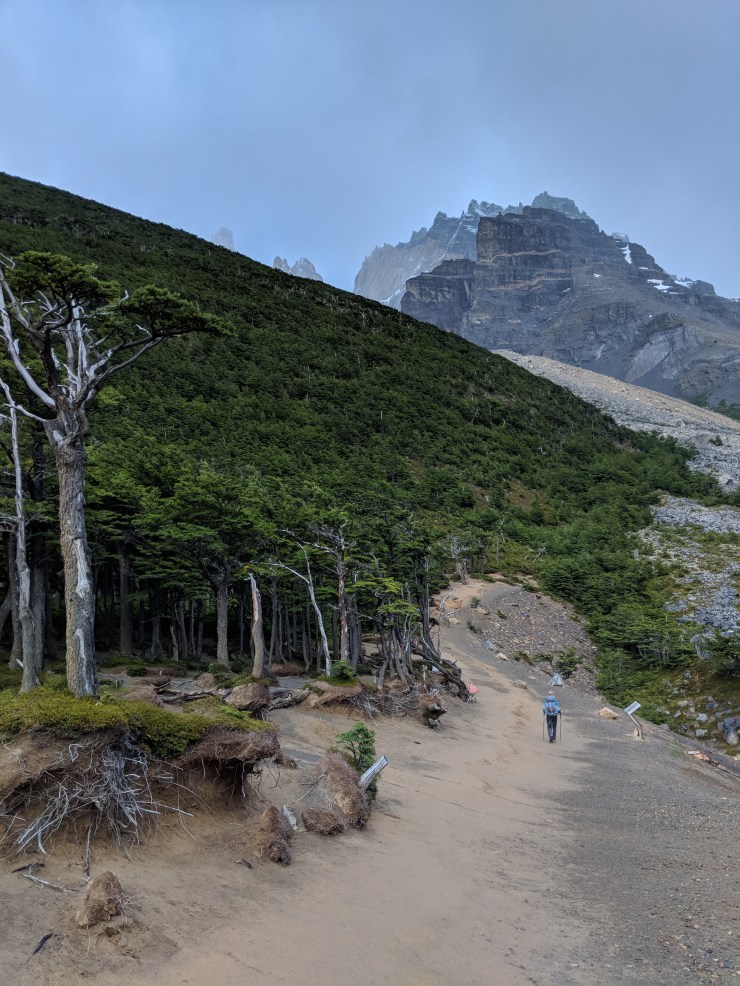
On day 4, we hiked over the John Gardner Pass on our way to Campamento Paso. The pass is awesome and provides great views on both the way up and way down. While you hike up to the pass you get 360 degree views of mountains. This section of the hike is very steep and cardio intensive. You also must hike in snow in sections, which requires careful footing. At the top of the pass, you are treated to your first views of the massive Glacier Grey. This part of the trail was one of our favorites. The size of Glacier Grey is hard to comprehend without seeing it in person. The trail then descends down towards the glacier before entering a forest and continuing to Campamento Paso. This portion of the trail is very steep and can be tough on your knees. However, the views of the glacier make it worth it.
This day’s hike took us about 4.75 hours. We got on the trail at ~6:00 am and arrived at Campamento Paso at ~10:45 am. We took a modest break at the top of the pass but did not stop for a lunch break. If the weather is not great in the morning, you should consult the CONAF rangers before heading up to the pass. The trail is not well marked, so hikers can easily get lost when visibility is low near the pass.


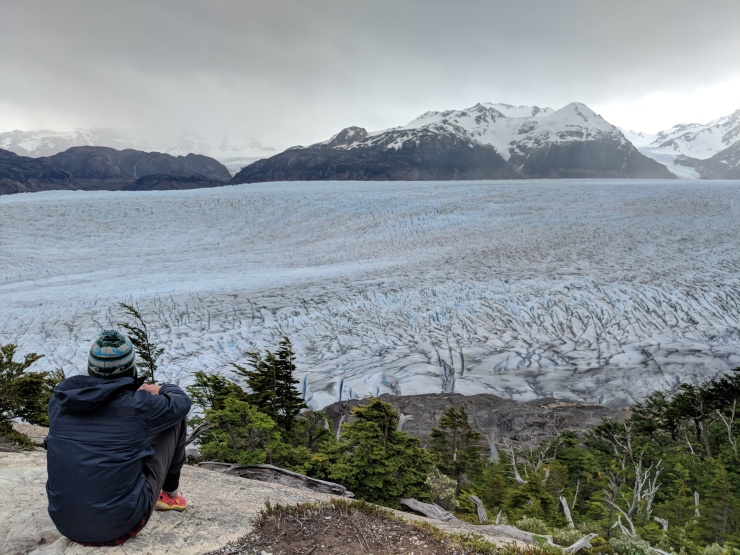

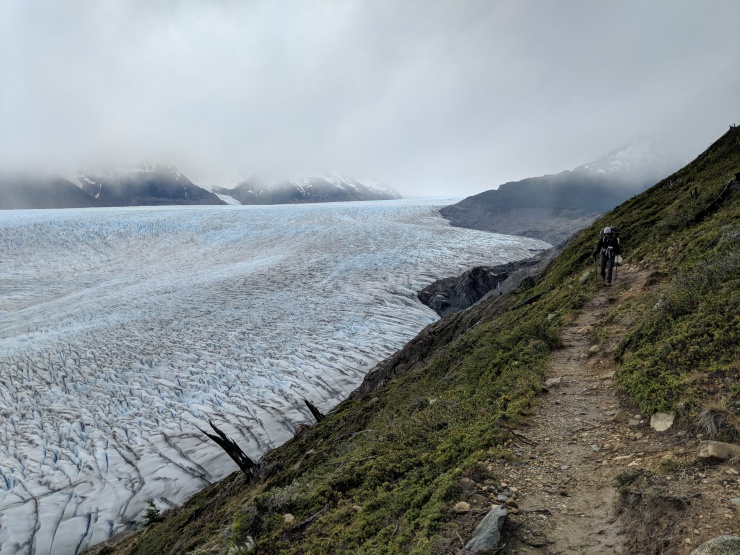
Day 5: ~5.8 miles; +800 feet; Campamento Paso to Refugio Glacier Grey

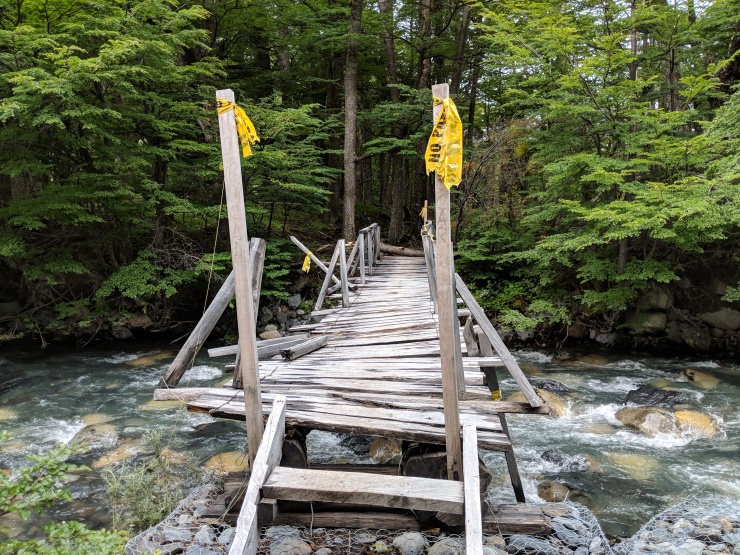
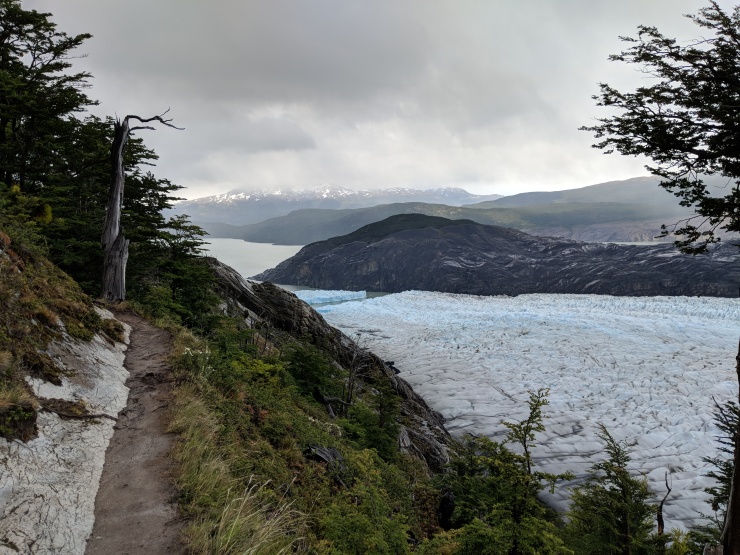
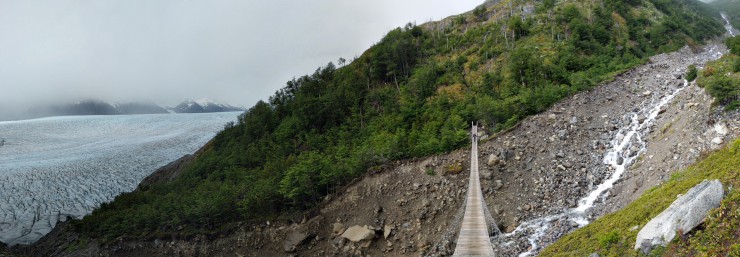
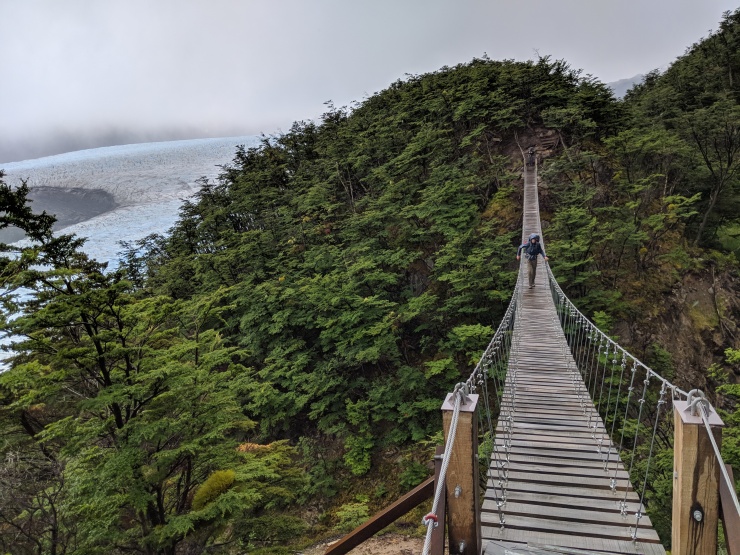
This day’s hike took us about 4 hours. We got on the trail at ~10:00 am and arrived at Refugio Grey at ~2 pm. Along the trail you are treated to some great views of Glacier Grey. Overall, the hike was pretty easy, and we hiked at a leisurely pace. Along the way the trail mostly follows a ridge above the glacier. There are three suspension bridges you must cross. These looked newly constructed and seemed very safe. If you are scared of heights, they may be pretty scary though!
We stayed at Refugio Grey in a shared bunk this night and also bought dinner at the refugio. Having a hot dinner was great, and we really liked Refugio Grey. The staff was great, the showers were hot, the room was clean, and the refugio had a nice lounge area to hang out in. There was also a full bar at Grey and the bartender made very good Pisco Sours. If you are going to stay in one refugio, I recommend staying at Grey!
We did not book any excursions, but you could do so and stay an extra day at this refugio. Some excursions include hiking on the glacier or kayaking in the water near the glacier.


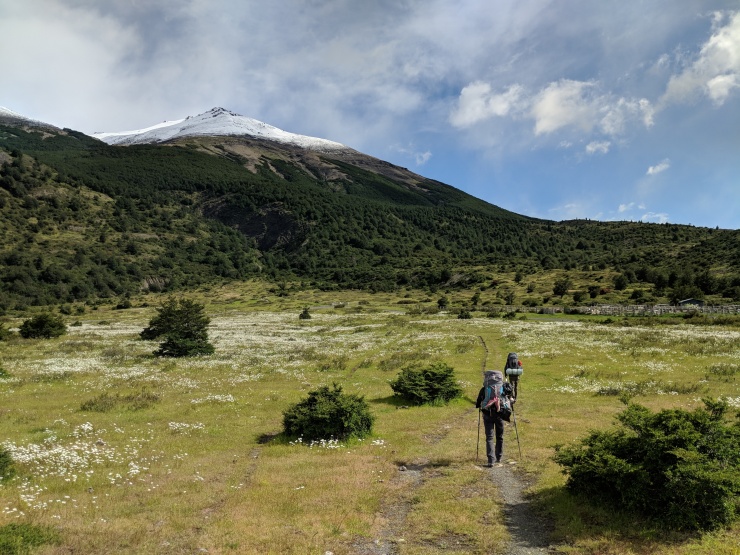
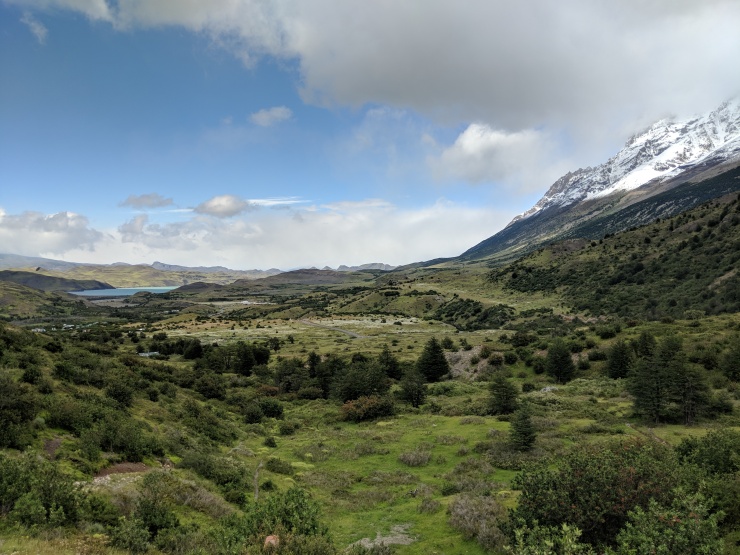
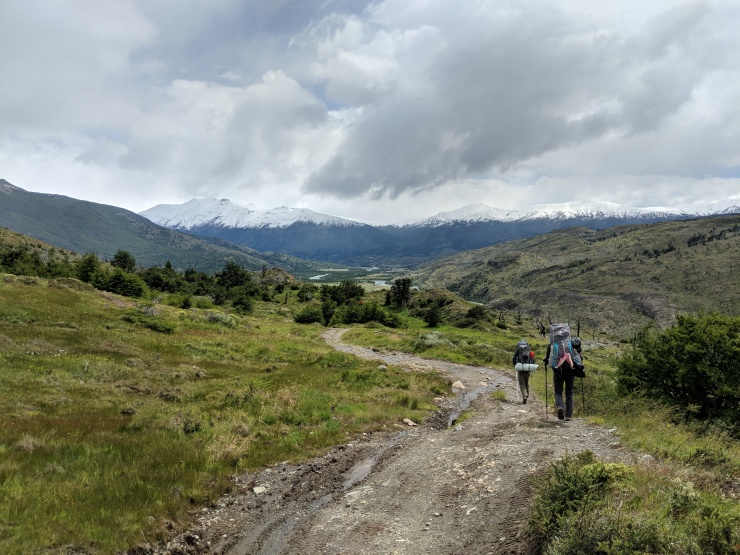
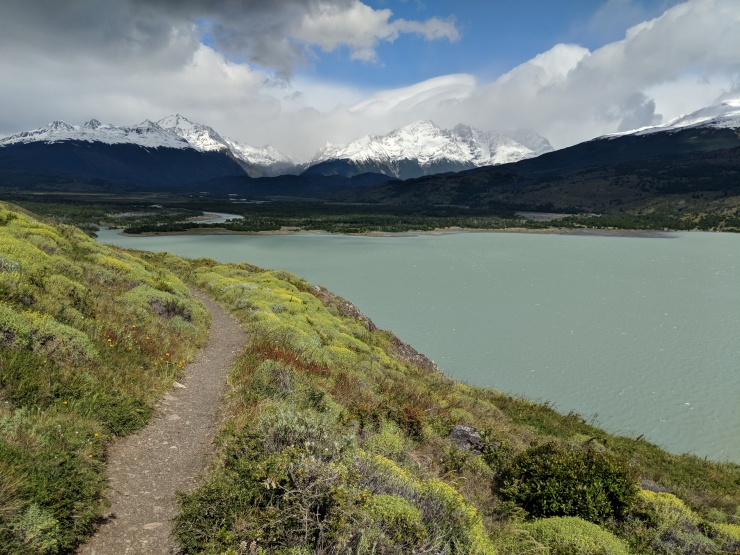
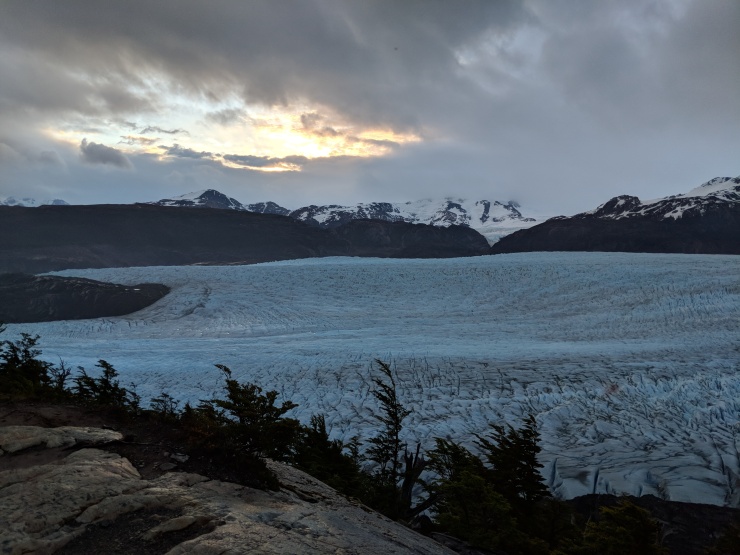
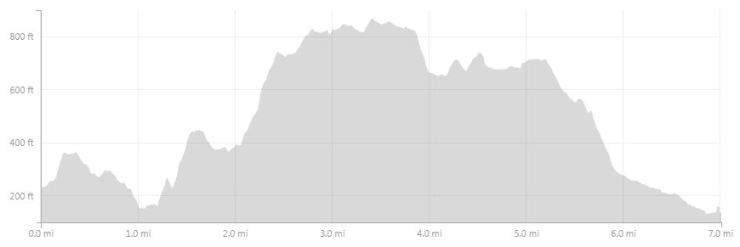
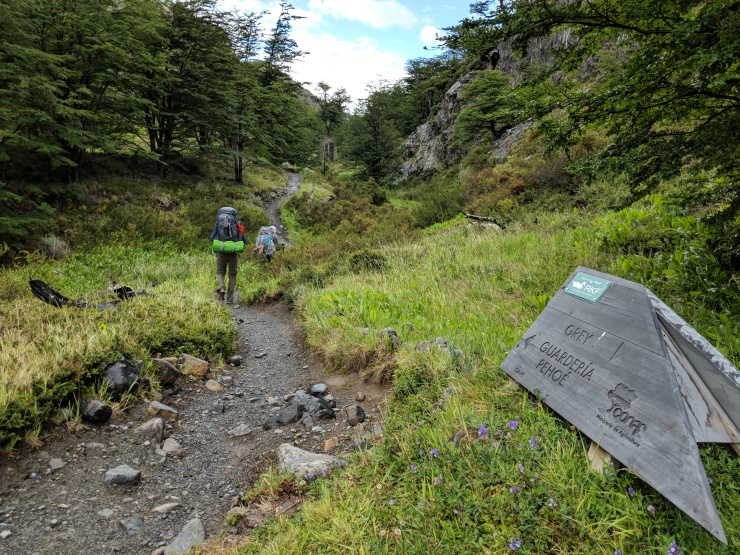
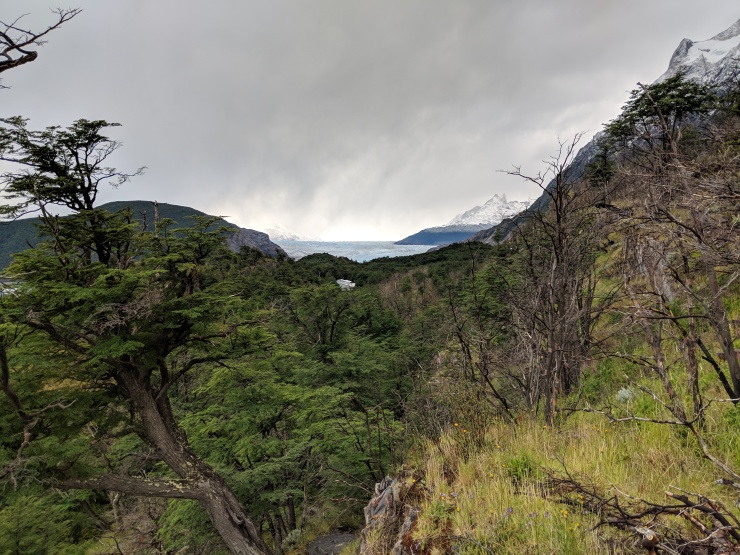
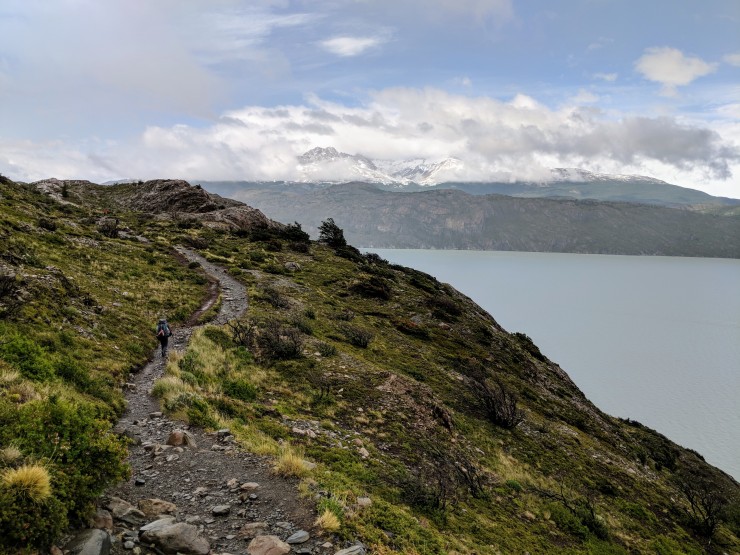
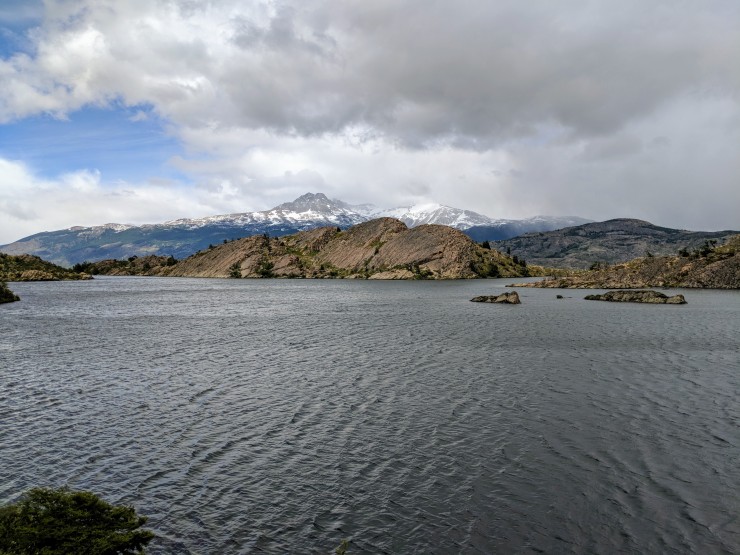
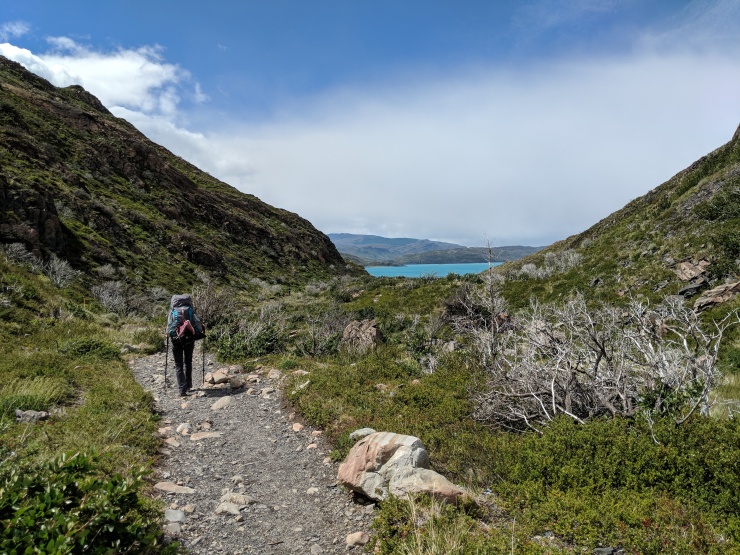
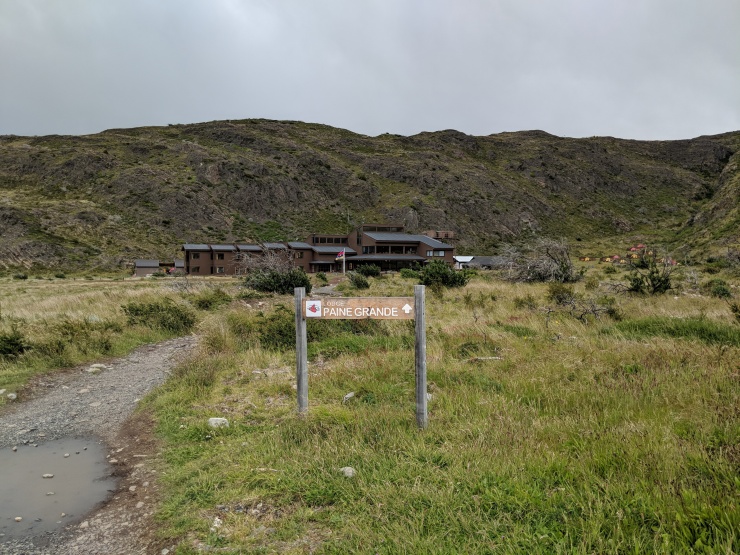
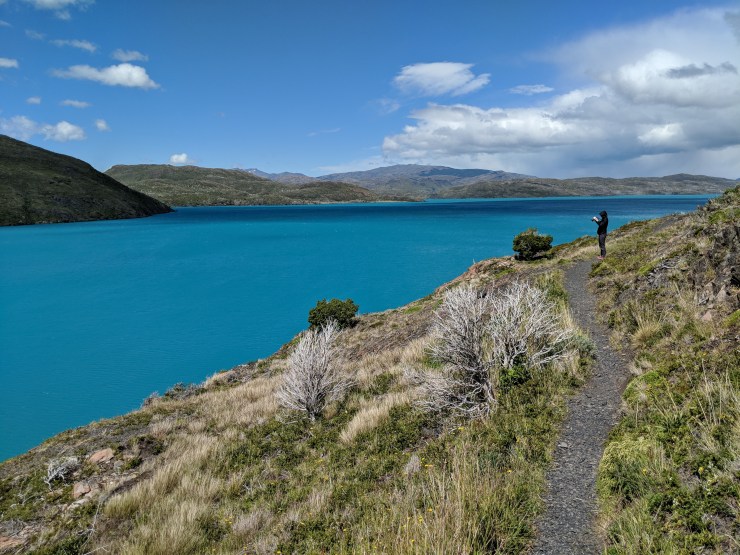
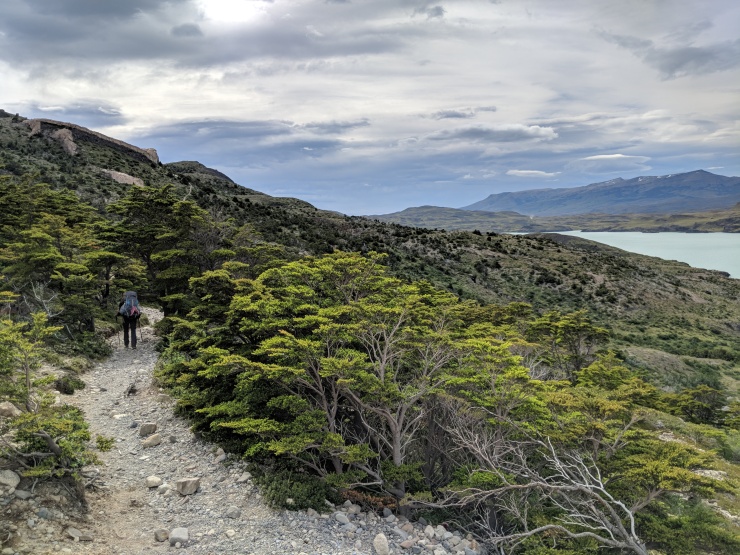
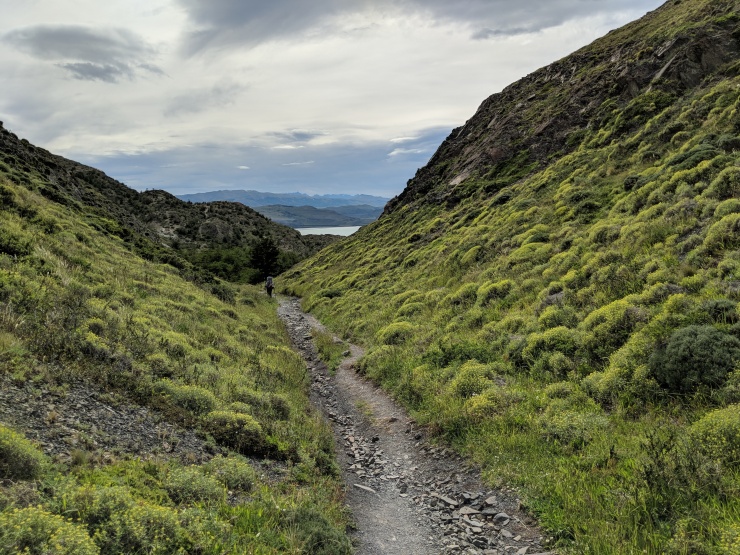
Day 6: ~7.1 miles; +1,300 feet; Refugio Glacier Grey to Refugio Paine Grande
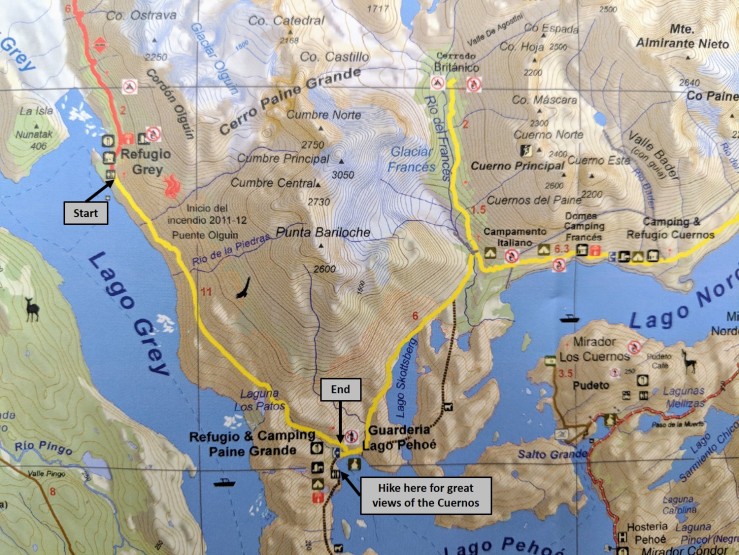
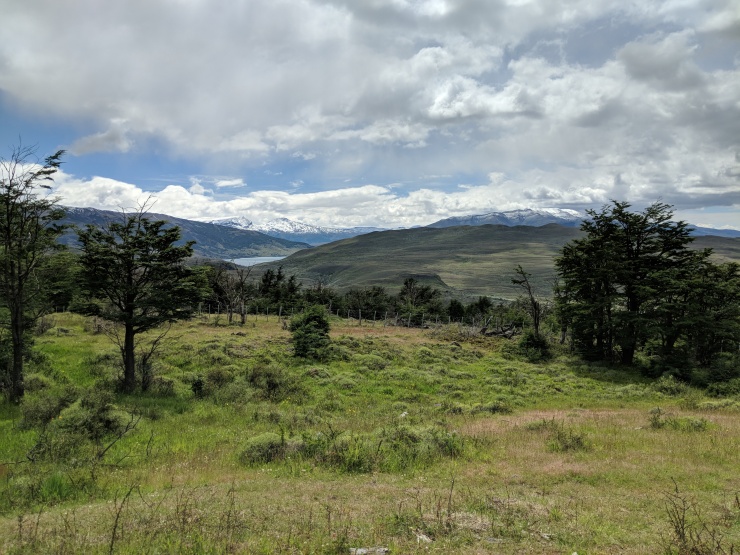
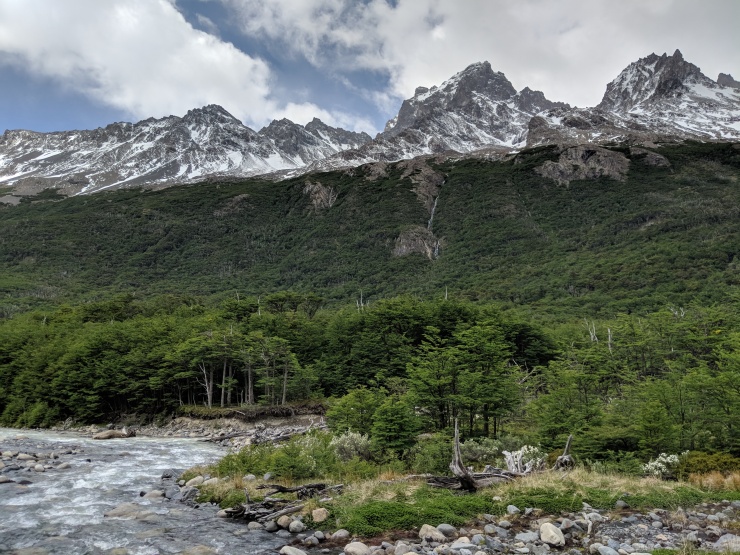
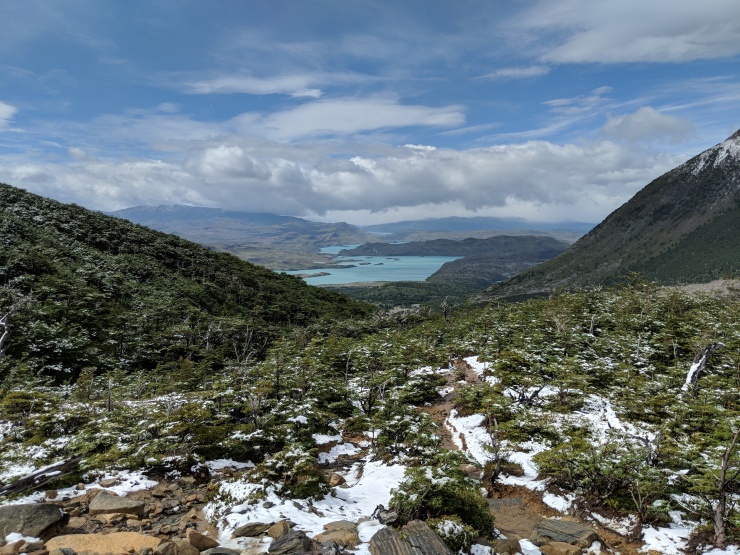
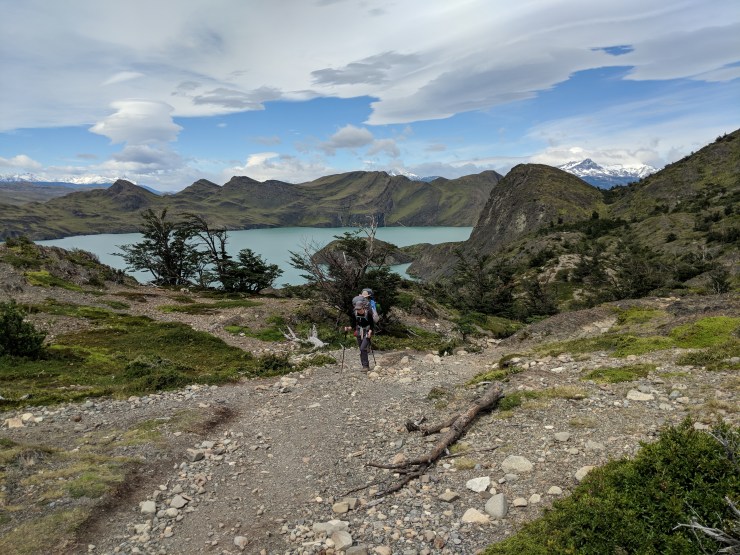
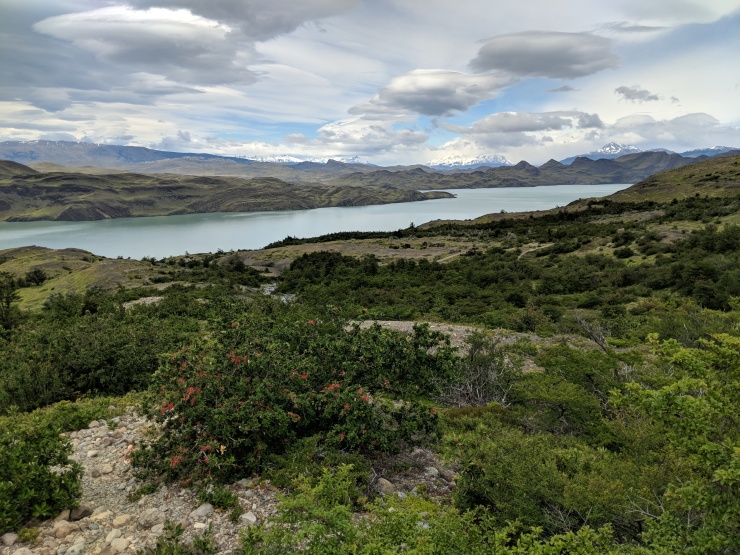
This day’s hike took us about 4 hours. We got on the trail at ~9:00 am and arrived at Paine Grande at ~1:00 pm. We hiked at modest pace and took several short photo breaks along the way. This hike is another fairly easy one. Throughout the hike you are treated to nice views of Lago Grey. There are also look outs where you find views of Glacier Grey when you look backwards. As you approach Paine Grande you will see the turquoise blue Lago Pehoe. It is a very beautiful area.
When you arrive at Refugio Paine Grande, there is a trail that travels Southwest along Lago Pehoe. The trail climbs up a hill and provides great views of the Cuerno mountain range across Lago Pehoe. I highly recommend doing this short trip after you have dropped off your packs and eaten lunch.
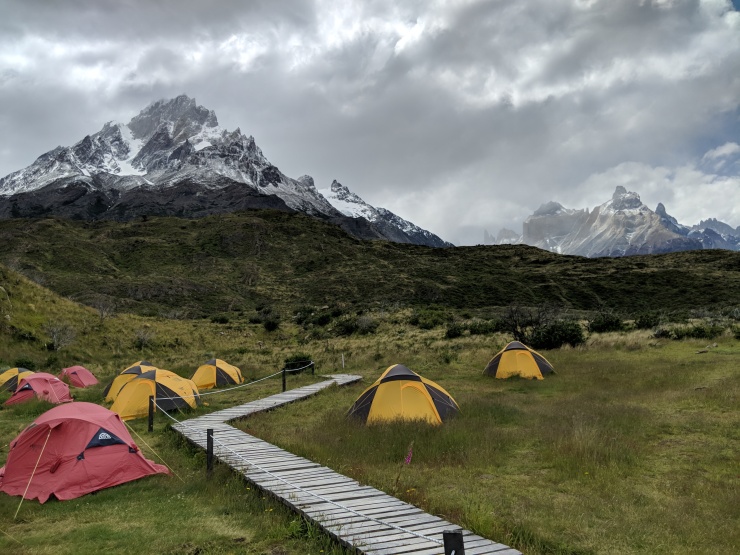
On this night we stayed in the refugio in a shared bunk. Paine Grande was one of the more expensive refugios. The room and showers were fine, but nothing amazing. The primary feature of this refugio is its location in a very beautiful area. There is also a bar on the second floor, which has a great view of the surrounding mountains. If you decide to camp at Paine Grande to save money, be prepared for strong winds. The campground is set in a beautiful location but is exposed to lots of wind.


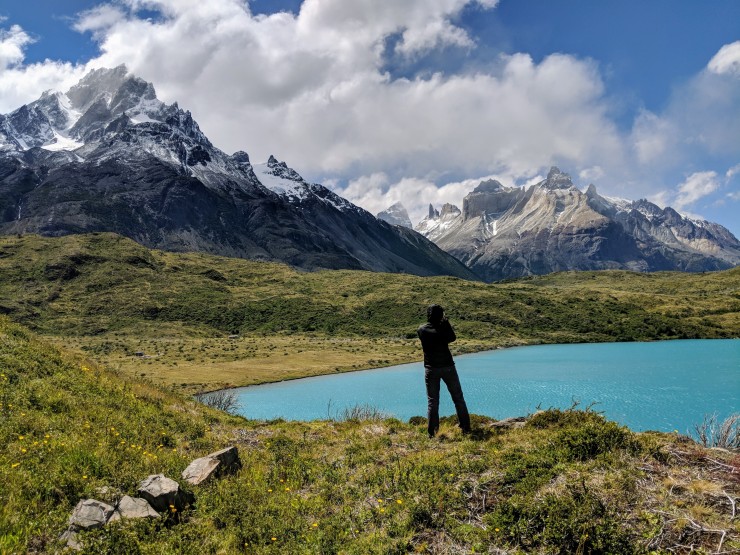

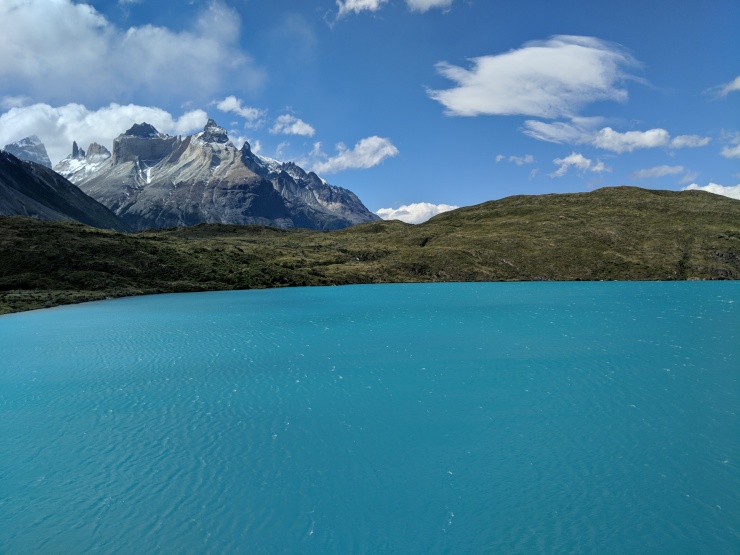
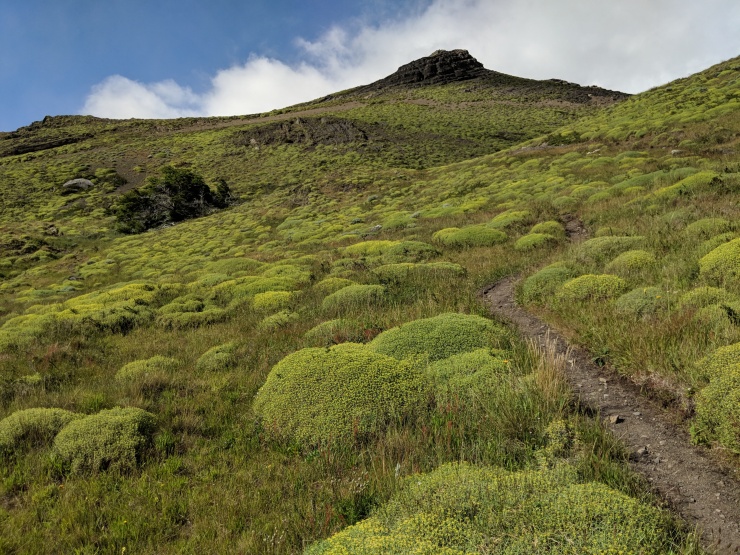
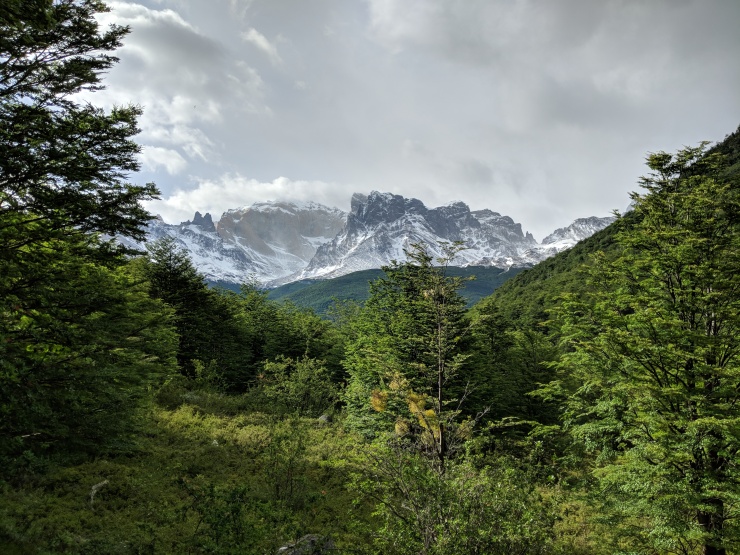
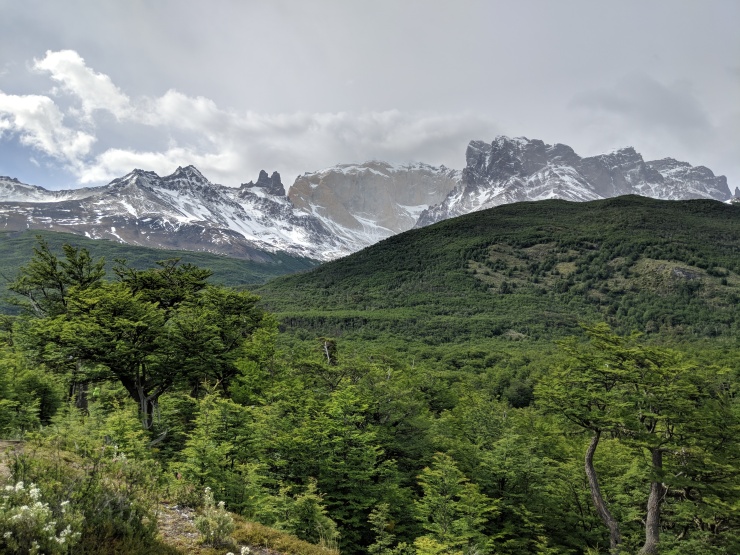
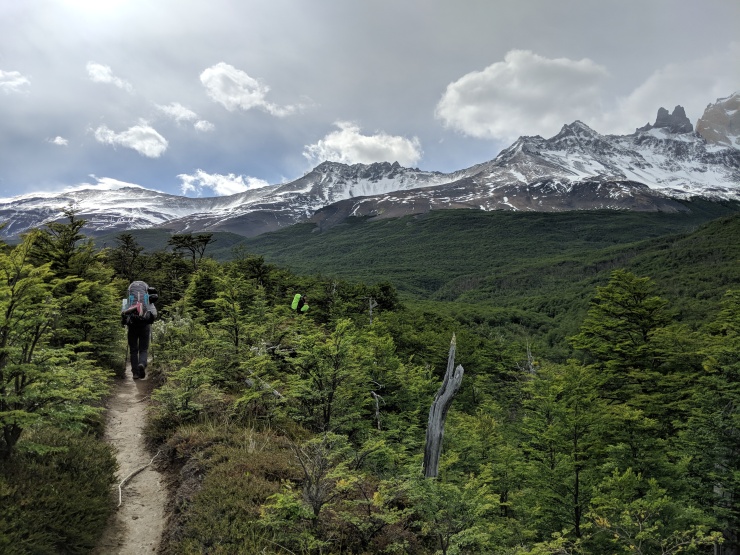
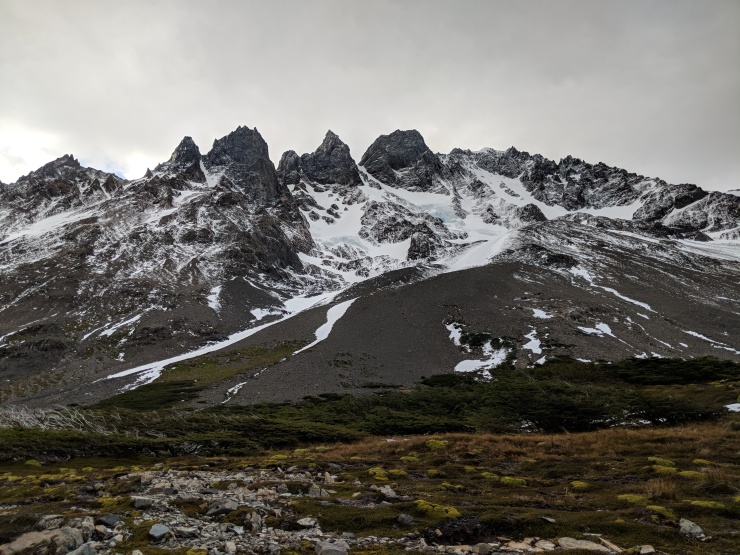
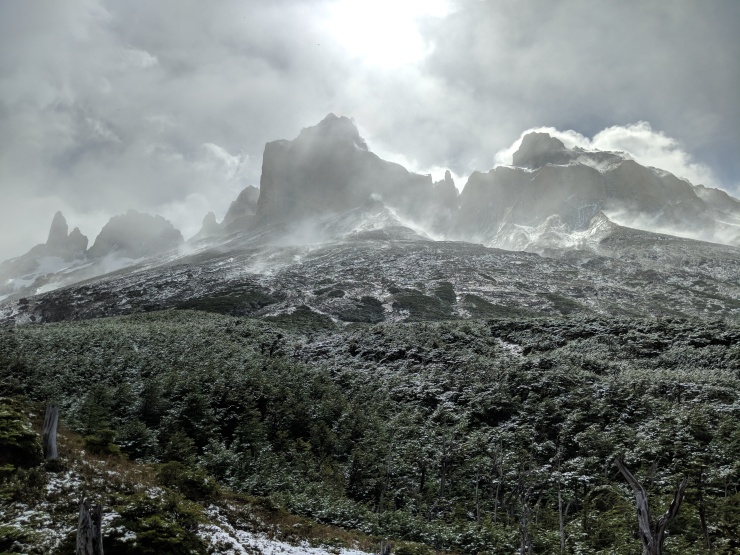
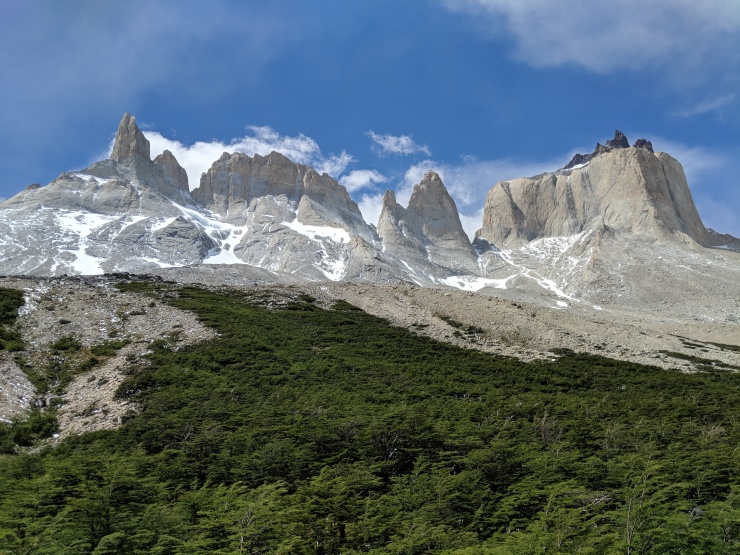
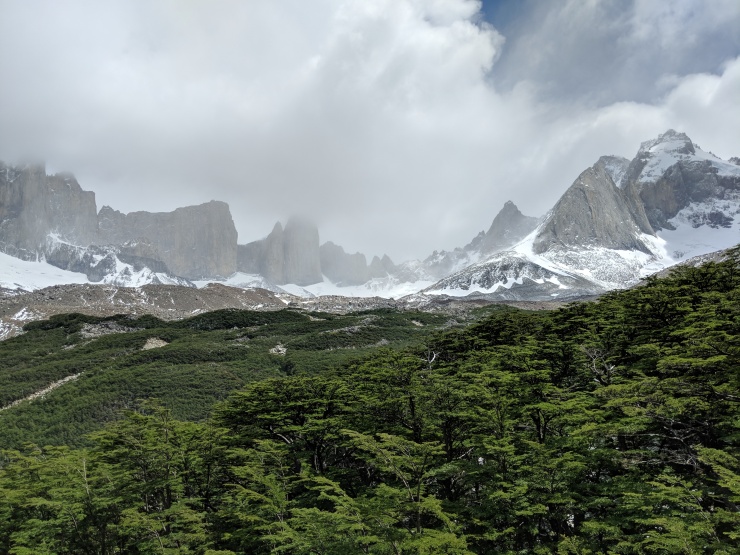
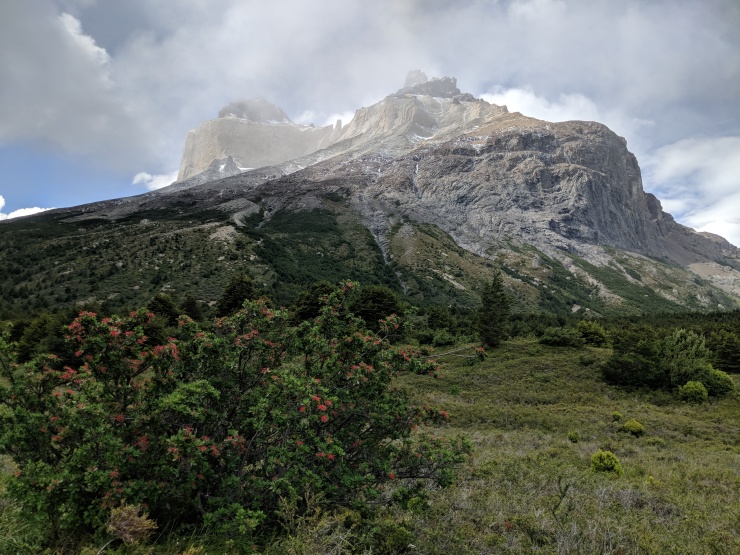
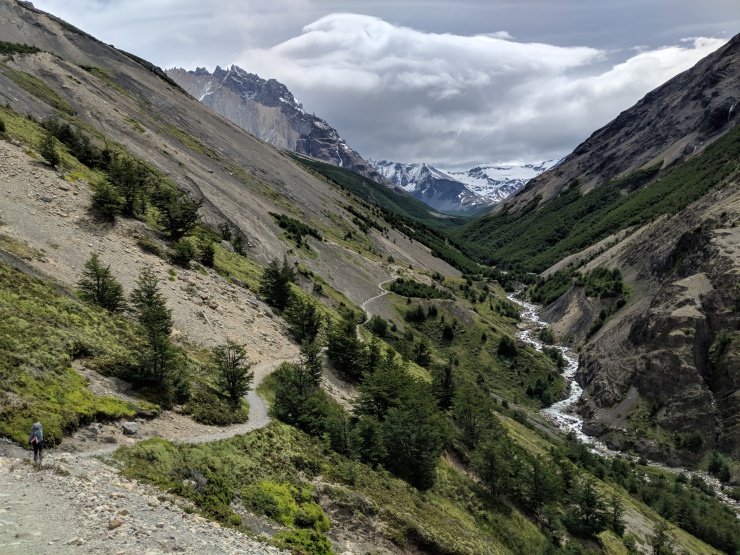
Day 7: ~13.2 miles; +2,950 feet; Refugio Paine Grande to Mirador Britanico to Camping Frances
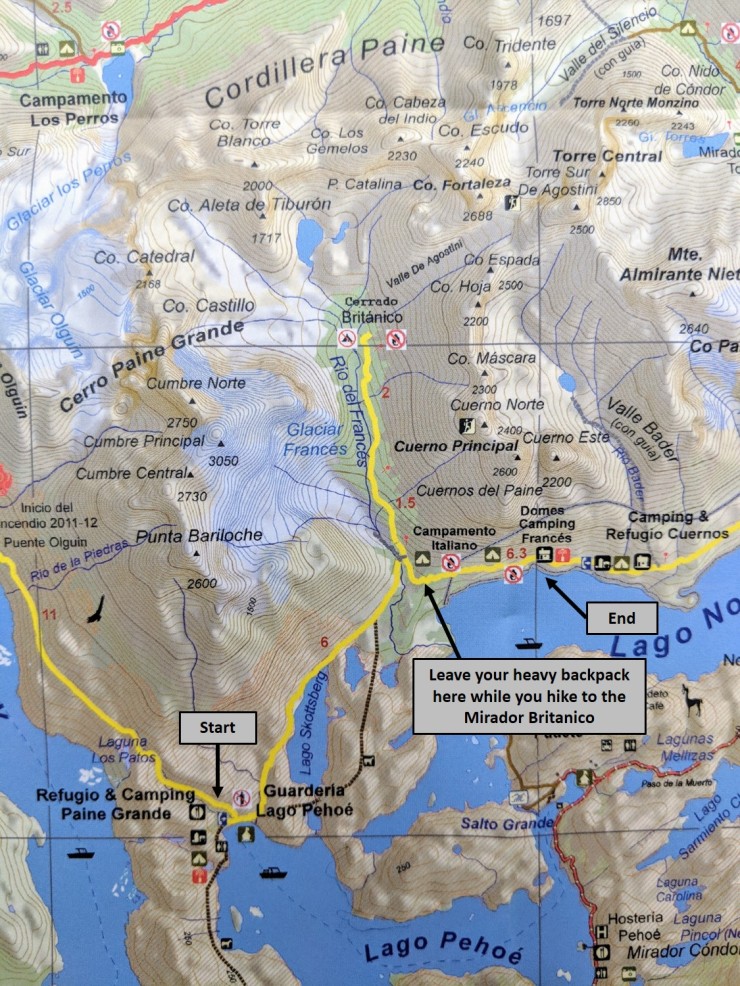
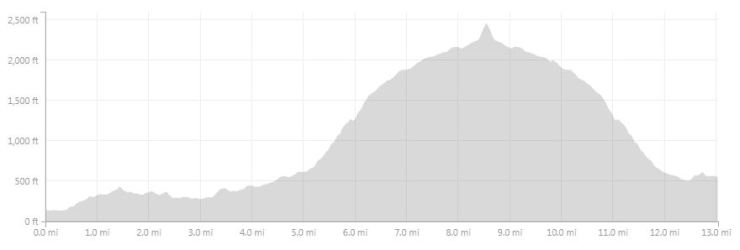
The hike on day 7 is fairly tough. This day’s hike took us about 8.5 hours total. We got on the trail at ~7:30 am and arrived at Campamento Italiano at ~10 am. We then hiked up to the Mirado Britanico (arrived at 12:30 pm), ate lunch, and hiked back down to Campamento Italiano (arrived at 3:30 pm). The hike from Italiano to Frances took roughly 30 minutes and we arrived at ~4 pm.
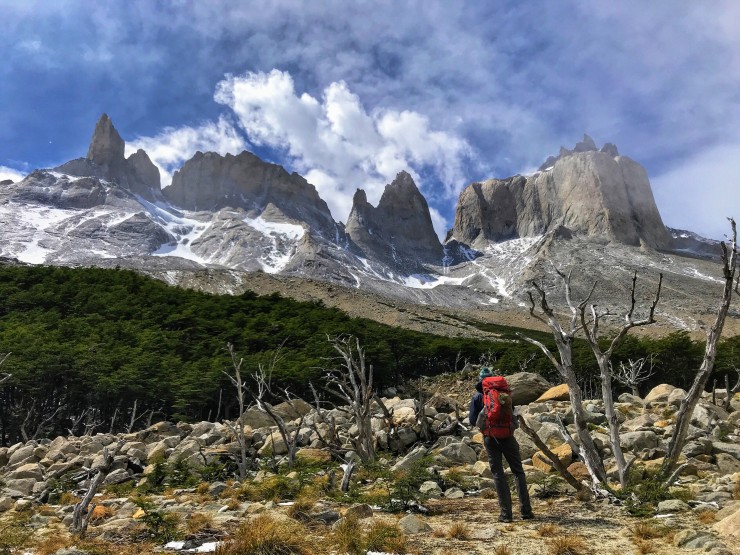
The hike to Italiano is relatively flat and provides some great views. It was snowing when we hiked this section, so the views were limited. In nice weather, this would be a very beautiful section of the trail. When you reach Campamento Italiano, you should leave your heavy pack near the ranger station. You do not want to lug your full pack up to the Mirador Britanico! You definitely will want to hike to this mirador – it is one of the best views in the Torres del Paine. Along the hike you will see glaciers, nice views of the river, and many peaks.
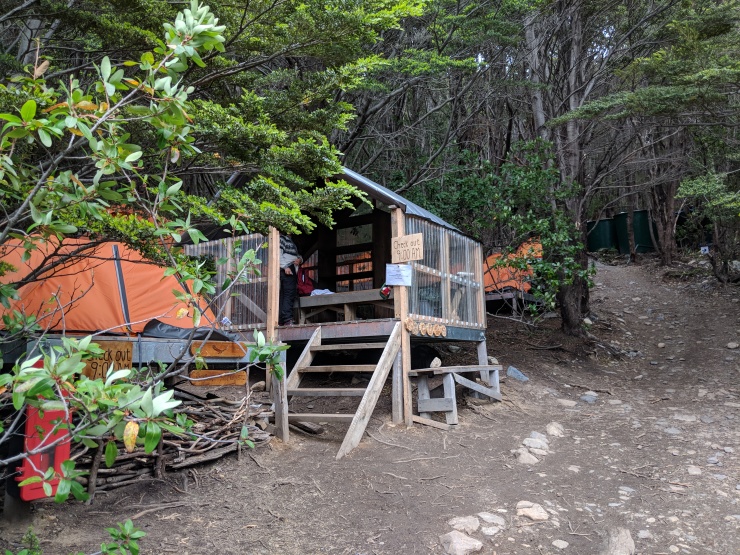
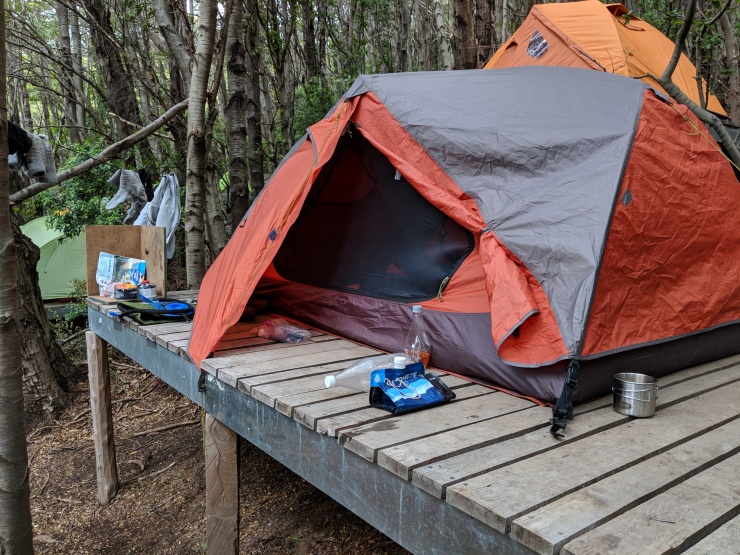
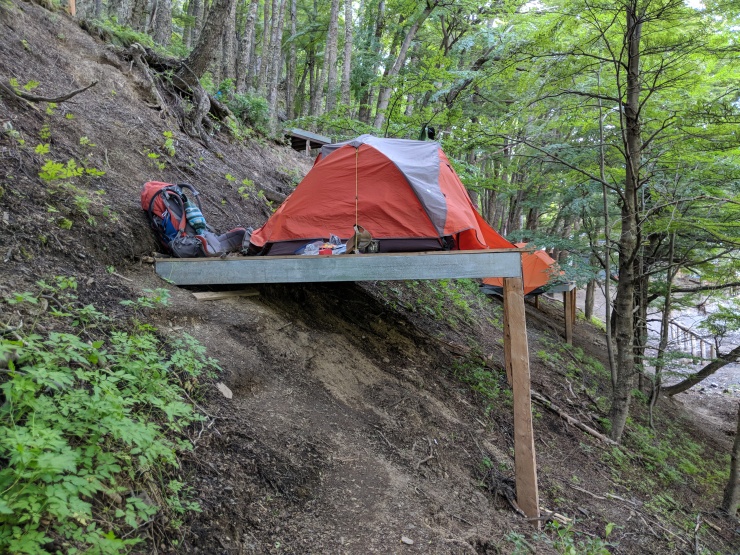
After you get back to Italiano, the final section of the hike to Frances is easy. Frances was a nice campsite with new bathrooms and showers. You must set your tent up on a wooden platform, which can be a bit challenging on the first try. However, they let you cook your food on your platform, so this makes up for it (at all other campsites you must cook in a designated mess tent).


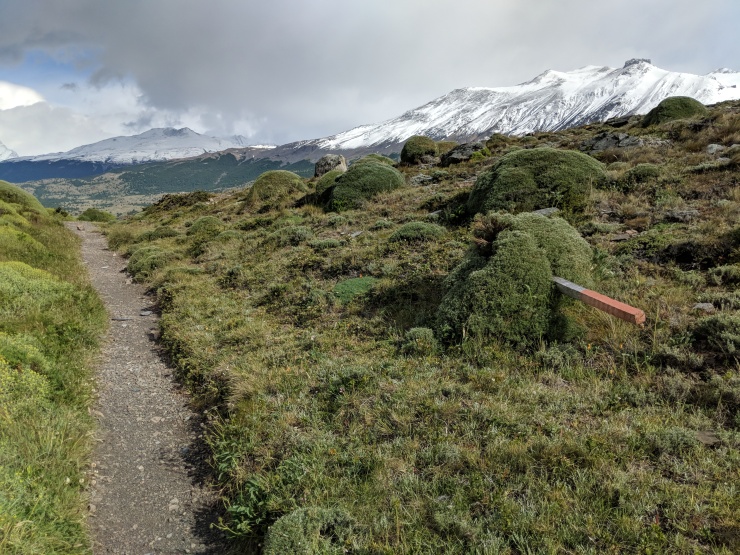
Day 8: ~10 miles; +2,500 feet; Camping Frances to Refugio Chileno
The hike on day 8 took us about 6 hours and was tough. The hike has a lot of steady elevation gain and is moderately long at 10 miles. We got on the trail at ~8:30 am and arrived at Chileno at ~2:30 pm. Along the way we shot many pictures and took a lunch break. I believe the hike felt so tough because much of the elevation gain is between miles 7 and 9. Also, near the end of the hike it was extremely windy and tough to hike. The hike is beautiful, but plan for a reasonably long and tough day.
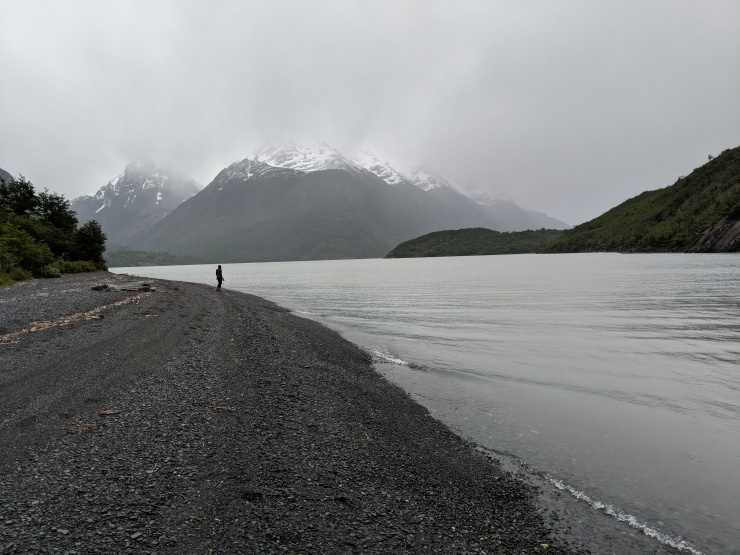
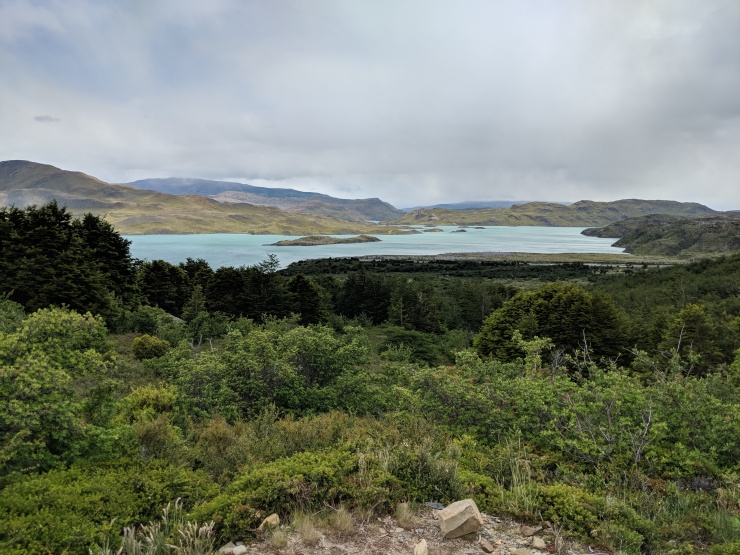
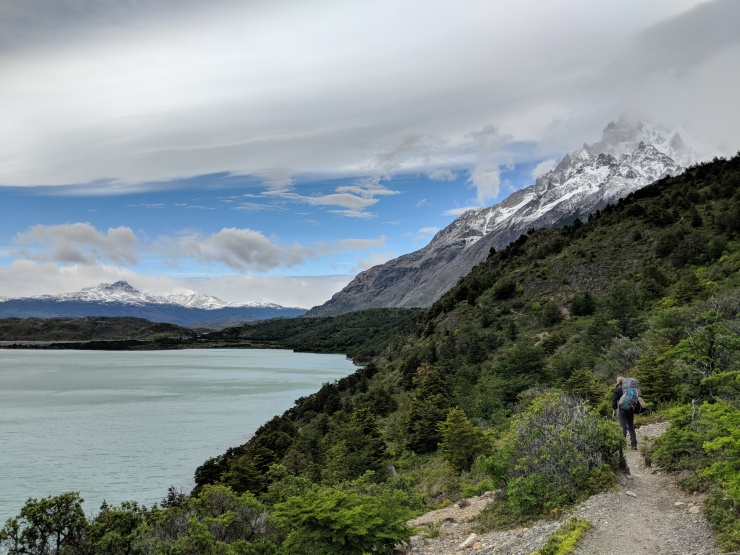
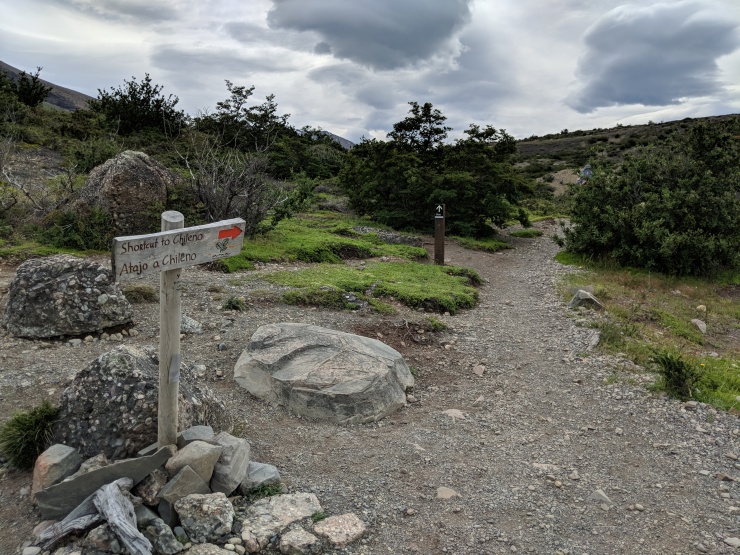
Much of the hike meanders near the edge of Lago Nordenskjold, providing great views across the lake. The trail makes it way all the way down to a beach at the shore of the lake. Then you begin to gain elevation and eventually you reach Refugio Los Cuernos, which makes for a nice spot for a quick break. There are bathrooms and an amazing view of the surrounding mountains. After leaving Los Cuernos, the trail moves inland a bit. This section of the trail has great views of the Cuernos mountains to the North and the lake to the South. Eventually you will reach a sign pointing towards the shortcut to Refugio Chileno. You want to take this shortcut as it bypasses Hotel Las Torres and saves you a couple miles. After the turnoff for the shortcut, the trail begins a steady climb to the valley that the Rio Ascencio flows through. It is likely to be windy in the valley so be prepared. The trail then continues to gain elevation while traveling up the valley. In the last 0.5 miles you make a steep descent and end up at Refugio Chileno.
The campsites at Chileno are wooden platforms like those at Frances. Many of the platforms were on very steep hills, which made them tough to access. There were also hot showers and bathrooms, which were nice. Chileno had a very nice lodge that we hung out in at night and drank some beer and played cards. It had a wood fire and power outlets where we charged our phones. We had to purchase our meals at Chileno, and the food was fairly mediocre. That was unfortunate, but the only alternative was to stay at Las Torres and have a much longer hike the next day.


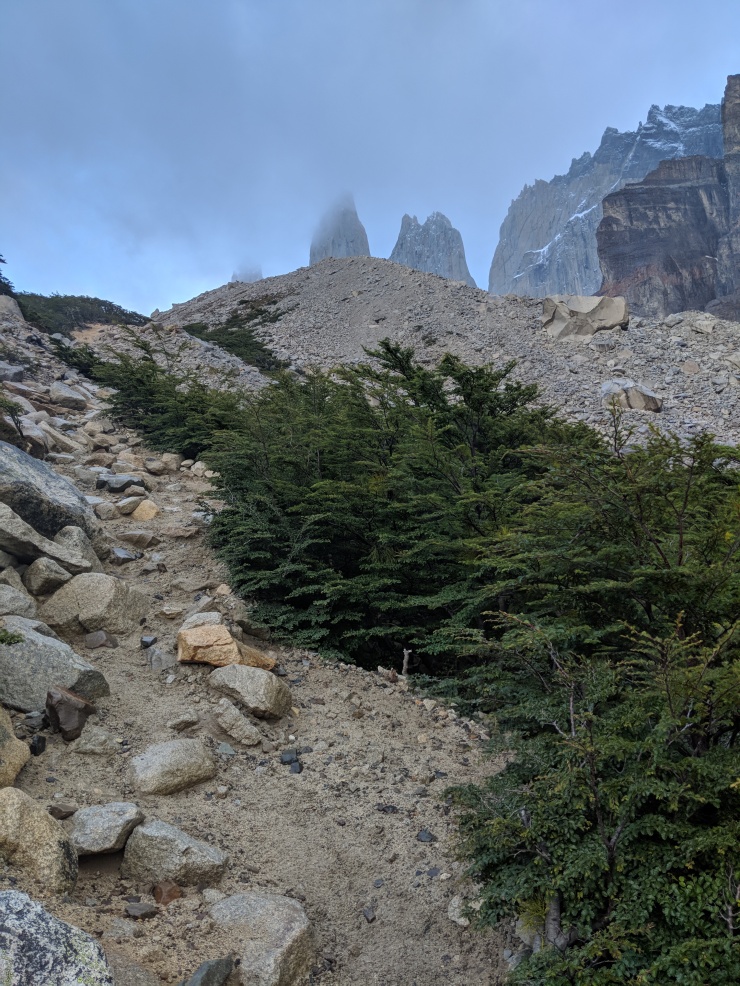
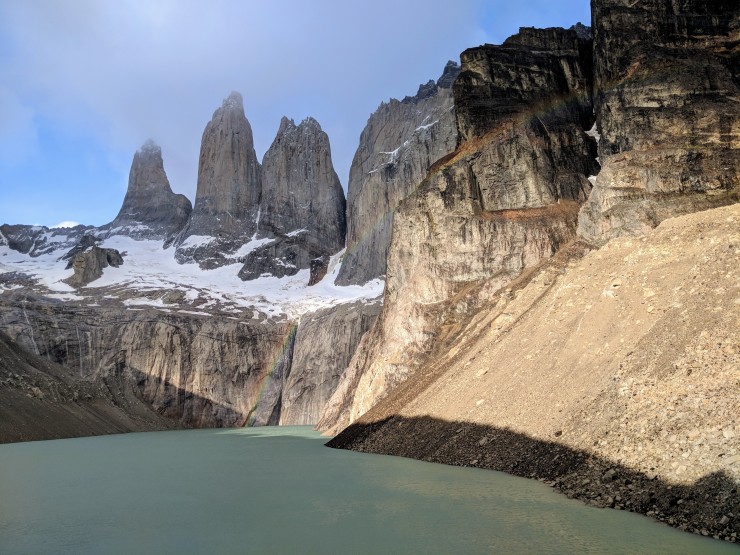
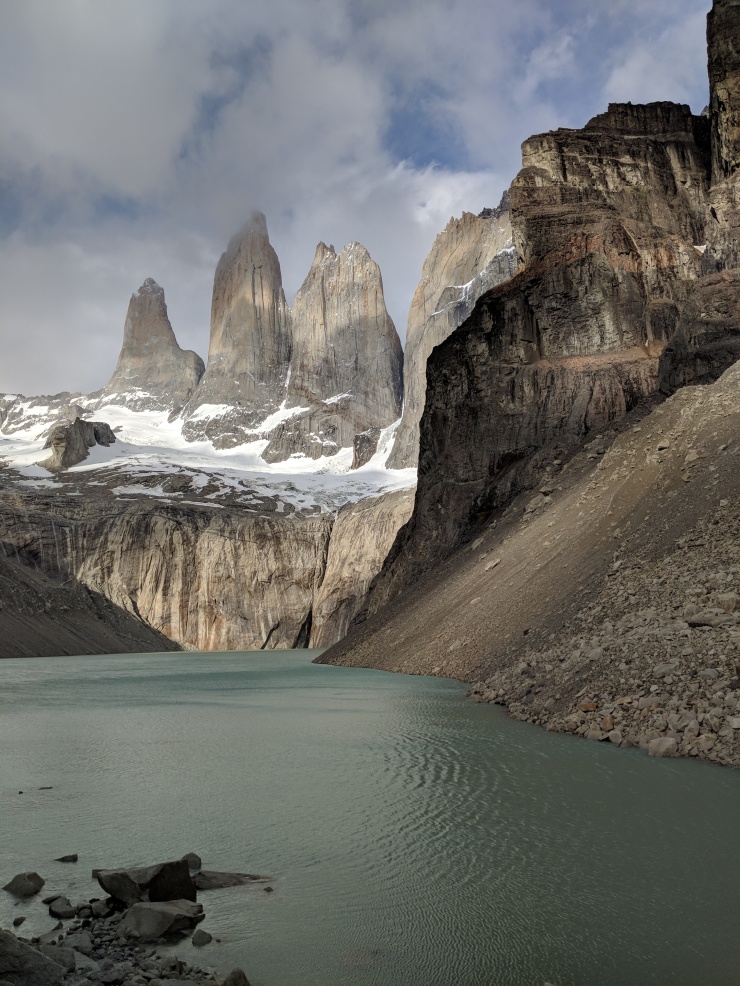
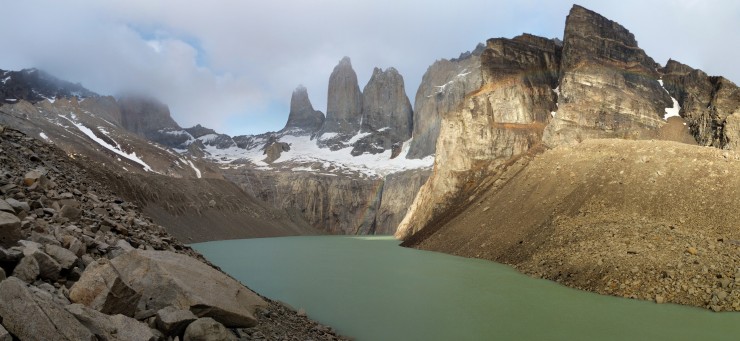
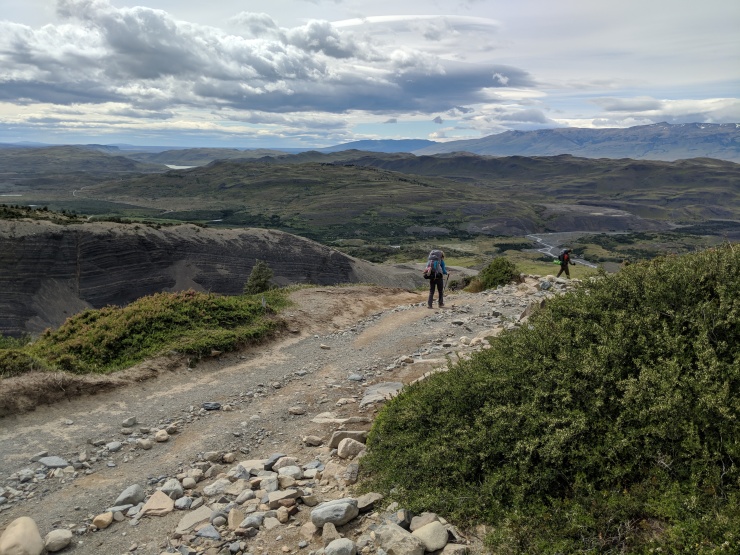
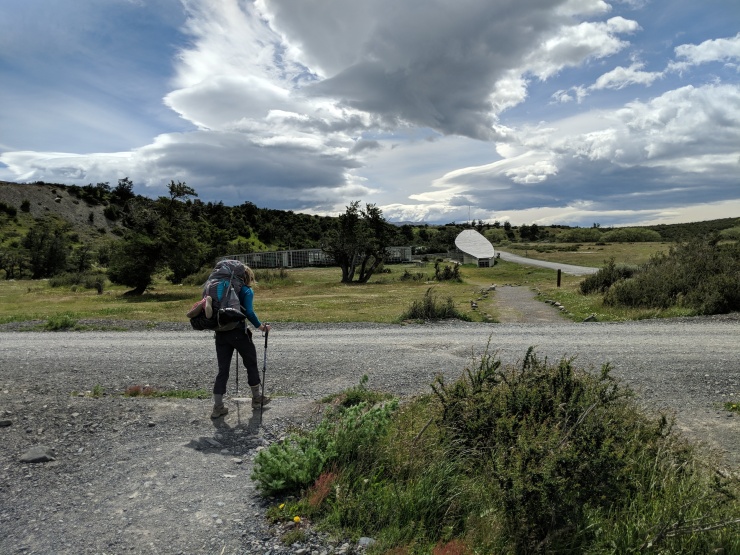
Day 9: ~9.8 miles; +2,250 feet; Refugio Chileno to Mirador de las Torres to Welcome Center
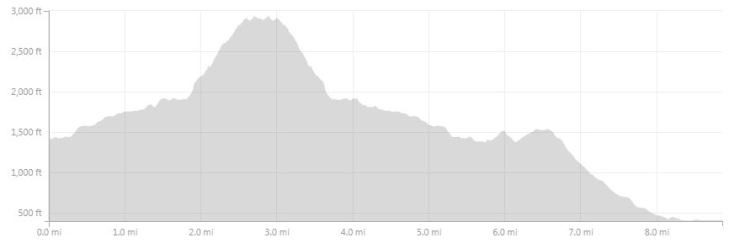
This day’s hike took us about 7 hours. We got on the trail at ~5:45 am and arrived at Mirador de las Torres at ~7:15 am. We took a break and ate a snack at the mirador and then headed back to Chileno, arriving at ~9:15 am. We spent an hour packing up our tent and eating some more breakfast. We set off for the Welcome center at 10:30 am and arrived at ~12:15 pm.
This makes for a long hike, but you are able to finish early in the day if you get off to an early start. Some people choose to hike up to the Mirador in the dark so that they can see the Torre Tower towers light up at sunrise. Because the sun rises very early in the summer, you may have to leave camp at ~3 am to catch sunrise. We wanted some extra sleep and decided to leave at 5:45 am. We only took day packs and left our tent on our platform.
The hike up to the mirador is a steady climb for the first 2 miles. In the third mile it gets steeper and there are many large rock steps you need to negotiate. The tough hike is worth it though because the mirador has a great view of the Torre Towers. It was cold and windy at the mirador, so we did not stay too long. When we got too cold, we headed back down to Chileno and packed up our camp. The final trek from Chileno down to Hotel Las Torres is a somewhat unremarkable 3.5 mile descent. You likely will encounter many hikers coming up the trail from the hotel and from the Las Torres Refugios.
Eventually you reach the Hotel Las Torres and then must hike a bit longer to reach the Welcome Center. At the Welcome Center we freshened up a bit, bought some beer, and ate a quick lunch before catching the shuttle to Laguna Amaraga. Once you reach Laguna Amarga, you find your bus and start the journey back to Puerto Natales!


Here are some similar trip reports!
Machu Picchu – 5 Day Salkantay Trek
Los Glaciares National Park, Patagonia – Mount Fitz Roy, Cerro Torre, and the Perito Moreno Glacier

Amazing trip report! Thank you!!!!
LikeLike
This was a great blog – thank you for all the lovely pics! Very informative and the information appears to be the most accurate I have seen.
LikeLike
Hello, nice, very complete report, Great Job! But don’t forget to credit the nice SIG Patagon nice maps – SIG Patagon – thanks
LikeLike
Your Torres Del Paine post was really helpful. I had a question about the 6 day itinerary. For hiking from Los Perros to Paine Grande, how long do you estimate that takes? Are the estimations on Fantastico Sur’s Map accurate or conservative? Also do the rangers allow it? I’m trying to hike from Los Perros to Paine Grande and take the catamaran out in one day if possible.
LikeLike
I’m glad the report was helpful! The hike from Los Perros to Paine Grande would be quite long and arduous. The mileage around 17.5 miles, so you would be hiking for most of the day. I’d say a fast backpacker who doesn’t take many photo breaks may be able to finish the hike in 9 hours. Most people would probably take >10 hours though because there are some really beautiful sections and because there are some steep sections between Los Perros and Paso.
If you plan to do this hike all at once, make sure you are in good shape, have packed a fairly light backpack, and be sure to wake up and leave early in the AM. Also, please keep in mind that the John Garner Pass can be occasionally closed, so it’s possible you could miss your catamaran (maybe do not book any flights immediately after you are due to exit the park).
I recall the estimates on the park map being pretty reasonable. It is hard to say though because we took a lot of pictures and tried to really take in the scenery, so I did not pay too much attention to the estimated times. A good rule of thumb is that an in shape backpacker can often finish a hike at a 30 minute/per mile pace. If in shape, you can hike at a rate of 20-25 minutes per mile. Throw in some occasional water breaks and a lunch break, and the average pace goes up to 30 minutes per mile. This is obviously dependent on how long your breaks are and how fast of a hiker you are, but it works for me…
For your proposed hike, I imagine the rangers would allow it but really have no idea. The rangers seemed to be most concerned with making sure your had camping reservations for camps on the backside of the O. Your hike would be long, but I doubt the rangers would prevent you from doing it (you results may vary though).
Best of luck with the trek!
LikeLike
Hello Emma, you should get a SIG Patagon map for your trek! haaha. I don’t put times on my maps as there are too many variables involved to make an estimate. I am slow and take my time, so probably couldn’t do it unless it was urgent to make it to Paine Grande from Perros. My friends at Erratic Rock have a TDP talk every day at 3:00 to get updates on the trek. Have fun!
LikeLike
Great and beautiful trip report on the Patagonia circuit. I know you can’t fly with camp stove fuel any more so was wondering if you know whether you can purchase the gas canisters in Puerto Natales or whether I need to plan on bringing my old liquid gas backpacking stove and fill the gas bottle there? Thanks so much
LikeLike
Hi Kerry – yes, there are plenty of shops selling outdoor gear and supplies in Puerto Natales. We had a butane stove so I can’t be certain about white gas availability. But, I would bet you will have several places to buy it from. Just go downtown and there are many stores renting and selling supplies!
LikeLike
thank you so much.
LikeLike
My wife and I want to hike the circuit at the end of this year but she is worried about hiking over the pass. She read somewhere that a hiker died on the pass. How hard is it to hike over the pass… Did you feel safe?
LikeLike
Hi Rupen – The Circuit in Torres del Paine is generally very safe if you are a fit hiker with some modest backpacking experience. If you have never backpacked or done a long hiking journey before, you can maybe try to join up with another group at a hostel? The trail is pretty busy during the hiking season, so if you have any issues you are likely to meet up with other hikers who can give advice or help out if need be. That said, if you are not fit or ready for an 80 mile journey, maybe try the W trek instead.
As far as the John Garner Pass goes, the hike up is pretty strenuous. It’s an uphill climb and you cross some small snow fields and streams along the way. We never felt in danger the morning we went over the pass. You just need to be ready for the climb and then watch your step when you cross the snowy sections and streams.
There is a ranger station at the Los Perros campsite. The rangers typically check the weather on the pass each morning and then report back and say whether or not it is safe to hike up. If you have any doubts, you can always ask the rangers about the weather! The main thing is to not try to get over the pass if the rangers say the weather is bad.
LikeLike
Your report here is so helpful! Thank you for going through all the effort! I really appreciate the breakdown of the days along with the map and elevation chart as well. It really helped me to get my sites booked properly and understand all of it clearly. THANK YOU!
LikeLike
Awesome, hope you have a great trip!
LikeLike
Hi. I was wondering what you did for currency while on both the circuit but also in town. Do most of the camps take credit card or do you need to convert dollars into Chilean or Argentinian currency? Thanks
LikeLike
Hi Kerry – We withdrew cash from an ATM in local currency at the airport in Santiago, Chile. You could also find an ATM in Puerto Natales. We had to pay cash for the entrance fee at the park (perhaps they take credit card for this now, but I’m not sure). At the refugios, they took credit card, but I would have some cash as a backup. Hope you have a great trip!
LikeLike
thank you so much for your great information.
LikeLike
Hey, thank you for this very useful guide! I’m primarily concerned about the toughness of the hikes because I’m not in the best shape. Is it mostly climbing? Would you recommend getting fit in advance? Thanks!
LikeLike
Hi Sophia – there is a good amount of climbing along the trail. You climb over 16,000 feet over the course of the 80 mile circuit! I would recommend trying to get into good hiking shape before starting the circuit. The better shape you are in, the more enjoyable the experience will be for you.
If you are worried about your fitness level, I would make sure to take 9 days (like we did in the itinerary described above) to hike the circuit. Trying to cover the 80 miles in fewer days will be tough unless you are in good shape. You can also try to lighten your pack by having meals at the refugios (when available) so you can carry less food. Alternatively you could hike the W trek instead of the Circuit and could stay at exclusively at refugios so you don’t even have to carry a tent. I hope that helps!
LikeLike
Did you have a favorite refugio? We are planning a future trip and want to know which refugios to splurge on and get a bed and dinner. Any info is appreciated!
LikeLike
Hi Jill – Out of the ones we stayed in, we really liked Refugio Dickson and Refugio Grey. Dickson was is a beautiful setting and is a nice cozy refugio. On the plus side you have a nice fire place and relaxing atomosphere. You can also go explore the lake nearby. On the negative side, there is not a bar to hang out at and there were not many showers (some were broke when we were there). Grey was nice because they had a big cafeteria and bar area where you would spread out and talk to other people if you wanted. They also have large bathrooms with several showers. On the negative, it was not super cozy and you shared the space with a lot of W trekkers. We had dinner at Grey and enjoyed it.
We also stayed at Paine Grande. It was fine, but was kind of big and hotel like and the vibe wasn’t as unique as Dickson or Grey. Hopefully those notes help ya, have a good trip!
LikeLike
Hi there, love your report. I am hiking the O loop next year in March, cannot wait. In your opinion, do you think hiking from Paine Grande to Los Cuernos, missing Frances is a bit of a stretch for that one day? Thank you so much!
LikeLike
Hi Lexie – I think skipping Frances can be done, but it will make an already tough day slightly tougher. The extra ~2 miles will not be too terrible since they are mostly flat. Just be ready to be tired when you get to Cuernos!
LikeLike
An excellent write up, thank you for taking the time. It has answered many questions. Muchas Gracias
LikeLike
We did the full O circuit in 2011. Someone told me it was the Q but I’m not sure if that’s correct.
LikeLike
Thank you fort the very useful information on this report! Doing the circuito O, starting in March 1/2020! Question: I’m doing the circuit in 8 days, with a guide, so I do not carry gear for camping, but everything else I do. One of the days I’m going from Gray to Paine grande. The next day I have schedule the ice walk for 4 hours and then finished the day at cabaña los cuernos. Any thoughts? Two long days in a row. Thanks in advance for any insightful info.
LikeLike
Hello – The hike from Grey to Paine Grade is not bad and should not take too long. Doing a 4 hour glacier walk and then hiking from Paine Grande to Los Cuernos will be quite a long day (especially if you take the side trip hike up to Mirador Britanico). Would it be possible to do the ice walk when you are at Grey? If so, then you could do the ice walk in the morning and then hike from Grey to Paine Grande afterwards. If this is not possible, you may just need to be flexible on whether or not you go up to Mirador Britanico on the long day from Paine Grande to Los Cuernos. If you end up with the time and energy, go for it. If you are feeling tired and running out of daylight, skip the mirador and go straight to Los Cuernos. I hope that helps!
LikeLike
Thank you! I will bring this comment to the guide and see if we can work with these suggestions.
Kind regards,.
A
LikeLike
I was supposed to be on day 3 of the O today, but alas, coronavirus struck. Instead of hiking, I’m cooped up in a house back in the US. As a mood booster, I’ve decided to take the 8 days of what would have been my hike and write about 8 hikes I’ve taken before. Just to tease what would have been, I’m going to put a map of what I would have hiked had I been in TdP. Is it okay for me to use your daily maps on my blog? I’ll put the direct link to your page below each one. I also looked a lot at your page while I was planning, which I can mention. All the info was very helpful, and it’ll be handy when I get to actually do the hike!
LikeLike
Sure, feel free to use the maps and a link to the site is appreciated! Sorry you missed your trip.
LikeLiked by 1 person
Hey, those are my SIG Patagon maps! hahhah How did you make it back to the States? I am still here!
LikeLike
My situation was special. I was on a US research vessel traveling from Antarctica to Punta Arenas. Somehow the right strings got pulled for us to dock in PA. We couldn’t go into town, but we had permission to grab gear from our warehouse and then go to the airport. LATAM got us from PA to Santiago, and Delta got my crew to Atlanta. We headed to our separate corners of the country from there. Amazingly Delta even successfully got my luggage and me all the way to Fairbanks, Alaska, without any cancellations or lost luggage!
Do you have plans to leave Chile, or are you stuck?
LikeLike
Hi – actually I live here, so I am stuck here – hahaha!
LikeLike