


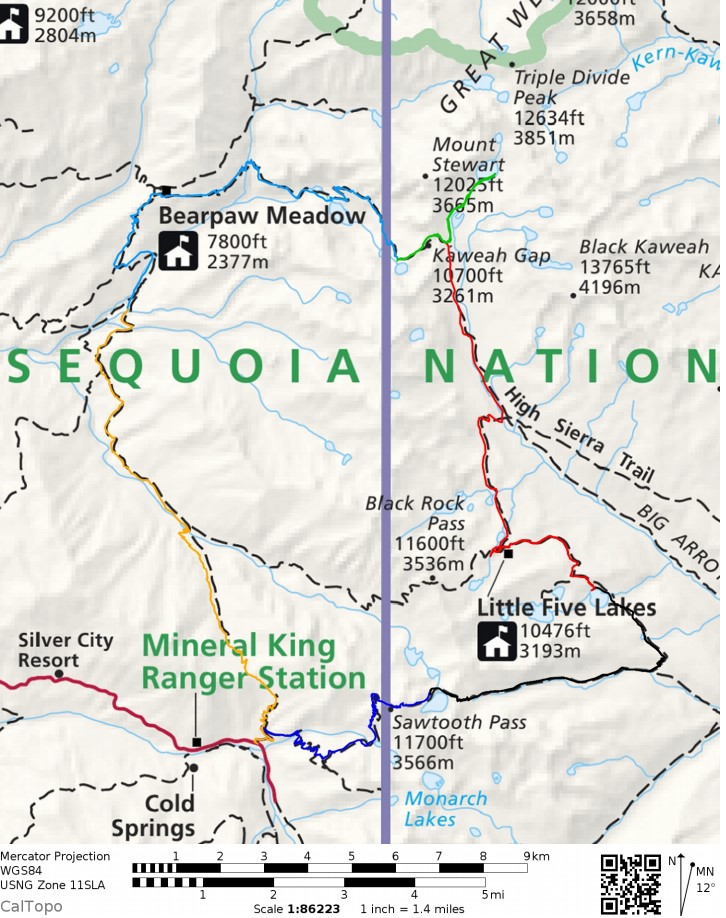
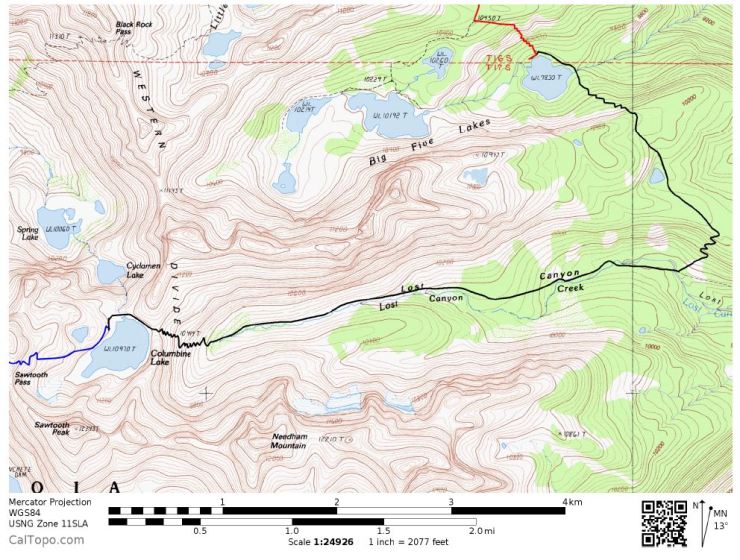
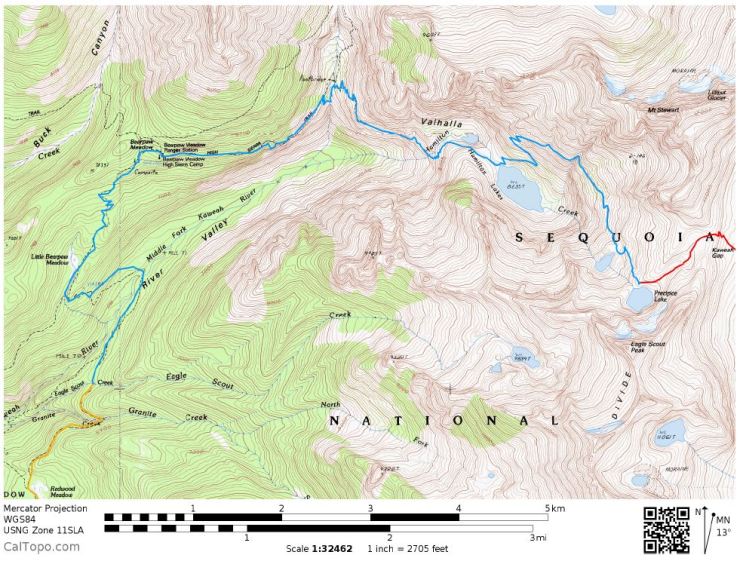
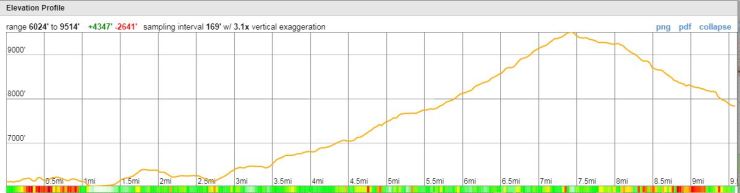
Trip Overview: The Mineral King Loop is a ~45 mile loop in the Mineral King area of Sequoia National Park that traverses 10 miles of the famous High Sierra Trail and climbs over Sawtooth Pass, Kaweah Gap and Timber Gap. +/- 12,000 feet of elevation with a starting elevation of 7,800 feet and a peak elevation of 11,800 feet. Highlights include alpine lakes, expansive granite canyon views, and scenic lake-side campsites. We completed the trip over 6 days and 5 nights in September of 2015.
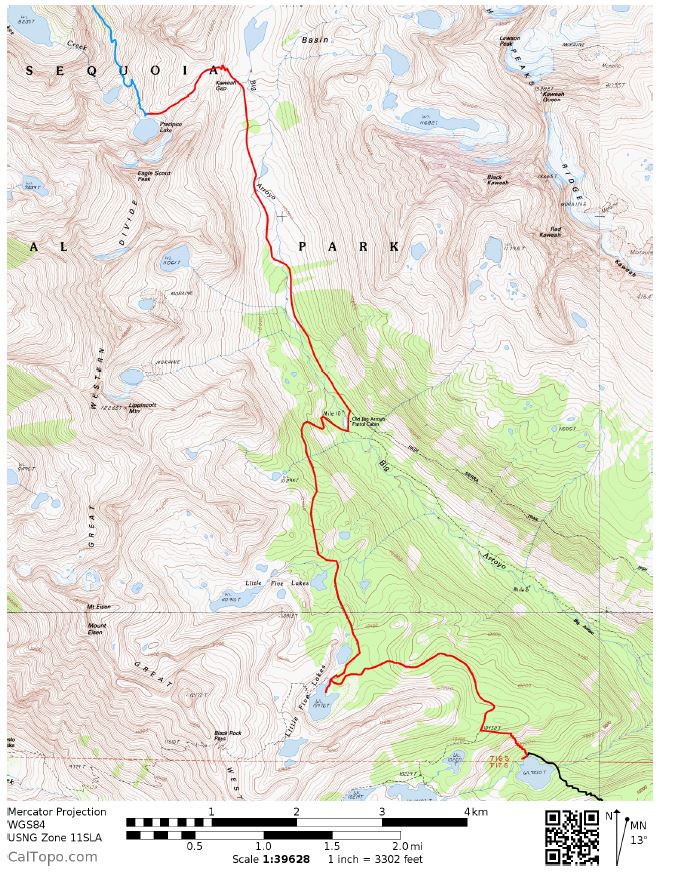
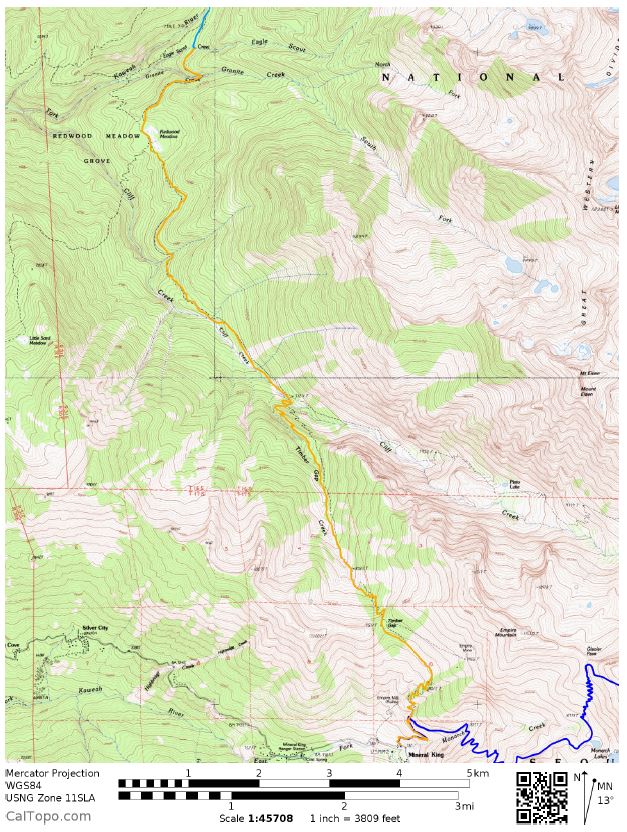
- High resolution USGS topographic map part 1 (pdf) and part 2 (pdf) and part 3 (pdf)
- Link to purchase topographic map (Tom Harris Mineral King Trail Map)
Jump to Day 1: Sawtooth Trailhead to Columbine Lake
Jump to Day 2: Columbine Lake to Big Five Lakes
Jump to Day 3: Big Five Lakes to Precipice Lakes
Jump to Day 4: Exploring the Nine Lakes Basin
Jump to Day 5: Precipice Lake to Eagle Scout Creek
Jump to Day 6: Eagle Scout Creek to the Sawtooth Trailhead
Shop Sale & Clearance Items at REI.com (up to 50% off)!
Permits: Permits are needed for any backcountry wilderness camping in Sequoia National Park. You do not need to apply to a lottery for permits in the Mineral King area, but they do limit the number of hikers entering each trailhead. If you want some certainty, it is easy to email or call the ranger station to reserve a permit. For more information about permits and the reservation process, check out the NPS website for Sequoia and Kings Canyon National Park.
Logistics: The trailheads in the Mineral King area are not quite as popular as the Rae Lakes Loop or the High Sierra Trail. That said, it is still worthwhile to reserve your permit ahead of time to ensure you can enter at your desired trailhead (Sawtooth Pass for this itinerary).
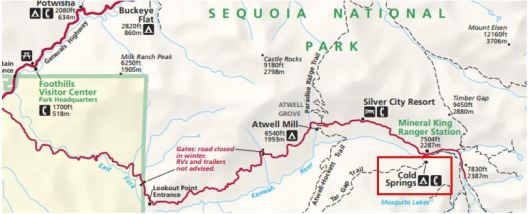
If you need to camp near the trailhead the night before going on your trek, there is Cold Springs Campground and Atwell Mill Campground nearby. These campgrounds are first come, first serve and there is a $12 fee per night for camping. Camping the night before your trek will give you a bit of time to acclimate to the high elevation in the Mineral King area and will let you get some sleep before tackling Sawtooth Pass on day 1 of the trek.
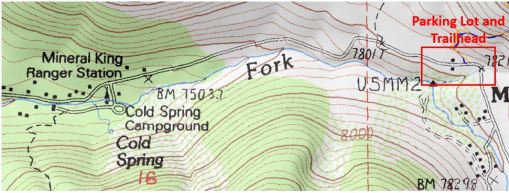
The Mineral King Ranger Station is on the way to the Sawtooth Pass Trailhead, so you can pick up your permits the morning of your hike. At the ranger station, there is a community storage shed we used to store the food and scented items we were not bringing on the hike (so bears did not try to get in our car). Once you get your permit, continue down the road to the trailhead. You can leave your car here while on your trek.
Trail Conditions and Difficulty: This itinerary is fairly strenuous, so you will want to be in pretty good hiking shape. There is a good amount of climbing which makes for some tough days (but also great views). The first day hike is tough because the Sawtooth Pass trail is unmaintained and is a bit hard on your legs. Once over Sawtooth Pass, the trail is well maintained and well marked.
Supplies: There are black bears in the area, so you are required to either bring a bear canister or a dry bag and rope for hanging your food. Rangers recommend using a bear canister rather than hanging your food. It seems as though some bears are smart enough to capture many bags of food hanging from trees.
You likely will want bug spray because the mosquitoes can be out in force in certain areas of the trek. I prefer a picaridin based spray because it does not damage plastics and synthetic fibers like high concentration DEET sprays do. I also like to pre-treat my clothes and tent with permethrin spray repellent
. The permethrin treatment stays on your clothes for up to 7 washes, so it helps reduce the amount of spray you need to put on your skin.
The other essential item for this trek is an inflatable sleeping pad. Most of the campsites are on pretty hard granite or gravel surfaces, so a good mat makes all the difference. If you plan to hike up Sawtooth Pass, you will want trekking poles and possibly microspikes/crampons. Depending on the time of year you hike, there can be snow on Sawtooth and the trail is not well maintained. The trekking poles are helpful because you can use them for stability in place of an ice ax (unnecessary for this hike in most conditions). It’s always best to call the ranger stations before starting your trek to ask about the conditions of the mountain passes and get an idea of what equipment they recommend.
Below is a list of the gear I brought on this Mineral King trek:
Hiking clothes
- a lightweight hiking rain jacket (North Face Venture 2 Jacket)
- fast drying synthetic hiking pants (prAna Zion Pants)
- a quick drying long sleeve hiking shirt (Columbia Silver Ridge L/S Shirt)
- wool outer socks (People Socks Moreno 4-pack)
- thin blister preventing base socks (WrightSock double layer Coolmesh)
- quick drying synthetic boxer briefs (ExOfficio Give-N-Go)
- Gore-tex hiking shoes (adidas Outdoor Terrex Fast R Gore-Tex Shoe)
Clothes for camp
- wool leggings (Minus33 Merino Wool Kancamagus Midweight Bottom)
- wool base layer shirt (Minus33 Merino Wool Chocorua Midweight Crew)
- warm wool overshirt (Pendleton Long Sleeve Classic-Fit Board Shirt)
- lightweight down jacket (Patagonia 800-fill Down Jacket)
- lightweight camp shoes (Xero Z-Trail lightweight sandal)
Hiking gear
- topographic map (Tom Harris Mineral King Trail Map)
- trekking poles (Black Diamond Trail Ergo Cork Trekking Poles)
- 2 liter hydration bladder (Platypus Big Zip Water Reservoir)
- 65 liter backpack (Osprey Atmos 65 Liter pack)
- water filtration system (Platypus gravity filtration system)
Camp gear
- strong tent with rain-fly (Alps Mountaineering Chaos 2 Tent)
- inflatable sleeping pad (Therm-a-Rest Trail Pro Sleeping Pad)
- sleeping bag (REI Co-op Igneo 25 Sleeping Bag)
- inflatable camping pillow (Ultralight Inflating Pillow)
- lightweight backpacking chair (Helinox Chair Zero)
- lightweight lantern (MPOWERD Luci Outdoor 2.0)
- headlamp (Black Diamond Cosmo Headlamp)
- multi-tool with knife (Gerber MDime Mini Multi-Tool)
- Ursack (Ursack Major bear bag) or bear canister (BearVault BV500)
- lightweight stove (MSR PocketRocket 2)
- lighter (BIC plastic lighters)
- 2 liter pot (GSI Outdoors Halulite Boiler Pot)
- coffee cup (GSI Outdoors Glacier Stainless Cup)
- lightweight spork (Snow Peak Titanium Spork)
- small, quick drying towel (REI mutli towel mini)
Random
- wet wipes (Stall Mates individually wrapped wipes)
- mole skin for blisters (Blister medic kit)
- lightweight trowel (GSI Sanitation Trowel)
- small amount of duct tape for gear repairs
- chapstick and sun screen
Food and drink
- a variety of my favorite dehydrated meals
- electrolyte replacement (NUUN Hydration Tablets)
- quick snacks (Clif Shot Bloks and Clif energy bars)
- instant coffee (Starbucks VIA)
- small plastic water bottles filled with whisky 🙂
Day 0: It was a 5 hour drive for us to reach the ranger station, so we decided to camp the night before taking off on the trek. This gave us the opportunity to both acclimate to the elevation (~7,500 feet) and get some sleep before starting early the next day. We camped at Cold Springs Campground (23 miles from Highway 198 on Mineral King Road, 36.451421, -118.612058) because it is less than a mile from the Mineral King Ranger Station.
The next morning we woke up and headed to the Mineral King Ranger Station to check-in and get our backcountry permit. We also filled up our camelbacks and water bottles at the ranger station.
Next, we got back in the car and drove ~1 mile to the Sawtooth trailhead and parking lot.
Day 1: ~6.5 miles; +4,400 ft / -1,300 ft; Sawtooth Trailhead to Columbine Lake
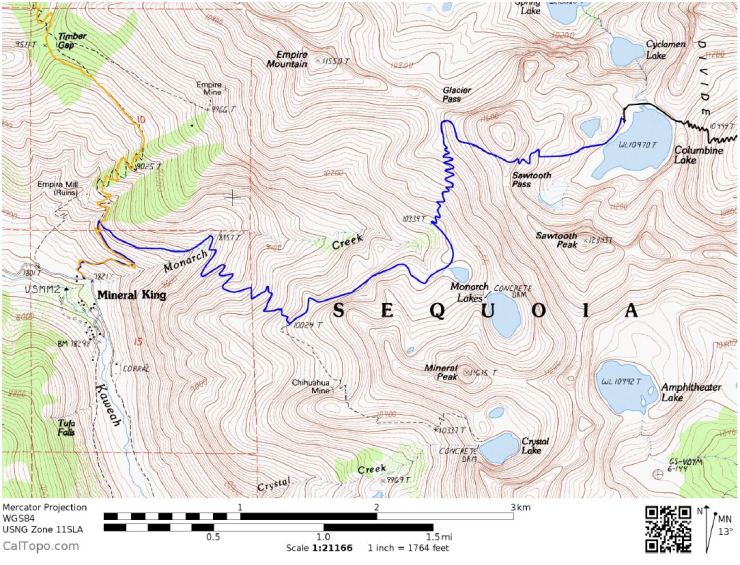
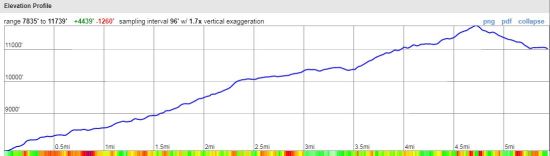
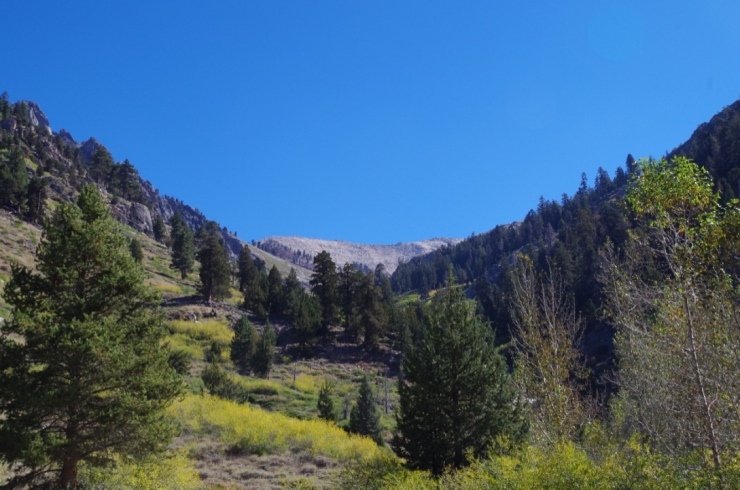
On Day 1 we hiked to Columbine Lake via Sawtooth Pass trail. Despite being only 6.5 miles long, the hike was fairly tough because you must hike over Sawtooth Pass. Upon leaving the parking lot take the trail towards Monarch Lakes. The trail is well marked and may see people going on day hikes up to the lakes and back. Along the way you can see Sawtooth Pass and Franklin Pass in the distance.
Monarch Lakes made a good lunch spot and we rested up there before attacking Sawtooth Pass. We just relaxed at Lower Monarch Lake, but some people were scrambling up to Upper Monarch Lake.
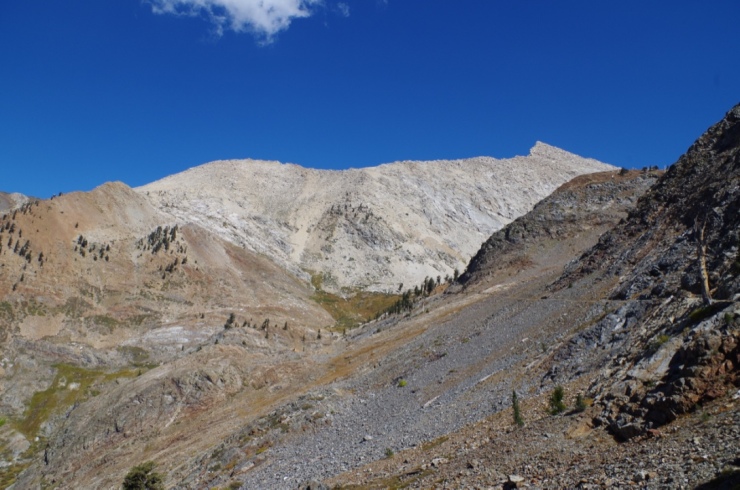
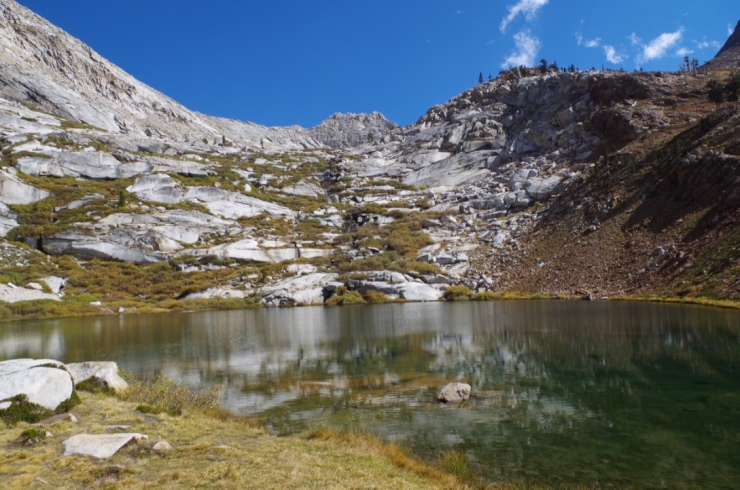
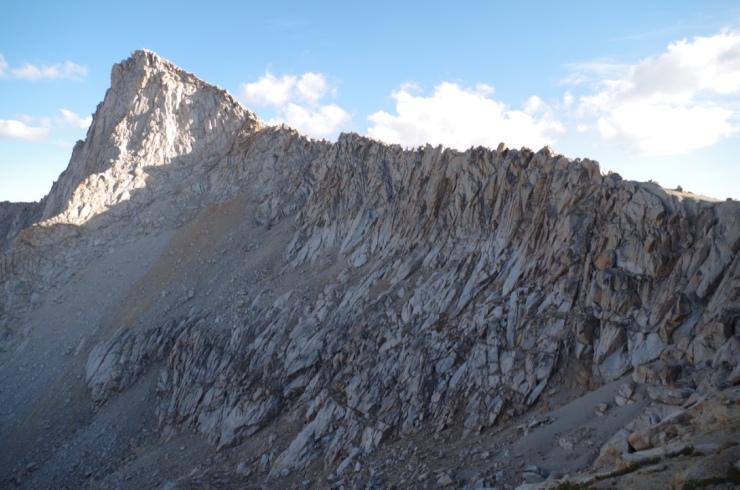
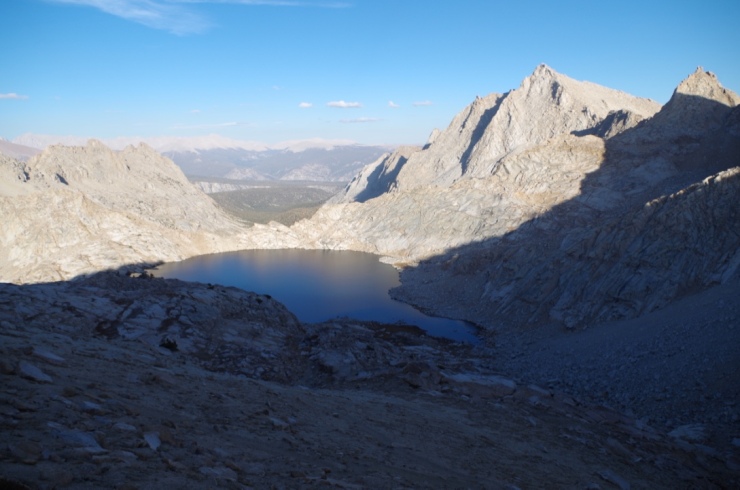
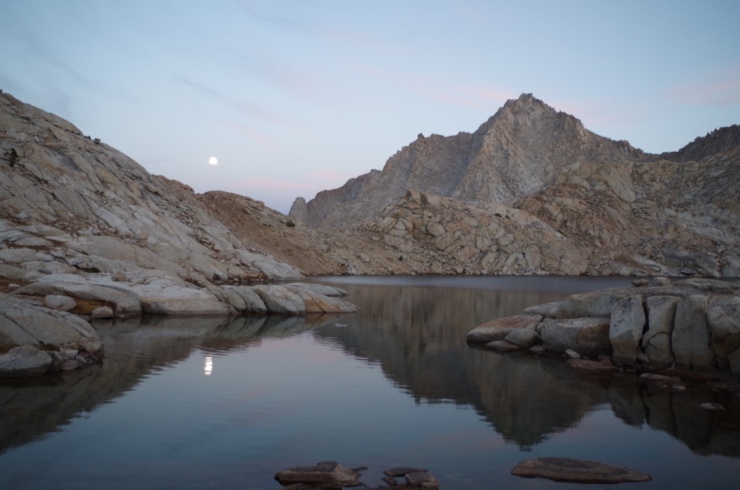
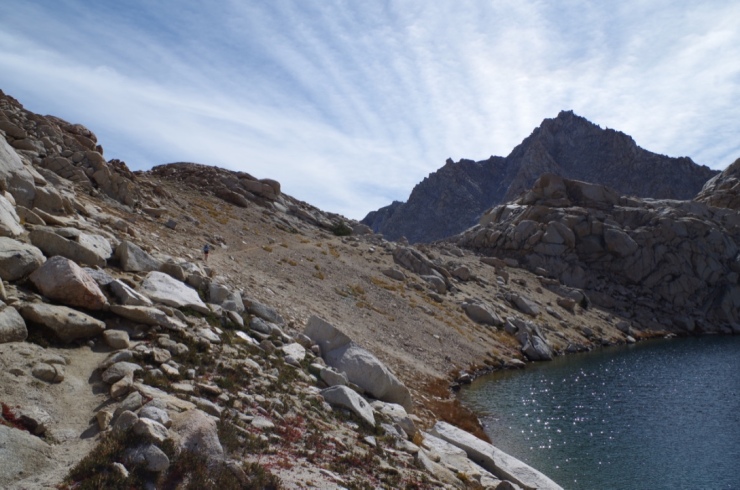
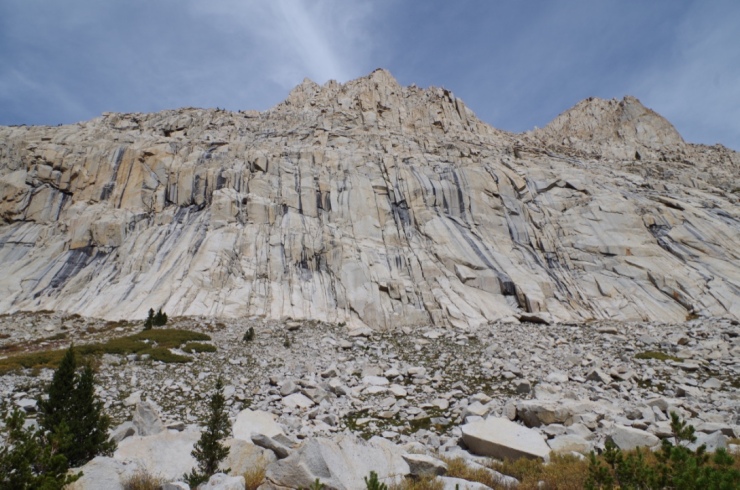
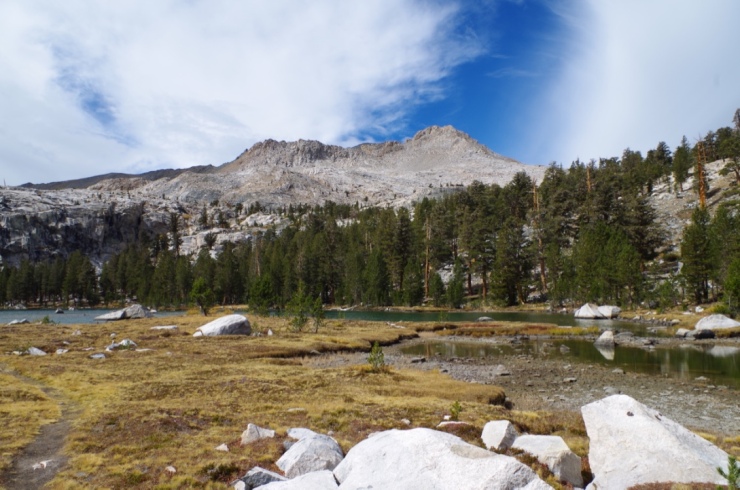
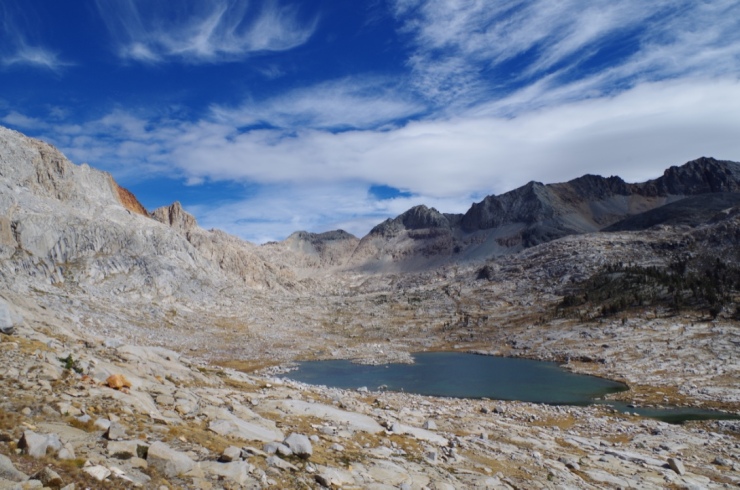
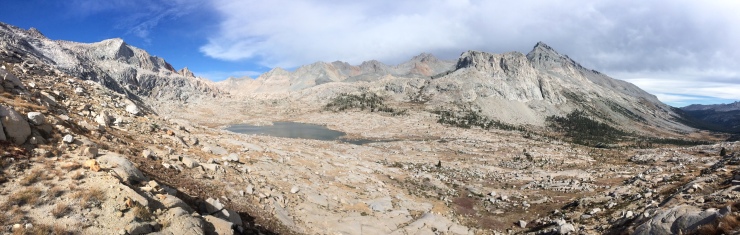
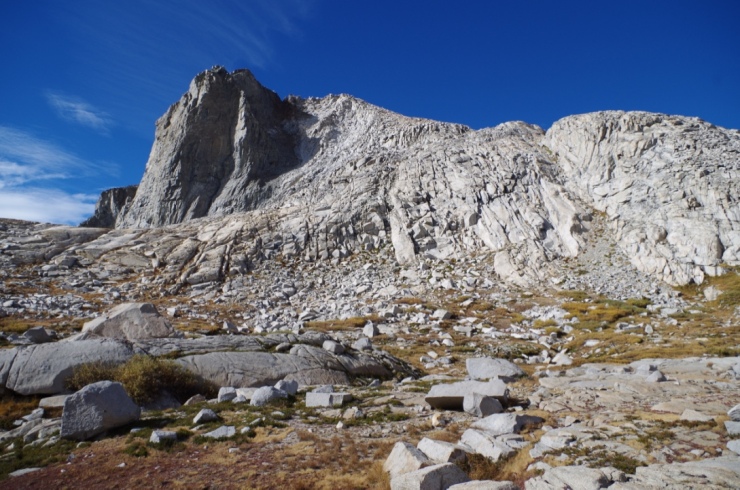
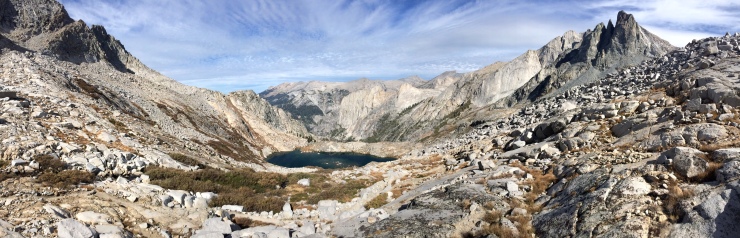
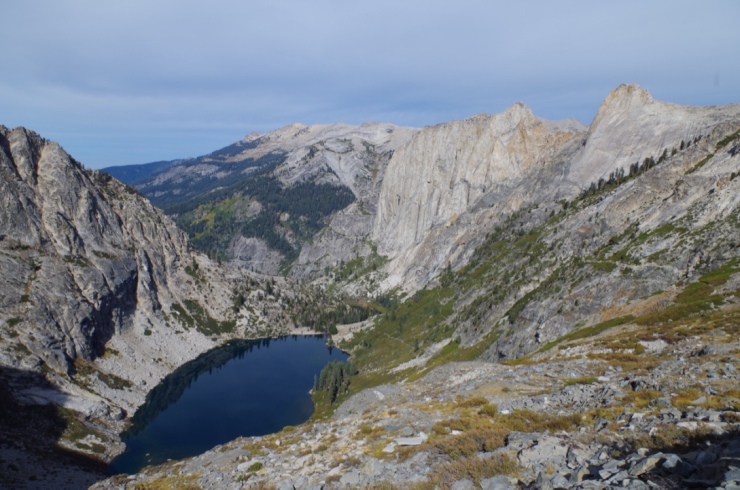
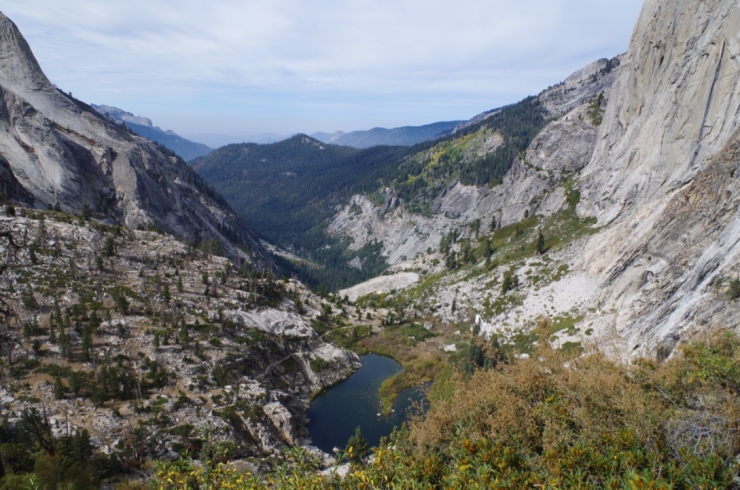
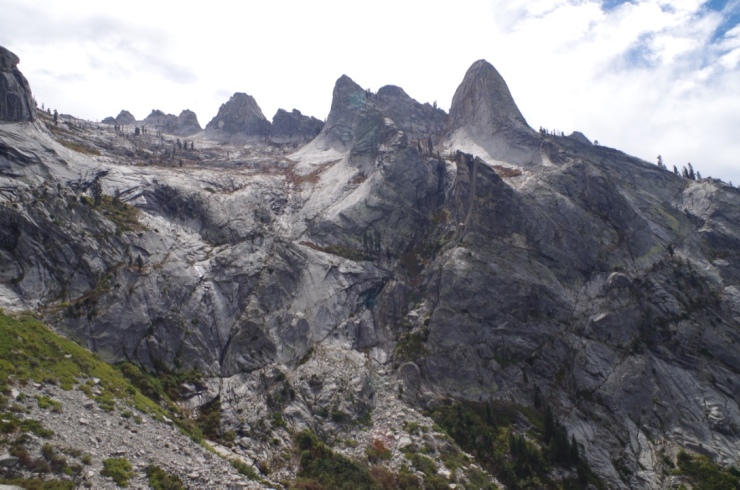
Then, we continued on the trail towards Sawtooth Pass. Eventually the trail becomes unmaintained and you must follow faint trails and cairns as you ascend towards Sawtooth Pass. There is no one correct route, but we did our best to slowly and carefully get up to the top of the 11,800 foot pass. The trial is sandy and dusty, so be prepared to go slowly. Once at the top of the pass, we enjoyed the view of Monarch Lakes on one side and Columbine Lake on the other side. Then, we made our way down the other side of the pass to Columbine Lake where we camped the first night.
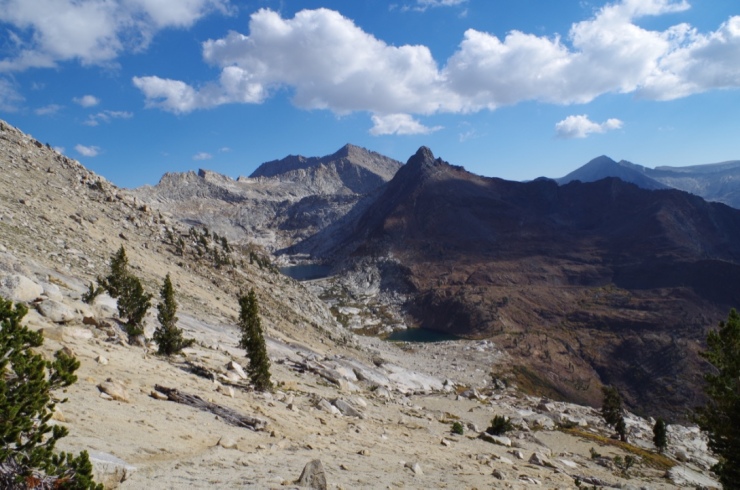
We camped on the northwest side of Columbine Lake, which gave great views of the lake and Sawtooth Peak. Columbine Lake is very beautiful and we really enjoyed camping there. The scenery is a great reward after tackling Sawtooth Pass.


Day 2: ~6.2 miles; +1,000 ft / -2,200 ft; Columbine Lake to Big Five Lakes
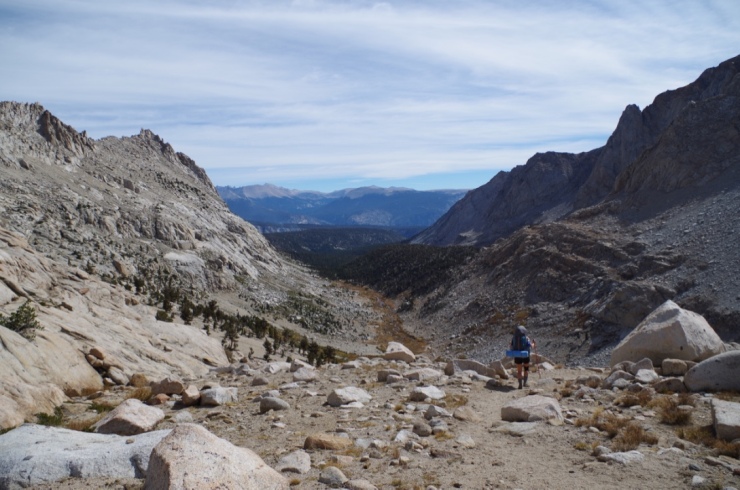
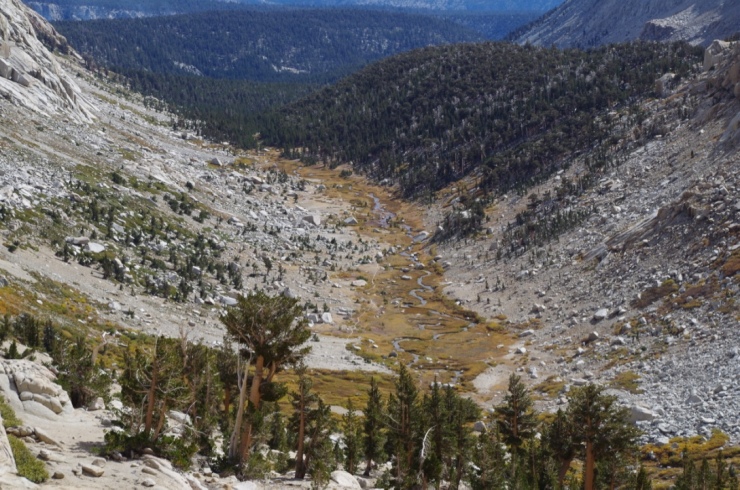
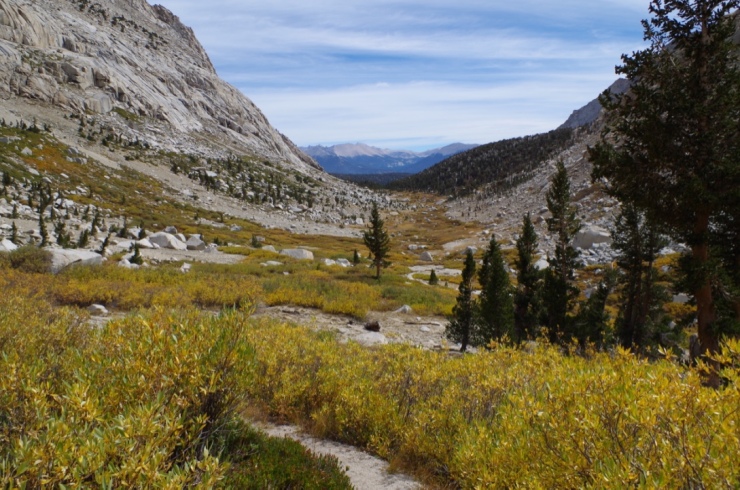
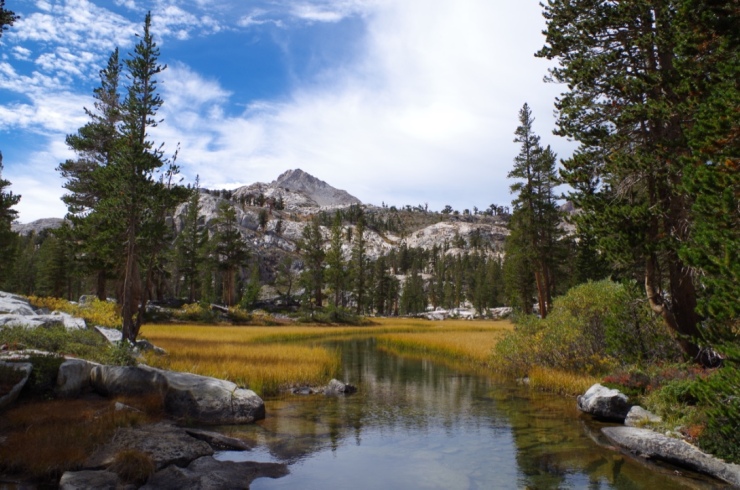
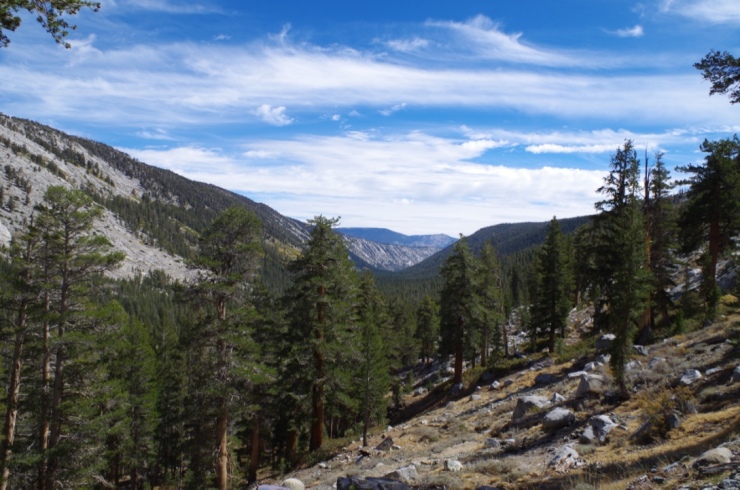
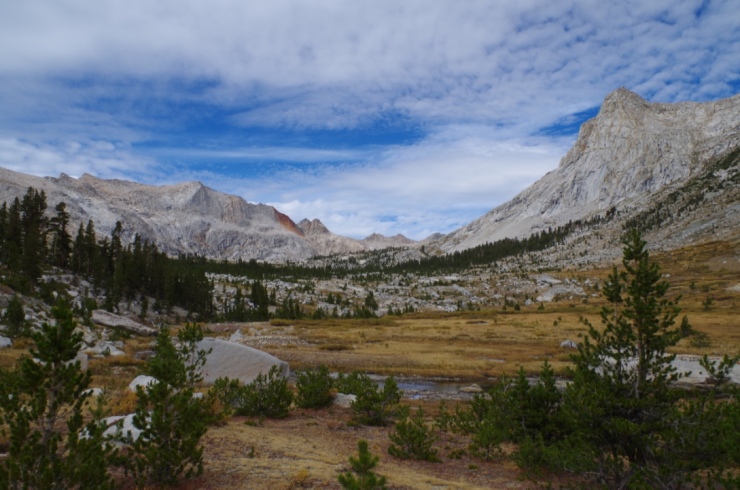
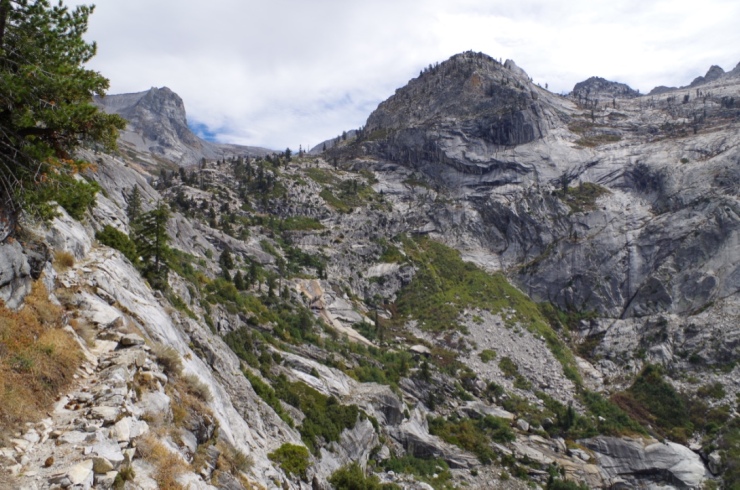
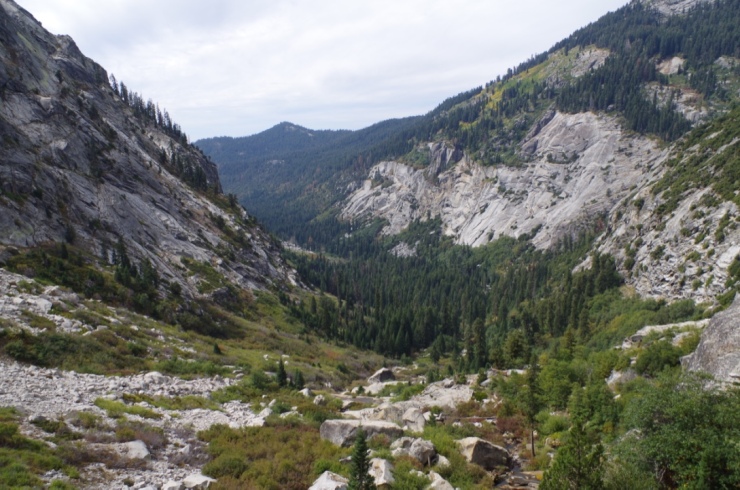
On Day 2 we hiked to Big Five Lakes from Columbine Lake along the Lost Canyon Trail. This day was easier than the last because it was mostly flat or downhill. Once you leave the small basin in which Columbine Lake sits, you are treated to a great view of the canyon that the Lost Canyon Trail travels through. Going through the canyon makes for a really nice hike. Along the hike there was water in the creek that the trail follows until you reach the next junction.
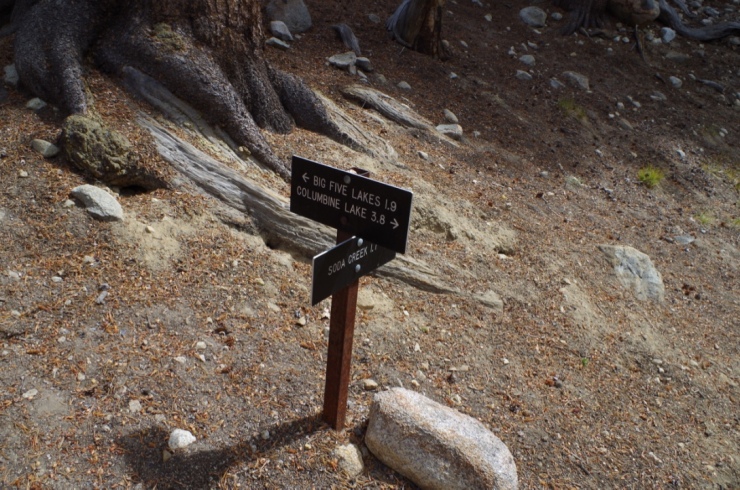
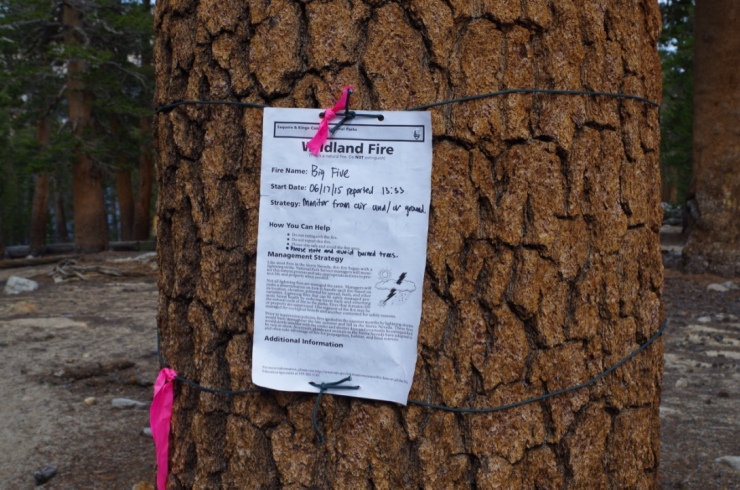
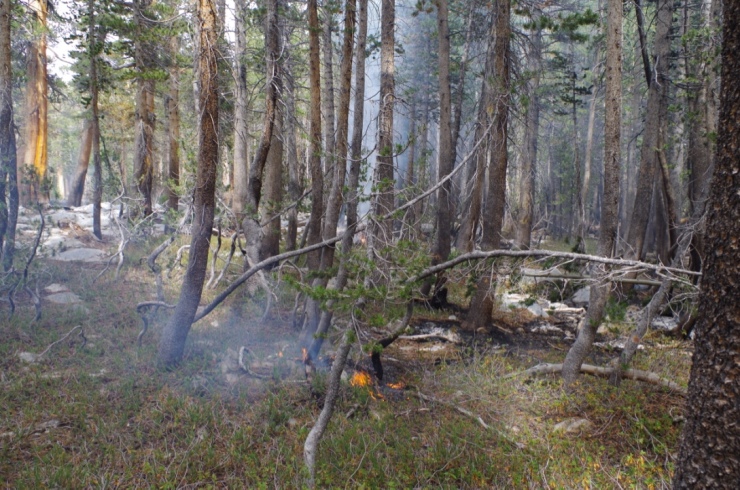
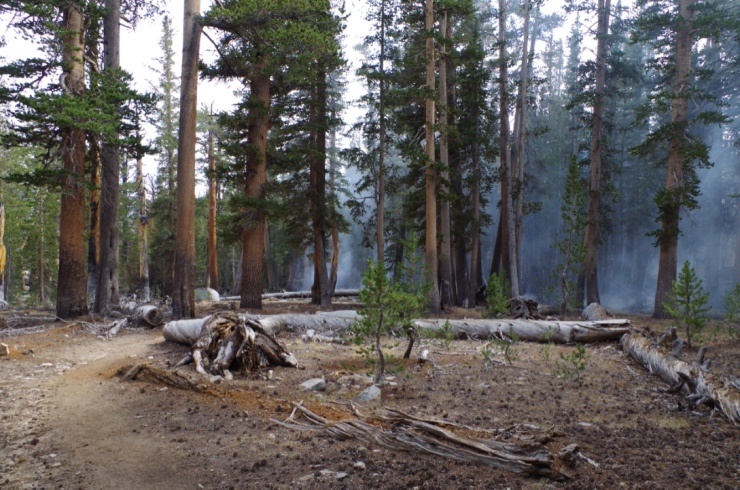
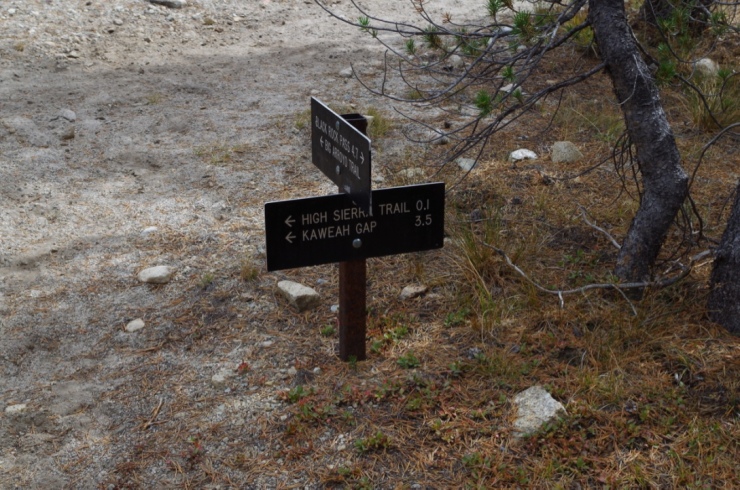
After ~3.5 miles along the Lost Canyon Trail we reached the junction for the trail with Big Five Lakes. We headed towards Big Five Lakes and we met with a surprise wildfire. The fire was “100% contained” and the sign said to leave the fire burning, so we just walked through the smoke as we tried to find Big Five Lakes. It should be noted that a fully contained wildfire is not necessarily 100% done burning…
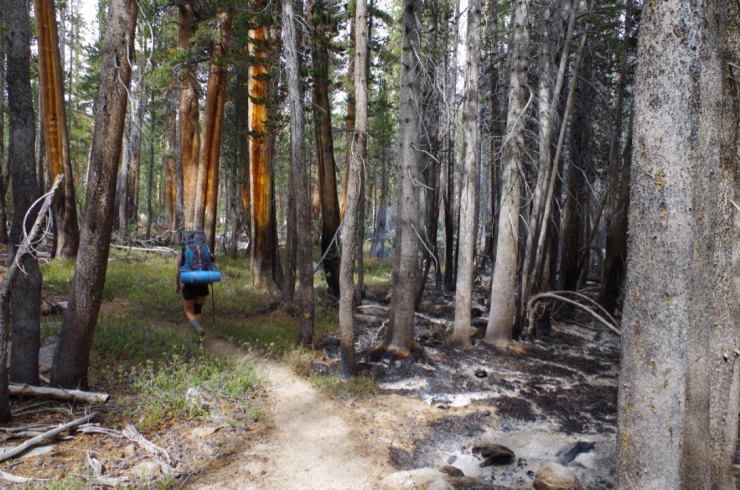
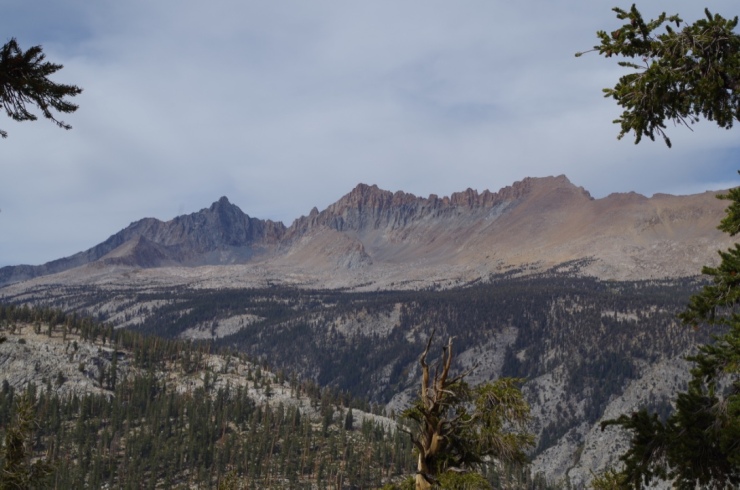
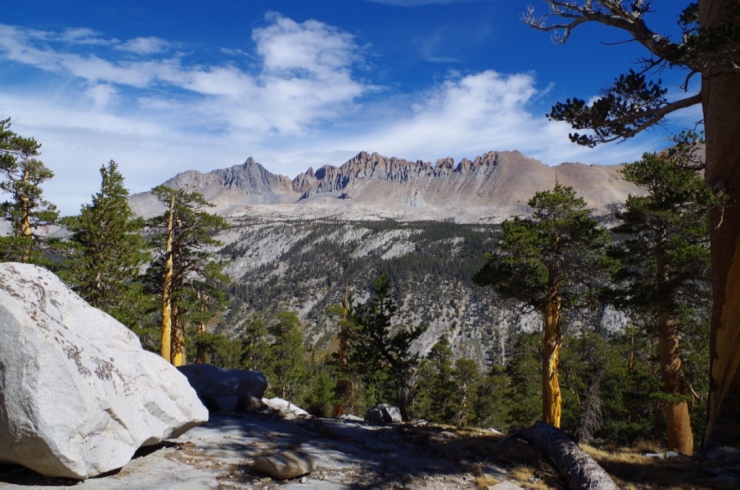
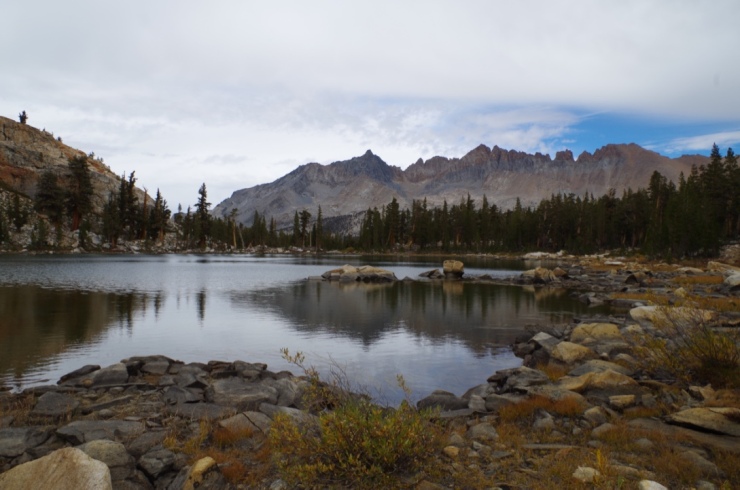
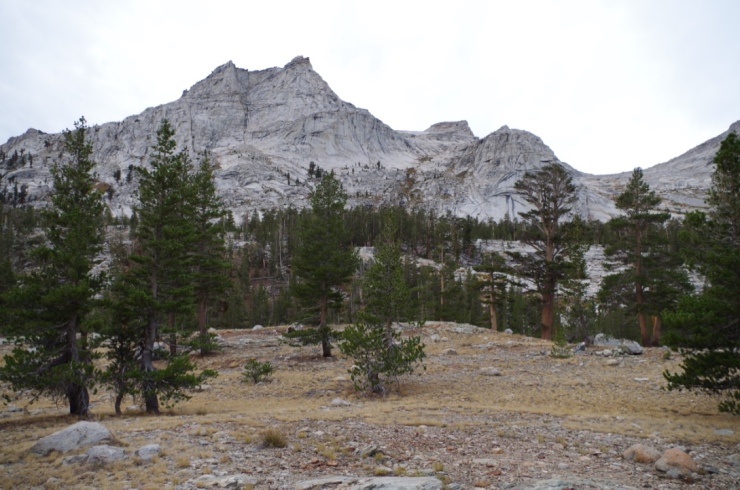
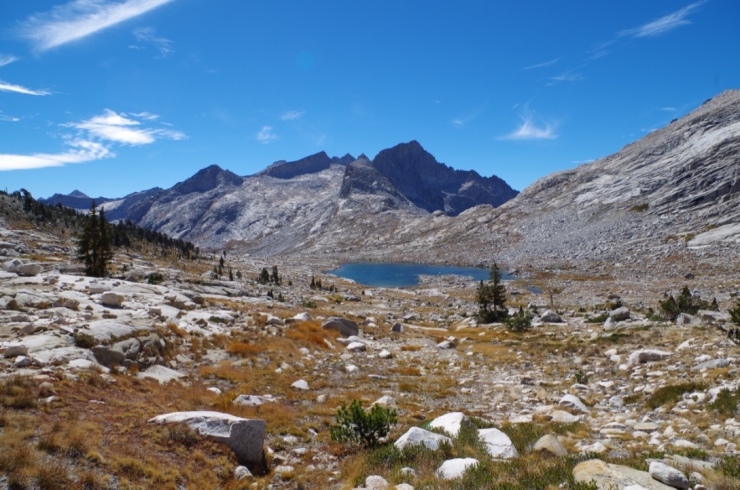
After getting through the forest and the smoke, we were treated with our first view of the Kaweah Peaks Ridge.
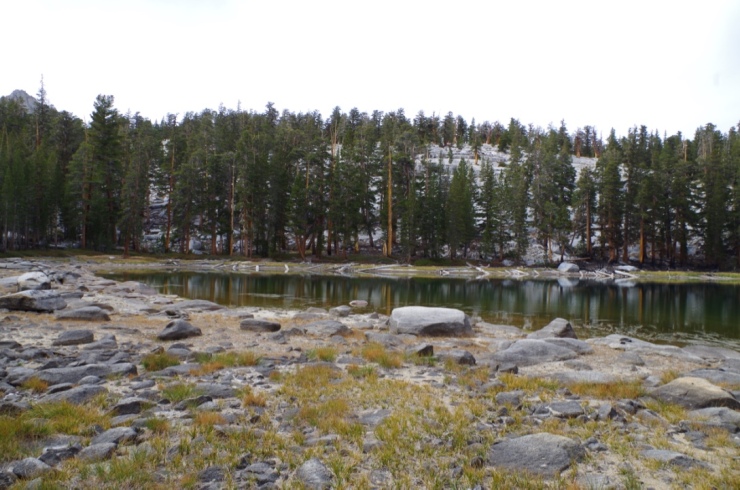
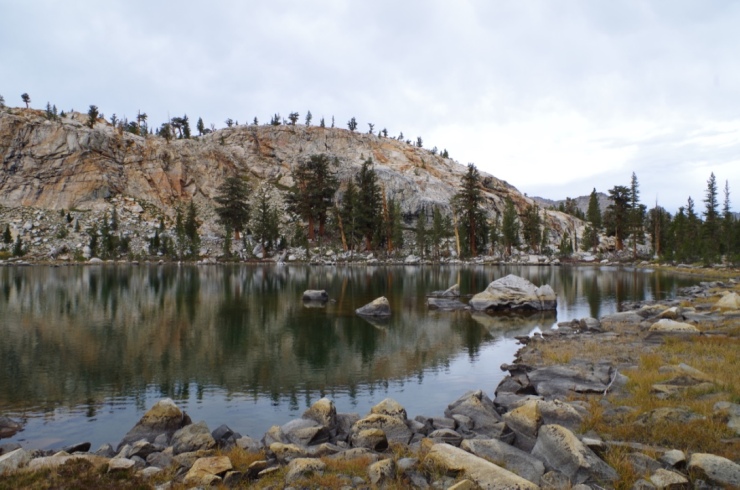
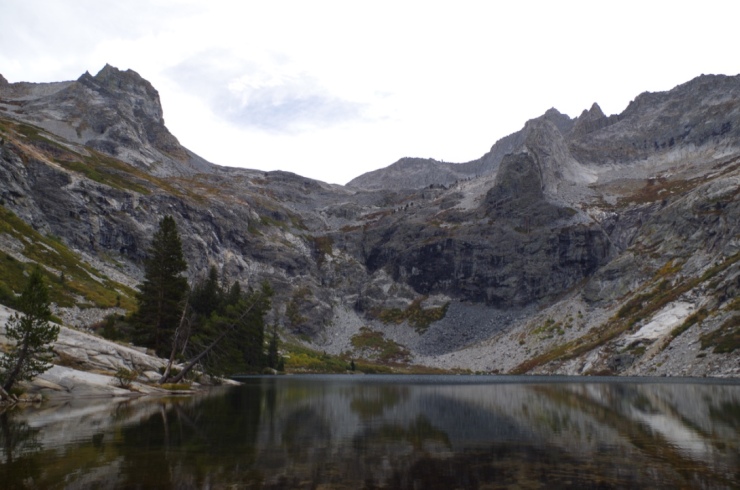
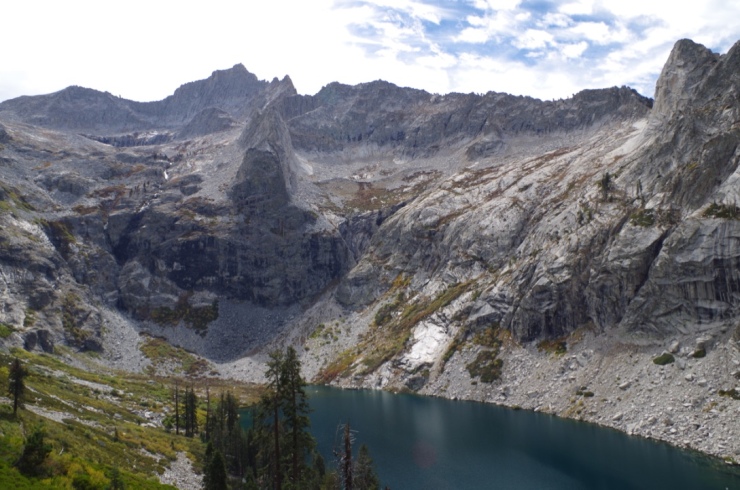
Finally, we arrive at Big Five Lakes and chose to camp at the first lake we encountered (WL9830 T). We found a nice campsite on the Northwest side of the lake that had a view of the lake and the mountain ridge. There was also a fire ring, though you need to check the current fire regulations before having a fire. This was a really nice campsite and I would stay there again.
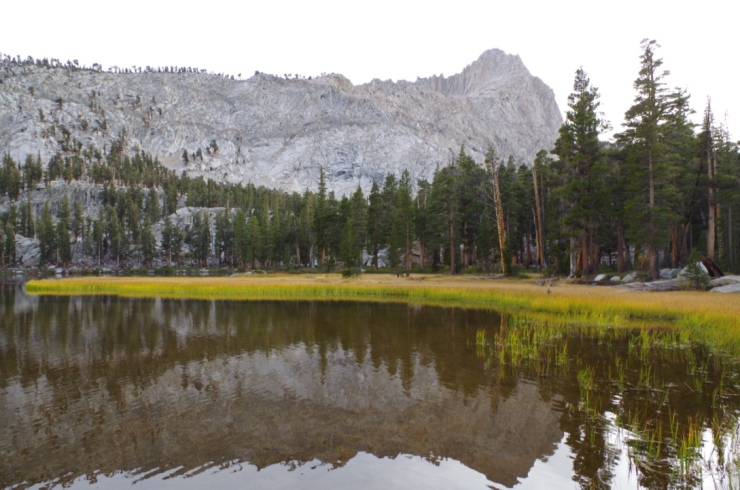
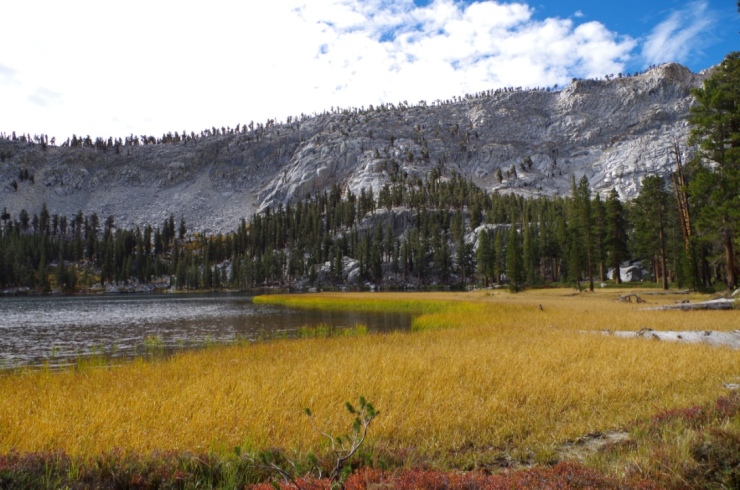
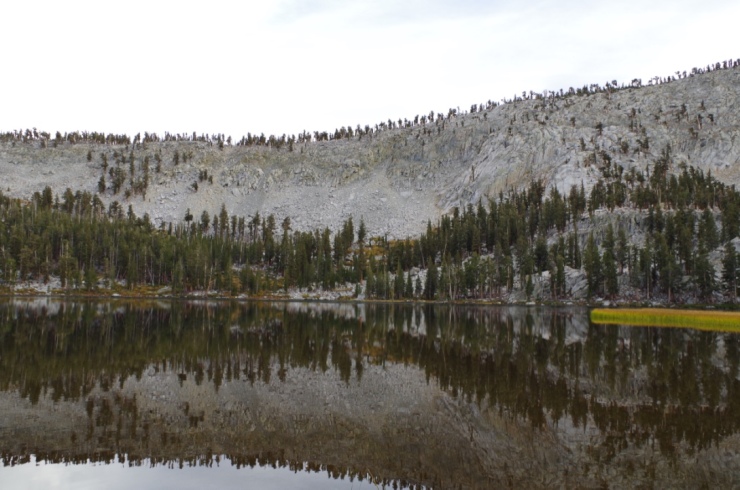
You could also hike a couple additional miles and camp at the larger lake. We were a bit tired and decided to just stop at the first lake we saw in the Big Five Lakes region.
Day 3: ~8.6 miles; +2,500 ft / -2,000 ft; Big Five Lakes to Precipice Lake
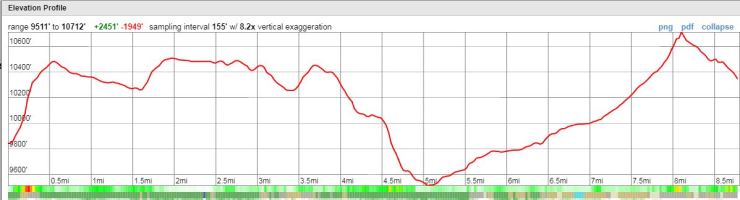
On Day 3 we hiked to Precipice Lake from Big Five Lakes Lake along the High Sierra Trail. This day was fairly tough as it is mostly uphill and roughly 9 miles long. However, the views along the High Sierra Trail were great and Little Five Lakes makes for a great lunch spot along the way.
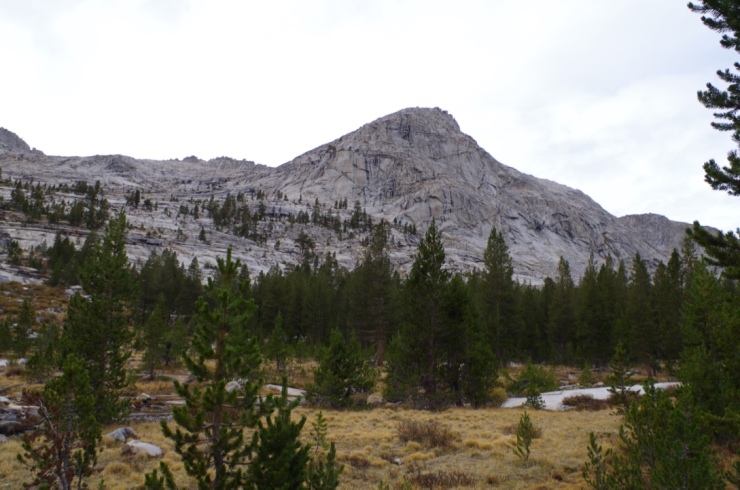
The hike starts with a moderate climb as you leave the lowest elevation lake at Big Five Lakes go around a ridge that separates Big Five Lakes from Little Five Lakes. From the ridge you are treated to some nice views.
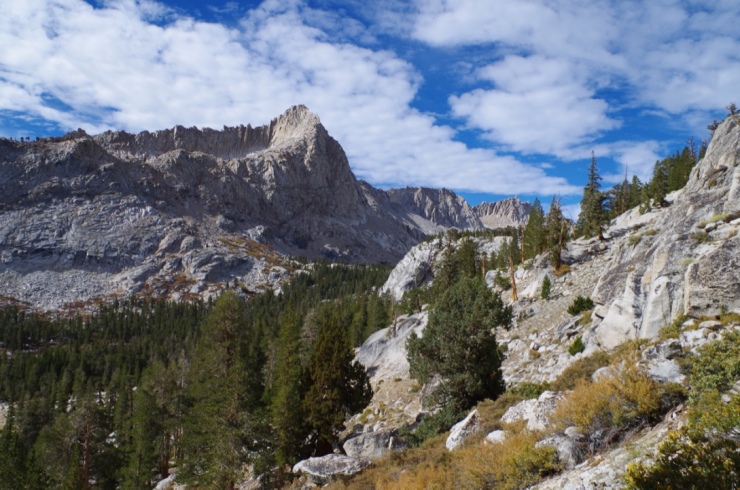
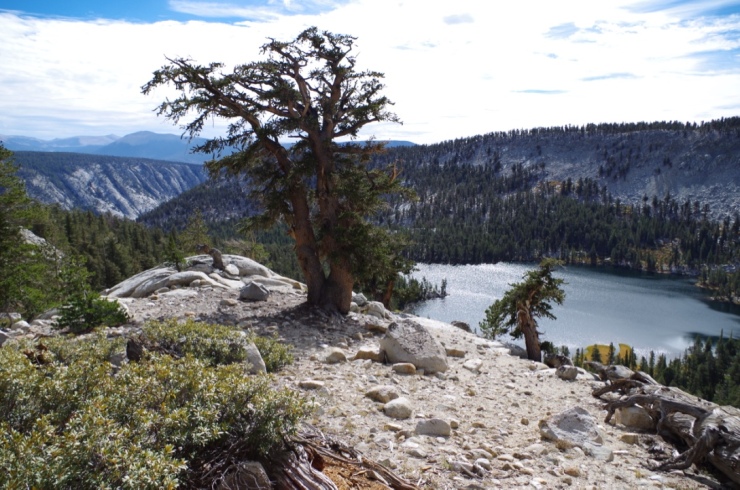
2-3 miles into the hike you reach the Little Five Lakes region. The views here are really nice and the lakes make either good lunch spots or nice camping spots.
From Little Five Lakes there is a ~3 mile hike to the junction with the High Sierra Trail. This section is mostly downhill as you descend into the Big Arroyo area to link up with the High Sierra Trail.
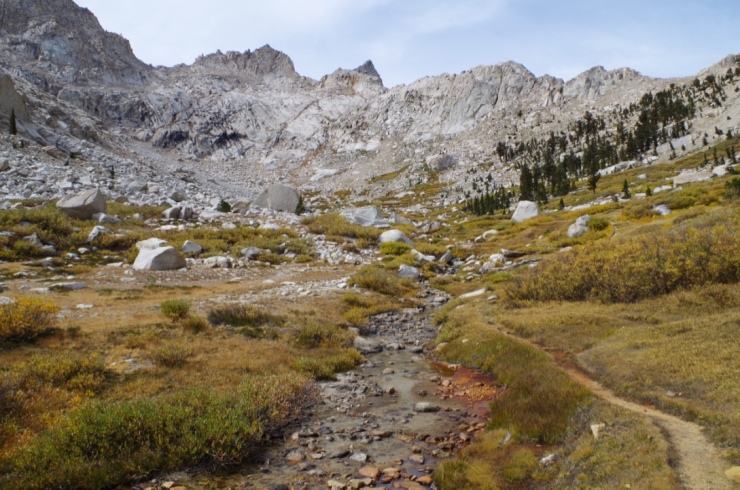
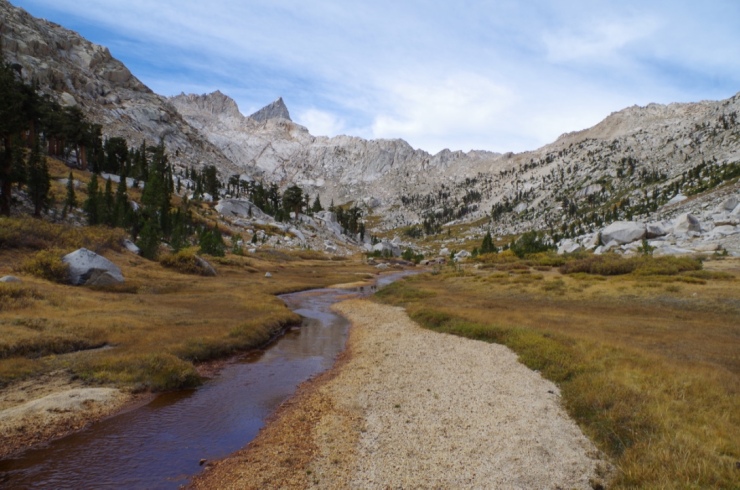
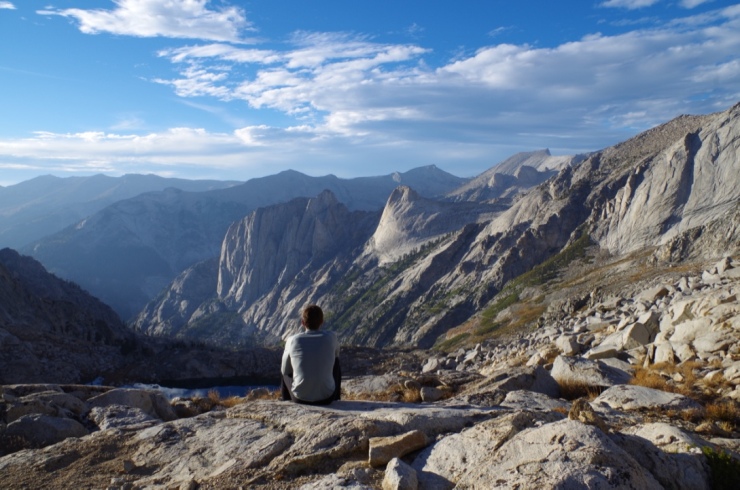
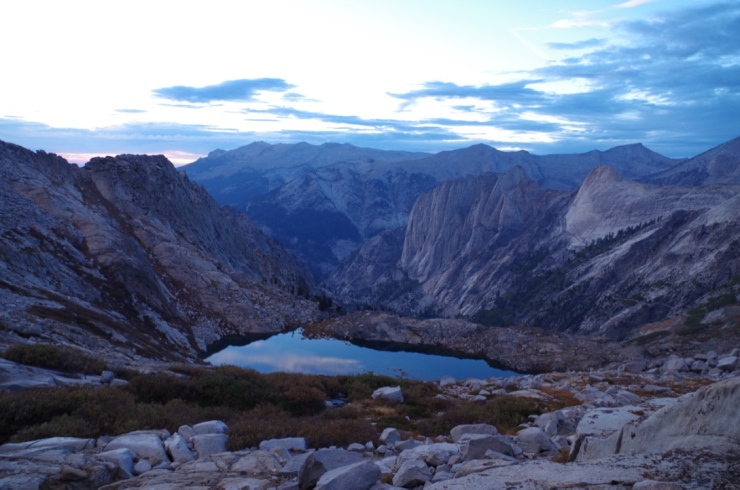
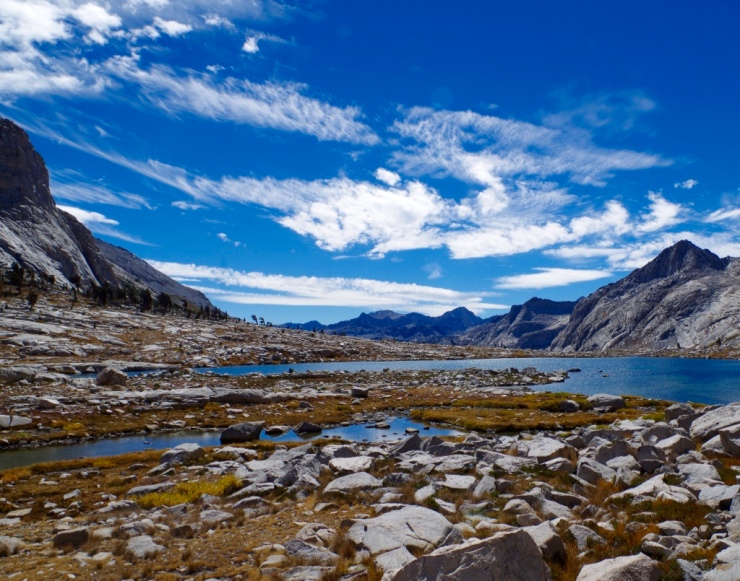
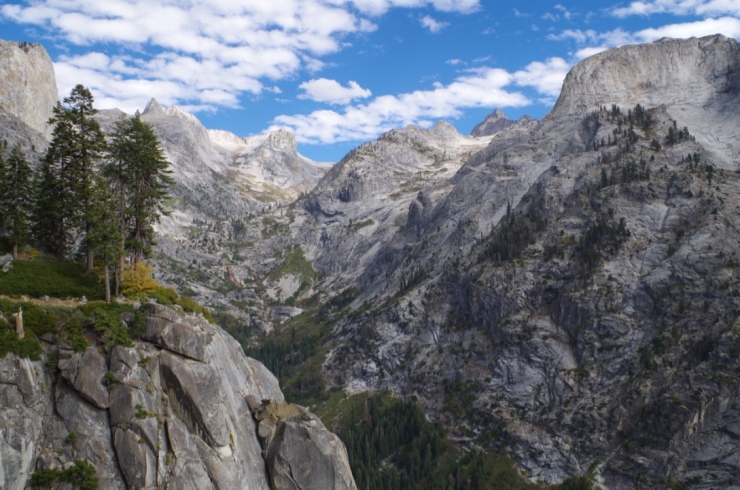
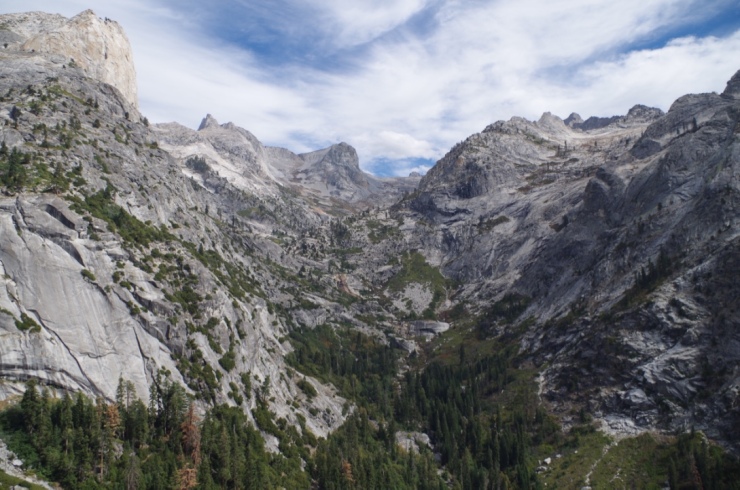
Hiking up the High Sierra Trail provides some great views as you hike through the Big Arroyo Area towards the Nine Lakes Basins. This part of the hike is a fairly steady uphill, but is not too bad. The scenery as you approach the Nine Lakes Basin is great and this area makes for a good lunch spot before hiking over the Kaweah Gap.

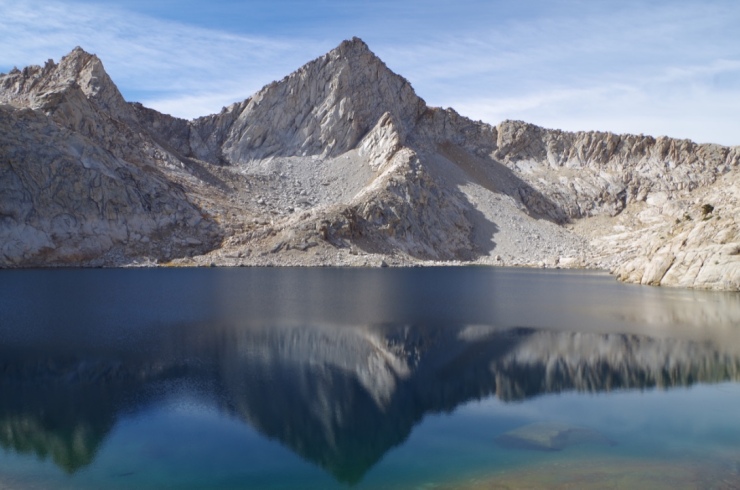
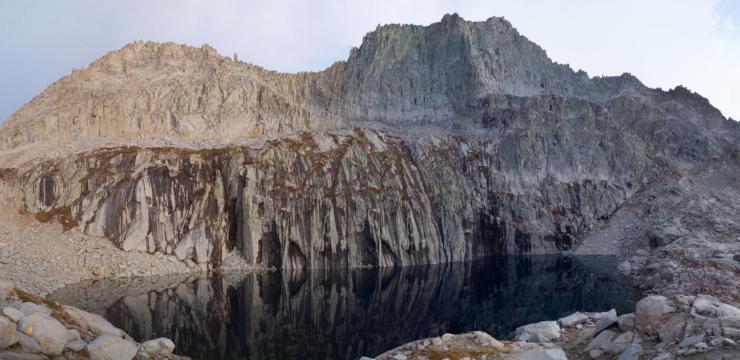
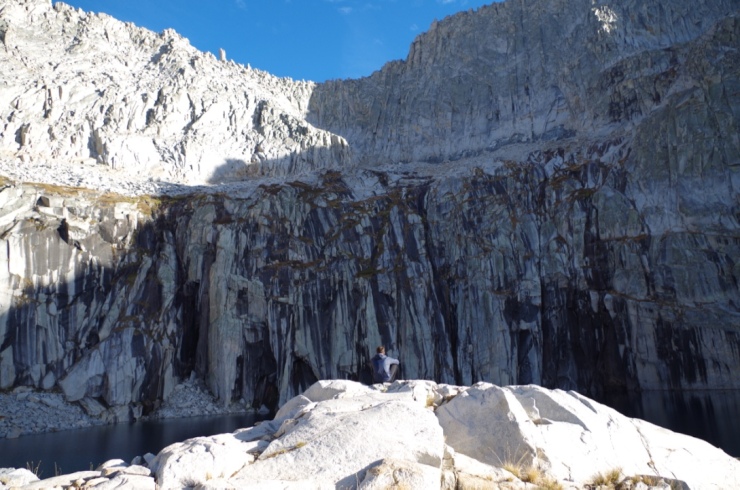
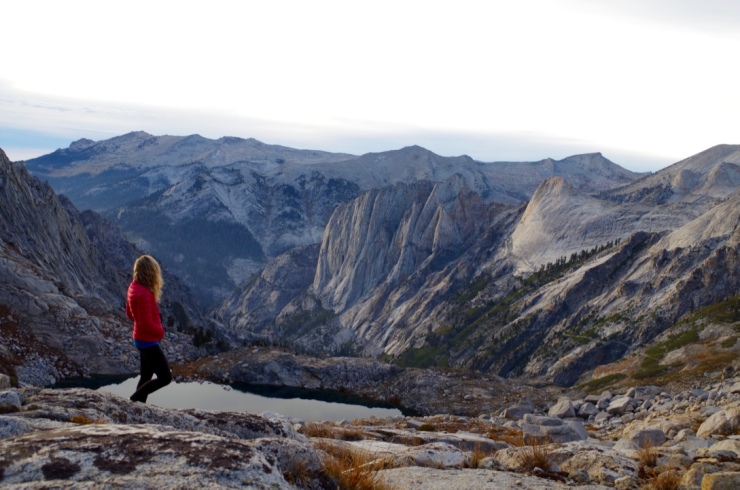
Once we reached the Nine Lakes Basin Area we grabbed lunch and then hiked up over the Kaweah Gap to reach our destination of Precipice Lake. The views from the Kawaeh Gap are great and Precipice Lake and the surround area are gorgeous.
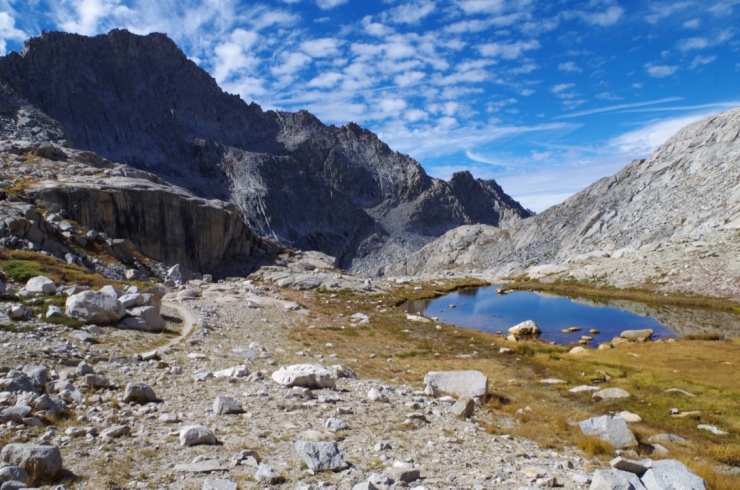
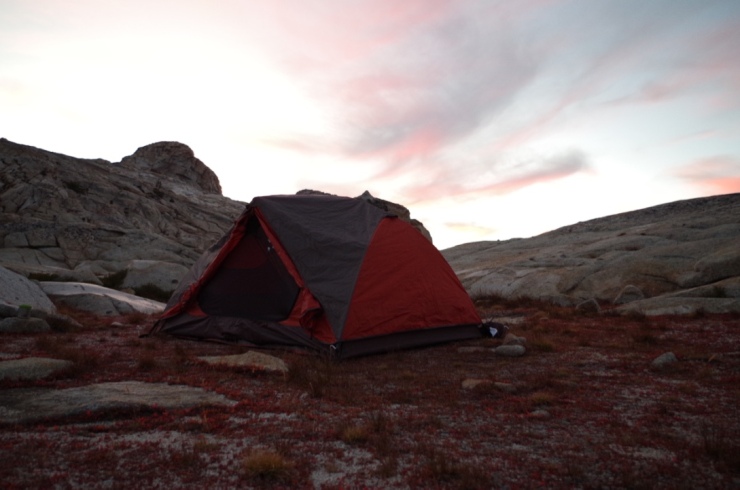
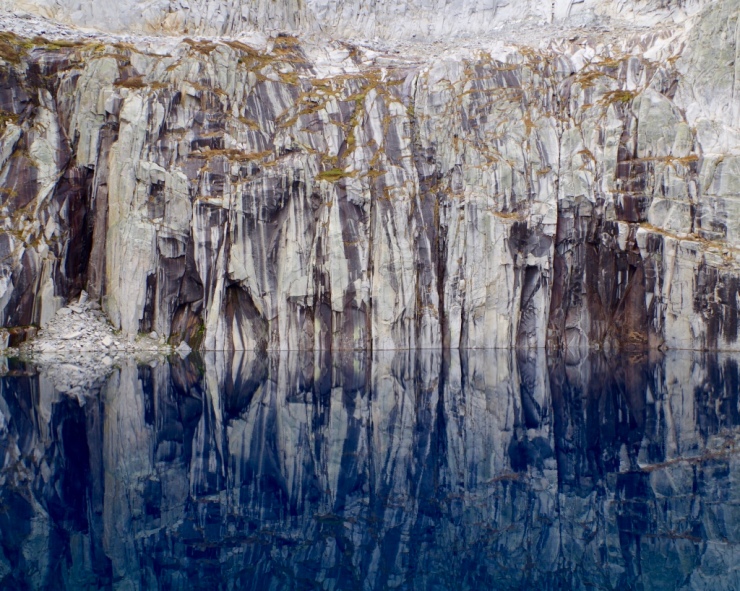
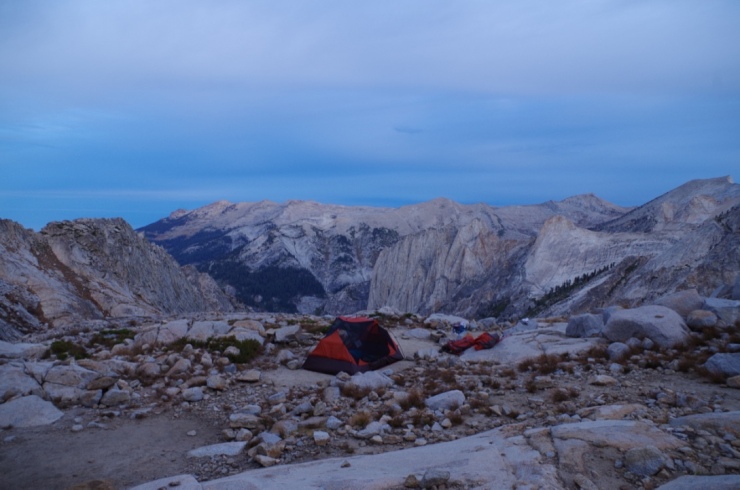
Once we reached Precipice Lake, we set up camp and took pictures of the beautiful lake and surrounding area. This is probably the best campsite we have ever had. The ground is hard and it is not easy to find large campsites, but the backdrop is hard to beat. One one side you look at Precipice Lake and on the other side you look down into the Hamilton Lakes Basin.


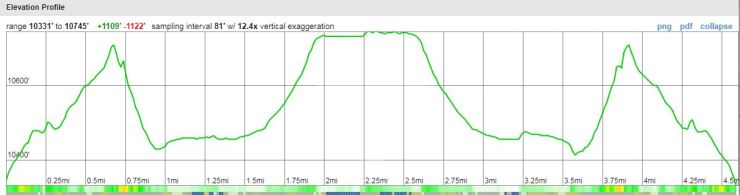
Day 4: day hike back into the Nine Lakes Basin to explore. Camp at Precipice Lake again.
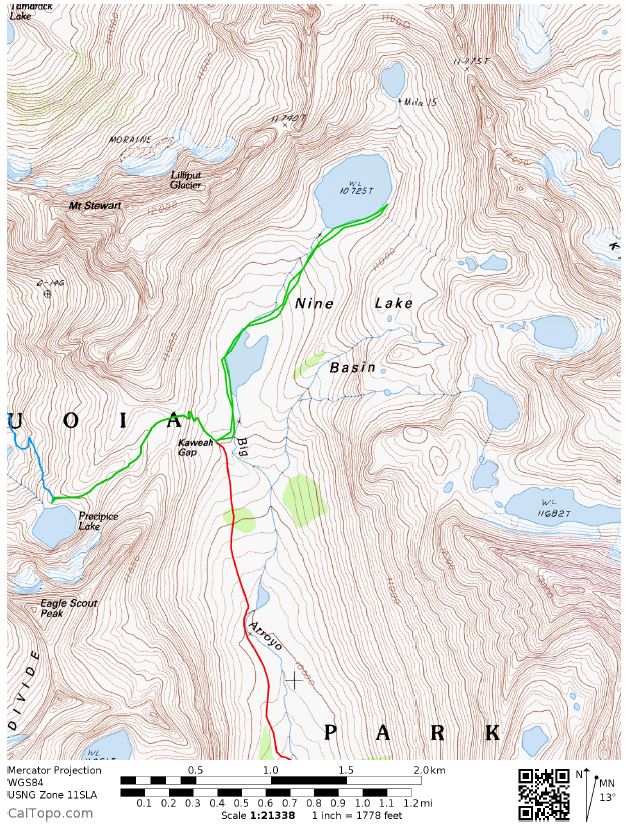
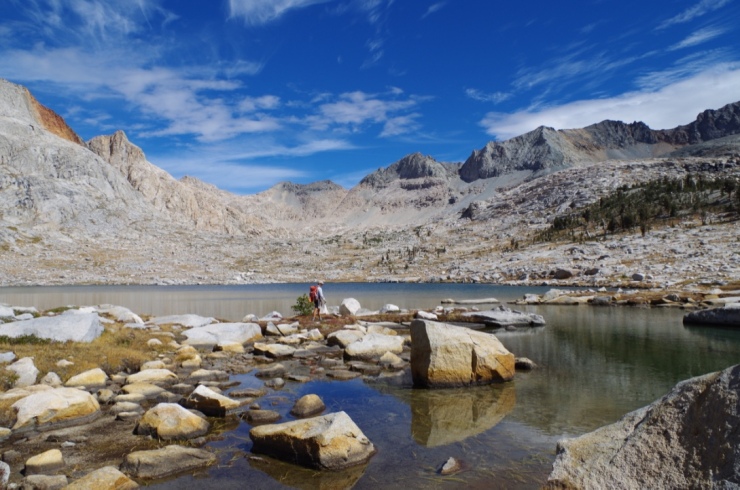
On Day 4 we decided to do a day hike and keep our camp at Precipice Lake. We hiked back over the Kaweah Gap and went into the Nine Lakes Basin to explore. We ended up scrambling up to Lake WL 10725T and then came back. These lakes had trout in them so you could do some fishing here. There are a bunch of other lakes in the basin, but they required more climbing and scrambling to get to and we wanted to take it kind of easy. I am sure the views of those lakes would be great though.

Day 5: ~9.4 miles; +1,400 ft / -5,600 ft; Precipice Lake to Eagle Scout Creek.
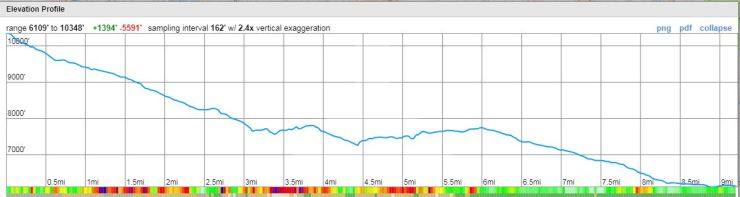
On Day 5 we packed up camp at Precipice Lake and set off towards Bear Paw Meadows. We originally planned to camp at Bear Paw, but upon arrival the camp was closed and there was no water. So, we continued on until we reach Eagle Scout Creek and set up camp next to the creek (there were a few campsites here). The added distance made the hike tougher, but we actually were happy with the choice because our hike out the next day was going to be shorter.
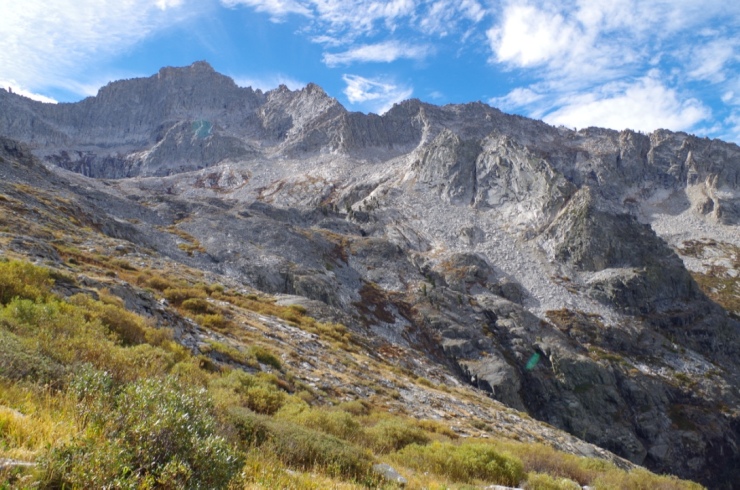
The hike from Precipice Lake down into the Hamilton Lakes Basin was spectacular. As you drop ~4,000 feet into the basin you are treated to amazing views of the Hamilton Lakes and the surrounding granite cliffs. Hamilton Lakes makes a great lunch spot and the lakes have plenty of trout for fishing. These lakes would also make a great campsite, though they appear pretty popular. We were very glad we were hiking down into the basin rather than hiking up to Precipice Lake because the views looking down at the basin are great. We encountered a few hikers going up the hill and they looked super tired…
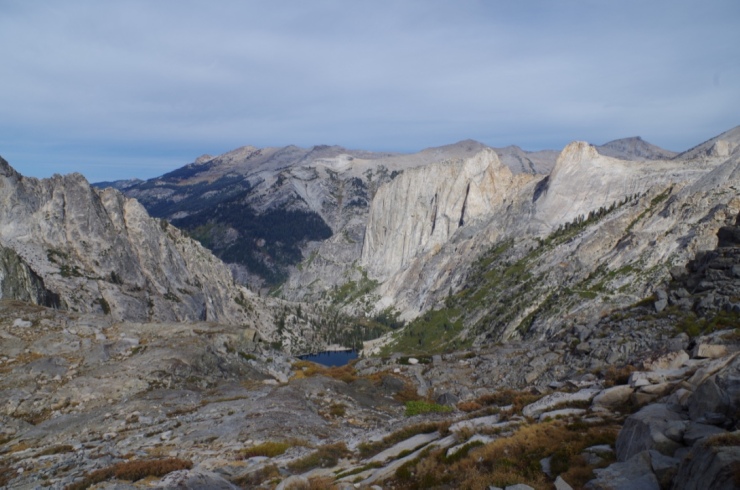
As you begin to descend into the basin you catch your first glimpse of Upper Hamilton Lake. The views going forward and behind you are great. The trail drops ~4,000 feet and has many switch backs.
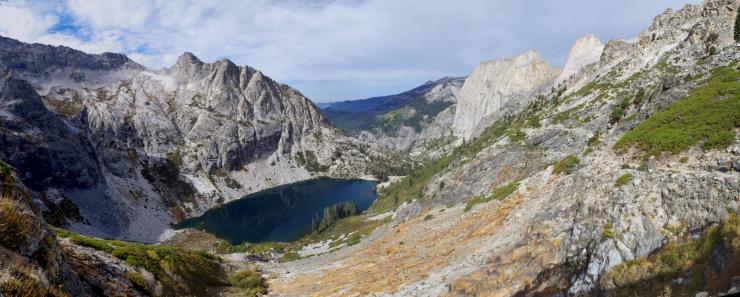
Once you reach Upper Hamilton Lake, you can explore the lake area. This lake makes for a great lunch spot and is gorgeous.
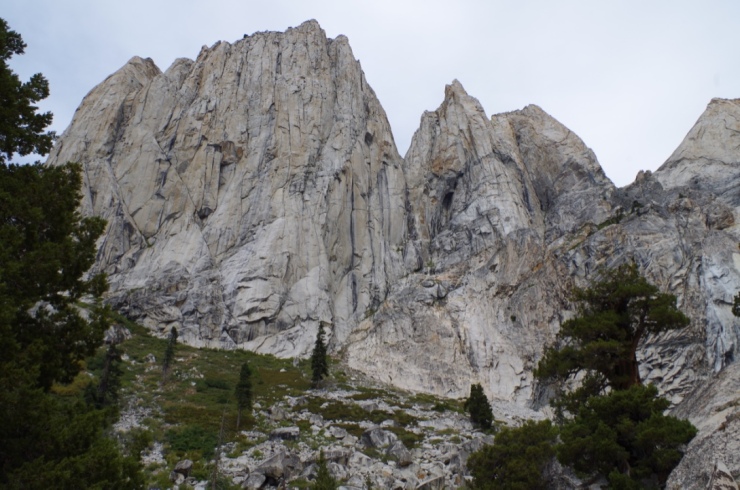
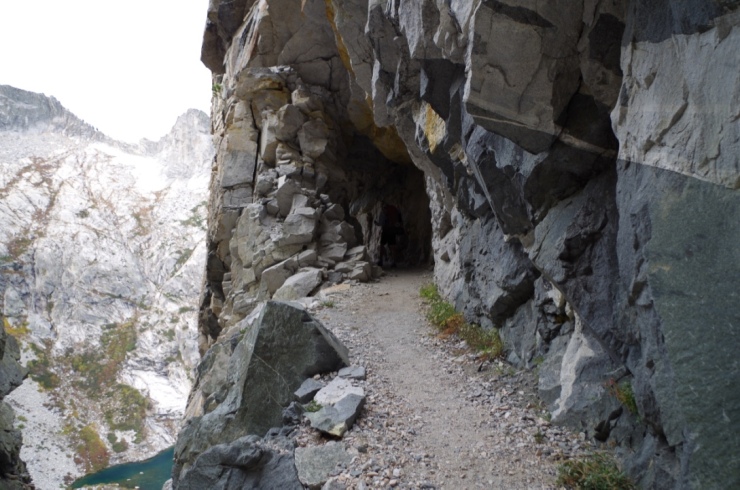
As you leave the upper lake and head to the Lower Hamilton Lake, you pass some vertical rock structures known as “Valhalla.” Soon you reach the smaller Lower Hamilton Lake. This whole section of the High Sierra Trail is great. Parts of the trail hug steep cliff walls and provide great views. There is even a tunnel you get to hike through.


Eventually the terrain changes from granite rock to a forest as you approach the Bear Paw Meadows area.
Day 6: ~9.5 miles; +4,400 ft / -2,600 ft; Eagle Scout Creek to Sawtooth parking lot.
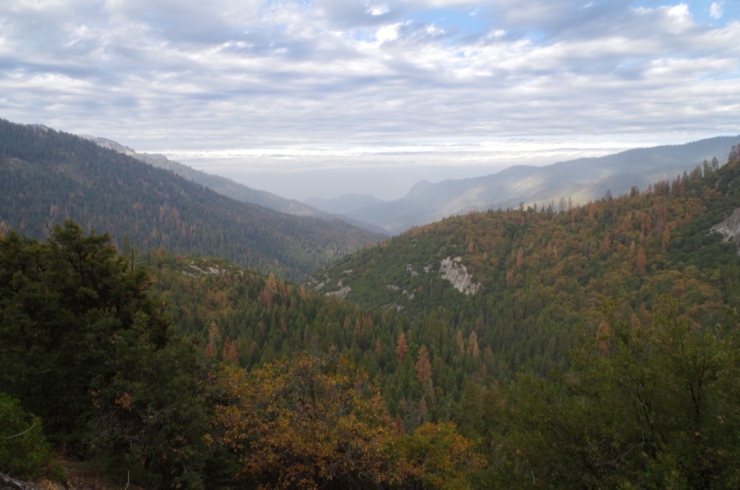
The day 6 hike was our last trek, and we went up over Timber Gap and then down to the Sawtooth parking lot. This hike ended up being quite tough as the climb up over timber pass was long and laborious. The views were not spectacular on this portion of the hike, but were still nice. You follow a creek for much of the hike, but near the top of Timber Gap I do not recall there being many sources of water. It’s best to fill up after the first few miles of the hike.
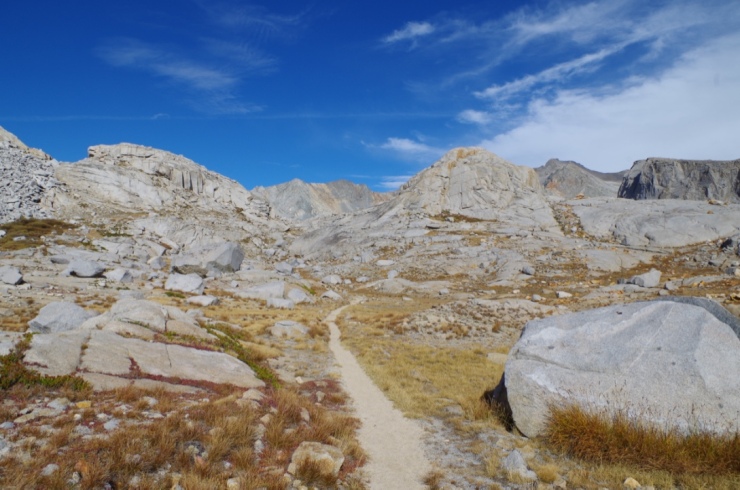
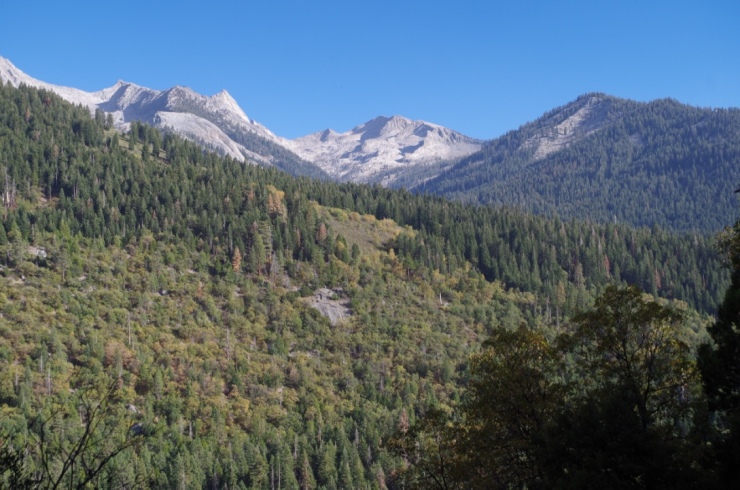
Along the way you see some granite outcrops peaking out of the forest.
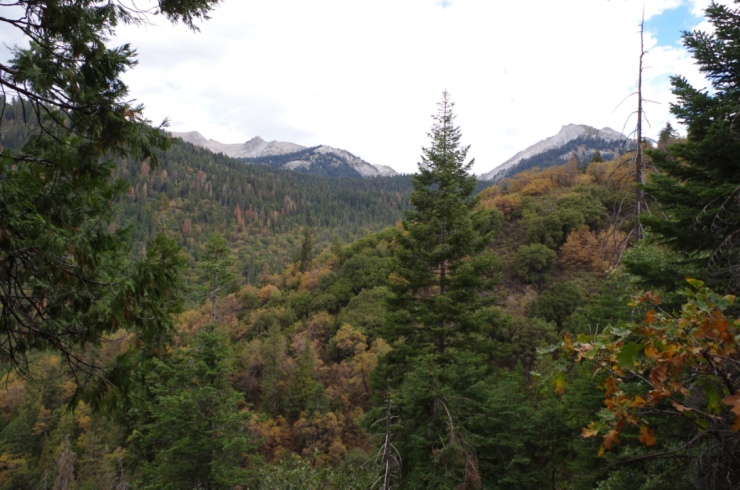
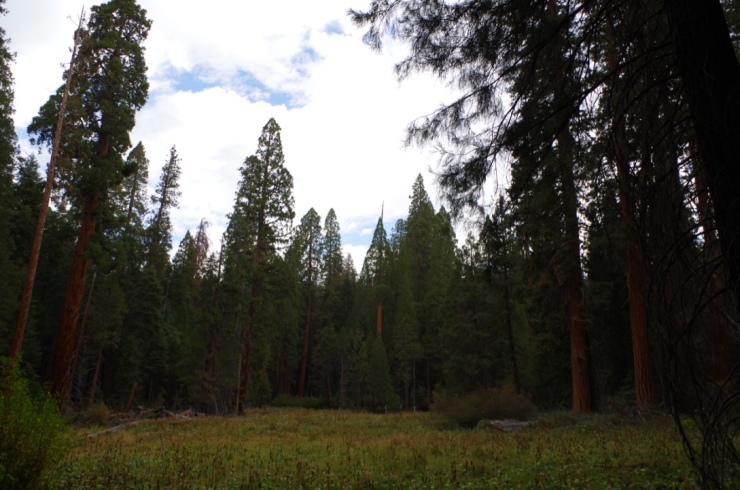
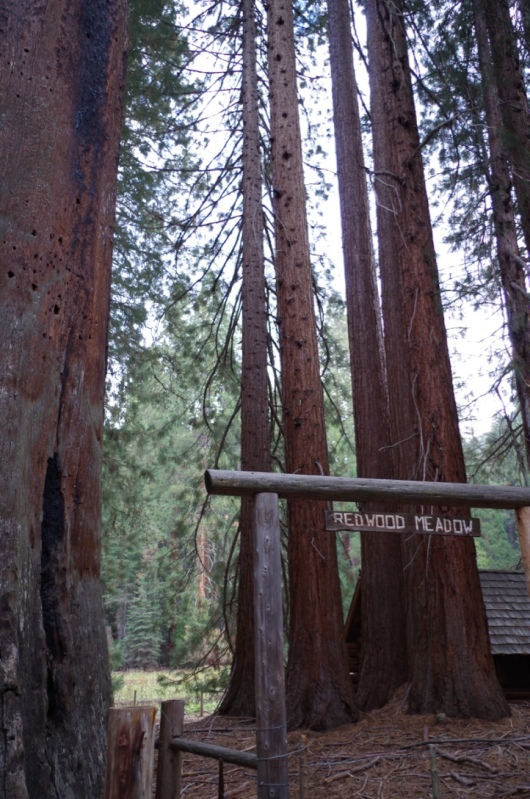
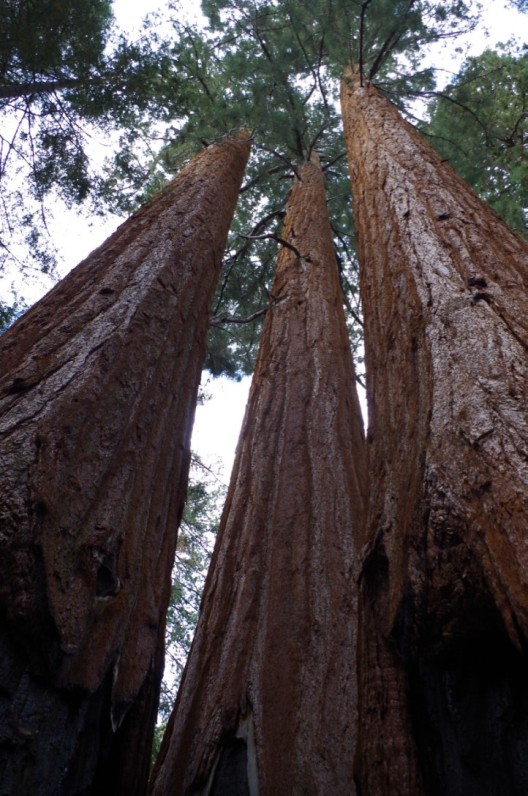
You also pass through a redwood meadow, which has some very large redwoods and a horse camp.
As you climb up Timber Gap there are some nice views looking back.
And then after you reach Timber Gap, it is only 2-3 miles downhill to the parking lot! I don’t have any pictures of this part of the hike because we were excited and rushing to get to the car. After you finish the hike, be sure to go to the storage shed by the ranger station and pick up any food you left.
Here are some similar trip reports!
Trinity Alps Wilderness – Four Lakes Loop (20 mile trek)
Sequoia National Park – Mineral King Area – Sawtooth Pass and High Sierra Trail
Rocky Mountain National Park – Continental Divide National Scenic Trail
Teton Crest Trail – Grand Teton National Park (48 mile loop)
North Circle Loop – Glacier National Park (52 mile loop)
Yosemite Highlights Loop – Yosemite National Park (40 mile loop)

Looks great
LikeLike
Thanks for sharing. what a great trip. we did Sawtooth Peak on July 1st this year. There was so much snow on that day. I had a hard time recognizing some of the places I saw.
LikeLike
I can imagine things were much different this year! We went towards the end of the drought, so we didn’t see any snow at all. It made for a really relaxing and easy hike without any need for crampons or other snow equipment. I bet the steep climb up Sawtooth was much trickier when the slope was covered with snow!
LikeLike
Hi we are doing a similar 5 day trip this summer. Is there anything you did that you would recommend against? Also how was the mosquito situation. Last year we did a trip in the northern part of the park (granite basin) and the mosquitos were absolutely nightmarish.
Cheers
Dave
LikeLike
Overall we really liked the loop and I wouldn’t have done anything differently! Depending on the snowpack this year, you may want to camp at Hamilton Lakes or the 9 Lakes Basin instead of Precipice Lake if there is still snow at Precipice. It’s probably also worth checking with the rangers about the condition of Sawtooth Pass before you go as well. I have heard that it can be snowy and a little tricky to hike early in the season.
When we did the hike, there were minimal issues with mosquitos until we got to our last campsite. There were also some annoying flies when hiking from Precipice Lake to Bearpaw Meadows, but they didn’t bite (they just buzzed around your head). However, we went at the tail end of the drought, so it could have been more dry than usual (we also went late in the summer too). I imagine there could be more bugs this year, especially in July/August.
LikeLike
Looks amazing! What were the temperatures like when you went?
LikeLike
The temperatures were very pleasant when we went. During the day it was in the 70s. At night it got chilly do we had to put on our layers, but it was not too bad. Mornings were chilly too, but it warmed up quickly!
LikeLike
You’re a really practical web site; couldn’t make it without ya!
LikeLike
How hard was it to hike over sawtooth pass? Id like to do this loop this summer but havent really hiked off trail before.
LikeLike
Hi Lindsay – The hike over Sawtooth Pass is strenuous but is manageable for anyone is good shape. It’s true that the trail is not maintained, but there are a couple different defined routes that you can follow. There are also many cairns set up that help guide you to the pass. Definitely budget plenty of time to get over Sawtooth because it is steep and you will be at high elevation. That said, I would not let it deter you! This is the only section of the Mineral King loop that is not on a well defined trail.
LikeLike
do you know what the snow pack in mineral king looks like this year? wondering if this will be doable around July 4th this year…
LikeLike
Hi Toby – there was a lot of snow this winter, so expect trails to be snowy for much of the summer. The road to Mineral King is still closed for the year and the campgrounds near the Mineral King trailhead are not expected to open until late June. On July 4th weekend, I believe it is safe to say you will encounter very snowy conditions, especially in areas of the trail around or above 10,000 feet in elevation. As of early May, the snow line was still only at 7,000-8,000 feet. I would only do this trek in early July if you are experienced and have some good navigation skills and crampons and an ice ax. Definitely confirm with the rangers towards the end of June though!
LikeLike
Hi, thank you for this fab overview! I have been thinking of doing this loop but have little navigation skills, well only really basic following an app on the phone, or a marked trail. Considering all the snow that fell in winter can I hike this loop safely around the 14th of September this year? Anyone here done it recently? I am planning to fly all the way from Sydney Australia, so it would be quite a long way to come and find out it’s not passable this summer season.
LikeLike
Hi Sandra – the snow has been melting quickly, so I imagine nearly the entire trail will be snow free by September. Looking at the week satellite images, right now it appears there is only snow on the east side of Sawtooth Pass and near Precipice Lake. The rest of the route is snow free. This means you probably would not need to negotiate any snow-covered trails in mid September unless we get an early snow storm in September.
Regarding navigation skills, I would make sure to get a map of the area and familiarize yourself with it before backpacking the loop. A phone with GPS is great, but a paper map backup is essential in my opinion!
I would also advise calling up the ranger station and asking for their advice! They can tell you more about the current conditions and what they think it may be like in mid September.
LikeLike
Great report – thank you!
We’re going to be there on 16 September and coming from Melbourne, Australia. Maybe see you there Sandra 🙂
LikeLike
I really enjoyed this hike! Especially the section that crossed the High Sierra trail. Thank you for providing this resource
LikeLike
Great write-up, thank you!
LikeLike
I absolutely loved this trip report, thank you so much for sharing it. I made a similar post inspired by you on my own blog, but for the equally great shorter 27-mile loop through Granite Pass and Black Rock Pass! I’ll definitely be checking out this loop when I want to head back for a longer trip. More lakes = more alpine dips!
https://mymountainmania.com/
LikeLike
Dear BR,
I was entranced by seeing Precipice the the first time in a magazine in Mammoth spotlighting some destinations. I finally made it up there on 8/9 – cried the first time I saw it after a year of planning and expectations. Although we had to make Precipice into a day hike due to some errors on the part of a ranger, I will be back to camp and finish the High Sierra Trail portion (my only regret, because the Black Rock Pass section we had to incorporate was brutal and unforgiving). Thanks for your excellent write-ups.
LikeLike
This is such a great review, thank you! Were there enough trees on this route to do bear hangs or did you use bear cannisters for your food?
LikeLike
Hi Micah – We used bear canisters for this route and the rangers in Sequoia recommended canisters. The campsites at Precipice Lake and Columbine Lake did not have trees, so you would struggle to hang food there. The other sites had plenty of trees around if I recall correctly.
LikeLike
Thanks such much for the review with the great pics and great maps. Wonderful trip. Brings back thoughts from a Boy Scout trip over 50 years ago. Lifelong memories.
LikeLike
Thank you for the fantastic review. I am planning to do this exact loop in early August, but due to permit availability, will start from Timber Gap and do it in reverse. Do you think this would significantly detract from the experience? Would it cause any major issues with the itinerary?
Thanks!
LikeLike
Hi Will – I think you can still have a great time doing the loop in reverse. The biggest difference is probably that you will have a really big climb the day you hike up to Precipice Lake. Just be prepared for a long hike on that day!
LikeLike
Just did this loop starting at Timber Gap last weekend. We pushed to Bearpaw the first day to take some mileage off the next day going to Precipice. Was a 14 mile day but worth it. The other really good thing about this direction is it’s definitely the best way to tackle Sawtooth. You go down the side that’s sandy and can pretty much surf it. My trip is on alltrails if you use that – 48.4mi.
LikeLike
Awesome – hope you had a great trip and hope the climb up to Precipice Lake wasn’t too much of a slog!!
LikeLike
Just have to say, this is a kick-ass post. Super helpful in planning and just getting inspired to get on the trails. Really appreciate the photo descriptions. Cheers!
LikeLike
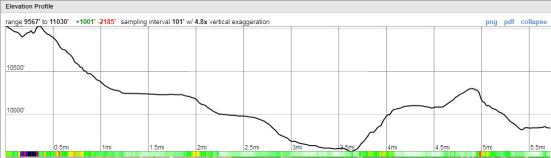
Doing this trip in a couple of days but clockwise and I’m pumped! Where did you do all of your images including the trail routes and elevation profiles?
LikeLike
I used caltopo.com for the map making and elevation profiles!
LikeLike
This is greeat
LikeLike