


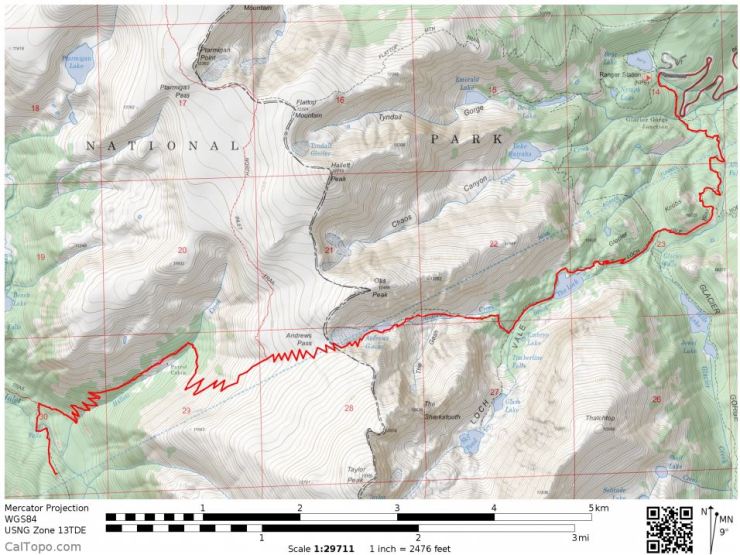
Trip overview: The Continental Divide Loop is a ~45 mile backpacking loop that traverses over 20 miles of the Continental Divide National Scenic Trail within Rocky Mountain National Park in Colorado. This route starts and ends at Bear Lake, though it can also be started at Grand Lake. +/- 11,600 feet of elevation with a starting elevation of 9,500 feet and a peak elevation of 12,300 feet. Highlights include expansive views of Continental Divide, large grassy meadows, and abundant wildlife. We completed this trip over 5 days in August of 2016. If you are unable to attain permits for this trek, the Four Pass Loop in the Maroon Bells Wilderness is a good alternative.
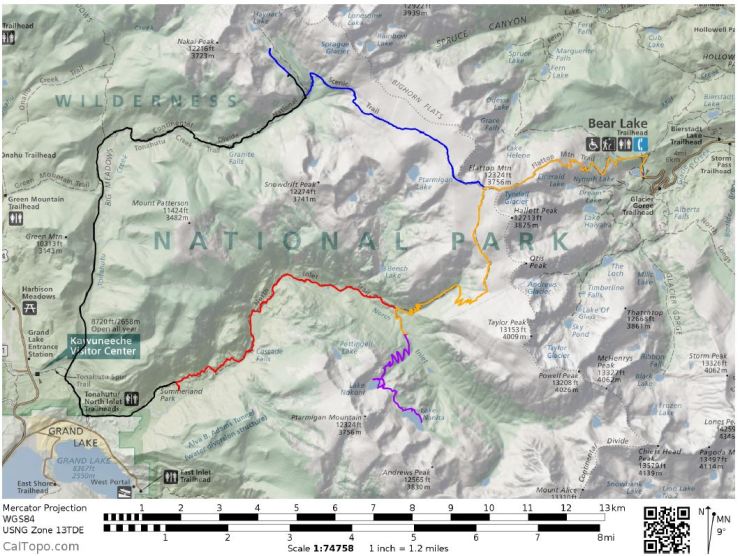
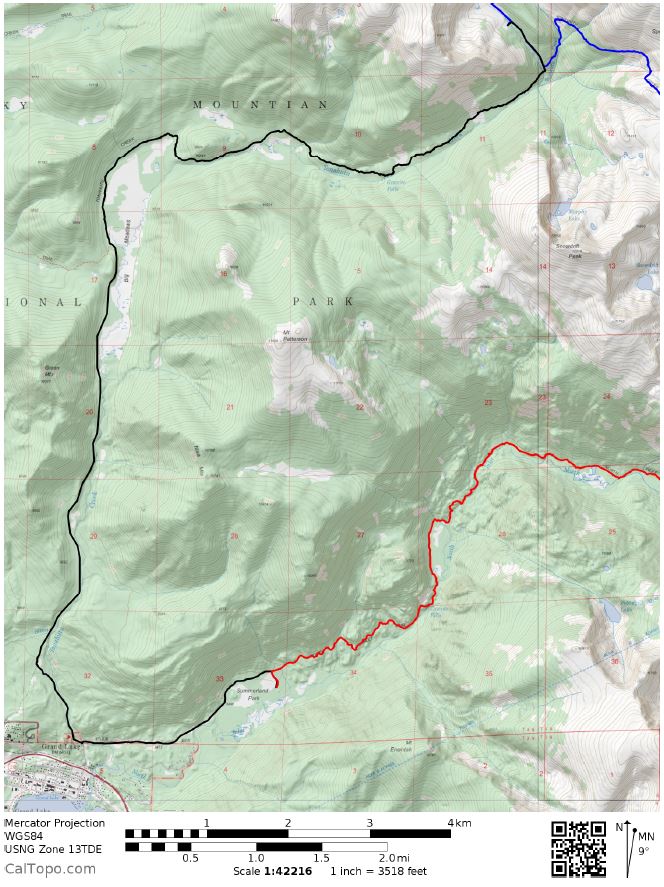
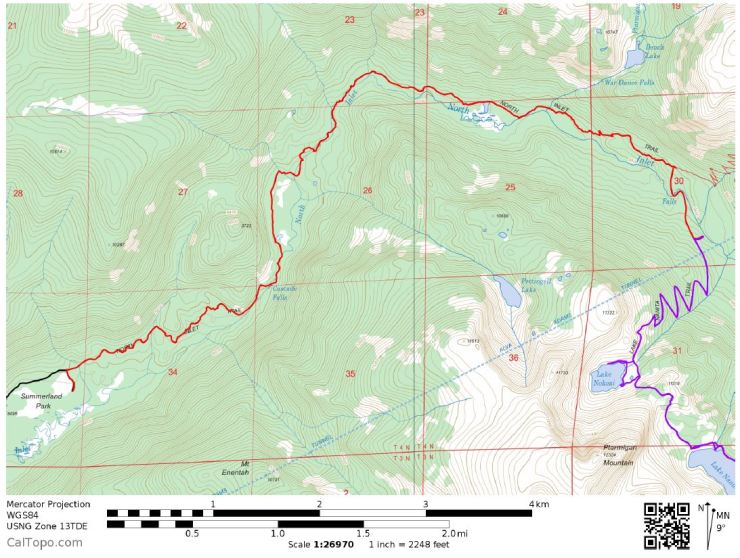
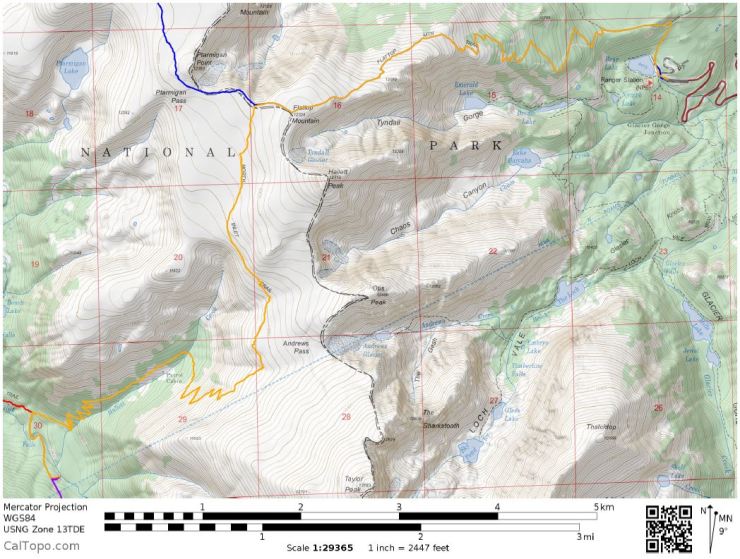
- Overall map of the backpacking route through Rocky Mountain National Park. Day 1 (blue, though the beginning part is covered by part of the yellow), Day 2 (black), Day 3 (red), Day 4 (purple), Day 5 (yellow).
- High resolution USGS topographic map download links part 1 (pdf) and part 2 (pdf)
- Links to buy Trails Illustrated Topographic map (here)
Jump to Day 1: Bear Lake Trailhead to Haynach Lakes Campsite
Jump to Day 2: Haynach Lakes Campsite to Summerland Park Campsite
Jump to Day 3: Summerland Park Campsite to Pine Marten Campsite
Jump to Day 4: Pine Marten Campsite to Lake Nokoni and Lake Nanita
Jump to Day 5: Pine Marten Campsite to Bear Lake Trailhead
Shop Sale & Clearance Items at REI.com (up to 50% off)!
Preparations:
Click here to read more about Permits
Permits: to backpack and camp in the backcountry at Rocky Mountain National Park (RMNP), you need a permit. The permit costs $26 and you can find the link to apply for it here if you are camping sometime between March 1st and October 28th. Unlike some other parks, RMNP requires you to specify on your permit where you will camp each night. Before applying for a permit you will want to check out the wilderness campsite map and the latest campsite availability list so you can decide where to camp. You can also find somewhat detailed information about all the campsites here. The popular campsites full up pretty fast in the prime season, so it is best to get your permit early.
Click here to read more about Logistics
Logistics: You must pick up your permit at either the Headquarters Wilderness Office near Estes Park, Colorado (next to the Beaver Meadows Visitor Center on Highway 36) or the Kawuneeche Visitor Center (on Highway 34 near Grand Lake). The latest you can grab your permit is Noon on the 1st day of your trek. I would advise grabbing your permit the day before your trek, if possible, so you can start the hike early in the morning. If you do not have a car, there is a shuttle that runs from the Wilderness Office to the Bear Lake Trailhead. If you have a car, you can park at the Park & Ride lot (or maybe at the Trailhead).
Click here to read more about Weather and Trail Conditions
Weather and Trail Conditions: You will want to make sure to check the weather before setting off on the trek. In the Colorado Rockies it often storms in the afternoon and lighting is a big concern in Rocky Mountain National Park. On the first day of the trek you must go over Flattop Mountain and Big Horn Flats and you are expose at high elevation for a couple miles. If there are any storms expected, you definitely want to get this part of the trek finished early in the morning to avoid any issues.
Click here to read more about Difficulty
Difficulty: Doing this trek over 5 days made for a manageable pace. There are some significant climbs, but the trails are all well marked and maintained. However, you need to be comfortable with high altitude hiking, and it is a great idea to acclimate to the altitude for a day or two before starting tour trek.
Supplies: There are black bears in the park, so you need to bring a bear canister to protect your food (and to protect the bears). I also recommend pre-treating your hiking clothes and tent with permethrin spray repellent
. This repellent keeps mosquitoes, flies, and ticks away. The permethrin treatment stays on your clothes for up to 7 washes, so it helps reduce the amount of spray you need to put on your skin.
The temperature can be quite cold at the higher elevation campsites in the evening and mornings. I highly recommend having some warm wool-based clothes for camp. Wool is great because it doesn’t pick up funky stenches as fast at cotton or synthetic clothes and also because it dries out quickly if you get caught in the rain. I had all wool layers for camp and didn’t have to wash any of my camp clothes for a full trek. You also want to make sure your hiking clothes are made of synthetic (or wool) fabric that will dry out if you get caught by a thunderstorm and get wet. That last you want is to be drenched in cotton clothes that will stay wet and keep you cold.
Below is a list of the gear I brought on this trip in Rocky Mountain National Park:
Hiking clothes
- a lightweight hiking rain jacket (North Face Venture 2 Jacket)
- fast drying synthetic hiking pants (prAna Zion Pants)
- a quick drying long sleeve hiking shirt (Columbia Silver Ridge L/S Shirt)
- wool outer socks (People Socks Moreno 4-pack)
- thin blister preventing base socks (WrightSock double layer Coolmesh)
- quick drying synthetic boxer briefs (ExOfficio Give-N-Go)
- Gore-tex hiking shoes (adidas Outdoor Terrex Fast R Gore-Tex Shoe)
Clothes for camp
- wool leggings (Minus33 Merino Wool Kancamagus Midweight Bottom)
- wool base layer shirt (Minus33 Merino Wool Chocorua Midweight Crew)
- warm wool overshirt (Pendleton Long Sleeve Classic-Fit Board Shirt)
- lightweight down jacket (Patagonia 800-fill Down Jacket)
- lightweight camp shoes (Xero Z-Trail lightweight sandal)
Hiking gear
- topographic map (Trails Illustrated Rocky Mountain topographic map)
- trekking poles (Black Diamond Trail Ergo Cork Trekking Poles)
- 2 liter hydration bladder (Platypus Big Zip Water Reservoir)
- 65 liter backpack (Osprey Atmos 65 Liter pack)
- water filtration system (Platypus gravity filtration system)
Camp gear
- strong tent with rain-fly (Alps Mountaineering Chaos 2 Tent)
- inflatable sleeping pad (Therm-a-Rest Trail Pro Sleeping Pad)
- sleeping bag (REI Co-op Igneo 25 Sleeping Bag)
- inflatable camping pillow (Ultralight Inflating Pillow)
- lightweight backpacking chair (Helinox Chair Zero)
- lightweight lantern (MPOWERD Luci Outdoor 2.0)
- headlamp (Black Diamond Cosmo Headlamp)
- multi-tool with knife (Gerber MDime Mini Multi-Tool)
- Ursack (Ursack Major bear bag) or bear canister (BearVault BV500)
- lightweight stove (MSR PocketRocket 2)
- lighter (BIC plastic lighters)
- 2 liter pot (GSI Outdoors Halulite Boiler Pot)
- coffee cup (GSI Outdoors Glacier Stainless Cup)
- lightweight spork (Snow Peak Titanium Spork)
- small, quick drying towel (REI mutli towel mini)
Random
- wet wipes (Stall Mates individually wrapped wipes)
- mole skin for blisters (Blister medic kit)
- lightweight trowel (GSI Sanitation Trowel)
- small amount of duct tape for gear repairs
- chapstick and sun screen
Food and drink
- a variety of my favorite dehydrated meals
- electrolyte replacement (NUUN Hydration Tablets)
- quick snacks (Clif Shot Bloks and Clif energy bars)
- instant coffee (Starbucks VIA)
- small plastic water bottles filled with whisky 🙂
Day 1: 10.2 miles: +3,700 / -2,500; Bear Lake Trailhead to Haynach Lakes Camp.
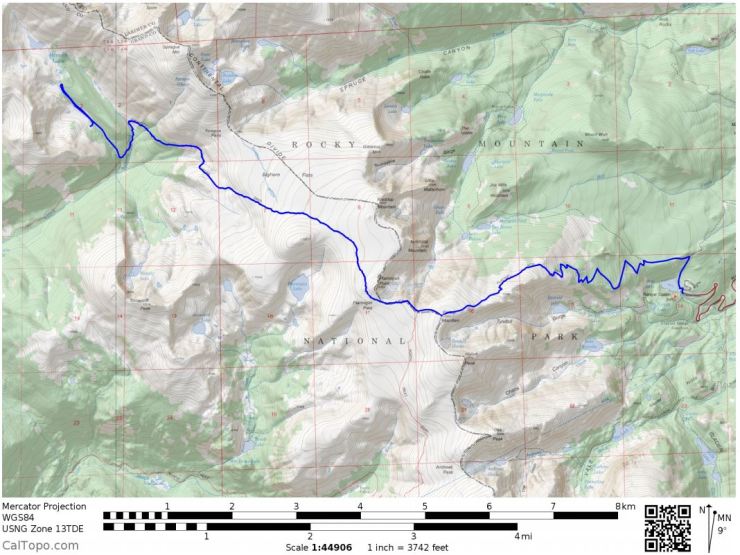
- Map of Day 1 hike backpacking in Rocky Mountain National Park in Colorado (Blue)
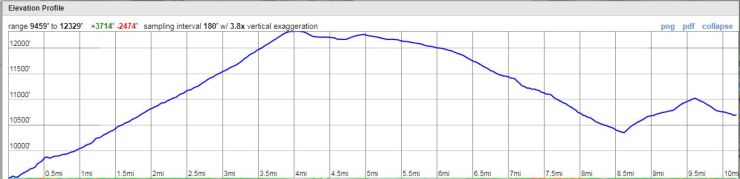
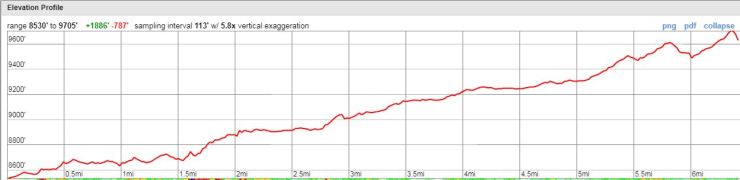
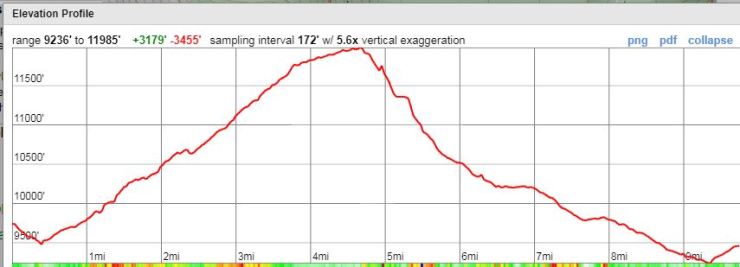
- Approximate elevation profile for the day 1 hike.
Before setting off on this backpacking trip in Rocky Mountain National Park we stayed at friend’s house near Denver, Colorado. This allowed us to acclimate a bit to the altitude and let us stop at REI to buy supplies. The morning of the trek we got a ride from our friend and were dropped off at the Beaver Meadows Visitor Center. We arrived at about 8:00 am and promptly walked down to the Backcountry Permit Office to get our permit. The Ranger immediately told us that we should have started our hike an hour earlier and said we were likely to get stuck on Flattop Mountain in the afternoon when thunderstorms are likely. At this point we did not really have a backup plan, so we just decided we would hike as fast as possible to get up and over Flattop Mountain before the storms.
Since we didn’t have a car, we planned to take the free park shuttle from the Visitor Center to Bear Lake. Unfortunately, we narrowly missed the Hiker Shuttle Express at 8:30 am and were forced to wait an hour until the next shuttle came at 9:30 am. This shuttle only runs hourly from 7:30 am to 11:00 am, so plan accordingly. It might be more wise to get a ride to the Park & Ride since you can grab a shuttle to Bear Lake from there at 7:00 am and get an early start (plus the Bear Lake shuttle runs more frequently). You probably would need to get your permit the day before though as I am not sure when the Backcountry Office opens in the morning.
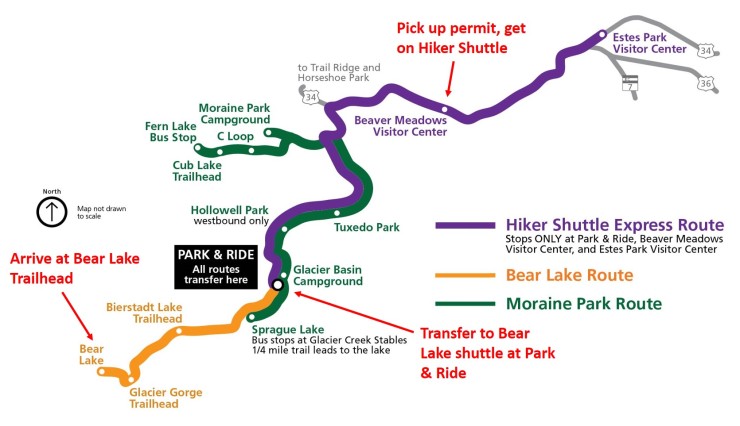
So, we got on the 9:30 am Hiker Shuttle, took that to the Park & Ride, and then hopped on the Bear Lake Shuttle. The Bear Lake Shuttle runs every 10-15 minutes and takes you all the way to the Bear Lake Ranger Station and Trailhead. We got off the bus and immediately started rushing up the Flattop Mountain Trail.
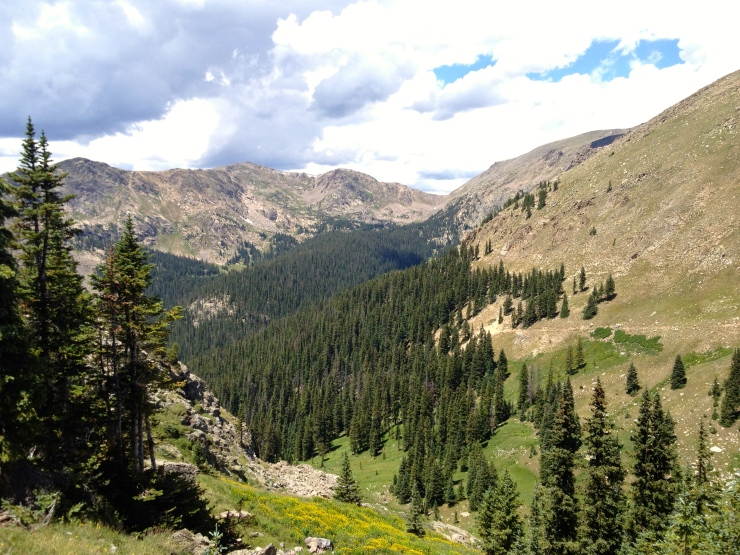
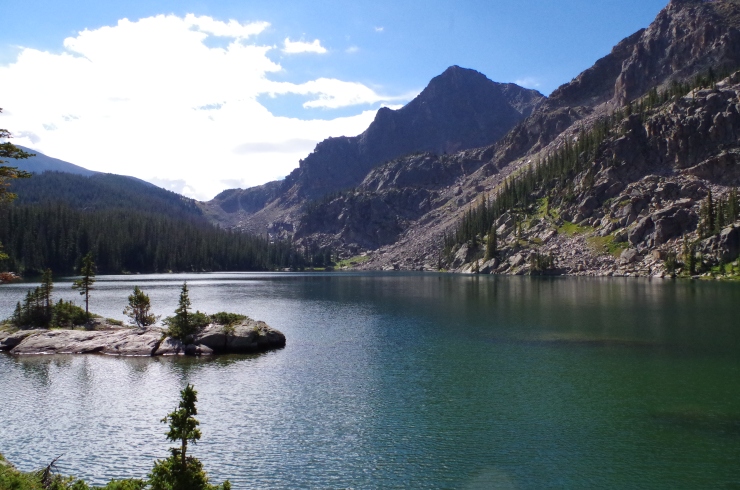
We set off on the hike between 10-11:00 am (I don’t recall the exact time anymore). The hike begins with a short flat section as you walk by Bear Lake. Then, there is a ~4 mile climb up to the top of Flattop Mountain. The views along the way are really nice and you can see several lakes and mountain peaks. This hike is pretty popular with day hikers, so you will likely encounter many other hikers unless you leave quite early.
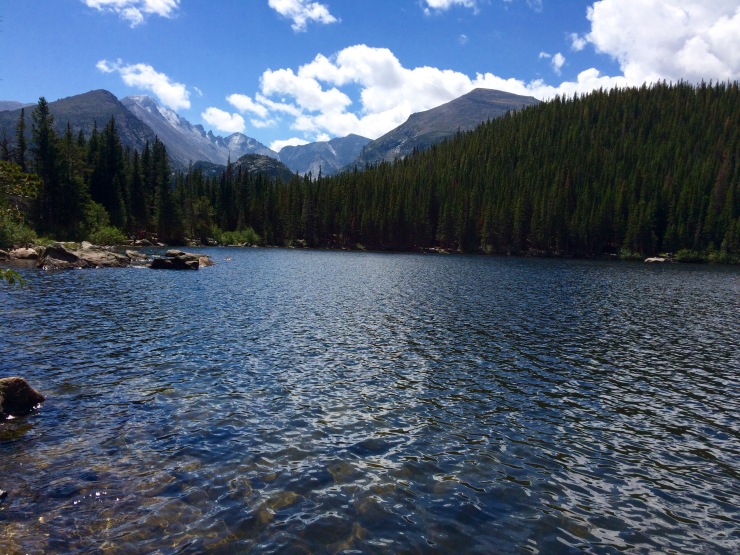
- Bear Lake at Rocky Mountain National Park.

- Looking down at Emerald Lake from the Flattop Mountain Trail.
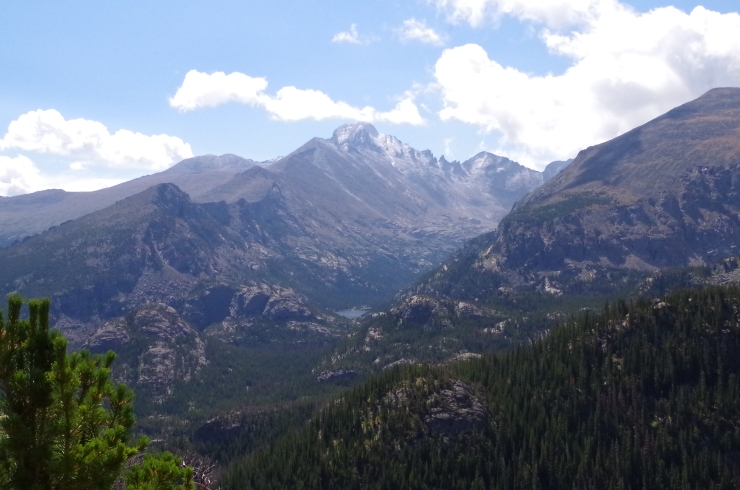
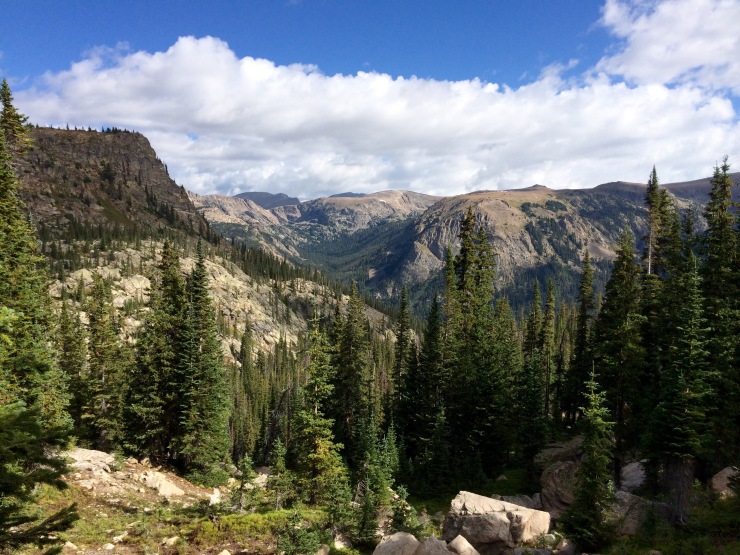
- View from the Flattop Mountain Trail.
- Looking back down the Flattop Mountail Trail.

- View of the canyon to the North of the Flattop Mountain Trail.
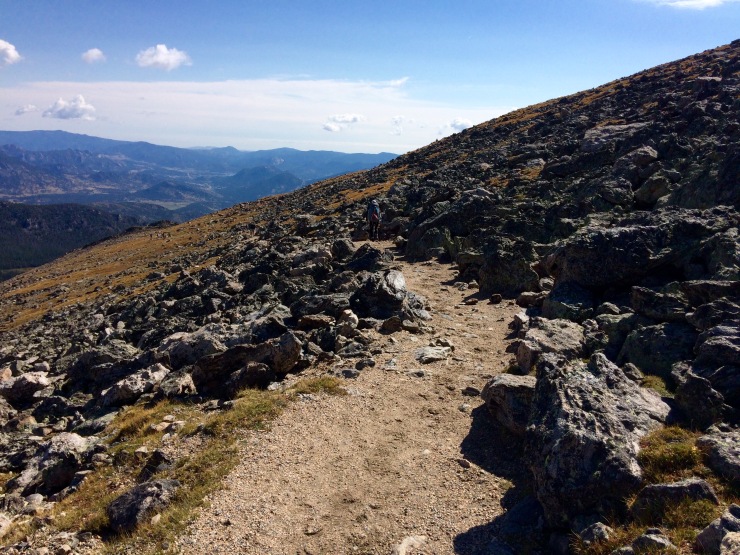
Once we got to the top of the climb (in what seemed like record time), we took the Tonahutu Creek Trail. This section of the trail goes across Bighorn Flats and is really exposed. It is a beautiful trail, but is a terrible place to be during a thunderstorm because there is zero cover.
We picked up our hiking pace even more here because the ranger said this would be the dangerous part of the hike for us. As we were hiking, the sky started turning dark and we began to hear thunder. Fortunately, we made it across the first 2.5 miles of the Tonahutu trail before the weather really started to look nasty, but we were still in a very exposed area. We decided to just run for a small group of trees and then went and sat down in the trees for ~1.5 hours until the storm had passed (this may not be the best strategy to avoid lightning, so do not take this is as advice). Note that some of these pictures are borrowed from the cited sources, because I was too busy running to take pictures…
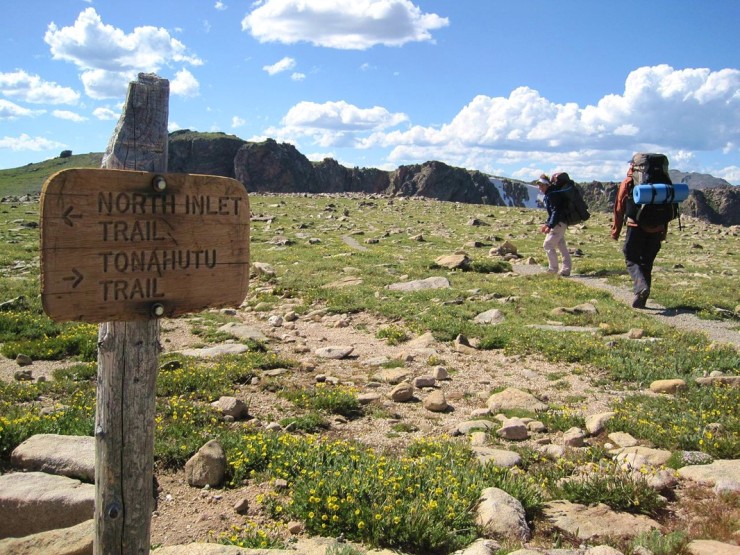
- Junction where you turn off onto the Tonahutu Trail (Credit: Eric Schmuttenmauer)
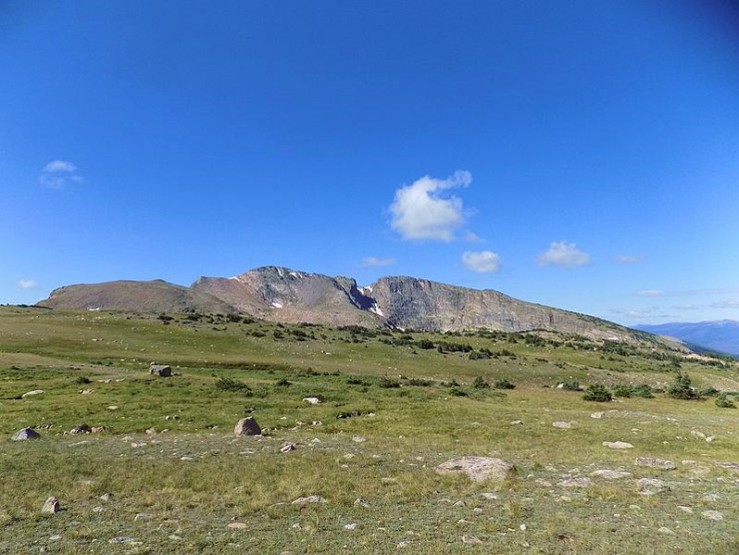
- View of Snowdrift Peak from the Tonahutu Creek Trail (credit: Wildernest 42)
- View South from Bighorn Flats (credit: Wildernest42)
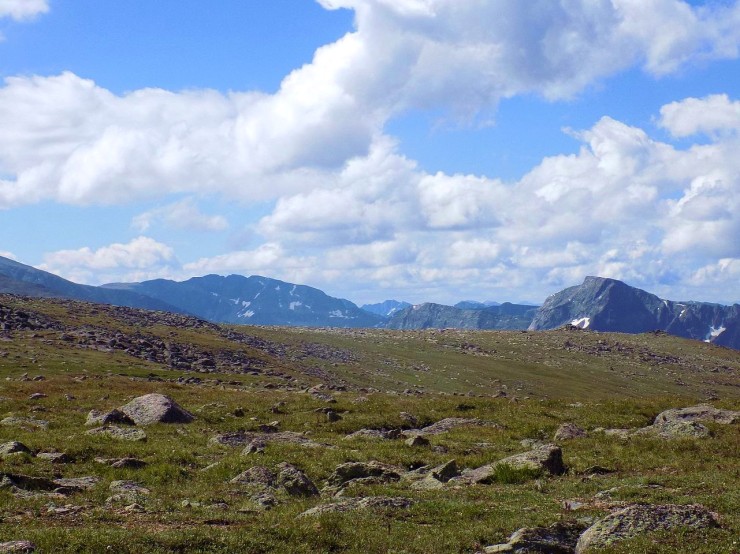
- View along the Tonahutu Trail showing the expansive Bighorn Flat area. (credit: Brandon Andress)

- Looking at the expansive Bighorn Flat area (credit: Brandon Andress)
- Tonahutu Creek Trail looking across BigHorn Flat towards Nakai Peak (credit: CSUMarmot)
Eventually the storm passed, and we felt comfortable enough to briskly hike another mile down the trail until we reached the the part of the trail that is surrounded by tall trees. At about the 8.5 mile mark you will see a sign for Haynach Lakes Camp and turn off the Tonahutu Creek Trail. We went up the trail, found the developed campsite, and dropped off our gear.
- The Tonahutu Trail becomes more covered before descending to the Haynach Lake turn-off. (credit: Brandon Andress)
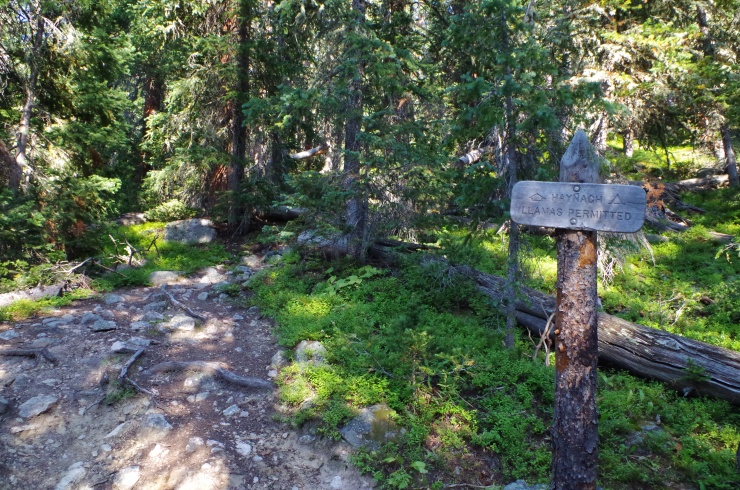
- Sign marking the turn off for the Haynach Lake camp site.
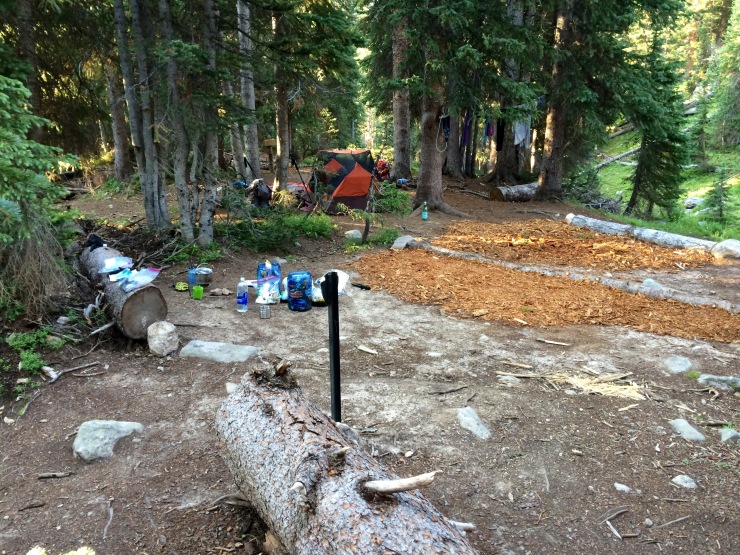
- The campsite here is quite large. There is easy access to a stream for water too. (pictured: BearVault Clear Bear Canister and ALPS Chaos 2 Tent )
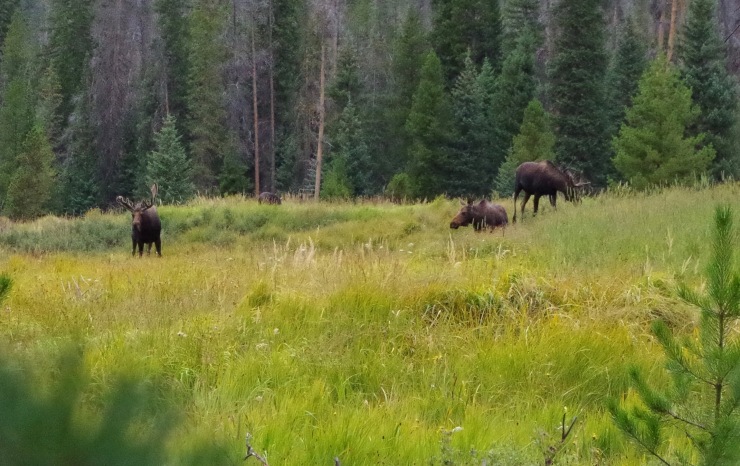
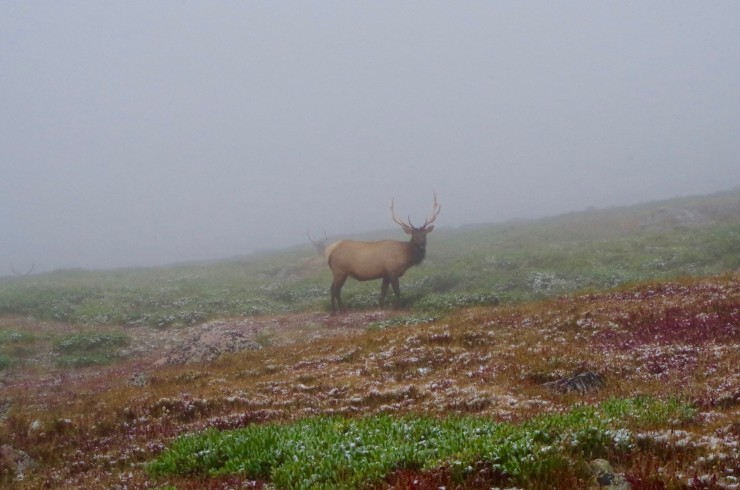
By this point, the weather was fine and we decided to leave our gear at camp and hike up to Haynach Lakes to explore. We were pretty tired after running up and over Flattop Mountain, so we didn’t actually make it to the main lake. It’s about a mile and up a few hundred feet in elevation to get there. We went about 0.5 miles up the trail and then decided to head back and make dinner. The scenery along the way was nice though and we came across some cool wildlife.
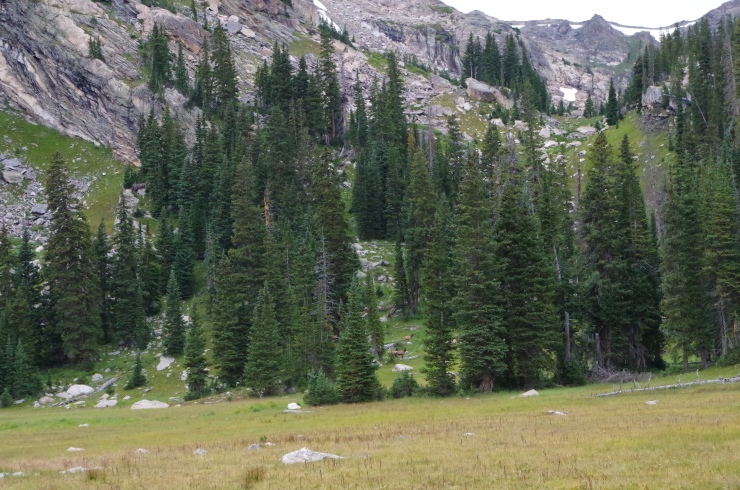
- Wildlife in the meadow on the trail up to Haynach Lakes.
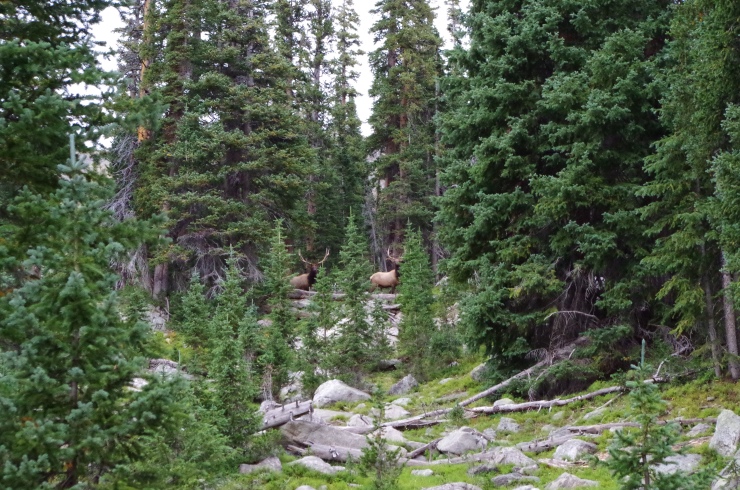
- Up close with some big guys close to the trail.
Day 2: 11.4 miles; +700 feet / -2,900 feet; Haynach Lakes Camp to Summerland Park.
- Map of Day 2 hike backpacking in Rocky Mountain National Park (Black).
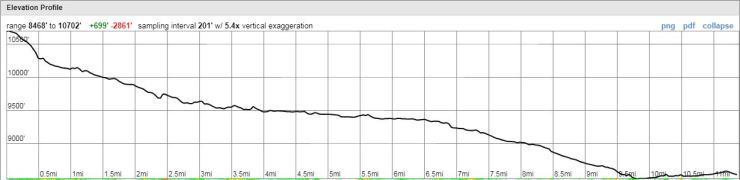
- Approximate elevation profile of the Day 2 hike.
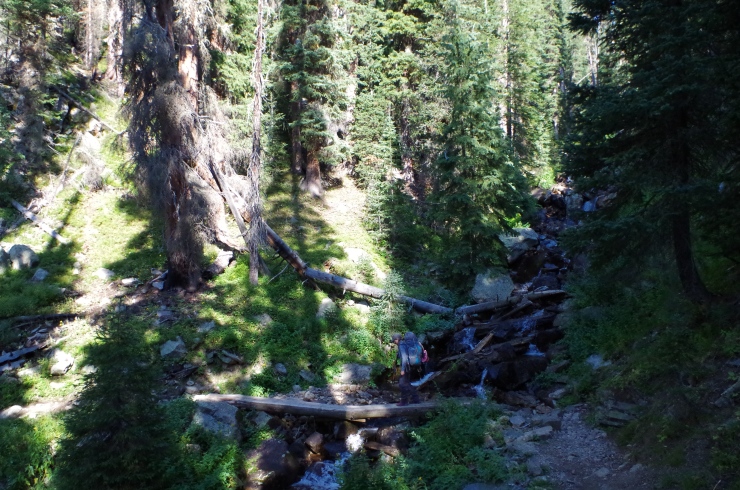
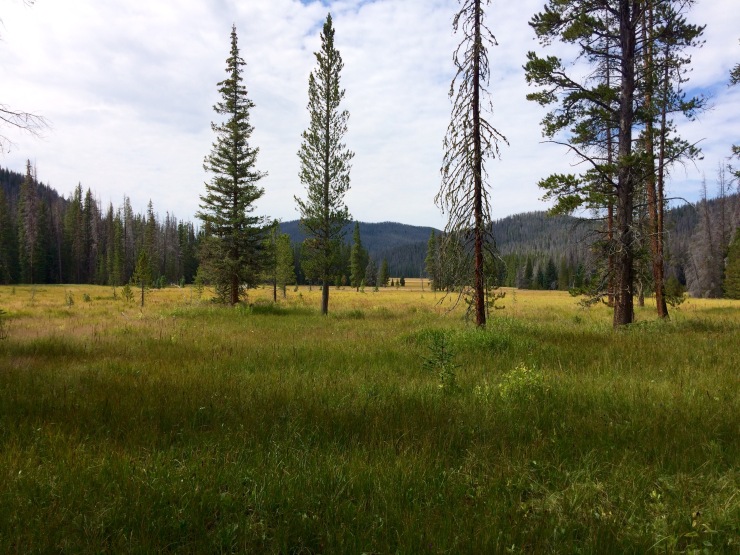
Despite being ~11 miles long, this hike was relatively easy since it was all down hill. Along the way, the hike alternates between going through forests and through Meadows. A couple miles into the hike we came across the first meadow and then encountered granite falls, which provided a nice spot for a water break and some pictures.
- Heading down the Tonahutu Creek Trail from Haynach Camp.
- Encountering the first meadow along the trail. (pictured: Vivobarefoot Water Shoes)
- View along the side of the meadow.
- Alternate view along the meadow.
- Looking backwards towards where we came from.
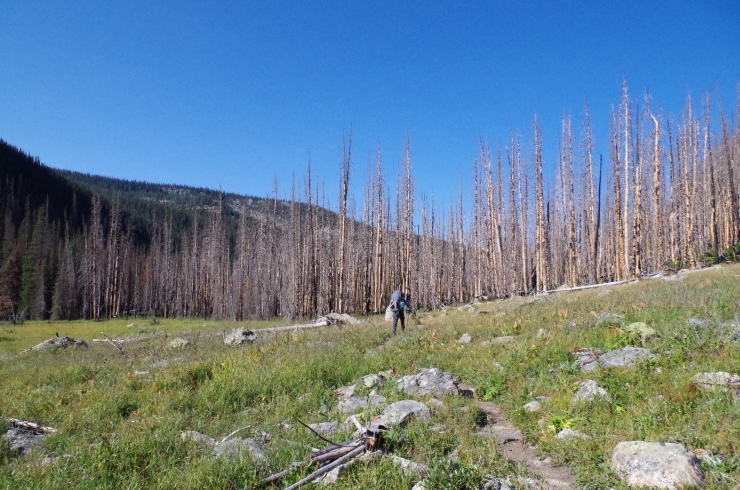
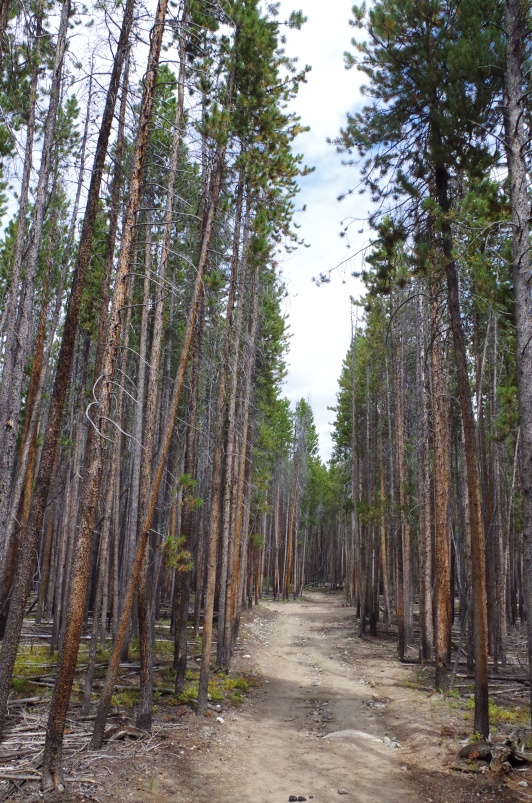
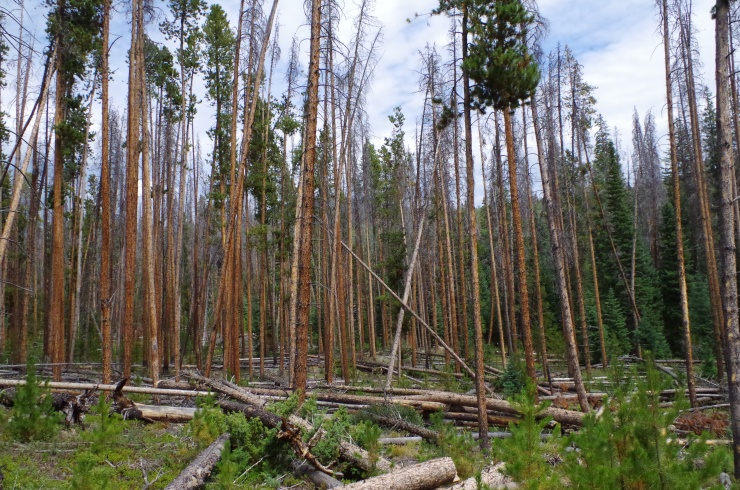
- The trail then enters a forest which probably was affected by the pine beetle infestation.
- The dead trees actually provided a nice contrast in color (pictured: Kelty Coyote 60L Backpack)
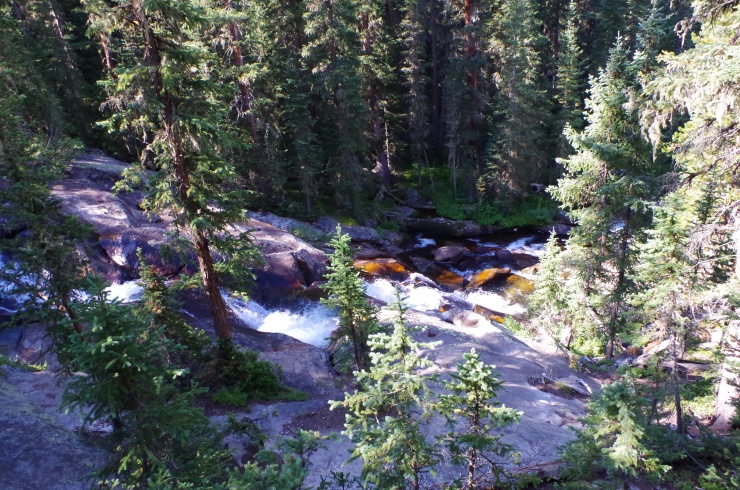
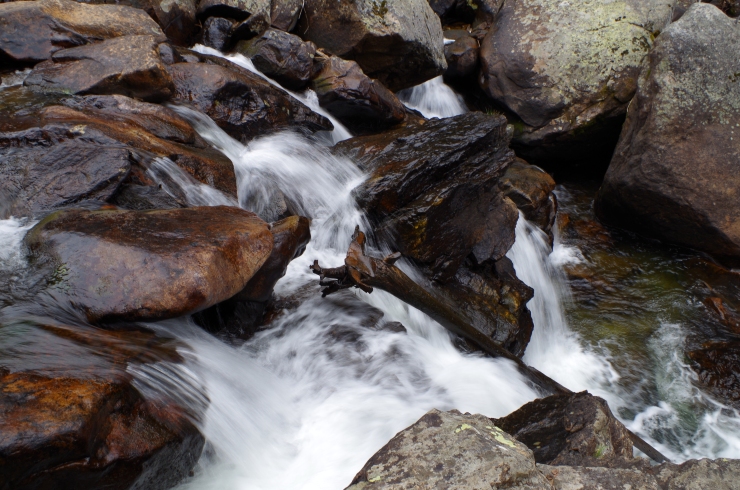
- View of Granite Falls from above.
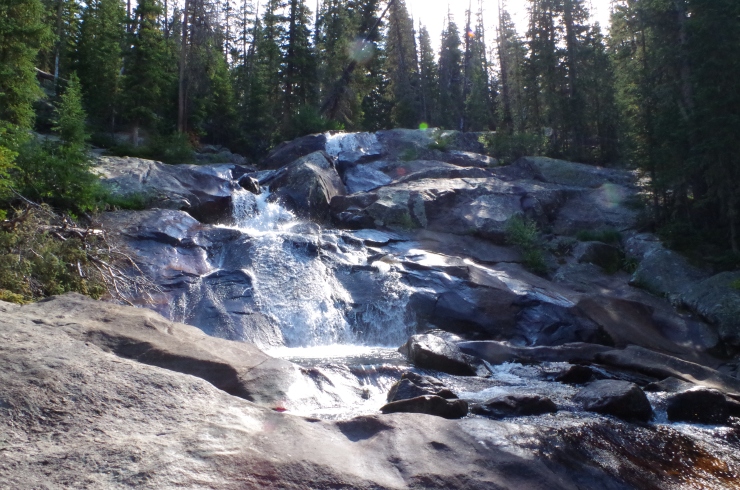
- Looking up at Granite Falls from the edge of the water.
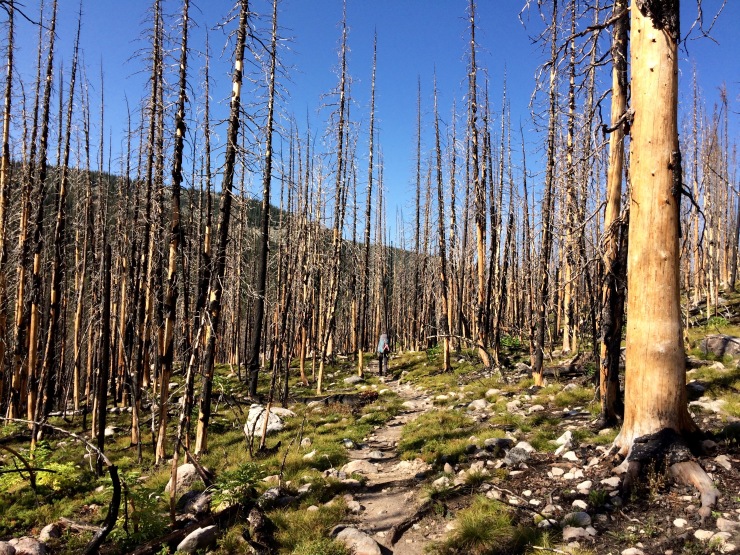
After the falls, we hiked through some more dead forest. This section of the trail had some wildflowers which provided nice color.
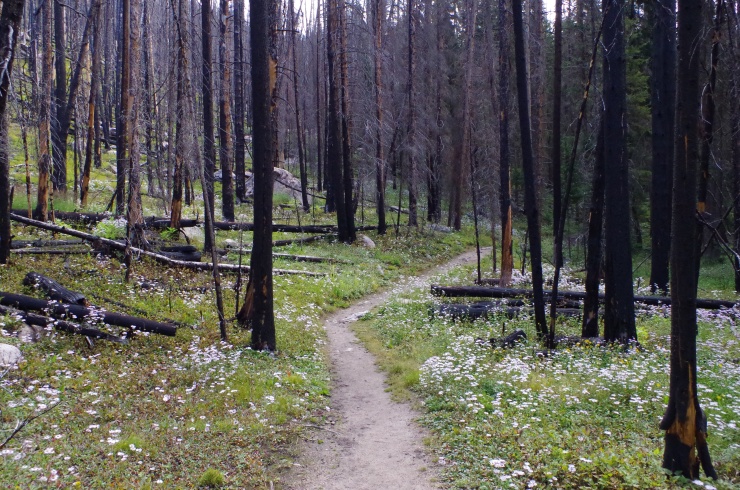
- Trail between Granite Falls and Big Meadows.

- Trail between Granite Falls and Big Meadows.
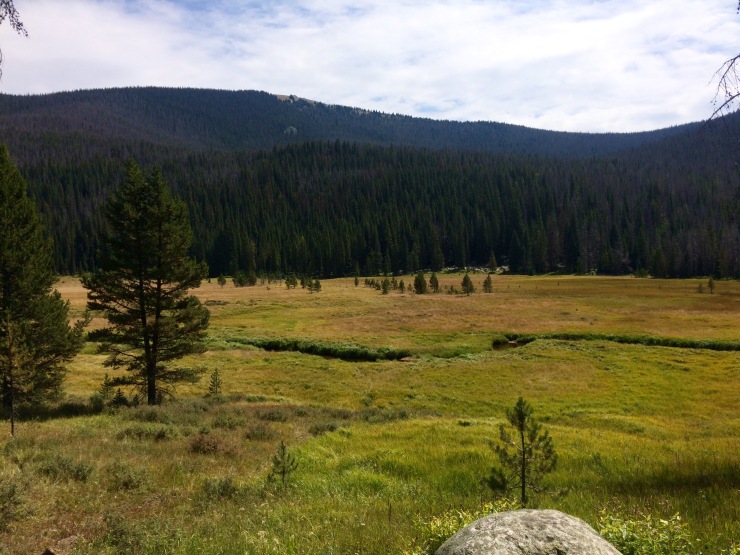
Next, the trail leads into the aptly named Big Meadows. This section of the trail was really nice and provides great views of the meadow and the Tonahutu Creek running through it. We were surprised we didn’t see any animals here though.
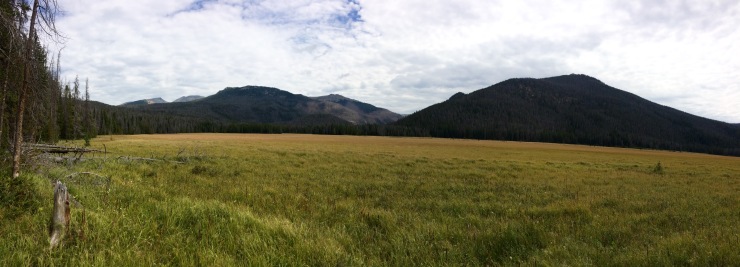
- Panoramic of Big Meadows.
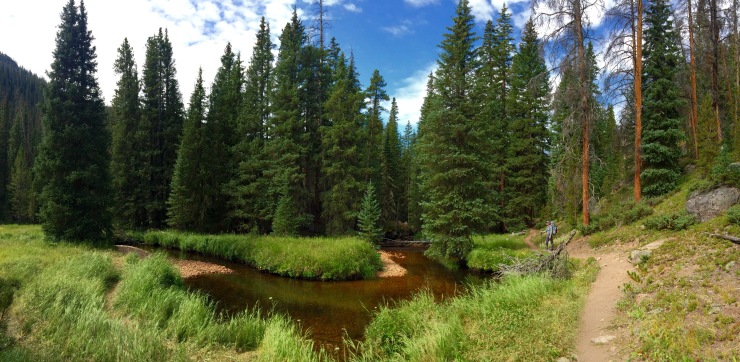
- Tonahutu Creek in the Big Meadows area.
- Big Meadows.
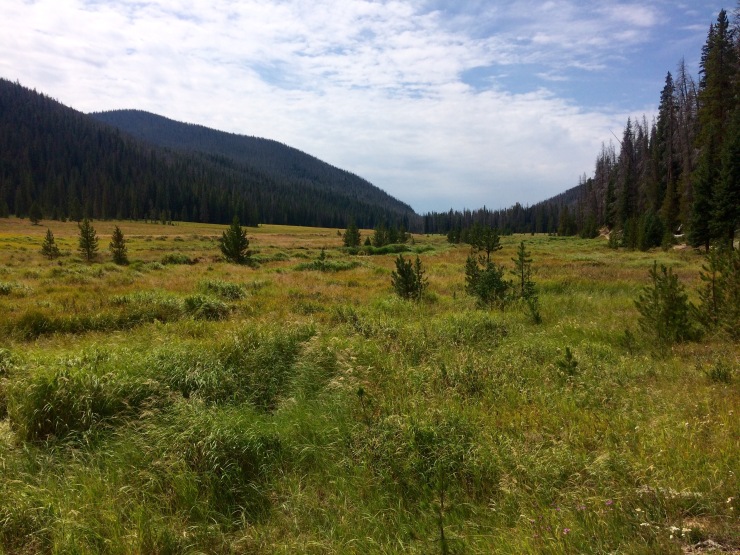
- Even more Big Meadows.

- Big Meadows and Tonahutu Creek.
- Leaving Big Meadows.
After hiking through Big Meadows we went through another pine forest (this one alive) before reaching the trailhead at Grand Lake.
- Tonahutu Creek Trail between Big Meadows and Grand Lake.
- Pine forest.
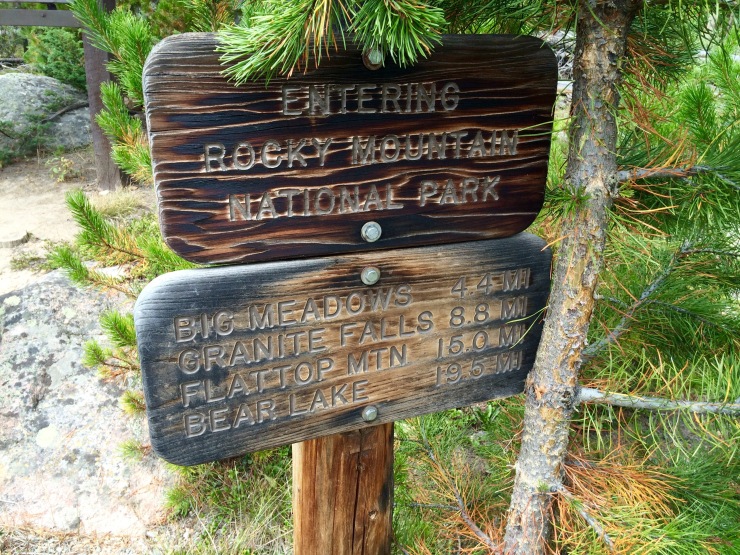
- Trail sign near the Grand Lake area.
Here we followed signs that led to the North Inlet Trail that goes to Summerland Park. If you needed to freshen up or buy a real meal, you could hike down to the developed area on the North side of Grand Lake. We chose to just continue on to Summerland Park.
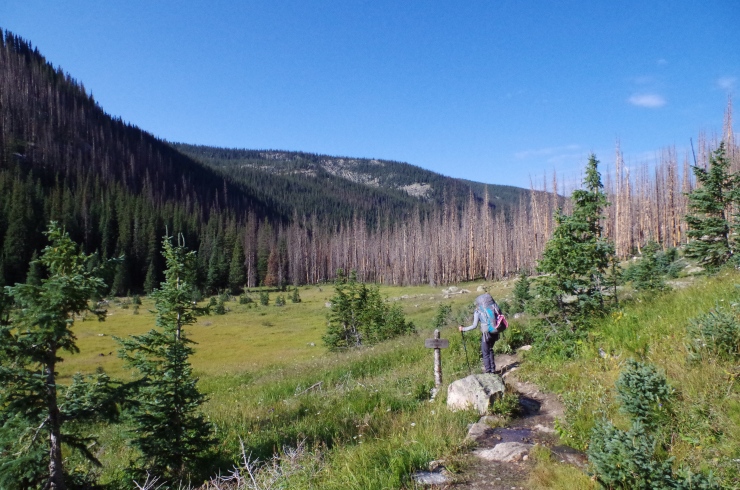
We encountered a fair number of people on this section of the trail. It seems to be a popular spot for day hikes. This section of the hike is a flat leisurely hike along side the Summerland Park meadow with views of the North Inlet creek. After a couple miles we came across a sign for the Summerland Park campsite. The site is a 5-10 minute walk into the meadow from the North Inlet trail, which is nice because it provides privacy from the popular trail. We couldn’t find an easily accessible walk source right near the camp, so ended up getting water from a small creek that crosses the North Inlet Trail near the turn off for the campsite. This was a bit annoying because it took 15 minutes to go get water. But, the campsite was really nice overall and is a great spot to see moose.
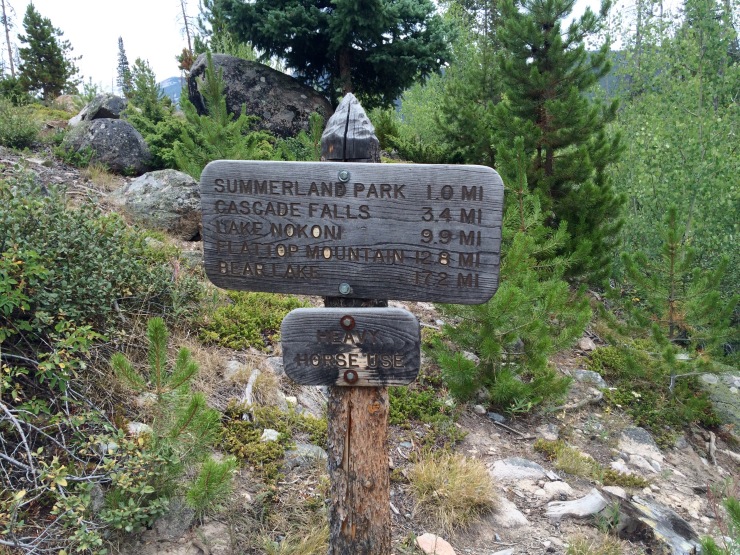
- Trail sign at the start of the North Inlet Trail.
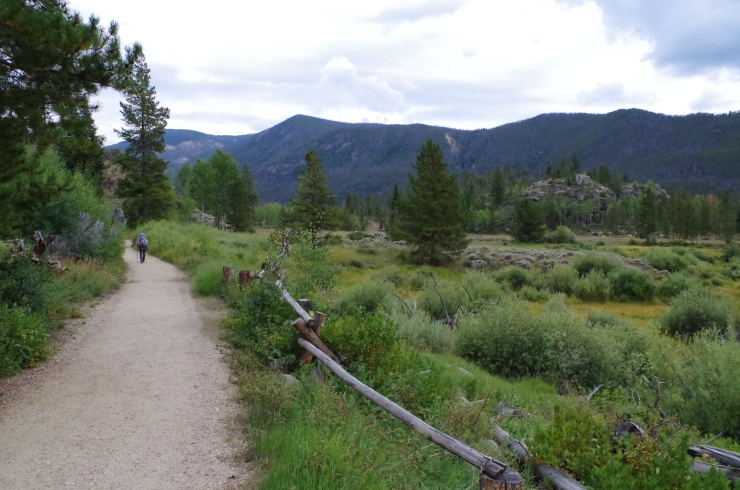
- Heading North on the North Inlet Trail.
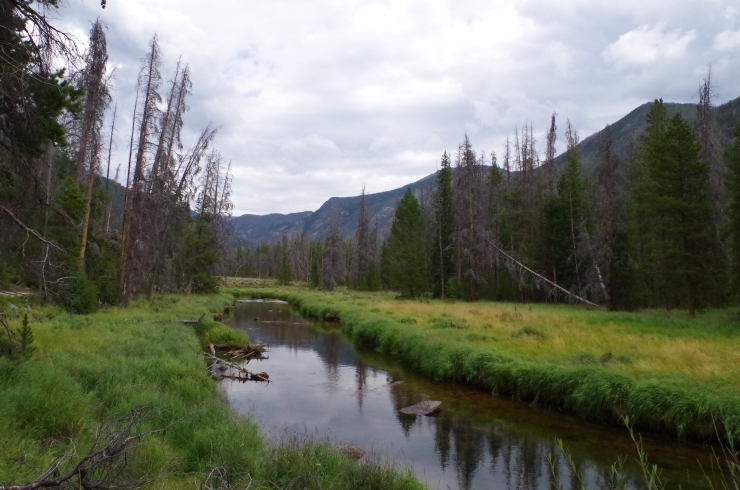
- View of the North Inlet.
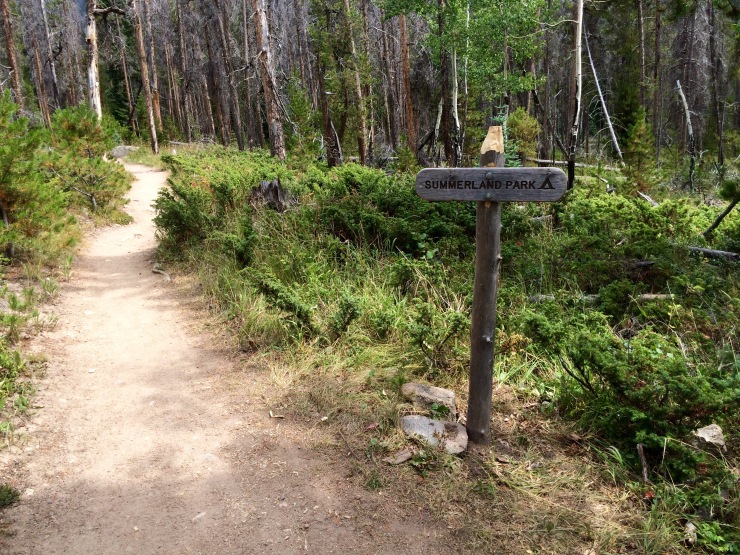
- Sign marking the trail for the Summerland Park campsite.
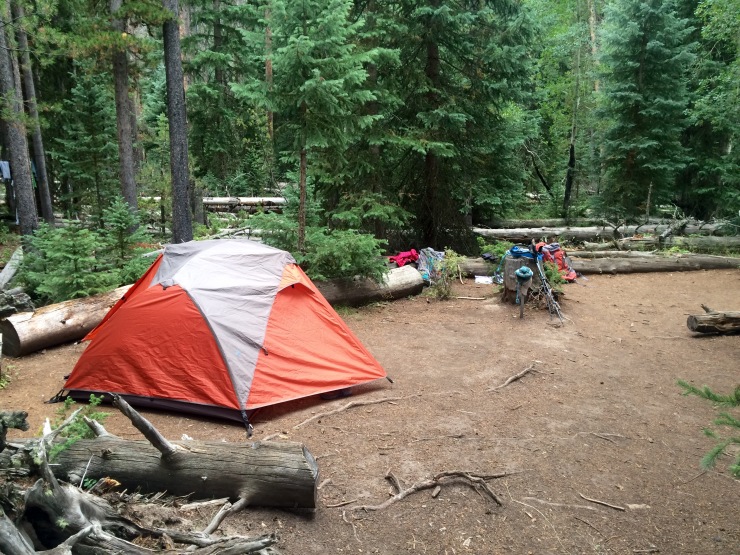
- Summerland Park has a nice large campsite (pictured: ALPS Chaos 2 Tent and Wool Beanie w/ Ear Flaps)
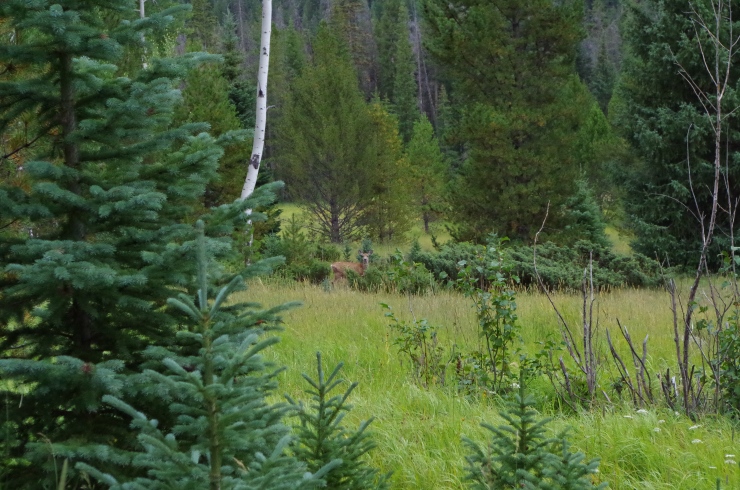
- A deer in the meadow.
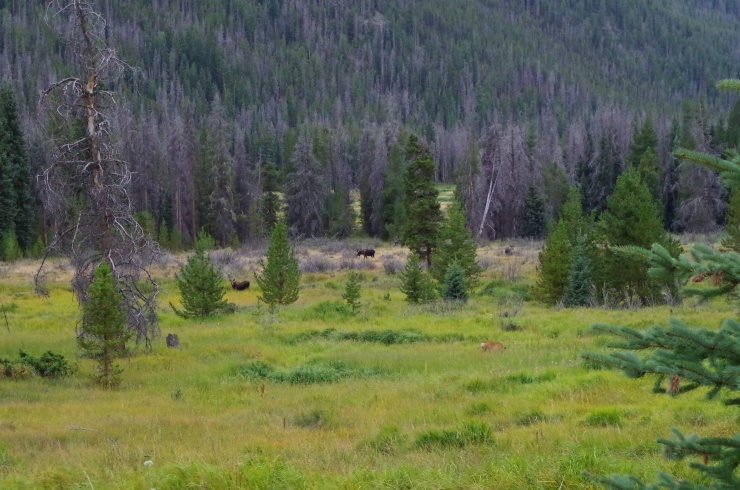
- Moose and a deer in Summerland Park.
- At one point the moose got a little too close for comfort.
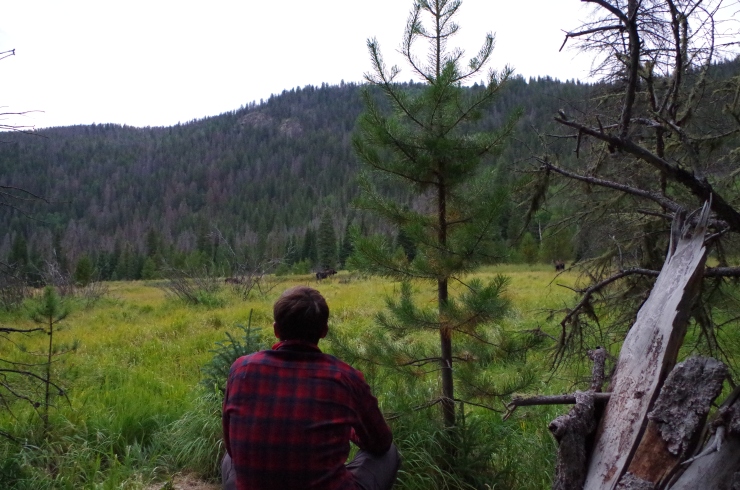
- Great scenery while relaxing after dinner. (pictured: Pendleton Wool Long Sleeve Shirt)
Day 3: 6.4 miles; +1,900 feet / -800 feet; Summerland Park to Pine Marten site #2.
- Map of Day 3 hike backpacking in Rocky Mountain National Park (Red).
- Approximate elevation profile of the Day 3 hike.
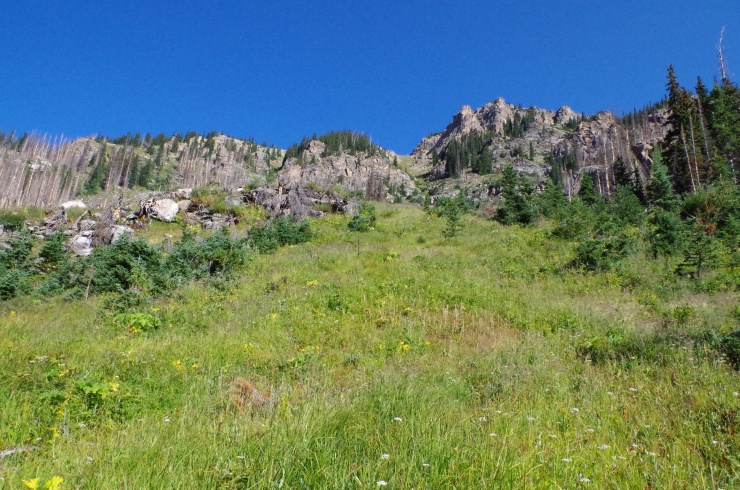
This trek involved a moderate climb, but was overall short in distance. We had considered scrambling up to Bench Lake before going to camp, but decided against. A ranger had told us that it required a lot of bushwacking to get there and that you had to get wet along the way. We enjoyed the short day though and had a good time relaxing at our campsite.
- Cascade Falls.
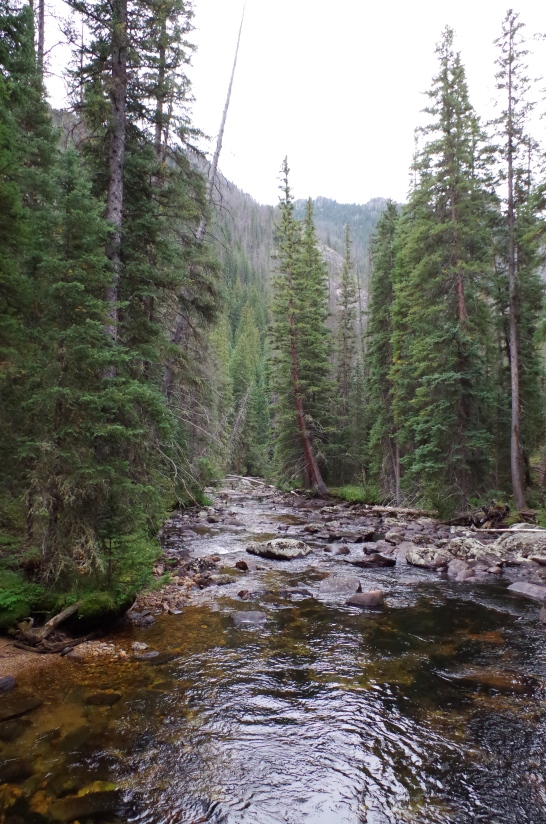
- A stream along the North Inlet Trail.
- Another little waterfall along the trail.
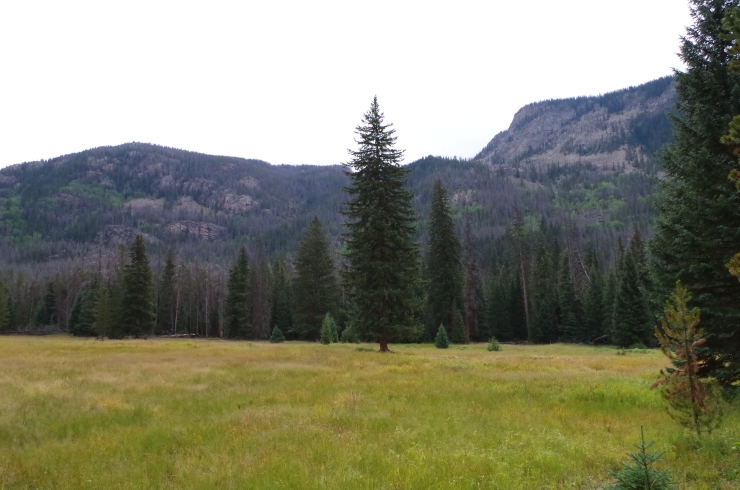
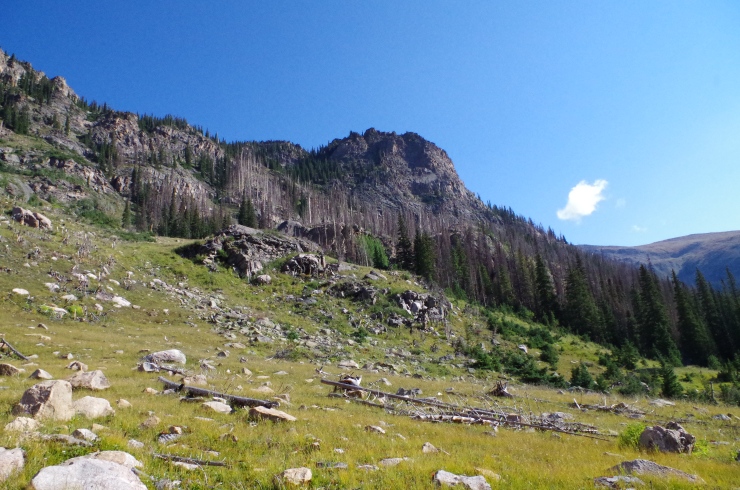
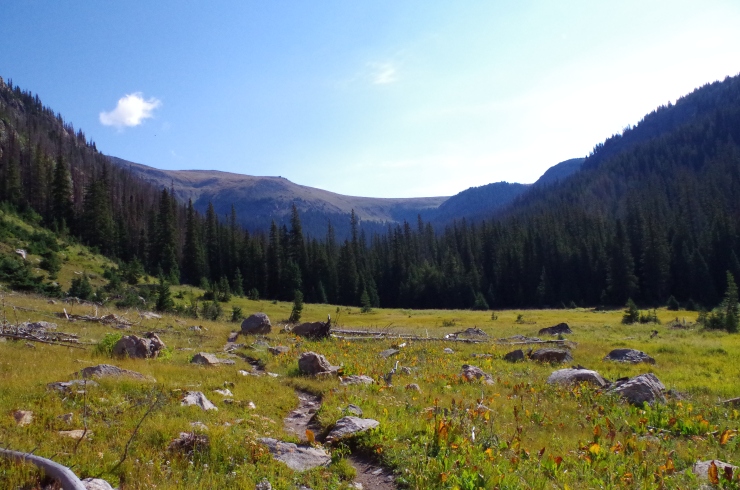
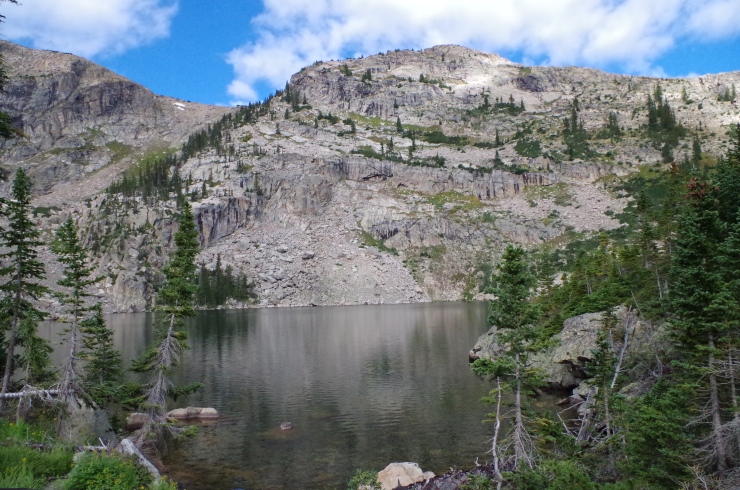
- A meadow along the North Inlet Trail.
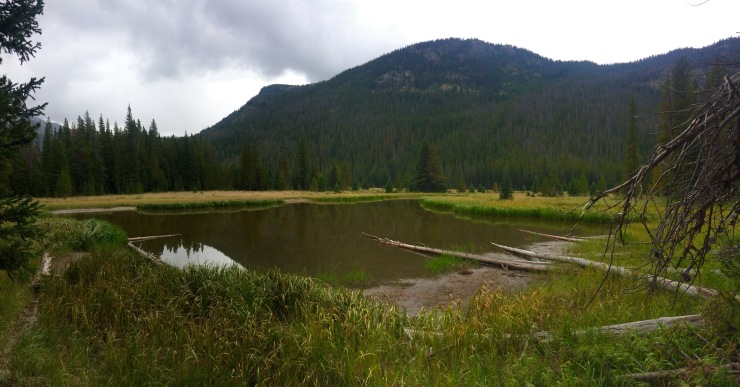
- Small lake in the meadow.
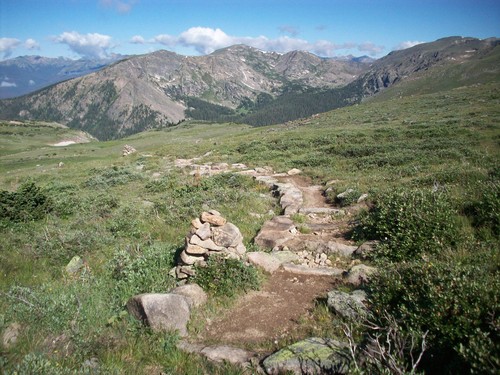
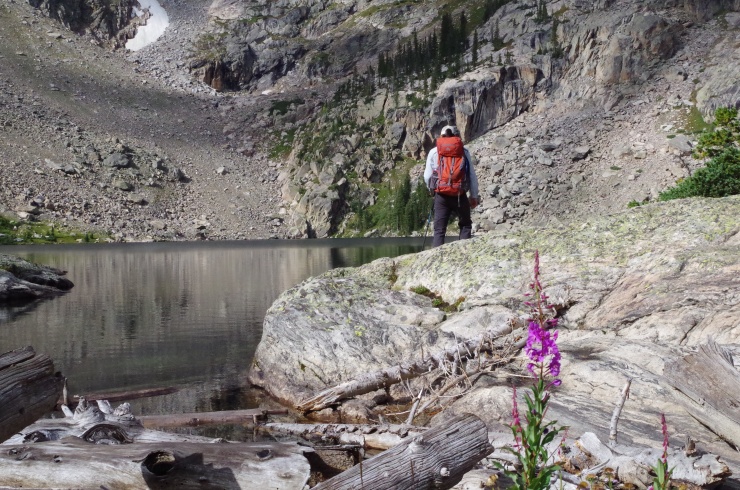
- Getting closer to our campsite which was on the way to Lake Nokoni and Lake Nanita.
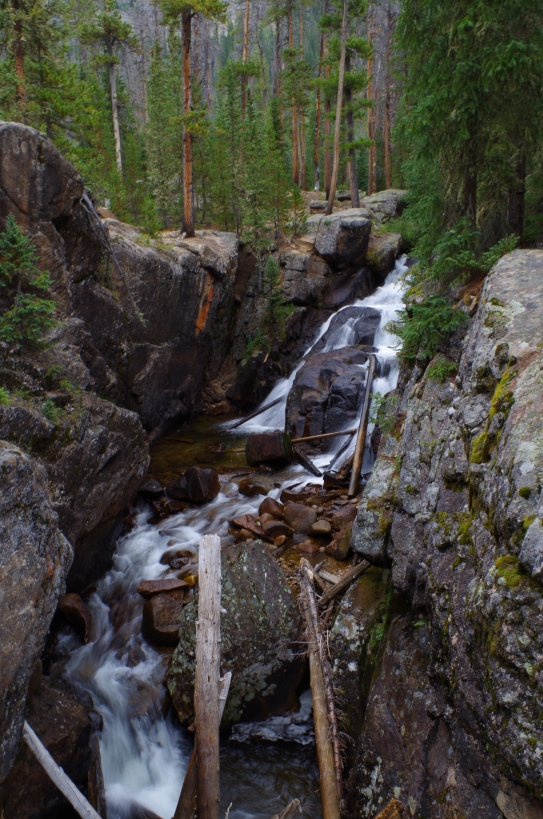
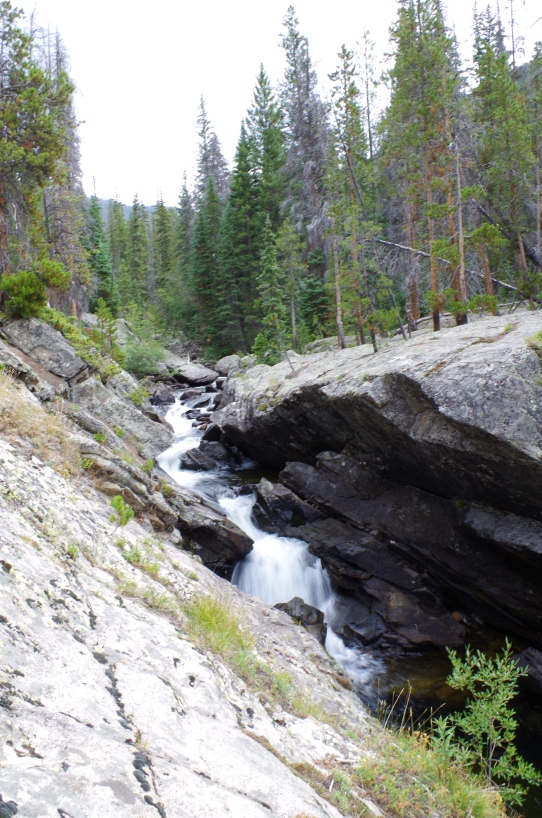
- North Inlet Falls.
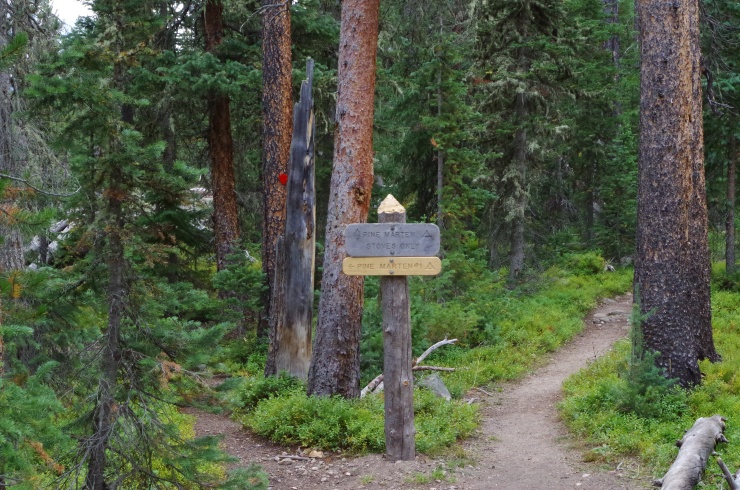
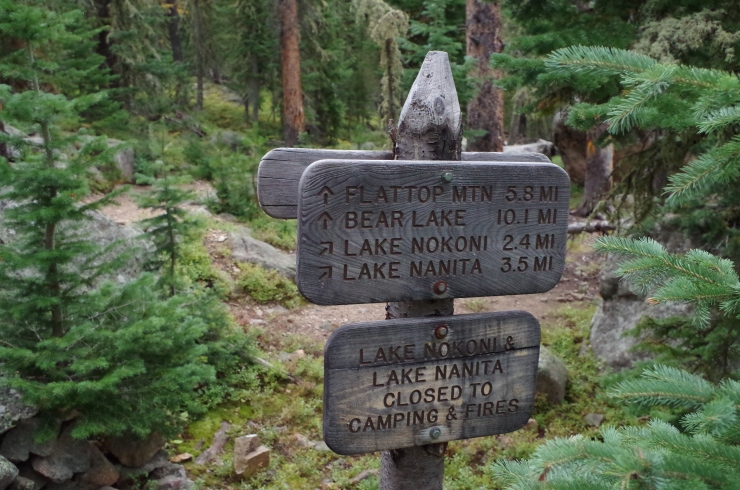
- Sign for Pine Marten campground. There are two sites and I do not recall which number we stayed at. But, we checked them both out and liked the one pictured below.
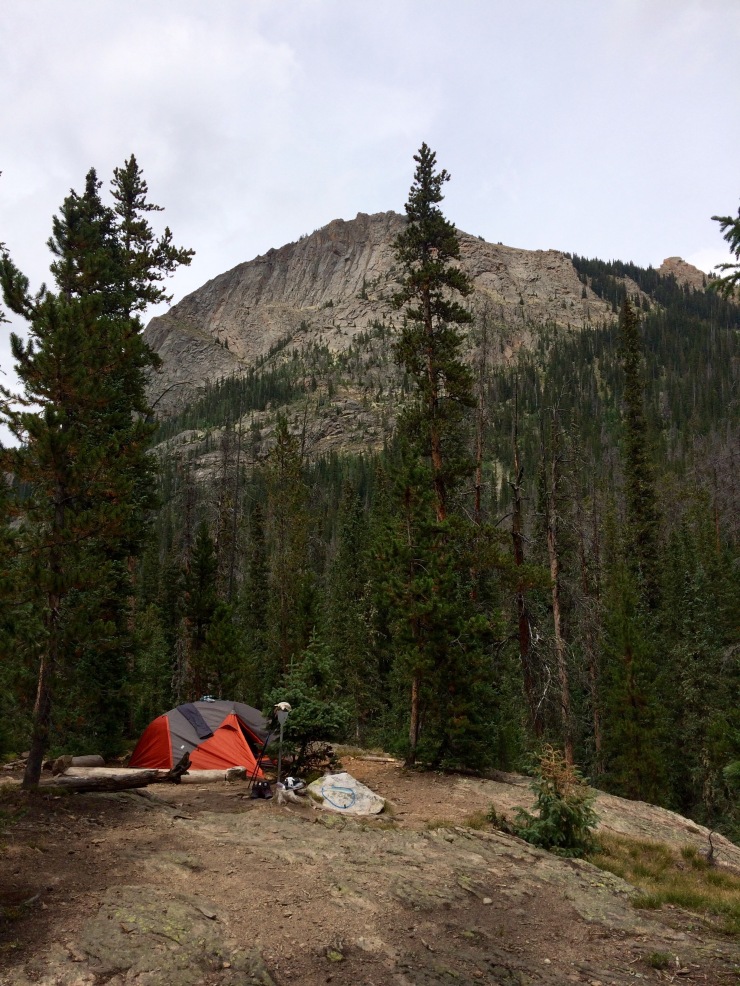
- Our campsite at Pine Marten. Water was only a 20 yard walk away (pictured: ALPS Chaos 2 Tent)
Day 4: 6.6 miles; +2,200 feet / -2,200 feet; Day hike to Lake Nokoni and Lake Nanita.
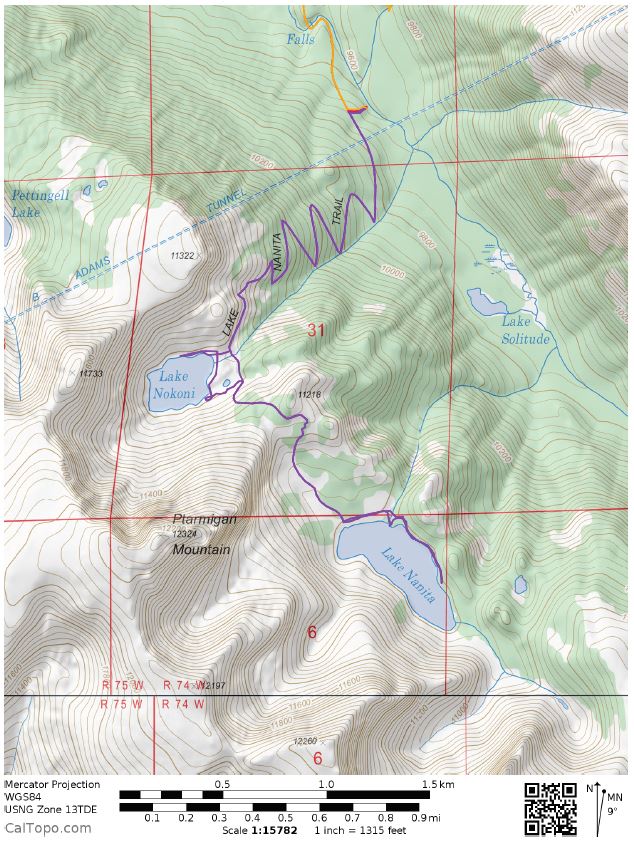
- Map of Day 4 hike backpacking in Rocky Mountain National Park (purple).

- Approximate elevation profile for the Day 4 hike.
On the 4th day, we jut did a day hike up to Lake Nokoni and Lake Nanita. It was great to not pick up camp and it feels great to hike without a full pack on. The lakes are really nice and the hike is not too difficult. It’s tough enough that you feel tired, but does not burn you out or anything. As usual, we left pretty early in the morning, which was necessary because it stormed pretty hard around 2 pm after we got back to camp. Thankfully our tent held up fine in the hail and we didn’t get wet at all.
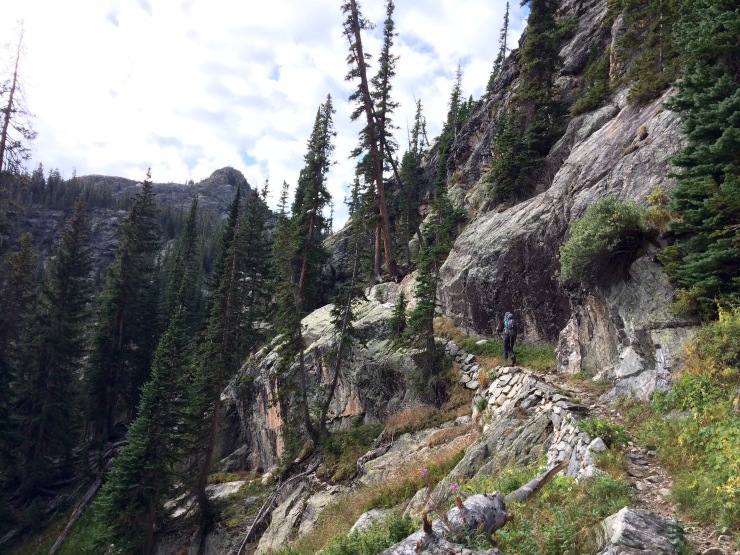
- Ascending the trail to Lake Nokoni (pictured: prAna Women’s Halle Pant)
- View looking back from the trail.
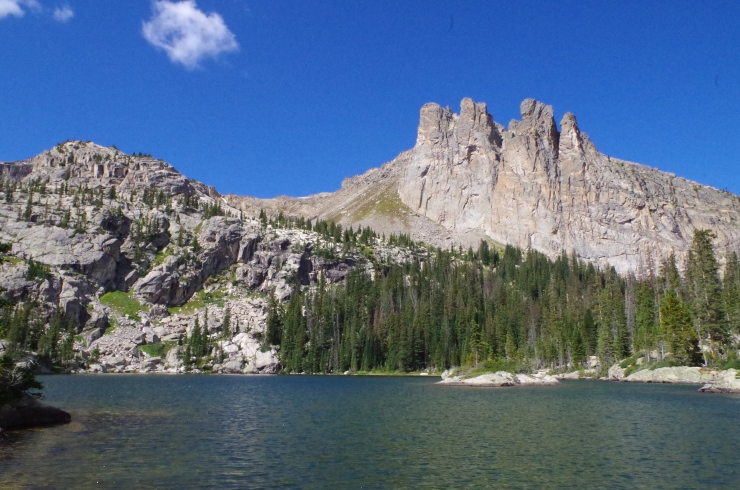
- First view of Lake Nokoni (pictured: prAna Stretch Zion Pants and Kelty Coyote 65L Backpack)
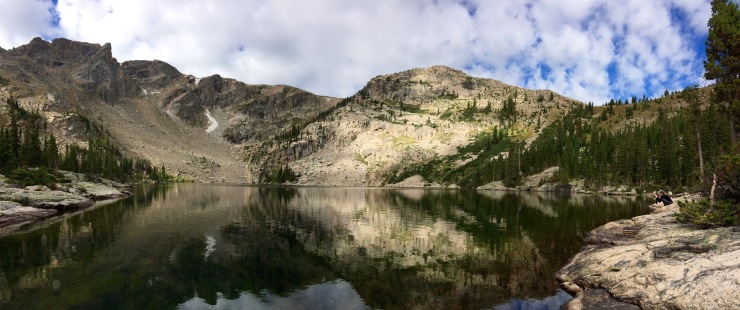
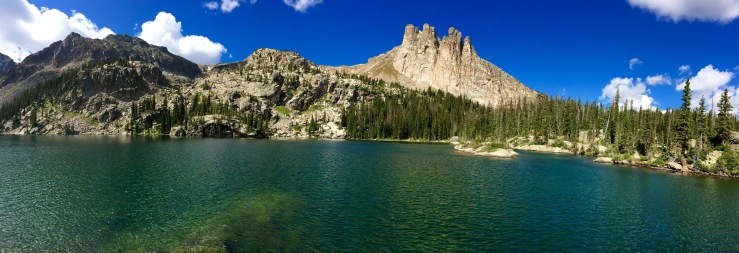
- Panoramic view of Lake Nokoni.
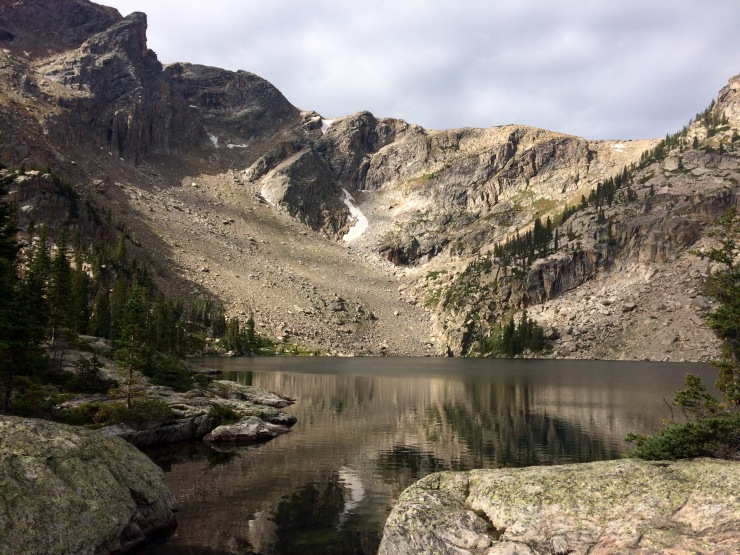
- Lake Nokoni.
- Lake Nokoni.
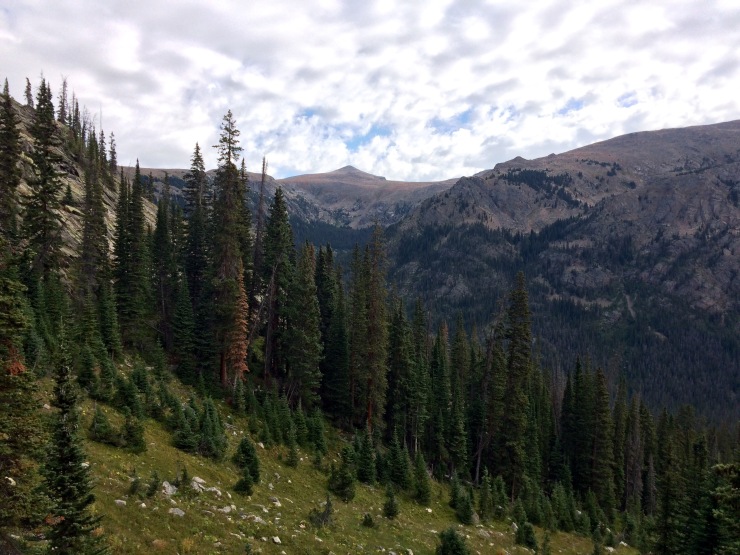
- View backwards from the trail going to Lake Nanita.
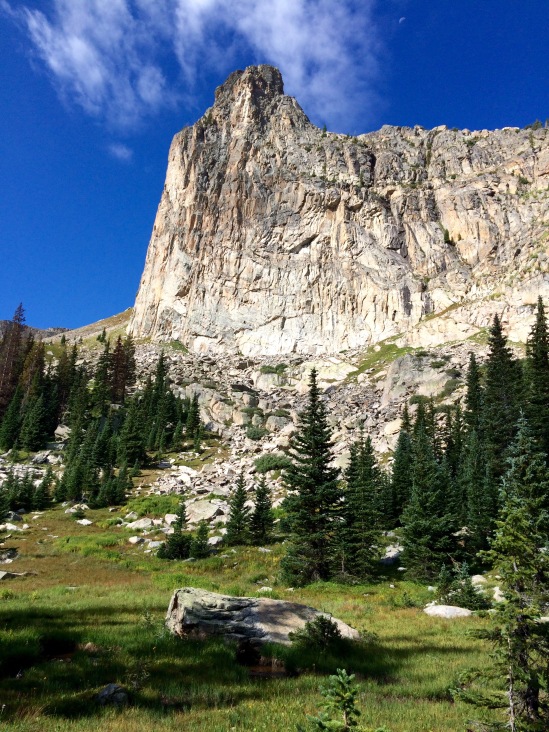
- Ptarmigan Towers.
- Panoramic view of Lake Nanita.
- Lake Nanita looking East at Ptarmigan Mountain.
- Lake Nanita looking West.
Day 5: 10.1 miles; +3,100 feet / -3,300 feet; Pine Marten Camp to Bear Lake Trailhead.
- Map of the Day 5 hike backpacking in Rocky Mountain National Park (yellow).
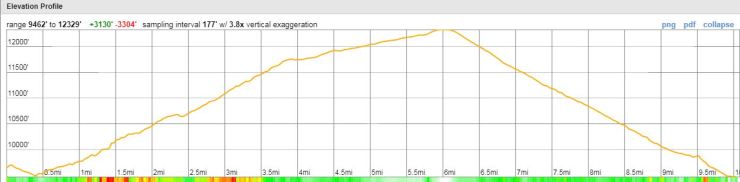
- Approximate elevation profile of the Day 5 hike.
We started our hike at 6:00 am on the last day because we didn’t want to get stuck on Flattop Mountain during a thunderstorm again. The climb in the first 4 miles of the hike is pretty tough. Along the way the fog was pretty dense and unfortunately blocked most of the views.
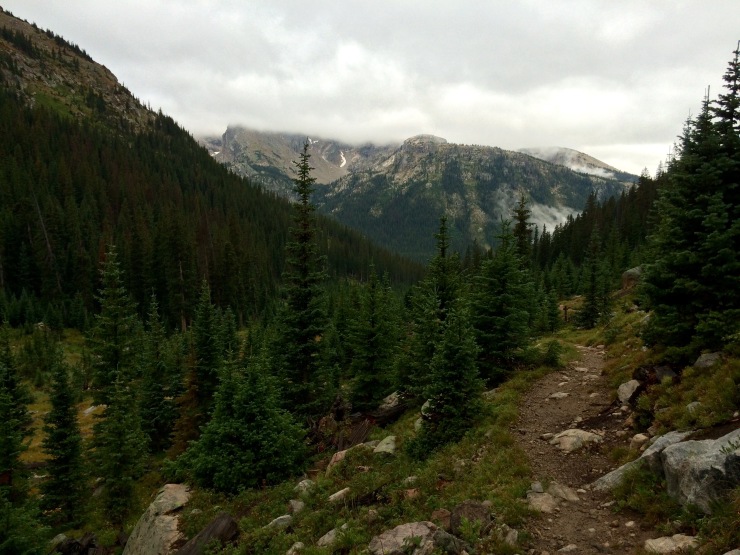
- View from where we came from on the North Inlet Trail.
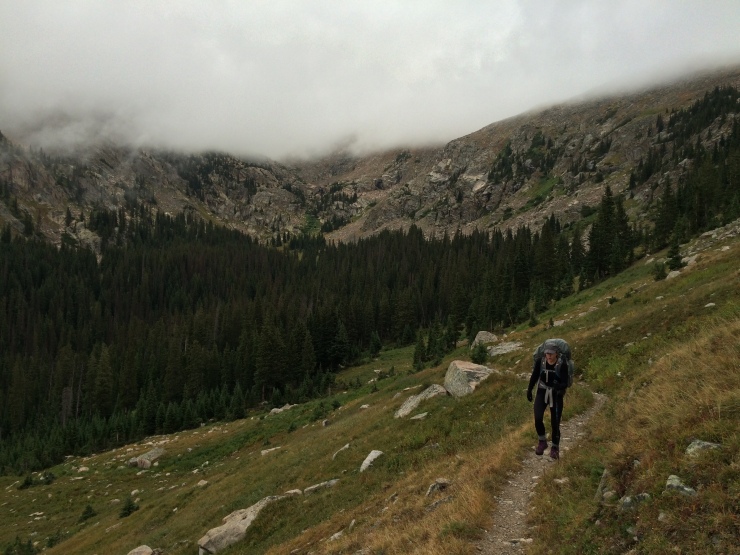
- Going up the steep climb (pictured: Chaos Summit Cadet Hat)
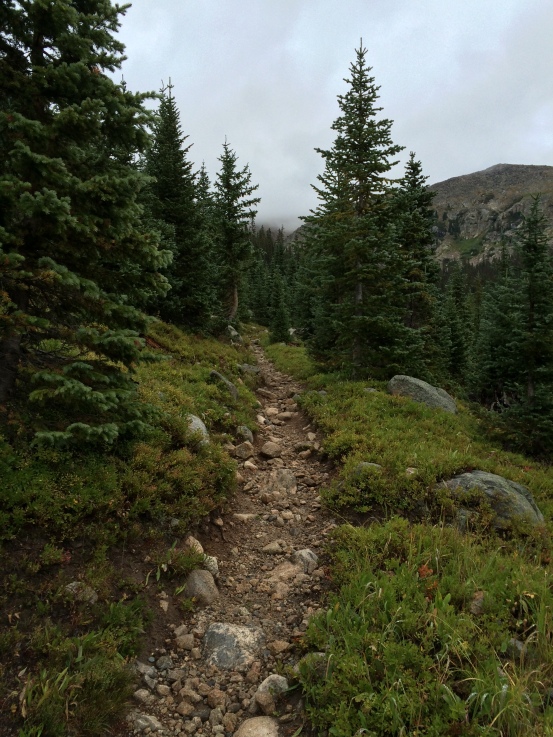
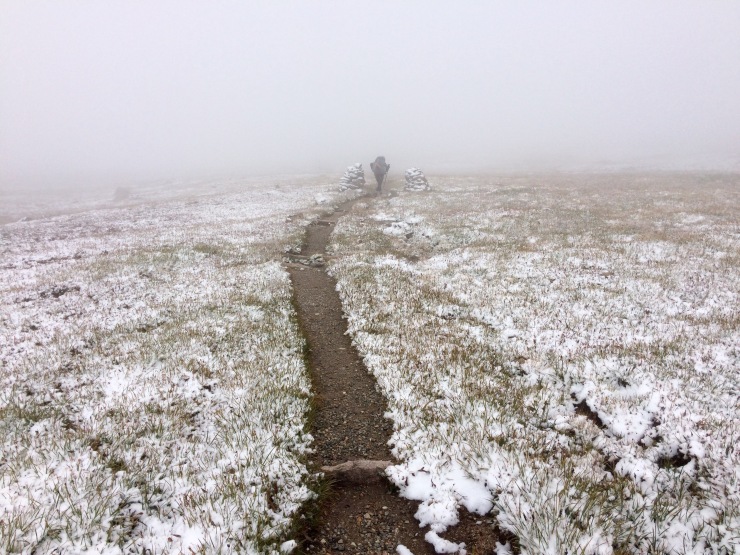
- Ascending up the North Inlet Trail into the fog.
As we got higher up in elevation, the foliage changed pretty dramatically. The trail was surrounded by small brush and red and yellow grass and moss. With the fog, the area looked pretty unusual. Visibility was only about 20 yards.
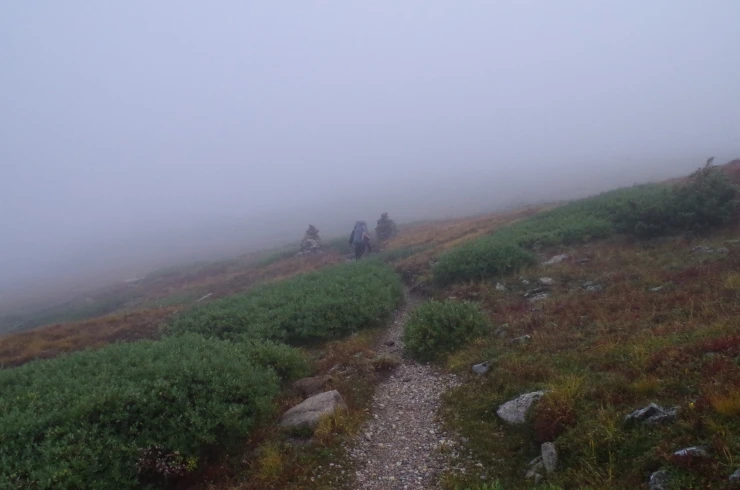
- Eventually we were hiking through the fog (pictured: Kelty Coyote 60L Backpack)

- The scenery was pretty strange in the fog, but the colors were really neat.
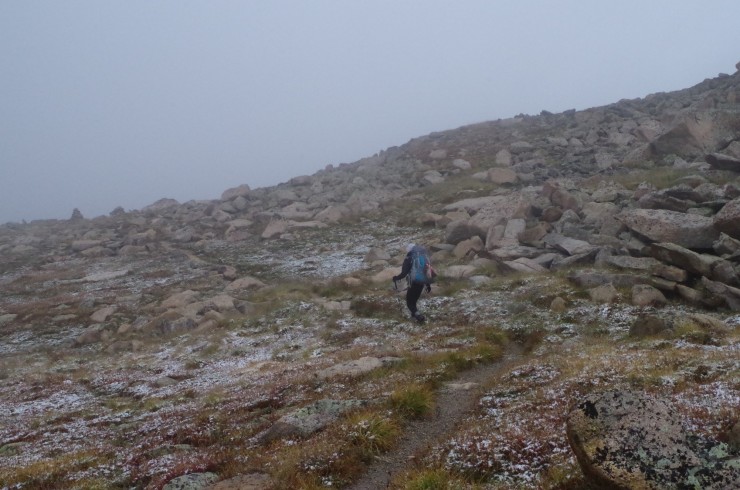
After about another mile or so, there start to more and more snow on the ground. It was fairly cold as well. We were not really expecting this kind of weather in late August, but I guess at 12,000 feet you are never really safe from any type of weather. I was really excited for this part of the trail because the views from the Continental Divide are supposed to be great. But, we wouldn’t have been able to see through the fog and we didn’t want to go off trail in the low visibility. I was especially hoping to scrabble over to see Andrews Glacier and Andrews Tarn, but it just didn’t work out this time.
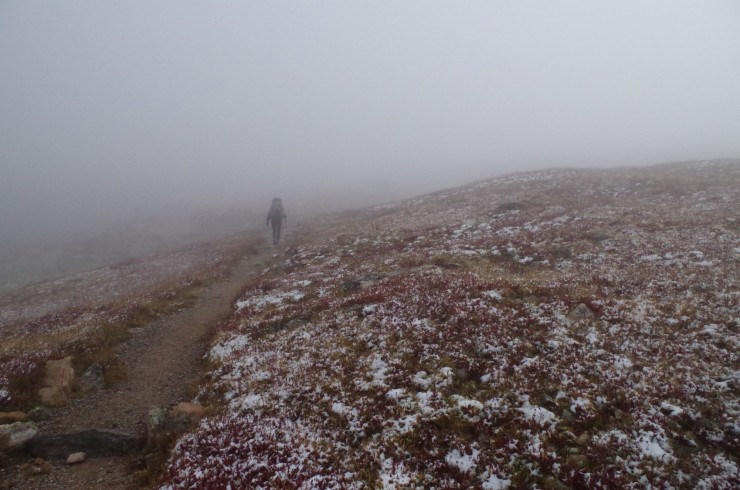
- Eventually we were hiking through some snow and visibility got even worse.
- We came across some elk on the trail.
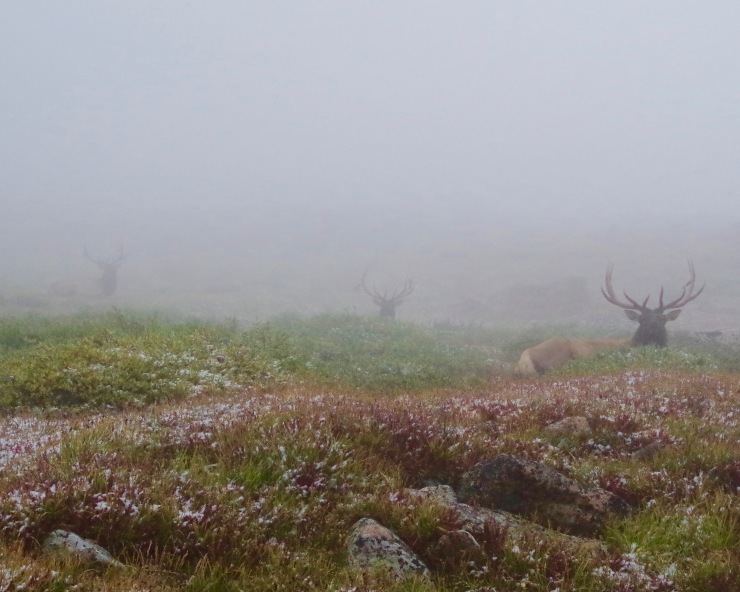
- They looked quite ominous in the fog.
- The climb continued in the snow (pictured: North Face Thermal Beanie)
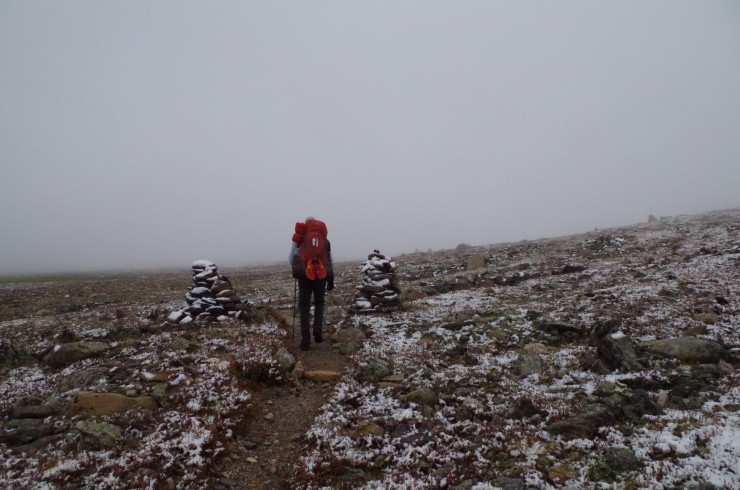
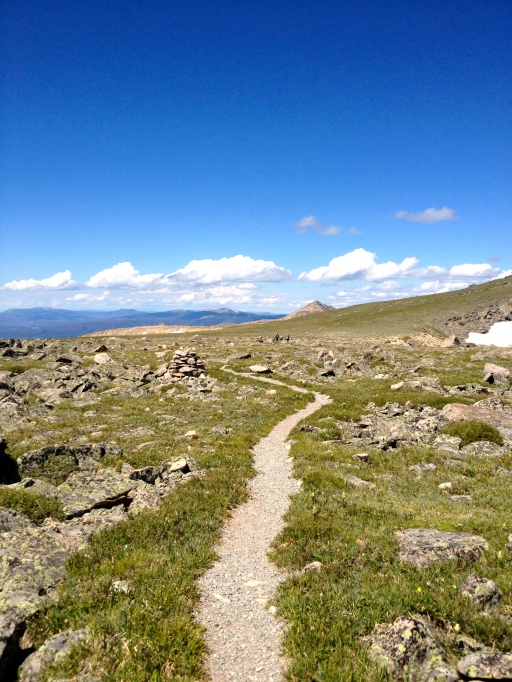
- The cairns were really helpful for seeing the trail. (pictured: Vivobarefoot Men’s Water Shoes)
- More snow along the trail.
Eventually we reached the junction with the Tonahutu Trail. Within ~30 minutes of arriving here, the skies start to clear and we were able to eat lunch and take some nice pictures of the area. This was great because we didn’t explore the area much on the way up since we were in a hurry.
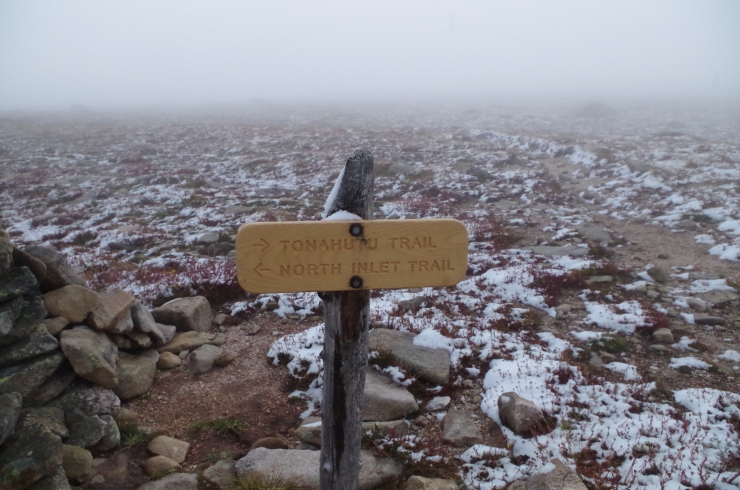
- Sign at the junction when we completed the loop section of the trek. Now we just needed to go back down to Bear Lake.
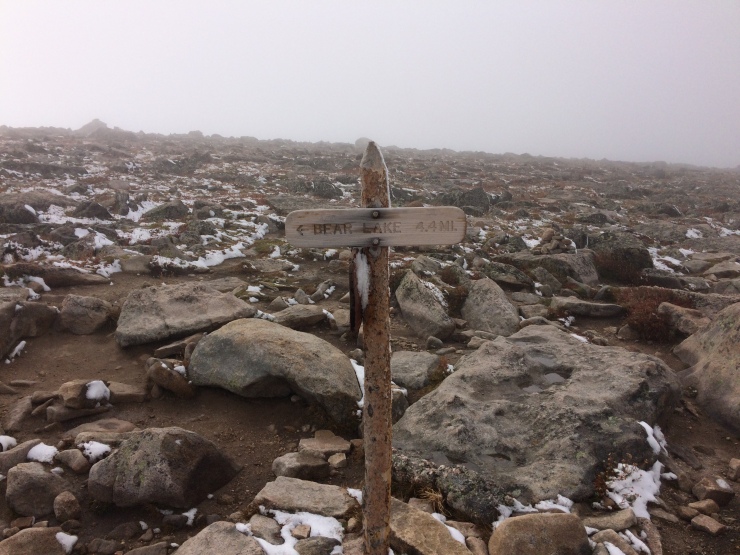
- Only 4.4 miles away to the end!
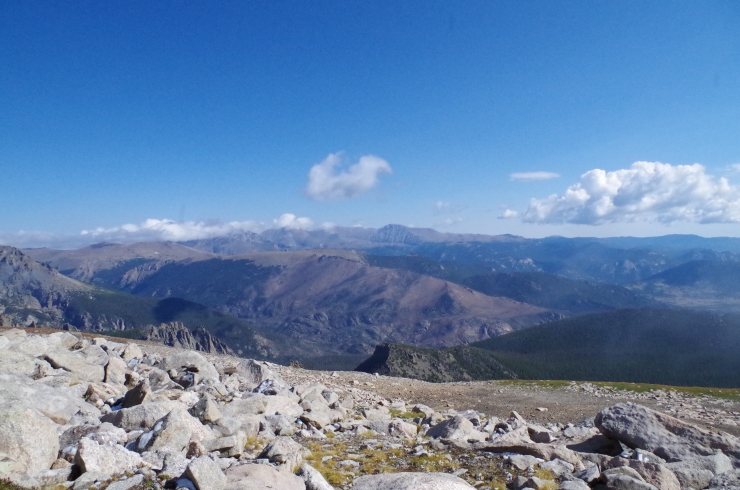
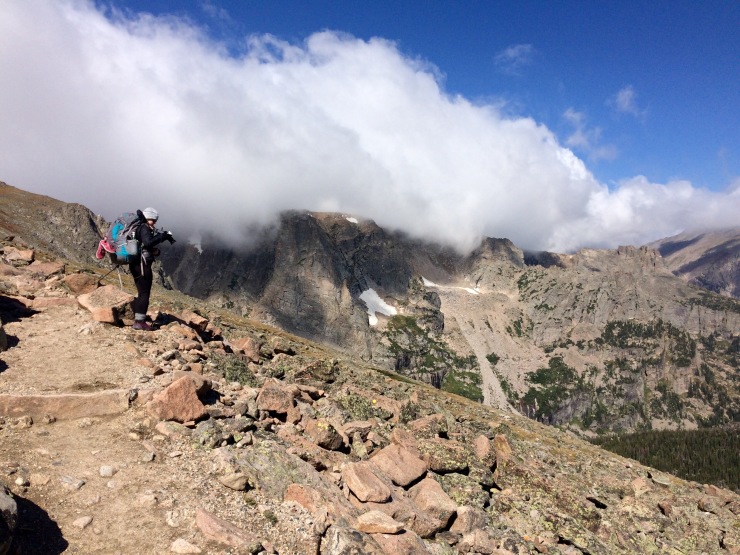
- And then the fog lifted and were treated to some nice views from atop the continental divide.
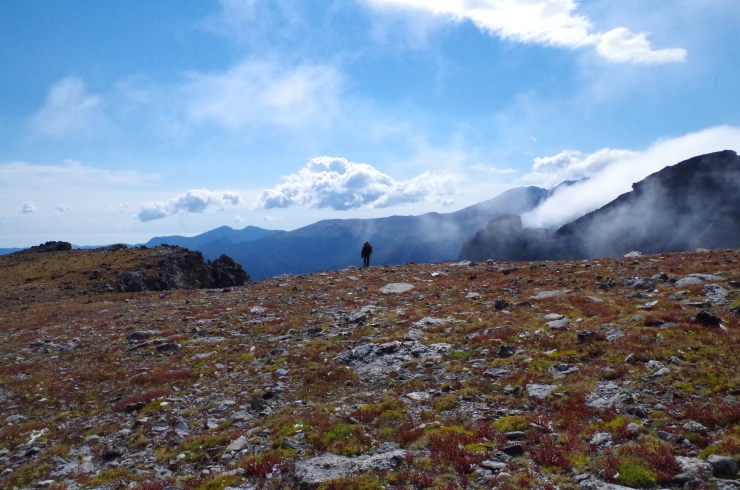
- The fog would quickly move in and fly away.
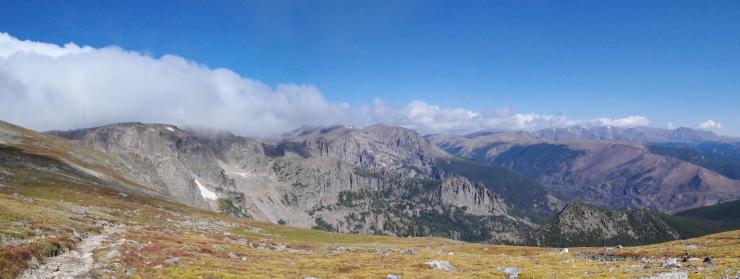
- Panoramic view from the Flattop Mountain area.

- View from the area near the top of Flattop Mountain.
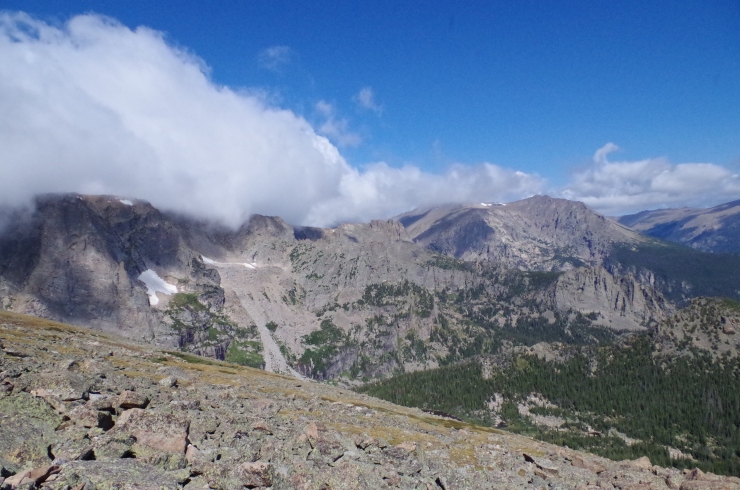
- View from the Flattop Mountain area.
- View from the Flattop Mountain area (pictured: Cascade Mountain Tech Quick Lock Trekking Poles)
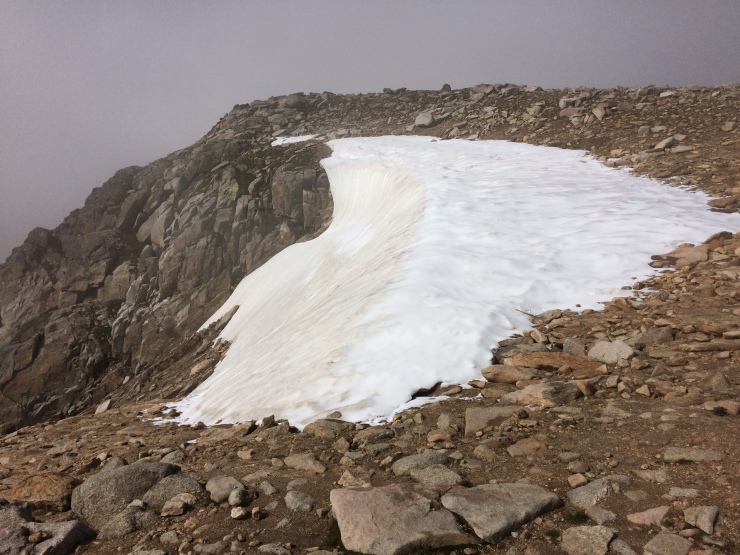
- Snow bank up near Flattop Mountain.
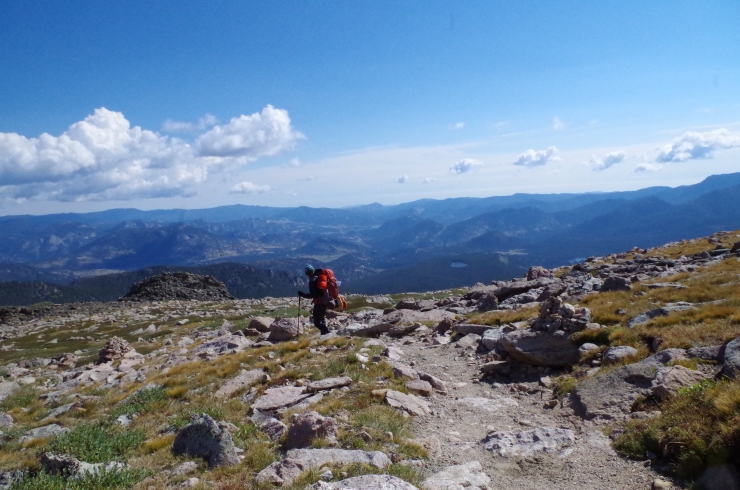
- Taking some final photos before descending to Bear Lake. (pictured: Pentax K-50 Waterproof DSLR Camera)
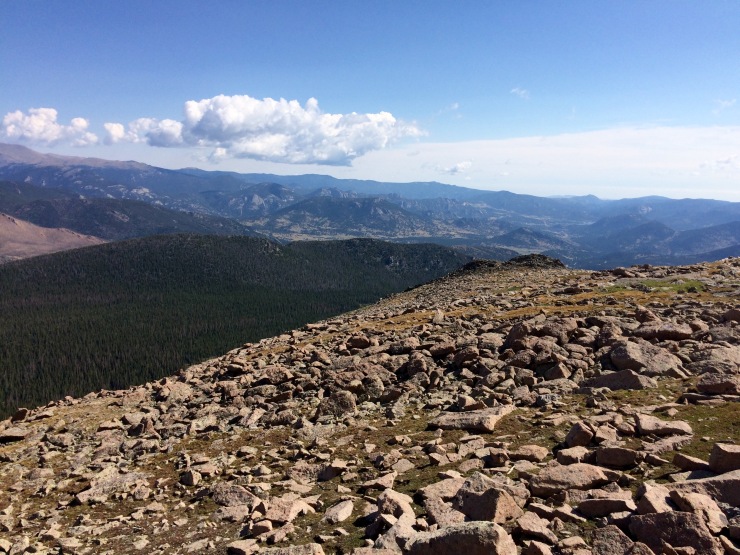
- View looking Southeast.
The hike down to Bear Lake from Flattop Mountain is fairly easy. You get some nice views of the area and it is all downhill. When we got down to the lake, we went up to the water and took some pictures. Then, we headed to the Ranger Station, hopped on the Bear Lake shuttle, and took that to the Park & Ride lot. From there, we got on the Hiker Shuttle and took it to the Estes Park Visitor Center. We freshened up a bit in the bathroom there and called our friend to pick us up.
While waiting for our ride, we walked over to Village Pizza and grabbed a pitcher of Dale’s Pale Ale and a couple pizzas!
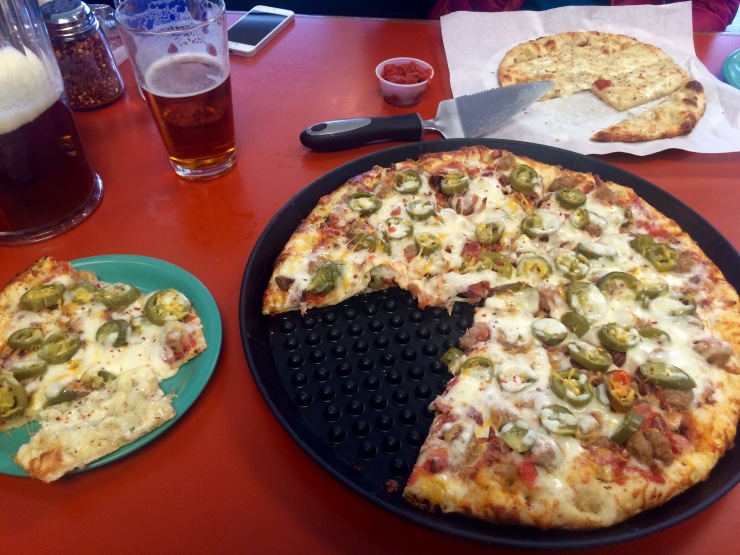
- A good beer cures the soreness after a hike. Pizza helps too!
Note: I really wanted to take the following alternate route on the last day, but the conditions just didn’t allow for it. It involves a scramble up to and down Andrews Glacier and follows the Loch Vale Trail to Bear Lake. We had cell phone service at our Summerland Park campsite and called the Ranger Station to ask about the condition of Andrews Glacier. They said the snow was really soft and we would likely go knee deep in snow if we tried to walk in our hiking boots. So, we decided it wasn’t safe to go down the glacier without any snow shoes or ice axes. Even if the conditions of the glacier were great, we probably wouldn’t have done it anyways given the fog we encountered on the trail the next day.
Alternate Day 5: 9.8 miles; +3,200 feet / -3,500 feet; Pine Marten to Bear Lake.
- Map of the alternate route you could take on Day 5.
- Approximate elevation profile for the alternate Day 5 hike.
Here are some example pictures of the area this hike goes through.
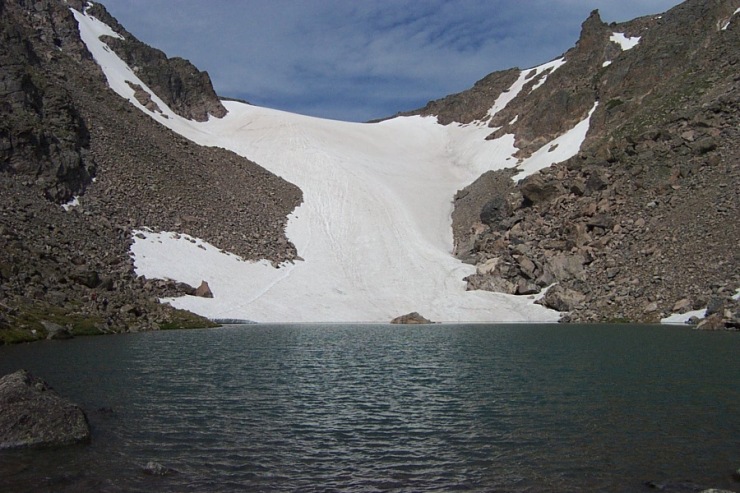
- View of Andrews Glacier from Andrews Tarn. You will come up over the mountain behind the glacier and then hike/slide down.
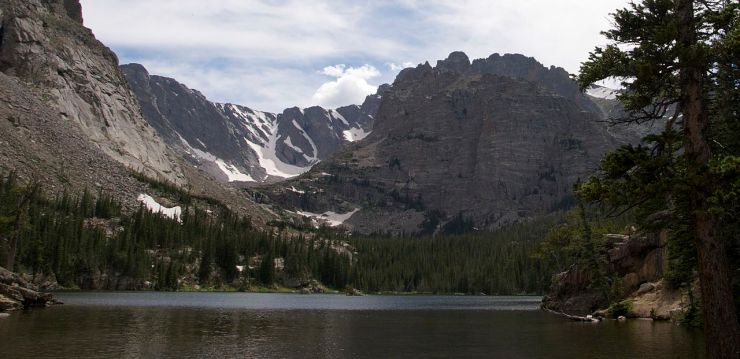
- View of The Loch looking up at the Continental Divide.
Here are some similar trip reports!
Teton Crest Trail – Grand Teton National Park (48 mile loop)
Sequoia National Park – Mineral King Area – Sawtooth Pass and High Sierra Trail
Rae Lakes Loop – Kings Canyon National Park Backpacking
Yosemite Highlights Loop – Yosemite National Park (40 mile loop)
Four Pass Loop – Maroon Bells Snowmass Wilderness, CO (28 mile loop)

Hi There, I’m thinking of doing this hike in the summer of 2018. myself and the two other people are from Chicago. I’m worried about acclimating to the high altitudes, especially since the first day is a climb. Do you have any suggestions for our situation? Should we arrive in Denver a couple days early to help adjust?
Thanks much!
-Matt
LikeLike
Yep, I would plan to spend a couple days in Denver or Estes Park before heading out. You can get used to the altitude and drink plenty of water. Beyond that, just try to be in good cardio shape and take breaks if you start to feel dizzy while hiking.
LikeLike
I am planning a hike using this trail with some of our Boy Scouts. Can you tell me which maps would show this trail (topography etc)?
LikeLike
Hello, you can find nice topographic maps at the USGS online store. Just search for 7.5′ topo maps in Rocky Mountain National Park and you can get what you need. It may require two or more maps to cover the whole loop. I did a quick search and the McHenrys Peak 7.5′ map covers a lot of the loop.
LikeLike
I bought a national geographic map of rocky mountain national park on amazon and it shows the whole route and camp sites. Looks like map number 200. It says waterproof and it survived light rain no problem.
LikeLike
Thanks for the tip. Here is the link to the Nat Geo map at REI if anyone is interested: http://bit.ly/2AMcQxv
LikeLike
We’re considering doing this hike late June of this year, should we be worried about ice and snow at that time that would require extra gear?
LikeLike
To be honest, you best bet is to call up the one of the ranger stations and ask for their advice. They will have the good idea of what extra gear you would need (if any). I would guess that in late June you will likely have to deal with snow in many areas at higher elevation, especially the section of North Inlet Trail along the Continental Divide and the Tonahutu Creek Trail in the Bighorn Flats area. I doubt these parts of the trail would be super technical or require ice axes, but navigation could be a big issue if snow is covering the trail. If you are very comfortable navigating via topographic map, you MIGHT be ok (I really don’t know), but you REALLY would not want to get lost up there! A decent point of reference is the 20 year average snow free date data on the NPS website (https://www.nps.gov/romo/planyourvisit/site_details.htm). For the campsites on my previous itinerary, the average snow free dates are: Haynach (7/7), Summerland Park (5/19), and Pine Marten (7/6). I hope that helps! If you ask the rangers for their opinion, let me know what you find out!
LikeLike
I LOVE this route and want to hike it but only have a couple friends that can and not sure they want to. As far as snow, there was a lot of snow above bear lake in June of 2017 so we didn’t make it past the 2nd lake. July or August are probably safer for snow free high elevation hikes. As far as altitude sickness, yes you should arrive early. Drink lots of water, be in shape, and hopefully you can do some small hikes before this one. Alberta Falls is really nice. Now I gotta figure out how to make this happen…..
LikeLiked by 1 person
Were you able to apply for your permit online before March 1st? I’m am running into a dead end when I follow your link or look on the RMNP website.
LikeLike
Looks like they only open up the reservation system on March 1 at 8am MT. I updated the link in the post to go to the Rocky Mountain NP website where they say this. I booked permits for my trip on March 1st to make sure I got the sites I wanted!
LikeLike
This looks fabulous! Does anyone know about a GPS waypoint file to put in my Garmin for this loop?
LikeLike
I don’t have a file with GPS data, but you could always trace the route in caltopo.com and then export to a GPX file!
LikeLike
We have had a lot of trouble getting backcountry permits at other national parks. Is this particular hike overly popular and tough to get a permit for?
LikeLike
The best campsites will tend to fill up relatively quickly for popular times like late July through early September. It’s hard to say exactly how early you need to reserve, but earlier is always better since you are required to camp at designated sites and can’t just camp wherever in the park. This means the loop you are able to hike will be dependent on which campsites you are able to get.
There is no lottery in place for permits (that I am aware of), so you can pretty much insure you get a permit by logging in and reserving on March 1st when the system opens. In that way it is nicer than some more popular parks that have hundreds of people apply for a small number of permits.
LikeLike
Thank you. I have every intention of getting my permit on March 1st. I just wasn’t sure if it was one of those hikes like in Zion where the permits are all gone like 2 minutes after they are available .
LikeLike
Best of luck! You can always give the rangers a call at the backcountry office and they can give you a better idea of the popularity. I looked through my e-mail and I reserved my campsites about 2 hours after the reservation system opened on March 1st. I didn’t keep track of when the other campsites booked up after that, but you should have at least a couple hours to reserve 🙂
LikeLike
My husband is thinking of doing this hike, minus the purple, with our boys who will be 9 and 12. Wondering about the first couple of days that are 10 and 11 miles….? They are active and we go hiking often. What do you think about kids doing this hike?
LikeLike
The first day will be tough as they need to go over flattop Mountain. If they are beginners, I would definitely leave early! It’s hard to say exactly whether or not they will be comfortable backpacking. I would say do a practice hike with a full backpack, and if your kids do well with the packs, they can probably finish this loop without issue.
LikeLike
is this hike possible in mid may or is there still too much snow?
LikeLike
I think there is likely to be snow at most of the campsites and probably on much of the trail (except at the low elevation sections). I would be cautious and ask the rangers before committing to go in May.
LikeLiked by 1 person
How bad were the storms in the afternoon, planning a trip for July, were they scary?
LikeLike
The storms were usually quick, finishing in an less than an hour. They were only scary when we were at high elevation and exposed. When we were at a safe spot with our tent, it was easy to get in the tent and wait for the storm to pass. I think you are likely to be totally fine if you just make sure to keep an eye out for ominous looking clouds and make sure you are not hiking in super exposed areas between roughly 1-4pm.
LikeLike
thank you!
LikeLike
I am planning a trip here for the first week of July this year and just had a couple of questions. We are coming from out of state, is there any camping at the bear lake trailhead where we could acclimate to the weather and start early the next morning? Second, what are the conditions like in early July? And third, do you in into many day hikers throughout the trail or is the majority of it more secluded and traveled on by backpackers doing the loop?
LikeLike
Hi Max, there is not a campsite at the Bear Lake Trailhead, but there a few campsites elsewhere in the park. You could perhaps camp at Glacier Basin or Moraine Park and then either drive to Bear Lake or take the shuttle the morning of your hike.
For the weather, I can’t give you a great answer. It looks like most campsites are snow free by early July, but it is probably very dependent on how much snow falls any given year. I would recommend you give the rangers a call and they can give you a better answer.
On this loop you will see many day hikers on your way up to Flattop Mountain. Once you reach the summit, all the day hikers turn around and you continue and will see very few people for the next 10ish miles. As you continue, you see day hikers near Grand Lake and summerland park. We didn’t see many hikers after Summerland Park and near Pine Marten. On the last day we didn’t see hikers until we reached the summit of Flattop Mountain again. In summary, there are day hikers in a couple sections, but you also get solitude in some sections. I will say it is not the most secluded and wild trail. That said, it is a popular National Park!
I hope that helps!
LikeLike
Does each person in the group need their own permit?
LikeLike
Nope, you just need one permit for the group. You’ll specify how many people are in your group when you reserve your permit.
LikeLike
Thanks for the information and photos. I am doing this loop in the second week of September with several other old men. We hope to avoid snow, but we will deal with whatever Mother Nature gives us. Thanks again!
LikeLike
Have a great time!
LikeLike
Another old man doing this the second week of Sept .Maybe I’ll run into you guys.
LikeLike
Hello, Thanks for your advice before. We are getting everything together to get the permit and I just had one more quick question. Do you think it would make a difference if I chose to hike the loop the other way. So clockwise instead of counter clockwise? Thanks for your advice!
LikeLike
Awesome – I hope you get the permits you want and have a great trip. I do not think there will be a difference if you do the hike in the clockwise direction. Just remember that either direction involves a couple miles hiking above the treeline after Flattop Mountain on the first day, so you will want to check the weather and hike early if storms are expected in the afternoon. I think I chose counter clockwise because I wanted the day hike to Lake Nanita to be towards the end of the loop. Other than that, it shouldn’t matter and you can just base it on campsite availability and your preferences.
LikeLike
Hi
Thank you for a very detailed trail info
We are planning to hike this in 4 days
Start at Bear Lake
08/27/2019 – Granite Falls , 08/28/2019 – Twinberry , 08/29/2019 – Porcupine (WF)
And finish at Bear Lake
Seems reasonable?
LikeLike
Sounds great! If you have the energy, maybe try to hike up to Lake Nokoni after setting up camp at Porcupine. Have a great time!
LikeLike
I have gotten a permit to do this trip in August. Do you have the gpx file for this route?
LikeLike
Hi Kelly – sorry, I do not have a full gpx file for this route. If visit caltopo.com, you can trace out the route and then export a GPX file. Maybe that will be helpful? Hope you have a great trip!
LikeLike
Can you tell us more about this? I’d love to find out more details.
LikeLike
Do you recommend taking the shuttle bus to the trailhead? We will have a rental car but worry about parking
LikeLike
Hi Joy, for the Bear Lake trailhead the shuttle is the way to go. Parking at Bear Lake is limited so I would at least take the Park & Ride shuttle to the trailhead. You can take the Hiker shuttle too and really cut down on driving, but that makes the ride quite a bit longer. Driving to the Park & Ride is a good compromise!
LikeLike
Is there a way to find out the exact mileage between the July campsite and Renegade campsite? We’re doing the loop in 4 days. Starting at North Inlet Trailhead-July-Renegade-Sunrise-NIT
LikeLike
Hi Lindsay – Based on my map is looks like the hike from July to Renegade is ~8 miles with +/- 2,000 foot of elevation change. Hope that helps!
LikeLike
Thank you. It’s easy to find the distances of the others on RMNP designated site details page but since July and Renegade are technically on two different trails, it’s hard to figure out. Thanks for your help!
LikeLike
I don’t understand one thing: at one time there were great meadows (Tonahutu Creek), where you could camp, with easy access to water. Why not camp there, instead of struggling on bare ground, in very small places among the trees?
LikeLike
Hello – you can only camp in designated sites within Rocky Mountain National Park. There area few sites near Tonahutu Creek (Paintbrush, Big Meadows, Sunset, Tonahutu Meadows, etc.). Those can be used if available when you reserve your permit. We didn’t camp there because it did not fit within our desired daily hiking mileage.
LikeLiked by 1 person
Thanks for reply.
I find this to be a constraint. I am curios if there are mountains in US where you can camp wherever you want. As far as I know, Tetons and Yellowstone have similar restrictions as Rocky.
I was planning a trip in Tetons, but I think I will move to Altai. Much more rewarding from this perspective – wilderness with no path, no people, no restrictions.
Here in Romania, in Carpathians, I have a lot of wilderness to explore. Some of them make you feel like dr Livingstone discovering a new cascade – for real. There are just a couple of parks where you have such restrictions for camping. The rest of Carpathians are without restrictions on camping. After all, who could control me, when even rangers do not dive in such wilderness?
Thanks again for your answer.
LikeLike
You could check out the Wind River Range for dispersed camping in non-designated sites. It is located within a couple hours of the Tetons.
LikeLiked by 1 person
Looking to duplicate this hike exactly and stretch it out t o 6 days. Is there any dispersed camping along the CDT so I can lengthen the trip in the backcountry to 6 days. I was hoping to acclimate in Estes park on the 10th of July. Then catch the shuttle to the trailhead on the 11 th. I was looking to come off trail and catch the shuttle on the 7/16. We were hoping to day camp in Estes on the 7/16 and depart for home on the 7/17. Any advice for the individual day camping for closeness to the trail. Looking for advice on securing permits
LikeLike
There is no dispersed camping within Rocky Mountain National Park, so you will need to have permits for specific campsites there. Perhaps you could follow the Continental Divide Trail into the Never Summer Wilderness area just outside the west edge of Rocky Mountain NP and spend an extra night or two there? I have never been there, but the camping regulations are usually much more lenient in wilderness areas.
LikeLike
We used a trail guide, Wildland Trekking. They obtained all the necessary permits. I highly recommend them.
LikeLike
My two adult son’s and I hiked this loop in late August from Grand Lake without any of the offshoots so it was about 27 miles and we did it in 3 days 2 nights. Much of the western side towards Grand Lake was burned out, so have sunscreen and full rim hat. Flat Tops is pretty cool and we had some time and good weather to have lunch and hang out for awhile.
LikeLike
I really enjoyed reading your post and it helped me a lot
LikeLike